No edit summary |
|||
| (6 intermediate revisions by 2 users not shown) | |||
| Line 19: | Line 19: | ||
|advHit=6 | |advHit=6 | ||
|advBlock=4 | |advBlock=4 | ||
|description= | |description=Cancelable into Light attacks<br>Edge {{clr|2|cl.L}} is the one true close jab, being 5 frames, not whiffing on crouch and converting to a full combo. Edge can take advantage of this by forcing +0 blockstrings, characters with bad jabs struggle to contest at all. | ||
}} | }} | ||
}} | }} | ||
| Line 41: | Line 41: | ||
|advHit=7 | |advHit=7 | ||
|advBlock=4 | |advBlock=4 | ||
|description=cancelable into | |description=cancelable into {{clr|4|cl.H}}<br>Combo starter and pressure starter. Can be done safe meaty vs slower dps. | ||
}} | }} | ||
}} | }} | ||
| Line 63: | Line 63: | ||
|advHit=1 | |advHit=1 | ||
|advBlock=-3 | |advBlock=-3 | ||
|description= | |description=chains out of {{clr|5|cl.M}}, chains into {{clr|4|cl.TC}} | ||
}} | }} | ||
}} | }} | ||
| Line 85: | Line 85: | ||
|advHit=6 | |advHit=6 | ||
|advBlock=4 | |advBlock=4 | ||
|description=cancelable into Light attacks | |description=cancelable into Light attacks<br>Not as strong as {{clr|2|cl.L}} but it doesn't matter much. While other characters need a strong far jab to punish -7 moves, Edge has a 6 frame {{clr|5|f.M}} to do that.<br> Edge {{clr|2|f.L}} is primarily used for mashing out of pressure, or punishing Vlad's bolshoi bash. | ||
}} | }} | ||
}} | }} | ||
| Line 107: | Line 107: | ||
|advHit=0 | |advHit=0 | ||
|advBlock=-3 | |advBlock=-3 | ||
|description= | |description=Amazing poke. Fastest f.m, converts consistently, great priority and hard to punish. You'll be spamming this a lot to hold your ground | ||
}} | }} | ||
}} | }} | ||
<section end=f.M/> | <section end=f.M/> | ||
===<big>{{clr|4|f.H}}</big>=== | ===<big>{{clr|4|f.H}}</big>=== | ||
<section begin=f.H/> | <section begin=f.H/> | ||
| Line 129: | Line 130: | ||
|advHit=-1 | |advHit=-1 | ||
|advBlock=-5 | |advBlock=-5 | ||
|description= | |description= Can be used to OS backdash after meaty normal. Chains into far H target combo. Decent poke that you can buffer OD behind. | ||
}} | }} | ||
}} | }} | ||
| Line 151: | Line 152: | ||
|advHit=7 | |advHit=7 | ||
|advBlock=5 | |advBlock=5 | ||
|description= | |description=Cancelable into Light attacks, links to mediums. <br>Getting mediums from {{clr|2|cr.L}} are mandatory routes to learn:<br><code>{{clr|2|cr.L}}, {{clr|5|cl.M}}...</code><br><code>{{clr|2|cl.L}}, {{clr|2|cr.L}}, {{clr|5|st.M}}...</code> | ||
}} | }} | ||
}} | }} | ||
| Line 173: | Line 174: | ||
|advHit=0 | |advHit=0 | ||
|advBlock=-3 | |advBlock=-3 | ||
|description= | |description=This move is significantly worse than {{clr|2|cr.L}} frame data wise, and doesn't have enough extra range to ever justify using. | ||
}} | }} | ||
}} | }} | ||
| Line 195: | Line 196: | ||
|advHit=sweep | |advHit=sweep | ||
|advBlock=-10 | |advBlock=-10 | ||
|description= | |description=Longer range than {{clr|4|f.H}}, makes it useful for catching longer backdashes (e.g. Crow, Talos). <br> Very minus on block, but easy to space and make safe. | ||
}} | }} | ||
}} | }} | ||
| Line 217: | Line 218: | ||
|advHit= | |advHit= | ||
|advBlock= | |advBlock= | ||
|description= | |description=massive air-to-air. combos into air 1.1 | ||
}} | }} | ||
}} | }} | ||
| Line 239: | Line 240: | ||
|advHit= | |advHit= | ||
|advBlock= | |advBlock= | ||
|description= | |description=great hitbox for hitting in front, especially good at ranges where j.D+H would crossup | ||
}} | }} | ||
}} | }} | ||
| Line 261: | Line 262: | ||
|advHit= | |advHit= | ||
|advBlock= | |advBlock= | ||
|description= | |description=god air button, hitbox so disjointed will clean beat some DPs. | ||
}} | }} | ||
}} | }} | ||
| Line 283: | Line 284: | ||
|advHit= | |advHit= | ||
|advBlock= | |advBlock= | ||
|description= | |description=hits rising, but can't fuzzy. Very limited usage | ||
}} | }} | ||
}} | }} | ||
| Line 305: | Line 306: | ||
|advHit= | |advHit= | ||
|advBlock= | |advBlock= | ||
|description= | |description=similar to dj.M with big downards hitbox, but less useful from a neutral jump | ||
}} | }} | ||
}} | }} | ||
| Line 327: | Line 328: | ||
|advHit= | |advHit= | ||
|advBlock= | |advBlock= | ||
|description= | |description=amazing hitbox, go to button for jumping throws | ||
}} | }} | ||
}} | }} | ||
| Line 349: | Line 350: | ||
|advHit=-4 | |advHit=-4 | ||
|advBlock=-7 | |advBlock=-7 | ||
|description=cancelable into specials on landing | |description=cancelable into specials on landing, only combos to s2 | ||
}} | }} | ||
}} | }} | ||
| Line 394: | Line 395: | ||
|advHit=-5 | |advHit=-5 | ||
|advBlock=-10 | |advBlock=-10 | ||
|description=forces stand | |description=forces stand<br>The Combo route Edge is always aiming for normally, and very easy to get thanks to <code>{{clr|5|cl.M}} xx {{clr|4|cl.H}}→{{clr|4|H}}...</code><br>{{clr|4|cl.TC}} is Edge's primary combo into 3.1 wallbounce, which is a both a powerhit+extender, allowing for great meterless damage and oki. | ||
}} | }} | ||
}} | }} | ||
| Line 416: | Line 417: | ||
|advHit=-7 | |advHit=-7 | ||
|advBlock=-11 | |advBlock=-11 | ||
|description= | |description=The less great, but still good TC. {{clr|4|f.TC}} is a common place to spend meter in combos e.g. <code>{{clr|5|st.M}}→{{clr|4|H}} xx {{clr|6|S1.2}} xx KA6...</code><br>It is extremely common to land this TC thanks to the strength of {{clr|5|st.M}} as a poke, and {{clr|4|st.H}} catching backdash. | ||
}} | }} | ||
}} | }} | ||
| Line 439: | Line 440: | ||
|advHit= | |advHit= | ||
|advBlock= | |advBlock= | ||
|description= | |description=Rarely worth cancelling.<br>Free safejump if the opponent quick rise. | ||
}} | }} | ||
}} | }} | ||
| Line 461: | Line 462: | ||
|advHit= | |advHit= | ||
|advBlock= | |advBlock= | ||
|description= | |description=Edge can close the distance after back throw very easily thanks to {{clr|8|S3.1}} and all its followups. | ||
}} | }} | ||
}} | }} | ||
| Line 484: | Line 485: | ||
|advHit=2 | |advHit=2 | ||
|advBlock=-2 | |advBlock=-2 | ||
|description=first hit enables second hit; increments sword charge; absorbs projectiles during frames 13-21 (gaining 40 meter and 1.5 sec CD) | |cooldown=3 sec | ||
|description=first hit enables second hit; increments sword charge; absorbs projectiles during frames 13-21 (gaining 40 meter and 1.5 sec CD).<br>The combination of {{clr|6|S1.1}} and {{clr|6|jS1.1}} allow Edge to win almost any fireball war. Building meter and sword charges is so valuable makes throwing fireballs vs Edge an incredible poor idea. | |||
}} | }} | ||
}} | }} | ||
| Line 506: | Line 508: | ||
|advHit= | |advHit= | ||
|advBlock= | |advBlock= | ||
|description=first hit enables second hit; increments sword charge; absorbs projectiles during frames 11-22 (gaining 40 meter and 1.5 sec CD); can attack/block after 2 landing frames, and walk after 4 frames | |cooldown=3 sec | ||
|description=first hit enables second hit; increments sword charge; absorbs projectiles during frames 11-22 (gaining 40 meter and 1.5 sec CD); can attack/block after 2 landing frames, and walk after 4 frames. | |||
}} | }} | ||
}} | }} | ||
| Line 528: | Line 531: | ||
|advHit=0 | |advHit=0 | ||
|advBlock=-4 | |advBlock=-4 | ||
|description=creates dual slash projectiles; increments sword charge once, on clean hit only | |cooldown=4.5 sec | ||
|description=creates dual slash projectiles; increments sword charge once, on clean hit only. <br>{{clr|6|S1.2}} is the go to choice thanks to its ability to turn {{clr|4|f.TC}} into a wallbounce combo for 1 bar.<br>Also useful for frametrapping and breaking armour. | |||
}} | }} | ||
}} | }} | ||
| Line 551: | Line 555: | ||
|advHit= | |advHit= | ||
|advBlock= | |advBlock= | ||
|cooldown=2 Sec | |||
|description=gains sword charge every 45th frame; gains meter continuously after frame 15; cancelable into exit, S2, or S3 after frame 10 | |description=gains sword charge every 45th frame; gains meter continuously after frame 15; cancelable into exit, S2, or S3 after frame 10 | ||
}} | }} | ||
| Line 588: | Line 593: | ||
|advHit=knockback | |advHit=knockback | ||
|advBlock=-27 | |advBlock=-27 | ||
|cooldown=6 sec | |||
|description=applies 50% damage/dizzy/meter reduction as combo starter | |description=applies 50% damage/dizzy/meter reduction as combo starter | ||
}} | }} | ||
| Line 625: | Line 631: | ||
|advHit=knockback | |advHit=knockback | ||
|advBlock=-25 | |advBlock=-25 | ||
|cooldown=5 sec | |||
|description=applies 50% damage/dizzy/meter reduction as combo starter | |description=applies 50% damage/dizzy/meter reduction as combo starter | ||
}} | }} | ||
| Line 639: | Line 646: | ||
|advHit=launch | |advHit=launch | ||
|advBlock=- | |advBlock=- | ||
|description=damage/dizzy values vary based on sword charges | |description=damage/dizzy values vary based on sword charges<br> | ||
}} | }} | ||
}} | }} | ||
<section end=S2.2/> | <section end=S2.2/> | ||
===<big>{{clr|8|S3.1}}</big>=== | ===<big>{{clr|8|S3.1}}</big>=== | ||
<section begin=S3.1/> | <section begin=S3.1/> | ||
| Line 662: | Line 670: | ||
|advHit= | |advHit= | ||
|advBlock= | |advBlock= | ||
|description=cancelable into S1, S2 | |cooldown=3 sec | ||
|description=cancelable into S3 followups, S1, S2 or halt after 6 frames; minimum runstop = 20 frames; normal runstop = 30 frames | |||
}} | }} | ||
{{AttackData-RT | {{AttackData-RT | ||
| Line 718: | Line 727: | ||
|advHit= | |advHit= | ||
|advBlock= | |advBlock= | ||
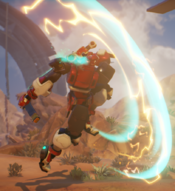
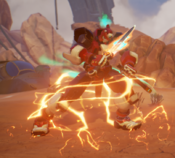
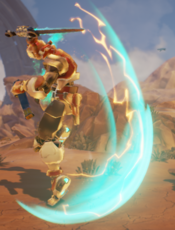
|description= | |description=This is Edge's strongest special, {{clr|8|S3.1}} referred to as "run" allows him to establish his offence.<br><br><b>Slide</b>({{clr|8|L/D+S3}}): <ul><li> Fullscreen, low profile neutral skip that's safe when spaced.</li><li> Upper body projectile invulnerable from frames 9-10</li></ul><b>Overhead</b>({{clr|8|M/U+S3}}): <ul><li>Overhead that can be comboed after with 1 bar.</li><li>Frametraps after target combo.</li><li>airborne during frames 10-25; invincible low during frames 10-23</li></ul><b>Wallbounce</b>({{clr|8|H/N+S3}}):<ul><li>Edge's only powerhit, should always be routed into (from close TC).</li></ul><b>Runstop</b>({{clr|8|B+S3}}):<ul><li>+0 after close TC</li><li>-1 after far TC</li><li>At any point halt can be cancelled into S1 or S2, which can be used to frametrap.</li></ul> | ||
}} | }} | ||
}} | }} | ||
<section end=S3.1/> | <section end=S3.1/> | ||
===<big>{{clr|8|S3.2}}</big>=== | ===<big>{{clr|8|S3.2}}</big>=== | ||
<section begin=S3.2/> | <section begin=S3.2/> | ||
| Line 740: | Line 750: | ||
|advHit=knockback | |advHit=knockback | ||
|advBlock=-5 | |advBlock=-5 | ||
|description= | |cooldown=3 sec | ||
|description=Don't pick this over run. | |||
}} | }} | ||
}} | }} | ||
| Line 808: | Line 819: | ||
|advHit= | |advHit= | ||
|advBlock= | |advBlock= | ||
|description= | |description=Invincible during frames 1-8; throw invulnerable from frames 9-15. | ||
}} | }} | ||
}} | }} | ||
Latest revision as of 03:26, 16 December 2024
Normals
cl.L
| Damage | Guard | Stun | Cancel | Startup | Active | Recovery | Total | Adv Hit | Adv Block | Cooldown |
|---|---|---|---|---|---|---|---|---|---|---|
| 25 | Mid | 50 | Spc/OD/KA | 5 | 2 | 7 | 14 | 6 | 4 | - |
Cancelable into Light attacks | ||||||||||
cl.M
| Damage | Guard | Stun | Cancel | Startup | Active | Recovery | Total | Adv Hit | Adv Block | Cooldown |
|---|---|---|---|---|---|---|---|---|---|---|
| 55 | Mid | 75 | Spc/OD/KA | 6 | 4 | 8 | 18 | 7 | 4 | - |
cancelable into cl.H | ||||||||||
cl.H
| Damage | Guard | Stun | Cancel | Startup | Active | Recovery | Total | Adv Hit | Adv Block | Cooldown |
|---|---|---|---|---|---|---|---|---|---|---|
| 80 | Mid | 100 | Spc/OD/KA | 10 | 5 | 17 | 32 | 1 | -3 | - |
chains out of cl.M, chains into cl.TC | ||||||||||
f.L
| Damage | Guard | Stun | Cancel | Startup | Active | Recovery | Total | Adv Hit | Adv Block | Cooldown |
|---|---|---|---|---|---|---|---|---|---|---|
| 25 | Mid (Whiffs crouching) | 50 | Spc/OD/KA | 5 | 2 | 7 | 14 | 6 | 4 | - |
cancelable into Light attacks | ||||||||||
f.M
| Damage | Guard | Stun | Cancel | Startup | Active | Recovery | Total | Adv Hit | Adv Block | Cooldown |
|---|---|---|---|---|---|---|---|---|---|---|
| 55 | Mid | 75 | Spc/OD/KA | 6 | 3 | 16 | 25 | 0 | -3 | - |
Amazing poke. Fastest f.m, converts consistently, great priority and hard to punish. You'll be spamming this a lot to hold your ground | ||||||||||
f.H
| Damage | Guard | Stun | Cancel | Startup | Active | Recovery | Total | Adv Hit | Adv Block | Cooldown |
|---|---|---|---|---|---|---|---|---|---|---|
| 80 | Mid | 100 | Spc/OD/KA | 10 | 5 | 19 | 34 | -1 | -5 | - |
Can be used to OS backdash after meaty normal. Chains into far H target combo. Decent poke that you can buffer OD behind. | ||||||||||
cr.L
| Damage | Guard | Stun | Cancel | Startup | Active | Recovery | Total | Adv Hit | Adv Block | Cooldown |
|---|---|---|---|---|---|---|---|---|---|---|
| 25 | Low | 50 | Spc/OD/KA | 6 | 2 | 6 | 14 | 7 | 5 | - |
Cancelable into Light attacks, links to mediums. | ||||||||||
cr.M
| Damage | Guard | Stun | Cancel | Startup | Active | Recovery | Total | Adv Hit | Adv Block | Cooldown |
|---|---|---|---|---|---|---|---|---|---|---|
| 60 | Low | 100 | Spc/OD/KA | 8 | 3 | 16 | 27 | 0 | -3 | - |
This move is significantly worse than cr.L frame data wise, and doesn't have enough extra range to ever justify using. | ||||||||||
cr.H
| Damage | Guard | Stun | Cancel | Startup | Active | Recovery | Total | Adv Hit | Adv Block | Cooldown |
|---|---|---|---|---|---|---|---|---|---|---|
| 90 | Low | 150 | KnAdv | 9 | 4 | 25 | 38 | sweep | -10 | - |
Longer range than f.H, makes it useful for catching longer backdashes (e.g. Crow, Talos). | ||||||||||
dj.L
| Damage | Guard | Stun | Cancel | Startup | Active | Recovery | Total | Adv Hit | Adv Block | Cooldown |
|---|---|---|---|---|---|---|---|---|---|---|
| 40 | High | 50 | Special | 6 | 13 | - | - | - | - | - |
massive air-to-air. combos into air 1.1 | ||||||||||
dj.M
| Damage | Guard | Stun | Cancel | Startup | Active | Recovery | Total | Adv Hit | Adv Block | Cooldown |
|---|---|---|---|---|---|---|---|---|---|---|
| 70 | High | 100 | None | 7 | 10 | - | - | - | - | - |
great hitbox for hitting in front, especially good at ranges where j.D+H would crossup | ||||||||||
dj.H
| Damage | Guard | Stun | Cancel | Startup | Active | Recovery | Total | Adv Hit | Adv Block | Cooldown |
|---|---|---|---|---|---|---|---|---|---|---|
| 90 | High | 200 | None | 8 | 8 | - | - | - | - | - |
god air button, hitbox so disjointed will clean beat some DPs. | ||||||||||
nj.L
| Damage | Guard | Stun | Cancel | Startup | Active | Recovery | Total | Adv Hit | Adv Block | Cooldown |
|---|---|---|---|---|---|---|---|---|---|---|
| 40 | High | 50 | Special | 6 | 13 | - | - | - | - | - |
hits rising, but can't fuzzy. Very limited usage | ||||||||||
nj.M
| Damage | Guard | Stun | Cancel | Startup | Active | Recovery | Total | Adv Hit | Adv Block | Cooldown |
|---|---|---|---|---|---|---|---|---|---|---|
| 70 | High | 100 | None | 7 | 10 | - | - | - | - | - |
similar to dj.M with big downards hitbox, but less useful from a neutral jump | ||||||||||
nj.H
| Damage | Guard | Stun | Cancel | Startup | Active | Recovery | Total | Adv Hit | Adv Block | Cooldown |
|---|---|---|---|---|---|---|---|---|---|---|
| 90 | High | 200 | None | 8 | 5 | - | - | - | - | - |
amazing hitbox, go to button for jumping throws | ||||||||||
F+M
| Damage | Guard | Stun | Cancel | Startup | Active | Recovery | Total | Adv Hit | Adv Block | Cooldown |
|---|---|---|---|---|---|---|---|---|---|---|
| 60 | High | 100 | Spc/OD/KA | 19 | 4 | 19 | 42 | -4 | -7 | - |
cancelable into specials on landing, only combos to s2 | ||||||||||
j.D+H
| Damage | Guard | Stun | Cancel | Startup | Active | Recovery | Total | Adv Hit | Adv Block | Cooldown |
|---|---|---|---|---|---|---|---|---|---|---|
| 90 | High | 200 | None | 9 | 7 | - | - | - | - | - |
crossup air attack | ||||||||||
Target Combos
cl.TC
| Damage | Guard | Stun | Cancel | Startup | Active | Recovery | Total | Adv Hit | Adv Block | Cooldown |
|---|---|---|---|---|---|---|---|---|---|---|
| 75 | Mid | 100 | Spc/OD/KA | 10 | 5 | 26 | 41 | -5 | -10 | - |
forces stand | ||||||||||
f.TC
| Damage | Guard | Stun | Cancel | Startup | Active | Recovery | Total | Adv Hit | Adv Block | Cooldown |
|---|---|---|---|---|---|---|---|---|---|---|
| 75 | Mid | 100 | Spc/OD/KA | 10 | 5 | 25 | 40 | -7 | -11 | - |
The less great, but still good TC. f.TC is a common place to spend meter in combos e.g. | ||||||||||
Throws
Forward Throw
| Damage | Guard | Stun | Cancel | Startup | Active | Recovery | Total | Adv Hit | Adv Block | Cooldown |
|---|---|---|---|---|---|---|---|---|---|---|
| 20+25+45 | Unblk | 0+50+0 | KnAdv | 5 | 3 | 27 | 35 | - | - | - |
Rarely worth cancelling. | ||||||||||
Back Throw
| Damage | Guard | Stun | Cancel | Startup | Active | Recovery | Total | Adv Hit | Adv Block | Cooldown |
|---|---|---|---|---|---|---|---|---|---|---|
| 120 | Unblk | 150 | None | 5 | 3 | 27 | 35 | - | - | - |
Edge can close the distance after back throw very easily thanks to S3.1 and all its followups. | ||||||||||
Specials
S1.1
| Damage | Guard | Stun | Cancel | Startup | Active | Recovery | Total | Adv Hit | Adv Block | Cooldown |
|---|---|---|---|---|---|---|---|---|---|---|
| 35+65 | Mid | 75+125 | OD/KA | 13 | 4 (+1) | 18 | 35 | 2 | -2 | 3 sec |
first hit enables second hit; increments sword charge; absorbs projectiles during frames 13-21 (gaining 40 meter and 1.5 sec CD). | ||||||||||
jS1.1
| Damage | Guard | Stun | Cancel | Startup | Active | Recovery | Total | Adv Hit | Adv Block | Cooldown |
|---|---|---|---|---|---|---|---|---|---|---|
| 35+65 | Mid | 75+125 | None | 13 | 4 (+1) | - | - | - | - | 3 sec |
first hit enables second hit; increments sword charge; absorbs projectiles during frames 11-22 (gaining 40 meter and 1.5 sec CD); can attack/block after 2 landing frames, and walk after 4 frames. | ||||||||||
S1.2
| Damage | Guard | Stun | Cancel | Startup | Active | Recovery | Total | Adv Hit | Adv Block | Cooldown |
|---|---|---|---|---|---|---|---|---|---|---|
| 40+40 | Mid | 75+75 | OD/KA | 15 | 1 (8) 1 | 30 | 55 | 0 | -4 | 4.5 sec |
creates dual slash projectiles; increments sword charge once, on clean hit only. | ||||||||||
S1.3
| Version | Damage | Guard | Stun | Cancel | Startup | Active | Recovery | Total | Adv Hit | Adv Block | Cooldown |
|---|---|---|---|---|---|---|---|---|---|---|---|
| Tranquil Thunder | 0 | - | 0 | Other | 10 | - | - | 140 | - | - | 2 Sec |
gains sword charge every 45th frame; gains meter continuously after frame 15; cancelable into exit, S2, or S3 after frame 10 | |||||||||||
| Version | Damage | Guard | Stun | Cancel | Startup | Active | Recovery | Total | Adv Hit | Adv Block | Cooldown |
| Tranquil Thunder Exit | 0 | - | 0 | Other | - | - | 8 | 8 | - | - | - |
cancelable into S2 or S3 | |||||||||||
S2.1
| Version | Damage | Guard | Stun | Cancel | Startup | Active | Recovery | Total | Adv Hit | Adv Block | Cooldown |
|---|---|---|---|---|---|---|---|---|---|---|---|
| Judgment | 80 | Mid | 100 | KnAdv | 7 | 4 | 39 | 50 | knockback | -27 | 6 sec |
applies 50% damage/dizzy/meter reduction as combo starter | |||||||||||
| Version | Damage | Guard | Stun | Cancel | Startup | Active | Recovery | Total | Adv Hit | Adv Block | Cooldown |
| Judgment Ender | 30!/60!/75! | Mid | 35!/70!/80! | None | 7 | 2 | land+20 | - | knockback | - | - |
damage/dizzy values vary based on sword charges | |||||||||||
S2.2
| Version | Damage | Guard | Stun | Cancel | Startup | Active | Recovery | Total | Adv Hit | Adv Block | Cooldown |
|---|---|---|---|---|---|---|---|---|---|---|---|
| Reckless Lightning | 90 | Mid | 100 | KnAdv | 8 | 2 | 39 | 49 | knockback | -25 | 5 sec |
applies 50% damage/dizzy/meter reduction as combo starter | |||||||||||
| Version | Damage | Guard | Stun | Cancel | Startup | Active | Recovery | Total | Adv Hit | Adv Block | Cooldown |
| Reckless Lightning Ender | 15!/45!/65! | Mid | 20!/60!/80! | KnAdv | 7 | 2 | 43 | 52 | launch | - | - |
damage/dizzy values vary based on sword charges | |||||||||||
S3.1
| Version | Damage | Guard | Stun | Cancel | Startup | Active | Recovery | Total | Adv Hit | Adv Block | Cooldown |
|---|---|---|---|---|---|---|---|---|---|---|---|
| Relentless Pursuit | 0 | - | 0 | None | 6 | - | - | - | - | - | 3 sec |
cancelable into S3 followups, S1, S2 or halt after 6 frames; minimum runstop = 20 frames; normal runstop = 30 frames | |||||||||||
| Version | Damage | Guard | Stun | Cancel | Startup | Active | Recovery | Total | Adv Hit | Adv Block | Cooldown |
| Relentless Gale (L/D+S3) | 100 | Low | 150 | KnAdv | 10 | 8 | 18 | 36 | sweep | -7 | - |
| Version | Damage | Guard | Stun | Cancel | Startup | Active | Recovery | Total | Adv Hit | Adv Block | Cooldown |
| Relentless Cyclone (M/U+S3) | 45+50 | High | 80+120 | KnAdv | 20 | 2 (8) 5 | 24 | 59 | -3 | -8 | - |
| Version | Damage | Guard | Stun | Cancel | Startup | Active | Recovery | Total | Adv Hit | Adv Block | Cooldown |
| Relentless Tempest (H/S3) | 90! | Mid | 100! | KnAdv | 17 | 5 | 29 | 51 | wall bounce | -15 | - |
| Version | Damage | Guard | Stun | Cancel | Startup | Active | Recovery | Total | Adv Hit | Adv Block | Cooldown |
| Halt (B) | 0 | - | 0 | Other | - | - | 14 | 14 | - | - | - |
This is Edge's strongest special, S3.1 referred to as "run" allows him to establish his offence.
Slide(L/D+S3):
| |||||||||||
S3.2
| Damage | Guard | Stun | Cancel | Startup | Active | Recovery | Total | Adv Hit | Adv Block | Cooldown |
|---|---|---|---|---|---|---|---|---|---|---|
| 100 | Mid | 200 | OD/KA | 15 | 4 | 20 | 39 | knockback | -5 | 3 sec |
Don't pick this over run. | ||||||||||
OD
| Damage | Guard | Stun | Cancel | Startup | Active | Recovery | Total | Adv Hit | Adv Block | Cooldown |
|---|---|---|---|---|---|---|---|---|---|---|
| 50!+225! | Mid | 0 | None | 5+5+5 | 12 | 60 | 87 | launch | -53 | - |
all hits stop raising juggle count at 4 | ||||||||||
Other
Forward Dash
| Damage | Guard | Stun | Cancel | Startup | Active | Recovery | Total | Adv Hit | Adv Block | Cooldown |
|---|---|---|---|---|---|---|---|---|---|---|
| - | - | - | None | - | - | - | 19 | - | - | - |
cancelable into any attack or jump (but not walk/block) after 17f | ||||||||||
Back Dash
| Damage | Guard | Stun | Cancel | Startup | Active | Recovery | Total | Adv Hit | Adv Block | Cooldown |
|---|---|---|---|---|---|---|---|---|---|---|
| - | - | - | None | - | - | - | 28 | - | - | - |
Invincible during frames 1-8; throw invulnerable from frames 9-15. | ||||||||||
