Eugene Lin (talk | contribs) |
Eugene Lin (talk | contribs) |
||
| Line 854: | Line 854: | ||
basically sweep every time, and that even requires walking forward a little to do it. You can still do st.lk, but it's not | basically sweep every time, and that even requires walking forward a little to do it. You can still do st.lk, but it's not | ||
optimal. | optimal. | ||
Neutral jumping is good. if ryu sweeps a lot, neutral jump, you can roundhouse it on your down, and it doubles as anticipation | |||
for a fireball, it seems a little silly, as you can still get punished, but try it out, you'll see it's useful. | |||
I love this. It's a punish bait. Good on Ryu's wakeup if he likes to punish jumpins with sweep. As ryu wakes up, do a | |||
jump in RH from far away, at the right time. He'll think he has time to sweep, so he will. As soon as you land, Tiger Uppercut! | |||
deep Uppercut. You can do this in other situations when you see fit, not just on wakeup. Don't let Ryu do this on you! | |||
Learn to punish DP whiffs with tiger uppercuts of your own! You might even have to walk forward a little to do it. Tiger knee | |||
is good too, but less damaging (though necessary at farther ranges). TU is better than a sweep or st.fp punish, more damage. | |||
this makes your footsie game so much scarier. | |||
oh, and I forgot to mention, Super. Make sure you punish bad fbs on reaction with super. Make sure Ryu knows he has to worry about it. This helps your game out. | |||
Now last and most importantly, the fireball game. Despite all this stuff here, the fireball game is still incredibly essential in | |||
this matchup. You still need not worry about super much, the situation is the same as O.Gat's. The main loss here is your low tiger | |||
game, much weaker than o.gat's. Fear not! you can still mount a projectile offense. Some things to keep in mind: | |||
Your low tiger's hitbox is worse, meaning ryu's fireball has to travel less farther to hit your low tiger on startup. This happens | |||
when you're trying to neutralize Ryu's Fireball pressure with your own tigers. low tiger is always a bad option, it's always better | |||
to neutralize ryu's fireball with a high tiger. Ryu's fireball seems to travel right under Sagat's arms when he does a High Tiger, | |||
giving you much more room to safely throw out a fireball. | |||
Medium low tigers are very useful, sagat's roundhouse fireball is nerfed, meaning the added poke potential of a RH low tiger is less | |||
worth the frame advantage loss compared to that of a medium one. Incorporate medium fireballs more, it will help. However, don't | |||
discount the RH low tiger completely, it is still useful, just not totally whoreable like o.gats. | |||
Use LK/Short low tigers at first in succession to mount a projectile offensive, and start using faster ones as you push Ryu out, | |||
but don't forget to mix it up at times too. | |||
The high tiger. ah, the high tiger. More useful than you could imagine. The high tigers have a much faster startup than the low ones, | |||
despite being less safe, so remember you have it. Sometimes it can be the solution to your problems. Use it to try to hit ryu on fireball | |||
startup (it's really that fast) or as he jumps. If you throw one out and he ducks, you do lose a little momentum, but you're still OK | |||
as long as you maintain your composure. | |||
The Slow/Jab/LP high tiger. This one is a beauty. So useful. Use it to mount an offense and get into your footsie/yaya game. throw one | |||
out, immediately tiger knee, and start walking forward. Ryu is locked into the ground. He has to crouch, and he can't neutralize it, | |||
that's a big frame disadvantage to him, if he doesn't get hit by it in the first place. Trying to get over it in the air is damn | |||
near suicide. It's time for footsies, baits, umeDPs. Fun times. | |||
You can also do this tiger knee follow up with a Slow Low tiger, and it's safer too, but it doesn't lock ryu in the ground like | |||
the slow high tiger. It's still a good pressure tool, and still highly useful. also, it's more useful in a sense, cause ryu isn't gonna | |||
crouch under it, he's gonna block it, allowing you to immediately do another low tiger, so you get better fireball pressure than just | |||
sitting full screen and baiting, which if Ryu is smart, is not how Sagat, even O.gat beats Ryu. At least not on that alone. So really, | |||
it's highly useful for O.gat as well. | |||
-- Ultracombo (2014) | |||
'''Tiger Knee Wakeup Crossup''' | '''Tiger Knee Wakeup Crossup''' | ||
I've seen this employed to various degrees, I've seen yaya do it vs aniken, i've seen | I've seen this employed to various degrees, I've seen yaya do it vs aniken, i've seen | ||
| Line 872: | Line 921: | ||
Yaya doing it: | Yaya doing it: | ||
http://www.youtube.com/watch?feature=player_detailpage&v=Ltm-tSL4HPI#t=43 | http://www.youtube.com/watch?feature=player_detailpage&v=Ltm-tSL4HPI#t=43 | ||
-- | |||
A good jumpin punish combo for reads on Ryu's fireball is J.rh, Close St.FP xx Fast fireball (low or high both work). | A good jumpin punish combo for reads on Ryu's fireball is J.rh, Close St.FP xx Fast fireball (low or high both work). | ||
Revision as of 18:04, 11 January 2014
Introduction
Competitive Overview
Strengths & Weaknesses
New & Old Versions Comparison
To select O.Sagat, choose Sagat and then press ↑ ↓ ↓ ↑ Jab/Fierce, pressing Short simultaneously with the punch button for the alternate color.
Here is the list of differences:
- Obvious stuff: O.Sagat can not tech throws and does not have a Super;
- O.Sagat has a slightly smaller hitbox than N.Sagat but it's unknown if it has any relevance. Note that this affects most standing normals as well so it will not be listed on the normal moves differences list;
- O.Sagat has a faster pre-jump animation by 2 frames;
- O.Sagat has some differences in some of his normals:
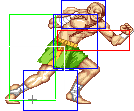
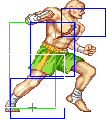
- Close Standing Strong has slower startup;
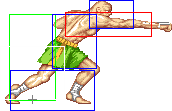
- Far Standing Strong can be special canceled;
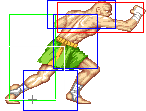
- Close Standing Fierce has slower startup and can not be special canceled but does a little more damage;
- Far Standing Fierce does a little more damage;
- Crouching Fierce does a little more damage;
- Second hit of Standing Short can be special canceled and it has better low-level priority but worse higher-level priority;
- Crouching Short does a little more damage;
- Standing Forward's first hit does a little more damage. Second hit can be special canceled and has better priority as a poke but worse priority as anti-air;
- Crouching Roundhouse does more damage;
- Both Jumping Fierces do more damage;
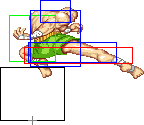
- Diagonal Jumping Forward can not be used as a cross-up attack;
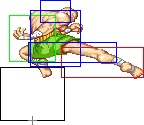
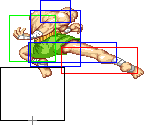
- Both Jumping Roundhouses do more damage;
- High Tiger Shots have the same recovery for all versions, plus a better foot hurtbox;
- Low Tiger Shots have faster startup, the same recovery for all versions, plus a better hurtbox at his fist;
- Fierce Tiger Uppercut is a single hit move so it always does full damage;
Color Options
| Jab | Strong | Fierce | Start | Old |
 |
 |
 |
 |

|
 |
 |
 |
 |

|
| Short | Forward | Roundhouse | Hold | Old Alternative |
--Born2SPD
Moves Analysis
Disclaimer: To better understand the diagrams, read this.
Normal Moves
Ground Normals
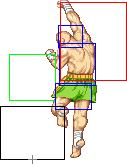
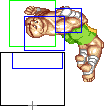
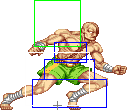
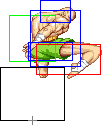
- Close Standing Jab:
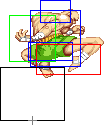
| Damage | 11 |  |
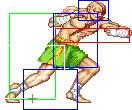 |

|
| Stun | 0~5 | |||
| Stun Timer | 40 | |||
| Chain Cancel | No | |||
| Special Cancel | Yes | |||
| Super Cancel | Yes | |||
| Frame Advantage | ? | |||
| Frame Count | 3 | 4 | 4 | |
| Simplified | 1 + 3 | 4 | 4 | |
- Far Standing Jab:
| Damage | 11 | 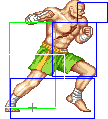 |
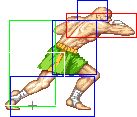 |
 |

|
| Stun | 0~5 | ||||
| Stun Timer | 40 | ||||
| Chain Cancel | No | ||||
| Special Cancel | Yes | ||||
| Super Cancel | Yes | ||||
| Frame Advantage | ? | ||||
| Frame Count | 3 | 4 | 4 | 1 | |
| Simplified | 1 + 3 | 4 | 5 | ||
- Crouching Jab:
| Damage | 11 |  |
 |
 |

|
| Stun | 0~5 | ||||
| Stun Timer | 40 | ||||
| Chain Cancel | No | ||||
| Special Cancel | Yes | ||||
| Super Cancel | Yes | ||||
| Frame Advantage | ? | ||||
| Frame Count | 2 | 2 | 3 | 4 | |
| Simplified | 1 + 4 | 3 | 4 | ||
- Close Standing Strong:
| Damage | 19 |  |
 |
 |

|
| Stun | 5~11 | ||||
| Stun Timer | 60 | ||||
| Chain Cancel | No | ||||
| Special Cancel | Yes | ||||
| Super Cancel | Yes | ||||
| Frame Advantage | ? | ||||
| Frame Count | 3 | 6 | 6 | 1 | |
| Simplified | 1 + 3 | 6 | 7 | ||
- Far Standing Strong:
| Damage | 19 |  |
 |
 |
 |
 |

|
| Stun | 5~11 | ||||||
| Stun Timer | 60 | ||||||
| Chain Cancel | No | ||||||
| Special Cancel | No | ||||||
| Super Cancel | Yes | ||||||
| Frame Advantage | ? | ||||||
| Frame Count | 3 | 2 | 4 | 4 | 4 | 1 | |
| Simplified | 1 + 5 | 4 | 9 | ||||
- Crouching Strong:
| Damage | 19 |  |
 |
 |

|
| Stun | 5~11 | ||||
| Stun Timer | 60 | ||||
| Chain Cancel | No | ||||
| Special Cancel | Yes | ||||
| Super Cancel | Yes | ||||
| Frame Advantage | ? | ||||
| Frame Count | 2 | 2 | 4 | 6 | |
| Simplified | 1 + 4 | 4 | 6 | ||
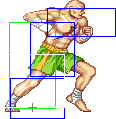
- Close Standing Fierce:
| Damage | 21 |  |
 |
 |

|
| Stun | 10~16 | ||||
| Stun Timer | 80 | ||||
| Chain Cancel | No | ||||
| Special Cancel | Yes | ||||
| Super Cancel | Yes | ||||
| Frame Advantage | ? | ||||
| Frame Count | 3 | 8 | 10 | 1 | |
| Simplified | 1 + 3 | 8 | 11 | ||
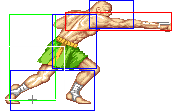
- Far Standing Fierce:
| Damage | 21 |  |
 |
 |
 |
 |

|
| Stun | 10~16 | ||||||
| Stun Timer | 80 | ||||||
| Chain Cancel | No | ||||||
| Special Cancel | No | ||||||
| Super Cancel | No | ||||||
| Frame Advantage | ? | ||||||
| Frame Count | 4 | 3 | 6 | 10 | 12 | 1 | |
| Simplified | 1 + 7 | 6 | 23 | ||||
- Crouching Fierce:
| Damage | 21 |  |
 |
 |

|
| Stun | 10~16 | ||||
| Stun Timer | 80 | ||||
| Chain Cancel | No | ||||
| Special Cancel | No | ||||
| Super Cancel | No | ||||
| Frame Advantage | ? | ||||
| Frame Count | 6 | 6 | 12 | 1 | |
| Simplified | 1 + 6 | 6 | 13 | ||
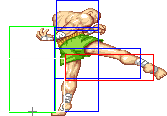
- Close/Far Standing Short:
| Damage | 11+11 | 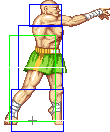 |
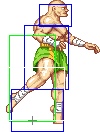 |
 |
 |
 |
 |

|
| Stun | 0~5+0~5 | |||||||
| Stun Timer | 40+40 | |||||||
| Chain Cancel | No | |||||||
| Special Cancel | Yes/No | |||||||
| Super Cancel | Yes/Yes | |||||||
| Frame Advantage | ? | |||||||
| Frame Count | 2 | 1 | 2 | 2 | 2 | 2 | 3 | |
| Simplified | 1 + 3 | 2 | 2 | 7 | ||||
- Crouching Short:
| Damage | 4 |  |
 |
 |

|
| Stun | 0~5 | ||||
| Stun Timer | 40 | ||||
| Chain Cancel | No | ||||
| Special Cancel | Yes | ||||
| Super Cancel | Yes | ||||
| Frame Advantage | ? | ||||
| Frame Count | 4 | 4 | 4 | 1 | |
| Simplified | 1 + 4 | 4 | 5 | ||
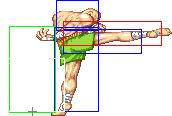
- Close/Far Standing Forward:
| Damage | 12+16 |  |
 |
 |
 |
 |
 |

|
| Stun | 5~11+5~11 | |||||||
| Stun Timer | 60+60 | |||||||
| Chain Cancel | No | |||||||
| Special Cancel | Yes/No | |||||||
| Super Cancel | Yes/Yes | |||||||
| Frame Advantage | ? | |||||||
| Frame Count | 2 | 1 | 2 | 2 | 3 | 4 | 6 | |
| Simplified | 1 + 3 | 2 | 2 | 13 | ||||
- Crouching Forward:
| Damage | 19 |  |
 |
 |
 |

|
| Stun | 5~11 | |||||
| Stun Timer | 60 | |||||
| Chain Cancel | No | |||||
| Special Cancel | Yes | |||||
| Super Cancel | Yes | |||||
| Frame Advantage | ? | |||||
| Frame Count | 2 | 2 | 4 | 3 | 4 | |
| Simplified | 1 + 4 | 4 | 7 | |||
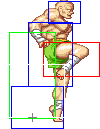
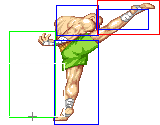
- Close/Far Standing Roundhouse:
| Damage | 14/20 |  |
 |
 |
 |
 |
 |

|
| Stun | 10~16/1~7 | |||||||
| Stun Timer | 80/70 | |||||||
| Chain Cancel | No | |||||||
| Special Cancel | Yes/No | |||||||
| Super Cancel | Yes/No | |||||||
| Frame Advantage | ? | |||||||
| Frame Count | 2 | 1 | 3 | 3 | 6 | 7 | 10 | |
| Simplified | 1 + 3 | 3 | 3 | 23 | ||||
Great anti-air and anti-cross-up.
- Crouching Roundhouse:
| Damage | 21 |  |
 |
 |
 |

|
| Stun | 5~11 | |||||
| Stun Timer | 130 | |||||
| Chain Cancel | No | |||||
| Special Cancel | No | |||||
| Super Cancel | No | |||||
| Frame Advantage | ? | |||||
| Frame Count | 4 | 2 | 6 | 8 | 9 | |
| Simplified | 1 + 6 | 6 | 17 | |||
This is Sagat's sweep attack. It has better range than most sweeps, so Sagat is able to safely trip jump-ins that characters such as shotos and Zangief can not.
Aerial Normals
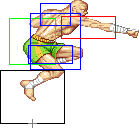
- Neutral Jumping Jab:
| Damage | 11 |  |
|
| Stun | 1~7 | ||
| Stun Timer | 40 | ||
| Frame Count | 3 | ∞ | |
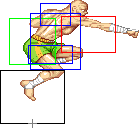
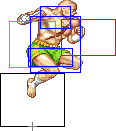
- Diagonal Jumping Jab:
| Damage | 11 |  |
 |
 |
 |

| |
| Stun | 1~7 | ||||||
| Stun Timer | 40 | ||||||
| Frame Count | 3 | 20 | 4 | 4 | ∞ | ||
| Simplified | 3 | 24 | ∞ | ||||
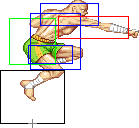
- Neutral Jumping Strong:
| Damage | 19 |  |
 |
 |
 |

|
| Stun | 5~11 | |||||
| Stun Timer | 50 | |||||
| Frame Count | 3 | 14 | 4 | 4 | ∞ | |
| Simplified | 3 | 14 | ∞ | |||
- Diagonal Jumping Strong:
| Damage | 19 |  |
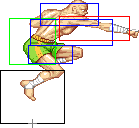 |
 |
 |

|
| Stun | 5~11 | |||||
| Stun Timer | 50 | |||||
| Frame Count | 3 | 14 | 4 | 4 | ∞ | |
| Simplified | 3 | 14 | ∞ | |||
- Neutral Jumping Fierce:
| Damage | 21 |  |
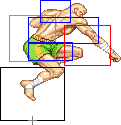 |
 |
 |

|
| Stun | 11~17 | |||||
| Stun Timer | 60 | |||||
| Frame Count | 5 | 10 | 4 | 4 | ∞ | |
| Simplified | 5 | 10 | ∞ | |||
- Diagonal Jumping Fierce:
| Damage | 21 |  |
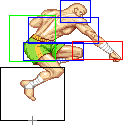 |
 |
 |

|
| Stun | 11~17 | |||||
| Stun Timer | 60 | |||||
| Frame Count | 5 | 8 | 4 | 4 | ∞ | |
| Simplified | 5 | 8 | ∞ | |||
- Neutral Jumping Short:
| Damage | 12 |  |
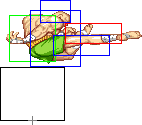
|
| Stun | 1~7 | ||
| Stun Timer | 40 | ||
| Frame Count | 2 | ∞ | |
- Diagonal Jumping Short:
| Damage | 14 |  |
|
| Stun | 1~7 | ||
| Stun Timer | 40 | ||
| Frame Count | 2 | ∞ | |
- Neutral Jumping Forward:
| Damage | 19 |  |
 |
 |
 |

|
| Stun | 5~11 | |||||
| Stun Timer | 50 | |||||
| Frame Count | 1 | 2 | 20 | 3 | ∞ | |
| Simplified | 3 | 20 | ∞ | |||
- Diagonal Jumping Forward:
| Damage | 19 |  |
 |
 |
 |

|
| Stun | 5~11 | |||||
| Stun Timer | 50 | |||||
| Frame Count | 1 | 2 | 20 | 3 | ∞ | |
| Simplified | 3 | 20 | ∞ | |||
- Neutral Jumping Roundhouse:
| Damage | 21 |  |
 |
 |
 |

|
| Stun | 11~17 | |||||
| Stun Timer | 60 | |||||
| Frame Count | 2 | 3 | 8 | 5 | ∞ | |
| Simplified | 5 | 8 | ∞ | |||
- Diagonal Jumping Roundhouse:
| Damage | 21 |  |
 |
 |
 |

|
| Stun | 11~17 | |||||
| Stun Timer | 60 | |||||
| Frame Count | 2 | 3 | 8 | 5 | ∞ | |
| Simplified | 5 | 8 | ∞ | |||
Throws
Sagat has only one throw, which is a shoulder toss. It is performed by moving the joystick left or right and pressing either Strong or Fierce. The direction you move the stick is the direction your enemy will get tossed at. This does around 22% damage.
Sagat's throw range is not very good: he is only at an advantage against Fei Long. Boxer's Fierce throw and T. Hawk's normal throws have less range, but those characters have longer reach options.
- Tiger Carry: (←/→ + Strong/Fierce)
| Damage | 32 | 
| |
| Stun | 7~13 | ||
| Stun Timer | 100 | ||
| Range | (from axis) | 48 | |
| (from throwable box) | 16 | ||
Special Moves
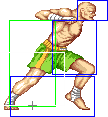
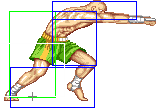
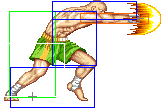
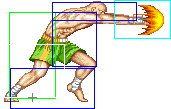
- Tiger Shot a.k.a. High Tiger: (↓↘→ + P)
Detailed Input: (↓ [0~6f] ↘ [0~6f] → [0~10/9/7f] Jab/Strong/Fierce)
- Startup:
| Super Meter | 3 |  |
 |
| |
| Frame Count | 6 | 3 | 1 | ||
| Simplified | 10 | ||||
- Active:
- Jab Version:
| Damage | 16 |  |
 |
 |
 |
|
| Stun | 9~15 | |||||
| Stun Timer | 100 | |||||
| Frame Count | 1 | 1 | 1 | 2 | 1... | |
| Simplified | 38 | |||||
- Strong Version:
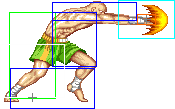
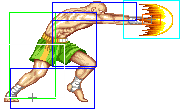
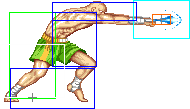
| Damage | 17 | 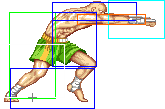 |
 |
 |
 |
|
| Stun | 9~15 | |||||
| Stun Timer | 100 | |||||
| Frame Count | 1 | 1 | 1 | 2 | 1... | |
| Simplified | 38 (40 in HSF2) | |||||
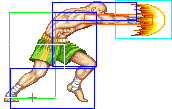
- Fierce Version:
| Damage | 19 |  |
 |
 |
 |
|
| Stun | 9~15 | |||||
| Stun Timer | 100 | |||||
| Frame Count | 1 | 1 | 1 | 2 | 1... | |
| Simplified | 38 (42 in HSF2) | |||||
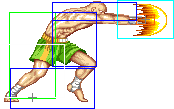
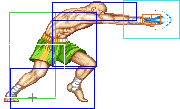
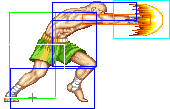
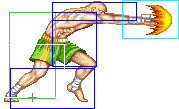
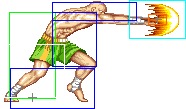
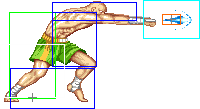
Sagat shouts his trademark move name and throws a projectile while standing still. The strength of the punch determines the speed and damage of the projectile, being Jab the lowest and Fierce the highest. This can be avoided by crouching under the projectile.
- Ground Tiger Shot a.k.a. Low Tiger: (↓↘→ + K)
Detailed Input: (↓ [0~6f] ↘ [0~6f] → [0~10/9/7f] Short/Forward/Roundhouse)
- Startup:
| Super Meter | 3 |  |
 |

| |
| Frame Count | 6 | 5 | 1 | ||
| Simplified | 12 | ||||
- Active:
- Short Version:
| Damage | 15 |  |
 |
 |
 |

|
| Stun | 9~15 | |||||
| Stun Timer | 100 | |||||
| Frame Count | 1 | 1 | 1 | 2 | 1... | |
| Simplified | 38 (46 in HSF2) | |||||
- Forward Version:
| Damage | 16 |  |
 |
 |
 |

|
| Stun | 9~15 | |||||
| Stun Timer | 100 | |||||
| Frame Count | 1 | 1 | 1 | 2 | 1... | |
| Simplified | 38 (46 in HSF2) | |||||
- Roundhouse Version:
| Damage | 17 |  |
 |
 |
 |

|
| Stun | 9~15 | |||||
| Stun Timer | 100 | |||||
| Frame Count | 1 | 1 | 1 | 2 | 1... | |
| Simplified | 38 (46 in HSF2) | |||||
Sagat shouts his trademark move name and throws a projectile while crouching. The kick version determines the speed and damage of the projectile, being Short the lowest and Roundhouse the highest. This move hits low, so the enemy must either evade it with a jump or special move, or crouch block.
- Tiger Uppercut: (→↓↘ + P)
Detailed Input: (→ [0~6f] ↓ [0~6f] ↘ [0~10/9/7f] Jab/Strong/Fierce)
Sagat performs a punch similar to a Shoryuken that hits once for big damage(Jab and Strong versions) or juggles into 4 or 5 hits (Fierce version). This move is invulnerable for a split second, making it an unavoidable anti-air if timed right. The second Stun and Stun Timer values are for the Fierce version.
- Tiger Knee Crush: (↓→↗ + K)
Detailed Input: (↓ [0~6f] → [0~6f] ↗ [0~10/9/7/3f] Short/Forward/Roundhouse/any K if you are at a jumpable state)
- Startup + Active:
- Recovery:
 |
 |
 |

| |
| Frame Count (Short) | 6 | 6 | 1 | 7 |
| Simplified (Short) | 20 | |||
| Frame Count (Forward) | 6 | 6 | 2 | 7 |
| Simplified (Forward) | 21 | |||
| Frame Count (Rh) | 6 | 6 | 3 | 7 |
| Simplified (Rh) | 22 | |||
Sagat performs an aerial knee bash attack that hits up to two times. The range, damage and recovery are determined by the kick version, being Short the shortest range and recovery and lowest damage; and Roundhouse the longest reach, longest recovery and highest damage. The first attack does from 14% to 16% damage and forces standing hitstun on the enemy while the second hit does 11% damage and causes a full knock down. This move can be used to avoid projectiles if timed right, finish combos and quickly get close to the enemy, often surprising him with a throw or Tiger Uppercut. Note that with N.Sagat this move is easier to perform because of his 2-frame longer pre-jump animation.
Super Move
- Tiger Genocide: (↓↘→↓↘ + P)
Detailed Input: (↓ [0~14f] ↘ [0~14f] → [0~14f] ↓ [0~14f] ↘ [0~10f] P)
| Damage | 14*6 |  |
 |
 |
 |
 |
 |
 |
 |
 |

|
| Stun | 0~4*6 | ||||||||||
| Stun Timer | 20*6 | ||||||||||
| Frame Count | 1 + [18] + 1 | 4 | 3 | 3 | 2 | 4 | 6 | 7 | 1 | 2 | |
| Simplified | 6 | 6 | 6 | 16 | |||||||
 |
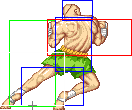 |
 |
 |
 |
 |

| |
| Frame Count | 4 | 3 | 27 | 4 | 4 | 15 | 9 |
| Simplified | 4 | 3 | 27 | 32 | |||
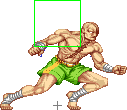
Can pass through fireballs, but doesn't have much horizontal range. You can add a HP Uppercut in the corner after the super.
The Basics
Advanced Strategy
Combos
Match-ups
Matchups classified with this diagram in mind. For the old characters i guessed the positions.
--Born2SPD
Serious Advantage Match-ups
Vs. Blanka:
- 8 - 2
Vs. Cammy:
- 7 - 3
Advantage Match-ups
Vs. E. Honda:
- 6.5 - 3.5
Vs. Fei Long:
- 6.5 - 3.5
Vs. T. Hawk:
- 6.5 - 3.5
You need to get your anti-airs (st.RH, cr.RH, Tiger Uppercut) ready here. Remember, a trade is much better than blocking against grapplers. If you can not react against a dive, just block it and punish it with reversal RH Tiger Knee. Try to get your super bar filled up so as to shut down his empty jump/air Jab/Condor Dive mix-up.
Vs. O. T. Hawk:
Vs. Zangief:
- 6 - 4
Fair Match-ups
Vs. Ken:
- 5 - 5
When throwing low Tigers, Ken's Jab SRK will be a (high-damage) nuisance, due to its range and your extended limbs. On the other hand, Sagat is one the few characters who can punish its recovery with ease. Let spammers fly just so you punch their ass out of the air after any whiffed Jab SRK they try from close range with your standing Fierce punch for high damage and stun. This move is the major issue, since it will beat your own Tiger Uppercuts, low Tigers, Tiger Knees and all jump-ins. Be ready to counter it so he will be forced to use normals and projectiles, which are worse than yours and can be punished by standing punches and aerial RH.
When you get the super, his Hadoukens will become punishable on reaction: use this to your advantage to stablish control and eventually corner him, when your super will become even more dangerous.
Vs. Dee Jay:
- 4.5 - 5.5
Vs. Sagat (self):
Disadvantage Match-ups
Vs. Ryu:
- 3.5 - 6.5
The major difference here is your lack of a stand short cancel and a much weaker low tiger. You can soften throws (important!) and you have a super (also important!) Also n.sagats low tiger has a more vulnerable hitbox than o.gat, meaning ryu can jump in and punish your low tiger from a farther distance and he can even do a neutral jump over your low tiger and air roundhouse your arms on the way down. Not many ryus do it, but it is possible. Due to these changes, you're going to play less of a zoning powerhouse game a "yaya-esque" style play. A fast dp is essential, for a surprise factor in the ground mixup game to keep Ryu at bay a little. Your footsies must be on point. For instance, O.gat would punish a whiffed sweep with st.lk into RH low tiger, or just RH low tiger it, if he doesn't sweep it. Why? It's easier, the sweep has more startup time than St.lk, and O.gat's low tiger travels incredibly fast, which is another nerf n.gat suffers. You'll notice his roundhouse low tiger travels slower than o.gats. So as n.gat, you want to sweep basically sweep every time, and that even requires walking forward a little to do it. You can still do st.lk, but it's not optimal.
Neutral jumping is good. if ryu sweeps a lot, neutral jump, you can roundhouse it on your down, and it doubles as anticipation for a fireball, it seems a little silly, as you can still get punished, but try it out, you'll see it's useful.
I love this. It's a punish bait. Good on Ryu's wakeup if he likes to punish jumpins with sweep. As ryu wakes up, do a jump in RH from far away, at the right time. He'll think he has time to sweep, so he will. As soon as you land, Tiger Uppercut! deep Uppercut. You can do this in other situations when you see fit, not just on wakeup. Don't let Ryu do this on you!
Learn to punish DP whiffs with tiger uppercuts of your own! You might even have to walk forward a little to do it. Tiger knee is good too, but less damaging (though necessary at farther ranges). TU is better than a sweep or st.fp punish, more damage. this makes your footsie game so much scarier.
oh, and I forgot to mention, Super. Make sure you punish bad fbs on reaction with super. Make sure Ryu knows he has to worry about it. This helps your game out.
Now last and most importantly, the fireball game. Despite all this stuff here, the fireball game is still incredibly essential in this matchup. You still need not worry about super much, the situation is the same as O.Gat's. The main loss here is your low tiger game, much weaker than o.gat's. Fear not! you can still mount a projectile offense. Some things to keep in mind:
Your low tiger's hitbox is worse, meaning ryu's fireball has to travel less farther to hit your low tiger on startup. This happens when you're trying to neutralize Ryu's Fireball pressure with your own tigers. low tiger is always a bad option, it's always better to neutralize ryu's fireball with a high tiger. Ryu's fireball seems to travel right under Sagat's arms when he does a High Tiger, giving you much more room to safely throw out a fireball.
Medium low tigers are very useful, sagat's roundhouse fireball is nerfed, meaning the added poke potential of a RH low tiger is less worth the frame advantage loss compared to that of a medium one. Incorporate medium fireballs more, it will help. However, don't discount the RH low tiger completely, it is still useful, just not totally whoreable like o.gats.
Use LK/Short low tigers at first in succession to mount a projectile offensive, and start using faster ones as you push Ryu out, but don't forget to mix it up at times too.
The high tiger. ah, the high tiger. More useful than you could imagine. The high tigers have a much faster startup than the low ones, despite being less safe, so remember you have it. Sometimes it can be the solution to your problems. Use it to try to hit ryu on fireball startup (it's really that fast) or as he jumps. If you throw one out and he ducks, you do lose a little momentum, but you're still OK as long as you maintain your composure.
The Slow/Jab/LP high tiger. This one is a beauty. So useful. Use it to mount an offense and get into your footsie/yaya game. throw one out, immediately tiger knee, and start walking forward. Ryu is locked into the ground. He has to crouch, and he can't neutralize it, that's a big frame disadvantage to him, if he doesn't get hit by it in the first place. Trying to get over it in the air is damn near suicide. It's time for footsies, baits, umeDPs. Fun times.
You can also do this tiger knee follow up with a Slow Low tiger, and it's safer too, but it doesn't lock ryu in the ground like the slow high tiger. It's still a good pressure tool, and still highly useful. also, it's more useful in a sense, cause ryu isn't gonna crouch under it, he's gonna block it, allowing you to immediately do another low tiger, so you get better fireball pressure than just sitting full screen and baiting, which if Ryu is smart, is not how Sagat, even O.gat beats Ryu. At least not on that alone. So really, it's highly useful for O.gat as well.
-- Ultracombo (2014)
Tiger Knee Wakeup Crossup
I've seen this employed to various degrees, I've seen yaya do it vs aniken, i've seen
roybisel do a double tiger knee crossup, i've seen valle do a double tiger knee crossup and jump behind his opponent!
Think of it like Blanka's hop. neat right? Now odds are you can't do a double tiger knee crossup, you won't have enough time.
but even one crossup is a good factor to have, if your opponent's never seen it, they're pretty much bound to fall for it.
If they have, you can still make them think about it, and it allows you to mount a wakeup mixup game on Ryu!
The best application of it, is to crossup Ryu with the tiger knee as he rises and land behind him. now this is risky if Ryu knows about it, so it's not abuseable. you have to do it a little late, so ryu can just do nothing and wait for you to land behind him then punish. So don't whore this move, even though it's fucking sweet. Anyways, do this is as a reversal bait, if ryu sees you walking straight into, he'll probably think you're gonna tick him or go for a crossup j.mk, and a reversal DP will be his first instinct. If timed right, you'll go right behind ryu as he does a reversal dp, free punish! usually you'll wanna do a Tiger uppercut. if he does a medium or fierce dp you must react accordingly.
Yaya doing it: http://www.youtube.com/watch?feature=player_detailpage&v=Ltm-tSL4HPI#t=43
--
A good jumpin punish combo for reads on Ryu's fireball is J.rh, Close St.FP xx Fast fireball (low or high both work). Guaranteed Dizzy. You can still try for the classic o.gat J.RH, Cr.mk xx Roundhouse fireball, but I find the st.fp to be a more guaranteed option. If you jumpin and hit ryu crouching, don't waste your time with either combo, they won't work. the St.fp will whiff, and the cr.mk xxRH low tiger won't combo. it's better to just do the good ol' J.RH Cr.RH noob combo. When it comes to the crossup game, incorporating N.Sagat's j.mk crossup is difficult, but if you can, it can win you rounds.
-- shotosallday (2014)
Vs. O. Ken:
He's more dangerous than N.Ken as all his SRKs go through projectiles. All high Tigers from mid range can be hit by Strong or Fierce Shoryuken. His crouching kicks have a higher chance of beating your Tiger Uppercut, which make him very dangerous up close.
Vs. Chun-Li:
- 3.5 - 6.5
Vs. Guile:
- 3.5 - 6.5
Vs. M. Bison (dictator):
- 3.5 - 6.5
Your job is to get in and keep him blocking with aerial attacks and standing Short kick, or trap him in the corner with projectiles. From mid range, his kicks will be very dangerous: react fast and don't be predictable with your Tigers.
Vs. O. Sagat:
Everything he has is better than what you got, so just play solidly and hope for a major mistake.
Serious Disadvantage Match-ups
Vs. Balrog (boxer):
- 2 - 8
Vs. Dhalsim:
- 1 - 9
Vs. Vega (claw):
- 2.5 - 7.5


