No edit summary |
|||
| (2 intermediate revisions by 2 users not shown) | |||
| Line 4: | Line 4: | ||
<section begin=cl.L/> | <section begin=cl.L/> | ||
{{MoveData | {{MoveData | ||
|name= | |name=Close s.L | ||
|image=Crow cl.L.png | |image=Crow cl.L.png | ||
|caption= | |caption= | ||
| Line 19: | Line 19: | ||
|advHit=5 | |advHit=5 | ||
|advBlock=3 | |advBlock=3 | ||
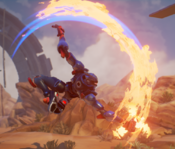
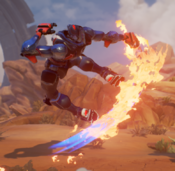
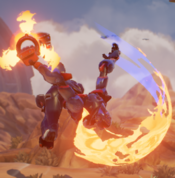
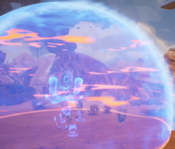
|description= Cancellable into | |description=Cancellable into lights.<br>{{clr|2|cl.L}} is 5 frames and hits crouchers, which is what you need a close jab to be. Marginally worse recovery and plus frames compared to other jabs, but this doesn't hurt Crow too much as {{clr|2|cl.L}} is primarily defensive. | ||
}} | }} | ||
}} | }} | ||
| Line 27: | Line 27: | ||
<section begin=cl.M/> | <section begin=cl.M/> | ||
{{MoveData | {{MoveData | ||
|name= | |name=Close s.M | ||
|image=Crow cl.M.png | |image=Crow cl.M.png | ||
|caption= | |caption= | ||
| Line 42: | Line 42: | ||
|advHit=10 | |advHit=10 | ||
|advBlock=7 | |advBlock=7 | ||
|description=Forces | |description=Forces standing; cancellable into {{clr|5|f.M}}.<br>A normal with a ton of potential that's incredibly plus on block even more incredibly plus on hit.<br><code>{{clr|5|cl.M}}, {{clr|4|cr.H}}</code> on hit allows you to score a hard knockdown without spending your {{clr|6|S1.1}} cooldown, and on block it's a frame trap.<br>{{clr|5|cl.M}} is primarily limited by Crow's awful walk speed, preventing him from walking up and looping it in pressure. | ||
}} | }} | ||
}} | }} | ||
| Line 50: | Line 50: | ||
<section begin=cl.H/> | <section begin=cl.H/> | ||
{{MoveData | {{MoveData | ||
|name= | |name=Close s.H | ||
|image=Crow cl.H.png | |image=Crow cl.H.png | ||
|caption= | |caption= | ||
| Line 65: | Line 65: | ||
|advHit=6 | |advHit=6 | ||
|advBlock=2 | |advBlock=2 | ||
|description=Forces | |description=Forces standing.<br>This normal has weaker than average frame data for Crow and is primarily used as combo filler. Unreliable anti-air due to being a proximity normal. | ||
}} | }} | ||
| Line 74: | Line 74: | ||
<section begin=f.L/> | <section begin=f.L/> | ||
{{MoveData | {{MoveData | ||
|name= | |name=Far s.L | ||
|image=Crow f.L.png | |image=Crow f.L.png | ||
|caption= | |caption= | ||
| Line 81: | Line 81: | ||
|damage=30 | |damage=30 | ||
|stun=50 | |stun=50 | ||
|guard=Mid (Whiffs | |guard=Mid (Whiffs Crouching) | ||
|cancel=Spc/OD/KA | |cancel=Spc/OD/KA | ||
|startup=5 | |startup=5 | ||
| Line 89: | Line 89: | ||
|advHit=4 | |advHit=4 | ||
|advBlock=2 | |advBlock=2 | ||
|description= Crow's standing jab is one of the best in the game | |description=Crow's standing jab is one of the best in the game. Having the standard startup of 5 frames, it stands out as the second longest range jab in the game. This means that for Crow, -6 moves are almost always in punishment range. Being able to consistently convert from a -6 scenario is invaluable in some matchups, though the only option to convert is {{clr|3|S2.3}}. | ||
}} | }} | ||
}} | }} | ||
| Line 97: | Line 97: | ||
<section begin=f.M/> | <section begin=f.M/> | ||
{{MoveData | {{MoveData | ||
|name= | |name=Far s.M | ||
|image=Crow f.M.png | |image=Crow f.M.png | ||
|caption= | |caption= | ||
| Line 120: | Line 120: | ||
<section begin=f.H/> | <section begin=f.H/> | ||
{{MoveData | {{MoveData | ||
|name= | |name=Far s.H | ||
|image=Crow f.H.png | |image=Crow f.H.png | ||
|caption= | |caption= | ||
| Line 135: | Line 135: | ||
|advHit=2 | |advHit=2 | ||
|advBlock=-2 | |advBlock=-2 | ||
|description=Massive poke button, often Crow's best choice to control horizontal space on the screen. Throwing {{clr|4|f.H}} with | |description=Massive poke button, often Crow's best choice to control horizontal space on the screen. Throwing {{clr|4|f.H}} with Discs on the screen allows Crow to occupy an absurd amount of screen space. | ||
}} | }} | ||
}} | }} | ||
| Line 158: | Line 158: | ||
|advHit=4 | |advHit=4 | ||
|advBlock=2 | |advBlock=2 | ||
|description= 1 frame slower than | |description=1 frame slower than his standing jab, but it maintains good range and hits low. Great for tick throw setups as well as an interrupt where {{clr|2|f.L}} may whiff on crouchers. Crow possesses other great low options, and {{clr|2|f.L}} is more useful in punishes, which leaves {{clr|2|cr.L}} with infrequent use. | ||
}} | }} | ||
}} | }} | ||
| Line 181: | Line 181: | ||
|advHit=9 | |advHit=9 | ||
|advBlock=6 | |advBlock=6 | ||
|description=Similar to {{clr|5|cl.M}}; a great move to keep up pressure and plus frames. While possessing slightly worse numbers than {{clr|5|cl.M}}, {{clr|5|cr.M}} hits low and is not gated by being a proximity normal. Great pressure normal often used to cover space that the opponent could be moving to | |description=Similar to {{clr|5|cl.M}}; a great move to keep up pressure and plus frames. While possessing slightly worse numbers than {{clr|5|cl.M}}, {{clr|5|cr.M}} hits low and is not gated by being a proximity normal. Great pressure normal often used to cover space that the opponent could be moving into.<br><code>{{clr|5|cr.M}}, {{clr|5|cr.M}} xx {{clr|3|S2.1}}</code> is Crow's most damaging low option, supported by {{clr|5|cl.M}}'s ability to link into itself. | ||
}} | |||
}} | }} | ||
<section end=cr.M/> | <section end=cr.M/> | ||
| Line 202: | Line 202: | ||
|recovery=17 | |recovery=17 | ||
|total=34 | |total=34 | ||
|advHit= | |advHit=HKD | ||
|advBlock=-5 | |advBlock=-5 | ||
|description=This is Crow's most important normal and | |description=This is Crow's most important normal and a very unique move. The hitbox of {{clr|4|cr.H}} is a 3-hit projectile as well as a physical sweep hitbox. On hit, this will act like a regular sweep and simply knock the opponent down. On block (or against an opponent who was out of range of the first hit), they will continue to be hit by the following projectile hitboxes. The initial sweep can also be canceled into a special, and when doing this the projectile hits will still be active, causing 18 frames of block stun; this is a cornerstone of Crow’s pressure game.<br><code>{{clr|4|cr.H}}(1) xx {{clr|6|S1.1}}</code> is a safe pressure string that lets you put a Disc on screen, opening up a ton of pressure opportunities especially when paired with Kinetic Advance. | ||
}} | }} | ||
}} | }} | ||
| Line 212: | Line 212: | ||
<section begin=dj.L/> | <section begin=dj.L/> | ||
{{MoveData | {{MoveData | ||
|name= | |name=Diagonal j.L | ||
|image=Crow dj.L.png | |image=Crow dj.L.png | ||
|caption= | |caption= | ||
| Line 227: | Line 227: | ||
|advHit= | |advHit= | ||
|advBlock= | |advBlock= | ||
|description= | |description=Only combos into {{clr|3|jS2.1}} in juggles, and very inconsistently. Terrible hitbox, very little reason to use this button. | ||
}} | }} | ||
}} | }} | ||
| Line 234: | Line 234: | ||
<section begin=dj.M/> | <section begin=dj.M/> | ||
{{MoveData | {{MoveData | ||
|name= | |name=Diagonal j.M | ||
|image=Crow dj.M.png | |image=Crow dj.M.png | ||
|caption= | |caption= | ||
| Line 249: | Line 249: | ||
|advHit= | |advHit= | ||
|advBlock= | |advBlock= | ||
|description= | |description=Combos into {{clr|3|jS2.1}} in juggles and against grounded opponents. Hits while rising vs Vlad, letting you fuzzy after a forward jump into an instant overhead.<br><code>{{clr|5|dj.M}} xx {{clr|3|j.S2.1}}</code> has niche usage as an armor-breaking jump-in. | ||
}} | }} | ||
}} | }} | ||
| Line 256: | Line 256: | ||
<section begin=dj.H/> | <section begin=dj.H/> | ||
{{MoveData | {{MoveData | ||
|name= | |name=Diagonal j.H | ||
|image=Crow dj.H.png | |image=Crow dj.H.png | ||
|caption= | |caption= | ||
| Line 271: | Line 271: | ||
|advHit= | |advHit= | ||
|advBlock= | |advBlock= | ||
|description=Your go-to jump in normal | |description=Your go-to jump-in normal with good range and frame data. Learning how to hit this move as deep as possible is key to Crow's fuzzy, his strongest tool offensively.<br>Jump back {{clr|4|dj.H}} can also let you cover a lot of space defensively. | ||
}} | }} | ||
| Line 280: | Line 280: | ||
<section begin=nj.L/> | <section begin=nj.L/> | ||
{{MoveData | {{MoveData | ||
|name= | |name=Neutral j.L | ||
|image=Crow nj.L.png | |image=Crow nj.L.png | ||
|caption= | |caption= | ||
| Line 295: | Line 295: | ||
|advHit= | |advHit= | ||
|advBlock= | |advBlock= | ||
|description= | |description=Similar to {{clr|2|dj.L}}: only combos into {{clr|3|jS2.1}} in juggles, and very inconsistently. Terrible hitbox, very little reason to use this button. | ||
}} | }} | ||
}} | }} | ||
| Line 302: | Line 302: | ||
<section begin=nj.M/> | <section begin=nj.M/> | ||
{{MoveData | {{MoveData | ||
|name= | |name=Neutral j.M | ||
|image=Crow nj.M.png | |image=Crow nj.M.png | ||
|caption= | |caption= | ||
| Line 317: | Line 317: | ||
|advHit= | |advHit= | ||
|advBlock= | |advBlock= | ||
|description= | |description=Hits while rising vs every character, allowing you to fuzzy after a j.H. This is Crow's most rewarding mixup and starter.<br>{{clr|5|nj.M}} allows Crow to have one of the scariest strike/throw mixups in the game, as calling out any throw tech attempt with this button gives him a full combo, which Crow otherwise has difficulty finding. | ||
}} | }} | ||
}} | }} | ||
| Line 324: | Line 324: | ||
<section begin=nj.H/> | <section begin=nj.H/> | ||
{{MoveData | {{MoveData | ||
|name= | |name=Neutral j.H | ||
|image=Crow nj.H.png | |image=Crow nj.H.png | ||
|caption= | |caption= | ||
| Line 339: | Line 339: | ||
|advHit= | |advHit= | ||
|advBlock= | |advBlock= | ||
|description= | |description=Hits up to 3 times, 2 frames apart.<br>This move is huge and effective at holding ground and air-to-airing. Being the only multi-hit air normal in the game, it naturally breaks armor. It can also prove tough to block as all 3 hits are considered overheads, and landing early can make the move only hit once or twice. | ||
}} | }} | ||
}} | }} | ||
<section end=nj.H/> | <section end=nj.H/> | ||
===<big>{{clr|5| | ===<big>{{clr|5|f+M}}</big>=== | ||
<section begin=F+M/> | <section begin=F+M/> | ||
{{MoveData | {{MoveData | ||
|name= | |name=f+M | ||
|image=Crow F+M.png | |image=Crow F+M.png | ||
|caption= | |caption= | ||
| Line 361: | Line 361: | ||
|advHit=4 | |advHit=4 | ||
|advBlock=1 | |advBlock=1 | ||
|description=Crow's standing overhead plus on block and hit, but doesn't naturally combo | |description=Crow's standing overhead is plus on block and hit, but it doesn't naturally combo without a hit from {{clr|3|S1.1}}. Crow has better tools for mixups than this, so use this very sparingly. | ||
}} | }} | ||
}} | }} | ||
<section end=F+M/> | <section end=F+M/> | ||
===<big>{{clr|5| | ===<big>{{clr|5|b+M}}</big>=== | ||
<section begin=B+M/> | <section begin=B+M/> | ||
{{MoveData | {{MoveData | ||
|name= | |name=b+M | ||
|image=Crow B+M.png | |image=Crow B+M.png | ||
|caption= | |caption= | ||
| Line 384: | Line 384: | ||
|advHit=3 | |advHit=3 | ||
|advBlock=0 | |advBlock=0 | ||
|description=Hits up to 3 times, 2 frames apart; | |description=Hits up to 3 times, 2 frames apart; cancellable only on the last hit. This is Crow's intended anti-air normal, but it has not the best hitbox, bad damage, mediocre speed, and no upper body invulnerability. Regardless, it's the most stable anti-air normal in his kit. This move tends to fall out and do 25 damage or trade, but it's often better than blocking a jump-in. | ||
}} | }} | ||
}} | }} | ||
<section end=B+M/> | <section end=B+M/> | ||
===<big>{{clr|4| | ===<big>{{clr|4|f+H}}</big>=== | ||
<section begin=F+H/> | <section begin=F+H/> | ||
{{MoveData | {{MoveData | ||
|name= | |name=f+H | ||
|image=Crow F+H.png | |image=Crow F+H.png | ||
|caption= | |caption= | ||
| Line 407: | Line 407: | ||
|advHit=Launch | |advHit=Launch | ||
|advBlock=-4 | |advBlock=-4 | ||
|description=Forward | |description=Forward-moving command normal that appears to jump but hits low. Some people might fall for this move a couple of times, but throwing it out in neutral is mostly just a gimmick. This is one of Crow's few accesses to a free juggle state, so it's useful for maintaining juggles. This move makes Crow’s arms invincible, which means it clean hits some pokes e.g. Crow {{clr|4|f.H}}.<br>The most common use for this move outside of juggles is chasing a backdash-happy opponent. | ||
}} | }} | ||
}} | }} | ||
<section end=F+H/> | <section end=F+H/> | ||
===<big>{{clr|4|j. | ===<big>{{clr|4|j.d+H}}</big>=== | ||
<section begin=j.D+H/> | <section begin=j.D+H/> | ||
{{MoveData | {{MoveData | ||
|name=j. | |name=j.d+H | ||
|image=Crow j.D+H.png | |image=Crow j.D+H.png | ||
|caption= | |caption= | ||
| Line 430: | Line 430: | ||
|advHit= | |advHit= | ||
|advBlock= | |advBlock= | ||
|description= | |description=Crossup air attack. | ||
}} | }} | ||
}} | }} | ||
<section end=j.D+H/> | <section end=j.D+H/> | ||
==Throws== | ==Throws== | ||
===<big>{{clr|0|Forward Throw}}</big>=== | ===<big>{{clr|0|Forward Throw}}</big>=== | ||
| Line 453: | Line 454: | ||
|advHit= | |advHit= | ||
|advBlock= | |advBlock= | ||
|description= | |description= Crow's throws are flipped compared to most characters. His {{clr|0|Forward Throw}} cannot be KA cancelled, but does more damage than back throw. Mid screen, Crow gets no oki, but in the corner a {{clr|0|Forward Throw}} gives Crow a safe jump vs quick rise. | ||
}} | }} | ||
}} | }} | ||
| Line 466: | Line 467: | ||
{{AttackData-RT | {{AttackData-RT | ||
|damage=20+30+50 | |damage=20+30+50 | ||
|stun=0+ | |stun=0+38+0 | ||
|guard=Unblk | |guard=Unblk | ||
|cancel=KnAdv | |cancel=KnAdv | ||
| Line 475: | Line 476: | ||
|advHit= | |advHit= | ||
|advBlock= | |advBlock= | ||
|description= | |description=Back throw can be cancelled, but isn't worth it without {{clr|3|S2.2}}. There is a bug that makes {{clr|0|Back Throw}} do 0 stun on the second hit, which makes it far less rewarding. Back throw does give oki midscreen, as a manually timed safe jump. The bug makes this move far worse than it should be. | ||
}} | }} | ||
}} | }} | ||
| Line 527: | Line 528: | ||
|advHit=22 | |advHit=22 | ||
|advBlock=18 | |advBlock=18 | ||
|description= | |description=Crow's only option for his first special slot. {{clr|6|S1.1}} (or disk) is a chargeable projectile that can be thrown at three angles: close, neutral, and far. An uncharged disk hits once, while a charged disk hits 3 times. Far {{clr|6|S1.1}} travels just under a fullscreen distance. When used in combos, far {{clr|6|S1.1}} is typically the disk of choice, giving the most frame advantage.<br> Close {{clr|6|S1.1}} is a great defensive tool creating a hitbox to cover space in front of you, protecting Crow from any forward advancement. This only works if you don't get knocked down or hit by super. <br> Charged disks have a special property of whiffing on crouchers on the way up, so no infinite blockstrings. | ||
}} | }} | ||
}} | }} | ||
| Line 549: | Line 551: | ||
|advHit=sweep | |advHit=sweep | ||
|advBlock=-3 | |advBlock=-3 | ||
|description= | |description=Puncture can combo from heavys and mediums, but not lights. Its unique benefit compared to the other specials is that it is safe on block, this means fishing for a low crush with puncture is very strong.<br>Pros:<ul><li> | ||
Better midscreen damage than {{clr|3|S2.3}}</li> | |||
<li>Low crush carries in some matchups</li></ul> | |||
Cons:<ul><li> | |||
Not the best best damage, the worst in corner</li> | |||
<li>No jab conversion</li></ul> | |||
}} | }} | ||
}} | }} | ||
| Line 571: | Line 579: | ||
|advHit=ground bounce / wall bounce | |advHit=ground bounce / wall bounce | ||
|advBlock=-15 | |advBlock=-15 | ||
|description= | |description={{clr|3|S2.2}} is a big damage powerhit that makes Crow's combos do much more damage, and especially a boon to Crow's juggles {{clr|0|OD}} and {{clr|0|Back Throw}}. <br>The drawback of {{clr|3|S2.2}} is you sacrifice combos from {{clr|5|cr.M}} and all lights.<br>Pros:<ul><li> | ||
<b>Damage</b></li></ul> | |||
Cons:<ul><li> | |||
Requires deeper combo knowledge and execution</li><li> | |||
Sacrifice common punishes</li><li> | |||
No neutral usage</li></ul> | |||
}} | }} | ||
}} | }} | ||
| Line 593: | Line 607: | ||
|advHit=launch | |advHit=launch | ||
|advBlock=-10 | |advBlock=-10 | ||
|description= | |description={{clr|3|S2.3}} can combo from every strength normal.<br><code>{{clr|2|st.L}} xx {{clr|3|S2.3}}</code> means Crow can punish -6/-7 moves with a knockdown.<br>{{clr|3|S2.3}} cannot be KA cancelled, but you do get meterless follow ups in the corner, normally just {{clr|4|cr.H}}.<br>Pros:<ul><li> | ||
Real punish of -6/-7 moves</li><li> | |||
Opens up corner combo routes</li><li> | |||
Can always convert from pressure regardless of button used</li><li> | |||
Best Oki</li></ul> | |||
Cons:<ul><li> | |||
Lowest damage when outside the corner</li></ul> | |||
}} | }} | ||
}} | }} | ||
<section end=S2.3/> | <section end=S2.3/> | ||
===<big>{{clr|3|jS2 | ===<big>{{clr|3|jS2}}</big>=== | ||
<section begin=jS2 | <section begin=jS2/> | ||
{{MoveData | {{MoveData | ||
|name=Aerial Core Slicer | |name=Aerial Core Slicer | ||
|image=Crow jS2 | |image=Crow jS2.png | ||
|caption= | |caption= | ||
|data= | |data= | ||
| Line 615: | Line 635: | ||
|advHit= | |advHit= | ||
|advBlock= | |advBlock= | ||
|description=can attack/block after 6 landing frames, and walk after 8 frames | |description=can attack/block after 6 landing frames, and walk after 8 frames.<br> {{clr|3|jS2}} is an excellent pressure tool, the move can be done at any point in the jump arc, and is always + on block. The move can be used to stall for a moment in the air to avoid anti-airs, as well as move forward from neutral/back jump. <br>{{clr|3|jS2}} can also be a combo starter. | ||
}} | }} | ||
}} | }} | ||
| Line 637: | Line 657: | ||
|advHit= | |advHit= | ||
|advBlock= | |advBlock= | ||
|description= | |description=Invincible during frames 1-15<br>{{clr|8|S3.1}} provides Crow with invisibility and some invincibility. It's normally more worthwhile to throw a disk than to setup {{clr|8|S3.1}} leaving the ground version has little use outside of avoiding chip death. | ||
}} | }} | ||
}} | }} | ||
| Line 659: | Line 679: | ||
|advHit= | |advHit= | ||
|advBlock= | |advBlock= | ||
|description=can attack/block after 2 landing frames, and walk after 4 frames | |description=can attack/block after 2 landing frames, and walk after 4 frames.<br>{{clr|8|jS3.1}} Has less invisibility range than {{clr|8|S3.1}} and provides no invincibility. However the move has the unique quality of completely halting air momentum, which can make for some tricky mixups when done above the opponent, landing either side. | ||
}} | }} | ||
}} | }} | ||
| Line 682: | Line 702: | ||
|advHit= | |advHit= | ||
|advBlock= | |advBlock= | ||
|description= | |description=Armored during frames 1-20; transitions into Riposte Forward, Riposte Back, or Neutral Jump after absorbing an attack; cooldown reduced to 5 seconds if triggered within first 5 frames. | ||
}} | }} | ||
{{AttackData-RT | {{AttackData-RT | ||
| Line 696: | Line 716: | ||
|advHit= | |advHit= | ||
|advBlock= | |advBlock= | ||
|description=other properties match forward dash | |description=invincible during frames 1-6; other properties match forward dash. | ||
}} | }} | ||
{{AttackData-RT | {{AttackData-RT | ||
| Line 710: | Line 730: | ||
|advHit= | |advHit= | ||
|advBlock= | |advBlock= | ||
|description= | |description=invincible during frames 1-12; throw invulnerable from frames 13-19 | ||
}} | |||
{{AttackData-RT | |||
|version=Riposte Jump | |||
|damage= | |||
|stun= | |||
|guard=- | |||
|cancel=None | |||
|startup= | |||
|active= | |||
|recovery= | |||
|total= | |||
|advHit= | |||
|advBlock= | |||
|description=properties match neutral jump.<hr>{{clr|8|S3.2}} is a parry, and Crow's best defensive move. Parrying certain moves and frametraps allow Crow to get a punish where he otherwise couldn't.<ul><li>{{clr|8|S3.2}} neutral jump is particularly rewarding, but the easiest to beat as rising {{clr|5|nj.M}} whiffs on crouch and the lack of invincibility will mean any second hit will catch Crow on the way up.</li><li>{{clr|8|S3.2}} back dash is far safer than neutral jump, giving Crow even more invincibility than regular backdash. This is the cloest thing Crow has to a panic button.</li><li>{{clr|8|S3.2}} foward dash also gives some invincibility, but is niche in usage. Can be used to parry projectiles and move forward.</li></ul> | |||
}} | }} | ||
}} | }} | ||
| Line 732: | Line 766: | ||
|advHit=twist | |advHit=twist | ||
|advBlock=34 | |advBlock=34 | ||
|description= | |description=Invincible during frames 1-18.<br>Crow {{clr|0|OD}} is unique amongst the game's supers as the only safe one, being +34 means Crow gets a free mixup opportunity from the opponent blocking super. The risk free nature of {{clr|0|OD}} makes it an excellent reversal, and its frequently worth holding just to make an opponent respect it.<br>{{clr|0|OD}} is also an excellent chip tool, Crow can cover most of the screen with <code>{{clr|6|fS1.1}} xx {{clr|0|OD}}</code>, while also being able to KA out of {{clr|0|OD}} to chase down escape attempts.<br>It's also Crow's most reliable juggle starter, with large corner carry and high damage corner combos, making it a great combo ender. | ||
}} | }} | ||
}} | }} | ||
| Line 807: | Line 841: | ||
|advHit= | |advHit= | ||
|advBlock= | |advBlock= | ||
|description= | |description=Invincible during frames 1-10; throw invulnerable from frames 11-17.<br>Crow has the second longest backdash, and tied for most invincibility. Extremely strong defensive movement option. | ||
}} | }} | ||
}} | }} | ||
Latest revision as of 17:29, 27 August 2024
Normals
cl.L
| Damage | Guard | Stun | Cancel | Startup | Active | Recovery | Total | Adv Hit | Adv Block | Cooldown |
|---|---|---|---|---|---|---|---|---|---|---|
| 30 | Mid | 50 | Spc/OD/KA | 5 | 2 | 8 | 15 | 5 | 3 | - |
Cancellable into lights. | ||||||||||
cl.M
| Damage | Guard | Stun | Cancel | Startup | Active | Recovery | Total | Adv Hit | Adv Block | Cooldown |
|---|---|---|---|---|---|---|---|---|---|---|
| 65 | Mid | 100 | Spc/OD/KA | 7 | 3 | 6 | 16 | 10 | 7 | - |
Forces standing; cancellable into f.M. | ||||||||||
cl.H
| Damage | Guard | Stun | Cancel | Startup | Active | Recovery | Total | Adv Hit | Adv Block | Cooldown |
|---|---|---|---|---|---|---|---|---|---|---|
| 100 | Mid | 200 | Spc/OD/KA | 8 | 4 | 13 | 25 | 6 | 2 | - |
Forces standing. | ||||||||||
f.L
| Damage | Guard | Stun | Cancel | Startup | Active | Recovery | Total | Adv Hit | Adv Block | Cooldown |
|---|---|---|---|---|---|---|---|---|---|---|
| 30 | Mid (Whiffs Crouching) | 50 | Spc/OD/KA | 5 | 2 | 9 | 16 | 4 | 2 | - |
Crow's standing jab is one of the best in the game. Having the standard startup of 5 frames, it stands out as the second longest range jab in the game. This means that for Crow, -6 moves are almost always in punishment range. Being able to consistently convert from a -6 scenario is invaluable in some matchups, though the only option to convert is S2.3. | ||||||||||
f.M
| Damage | Guard | Stun | Cancel | Startup | Active | Recovery | Total | Adv Hit | Adv Block | Cooldown |
|---|---|---|---|---|---|---|---|---|---|---|
| 25+25+25 | Mid | 30+30+40 | OD/KA | 8 | 9 | 11 | 28 | 3 | 0 | - |
Hits up to 3 times, 2 frames apart. This move is very niche. It can be used occasionally to break armour or counter poke, but the long active time is prone to getting jumped. | ||||||||||
f.H
| Damage | Guard | Stun | Cancel | Startup | Active | Recovery | Total | Adv Hit | Adv Block | Cooldown |
|---|---|---|---|---|---|---|---|---|---|---|
| 110 | Mid | 200 | None | 12 | 3 | 18 | 33 | 2 | -2 | - |
Massive poke button, often Crow's best choice to control horizontal space on the screen. Throwing f.H with Discs on the screen allows Crow to occupy an absurd amount of screen space. | ||||||||||
cr.L
| Damage | Guard | Stun | Cancel | Startup | Active | Recovery | Total | Adv Hit | Adv Block | Cooldown |
|---|---|---|---|---|---|---|---|---|---|---|
| 30 | Low | 50 | Spc/OD/KA | 6 | 2 | 9 | 17 | 4 | 2 | - |
1 frame slower than his standing jab, but it maintains good range and hits low. Great for tick throw setups as well as an interrupt where f.L may whiff on crouchers. Crow possesses other great low options, and f.L is more useful in punishes, which leaves cr.L with infrequent use. | ||||||||||
cr.M
| Damage | Guard | Stun | Cancel | Startup | Active | Recovery | Total | Adv Hit | Adv Block | Cooldown |
|---|---|---|---|---|---|---|---|---|---|---|
| 65 | Low | 100 | Spc/OD/KA | 8 | 2 | 8 | 18 | 9 | 6 | - |
Similar to cl.M; a great move to keep up pressure and plus frames. While possessing slightly worse numbers than cl.M, cr.M hits low and is not gated by being a proximity normal. Great pressure normal often used to cover space that the opponent could be moving into. | ||||||||||
cr.H
| Damage | Guard | Stun | Cancel | Startup | Active | Recovery | Total | Adv Hit | Adv Block | Cooldown |
|---|---|---|---|---|---|---|---|---|---|---|
| 100 | Low | 150 | Spc/OD/KA | 9 | 2 (0) 6 | 17 | 34 | HKD | -5 | - |
This is Crow's most important normal and a very unique move. The hitbox of cr.H is a 3-hit projectile as well as a physical sweep hitbox. On hit, this will act like a regular sweep and simply knock the opponent down. On block (or against an opponent who was out of range of the first hit), they will continue to be hit by the following projectile hitboxes. The initial sweep can also be canceled into a special, and when doing this the projectile hits will still be active, causing 18 frames of block stun; this is a cornerstone of Crow’s pressure game. | ||||||||||
dj.L
| Damage | Guard | Stun | Cancel | Startup | Active | Recovery | Total | Adv Hit | Adv Block | Cooldown |
|---|---|---|---|---|---|---|---|---|---|---|
| 50 | High | 50 | Special | 5 | 12 | - | - | - | - | - |
Only combos into jS2.1 in juggles, and very inconsistently. Terrible hitbox, very little reason to use this button. | ||||||||||
dj.M
| Damage | Guard | Stun | Cancel | Startup | Active | Recovery | Total | Adv Hit | Adv Block | Cooldown |
|---|---|---|---|---|---|---|---|---|---|---|
| 80 | High | 100 | Special | 6 | 9 | - | - | - | - | - |
Combos into jS2.1 in juggles and against grounded opponents. Hits while rising vs Vlad, letting you fuzzy after a forward jump into an instant overhead. | ||||||||||
dj.H
| Damage | Guard | Stun | Cancel | Startup | Active | Recovery | Total | Adv Hit | Adv Block | Cooldown |
|---|---|---|---|---|---|---|---|---|---|---|
| 100 | High | 200 | None | 7 | 6 | - | - | - | - | - |
Your go-to jump-in normal with good range and frame data. Learning how to hit this move as deep as possible is key to Crow's fuzzy, his strongest tool offensively. | ||||||||||
nj.L
| Damage | Guard | Stun | Cancel | Startup | Active | Recovery | Total | Adv Hit | Adv Block | Cooldown |
|---|---|---|---|---|---|---|---|---|---|---|
| 50 | High | 50 | Special | 5 | 12 | - | - | - | - | - |
Similar to dj.L: only combos into jS2.1 in juggles, and very inconsistently. Terrible hitbox, very little reason to use this button. | ||||||||||
nj.M
| Damage | Guard | Stun | Cancel | Startup | Active | Recovery | Total | Adv Hit | Adv Block | Cooldown |
|---|---|---|---|---|---|---|---|---|---|---|
| 80 | High | 100 | Special | 5 | 9 | - | - | - | - | - |
Hits while rising vs every character, allowing you to fuzzy after a j.H. This is Crow's most rewarding mixup and starter. | ||||||||||
nj.H
| Damage | Guard | Stun | Cancel | Startup | Active | Recovery | Total | Adv Hit | Adv Block | Cooldown |
|---|---|---|---|---|---|---|---|---|---|---|
| 35+35+35 | High | 65+65+70 | None | 7 | 9 | - | - | - | - | - |
Hits up to 3 times, 2 frames apart. | ||||||||||
f+M
| Damage | Guard | Stun | Cancel | Startup | Active | Recovery | Total | Adv Hit | Adv Block | Cooldown |
|---|---|---|---|---|---|---|---|---|---|---|
| 75 | High | 100 | OD/KA | 18 | 3 | 12 | 33 | 4 | 1 | - |
Crow's standing overhead is plus on block and hit, but it doesn't naturally combo without a hit from S1.1. Crow has better tools for mixups than this, so use this very sparingly. | ||||||||||
b+M
| Damage | Guard | Stun | Cancel | Startup | Active | Recovery | Total | Adv Hit | Adv Block | Cooldown |
|---|---|---|---|---|---|---|---|---|---|---|
| 25+25+25 | Mid | 30+30+40 | OD/KA | 7 | 7 | 13 | 27 | 3 | 0 | - |
Hits up to 3 times, 2 frames apart; cancellable only on the last hit. This is Crow's intended anti-air normal, but it has not the best hitbox, bad damage, mediocre speed, and no upper body invulnerability. Regardless, it's the most stable anti-air normal in his kit. This move tends to fall out and do 25 damage or trade, but it's often better than blocking a jump-in. | ||||||||||
f+H
| Damage | Guard | Stun | Cancel | Startup | Active | Recovery | Total | Adv Hit | Adv Block | Cooldown |
|---|---|---|---|---|---|---|---|---|---|---|
| 105 | Low | 150 | OD/KA | 25 | 3 | 20 | 48 | Launch | -4 | - |
Forward-moving command normal that appears to jump but hits low. Some people might fall for this move a couple of times, but throwing it out in neutral is mostly just a gimmick. This is one of Crow's few accesses to a free juggle state, so it's useful for maintaining juggles. This move makes Crow’s arms invincible, which means it clean hits some pokes e.g. Crow f.H. | ||||||||||
j.d+H
| Damage | Guard | Stun | Cancel | Startup | Active | Recovery | Total | Adv Hit | Adv Block | Cooldown |
|---|---|---|---|---|---|---|---|---|---|---|
| 100 | High | 200 | None | 7 | 6 | - | - | - | - | - |
Crossup air attack. | ||||||||||
Throws
Forward Throw
| Damage | Guard | Stun | Cancel | Startup | Active | Recovery | Total | Adv Hit | Adv Block | Cooldown |
|---|---|---|---|---|---|---|---|---|---|---|
| 125 | Unblk | 150 | None | 5 | 3 | 27 | 35 | - | - | - |
Crow's throws are flipped compared to most characters. His Forward Throw cannot be KA cancelled, but does more damage than back throw. Mid screen, Crow gets no oki, but in the corner a Forward Throw gives Crow a safe jump vs quick rise. | ||||||||||
Back Throw
| Damage | Guard | Stun | Cancel | Startup | Active | Recovery | Total | Adv Hit | Adv Block | Cooldown |
|---|---|---|---|---|---|---|---|---|---|---|
| 20+30+50 | Unblk | 0+38+0 | KnAdv | 5 | 3 | 27 | 35 | - | - | - |
Back throw can be cancelled, but isn't worth it without S2.2. There is a bug that makes Back Throw do 0 stun on the second hit, which makes it far less rewarding. Back throw does give oki midscreen, as a manually timed safe jump. The bug makes this move far worse than it should be. | ||||||||||
Specials
S1.1
| Version | Damage | Guard | Stun | Cancel | Startup | Active | Recovery | Total | Adv Hit | Adv Block | Cooldown |
|---|---|---|---|---|---|---|---|---|---|---|---|
| Devil's Halo Charge | - | - | - | None | 7 | - | - | - | - | - | - |
cancelable into Devil's Halo Quick Toss after 7 frames; disc becomes charged after 20 frames, but can be held indefinitely | |||||||||||
| Version | Damage | Guard | Stun | Cancel | Startup | Active | Recovery | Total | Adv Hit | Adv Block | Cooldown |
| Devil's Halo Quick Toss | 75 | Mid | 100 | OD/KA | 8 | 1 | 22 | 31 | 8 | 4 | - |
| Version | Damage | Guard | Stun | Cancel | Startup | Active | Recovery | Total | Adv Hit | Adv Block | Cooldown |
| Devil's Halo Charged Toss | 30!+30!+40! | Mid (Whiffs crouching) | 50!+50!+50! | OD/KA | 8 | 1 | 22 | 31 | 22 | 18 | - |
Crow's only option for his first special slot. S1.1 (or disk) is a chargeable projectile that can be thrown at three angles: close, neutral, and far. An uncharged disk hits once, while a charged disk hits 3 times. Far S1.1 travels just under a fullscreen distance. When used in combos, far S1.1 is typically the disk of choice, giving the most frame advantage. | |||||||||||
S2.1
| Damage | Guard | Stun | Cancel | Startup | Active | Recovery | Total | Adv Hit | Adv Block | Cooldown |
|---|---|---|---|---|---|---|---|---|---|---|
| 115 | Mid | 200 | None | 16 | 4 | 20 | 40 | sweep | -3 | - |
Puncture can combo from heavys and mediums, but not lights. Its unique benefit compared to the other specials is that it is safe on block, this means fishing for a low crush with puncture is very strong.
Pros:
| ||||||||||
S2.2
| Damage | Guard | Stun | Cancel | Startup | Active | Recovery | Total | Adv Hit | Adv Block | Cooldown |
|---|---|---|---|---|---|---|---|---|---|---|
| 50!+60! | Mid | 100!+100! | OD/KA | 19 | 2 (13) 2 | 32 | 68 | ground bounce / wall bounce | -15 | - |
S2.2 is a big damage powerhit that makes Crow's combos do much more damage, and especially a boon to Crow's juggles OD and Back Throw.
The drawback of S2.2 is you sacrifice combos from cr.M and all lights. Pros:
| ||||||||||
S2.3
| Damage | Guard | Stun | Cancel | Startup | Active | Recovery | Total | Adv Hit | Adv Block | Cooldown |
|---|---|---|---|---|---|---|---|---|---|---|
| 100 | Mid | 200 | None | 12 | 2 | 27 | 41 | launch | -10 | - |
S2.3 can combo from every strength normal.
st.L xx S2.3 means Crow can punish -6/-7 moves with a knockdown.S2.3 cannot be KA cancelled, but you do get meterless follow ups in the corner, normally just cr.H. Pros:
| ||||||||||
jS2
| Damage | Guard | Stun | Cancel | Startup | Active | Recovery | Total | Adv Hit | Adv Block | Cooldown |
|---|---|---|---|---|---|---|---|---|---|---|
| 90 | Mid | 100 | None | 16 | 4 | - | - | - | - | - |
can attack/block after 6 landing frames, and walk after 8 frames. | ||||||||||
S3.1
| Damage | Guard | Stun | Cancel | Startup | Active | Recovery | Total | Adv Hit | Adv Block | Cooldown |
|---|---|---|---|---|---|---|---|---|---|---|
| - | - | - | None | 14 | 1 | 41 | 56 | - | - | - |
Invincible during frames 1-15 | ||||||||||
jS3.1
| Damage | Guard | Stun | Cancel | Startup | Active | Recovery | Total | Adv Hit | Adv Block | Cooldown |
|---|---|---|---|---|---|---|---|---|---|---|
| - | - | - | None | 13 | 1 | - | - | - | - | - |
can attack/block after 2 landing frames, and walk after 4 frames. | ||||||||||
S3.2
| Version | Damage | Guard | Stun | Cancel | Startup | Active | Recovery | Total | Adv Hit | Adv Block | Cooldown |
|---|---|---|---|---|---|---|---|---|---|---|---|
| Riposte | - | - | - | None | 0 | 20 | 15 | 35 | - | - | - |
Armored during frames 1-20; transitions into Riposte Forward, Riposte Back, or Neutral Jump after absorbing an attack; cooldown reduced to 5 seconds if triggered within first 5 frames. | |||||||||||
| Version | Damage | Guard | Stun | Cancel | Startup | Active | Recovery | Total | Adv Hit | Adv Block | Cooldown |
| Riposte Forward | - | - | - | None | - | - | - | 20 | - | - | - |
invincible during frames 1-6; other properties match forward dash. | |||||||||||
| Version | Damage | Guard | Stun | Cancel | Startup | Active | Recovery | Total | Adv Hit | Adv Block | Cooldown |
| Riposte Back | - | - | - | None | - | - | - | 28 | - | - | - |
invincible during frames 1-12; throw invulnerable from frames 13-19 | |||||||||||
| Version | Damage | Guard | Stun | Cancel | Startup | Active | Recovery | Total | Adv Hit | Adv Block | Cooldown |
| Riposte Jump | - | - | - | None | - | - | - | - | - | - | - |
properties match neutral jump.
S3.2 is a parry, and Crow's best defensive move. Parrying certain moves and frametraps allow Crow to get a punish where he otherwise couldn't.
| |||||||||||
OD
| Damage | Guard | Stun | Cancel | Startup | Active | Recovery | Total | Adv Hit | Adv Block | Cooldown |
|---|---|---|---|---|---|---|---|---|---|---|
| 20!x6 + 80! = 200! | Mid | 0 | KnAdv | 5+5+7 | 1 | 40 | 58 | twist | 34 | - |
Invincible during frames 1-18. | ||||||||||
Other
Forward Dash
| Version | Damage | Guard | Stun | Cancel | Startup | Active | Recovery | Total | Adv Hit | Adv Block | Cooldown |
|---|---|---|---|---|---|---|---|---|---|---|---|
| Forward Dash | - | - | - | None | - | - | - | 20 | - | - | - |
transitions into forward run after 15f if holding Fwd; cancelable into any attack or jump (but not walk/block) after 18f in both cases | |||||||||||
| Version | Damage | Guard | Stun | Cancel | Startup | Active | Recovery | Total | Adv Hit | Adv Block | Cooldown |
| Forward Run | - | - | - | Any | - | - | - | - | - | - | - |
cancelable into attack or jump; transitions into forward run stop | |||||||||||
| Version | Damage | Guard | Stun | Cancel | Startup | Active | Recovery | Total | Adv Hit | Adv Block | Cooldown |
| Forward Run Stop | - | - | - | Any | - | - | - | 10 | - | - | - |
cancelable into attack or jump; all actions enabled after 10 frames | |||||||||||
Back Dash
| Damage | Guard | Stun | Cancel | Startup | Active | Recovery | Total | Adv Hit | Adv Block | Cooldown |
|---|---|---|---|---|---|---|---|---|---|---|
| - | - | - | None | - | - | - | 28 | - | - | - |
Invincible during frames 1-10; throw invulnerable from frames 11-17. | ||||||||||
