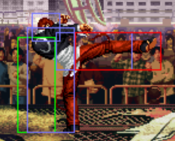
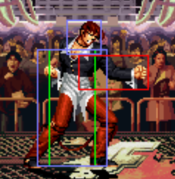
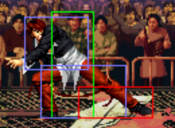
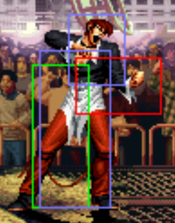
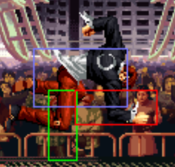
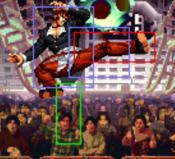
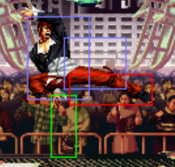
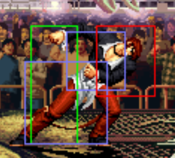
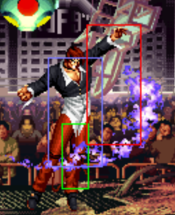
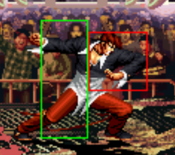
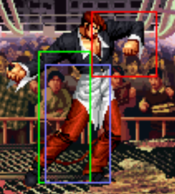
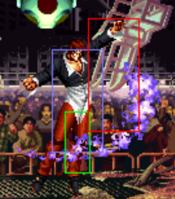
Lichmassacre (talk | contribs) mNo edit summary |
m (added video) |
||
| (18 intermediate revisions by one other user not shown) | |||
| Line 3: | Line 3: | ||
==Introduction== | ==Introduction== | ||
{{ ProConTable | |||
| pros= | |||
* placeholder | |||
| cons= | |||
* placeholder | |||
}} | |||
==Movelist== | ==Movelist== | ||
<center>'''Move List Showcase''' <br> | |||
<youtube>2E0zrk-0BSA</youtube></center> | |||
=== Normals === | === Normals === | ||
==== Far Normals ==== | ==== Far Normals ==== | ||
| Line 10: | Line 19: | ||
<font style="visibility:hidden" size="0"></font> | <font style="visibility:hidden" size="0"></font> | ||
{{MoveData | {{MoveData | ||
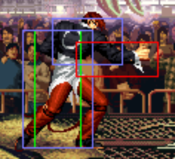
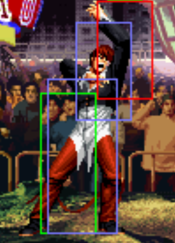
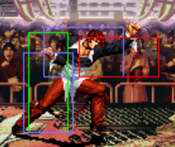
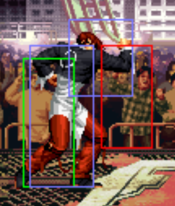
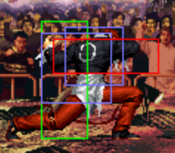
|image= | |image=KOF97 Iori st.A.png | ||
|caption= | |caption= | ||
|name=st.A | |name=st.A | ||
| Line 17: | Line 26: | ||
{{AttackData-KOF97 | {{AttackData-KOF97 | ||
|Damage=- | |Damage=- | ||
|G. Damage= | |G. Damage=- | ||
|Stun=- | |Stun=- | ||
|Cancel= | |Cancel=- | ||
|Guard= Mid | |Guard= Mid | ||
|Startup= | |Startup=6 | ||
| | |active=4 | ||
| | |recovery=4 | ||
| | |total=14 | ||
|Hit Adv= | |Hit Adv=+4 | ||
|Block Adv= | |Block Adv=+2 | ||
| | |invul=- | ||
|description= | |description= | ||
}} | }} | ||
}} | }} | ||
| Line 35: | Line 44: | ||
<font style="visibility:hidden" size="0"></font> | <font style="visibility:hidden" size="0"></font> | ||
{{MoveData | {{MoveData | ||
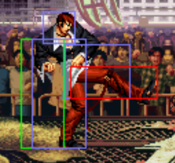
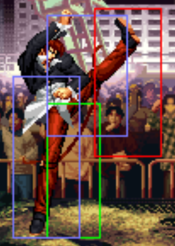
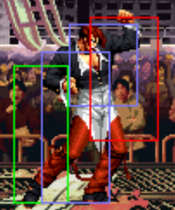
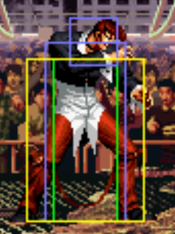
|image= | |image=KOF97 Iori st.B.png | ||
|caption= | |caption= | ||
|name=st.B | |name=st.B | ||
| Line 42: | Line 51: | ||
{{AttackData-KOF97 | {{AttackData-KOF97 | ||
|Damage=- | |Damage=- | ||
|G. Damage= | |G. Damage=- | ||
|Stun=- | |Stun=- | ||
|Cancel= | |Cancel=- | ||
|Guard= Mid | |Guard= Mid | ||
|Startup= | |Startup=6 | ||
| | |active=4 | ||
| | |recovery=7 | ||
| | |total=17 | ||
|Hit Adv= | |Hit Adv=+1 | ||
|Block Adv= | |Block Adv=-1 | ||
| | |invul=- | ||
|description= | |description= | ||
}} | }} | ||
}} | }} | ||
| Line 60: | Line 69: | ||
<font style="visibility:hidden" size="0"></font> | <font style="visibility:hidden" size="0"></font> | ||
{{MoveData | {{MoveData | ||
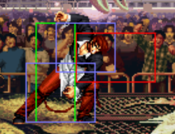
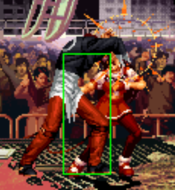
|image= | |image=KOF97 Iori st.C.png | ||
|caption= | |caption= | ||
|name=st.C | |name=st.C | ||
| Line 67: | Line 76: | ||
{{AttackData-KOF97 | {{AttackData-KOF97 | ||
|Damage=- | |Damage=- | ||
|G. Damage= | |G. Damage=- | ||
|Stun=- | |Stun=- | ||
|Cancel= | |Cancel=Special | ||
|Guard= Mid | |Guard= Mid | ||
|Startup= | |Startup=8 | ||
| | |active=3 | ||
| | |recovery=19 | ||
| | |total=30 | ||
|Hit Adv= | |Hit Adv=-2 | ||
|Block Adv= | |Block Adv=-4 | ||
| | |invul=- | ||
|description= | |description= | ||
}} | }} | ||
}} | }} | ||
| Line 85: | Line 94: | ||
<font style="visibility:hidden" size="0"></font> | <font style="visibility:hidden" size="0"></font> | ||
{{MoveData | {{MoveData | ||
|image= | |image=KOF97 Iori st.D.png | ||
|caption= | |caption= | ||
|name=st.D | |name=st.D | ||
| Line 92: | Line 101: | ||
{{AttackData-KOF97 | {{AttackData-KOF97 | ||
|Damage=- | |Damage=- | ||
|G. Damage= | |G. Damage=- | ||
|Stun=- | |Stun=- | ||
|Cancel= | |Cancel=- | ||
|Guard= Mid | |Guard= Mid | ||
|Startup= | |Startup=10 | ||
| | |active=8 | ||
| | |recovery=17 | ||
| | |total=35 | ||
|Hit Adv= | |Hit Adv=-5 | ||
|Block Adv= | |Block Adv=-7 | ||
| | |invul=- | ||
|description= | |description= | ||
}} | }} | ||
}} | }} | ||
| Line 111: | Line 120: | ||
<font style="visibility:hidden" size="0"></font> | <font style="visibility:hidden" size="0"></font> | ||
{{MoveData | {{MoveData | ||
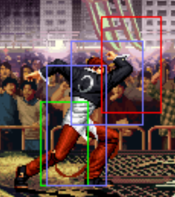
|image= | |image=KOF97 Iori cl.A.png | ||
|caption= | |caption= | ||
|name=cl.A | |name=cl.A | ||
| Line 118: | Line 127: | ||
{{AttackData-KOF97 | {{AttackData-KOF97 | ||
|Damage=- | |Damage=- | ||
|G. Damage= | |G. Damage=- | ||
|Stun=- | |Stun=- | ||
|Cancel= | |Cancel=self,special | ||
|Guard= Mid | |Guard= Mid | ||
|Startup= | |Startup=4 | ||
| | |active=4 | ||
| | |recovery=5 | ||
| | |total=13 | ||
|Hit Adv= | |Hit Adv=+3 | ||
|Block Adv= | |Block Adv=+1 | ||
| | |invul=- | ||
|description= | |description= | ||
}} | }} | ||
}} | }} | ||
| Line 136: | Line 145: | ||
<font style="visibility:hidden" size="0"></font> | <font style="visibility:hidden" size="0"></font> | ||
{{MoveData | {{MoveData | ||
|image= | |image=KOF97 Iori cl.B.png | ||
|caption= | |caption= | ||
|name=cl.B | |name=cl.B | ||
| Line 143: | Line 152: | ||
{{AttackData-KOF97 | {{AttackData-KOF97 | ||
|Damage=- | |Damage=- | ||
|G. Damage= | |G. Damage=- | ||
|Stun=- | |Stun=- | ||
|Cancel= | |Cancel=command | ||
|Guard= | |Guard= Low | ||
|Startup= | |Startup=4 | ||
| | |active=4 | ||
| | |recovery=7 | ||
| | |total=15 | ||
|Hit Adv= | |Hit Adv=+1 | ||
|Block Adv= | |Block Adv=-1 | ||
| | |invul=- | ||
|description= | |description= | ||
}} | }} | ||
}} | }} | ||
| Line 161: | Line 170: | ||
<font style="visibility:hidden" size="0"></font> | <font style="visibility:hidden" size="0"></font> | ||
{{MoveData | {{MoveData | ||
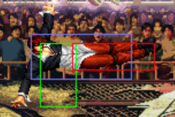
|image= | |image=KOF97 Iori cl.C (1).png | ||
|image2=KOF97 Iori cl.C (2).png | |||
|caption= | |caption= | ||
|name=cl.C | |name=cl.C | ||
| Line 168: | Line 178: | ||
{{AttackData-KOF97 | {{AttackData-KOF97 | ||
|Damage=- | |Damage=- | ||
|G. Damage= | |G. Damage=- | ||
|Stun=- | |Stun=- | ||
|Cancel= | |Cancel=command | ||
|Guard= Mid | |Guard= Mid | ||
|Startup= | |Startup=2 | ||
| | |active=2,5 | ||
| | |recovery=14 | ||
| | |total=23 | ||
|Hit Adv= | |Hit Adv=-1 | ||
|Block Adv= | |Block Adv=-3 | ||
| | |invul=- | ||
|description= | |description= | ||
}} | }} | ||
}} | }} | ||
| Line 186: | Line 196: | ||
<font style="visibility:hidden" size="0"></font> | <font style="visibility:hidden" size="0"></font> | ||
{{MoveData | {{MoveData | ||
|image= | |image=KOF97 Iori cl.D.png | ||
|caption= | |caption= | ||
|name=cl.D | |name=cl.D | ||
| Line 193: | Line 203: | ||
{{AttackData-KOF97 | {{AttackData-KOF97 | ||
|Damage=- | |Damage=- | ||
|G. Damage= | |G. Damage=- | ||
|Stun=- | |Stun=- | ||
|Cancel= | |Cancel=- | ||
|Guard= Mid | |Guard= Mid | ||
|Startup= | |Startup=6 | ||
| | |active=6 | ||
| | |recovery=13 | ||
| | |total=25 | ||
|Hit Adv= | |Hit Adv=+1 | ||
|Block Adv= | |Block Adv=-1 | ||
| | |invul=- | ||
|description= | |description= | ||
}} | }} | ||
}} | }} | ||
| Line 212: | Line 222: | ||
<font style="visibility:hidden" size="0"></font> | <font style="visibility:hidden" size="0"></font> | ||
{{MoveData | {{MoveData | ||
|image= | |image=KOF97 Iori cr.A.png | ||
|caption= | |caption= | ||
|name=cr.A | |name=cr.A | ||
| Line 219: | Line 229: | ||
{{AttackData-KOF97 | {{AttackData-KOF97 | ||
|Damage=- | |Damage=- | ||
|G. Damage= | |G. Damage=- | ||
|Stun=- | |Stun=- | ||
|Cancel= | |Cancel=self,special | ||
|Guard= Mid | |Guard= Mid | ||
|Startup= | |Startup=5 | ||
| | |active=3 | ||
| | |recovery=7 | ||
| | |total=15 | ||
|Hit Adv= | |Hit Adv=+2 | ||
|Block Adv= | |Block Adv=0 | ||
| | |invul=- | ||
|description= | |description= | ||
}} | }} | ||
}} | }} | ||
| Line 237: | Line 247: | ||
<font style="visibility:hidden" size="0"></font> | <font style="visibility:hidden" size="0"></font> | ||
{{MoveData | {{MoveData | ||
|image= | |image=KOF97 Iori cr.B.png | ||
|caption= | |caption= | ||
|name=cr.B | |name=cr.B | ||
| Line 244: | Line 254: | ||
{{AttackData-KOF97 | {{AttackData-KOF97 | ||
|Damage=- | |Damage=- | ||
|G. Damage= | |G. Damage=- | ||
|Stun=- | |Stun=- | ||
|Cancel= | |Cancel=self | ||
|Guard= Low | |Guard=Low | ||
|Startup= | |Startup=5 | ||
| | |active=5 | ||
| | |recovery=5 | ||
| | |total=15 | ||
|Hit Adv= | |Hit Adv=+2 | ||
|Block Adv= | |Block Adv=0 | ||
| | |invul=- | ||
|description= | |description= | ||
}} | }} | ||
}} | }} | ||
| Line 262: | Line 272: | ||
<font style="visibility:hidden" size="0"></font> | <font style="visibility:hidden" size="0"></font> | ||
{{MoveData | {{MoveData | ||
|image= | |image=KOF97 Iori cr.C.png | ||
|caption= | |caption= | ||
|name=cr.C | |name=cr.C | ||
| Line 269: | Line 279: | ||
{{AttackData-KOF97 | {{AttackData-KOF97 | ||
|Damage=- | |Damage=- | ||
|G. Damage= | |G. Damage=- | ||
|Stun=- | |Stun=- | ||
|Cancel= | |Cancel=command | ||
|Guard= Mid | |Guard=Mid | ||
|Startup= | |Startup=7 | ||
| | |active=5 | ||
| | |recovery=16 | ||
| | |total=28 | ||
|Hit Adv= | |Hit Adv=-1 | ||
|Block Adv= | |Block Adv=-3 | ||
| | |invul=- | ||
|description= | |description= | ||
}} | }} | ||
}} | }} | ||
| Line 287: | Line 297: | ||
<font style="visibility:hidden" size="0"></font> | <font style="visibility:hidden" size="0"></font> | ||
{{MoveData | {{MoveData | ||
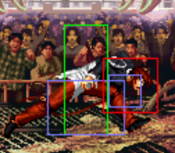
|image= | |image=KOF97 Iori cr.D.png | ||
|caption= | |caption= | ||
|name=cr.D | |name=cr.D | ||
| Line 294: | Line 304: | ||
{{AttackData-KOF97 | {{AttackData-KOF97 | ||
|Damage=- | |Damage=- | ||
|G. Damage= | |G. Damage=- | ||
|Stun=- | |Stun=- | ||
|Cancel= | |Cancel=- | ||
|Guard= Low | |Guard=Low | ||
|Startup= | |Startup=5 | ||
| | |active=6 | ||
| | |recovery=29 | ||
| | |total=40 | ||
|Hit Adv= | |Hit Adv=KND | ||
|Block Adv= | |Block Adv=-17 | ||
| | |invul=- | ||
|description= | |description= | ||
}} | }} | ||
}} | }} | ||
| Line 313: | Line 323: | ||
<font style="visibility:hidden" size="0"></font> | <font style="visibility:hidden" size="0"></font> | ||
{{MoveData | {{MoveData | ||
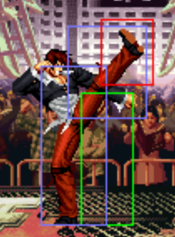
|image= | |image=KOF97 Iori jump.A.png | ||
|caption= | |caption= | ||
|name=nj.A | |name=nj.A | ||
| Line 322: | Line 332: | ||
|G. Damage= | |G. Damage= | ||
|Stun=- | |Stun=- | ||
|Cancel= | |Cancel=- | ||
|Guard=Overhead | |Guard=Overhead | ||
|Startup= | |Startup=4 | ||
| | |active=20 | ||
| | |recovery= | ||
| | |total= | ||
|Hit Adv= | |Hit Adv= | ||
|Block Adv= | |Block Adv= | ||
| | |invul=- | ||
|description= | |description= | ||
}} | }} | ||
| Line 338: | Line 348: | ||
<font style="visibility:hidden" size="0"></font> | <font style="visibility:hidden" size="0"></font> | ||
{{MoveData | {{MoveData | ||
|image= | |image=KOF97 Iori jump.B.png | ||
|caption= | |caption= | ||
|name=nj.B | |name=nj.B | ||
| Line 347: | Line 357: | ||
|G. Damage= | |G. Damage= | ||
|Stun=- | |Stun=- | ||
|Cancel= | |Cancel=- | ||
|Guard=Overhead | |Guard=Overhead | ||
|Startup= | |Startup=5 | ||
| | |active=7 | ||
| | |recovery= | ||
| | |total= | ||
|Hit Adv= | |Hit Adv= | ||
|Block Adv= | |Block Adv= | ||
| | |invul=- | ||
|description= | |description= | ||
}} | }} | ||
| Line 363: | Line 373: | ||
<font style="visibility:hidden" size="0"></font> | <font style="visibility:hidden" size="0"></font> | ||
{{MoveData | {{MoveData | ||
|image= | |image=KOF97 Iori jump.C.png | ||
|caption= | |caption= | ||
|name=nj.C | |name=nj.C | ||
| Line 374: | Line 384: | ||
|Cancel= | |Cancel= | ||
|Guard=Overhead | |Guard=Overhead | ||
|Startup= | |Startup=9 | ||
| | |active=6 | ||
| | |recovery= | ||
| | |total= | ||
|Hit Adv= | |Hit Adv= | ||
|Block Adv= | |Block Adv= | ||
| | |invul=- | ||
|description= | |description= | ||
}} | }} | ||
| Line 388: | Line 398: | ||
<font style="visibility:hidden" size="0"></font> | <font style="visibility:hidden" size="0"></font> | ||
{{MoveData | {{MoveData | ||
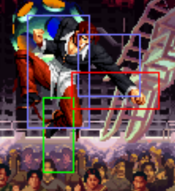
|image= | |image=KOF97 Iori jump.D (1).png | ||
|image2=KOF97 Iori jump.D (2).png | |||
|caption= | |caption= | ||
|name=nj.D | |name=nj.D | ||
| Line 399: | Line 410: | ||
|Cancel= | |Cancel= | ||
|Guard=Overhead | |Guard=Overhead | ||
|Startup= | |Startup=6 | ||
| | |active=4,6 | ||
| | |recovery= | ||
| | |total= | ||
|Hit Adv= | |Hit Adv= | ||
|Block Adv= | |Block Adv= | ||
| | |invul=- | ||
|description= | |description= | ||
}} | }} | ||
| Line 414: | Line 425: | ||
<font style="visibility:hidden" size="0"></font> | <font style="visibility:hidden" size="0"></font> | ||
{{MoveData | {{MoveData | ||
|image= | |image=KOF97 Iori jump.A.png | ||
|caption= | |caption= | ||
|name=dj.A | |name=dj.A | ||
| Line 425: | Line 436: | ||
|Cancel= | |Cancel= | ||
|Guard=Overhead | |Guard=Overhead | ||
|Startup= | |Startup=4 | ||
| | |active=20 | ||
| | |recovery= | ||
| | |total= | ||
|Hit Adv= | |Hit Adv= | ||
|Block Adv= | |Block Adv= | ||
| | |invul=- | ||
|description= | |description= | ||
}} | }} | ||
| Line 439: | Line 450: | ||
<font style="visibility:hidden" size="0"></font> | <font style="visibility:hidden" size="0"></font> | ||
{{MoveData | {{MoveData | ||
|image= | |image=KOF97 Iori jump.B.png | ||
|caption= | |caption= | ||
|name=dj.B | |name=dj.B | ||
| Line 450: | Line 461: | ||
|Cancel= | |Cancel= | ||
|Guard=Overhead | |Guard=Overhead | ||
|Startup= | |Startup=5 | ||
| | |active=7 | ||
| | |recovery= | ||
| | |total= | ||
|Hit Adv= | |Hit Adv= | ||
|Block Adv= | |Block Adv= | ||
| | |invul=- | ||
|description= | |description= | ||
}} | }} | ||
| Line 464: | Line 475: | ||
<font style="visibility:hidden" size="0"></font> | <font style="visibility:hidden" size="0"></font> | ||
{{MoveData | {{MoveData | ||
|image= | |image=KOF97 Iori jump.C.png | ||
|caption= | |caption= | ||
|name=dj.C | |name=dj.C | ||
| Line 475: | Line 486: | ||
|Cancel= | |Cancel= | ||
|Guard=Overhead | |Guard=Overhead | ||
|Startup= | |Startup=9 | ||
| | |active=6 | ||
| | |recovery= | ||
| | |total= | ||
|Hit Adv= | |Hit Adv= | ||
|Block Adv= | |Block Adv= | ||
| | |invul=- | ||
|description= | |description= | ||
}} | }} | ||
| Line 489: | Line 500: | ||
<font style="visibility:hidden" size="0"></font> | <font style="visibility:hidden" size="0"></font> | ||
{{MoveData | {{MoveData | ||
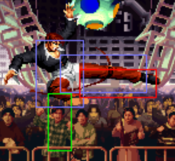
|image= | |image=KOF97 Iori jump.D (1).png | ||
|image2=KOF97 Iori jump.D (2).png | |||
|caption= | |caption= | ||
|name=dj.D | |name=dj.D | ||
| Line 500: | Line 512: | ||
|Cancel= | |Cancel= | ||
|Guard=Overhead | |Guard=Overhead | ||
|Startup= | |Startup=6 | ||
| | |active=4,6 | ||
| | |recovery= | ||
| | |total= | ||
|Hit Adv= | |Hit Adv= | ||
|Block Adv= | |Block Adv= | ||
| | |invul=- | ||
|description= | |description= | ||
}} | }} | ||
| Line 515: | Line 527: | ||
<font style="visibility:hidden" size="0"></font> | <font style="visibility:hidden" size="0"></font> | ||
{{MoveData | {{MoveData | ||
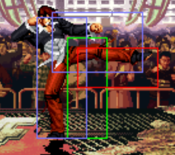
|image= | |image=KOF97 Iori st.CD.png | ||
|caption= | |caption= | ||
|name= | |name=CD | ||
|input={{Icon-SNK|c}}+{{Icon-SNK|d}} | |input={{Icon-SNK|c}}+{{Icon-SNK|d}} | ||
|data= | |data= | ||
{{AttackData-KOF97 | {{AttackData-KOF97 | ||
|Damage=- | |Damage=- | ||
|G. Damage= | |G. Damage=- | ||
|Stun=- | |Stun=- | ||
|Cancel= | |Cancel=Special | ||
|Guard= | |Guard=Mid | ||
|Startup= | |Startup=11 | ||
| | |active=5 | ||
| | |recovery=24 | ||
| | |total=40 | ||
|Hit Adv= | |Hit Adv=KND | ||
|Block Adv= | |Block Adv=-7 | ||
| | |invul=- | ||
|description= | |description= | ||
}} | }} | ||
}} | }} | ||
| Line 540: | Line 552: | ||
<font style="visibility:hidden" size="0"></font> | <font style="visibility:hidden" size="0"></font> | ||
{{MoveData | {{MoveData | ||
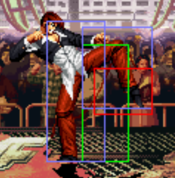
|image= | |image=KOF97 Iori jp.CD.png | ||
|caption= | |caption= | ||
|name= | |name=jp.CD | ||
|input={{Motion|7}}/{{Motion|8}}/{{Motion|9}}+{{Icon-SNK|c}}+{{Icon-SNK|d}} | |input={{Motion|7}}/{{Motion|8}}/{{Motion|9}}+{{Icon-SNK|c}}+{{Icon-SNK|d}} | ||
|data= | |data= | ||
| Line 549: | Line 561: | ||
|G. Damage= | |G. Damage= | ||
|Stun=- | |Stun=- | ||
|Cancel | |Cancel=- | ||
|Guard=Overhead | |||
|Startup=13 | |||
|active=4 | |||
|recovery= | |||
|total= | |||
|Hit Adv=KND | |||
|Guard= | |||
|Startup= | |||
| | |||
| | |||
| | |||
|Hit Adv= | |||
|Block Adv= | |Block Adv= | ||
| | |invul=- | ||
|description= | |description= | ||
}} | }} | ||
| Line 591: | Line 578: | ||
<font style="visibility:hidden" size="0"></font> | <font style="visibility:hidden" size="0"></font> | ||
{{MoveData | {{MoveData | ||
|image= | |image=KOF97 Iori C throw.png | ||
|caption= | |caption= | ||
|name=Sakahagi | |name=Sakahagi | ||
| Line 602: | Line 589: | ||
|Cancel= | |Cancel= | ||
|Guard= Throw | |Guard= Throw | ||
|Startup= | |Startup=1 | ||
| | |active=1 | ||
| | |recovery=0 | ||
| | |total= | ||
|Hit Adv= | |Hit Adv=KD | ||
|Block Adv= | |Block Adv= | ||
| | |invul=- | ||
|description= | |description= | ||
}} | }} | ||
| Line 616: | Line 603: | ||
<font style="visibility:hidden" size="0"></font> | <font style="visibility:hidden" size="0"></font> | ||
{{MoveData | {{MoveData | ||
|image= | |image=KOF97 Iori D throw.png | ||
|caption= | |caption= | ||
|name=Saka Sakahagi | |name=Saka Sakahagi | ||
| Line 627: | Line 614: | ||
|Cancel= | |Cancel= | ||
|Guard= Throw | |Guard= Throw | ||
|Startup= | |Startup=1 | ||
| | |active=1 | ||
| | |recovery=0 | ||
| | |total= | ||
|Hit Adv= | |Hit Adv=KD | ||
|Block Adv= | |Block Adv= | ||
| | |invul=- | ||
|description= | |description= | ||
}} | }} | ||
| Line 642: | Line 629: | ||
<font style="visibility:hidden" size="0"></font> | <font style="visibility:hidden" size="0"></font> | ||
{{MoveData | {{MoveData | ||
|image= | |image=KOF97 Iori f.A.png | ||
|image2=KOF97 Iori f.A,A.png | |||
|caption= | |caption= | ||
|name=Ge Shiki ~ Yumebiki | |name=Ge Shiki ~ Yumebiki | ||
| Line 652: | Line 640: | ||
|G. Damage= | |G. Damage= | ||
|Stun=- | |Stun=- | ||
|Cancel= | |Cancel=special | ||
|Guard=Mid | |Guard=Mid | ||
|Startup= | |Startup=8 | ||
|Active= | |Active=4 | ||
| | |recovery=19 | ||
| | |total=31 | ||
|Hit Adv= | |Hit Adv=-3 | ||
|Block Adv= | |Block Adv=-5 | ||
| | |ynvul=- | ||
|description= | |description= | ||
}} | }} | ||
{{AttackData-KOF97 | {{AttackData-KOF97 | ||
|Damage=- | |Damage=- | ||
|G. Damage= | |G. Damage= | ||
|Stun=- | |Stun=- | ||
|Cancel= | |version={{Motion|6}}{{Icon-SNK|a}}{{Icon-SNK|a}} | ||
|Cancel=special | |||
|Guard=Mid | |Guard=Mid | ||
|Startup= | |Startup=9 | ||
|Active= | |Active=7 | ||
| | |recovery=15 | ||
| | |total=31 | ||
|Hit Adv= | |Hit Adv=-2 | ||
|Block Adv= | |Block Adv=-4 | ||
| | |invul=- | ||
|description= | |description= | ||
}} | }} | ||
| Line 684: | Line 672: | ||
<font style="visibility:hidden" size="0"></font> | <font style="visibility:hidden" size="0"></font> | ||
{{MoveData | {{MoveData | ||
|image= | |image=KOF97 Iori f.B (1).png | ||
|image2=KOF97 Iori f.B (1) .png | |||
|image3=KOF97 Iori f.B (3).png | |||
|caption= | |caption= | ||
|name=Ge Shiki ~ Goufu In Shinigami | |name=Ge Shiki ~ Goufu In Shinigami | ||
| Line 693: | Line 683: | ||
|G. Damage= | |G. Damage= | ||
|Stun=- | |Stun=- | ||
|Cancel= | |Cancel=[special,super] | ||
|Guard=Mid | |Guard=Mid | ||
|Startup= | |Startup=24 | ||
| | |active=3,3,3 | ||
| | |recovery=20 | ||
| | |total=53 | ||
|Hit Adv= | |Hit Adv= | ||
|Block Adv= | |Block Adv= | ||
| | |invul=- | ||
|description= | |description= | ||
}} | }} | ||
| Line 709: | Line 699: | ||
<font style="visibility:hidden" size="0"></font> | <font style="visibility:hidden" size="0"></font> | ||
{{MoveData | {{MoveData | ||
|image= | |image=KOF97 Iori Taco.png | ||
|caption= | |caption= | ||
|name=Ge Shiki ~ Yuri Ori | |name=Ge Shiki ~ Yuri Ori | ||
| Line 720: | Line 710: | ||
|Cancel= | |Cancel= | ||
|Guard=Mid | |Guard=Mid | ||
|Startup= | |Startup=1 | ||
| | |active=13 | ||
| | |recovery= | ||
| | |total= | ||
|Hit Adv= | |Hit Adv= | ||
|Block Adv= | |Block Adv= | ||
| | |invul=- | ||
|description= | |description= | ||
}} | }} | ||
| Line 735: | Line 725: | ||
<font style="visibility:hidden" size="0"></font> | <font style="visibility:hidden" size="0"></font> | ||
{{MoveData | {{MoveData | ||
|image= | |image=KOF97 Iori qcf P (A).png | ||
|caption= | |caption= | ||
|name=108 Shiki ~ Yami Barai | |name=108 Shiki ~ Yami Barai | ||
| Line 741: | Line 731: | ||
|data= | |data= | ||
{{AttackData-KOF97 | {{AttackData-KOF97 | ||
|version= | |version={{Icon-SNK|a}} | ||
|Damage=- | |||
|G. Damage= | |||
|Stun=- | |||
|Cancel=- | |||
|Guard=Mid | |||
|Startup=9 | |||
|active=Full screen projectile | |||
|recovery=37 | |||
|total= | |||
|Hit Adv=- | |||
|Block Adv=- | |||
|invul=- | |||
|description= | |||
}} | |||
{{AttackData-KOF97 | |||
|version={{Icon-SNK|c}} | |||
|Damage=- | |Damage=- | ||
|G. Damage= | |G. Damage= | ||
|Stun=- | |Stun=- | ||
|Cancel= | |Cancel=- | ||
|Guard= | |Guard=Mid | ||
|Startup= | |Startup=9 | ||
| | |active=Full screen projectile | ||
| | |recovery=37 | ||
| | |total= | ||
|Hit Adv= | |Hit Adv=- | ||
|Block Adv= | |Block Adv=- | ||
| | |invul=- | ||
|description= | |description= | ||
}} | }} | ||
| Line 761: | Line 767: | ||
<font style="visibility:hidden" size="0"></font> | <font style="visibility:hidden" size="0"></font> | ||
{{MoveData | {{MoveData | ||
|image= | |image=KOF97 Iori DP.A (1).png | ||
| | |image2=KOF97 Iori DP.A (2).png | ||
|image3=KOF97 Iori DP.A (3).png | |||
|image4=KOF97 Iori DP.C (1).png | |||
|image5=KOF97 Iori DP.C (2).png | |||
|image6=KOF97 Iori DP.C (3).png | |||
|caption3=A version | |||
|caption6=C version | |||
|name=100 Shiki ~ Oniyaki | |name=100 Shiki ~ Oniyaki | ||
|input={{Motion|623}}[[File:P.png]] | |input={{Motion|623}}[[File:P.png]] | ||
| Line 772: | Line 784: | ||
|Stun=- | |Stun=- | ||
|Cancel= | |Cancel= | ||
|Guard= | |Guard=Mid | ||
|Startup= | |Startup=5 | ||
| | |active=2,3,8 | ||
| | |recovery=24 | ||
| | |total=42 | ||
|Hit Adv= | |Hit Adv=-15 | ||
|Block Adv= | |Block Adv=-17 | ||
| | |invul=f1-6(full body) | ||
| | |description= | ||
}} | }} | ||
{{AttackData-KOF97 | {{AttackData-KOF97 | ||
| Line 787: | Line 799: | ||
|G. Damage= | |G. Damage= | ||
|Stun=- | |Stun=- | ||
|Cancel= | |Cancel=- | ||
|Guard= | |Guard=Mid | ||
|Startup= | |Startup=5 | ||
| | |active=3,4,13 | ||
| | |recovery=40 | ||
| | |total=65 | ||
|Hit Adv= | |Hit Adv=KND | ||
|Block Adv= | |Block Adv=-32 | ||
| | |invul=f1-8(full body),f8-12 (upper body) | ||
|description= | |description= | ||
}} | }} | ||
| Line 803: | Line 815: | ||
<font style="visibility:hidden" size="0"></font> | <font style="visibility:hidden" size="0"></font> | ||
{{MoveData | {{MoveData | ||
|image= | |image=KOF97 Iori A rekka's (1).png | ||
|caption= | |caption= | ||
|name=127 Shiki ~ Aoi Hana | |name=127 Shiki ~ Aoi Hana 1 | ||
|input={{Motion|214}} | |input={{Motion|214}}[[File:P.png]] | ||
|data= | |data= | ||
{{AttackData-KOF97 | {{AttackData-KOF97 | ||
|version= | |version={{Icon-SNK|a}} | ||
|Damage=- | |||
|G. Damage= | |||
|Stun=- | |||
|Cancel=- | |||
|Guard=Mid | |||
|Startup=7 | |||
|active=3 | |||
|recovery=15 | |||
|total=25 | |||
|Hit Adv=-2 | |||
|Block Adv=-5 | |||
|invul=- | |||
|description= | |||
}} | |||
{{AttackData-KOF97 | |||
|version={{Icon-SNK|c}} | |||
|Damage=- | |Damage=- | ||
|G. Damage= | |G. Damage= | ||
|Stun=- | |Stun=- | ||
|Cancel= | |Cancel=- | ||
|Guard= | |Guard=Mid | ||
|Startup= | |Startup=11 | ||
| | |active=3 | ||
| | |recovery=23 | ||
| | |total=37 | ||
|Hit Adv= | |Hit Adv=-12 | ||
|Block Adv= | |Block Adv=-14 | ||
| | |invul=f1-7(upper body) | ||
| | |description= | ||
}} | }} | ||
}} | |||
===== <span class="invisible-header"></span> ===== | |||
<font style="visibility:hidden" size="0"></font> | |||
{{MoveData | |||
|image=KOF97 Iori A rekka's (2).png | |||
|caption= | |||
|name=127 Shiki ~ Aoi Hana 2 | |||
|input={{Motion|214}}[[File:P.png]] x2 | |||
|data= | |||
{{AttackData-KOF97 | {{AttackData-KOF97 | ||
|version= | |version={{Icon-SNK|a}} | ||
|Damage=- | |Damage=- | ||
|G. Damage= | |G. Damage= | ||
|Stun=- | |Stun=- | ||
|Cancel= | |Cancel=- | ||
|Guard= | |Guard=Mid | ||
|Startup= | |Startup=7 | ||
| | |active=3 | ||
| | |recovery=18 | ||
| | |total=28 | ||
|Hit Adv= | |Hit Adv=KND | ||
|Block Adv= | |Block Adv=-8 | ||
| | |invul=- | ||
|description= | |description= | ||
}} | }} | ||
{{AttackData-KOF97 | {{AttackData-KOF97 | ||
|version= | |version={{Icon-SNK|c}} | ||
|Damage=- | |Damage=- | ||
|G. Damage= | |G. Damage= | ||
|Stun=- | |Stun=- | ||
|Cancel= | |Cancel= | ||
|Guard= | |Guard=Mid | ||
|Startup= | |Startup=10 | ||
| | |active=3 | ||
| | |recovery=16 | ||
| | |total=29 | ||
|Hit Adv= | |Hit Adv=KND | ||
|Block Adv= | |Block Adv=-17 | ||
| | |invul=- | ||
|description= | |description= | ||
}} | }} | ||
}} | }} | ||
===== <span class="invisible-header"></span> ===== | ===== <span class="invisible-header"></span> ===== | ||
<font style="visibility:hidden" size="0"></font> | <font style="visibility:hidden" size="0"></font> | ||
{{MoveData | {{MoveData | ||
|image= | |image=KOF97 Iori A rekka's (3).png | ||
|caption= | |caption= | ||
|name=127 Shiki ~ Aoi Hana | |name=127 Shiki ~ Aoi Hana 3 | ||
|input={{Motion|214}} | |input={{Motion|214}}[[File:P.png]] x3 | ||
|data= | |data= | ||
{{AttackData-KOF97 | {{AttackData-KOF97 | ||
|version= | |version={{Icon-SNK|a}} | ||
|Damage=- | |Damage=- | ||
|G. Damage= | |G. Damage= | ||
|Stun=- | |Stun=- | ||
|Cancel= | |Cancel= | ||
|Guard= | |Guard=Overhead | ||
|Startup= | |Startup=10 | ||
| | |active=2 | ||
| | |recovery=25 | ||
| | |total=41 | ||
|Hit Adv= | |Hit Adv=HKD | ||
|Block Adv | |Block Adv=-10 | ||
|invul=- | |||
| | |||
|description= | |description= | ||
}} | }} | ||
{{AttackData-KOF97 | {{AttackData-KOF97 | ||
|version= | |version={{Icon-SNK|c}} | ||
|Damage=- | |Damage=- | ||
|G. Damage= | |G. Damage= | ||
|Stun=- | |Stun=- | ||
|Cancel= | |Cancel= | ||
|Guard= | |Guard=Overhead | ||
|Startup= | |Startup=12 | ||
| | |active=9 | ||
| | |recovery=29 | ||
| | |total= | ||
|Hit Adv= | |Hit Adv=HKD | ||
|Block Adv= | |Block Adv=-20 | ||
| | |invul=- | ||
|description= | |description= | ||
}} | }} | ||
| Line 919: | Line 939: | ||
<font style="visibility:hidden" size="0"></font> | <font style="visibility:hidden" size="0"></font> | ||
{{MoveData | {{MoveData | ||
|image= | |image=KOF97 Iori hcb.K (run).png | ||
|image2=KOF97 Iori hcb K.png | |||
|caption= | |caption= | ||
|name=212 Shiki ~ Kototsuki You | |name=212 Shiki ~ Kototsuki You | ||
| Line 929: | Line 950: | ||
|G. Damage= | |G. Damage= | ||
|Stun=- | |Stun=- | ||
|Cancel= | |Cancel=- | ||
|Guard= | |Guard=Mid | ||
|Startup= | |Startup=6 | ||
| | |active=16 | ||
| | |recovery=14 | ||
| | |total= | ||
|Hit Adv= | |Hit Adv=HKD | ||
|Block Adv= | |Block Adv=-20 | ||
| | |invul=- | ||
| | |description= | ||
}} | }} | ||
{{AttackData-KOF97 | {{AttackData-KOF97 | ||
| Line 946: | Line 967: | ||
|Stun=- | |Stun=- | ||
|Cancel= | |Cancel= | ||
|Guard= | |Guard=Mid | ||
|Startup= | |Startup=6 | ||
| | |active=24 | ||
| | |recovery=14 | ||
| | |total= | ||
|Hit Adv= | |Hit Adv=HKD | ||
|Block Adv= | |Block Adv=-20 | ||
| | |invul=- | ||
|description= | |description= | ||
}} | }} | ||
| Line 961: | Line 982: | ||
<font style="visibility:hidden" size="0"></font> | <font style="visibility:hidden" size="0"></font> | ||
{{MoveData | {{MoveData | ||
|image= | |image=KOF97 Iori scum gale.png | ||
|image2=KOF97 Iori Scum gale (connects).png | |||
|caption= | |caption= | ||
|name=Kuzukaze | |name=Kuzukaze | ||
| Line 972: | Line 994: | ||
|Stun=- | |Stun=- | ||
|Cancel= | |Cancel= | ||
|Guard= | |Guard=Throw | ||
|Startup= | |Startup=1 | ||
| | |active=1 | ||
| | |recovery=- | ||
| | |total= | ||
|Hit Adv= | |Hit Adv=+12 | ||
|Block Adv= | |Block Adv=Unblockable | ||
| | |invul=- | ||
| | |description= | ||
}} | }} | ||
{{AttackData-KOF97 | {{AttackData-KOF97 | ||
| Line 987: | Line 1,009: | ||
|G. Damage= | |G. Damage= | ||
|Stun=- | |Stun=- | ||
|Cancel= | |Cancel= | ||
|Guard= | |Guard=Throw | ||
|Startup= | |Startup=1 | ||
| | |active=1 | ||
| | |recovery=- | ||
| | |total= | ||
|Hit Adv= | |Hit Adv=+12 | ||
|Block Adv= | |Block Adv=Unblockable | ||
| | |invul=- | ||
|description= | |description= | ||
}} | }} | ||
| Line 1,004: | Line 1,026: | ||
<font style="visibility:hidden" size="0"></font> | <font style="visibility:hidden" size="0"></font> | ||
{{MoveData | {{MoveData | ||
|image= | |image=KOF97 Iori maiden masher.png | ||
|image2=KOF97 Iori Maiden masher SDM.png | |||
|caption= | |caption= | ||
|name=Kin 1201 Shiki ~ Ya Otome | |name=Kin 1201 Shiki ~ Ya Otome | ||
| Line 1,023: | Line 1,046: | ||
|Block Adv= | |Block Adv= | ||
|Invul=- | |Invul=- | ||
| | |description= | ||
}} | }} | ||
{{AttackData-KOF97 | {{AttackData-KOF97 | ||
| Line 1,062: | Line 1,085: | ||
<font style="visibility:hidden" size="0"></font> | <font style="visibility:hidden" size="0"></font> | ||
{{MoveData | {{MoveData | ||
|image= | |image=KOF97 Iori Super fireball.png | ||
|image2=KOF97 Iori Super fireball (SDM).png | |||
|caption= | |caption= | ||
|name=Ura 108 Shiki ~ Ya Sakazuki | |name=Ura 108 Shiki ~ Ya Sakazuki | ||
|input={{Motion|214}}{{Motion|41236}}[[File:P.png]] | |input={{Motion|214}}{{Motion|41236}}[[File:P.png]] | ||
|data= | |data= | ||
{{AttackData-KOF97 | {{AttackData-KOF97 | ||
| Line 1,081: | Line 1,105: | ||
|Block Adv= | |Block Adv= | ||
|Invul=- | |Invul=- | ||
| | |description= | ||
}} | }} | ||
{{AttackData-KOF97 | {{AttackData-KOF97 | ||
| Line 1,118: | Line 1,142: | ||
==Combos== | ==Combos== | ||
General notes: | |||
*when in max mode. moves will have more pushback which can be a problem in certian combos.. in Iori's case,certian hit-confirms into rekka will whiff at midscreen, even if done after a jump-in/cross-up. | |||
==== meterless ==== | |||
''(midscreen)'' | |||
*'''Cr.Bx2, Cr.A, qcb Ax3''' | |||
( | the classic iori hit-confirm, still your go-to hit-confirm for an easy hard KND. | ||
*'''Cr.B, Cr.A /cl.A /cl.B, f.A, qcb Cx3''' | |||
great hit-confirm, but very difficult due to the tight cancel window of f.A. | |||
if you can do this consistently (especally from cr.A) then use this instead. | |||
*'''(j.X), cl.C (f.A), qcb Cx3''' | |||
iori's main BnB, omit the f.A if you can't cancel it into rekka consistently | |||
*'''(j.X), cl.C, hcb K''' | |||
run grab combo. Does about the same dmg as the one above. | |||
*'''(j.X), (cl.C), hcf C, st.C, qcb Cx3''' | |||
combo involving command grab. iori unfortunately recovers too slowly from the command grab to do run-up cl.C, and unless you can do the 'ghost step' trick, st.C into C rekka's is what your mainly gonna use after hcf C. | |||
*'''(j.X), (cl.C), hcf C~(hcf,b A(Hold), cl.C (release A), f.A, qcb Cx3''' | |||
By utilizing the ghost step technique, iori is able to do his classic bnb from the command grab. Compared to most ghost steps, this one is probably the easiest one to execute since the hcf,b / hcb,f A will always register ethier of his super input and you have an audio que as for when to input the ghost step. Still difficult to execute consistently since you also have to hold A while holding f/b, releasing A as soon as you get cl.C, and input the motion quickly or else you'll get f.A, but it's much more leniant than most ghost step's. | |||
*'''(j.X), hcf C~(hcf,b A(Hold), cl.C (release A), hcf C~(hcb,f A(hold).....''' | |||
One of 2 iori infinites. The Command grab infinite requires you to do the ghost step technique. | |||
''(corner)'' | |||
*'''jp.C/D, cl.C, qcb Ax2, cl.C''' | |||
Corner combo that leads into a rest. requires some timming. | |||
*'''st.C, qcb Ax2, dp A''' | |||
combo that ressembles iori's 95 bnb (which only worked with A rekkas). requires you to be slightly outside of the activation range of cl.C as well as slowly input the 2nd rekka in order for this to work. doesn't do that much dmg compared to doing the last hit of the rekka so it's not really useful but just know that it's there. | |||
*'''(against aiorborne opponents) qcb A~qcb (miner pause) C (miner pause) ,qcb CA~qcb (miner pause) C.....''' | |||
another one of many infinites (and 2 of the iori infinites) in kof 97. i'll admit i haven't done this infinite yet and for good reason (too difficult), but i have seen footage of it preformed. the way it works is that do QCB A and then quickly make another QCB for next hit but don't press the C button quickly wait a nano second and when player goes up after second hit again wait for nano second and quickly press QCB CA (CA is like a tip tap on two buttons) and make a quick QCB just after you press CA, So it's like QCB+CA+QCB and wait for nano second and C... and repeat again n again. | |||
==== with meter ==== | |||
''(midscreen)'' | |||
*'''Cr.B,Cr.A,f.A qcf,hcb P''' | |||
this is slightly eaiser to pull off since your doing cr.A,f.A,hcb P, still can be abit finicky. | |||
*'''(j.X), cl.C / cr.C, (f.A), qcf,hcb+P''' | |||
basic combo into super. If you implement f.A, remember to do the button hold trick to make doing the super easier (do it as cl.C (hold C), qcf A, (release C) hcb C) | |||
*'''(j.X), cl.C, hcf C, st.C, qcf,hcb P''' | |||
combo into command grab for abit more dmg than the combo above. | |||
*'''(j.X), (cl.C), hcf C~(hcf,b A(Hold), cl.C (release A), (f.A), qcf,hcb P''' | |||
alternate and more difficult command grab combo into super. If you implement f.A, remember to do the button hold trick to make doing the super easier | |||
''(corner)'' | |||
*'''cl.C, hcf C, f.A,A, qcb Ax2, qcf,hcb P''' | |||
Situational corner combo. Iori has to be the one cornered for this to work. Requires some timming for this to work. Impractical combo | |||
*'''cl.C, qcb Ax2, qcf,hcb P''' | |||
An easier version of the combo above. | |||
==Strategy== | ==Strategy== | ||
[[Category:The King of Fighters '97]] | [[Category:The King of Fighters '97]] | ||
[[Category:Iori Yagami]] | |||
{{The King Of Fighters '97}} | {{The King Of Fighters '97}} | ||
Latest revision as of 08:46, 23 May 2024
Introduction
| Strengths | Weaknesses |
|---|---|
|
|
Movelist
Normals
Far Normals
| Guard | Cancel Properties | Startup | Active | Recovery | Total | Invulnerability | Hit Advantage | Block Advantage | Stun | Guard Damage | Damage |
|---|---|---|---|---|---|---|---|---|---|---|---|
| Mid | - | 6 | 4 | 4 | 14 | - | +4 | +2 | - | - | - |
| Guard | Cancel Properties | Startup | Active | Recovery | Total | Invulnerability | Hit Advantage | Block Advantage | Stun | Guard Damage | Damage |
|---|---|---|---|---|---|---|---|---|---|---|---|
| Mid | - | 6 | 4 | 7 | 17 | - | +1 | -1 | - | - | - |
| Guard | Cancel Properties | Startup | Active | Recovery | Total | Invulnerability | Hit Advantage | Block Advantage | Stun | Guard Damage | Damage |
|---|---|---|---|---|---|---|---|---|---|---|---|
| Mid | Special | 8 | 3 | 19 | 30 | - | -2 | -4 | - | - | - |
| Guard | Cancel Properties | Startup | Active | Recovery | Total | Invulnerability | Hit Advantage | Block Advantage | Stun | Guard Damage | Damage |
|---|---|---|---|---|---|---|---|---|---|---|---|
| Mid | - | 10 | 8 | 17 | 35 | - | -5 | -7 | - | - | - |
Close Range Normals
| Guard | Cancel Properties | Startup | Active | Recovery | Total | Invulnerability | Hit Advantage | Block Advantage | Stun | Guard Damage | Damage |
|---|---|---|---|---|---|---|---|---|---|---|---|
| Mid | self,special | 4 | 4 | 5 | 13 | - | +3 | +1 | - | - | - |
| Guard | Cancel Properties | Startup | Active | Recovery | Total | Invulnerability | Hit Advantage | Block Advantage | Stun | Guard Damage | Damage |
|---|---|---|---|---|---|---|---|---|---|---|---|
| Low | command | 4 | 4 | 7 | 15 | - | +1 | -1 | - | - | - |
| Guard | Cancel Properties | Startup | Active | Recovery | Total | Invulnerability | Hit Advantage | Block Advantage | Stun | Guard Damage | Damage |
|---|---|---|---|---|---|---|---|---|---|---|---|
| Mid | command | 2 | 2,5 | 14 | 23 | - | -1 | -3 | - | - | - |
| Guard | Cancel Properties | Startup | Active | Recovery | Total | Invulnerability | Hit Advantage | Block Advantage | Stun | Guard Damage | Damage |
|---|---|---|---|---|---|---|---|---|---|---|---|
| Mid | - | 6 | 6 | 13 | 25 | - | +1 | -1 | - | - | - |
Crouching Normals
| Guard | Cancel Properties | Startup | Active | Recovery | Total | Invulnerability | Hit Advantage | Block Advantage | Stun | Guard Damage | Damage |
|---|---|---|---|---|---|---|---|---|---|---|---|
| Mid | self,special | 5 | 3 | 7 | 15 | - | +2 | 0 | - | - | - |
| Guard | Cancel Properties | Startup | Active | Recovery | Total | Invulnerability | Hit Advantage | Block Advantage | Stun | Guard Damage | Damage |
|---|---|---|---|---|---|---|---|---|---|---|---|
| Low | self | 5 | 5 | 5 | 15 | - | +2 | 0 | - | - | - |
| Guard | Cancel Properties | Startup | Active | Recovery | Total | Invulnerability | Hit Advantage | Block Advantage | Stun | Guard Damage | Damage |
|---|---|---|---|---|---|---|---|---|---|---|---|
| Mid | command | 7 | 5 | 16 | 28 | - | -1 | -3 | - | - | - |
| Guard | Cancel Properties | Startup | Active | Recovery | Total | Invulnerability | Hit Advantage | Block Advantage | Stun | Guard Damage | Damage |
|---|---|---|---|---|---|---|---|---|---|---|---|
| Low | - | 5 | 6 | 29 | 40 | - | KND | -17 | - | - | - |
Neutral Jumping Normals
| Guard | Cancel Properties | Startup | Active | Recovery | Total | Invulnerability | Hit Advantage | Block Advantage | Stun | Guard Damage | Damage |
|---|---|---|---|---|---|---|---|---|---|---|---|
| Overhead | - | 4 | 20 | - | - | - | - | - | - | - | - |
| Guard | Cancel Properties | Startup | Active | Recovery | Total | Invulnerability | Hit Advantage | Block Advantage | Stun | Guard Damage | Damage |
|---|---|---|---|---|---|---|---|---|---|---|---|
| Overhead | - | 5 | 7 | - | - | - | - | - | - | - | - |
| Guard | Cancel Properties | Startup | Active | Recovery | Total | Invulnerability | Hit Advantage | Block Advantage | Stun | Guard Damage | Damage |
|---|---|---|---|---|---|---|---|---|---|---|---|
| Overhead | - | 9 | 6 | - | - | - | - | - | - | - | - |
| Guard | Cancel Properties | Startup | Active | Recovery | Total | Invulnerability | Hit Advantage | Block Advantage | Stun | Guard Damage | Damage |
|---|---|---|---|---|---|---|---|---|---|---|---|
| Overhead | - | 6 | 4,6 | - | - | - | - | - | - | - | - |
Diagonal Jump Normals
| Guard | Cancel Properties | Startup | Active | Recovery | Total | Invulnerability | Hit Advantage | Block Advantage | Stun | Guard Damage | Damage |
|---|---|---|---|---|---|---|---|---|---|---|---|
| Overhead | - | 4 | 20 | - | - | - | - | - | - | - | - |
| Guard | Cancel Properties | Startup | Active | Recovery | Total | Invulnerability | Hit Advantage | Block Advantage | Stun | Guard Damage | Damage |
|---|---|---|---|---|---|---|---|---|---|---|---|
| Overhead | - | 5 | 7 | - | - | - | - | - | - | - | - |
| Guard | Cancel Properties | Startup | Active | Recovery | Total | Invulnerability | Hit Advantage | Block Advantage | Stun | Guard Damage | Damage |
|---|---|---|---|---|---|---|---|---|---|---|---|
| Overhead | - | 9 | 6 | - | - | - | - | - | - | - | - |
| Guard | Cancel Properties | Startup | Active | Recovery | Total | Invulnerability | Hit Advantage | Block Advantage | Stun | Guard Damage | Damage |
|---|---|---|---|---|---|---|---|---|---|---|---|
| Overhead | - | 6 | 4,6 | - | - | - | - | - | - | - | - |
Blowback Attack
| Guard | Cancel Properties | Startup | Active | Recovery | Total | Invulnerability | Hit Advantage | Block Advantage | Stun | Guard Damage | Damage |
|---|---|---|---|---|---|---|---|---|---|---|---|
| Mid | Special | 11 | 5 | 24 | 40 | - | KND | -7 | - | - | - |
| Guard | Cancel Properties | Startup | Active | Recovery | Total | Invulnerability | Hit Advantage | Block Advantage | Stun | Guard Damage | Damage |
|---|---|---|---|---|---|---|---|---|---|---|---|
| Overhead | - | 13 | 4 | - | - | - | KND | - | - | - | - |
Throws
| Guard | Cancel Properties | Startup | Active | Recovery | Total | Invulnerability | Hit Advantage | Block Advantage | Stun | Guard Damage | Damage |
|---|---|---|---|---|---|---|---|---|---|---|---|
| Throw | - | 1 | 1 | 0 | - | - | KD | - | - | - | - |
| Guard | Cancel Properties | Startup | Active | Recovery | Total | Invulnerability | Hit Advantage | Block Advantage | Stun | Guard Damage | Damage |
|---|---|---|---|---|---|---|---|---|---|---|---|
| Throw | - | 1 | 1 | 0 | - | - | KD | - | - | - | - |
Command Normals
| Guard | Cancel Properties | Startup | Active | Recovery | Total | Invulnerability | Hit Advantage | Block Advantage | Stun | Guard Damage | Damage |
|---|---|---|---|---|---|---|---|---|---|---|---|
| Mid | [special,super] | 24 | 3,3,3 | 20 | 53 | - | - | - | - | - | - |
| Guard | Cancel Properties | Startup | Active | Recovery | Total | Invulnerability | Hit Advantage | Block Advantage | Stun | Guard Damage | Damage |
|---|---|---|---|---|---|---|---|---|---|---|---|
| Mid | - | 1 | 13 | - | - | - | - | - | - | - | - |
Special Moves
Super Moves
Combos
General notes:
- when in max mode. moves will have more pushback which can be a problem in certian combos.. in Iori's case,certian hit-confirms into rekka will whiff at midscreen, even if done after a jump-in/cross-up.
meterless
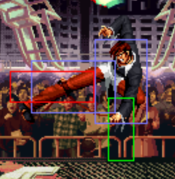
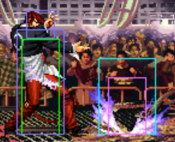
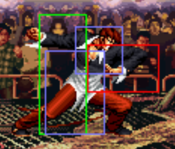
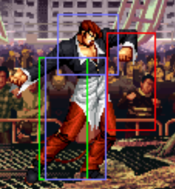
(midscreen)
- Cr.Bx2, Cr.A, qcb Ax3
the classic iori hit-confirm, still your go-to hit-confirm for an easy hard KND.
- Cr.B, Cr.A /cl.A /cl.B, f.A, qcb Cx3
great hit-confirm, but very difficult due to the tight cancel window of f.A. if you can do this consistently (especally from cr.A) then use this instead.
- (j.X), cl.C (f.A), qcb Cx3
iori's main BnB, omit the f.A if you can't cancel it into rekka consistently
- (j.X), cl.C, hcb K
run grab combo. Does about the same dmg as the one above.
- (j.X), (cl.C), hcf C, st.C, qcb Cx3
combo involving command grab. iori unfortunately recovers too slowly from the command grab to do run-up cl.C, and unless you can do the 'ghost step' trick, st.C into C rekka's is what your mainly gonna use after hcf C.
- (j.X), (cl.C), hcf C~(hcf,b A(Hold), cl.C (release A), f.A, qcb Cx3
By utilizing the ghost step technique, iori is able to do his classic bnb from the command grab. Compared to most ghost steps, this one is probably the easiest one to execute since the hcf,b / hcb,f A will always register ethier of his super input and you have an audio que as for when to input the ghost step. Still difficult to execute consistently since you also have to hold A while holding f/b, releasing A as soon as you get cl.C, and input the motion quickly or else you'll get f.A, but it's much more leniant than most ghost step's.
- (j.X), hcf C~(hcf,b A(Hold), cl.C (release A), hcf C~(hcb,f A(hold).....
One of 2 iori infinites. The Command grab infinite requires you to do the ghost step technique.
(corner)
- jp.C/D, cl.C, qcb Ax2, cl.C
Corner combo that leads into a rest. requires some timming.
- st.C, qcb Ax2, dp A
combo that ressembles iori's 95 bnb (which only worked with A rekkas). requires you to be slightly outside of the activation range of cl.C as well as slowly input the 2nd rekka in order for this to work. doesn't do that much dmg compared to doing the last hit of the rekka so it's not really useful but just know that it's there.
- (against aiorborne opponents) qcb A~qcb (miner pause) C (miner pause) ,qcb CA~qcb (miner pause) C.....
another one of many infinites (and 2 of the iori infinites) in kof 97. i'll admit i haven't done this infinite yet and for good reason (too difficult), but i have seen footage of it preformed. the way it works is that do QCB A and then quickly make another QCB for next hit but don't press the C button quickly wait a nano second and when player goes up after second hit again wait for nano second and quickly press QCB CA (CA is like a tip tap on two buttons) and make a quick QCB just after you press CA, So it's like QCB+CA+QCB and wait for nano second and C... and repeat again n again.
with meter
(midscreen)
- Cr.B,Cr.A,f.A qcf,hcb P
this is slightly eaiser to pull off since your doing cr.A,f.A,hcb P, still can be abit finicky.
- (j.X), cl.C / cr.C, (f.A), qcf,hcb+P
basic combo into super. If you implement f.A, remember to do the button hold trick to make doing the super easier (do it as cl.C (hold C), qcf A, (release C) hcb C)
- (j.X), cl.C, hcf C, st.C, qcf,hcb P
combo into command grab for abit more dmg than the combo above.
- (j.X), (cl.C), hcf C~(hcf,b A(Hold), cl.C (release A), (f.A), qcf,hcb P
alternate and more difficult command grab combo into super. If you implement f.A, remember to do the button hold trick to make doing the super easier
(corner)
- cl.C, hcf C, f.A,A, qcb Ax2, qcf,hcb P
Situational corner combo. Iori has to be the one cornered for this to work. Requires some timming for this to work. Impractical combo
- cl.C, qcb Ax2, qcf,hcb P
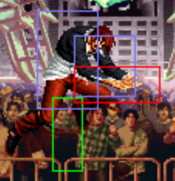
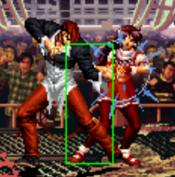
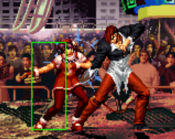
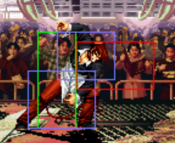
An easier version of the combo above.
Strategy
