m (added video) |
|||
| (9 intermediate revisions by 2 users not shown) | |||
| Line 1: | Line 1: | ||
[[File:Daimon97Win.gif|right]] | [[File:Daimon97Win.gif|right]] | ||
{{TOClimit}} | |||
==Introduction== | |||
== | {{ ProConTable | ||
{ | | pros= | ||
* placeholder | |||
| cons= | |||
* placeholder | |||
}} | |||
| | |||
| | |||
== | ==Movelist== | ||
<center>'''Move List Showcase''' <br> | |||
<youtube>B1jaGk3pY2w</youtube></center> | |||
== | === Normals === | ||
==== Far Normals ==== | |||
===== <span class="invisible-header"></span> ===== | |||
<font style="visibility:hidden" size="0"></font> | |||
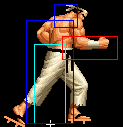
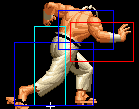
{{MoveData | |||
|image=Kof97p056.png | |||
|caption= | |||
|name=st.A | |||
|input={{Icon-SNK|a}} | |||
|data= | |||
{{AttackData-KOF97 | |||
| | |Damage=- | ||
| | |G. Damage= | ||
|Stun=- | |||
|Cancel= | |||
|Guard=Mid | |||
| | |Startup= | ||
|Active= | |||
|Recovery= | |||
|Total= | |||
| | |Hit Adv= | ||
| | |Block Adv= | ||
| | |Invul=- | ||
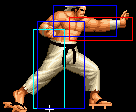
|description=4/5/6 +1/-1 | |||
Fast, really good anti-air against short hop. | |||
| | }} | ||
| | }} | ||
|- | |||
| | |||
| | |||
| | |||
| | |||
| | |||
| | |||
| | |||
| | |||
| | |||
== | ===== <span class="invisible-header"></span> ===== | ||
<font style="visibility:hidden" size="0"></font> | |||
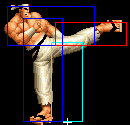
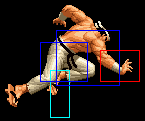
{{MoveData | |||
|image=Kof97p057.png | |||
|caption= | |||
|name=st.B | |||
|input={{Icon-SNK|b}} | |||
| | |data= | ||
{{AttackData-KOF97 | |||
| | |Damage=- | ||
| | |G. Damage= | ||
| | |Stun=- | ||
| | |Cancel= | ||
|Guard=Low | |||
|Startup= | |||
| | |Active= | ||
| | |Recovery= | ||
|- | |Total= | ||
|Hit Adv= | |||
| | |Block Adv= | ||
| | |Invul=- | ||
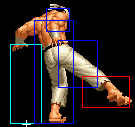
| | |description=4/5/10 -3/-5 | ||
| | One of the best st.Bs in KOF97. Fast, low, long range, cancelable. | ||
}} | |||
| | }} | ||
| | |||
| | |||
|- | |||
= | ===== <span class="invisible-header"></span> ===== | ||
<font style="visibility:hidden" size="0"></font> | |||
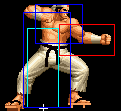
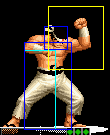
{{MoveData | |||
|image=Kof97p058.png | |||
|caption= | |||
|name=st.C | |||
|input={{Icon-SNK|c}} | |||
|data= | |||
{{AttackData-KOF97 | |||
|Damage=- | |||
|G. Damage= | |||
|Stun=- | |||
|Cancel= | |||
|Guard=Mid | |||
|Startup= | |||
|Active= | |||
|Recovery= | |||
|Total= | |||
|Hit Adv= | |||
|Block Adv= | |||
|Invul=- | |||
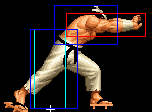
|description=9/9/16 -5/-7 Nice and big, stays out a long time. Can stop short hops. | |||
}} | |||
}} | |||
= | ===== <span class="invisible-header"></span> ===== | ||
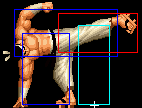
<font style="visibility:hidden" size="0"></font> | |||
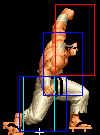
{{MoveData | |||
|image=Kof97p059.png | |||
|caption= | |||
|name=st.D | |||
|input={{Icon-SNK|d}} | |||
|data= | |||
{{AttackData-KOF97 | |||
|Damage=- | |||
|G. Damage= | |||
|Stun=- | |||
|Cancel= | |||
|Guard=Mid | |||
|Startup= | |||
|Active= | |||
|Recovery= | |||
|Total= | |||
|Hit Adv= | |||
|Block Adv= | |||
|Invul=- | |||
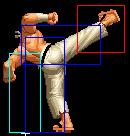
|description=5/6/16 -2/-4 | |||
The best anti-air normal in the game. Beats most jump moves and many ground moves from afar. Far better than its KOF98 counterpart. It will whiff over crouching characters, so watch that. | |||
}} | |||
}} | |||
=== | ==== Close Range Normals ==== | ||
===== <span class="invisible-header"></span> ===== | |||
<font style="visibility:hidden" size="0"></font> | |||
{{MoveData | |||
|image=Kof97p070.png | |||
|caption= | |||
|name=cl.A | |||
|input={{Icon-SNK|a}} | |||
|data= | |||
{{AttackData-KOF97 | |||
|Damage=- | |||
|G. Damage= | |||
|Stun=- | |||
|Cancel= | |||
|Guard=Mid | |||
|Startup=4 | |||
|Active=4 | |||
|Recovery=5 | |||
|Total= | |||
|Hit Adv=+3 | |||
|Block Adv=+1 | |||
|Invul=- | |||
|description= | |||
}} | |||
}} | |||
===== <span class="invisible-header"></span> ===== | |||
<font style="visibility:hidden" size="0"></font> | |||
{{MoveData | |||
|image=Kof97p071.png | |||
|caption= | |||
|name=cl.B | |||
|input={{Icon-SNK|b}} | |||
|data= | |||
{{AttackData-KOF97 | |||
|Damage=- | |||
|G. Damage= | |||
|Stun=- | |||
|Cancel= | |||
|Guard=Mid | |||
|Startup= | |||
|Active= | |||
|Recovery= | |||
|Total= | |||
|Hit Adv= | |||
|Block Adv= | |||
|Invul=- | |||
|description=7/4/9, -1/-3 | |||
}} | |||
}} | |||
===== <span class="invisible-header"></span> ===== | |||
<font style="visibility:hidden" size="0"></font> | |||
{{MoveData | |||
|image=Kof97p072.png | |||
|caption= | |||
|name=cl.C | |||
|input={{Icon-SNK|c}} | |||
|data= | |||
{{AttackData-KOF97 | |||
|Damage=- | |||
|G. Damage= | |||
|Stun=- | |||
|Cancel= | |||
|Guard= Mid | |||
|Startup= | |||
|Active= | |||
|Recovery= | |||
|Total= | |||
|Hit Adv= | |||
|Block Adv= | |||
|Invul=- | |||
|description=4/4/13, +3/+1 | |||
Fast, cancelable, great as a meaty. More range than close D, so you can use cr.A, cl.C as a block string. | |||
}} | |||
}} | |||
===== <span class="invisible-header"></span> ===== | |||
<font style="visibility:hidden" size="0"></font> | |||
{{MoveData | |||
|image=Kof97p073.png | |||
|caption= | |||
|name=cl.D | |||
|input={{Icon-SNK|d}} | |||
|data= | |||
{{AttackData-KOF97 | |||
|Damage=- | |||
|G. Damage= | |||
|Stun=- | |||
|Cancel= | |||
|Guard= Mid | |||
|Startup= | |||
|Active= | |||
|Recovery= | |||
|Total= | |||
|Hit Adv= | |||
|Block Adv= | |||
|Invul=- | |||
|description=4/8/14, -2/-4 | |||
Best meaty, and if not too meaty or out in the open, you actually have a good amount of time to hit-check hcb,f+P off of it. Same speed as close C, cancelable. | |||
}} | |||
}} | |||
' | ==== Crouching Normals ==== | ||
===== <span class="invisible-header"></span> ===== | |||
<font style="visibility:hidden" size="0"></font> | |||
{{MoveData | |||
|image=Kof97p065.png | |||
|caption= | |||
|name=cr.A | |||
|input={{Motion|2}}{{Icon-SNK|a}} | |||
|data= | |||
{{AttackData-KOF97 | |||
|Damage=- | |||
|G. Damage= | |||
|Stun=- | |||
|Cancel= | |||
|Guard= Mid | |||
|Startup= | |||
|Active= | |||
|Recovery= | |||
|Total= | |||
|Hit Adv= | |||
|Block Adv= | |||
|Invul=- | |||
|description=3/5/5, +2/0 | |||
#1 poke if you're too close for standing B. Cancelable. | |||
}} | |||
}} | |||
===== <span class="invisible-header"></span> ===== | |||
<font style="visibility:hidden" size="0"></font> | |||
{{MoveData | |||
|image=Kof97p066.png | |||
|caption= | |||
|name=cr.B | |||
|input={{Motion|2}}{{Icon-SNK|b}} | |||
|data= | |||
{{AttackData-KOF97 | |||
|Damage=- | |||
|G. Damage= | |||
|Stun=- | |||
|Cancel= | |||
|Guard= Low | |||
|Startup= | |||
|Active= | |||
|Recovery= | |||
|Total= | |||
|Hit Adv= | |||
|Block Adv= | |||
|Invul=- | |||
|description=4/5/6, +1/-1 | |||
Good poke if you're too close for standing B as well. Links into super easily since it has a long animation/advantage. | |||
}} | |||
}} | |||
===== <span class="invisible-header"></span> ===== | |||
<font style="visibility:hidden" size="0"></font> | |||
{{MoveData | |||
|image=Kof97p067.png | |||
|caption= | |||
|name=cr.C | |||
|input={{Motion|2}}{{Icon-SNK|c}} | |||
|data= | |||
{{AttackData-KOF97 | |||
|Damage=- | |||
|G. Damage= | |||
|Stun=- | |||
|Cancel=None | |||
|Guard= Mid | |||
|Startup= | |||
|Active= | |||
|Recovery= | |||
|Total= | |||
|Hit Adv= | |||
|Block Adv= | |||
|Invul=- | |||
|description=5/4/19, -3/-5 | |||
}} | |||
}} | |||
===== <span class="invisible-header"></span> ===== | |||
<font style="visibility:hidden" size="0"></font> | |||
{{MoveData | |||
|image=Kof97p068.png | |||
|caption= | |||
|name=cr.D | |||
|input={{Motion|2}}{{Icon-SNK|d}} | |||
|data= | |||
{{AttackData-KOF97 | |||
|Damage=- | |||
|G. Damage= | |||
|Stun=- | |||
|Cancel= | |||
|Guard= Low | |||
|Startup= | |||
|Active= | |||
|Recovery= | |||
|Total= | |||
|Hit Adv=KD | |||
|Block Adv= | |||
|Invul=- | |||
|description=4/7/12, KD/-1 | |||
A sweep! Can be meatied pretty easily. | |||
}} | |||
}} | |||
==== Neutral Jumping Normals ==== | |||
===== <span class="invisible-header"></span> ===== | |||
<font style="visibility:hidden" size="0"></font> | |||
{{MoveData | |||
|image= | |||
|caption= | |||
|name=nj.A | |||
|input={{Motion|8}}{{Icon-SNK|a}} | |||
|data= | |||
{{AttackData-KOF97 | |||
|Damage=- | |||
|G. Damage= | |||
|Stun=- | |||
|Cancel= | |||
|Guard=Overhead | |||
|Startup= | |||
|Active= | |||
|Recovery= | |||
|Total= | |||
|Hit Adv= | |||
|Block Adv= | |||
|Invul=- | |||
|description= | |||
}} | |||
}} | |||
===== <span class="invisible-header"></span> ===== | |||
<font style="visibility:hidden" size="0"></font> | |||
{{MoveData | |||
|image= | |||
|caption= | |||
|name=nj.B | |||
|input={{Motion|8}}{{Icon-SNK|b}} | |||
|data= | |||
{{AttackData-KOF97 | |||
|Damage=- | |||
|G. Damage= | |||
|Stun=- | |||
|Cancel= | |||
|Guard=Overhead | |||
|Startup= | |||
|Active= | |||
|Recovery= | |||
|Total= | |||
|Hit Adv= | |||
|Block Adv= | |||
|Invul=- | |||
|description= | |||
}} | |||
}} | |||
===== <span class="invisible-header"></span> ===== | |||
<font style="visibility:hidden" size="0"></font> | |||
{{MoveData | |||
|image= | |||
|caption= | |||
|name=nj.C | |||
|input={{Motion|8}}{{Icon-SNK|c}} | |||
|data= | |||
{{AttackData-KOF97 | |||
|Damage=- | |||
|G. Damage= | |||
|Stun=- | |||
|Cancel= | |||
|Guard=Overhead | |||
|Startup= | |||
|Active= | |||
|Recovery=- | |||
|Total= | |||
|Hit Adv= | |||
|Block Adv= | |||
|Invul=- | |||
|description= | |||
}} | |||
}} | |||
===== <span class="invisible-header"></span> ===== | |||
<font style="visibility:hidden" size="0"></font> | |||
{{MoveData | |||
|image= | |||
|caption= | |||
|name=nj.D | |||
|input={{Motion|8}}{{Icon-SNK|d}} | |||
|data= | |||
{{AttackData-KOF97 | |||
|Damage=- | |||
|G. Damage= | |||
|Stun=- | |||
|Cancel= | |||
|Guard=Overhead | |||
|Startup= | |||
|Active= | |||
|Recovery= | |||
|Total= | |||
|Hit Adv= | |||
|Block Adv= | |||
|Invul=- | |||
|description= | |||
}} | |||
}} | |||
==== Diagonal Jump Normals ==== | |||
===== <span class="invisible-header"></span> ===== | |||
<font style="visibility:hidden" size="0"></font> | |||
{{MoveData | |||
|image=Kof97p060.png | |||
|caption= | |||
|name=dj.A | |||
|input={{Motion|7}}/{{Motion|9}}+{{Icon-SNK|a}} | |||
|data= | |||
{{AttackData-KOF97 | |||
|Damage=- | |||
|G. Damage= | |||
|Stun=- | |||
|Cancel= | |||
|Guard=Overhead | |||
|Startup= | |||
|Active= | |||
|Recovery=- | |||
|Total= | |||
|Hit Adv= | |||
|Block Adv= | |||
|Invul=- | |||
|description=5/13/- | |||
Pretty good air-to-air. | |||
}} | |||
}} | |||
' | ===== <span class="invisible-header"></span> ===== | ||
<font style="visibility:hidden" size="0"></font> | |||
{{MoveData | |||
|image=Kof97p061.png | |||
|caption= | |||
|name=dj.B | |||
|input={{Motion|7}}/{{Motion|9}}+{{Icon-SNK|b}} | |||
|data= | |||
{{AttackData-KOF97 | |||
|Damage=- | |||
|G. Damage= | |||
|Stun=- | |||
|Cancel= | |||
|Guard=Overhead | |||
|Startup= | |||
|Active= | |||
|Recovery=- | |||
|Total= | |||
|Hit Adv= | |||
|Block Adv= | |||
|Invul=- | |||
|description=8/17/- | |||
Stays out for a long time, can be used as a crossup if it's very meaty, or your opponent is close to the corner, or in the corner and you are player 2. Good setup for his grab mixups. | |||
}} | |||
}} | |||
===== <span class="invisible-header"></span> ===== | |||
<font style="visibility:hidden" size="0"></font> | |||
{{MoveData | |||
|image=Kof97p062.png | |||
|caption= | |||
|name=dj.C | |||
|input={{Motion|7}}/{{Motion|9}}+{{Icon-SNK|c}} | |||
|data= | |||
{{AttackData-KOF97 | |||
|Damage=- | |||
|G. Damage= | |||
|Stun=- | |||
|Cancel= | |||
|Guard=Overhead | |||
|Startup= | |||
|Active= | |||
|Recovery=- | |||
|Total= | |||
|Hit Adv= | |||
|Block Adv= | |||
|Invul=- | |||
|description=9/8/- | |||
Crosses up, has a pretty hefty hitbox. | |||
}} | |||
}} | |||
===== <span class="invisible-header"></span> ===== | |||
<font style="visibility:hidden" size="0"></font> | |||
{{MoveData | |||
|image=Kof97p063.png | |||
|caption= | |||
|name=dj.D | |||
|input={{Motion|7}}/{{Motion|9}}+{{Icon-SNK|d}} | |||
|data= | |||
{{AttackData-KOF97 | |||
|Damage=- | |||
|G. Damage= | |||
|Stun=- | |||
|Cancel= | |||
|Guard=Overhead | |||
|Startup= | |||
|Active= | |||
|Recovery= | |||
|Total= | |||
|Hit Adv= | |||
|Block Adv= | |||
|Invul=- | |||
|description=7/7/- | |||
Godly jump move. Good for jumping in, or air-to-air jumping back. Can be used as an instant overhead (short hop only). | |||
}} | |||
}} | |||
==== Blowback Attack ==== | |||
===== <span class="invisible-header"></span> ===== | |||
<font style="visibility:hidden" size="0"></font> | |||
{{MoveData | |||
|image=Kof97p069.png | |||
|caption= | |||
|name=CD | |||
|input={{Icon-SNK|c}}+{{Icon-SNK|d}} | |||
|data= | |||
{{AttackData-KOF97 | |||
|Damage=- | |||
|G. Damage= | |||
|Stun=- | |||
|Cancel= | |||
|Guard=Mid | |||
|Startup=- | |||
|Active=- | |||
|Recovery=- | |||
|Total= | |||
|Hit Adv= | |||
|Block Adv= | |||
|Invul=- | |||
|description=15/4/26, KD/-8, S,Su | |||
Big ass cancelable move. often used to cancel into his qcf+K counter and bait CD counters. | |||
}} | |||
}} | |||
===== <span class="invisible-header"></span> ===== | |||
<font style="visibility:hidden" size="0"></font> | |||
{{MoveData | |||
|image=Kof97p064.png | |||
|caption= | |||
|name=jp.CD | |||
|input={{Motion|7}}/{{Motion|8}}/{{Motion|9}}+{{Icon-SNK|c}}+{{Icon-SNK|d}} | |||
|data= | |||
{{AttackData-KOF97 | |||
|Damage=- | |||
|G. Damage= | |||
|Stun=- | |||
|Cancel= | |||
|Guard=Overhead | |||
|Startup=- | |||
|Active=- | |||
|Recovery=- | |||
|Total= | |||
|Hit Adv= | |||
|Block Adv= | |||
|Invul=- | |||
|description=15/4/-, KD/- | |||
}} | |||
}} | |||
===Throws=== | |||
===== <span class="invisible-header"></span> ===== | |||
<font style="visibility:hidden" size="0"></font> | |||
{{MoveData | |||
|image= | |||
|caption= | |||
|name=Juuji Shime | |||
|input={{Motion|4}}/{{Motion|6}}+{{Icon-SNK|c}} | |||
|data= | |||
{{AttackData-KOF97 | |||
|Damage=- | |||
|G. Damage= | |||
|Stun=- | |||
|Cancel= | |||
|Guard= Throw | |||
|Startup=- | |||
|Active=- | |||
|Recovery=- | |||
|Total= | |||
|Hit Adv= | |||
|Block Adv= | |||
|Invul=- | |||
|description= | |||
}} | |||
}} | |||
===== <span class="invisible-header"></span> ===== | |||
<font style="visibility:hidden" size="0"></font> | |||
{{MoveData | |||
|image= | |||
|caption= | |||
|name=Okuri Ashi Barai | |||
|input={{Motion|4}}/{{Motion|6}}+{{Icon-SNK|d}} | |||
|data= | |||
{{AttackData-KOF97 | |||
|Damage=- | |||
|G. Damage= | |||
|Stun=- | |||
|Cancel= | |||
|Guard= Throw | |||
|Startup=- | |||
|Active=- | |||
|Recovery=- | |||
|Total= | |||
|Hit Adv= | |||
|Block Adv= | |||
|Invul=- | |||
|description= | |||
}} | |||
}} | |||
===== <span class="invisible-header"></span> ===== | |||
<font style="visibility:hidden" size="0"></font> | |||
{{MoveData | |||
|image= | |||
|caption= | |||
|name=Tsukami Tataki Tsuke | |||
|input={{Motion|4}}/{{Motion|6}}+{{Icon-SNK|c}} | |||
|data= | |||
{{AttackData-KOF97 | |||
|Damage=- | |||
|G. Damage= | |||
|Stun=- | |||
|Cancel= | |||
|Guard= Throw | |||
|Startup=- | |||
|Active=- | |||
|Recovery=- | |||
|Total= | |||
|Hit Adv= | |||
|Block Adv= | |||
|Invul=- | |||
|description= | |||
}} | |||
}} | |||
=== Command Normals === | |||
===== <span class="invisible-header"></span> ===== | |||
<font style="visibility:hidden" size="0"></font> | |||
{{MoveData | |||
|image=Kof97p074.png | |||
|image2=Kof97p075.png | |||
|caption= | |||
|name=Takara Tsubushi | |||
|input={{Motion|6}}{{Icon-SNK|a}} | |||
|data= | |||
{{AttackData-KOF97 | |||
|version= | |||
|Damage=- | |||
|G. Damage= | |||
|Stun=- | |||
|Cancel= | |||
|Guard=Mid | |||
|Startup= | |||
|Active=- | |||
|Recovery=- | |||
|Total= | |||
|Hit Adv= | |||
|Block Adv= | |||
|Invul=- | |||
|description=22/4/26, -10/-12 | |||
| Not overhead. Active frames and last two start-up frames cancel projectiles. | |||
}} | |||
}} | |||
' | ===== <span class="invisible-header"></span> ===== | ||
<font style="visibility:hidden" size="0"></font> | |||
{{MoveData | |||
|image=Kof97p077.png | |||
|image2=Kof97p078.png | |||
|caption= | |||
|name=Zuju Barai | |||
|input={{Motion|3}}{{Icon-SNK|c}} | |||
|data= | |||
{{AttackData-KOF97 | |||
|version= | |||
|Damage=- | |||
|G. Damage= | |||
|Stun=- | |||
|Cancel= | |||
|Guard=Mid | |||
|Startup= | |||
|Active=- | |||
|Recovery=- | |||
|Total= | |||
|Hit Adv= | |||
|Block Adv= | |||
|Invul=- | |||
|description=3/4+9/16, KD/-11 | |||
Great anti-air. It doesn't beat as much stuff as standing D, but it will trade with most things, enabling you to perform a ground pound combo. Remember if it trades, you will have to re-buffer your qcb+B/qcf+B afterwards so the ground pound will hit OTG. | |||
}} | |||
}} | |||
===Special Moves=== | |||
===== <span class="invisible-header"></span> ===== | |||
<font style="visibility:hidden" size="0"></font> | |||
{{MoveData | |||
|image= | |||
|caption= | |||
|name=Kumo Tsukami Nage | |||
|input={{Motion|41236}}{{Icon-SNK|a}} | |||
|data= | |||
{{AttackData-KOF97 | |||
|version= | |||
|Damage=- | |||
|G. Damage= | |||
|Stun=- | |||
|Cancel= | |||
|Guard=High | |||
|Startup= | |||
|Active=- | |||
|Recovery=- | |||
|Total= | |||
|Hit Adv= | |||
|Block Adv= | |||
|Invul=- | |||
|description=5/7/41 | |||
Beats pretty much everything above the top half of the screen, his arm is not hittable. It can be air blocked if the opponent is jumping up or back, though. Can be comboed from d/f+C on an opponent in the air. Ends in a back turned, un-rollable knockdown, and sets up for a meaty (unblockable) Ground Pound (dp+A). | |||
}} | |||
}} | |||
===== <span class="invisible-header"></span> ===== | |||
<font style="visibility:hidden" size="0"></font> | |||
{{MoveData | |||
|image= | |||
|caption= | |||
|name=Kiri Kabu Gaeshi | |||
|input={{Motion|41236}}{{Icon-SNK|c}} | |||
|data= | |||
{{AttackData-KOF97 | |||
|version= | |||
|Damage=- | |||
|G. Damage= | |||
|Stun=- | |||
|Cancel= | |||
|Guard=Low | |||
|Startup= | |||
|Active=- | |||
|Recovery=- | |||
|Total= | |||
|Hit Adv= | |||
|Block Adv= | |||
|Invul=- | |||
|description=12/4/37 | |||
Catches ground pokes, but is punishable by some fast long range things. Good to use as a combo ender if you aren't comfortable using hcb,f+P. Can hit OTG. Ends in a back turned, un-rollable knockdown, and sets up for a meaty (unblockable) Ground Pound (dp+A). | |||
}} | |||
}} | |||
===== <span class="invisible-header"></span> ===== | |||
<font style="visibility:hidden" size="0"></font> | |||
{{MoveData | |||
|image= | |||
|caption= | |||
|name=Tenchi Gaeshi | |||
|input={{Motion|63214}}{{Motion|6}}[[File:P.png]] | |||
|data= | |||
{{AttackData-KOF97 | |||
|version= | |||
|Damage=- | |||
|G. Damage= | |||
|Stun=- | |||
|Cancel= | |||
|Guard=Throw | |||
|Startup= | |||
|Active=- | |||
|Recovery=- | |||
|Total= | |||
|Hit Adv= | |||
|Block Adv= | |||
|Invul=- | |||
|description=Instant command throw. Range: 42px. Not rollable, and sets up for a meaty (unblockable) Ground Pound (dp+A). | |||
}} | |||
}} | |||
===== <span class="invisible-header"></span> ===== | |||
<font style="visibility:hidden" size="0"></font> | |||
{{MoveData | |||
|image= | |||
|caption= | |||
|name=Chou Ousoto Gari | |||
|input={{Motion|623}}[[File:K.png]] | |||
|data= | |||
{{AttackData-KOF97 | |||
|version= | |||
|Damage=- | |||
|G. Damage= | |||
|Stun=- | |||
|Cancel= | |||
|Guard= | |||
|Startup= | |||
|Active=- | |||
|Recovery=- | |||
|Total= | |||
|Hit Adv= | |||
|Block Adv= | |||
|Invul=- | |||
|description=Instant command throw. Range: 32px. Rarely used in KOF97. | |||
}} | |||
}} | |||
===== <span class="invisible-header"></span> ===== | |||
<font style="visibility:hidden" size="0"></font> | |||
{{MoveData | |||
|image= | |||
|caption= | |||
|name=Jirai Shin | |||
|input={{Motion|623}}[[File:P.png]] | |||
|data= | |||
{{AttackData-KOF97 | |||
|version={{Icon-SNK|a}} | |||
|Damage=- | |||
|G. Damage= | |||
|Stun=- | |||
|Cancel= | |||
|Guard=Low | |||
|Startup= | |||
|Active=- | |||
|Recovery=- | |||
|Total= | |||
|Hit Adv= | |||
|Block Adv= | |||
|Invul=- | |||
|description=27/1/44 | |||
C version is a ground pound fake. It is 'blocked' by crouching, but there is no blockstun. You don't even need to hold d/b, just crouch. This can hit OTG (on the ground) after an anti-air d/f+C canceled into a non-blockable move (like a throw or utility move). It is also unblockable if done as a meaty attack, but the window is small and the setups vary from character to character. The knockdown can be rolled, but if they miss, you can combo a hcf+C in the corner. | |||
}} | |||
{{AttackData-KOF97 | |||
|version={{Icon-SNK|c}} | |||
|Damage=- | |||
|G. Damage= | |||
|Stun=- | |||
|Cancel= | |||
|Guard=Low | |||
|Startup= | |||
|Active=- | |||
|Recovery=- | |||
|Total= | |||
|Hit Adv= | |||
|Block Adv= | |||
|Invul=- | |||
|description=35 | |||
}} | |||
}} | |||
===== <span class="invisible-header"></span> ===== | |||
<font style="visibility:hidden" size="0"></font> | |||
{{MoveData | |||
|image= | |||
|caption= | |||
|name=Chou Ukemi | |||
|input={{Motion|214}}[[File:K.png]] | |||
|data= | |||
{{AttackData-KOF97 | |||
|version={{Icon-SNK|b}} | |||
|Damage=- | |||
|G. Damage= | |||
|Stun=- | |||
|Cancel= | |||
|Guard= | |||
|Startup= | |||
|Active=- | |||
|Recovery=- | |||
|Total= | |||
|Hit Adv= | |||
|Block Adv= | |||
|Invul=- | |||
|description=16+17 | |||
Invincible during the roll, but completely vulnerable at the end of the roll. Usually used for the ground pound combo bug or to gain meter after a knockdown. Can be canceled into to roll through some auto-guard moves or CD counters. | |||
}} | |||
{{AttackData-KOF97 | |||
|version={{Icon-SNK|d}} | |||
|Damage=- | |||
|G. Damage= | |||
|Stun=- | |||
|Cancel= | |||
|Guard= | |||
|Startup= | |||
|Active=- | |||
|Recovery=- | |||
|Total= | |||
|Hit Adv= | |||
|Block Adv= | |||
|Invul=- | |||
|description=23+18 | |||
}} | |||
}} | |||
===== <span class="invisible-header"></span> ===== | |||
<font style="visibility:hidden" size="0"></font> | |||
{{MoveData | |||
|image= | |||
|caption= | |||
|name=Neko Gaeshi | |||
|input={{Motion|236}}[[File:K.png]] | |||
|data= | |||
{{AttackData-KOF97 | |||
|version= | |||
|Damage=- | |||
|G. Damage= | |||
|Stun=- | |||
|Cancel= | |||
|Guard= | |||
|Startup= | |||
|Active=- | |||
|Recovery=- | |||
|Total= | |||
|Hit Adv= | |||
|Block Adv= | |||
|Invul=- | |||
|description=2/12/15 | |||
Will counter any mid/high hitting normal attack or CD counter. Usually used to cancel into to make moves safeer (like standing CD) and to bait CD counters at the same time. Ends in a back turned, un-rollable knockdown, and sets up for a meaty (unblockable) Ground Pound (dp+A). | |||
}} | |||
}} | |||
===== <span class="invisible-header"></span> ===== | |||
<font style="visibility:hidden" size="0"></font> | |||
{{MoveData | |||
|image= | |||
|caption= | |||
|name=Uru Nage | |||
|input={{Motion|63214}}{{Motion|6}}[[File:K.png]] | |||
|data= | |||
{{AttackData-KOF97 | |||
|version= | |||
|Damage=- | |||
|G. Damage= | |||
|Stun=- | |||
|Cancel= | |||
|Guard=Throw | |||
|Startup= | |||
|Active=- | |||
|Recovery=- | |||
|Total= | |||
|Hit Adv= | |||
|Block Adv= | |||
|Invul=- | |||
|description= | |||
}} | |||
}} | |||
===Super Moves=== | |||
===== <span class="invisible-header"></span> ===== | |||
<font style="visibility:hidden" size="0"></font> | |||
{{MoveData | |||
|image= | |||
|caption= | |||
|name=Jigoku Gokuraku Otoshi | |||
|input={{Motion|63214}}{{Motion|63214}}[[File:P.png]] | |||
|data= | |||
{{AttackData-KOF97 | |||
|version=Normal | |||
|Damage=- | |||
|G. Damage= | |||
|Stun=- | |||
|Cancel= | |||
|Guard=Throw | |||
|Startup= | |||
|Active=- | |||
|Recovery=- | |||
|Total= | |||
|Hit Adv= | |||
|Block Adv= | |||
|Invul=- | |||
|description=Instant command throw. Range: 43px. Less frequently used than the other SDM due to shorter range. | |||
}} | |||
{{AttackData-KOF97 | |||
|version=Max Mode | |||
|Damage=- | |||
|G. Damage= | |||
|Stun=- | |||
|Cancel= | |||
|Guard=Throw | |||
|Startup= | |||
|Active=- | |||
|Recovery=- | |||
|Total= | |||
|Hit Adv= | |||
|Block Adv= | |||
|Invul=- | |||
|description= | |||
}} | |||
}} | |||
===== <span class="invisible-header"></span> ===== | |||
<font style="visibility:hidden" size="0"></font> | |||
{{MoveData | |||
|image= | |||
|caption= | |||
|name=Arashi no Yama (Nekko Meki) | |||
|input={{Motion|41236}}{{Motion|41236}}[[File:K.png]] | |||
|data= | |||
{{AttackData-KOF97 | |||
|version=1st Rekka | |||
|Damage=- | |||
|G. Damage= | |||
|Stun=- | |||
|Cancel= | |||
|Guard=Throw | |||
|Startup= | |||
|Active=- | |||
|Recovery=- | |||
|Total= | |||
|Hit Adv= | |||
|Block Adv= | |||
|Invul=- | |||
|description=Instant command throw. Range: 62px (the second longest range in KOF97). Redirected to st.D, qcf+K or hcf+K when missed. | |||
}} | |||
{{AttackData-KOF97 | |||
|version=2nd Rekka - Arashi no Yama (Zoku Kiri Kabu Gaeshi) | |||
|subtitle={{Motion|41236}}[[File:K.png]] | |||
|Damage=- | |||
|G. Damage= | |||
|Stun=- | |||
|Cancel= | |||
|Guard=Throw | |||
|Startup= | |||
|Active=- | |||
|Recovery=- | |||
|Total= | |||
|Hit Adv= | |||
|Block Adv= | |||
|Invul=- | |||
|description= | |||
}} | |||
{{AttackData-KOF97 | |||
|version=3rd Rekka - Arashi no Yama (Nekko Meki Ura Nage) | |||
|subtitle={{Motion|623}}[[File:K.png]] | |||
|Damage=- | |||
|G. Damage= | |||
|Stun=- | |||
|Cancel= | |||
|Guard=Throw | |||
|Startup= | |||
|Active=- | |||
|Recovery=- | |||
|Total= | |||
|Hit Adv= | |||
|Block Adv= | |||
|Invul=- | |||
|description=Normal version | |||
}} | |||
{{AttackData-KOF97 | |||
|version=3rd Rekka - Arashi no Yama (Zoku Tenchi Gaeshi) | |||
|subtitle={{Motion|623}}[[File:K.png]] | |||
|Damage=- | |||
|G. Damage= | |||
|Stun=- | |||
|Cancel= | |||
|Guard=Throw | |||
|Startup= | |||
|Active=- | |||
|Recovery=- | |||
|Total= | |||
|Hit Adv= | |||
|Block Adv= | |||
|Invul=- | |||
|description=Max Mode version | |||
}} | |||
}} | |||
== Combos == | |||
General notes: | |||
==== meterless ==== | |||
''(midscreen)'' | |||
*'''cr.B, hcb,f P''' | |||
low link into command grab. | |||
''' | *'''cl.B, dp K / hcb,f P''' | ||
*'' | *'''(j.X), dp.K / hcb,f P''' | ||
command grab combo off of a jump-in. hcb,f P is prefered | |||
*'''(j.X), cl.C / cl.D, dp.K / hcb,f P''' | |||
standard bnb combo. hcb,f P is prefered | |||
''' | *'''(j.X), cl.C / cl.D, df.C, hcb,f P''' | ||
requires either a very close cl.C/cl.D or a very good jump-in angle so df.C won't whiff. | |||
*''hcf | *'''(against airborne opponent) df.C, hcf A''' | ||
anti-air combo with df.C | |||
*'''(against airborne opponent) df.C, qcb B, df.C, hcf A''' | |||
requires a counter-hit df.C in order for it to work. | |||
''' | *'''f.A, hcf C''' | ||
if you ever happen to land f.A, daimon can do hcf C to add on abit of extra dmg as well as set-up his unblockable dp A (see notes below). | |||
*''CD | *'''cr.D / CD / jp.CD, qcb B, hcf C''' | ||
an alternate version of the combo above. adding qcb B gives you abit of extra meter gain as well as more consistency to landing hcf C (except CD and jp.CD at tip range), be aware that these options cause a soft KND. | |||
=== | ==== with meter ==== | ||
''(midscreen)'' | |||
*'''cr.B, hcbx2 P''' | |||
low confirm into special. abit less confirmer than the meterless version but still fairly easy. | |||
*'''(j.X), cl.C / cl.D, hcbx2 P''' | |||
for an eaiser time doing this, do (j.X), hcb+C, hcb+P. | |||
*'''(j.X), hcfx2 K~hcf K, hcf C''' | |||
combo with other super. deals about the same dmg as he combo above. also never use the final follow-up, hcf C does more dmg | |||
''' | ==Strategy== | ||
===Unblockable Dp A=== | |||
if you've played daimon in KOF 98, you'll proabably be familiar with this. it's possible for daimon to set-up his Dp A after his hcb,f P and hcf C grabs in a situation where the opponent cannot block the dp A, making it fully guarented; however, doing it alone can be difficult as it needs to be done very accurately and wake-up speeds vary from character to character. this is where the set-ups come in play, By using various combinations of backdashes and special moves/supers, you can line-up your timming on the unbockable. | |||
Also, note that while these setups are unblockable, certain attacks can allow some characters to escape the setups. Most notably command moves that use the df input (i.e kyo's df.D, daimon's df.C) and one frame command grabs that are used as reversal if daimon's is within throw range. | |||
For more information on the unblockable dp A, see [[Goro Daimon's unblockable Ground Pound in KOF98|daimon's unblockable dp A]] page for KOF 98, although keep in mind that the set-ups listed on that page may not work in this game. | |||
'''Daimon | ====Unblockable dp+A timing after hcb,f+P==== | ||
'''Kyo, Benimaru, Daimon, Leona, Shingo:''' | |||
*qcf+K, dp+C, dp+A | |||
'''Ralf, Clark, Joe, Ryo:''' | |||
*qcf+K, qcf+K, dp+A | |||
'''Kim:''' | |||
*qcb+B, CD, dp+A | |||
''' | '''Chang:''' | ||
*CD, dp+C, CD, dp+A | |||
'''Choi:''' | |||
*qcb+B, qcf+K, dp+A | |||
'''Terry, Yashiro:''' | |||
*qcb+B, ABC, dp+A | |||
''' | '''Andy, Shermie, Chizuru, Billy:''' | ||
*qcb+B, dp+C, dp+A | |||
'''Athena:''' | |||
*qcf+K, ABC, dp+A | |||
'''Kensou:''' | |||
*qcf+K, qcb+B, dp+A | |||
''' | '''Chin:''' | ||
*roll, roll, dp+A | |||
'''Chris:''' | |||
*backdash, qcb+D, dp+A | |||
'''Robert, Mary:''' | |||
*CD, qcb+D, dp+A | |||
''' | '''Yuri:''' | ||
*hcf+A, dp+A | |||
'''Mai:''' | |||
*j+CD (as coming down), CD, dp+A | |||
'''King:''' | |||
*dp+C, ABC, dp+A | |||
''' | '''Yamazaki:''' | ||
*qcf+K, st.D, dp+A | |||
'''Iori:''' | |||
*short-jump, back-roll, dp A | |||
*CD, qcb+D, CD, dp+A | |||
====Unblockable dp+A timing after hcf+C==== | |||
'''Kyo, Benimaru, Choi, Chin, King:''' | |||
*2D, dp+A | |||
''' | '''Daimon:''' | ||
*B, dp+A | |||
'''Leona:''' | |||
*backdash, dp+A | |||
'''Ralf, Clark, Kim, terry, Athena, Ryo:''' | |||
*A, dp+A | |||
''' | '''Chang, Shermie, Billy:''' | ||
*ABC, dp+A | |||
'''Terry, Joe, Kensou, Yashiro, Robert, Yamazaki, Shingo, Iori:''' | |||
*CD, dp+A | |||
'''Andy:''' | |||
*D, dp+A | |||
'''Chizuru:''' | |||
*dp+C, dp+A | |||
[[Category:The King of Fighters '97]] | [[Category:The King of Fighters '97]] | ||
{{The King Of Fighters '97}} | |||
Latest revision as of 08:45, 23 May 2024
Introduction
| Strengths | Weaknesses |
|---|---|
|
|
Movelist
Normals
Far Normals
| Guard | Cancel Properties | Startup | Active | Recovery | Total | Invulnerability | Hit Advantage | Block Advantage | Stun | Guard Damage | Damage |
|---|---|---|---|---|---|---|---|---|---|---|---|
| Mid | - | - | - | - | - | - | - | - | - | - | - |
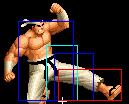
4/5/6 +1/-1 Fast, really good anti-air against short hop. | |||||||||||
| Guard | Cancel Properties | Startup | Active | Recovery | Total | Invulnerability | Hit Advantage | Block Advantage | Stun | Guard Damage | Damage |
|---|---|---|---|---|---|---|---|---|---|---|---|
| Low | - | - | - | - | - | - | - | - | - | - | - |
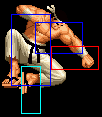
4/5/10 -3/-5 One of the best st.Bs in KOF97. Fast, low, long range, cancelable. | |||||||||||
| Guard | Cancel Properties | Startup | Active | Recovery | Total | Invulnerability | Hit Advantage | Block Advantage | Stun | Guard Damage | Damage |
|---|---|---|---|---|---|---|---|---|---|---|---|
| Mid | - | - | - | - | - | - | - | - | - | - | - |
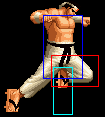
9/9/16 -5/-7 Nice and big, stays out a long time. Can stop short hops. | |||||||||||
| Guard | Cancel Properties | Startup | Active | Recovery | Total | Invulnerability | Hit Advantage | Block Advantage | Stun | Guard Damage | Damage |
|---|---|---|---|---|---|---|---|---|---|---|---|
| Mid | - | - | - | - | - | - | - | - | - | - | - |
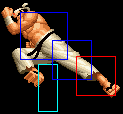
5/6/16 -2/-4 The best anti-air normal in the game. Beats most jump moves and many ground moves from afar. Far better than its KOF98 counterpart. It will whiff over crouching characters, so watch that. | |||||||||||
Close Range Normals
| Guard | Cancel Properties | Startup | Active | Recovery | Total | Invulnerability | Hit Advantage | Block Advantage | Stun | Guard Damage | Damage |
|---|---|---|---|---|---|---|---|---|---|---|---|
| Mid | - | 4 | - | - | - | - | +3 | +1 | - | - | - |
| Guard | Cancel Properties | Startup | Active | Recovery | Total | Invulnerability | Hit Advantage | Block Advantage | Stun | Guard Damage | Damage |
|---|---|---|---|---|---|---|---|---|---|---|---|
| Mid | - | - | - | - | - | - | - | - | - | - | - |
7/4/9, -1/-3 | |||||||||||
| Guard | Cancel Properties | Startup | Active | Recovery | Total | Invulnerability | Hit Advantage | Block Advantage | Stun | Guard Damage | Damage |
|---|---|---|---|---|---|---|---|---|---|---|---|
| Mid | - | - | - | - | - | - | - | - | - | - | - |
4/4/13, +3/+1 Fast, cancelable, great as a meaty. More range than close D, so you can use cr.A, cl.C as a block string. | |||||||||||
| Guard | Cancel Properties | Startup | Active | Recovery | Total | Invulnerability | Hit Advantage | Block Advantage | Stun | Guard Damage | Damage |
|---|---|---|---|---|---|---|---|---|---|---|---|
| Mid | - | - | - | - | - | - | - | - | - | - | - |
4/8/14, -2/-4 Best meaty, and if not too meaty or out in the open, you actually have a good amount of time to hit-check hcb,f+P off of it. Same speed as close C, cancelable. | |||||||||||
Crouching Normals
| Guard | Cancel Properties | Startup | Active | Recovery | Total | Invulnerability | Hit Advantage | Block Advantage | Stun | Guard Damage | Damage |
|---|---|---|---|---|---|---|---|---|---|---|---|
| Mid | - | - | - | - | - | - | - | - | - | - | - |
3/5/5, +2/0
| |||||||||||
| Guard | Cancel Properties | Startup | Active | Recovery | Total | Invulnerability | Hit Advantage | Block Advantage | Stun | Guard Damage | Damage |
|---|---|---|---|---|---|---|---|---|---|---|---|
| Low | - | - | - | - | - | - | - | - | - | - | - |
4/5/6, +1/-1 Good poke if you're too close for standing B as well. Links into super easily since it has a long animation/advantage. | |||||||||||
| Guard | Cancel Properties | Startup | Active | Recovery | Total | Invulnerability | Hit Advantage | Block Advantage | Stun | Guard Damage | Damage |
|---|---|---|---|---|---|---|---|---|---|---|---|
| Mid | None | - | - | - | - | - | - | - | - | - | - |
5/4/19, -3/-5 | |||||||||||
| Guard | Cancel Properties | Startup | Active | Recovery | Total | Invulnerability | Hit Advantage | Block Advantage | Stun | Guard Damage | Damage |
|---|---|---|---|---|---|---|---|---|---|---|---|
| Low | - | - | - | - | - | - | KD | - | - | - | - |
4/7/12, KD/-1 A sweep! Can be meatied pretty easily. | |||||||||||
Neutral Jumping Normals
| Guard | Cancel Properties | Startup | Active | Recovery | Total | Invulnerability | Hit Advantage | Block Advantage | Stun | Guard Damage | Damage |
|---|---|---|---|---|---|---|---|---|---|---|---|
| Overhead | - | - | - | - | - | - | - | - | - | - | - |
| Guard | Cancel Properties | Startup | Active | Recovery | Total | Invulnerability | Hit Advantage | Block Advantage | Stun | Guard Damage | Damage |
|---|---|---|---|---|---|---|---|---|---|---|---|
| Overhead | - | - | - | - | - | - | - | - | - | - | - |
| Guard | Cancel Properties | Startup | Active | Recovery | Total | Invulnerability | Hit Advantage | Block Advantage | Stun | Guard Damage | Damage |
|---|---|---|---|---|---|---|---|---|---|---|---|
| Overhead | - | - | - | - | - | - | - | - | - | - | - |
| Guard | Cancel Properties | Startup | Active | Recovery | Total | Invulnerability | Hit Advantage | Block Advantage | Stun | Guard Damage | Damage |
|---|---|---|---|---|---|---|---|---|---|---|---|
| Overhead | - | - | - | - | - | - | - | - | - | - | - |
Diagonal Jump Normals
| Guard | Cancel Properties | Startup | Active | Recovery | Total | Invulnerability | Hit Advantage | Block Advantage | Stun | Guard Damage | Damage |
|---|---|---|---|---|---|---|---|---|---|---|---|
| Overhead | - | - | - | - | - | - | - | - | - | - | - |
5/13/- Pretty good air-to-air. | |||||||||||
| Guard | Cancel Properties | Startup | Active | Recovery | Total | Invulnerability | Hit Advantage | Block Advantage | Stun | Guard Damage | Damage |
|---|---|---|---|---|---|---|---|---|---|---|---|
| Overhead | - | - | - | - | - | - | - | - | - | - | - |
8/17/- Stays out for a long time, can be used as a crossup if it's very meaty, or your opponent is close to the corner, or in the corner and you are player 2. Good setup for his grab mixups. | |||||||||||
| Guard | Cancel Properties | Startup | Active | Recovery | Total | Invulnerability | Hit Advantage | Block Advantage | Stun | Guard Damage | Damage |
|---|---|---|---|---|---|---|---|---|---|---|---|
| Overhead | - | - | - | - | - | - | - | - | - | - | - |
9/8/- Crosses up, has a pretty hefty hitbox. | |||||||||||
| Guard | Cancel Properties | Startup | Active | Recovery | Total | Invulnerability | Hit Advantage | Block Advantage | Stun | Guard Damage | Damage |
|---|---|---|---|---|---|---|---|---|---|---|---|
| Overhead | - | - | - | - | - | - | - | - | - | - | - |
7/7/- Godly jump move. Good for jumping in, or air-to-air jumping back. Can be used as an instant overhead (short hop only). | |||||||||||
Blowback Attack
| Guard | Cancel Properties | Startup | Active | Recovery | Total | Invulnerability | Hit Advantage | Block Advantage | Stun | Guard Damage | Damage |
|---|---|---|---|---|---|---|---|---|---|---|---|
| Mid | - | - | - | - | - | - | - | - | - | - | - |
15/4/26, KD/-8, S,Su Big ass cancelable move. often used to cancel into his qcf+K counter and bait CD counters. | |||||||||||
| Guard | Cancel Properties | Startup | Active | Recovery | Total | Invulnerability | Hit Advantage | Block Advantage | Stun | Guard Damage | Damage |
|---|---|---|---|---|---|---|---|---|---|---|---|
| Overhead | - | - | - | - | - | - | - | - | - | - | - |
15/4/-, KD/- | |||||||||||
Throws
| Guard | Cancel Properties | Startup | Active | Recovery | Total | Invulnerability | Hit Advantage | Block Advantage | Stun | Guard Damage | Damage |
|---|---|---|---|---|---|---|---|---|---|---|---|
| Throw | - | - | - | - | - | - | - | - | - | - | - |
| Guard | Cancel Properties | Startup | Active | Recovery | Total | Invulnerability | Hit Advantage | Block Advantage | Stun | Guard Damage | Damage |
|---|---|---|---|---|---|---|---|---|---|---|---|
| Throw | - | - | - | - | - | - | - | - | - | - | - |
| Guard | Cancel Properties | Startup | Active | Recovery | Total | Invulnerability | Hit Advantage | Block Advantage | Stun | Guard Damage | Damage |
|---|---|---|---|---|---|---|---|---|---|---|---|
| Throw | - | - | - | - | - | - | - | - | - | - | - |
Command Normals
| Guard | Cancel Properties | Startup | Active | Recovery | Total | Invulnerability | Hit Advantage | Block Advantage | Stun | Guard Damage | Damage |
|---|---|---|---|---|---|---|---|---|---|---|---|
| Mid | - | - | - | - | - | - | - | - | - | - | - |
22/4/26, -10/-12 | |||||||||||
| Guard | Cancel Properties | Startup | Active | Recovery | Total | Invulnerability | Hit Advantage | Block Advantage | Stun | Guard Damage | Damage |
|---|---|---|---|---|---|---|---|---|---|---|---|
| Mid | - | - | - | - | - | - | - | - | - | - | - |
3/4+9/16, KD/-11 Great anti-air. It doesn't beat as much stuff as standing D, but it will trade with most things, enabling you to perform a ground pound combo. Remember if it trades, you will have to re-buffer your qcb+B/qcf+B afterwards so the ground pound will hit OTG. | |||||||||||
Special Moves
| Guard | Cancel Properties | Startup | Active | Recovery | Total | Invulnerability | Hit Advantage | Block Advantage | Stun | Guard Damage | Damage |
|---|---|---|---|---|---|---|---|---|---|---|---|
| High | - | - | - | - | - | - | - | - | - | - | - |
5/7/41 Beats pretty much everything above the top half of the screen, his arm is not hittable. It can be air blocked if the opponent is jumping up or back, though. Can be comboed from d/f+C on an opponent in the air. Ends in a back turned, un-rollable knockdown, and sets up for a meaty (unblockable) Ground Pound (dp+A). | |||||||||||
| Guard | Cancel Properties | Startup | Active | Recovery | Total | Invulnerability | Hit Advantage | Block Advantage | Stun | Guard Damage | Damage |
|---|---|---|---|---|---|---|---|---|---|---|---|
| Low | - | - | - | - | - | - | - | - | - | - | - |
12/4/37 Catches ground pokes, but is punishable by some fast long range things. Good to use as a combo ender if you aren't comfortable using hcb,f+P. Can hit OTG. Ends in a back turned, un-rollable knockdown, and sets up for a meaty (unblockable) Ground Pound (dp+A). | |||||||||||
| Guard | Cancel Properties | Startup | Active | Recovery | Total | Invulnerability | Hit Advantage | Block Advantage | Stun | Guard Damage | Damage |
|---|---|---|---|---|---|---|---|---|---|---|---|
| Throw | - | - | - | - | - | - | - | - | - | - | - |
Instant command throw. Range: 42px. Not rollable, and sets up for a meaty (unblockable) Ground Pound (dp+A). | |||||||||||
| Guard | Cancel Properties | Startup | Active | Recovery | Total | Invulnerability | Hit Advantage | Block Advantage | Stun | Guard Damage | Damage |
|---|---|---|---|---|---|---|---|---|---|---|---|
| - | - | - | - | - | - | - | - | - | - | - | - |
Instant command throw. Range: 32px. Rarely used in KOF97. | |||||||||||
| Guard | Cancel Properties | Startup | Active | Recovery | Total | Invulnerability | Hit Advantage | Block Advantage | Stun | Guard Damage | Damage |
|---|---|---|---|---|---|---|---|---|---|---|---|
| - | - | - | - | - | - | - | - | - | - | - | - |
2/12/15 Will counter any mid/high hitting normal attack or CD counter. Usually used to cancel into to make moves safeer (like standing CD) and to bait CD counters at the same time. Ends in a back turned, un-rollable knockdown, and sets up for a meaty (unblockable) Ground Pound (dp+A). | |||||||||||
| Guard | Cancel Properties | Startup | Active | Recovery | Total | Invulnerability | Hit Advantage | Block Advantage | Stun | Guard Damage | Damage |
|---|---|---|---|---|---|---|---|---|---|---|---|
| Throw | - | - | - | - | - | - | - | - | - | - | - |
Super Moves
| Version | Guard | Cancel Properties | Startup | Active | Recovery | Total | Invulnerability | Hit Advantage | Block Advantage | Stun | Guard Damage | Damage |
|---|---|---|---|---|---|---|---|---|---|---|---|---|
| Normal | Throw | - | - | - | - | - | - | - | - | - | - | - |
Instant command throw. Range: 43px. Less frequently used than the other SDM due to shorter range. | ||||||||||||
| Version | Guard | Cancel Properties | Startup | Active | Recovery | Total | Invulnerability | Hit Advantage | Block Advantage | Stun | Guard Damage | Damage |
| Max Mode | Throw | - | - | - | - | - | - | - | - | - | - | - |
Combos
General notes:
meterless
(midscreen)
- cr.B, hcb,f P
low link into command grab.
- cl.B, dp K / hcb,f P
- (j.X), dp.K / hcb,f P
command grab combo off of a jump-in. hcb,f P is prefered
- (j.X), cl.C / cl.D, dp.K / hcb,f P
standard bnb combo. hcb,f P is prefered
- (j.X), cl.C / cl.D, df.C, hcb,f P
requires either a very close cl.C/cl.D or a very good jump-in angle so df.C won't whiff.
- (against airborne opponent) df.C, hcf A
anti-air combo with df.C
- (against airborne opponent) df.C, qcb B, df.C, hcf A
requires a counter-hit df.C in order for it to work.
- f.A, hcf C
if you ever happen to land f.A, daimon can do hcf C to add on abit of extra dmg as well as set-up his unblockable dp A (see notes below).
- cr.D / CD / jp.CD, qcb B, hcf C
an alternate version of the combo above. adding qcb B gives you abit of extra meter gain as well as more consistency to landing hcf C (except CD and jp.CD at tip range), be aware that these options cause a soft KND.
with meter
(midscreen)
- cr.B, hcbx2 P
low confirm into special. abit less confirmer than the meterless version but still fairly easy.
- (j.X), cl.C / cl.D, hcbx2 P
for an eaiser time doing this, do (j.X), hcb+C, hcb+P.
- (j.X), hcfx2 K~hcf K, hcf C
combo with other super. deals about the same dmg as he combo above. also never use the final follow-up, hcf C does more dmg
Strategy
Unblockable Dp A
if you've played daimon in KOF 98, you'll proabably be familiar with this. it's possible for daimon to set-up his Dp A after his hcb,f P and hcf C grabs in a situation where the opponent cannot block the dp A, making it fully guarented; however, doing it alone can be difficult as it needs to be done very accurately and wake-up speeds vary from character to character. this is where the set-ups come in play, By using various combinations of backdashes and special moves/supers, you can line-up your timming on the unbockable.
Also, note that while these setups are unblockable, certain attacks can allow some characters to escape the setups. Most notably command moves that use the df input (i.e kyo's df.D, daimon's df.C) and one frame command grabs that are used as reversal if daimon's is within throw range.
For more information on the unblockable dp A, see daimon's unblockable dp A page for KOF 98, although keep in mind that the set-ups listed on that page may not work in this game.
Unblockable dp+A timing after hcb,f+P
Kyo, Benimaru, Daimon, Leona, Shingo:
- qcf+K, dp+C, dp+A
Ralf, Clark, Joe, Ryo:
- qcf+K, qcf+K, dp+A
Kim:
- qcb+B, CD, dp+A
Chang:
- CD, dp+C, CD, dp+A
Choi:
- qcb+B, qcf+K, dp+A
Terry, Yashiro:
- qcb+B, ABC, dp+A
Andy, Shermie, Chizuru, Billy:
- qcb+B, dp+C, dp+A
Athena:
- qcf+K, ABC, dp+A
Kensou:
- qcf+K, qcb+B, dp+A
Chin:
- roll, roll, dp+A
Chris:
- backdash, qcb+D, dp+A
Robert, Mary:
- CD, qcb+D, dp+A
Yuri:
- hcf+A, dp+A
Mai:
- j+CD (as coming down), CD, dp+A
King:
- dp+C, ABC, dp+A
Yamazaki:
- qcf+K, st.D, dp+A
Iori:
- short-jump, back-roll, dp A
- CD, qcb+D, CD, dp+A
Unblockable dp+A timing after hcf+C
Kyo, Benimaru, Choi, Chin, King:
- 2D, dp+A
Daimon:
- B, dp+A
Leona:
- backdash, dp+A
Ralf, Clark, Kim, terry, Athena, Ryo:
- A, dp+A
Chang, Shermie, Billy:
- ABC, dp+A
Terry, Joe, Kensou, Yashiro, Robert, Yamazaki, Shingo, Iori:
- CD, dp+A
Andy:
- D, dp+A
Chizuru:
- dp+C, dp+A
