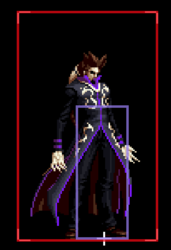
Lichmassacre (talk | contribs) m (→Data: Unnecessary.) |
Lichmassacre (talk | contribs) m (→Combos) |
||
| (14 intermediate revisions by 2 users not shown) | |||
| Line 9: | Line 9: | ||
| '''Tier Placement''' || S+ | | '''Tier Placement''' || S+ | ||
|- | |- | ||
| '''Ratio Cost (Sarsen)''' || 7 Points (8 Points Leader) | | '''Ratio Cost (Sarsen)''' || 7 Points (8 Points Leader) of 15 | ||
|- | |- | ||
| '''Ratio Cost (China)''' || 12 Points | | '''Ratio Cost (China)''' || 12 Points of 20 | ||
|- | |- | ||
| '''Best Position''' || Any | | '''Best Position''' || Any | ||
|- | |- | ||
| '''Good LDM?''' || Inconvenient | | '''Good LDM?''' || Inconvenient | ||
|- | |||
| '''Crouch Height''' || Medium | |||
|- | |||
| '''Wakeup Speed''' || 26 Frames | |||
|- | |||
| '''Stun Value''' || 900 | |||
|- | |- | ||
|} | |} | ||
| Line 22: | Line 28: | ||
'''''「 Duo Lon 」''''' | '''''「 Duo Lon 」''''' | ||
{{ ProConTable | {{ ProConTable | ||
| pros= | | pros= | ||
* | * Rekka's are extremely versatile | ||
* | * great toolkit in general | ||
* extremely easy MSA starters | |||
* amazing mix-up potential | * amazing mix-up potential | ||
* | * 2 infinites | ||
| cons= | | cons= | ||
* | * difficult to master | ||
* | * defense can be lacking | ||
* you will lose friends | * you will lose friends | ||
}} | }} | ||
===Colors=== | ===Colors=== | ||
{| | |||
! [[image:snka.gif]] | |||
! [[image:snkb.gif]] | |||
! [[image:snkc.gif]] | |||
! [[image:snkd.gif]] | |||
|- | |||
|[[File:KOF2003 Duolon colour A.png]] | |||
|[[File:KOF2003 Duolon colour B.png]] | |||
|[[File:KOF2003 Duolon colour C.png]] | |||
|[[File:KOF2003 Duolon colour D.png]] | |||
|} | |||
==Movelist== | ==Movelist== | ||
==== Far Normals ==== | ==== Far Normals ==== | ||
===== <span class="invisible-header"></span> ===== | |||
<font style="visibility:hidden" size="0"></font> | |||
{{MoveData | {{MoveData | ||
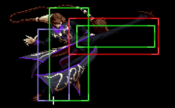
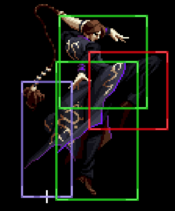
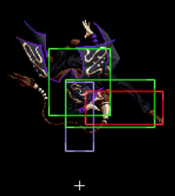
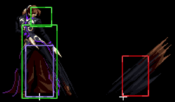
|image= | |image=KOF2003 Duolon St.A.png | ||
|caption= | |caption= | ||
|name=st.A | |name=st.A | ||
| Line 67: | Line 80: | ||
}} | }} | ||
===== <span class="invisible-header"></span> ===== | |||
<font style="visibility:hidden" size="0"></font> | |||
{{MoveData | {{MoveData | ||
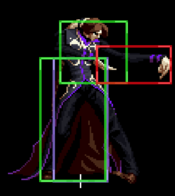
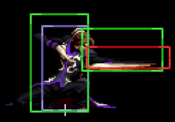
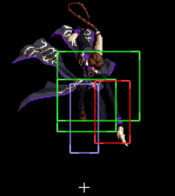
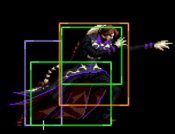
|image= | |image=KOF2003 Duolon St.B.png | ||
|caption= | |caption= | ||
|name=st.B | |name=st.B | ||
| Line 91: | Line 105: | ||
}} | }} | ||
===== <span class="invisible-header"></span> ===== | |||
<font style="visibility:hidden" size="0"></font> | |||
{{MoveData | {{MoveData | ||
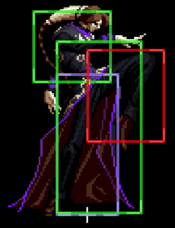
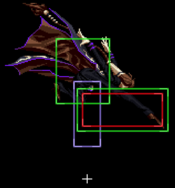
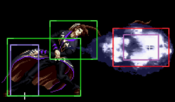
|image= | |image=KOF2003 Duolon St.C.png | ||
|caption= | |caption= | ||
|name=st.C | |name=st.C | ||
| Line 115: | Line 130: | ||
}} | }} | ||
===== <span class="invisible-header"></span> ===== | |||
<font style="visibility:hidden" size="0"></font> | |||
{{MoveData | {{MoveData | ||
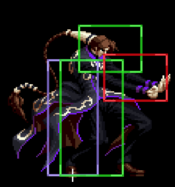
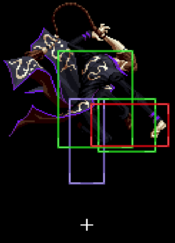
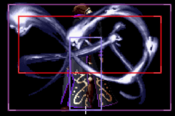
|image= | |image=KOF2003 Duolon St.D.png | ||
|caption= | |caption= | ||
|name=st.D | |name=st.D | ||
| Line 141: | Line 157: | ||
==== Close Range Normals ==== | ==== Close Range Normals ==== | ||
===== <span class="invisible-header"></span> ===== | |||
<font style="visibility:hidden" size="0"></font> | |||
{{MoveData | {{MoveData | ||
|image= | |image=KOF2003 Duolon Cl.A.png | ||
|caption= | |caption= | ||
|name=cl.A | |name=cl.A | ||
| Line 165: | Line 182: | ||
}} | }} | ||
===== <span class="invisible-header"></span> ===== | |||
<font style="visibility:hidden" size="0"></font> | |||
{{MoveData | {{MoveData | ||
|image= | |image=KOF2003 Duolon Cl.B.png | ||
|caption= | |caption= | ||
|name=cl.B | |name=cl.B | ||
| Line 189: | Line 207: | ||
}} | }} | ||
===== <span class="invisible-header"></span> ===== | |||
<font style="visibility:hidden" size="0"></font> | |||
{{MoveData | {{MoveData | ||
|image= | |image=KOF2003 Duolon Cl.C.png | ||
|caption= | |caption= | ||
|name=cl.C | |name=cl.C | ||
| Line 213: | Line 232: | ||
}} | }} | ||
===== <span class="invisible-header"></span> ===== | |||
<font style="visibility:hidden" size="0"></font> | |||
{{MoveData | {{MoveData | ||
|image= | |image=KOF2003 Duolon Cl.D.png | ||
|caption= | |caption= | ||
|name=cl.D | |name=cl.D | ||
| Line 239: | Line 259: | ||
==== Crouching Normals ==== | ==== Crouching Normals ==== | ||
===== <span class="invisible-header"></span> ===== | |||
<font style="visibility:hidden" size="0"></font> | |||
{{MoveData | {{MoveData | ||
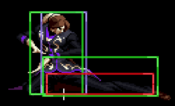
|image= | |image=KOF2003 Duolon Cr.A.png | ||
|caption= | |caption= | ||
|name=cr.A | |name=cr.A | ||
| Line 263: | Line 284: | ||
}} | }} | ||
===== <span class="invisible-header"></span> ===== | |||
<font style="visibility:hidden" size="0"></font> | |||
{{MoveData | {{MoveData | ||
|image= | |image=KOF2003 Duolon Cr.B.png | ||
|caption= | |caption= | ||
|name=cr.B | |name=cr.B | ||
| Line 287: | Line 309: | ||
}} | }} | ||
===== <span class="invisible-header"></span> ===== | |||
<font style="visibility:hidden" size="0"></font> | |||
{{MoveData | {{MoveData | ||
|image= | |image=KOF2003 Duolon Cr.C.png | ||
|image2=KOF2003 Duolon Cr. 3.png | |||
|caption= | |caption= | ||
|name=cr.C | |name=cr.C | ||
| Line 311: | Line 335: | ||
}} | }} | ||
===== <span class="invisible-header"></span> ===== | |||
<font style="visibility:hidden" size="0"></font> | |||
{{MoveData | {{MoveData | ||
|image= | |image=KOF2003 Duolon Cr.D.png | ||
|caption= | |caption= | ||
|name=cr.D | |name=cr.D | ||
| Line 337: | Line 362: | ||
==== Neutral Jumping Normals ==== | ==== Neutral Jumping Normals ==== | ||
===== <span class="invisible-header"></span> ===== | |||
<font style="visibility:hidden" size="0"></font> | |||
{{MoveData | {{MoveData | ||
|image= | |image=KOF2003 Duolon Nj.A.png | ||
|caption= | |caption= | ||
|name=nj.A | |name=nj.A | ||
| Line 361: | Line 387: | ||
}} | }} | ||
===== <span class="invisible-header"></span> ===== | |||
<font style="visibility:hidden" size="0"></font> | |||
{{MoveData | {{MoveData | ||
|image= | |image=KOF2003 Duolon Nj.B.png | ||
|caption= | |caption= | ||
|name=nj.B | |name=nj.B | ||
| Line 385: | Line 412: | ||
}} | }} | ||
===== <span class="invisible-header"></span> ===== | |||
<font style="visibility:hidden" size="0"></font> | |||
{{MoveData | {{MoveData | ||
|image= | |image=KOF2003 Duolon Nj.C.png | ||
|caption= | |caption= | ||
|name=nj.C | |name=nj.C | ||
| Line 409: | Line 437: | ||
}} | }} | ||
===== <span class="invisible-header"></span> ===== | |||
<font style="visibility:hidden" size="0"></font> | |||
{{MoveData | {{MoveData | ||
|image= | |image=KOF2003 Duolon Nj.D.png | ||
|caption= | |caption= | ||
|name=nj.D | |name=nj.D | ||
| Line 434: | Line 463: | ||
==== Diagonal Jump Normals ==== | ==== Diagonal Jump Normals ==== | ||
===== <span class="invisible-header"></span> ===== | |||
<font style="visibility:hidden" size="0"></font> | |||
{{MoveData | {{MoveData | ||
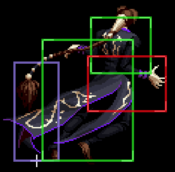
|image= | |image=KOF2003 Duolon J.A.png | ||
|caption= | |caption= | ||
|name=dj.A | |name=dj.A | ||
| Line 458: | Line 488: | ||
}} | }} | ||
===== <span class="invisible-header"></span> ===== | |||
<font style="visibility:hidden" size="0"></font> | |||
{{MoveData | {{MoveData | ||
|image= | |image=KOF2003 Duolon J.B.png | ||
|caption= | |caption= | ||
|name=dj.B | |name=dj.B | ||
| Line 482: | Line 513: | ||
}} | }} | ||
===== <span class="invisible-header"></span> ===== | |||
<font style="visibility:hidden" size="0"></font> | |||
{{MoveData | |||
|image=KOF2003 Duolon J.C.png | |||
|caption= | |||
|name=dj.C | |||
|input={{Motion|7}}/{{Motion|9}}+{{Icon-SNK|c}} | |||
|data= | |||
{{AttackData-KoF03 | |||
|damage=- | |||
|b. damage=0 | |||
|stun=- | |||
|cancel= | |||
|guard=Overhead | |||
|startup= | |||
|active= | |||
|recovery= | |||
|total= | |||
|advHit= | |||
|advBlock= | |||
|invul=- | |||
|description= | |||
}} | |||
}} | |||
===== <span class="invisible-header"></span> ===== | |||
<font style="visibility:hidden" size="0"></font> | |||
{{MoveData | {{MoveData | ||
|image= | |image=KOF2003 Duolon J.D.png | ||
|caption= | |caption= | ||
|name=dj.D | |name=dj.D | ||
| Line 507: | Line 564: | ||
=== Throws === | === Throws === | ||
{{MoveData | {{MoveData | ||
|image= | |image= | ||
|caption= | |caption= | ||
|name= | |name=Suishu ~ Shoukou | ||
|input={{Motion|4}}/{{Motion|6}}+{{Icon-SNK|c}}/{{Icon-SNK|d}} | |input={{Motion|4}}/{{Motion|6}}+{{Icon-SNK|c}}/{{Icon-SNK|d}} | ||
|data= | |data= | ||
| Line 532: | Line 588: | ||
=== MSA === | === MSA === | ||
===== <span class="invisible-header"></span> ===== | |||
<font style="visibility:hidden" size="0"></font> | |||
{{MoveData | {{MoveData | ||
|image= | |image= | ||
| Line 556: | Line 613: | ||
}} | }} | ||
===== <span class="invisible-header"></span> ===== | |||
<font style="visibility:hidden" size="0"></font> | |||
{{MoveData | {{MoveData | ||
|image= | |image= | ||
| Line 581: | Line 640: | ||
=== Command Normals === | === Command Normals === | ||
===== <span class="invisible-header"></span> ===== | |||
<font style="visibility:hidden" size="0"></font> | |||
{{MoveData | |||
|image=KOF2003 Duolon Fuuka Tenshi (DF + D).png | |||
|image2=KOF2003 Duolon Raika Tenshi (Fuuka Tenshi ~ D).png | |||
|caption= | |||
|name=Fuuka Tenshi > Raika Tenshi | |||
|input={{Motion|3}}{{Icon-SNK|d}} | |||
|data= | |||
{{AttackData-KoF03 | |||
|version=Fuuka Tenshi | |||
|subtitle={{Motion|3}}{{Icon-SNK|d}} | |||
|damage=- | |||
|b. damage=0 | |||
|stun=- | |||
|cancel= | |||
|guard=Mid | |||
|startup= | |||
|active= | |||
|recovery= | |||
|total= | |||
|advHit= | |||
|advBlock= | |||
|invul=- | |||
|description= | |||
}} | |||
{{AttackData-KoF03 | |||
|version=Raika Tenshi | |||
|subtitle={{Icon-SNK|d}} | |||
|damage=- | |||
|b. damage=0 | |||
|stun=- | |||
|cancel= | |||
|guard=Mid | |||
|startup= | |||
|active= | |||
|recovery= | |||
|total= | |||
|advHit= | |||
|advBlock= | |||
|invul=- | |||
|description= | |||
}} | |||
}} | |||
===== <span class="invisible-header"></span> ===== | |||
<font style="visibility:hidden" size="0"></font> | |||
{{MoveData | {{MoveData | ||
|image= | |image=KOF2003 Duolon J.B.png | ||
|image2= | |||
|caption= | |caption= | ||
|name= | |name=Hika Tenshi | ||
|input={{ | |input=Jump {{Icon-SNK|b}}{{Icon-SNK|d}} | ||
|data= | |data= | ||
{{AttackData-KoF03 | {{AttackData-KoF03 | ||
| Line 605: | Line 711: | ||
}} | }} | ||
=== | ===== <span class="invisible-header"></span> ===== | ||
<font style="visibility:hidden" size="0"></font> | |||
{{MoveData | {{MoveData | ||
|image= | |image= | ||
|caption= | |caption= | ||
|name= | |name=Sankaku Tobi | ||
|input= | |input=(In corner) Jump {{Motion|6}} | ||
|data= | |data= | ||
{{AttackData-KoF03 | {{AttackData-KoF03 | ||
| Line 617: | Line 723: | ||
|b. damage=0 | |b. damage=0 | ||
|stun=- | |stun=- | ||
|cancel= | |cancel= | ||
|guard= | |guard=Mid | ||
|startup= | |startup= | ||
|active= | |active= | ||
|recovery= | |recovery= | ||
|total= | |total= | ||
|advHit= | |advHit= | ||
|advBlock= | |advBlock= | ||
|invul=- | |invul=- | ||
|description= | |description=* Wall Jump | ||
}} | }} | ||
}} | }} | ||
=== Special Moves === | |||
===== <span class="invisible-header"></span> ===== | |||
<font style="visibility:hidden" size="0"></font> | |||
{{MoveData | {{MoveData | ||
|image= | |image=KOF2003 Duolon Jaki Juuryuu (QCF + P).png | ||
|image2=KOF2003 Duolon Jaki Juuryuu combo (Jaky Juuryuu ~ QCF + P).png | |||
|image3=KOF2003 Duolon Jaki Juuryuu Combo (Jaky Juuryuu ~ QCF + P) 2.png | |||
|caption= | |caption= | ||
|name= | |name=Jaki Juuryuu Combo | ||
|input= | |input={{Motion|236}}[[File:P.png]] x3 | ||
|data= | |data= | ||
{{AttackData-KoF03 | {{AttackData-KoF03 | ||
|version= | |version=1st Rekka | ||
|damage=- | |||
|b. damage=0 | |||
|stun=- | |||
|cancel= | |||
|guard= | |||
|startup= | |||
|active=- | |||
|recovery=- | |||
|total= | |||
|advHit= | |||
|advBlock= | |||
|invul=- | |||
|description=* Special move works the same regardless of button strength. | |||
}} | |||
{{AttackData-KoF03 | |||
|version=2nd Rekka | |||
|damage=- | |damage=- | ||
|b. damage=0 | |b. damage=0 | ||
| Line 651: | Line 777: | ||
|advBlock= | |advBlock= | ||
|invul=- | |invul=- | ||
|description=* Special move works the same regardless of button strength. | |||
}} | }} | ||
{{AttackData-KoF03 | {{AttackData-KoF03 | ||
|version= | |version=3rd Rekka | ||
|damage=- | |damage=- | ||
|b. damage=0 | |b. damage=0 | ||
|stun=- | |stun=- | ||
|cancel= | |cancel= | ||
|guard= | |guard= | ||
|startup= | |startup= | ||
| Line 666: | Line 793: | ||
|advBlock= | |advBlock= | ||
|invul=- | |invul=- | ||
|description= | |description=* Special move works the same regardless of button strength. | ||
* Final rekka can cancel into any of the following moves: | |||
:* Himou Kyaku (236K) | |||
:* Genma Kyaku (623K or 421K) | |||
:* Genma Hishou Keikou (214K) | |||
}} | }} | ||
}} | }} | ||
===== <span class="invisible-header"></span> ===== | |||
<font style="visibility:hidden" size="0"></font> | |||
{{MoveData | {{MoveData | ||
|image= | |image=KOF2003 Duolon Jaki Juuryuu (QCF + P).png | ||
|image2=KOF2003 Duolon Onpei Ryuujin Ha (Jaki Juuryuu ~ F + K).png | |||
|image3=KOF2003 Duolon Shirou Hassei Kin (Onpei Ryuujin Ha ~ QCB + P).png | |||
|caption= | |caption= | ||
|name= | |name=Jaki Juuryuu Combo 2 | ||
|input= | |input={{Motion|236}}[[File:P.png]] | ||
|data= | |data= | ||
{{AttackData-KoF03 | {{AttackData-KoF03 | ||
|version=Jaki Juuryuu | |||
|subtitle={{Motion|236}}[[File:P.png]] | |||
|damage=- | |damage=- | ||
|b. damage=0 | |b. damage=0 | ||
|stun=- | |stun=- | ||
|cancel= | |cancel= | ||
|guard= | |||
|startup= | |||
|active=- | |||
|recovery=- | |||
|total= | |||
|advHit= | |||
|advBlock= | |||
|invul=- | |||
|description=* Special move works the same regardless of button strength. | |||
}} | |||
{{AttackData-KoF03 | |||
|version=Onpei Ryuujin Ha | |||
|subtitle={{Motion|6}}[[File:K.png]] | |||
|damage=- | |||
|b. damage=0 | |||
|stun=- | |||
|cancel= | |||
|guard= | |guard= | ||
|startup= | |startup= | ||
|active= | |active=- | ||
|recovery= | |recovery=- | ||
|total= | |total= | ||
|advHit= | |advHit= | ||
|advBlock= | |advBlock= | ||
|invul=- | |invul=- | ||
|description= | |description=* Special move works the same regardless of button strength. | ||
* Second rekka can cancel into any of the following moves: | |||
:* Himou Kyaku (236K) | |||
:* Genma Kyaku (623K or 421K) | |||
:* Fuuka Tenshi > Raika Tenshi (3D > D) | |||
}} | }} | ||
{{AttackData-KoF03 | {{AttackData-KoF03 | ||
|version=Shiryou Hassei Kin | |||
|subtitle={{Motion|214}}[[File:P.png]] | |||
|damage=- | |damage=- | ||
|b. damage=0 | |b. damage=0 | ||
|stun=- | |stun=- | ||
|cancel= | |cancel= | ||
|guard= | |guard= | ||
|startup= | |startup= | ||
|active= | |active=- | ||
|recovery= | |recovery=- | ||
|total= | |total= | ||
|advHit= | |advHit= | ||
|advBlock= | |advBlock= | ||
|invul=- | |invul=- | ||
|description= | |description=* Special move works the same regardless of button strength. | ||
}} | }} | ||
}} | }} | ||
===== <span class="invisible-header"></span> ===== | |||
<font style="visibility:hidden" size="0"></font> | |||
{{MoveData | {{MoveData | ||
|image= | |image=KOF2003 Duolon Himou Kyaku (QCF + K).png | ||
|caption= | |caption= | ||
|name= | |name=Himou Kyaku | ||
|input= | |input={{Motion|236}}[[File:K.png]] | ||
|data= | |data= | ||
{{AttackData-KoF03 | {{AttackData-KoF03 | ||
| Line 729: | Line 881: | ||
|stun=- | |stun=- | ||
|cancel= | |cancel= | ||
|guard= | |guard= | ||
|startup= | |startup= | ||
|active= | |active= | ||
|recovery= | |recovery= | ||
|total= | |total= | ||
|advHit= | |advHit= | ||
| Line 741: | Line 893: | ||
}} | }} | ||
===== <span class="invisible-header"></span> ===== | |||
<font style="visibility:hidden" size="0"></font> | |||
{{MoveData | {{MoveData | ||
|image= | |image=KOF2003 Duolon Genmu Kyaku (DP + K).png | ||
|caption= | |caption= | ||
|name= | |name=Genma Kyaku | ||
|input= | |input={{Motion|421}}/{{Motion|623}}[[File:K.png]] | ||
|data= | |data= | ||
{{AttackData-KoF03 | {{AttackData-KoF03 | ||
| Line 752: | Line 906: | ||
|stun=- | |stun=- | ||
|cancel= | |cancel= | ||
|guard= | |guard= Mid | ||
|startup= | |startup= | ||
|active= | |active= | ||
|recovery= | |recovery= | ||
|total= | |total= | ||
|advHit= | |advHit= | ||
|advBlock= | |advBlock= | ||
|invul=- | |invul=- | ||
|description= | |description=* Both the motion used and button pressed determines the attack's distance in front of Duo Lon. | ||
}} | }} | ||
}} | }} | ||
===== <span class="invisible-header"></span> ===== | |||
<font style="visibility:hidden" size="0"></font> | |||
{{MoveData | {{MoveData | ||
|image= | |image= | ||
|caption= | |caption= | ||
|name= | |name=Genma Hishou Keikou | ||
|input= | |input={{Motion|214}}[[File:K.png]] | ||
|data= | |data= | ||
{{AttackData-KoF03 | {{AttackData-KoF03 | ||
| Line 775: | Line 931: | ||
|stun=- | |stun=- | ||
|cancel= | |cancel= | ||
|guard= | |guard= | ||
|startup=- | |startup=- | ||
|active=- | |active=- | ||
| Line 787: | Line 943: | ||
}} | }} | ||
===== <span class="invisible-header"></span> ===== | |||
<font style="visibility:hidden" size="0"></font> | |||
{{MoveData | {{MoveData | ||
|image= | |image=KOF2003 Duolon Suishu~Makyakuho (HCB, F + P).png | ||
|caption= | |caption= | ||
|name= | |name=Suishu ~ Makyakuho | ||
|input= | |input={{Motion|63214}}{{Motion|6}}[[File:P.png]] | ||
|data= | |data= | ||
{{AttackData-KoF03 | {{AttackData-KoF03 | ||
|version=Suishu ~ Makyakuho | |||
|subtitle={{Motion|63214}}{{Motion|6}}[[File:P.png]] | |||
|damage=- | |damage=- | ||
|b. damage=0 | |b. damage=0 | ||
|stun=- | |stun=- | ||
|cancel= | |cancel= | ||
|guard= | |guard= | ||
|startup= | |startup=- | ||
|active=- | |active=- | ||
|recovery=- | |recovery=- | ||
| Line 807: | Line 966: | ||
|advBlock= | |advBlock= | ||
|invul=- | |invul=- | ||
|description= | |description=* Command grab. Opponent stays on the same side. | ||
}} | }} | ||
{{AttackData-KoF03 | {{AttackData-KoF03 | ||
|version=Suishu ~ Ransaiki | |||
|subtitle={{Motion|214}}[[File:P.png]] | |||
|damage=- | |damage=- | ||
|b. damage=0 | |b. damage=0 | ||
| Line 824: | Line 976: | ||
|cancel= | |cancel= | ||
|guard= | |guard= | ||
|startup= | |startup=- | ||
|active=- | |active=- | ||
|recovery=- | |recovery=- | ||
| Line 831: | Line 983: | ||
|advBlock= | |advBlock= | ||
|invul=- | |invul=- | ||
|description= | |description=* Command grab follow-up where Duo Lon swaps sides with the opponent. | ||
}} | }} | ||
}} | }} | ||
=== Super Moves === | === Super Moves === | ||
===== <span class="invisible-header"></span> ===== | |||
<font style="visibility:hidden" size="0"></font> | |||
{{MoveData | {{MoveData | ||
|image= | |image=KOF2003 Duolon Hiden~Genmu Juon Shikon (QCB, HCF + P).png | ||
|caption= | |caption= | ||
|name= | |name=Hiden ~ Genmu Juon Shikon | ||
|input= | |input={{Motion|214}}{{Motion|41236}}[[File:P.png]] | ||
|data= | |data= | ||
{{AttackData-KoF03 | {{AttackData-KoF03 | ||
| Line 861: | Line 1,013: | ||
}} | }} | ||
===== <span class="invisible-header"></span> ===== | |||
<font style="visibility:hidden" size="0"></font> | |||
{{MoveData | {{MoveData | ||
|image= | |image=KOF2003 Duolon Hiden~Genmu Onryou Heki (HCBx2 + P).png | ||
|caption= | |caption= | ||
|name= | |name=Hiden ~ Genmu Onryou Heki | ||
|input= | |input={{Motion|63214}}{{Motion|63214}}[[File:P.png]] | ||
|data= | |data= | ||
{{AttackData-KoF03 | {{AttackData-KoF03 | ||
| Line 885: | Line 1,039: | ||
=== LDM === | === LDM === | ||
{{MoveData | {{MoveData | ||
|image= | |image=KOF2003 Duolon Ougi~Tajuun Genmu Ankei (A~C~B~D).png | ||
|caption= | |caption= | ||
|name= | |name=Ougi ~ Tajuu Genmu Ankei | ||
|input= | |input={{Icon-SNK|a}}{{Icon-SNK|c}}{{Icon-SNK|b}}{{Icon-SNK|d}} | ||
|data= | |data= | ||
{{AttackData-KoF03 | {{AttackData-KoF03 | ||
| Line 909: | Line 1,062: | ||
}} | }} | ||
== | ==Combos== | ||
''' | General notes: | ||
*when landing from a standing MSA, remember to do the bnb's rather than the MSA ender (some Bnb's are more favored than others in this secnario) | |||
*for the most part, counterwire combos are dependant on where you landed the move. | |||
*when landing from an MSA, duolon will land behind the opponent, this allows for specific combos that only work when the opponent is backturned. | |||
'''BnBs:''' | |||
* (cr.B, cr.A)/cl.C/cl.D, qcfx3 P, qcf K, cl.D/jp.B~D | |||
: | |||
* (cr.B, cr.A)/cl.C/cl.D, qcf P, f K, df D,D | |||
: | |||
* cl.C/cl.D, qcf P, f K, rdp D, jp.B~D | |||
:slightly delay the qcf P so that it's possible for rdp D to connect. | |||
* cl.A/cr.A/cr.B, qcf P, f K, qcb P, cr.A, (qcfx3 P, qcfK, jp.B~D) / (qcf P, f K, rdp D, jp.B~D) | |||
:the timming for the link from the qcb P into cr.A can be difficult to get down consistently. this can only work off of one light as comboing it from cr.B,cr.A or heavies will cause too much pushback for the last rekka to hit. | |||
* cl.A / cr.A / cr.B, qcf Px3, qcb,hcf C | |||
: | |||
* cl.A / cr.A / cr.B, qcf P, f K, qcb P, qcb,hcf P/hcbx2 P | |||
: | |||
* hcb,f P, run-up, cr.A, hcb,f P..... | |||
: One of 2 Duo Lon infinites. This one is slightly easier due to the fact that you can do it from both sides and the fact that it works anywhere on screen. Only issue - you can jump to avoid it entirely, but that's also the only way to escape it. If the opponent doesn't know better this is a free character kill, but if they do you'll get punished on command grab whiff. | |||
* (CH) df.D,D (2nd hit), jp.B~D | |||
:Counterwire combo. | |||
'''MSA Starters:''' | |||
* (cr.B, cr.A) / cl.C / cl.D, qcfx3 P, qcf K, MSA | |||
:one of the eaiest MSA set-ups in the game. | |||
* cl.A / cr.A / cr.B / cl.B, qcf P, f K, qcb P, MSA | |||
:yet another extremly easy and reliable MSA set-up. | |||
* cr.A, qcf P, f K, qcb P, cr.b, qcf P, f K, rdp D, MSA | |||
:an alternate to the MSA set-up above. | |||
* (CH) df.D,D (2nd hit), MSA | |||
:a somewhat unreliable set-up. remember to whiff the 1st hit of df.D.D in order for this to work. | |||
'''MSA Enders:''' | |||
''(Grounded):'' | |||
* (After landing from MSA) cr.A / cr.B, qcf P, f K, qcb P, cr.A, qcf Px3, qcf K, cl.D/jp.B~D | |||
:basic MSA ender | |||
* (After landing from MSA) cr.A / cr.B, qcf P, f K, qcb P, cr.A, qcf P, f K, rdp D, rdp B, jp.B~D | |||
:an alternate ender to the one above | |||
* (After landing from MSA) hcb,f P, run-up, anything you want | |||
:use this ender if you want to reposition the opponent to face towards you. | |||
* (After landing from MSA) hcb,f P, run-up, cr.A, qcf P, f K, qcb P, cr.b, qcf P, f K, rdp D, MSA | |||
:this combo exceeds past the time limit for disabling MSA, which means you can go ahead and go into another MSA | |||
* (corner, after landing from MSA) cr.A / cr.B, qcf P, f K, qcb P... | |||
:one of the most infamous infinites in the game, this only works when the opponent is backturned and in the corner. since duolon almost always side-switches upon an MSA entry, this makes pulling it off more manageable. takes some time to get used to the timming but once your use to it, enjoy making your opponent suffer. | |||
* (corner, after landing from MSA) cr.A / cr.B, qcf P, f K, qcb P, cr.A / cr.B, qcf P, f K, qcb P, cr.A / cr.B, qcf P, f K, qcb P, MSA | |||
:slightly more stylish version of his infinite | |||
''(air):'' | |||
*(After landing from MSA) backdash rdp D, rdp K, nj.C | |||
:only works in secnarios where the MSA entry launches the opponent (i.e ash: hcf C, qcfx2 P, MSA during the qcfx2 P) | |||
==Strategy== | ==Strategy== | ||
| Line 1,072: | Line 1,285: | ||
{{Navbox-KOF2003}} | {{Navbox-KOF2003}} | ||
[[Category:The King of Fighters 2003]] | [[Category:The King of Fighters 2003]] | ||
[[Category:Duo Lon]] | |||
Latest revision as of 18:42, 6 June 2023
| 堕瓏 / 静しずかなる暗殺者, The Silent Assassin | |
|---|---|
| Tier Placement | S+ |
| Ratio Cost (Sarsen) | 7 Points (8 Points Leader) of 15 |
| Ratio Cost (China) | 12 Points of 20 |
| Best Position | Any |
| Good LDM? | Inconvenient |
| Crouch Height | Medium |
| Wakeup Speed | 26 Frames |
| Stun Value | 900 |
Introduction
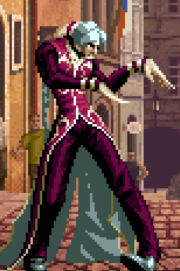
「 Duo Lon 」
| Strengths | Weaknesses |
|---|---|
|
|
Colors
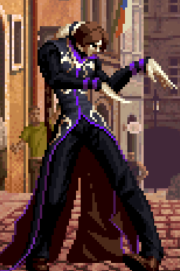
|
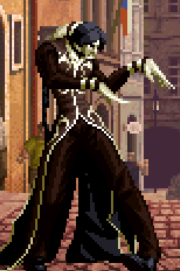
|
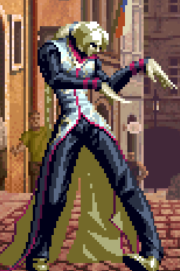
|
|
Movelist
Far Normals
| Damage | Counter Dmg | Guard | Guard Damage | Damage Scaling | Stun | CH Stun | Meter | Cancel Properties | Startup | Active | Recovery | Total | Hit Advantage | Block Advantage | Invulnerability |
|---|---|---|---|---|---|---|---|---|---|---|---|---|---|---|---|
| - | - | Mid | - | - | - | - | - | - | - | - | - | - | - | - | - |
Close Range Normals
| Damage | Counter Dmg | Guard | Guard Damage | Damage Scaling | Stun | CH Stun | Meter | Cancel Properties | Startup | Active | Recovery | Total | Hit Advantage | Block Advantage | Invulnerability |
|---|---|---|---|---|---|---|---|---|---|---|---|---|---|---|---|
| - | - | Mid | - | - | - | - | - | - | - | - | - | - | - | - | - |
Crouching Normals
| Damage | Counter Dmg | Guard | Guard Damage | Damage Scaling | Stun | CH Stun | Meter | Cancel Properties | Startup | Active | Recovery | Total | Hit Advantage | Block Advantage | Invulnerability |
|---|---|---|---|---|---|---|---|---|---|---|---|---|---|---|---|
| - | - | Mid | - | - | - | - | - | - | - | - | - | - | - | - | - |
| Damage | Counter Dmg | Guard | Guard Damage | Damage Scaling | Stun | CH Stun | Meter | Cancel Properties | Startup | Active | Recovery | Total | Hit Advantage | Block Advantage | Invulnerability |
|---|---|---|---|---|---|---|---|---|---|---|---|---|---|---|---|
| - | - | Low | - | - | - | - | - | - | - | - | - | - | - | - | - |
| Damage | Counter Dmg | Guard | Guard Damage | Damage Scaling | Stun | CH Stun | Meter | Cancel Properties | Startup | Active | Recovery | Total | Hit Advantage | Block Advantage | Invulnerability |
|---|---|---|---|---|---|---|---|---|---|---|---|---|---|---|---|
| - | - | Mid | - | - | - | - | - | None | - | - | - | - | - | - | - |
| Damage | Counter Dmg | Guard | Guard Damage | Damage Scaling | Stun | CH Stun | Meter | Cancel Properties | Startup | Active | Recovery | Total | Hit Advantage | Block Advantage | Invulnerability |
|---|---|---|---|---|---|---|---|---|---|---|---|---|---|---|---|
| - | - | Low | - | - | - | - | - | - | - | - | - | - | KD | - | - |
Neutral Jumping Normals
| Damage | Counter Dmg | Guard | Guard Damage | Damage Scaling | Stun | CH Stun | Meter | Cancel Properties | Startup | Active | Recovery | Total | Hit Advantage | Block Advantage | Invulnerability |
|---|---|---|---|---|---|---|---|---|---|---|---|---|---|---|---|
| - | - | Overhead | - | - | - | - | - | - | - | - | - | - | - | - | - |
Diagonal Jump Normals
| Damage | Counter Dmg | Guard | Guard Damage | Damage Scaling | Stun | CH Stun | Meter | Cancel Properties | Startup | Active | Recovery | Total | Hit Advantage | Block Advantage | Invulnerability |
|---|---|---|---|---|---|---|---|---|---|---|---|---|---|---|---|
| - | - | Overhead | - | - | - | - | - | - | - | - | - | - | - | - | - |
Throws
| Damage | Counter Dmg | Guard | Guard Damage | Damage Scaling | Stun | CH Stun | Meter | Cancel Properties | Startup | Active | Recovery | Total | Hit Advantage | Block Advantage | Invulnerability |
|---|---|---|---|---|---|---|---|---|---|---|---|---|---|---|---|
| - | - | Throw | - | - | - | - | - | - | - | - | - | - | - | - | - |
MSA
| Damage | Counter Dmg | Guard | Guard Damage | Damage Scaling | Stun | CH Stun | Meter | Cancel Properties | Startup | Active | Recovery | Total | Hit Advantage | Block Advantage | Invulnerability |
|---|---|---|---|---|---|---|---|---|---|---|---|---|---|---|---|
| - | - | Mid | - | - | - | - | - | - | - | - | - | - | - | - | Strike/Projectile |
| Damage | Counter Dmg | Guard | Guard Damage | Damage Scaling | Stun | CH Stun | Meter | Cancel Properties | Startup | Active | Recovery | Total | Hit Advantage | Block Advantage | Invulnerability |
|---|---|---|---|---|---|---|---|---|---|---|---|---|---|---|---|
| - | - | Mid | - | - | - | - | - | - | - | - | - | - | - | - | - |
Command Normals
| Damage | Counter Dmg | Guard | Guard Damage | Damage Scaling | Stun | CH Stun | Meter | Cancel Properties | Startup | Active | Recovery | Total | Hit Advantage | Block Advantage | Invulnerability |
|---|---|---|---|---|---|---|---|---|---|---|---|---|---|---|---|
| - | - | Mid | - | - | - | - | - | - | - | - | - | - | - | - | - |
| |||||||||||||||
Special Moves
| Version | Damage | Counter Dmg | Guard | Guard Damage | Damage Scaling | Stun | CH Stun | Meter | Cancel Properties | Startup | Active | Recovery | Total | Hit Advantage | Block Advantage | Invulnerability |
|---|---|---|---|---|---|---|---|---|---|---|---|---|---|---|---|---|
| 1st Rekka | - | - | - | - | - | - | - | - | - | - | - | - | - | - | - | - |
| ||||||||||||||||
| Version | Damage | Counter Dmg | Guard | Guard Damage | Damage Scaling | Stun | CH Stun | Meter | Cancel Properties | Startup | Active | Recovery | Total | Hit Advantage | Block Advantage | Invulnerability |
| 2nd Rekka | - | - | - | - | - | - | - | - | - | - | - | - | - | - | - | - |
| ||||||||||||||||
| Version | Damage | Counter Dmg | Guard | Guard Damage | Damage Scaling | Stun | CH Stun | Meter | Cancel Properties | Startup | Active | Recovery | Total | Hit Advantage | Block Advantage | Invulnerability |
| 3rd Rekka | - | - | - | - | - | - | - | - | - | - | - | - | - | - | - | - |
| ||||||||||||||||
| Damage | Counter Dmg | Guard | Guard Damage | Damage Scaling | Stun | CH Stun | Meter | Cancel Properties | Startup | Active | Recovery | Total | Hit Advantage | Block Advantage | Invulnerability |
|---|---|---|---|---|---|---|---|---|---|---|---|---|---|---|---|
| - | - | - | - | - | - | - | - | - | - | - | - | - | - | - | - |
| Damage | Counter Dmg | Guard | Guard Damage | Damage Scaling | Stun | CH Stun | Meter | Cancel Properties | Startup | Active | Recovery | Total | Hit Advantage | Block Advantage | Invulnerability |
|---|---|---|---|---|---|---|---|---|---|---|---|---|---|---|---|
| - | - | Mid | - | - | - | - | - | - | - | - | - | - | - | - | - |
| |||||||||||||||
| Damage | Counter Dmg | Guard | Guard Damage | Damage Scaling | Stun | CH Stun | Meter | Cancel Properties | Startup | Active | Recovery | Total | Hit Advantage | Block Advantage | Invulnerability |
|---|---|---|---|---|---|---|---|---|---|---|---|---|---|---|---|
| - | - | - | - | - | - | - | - | - | - | - | - | - | - | - | - |
Super Moves
| Damage | Counter Dmg | Guard | Guard Damage | Damage Scaling | Stun | CH Stun | Meter | Cancel Properties | Startup | Active | Recovery | Total | Hit Advantage | Block Advantage | Invulnerability |
|---|---|---|---|---|---|---|---|---|---|---|---|---|---|---|---|
| - | - | - | - | - | - | - | - | - | - | - | - | - | - | - | - |
LDM
| Damage | Counter Dmg | Guard | Guard Damage | Damage Scaling | Stun | CH Stun | Meter | Cancel Properties | Startup | Active | Recovery | Total | Hit Advantage | Block Advantage | Invulnerability |
|---|---|---|---|---|---|---|---|---|---|---|---|---|---|---|---|
| - | - | - | - | - | - | - | - | - | - | - | - | - | - | - | - |
Combos
General notes:
- when landing from a standing MSA, remember to do the bnb's rather than the MSA ender (some Bnb's are more favored than others in this secnario)
- for the most part, counterwire combos are dependant on where you landed the move.
- when landing from an MSA, duolon will land behind the opponent, this allows for specific combos that only work when the opponent is backturned.
BnBs:
- (cr.B, cr.A)/cl.C/cl.D, qcfx3 P, qcf K, cl.D/jp.B~D
- (cr.B, cr.A)/cl.C/cl.D, qcf P, f K, df D,D
- cl.C/cl.D, qcf P, f K, rdp D, jp.B~D
- slightly delay the qcf P so that it's possible for rdp D to connect.
- cl.A/cr.A/cr.B, qcf P, f K, qcb P, cr.A, (qcfx3 P, qcfK, jp.B~D) / (qcf P, f K, rdp D, jp.B~D)
- the timming for the link from the qcb P into cr.A can be difficult to get down consistently. this can only work off of one light as comboing it from cr.B,cr.A or heavies will cause too much pushback for the last rekka to hit.
- cl.A / cr.A / cr.B, qcf Px3, qcb,hcf C
- cl.A / cr.A / cr.B, qcf P, f K, qcb P, qcb,hcf P/hcbx2 P
- hcb,f P, run-up, cr.A, hcb,f P.....
- One of 2 Duo Lon infinites. This one is slightly easier due to the fact that you can do it from both sides and the fact that it works anywhere on screen. Only issue - you can jump to avoid it entirely, but that's also the only way to escape it. If the opponent doesn't know better this is a free character kill, but if they do you'll get punished on command grab whiff.
- (CH) df.D,D (2nd hit), jp.B~D
- Counterwire combo.
MSA Starters:
- (cr.B, cr.A) / cl.C / cl.D, qcfx3 P, qcf K, MSA
- one of the eaiest MSA set-ups in the game.
- cl.A / cr.A / cr.B / cl.B, qcf P, f K, qcb P, MSA
- yet another extremly easy and reliable MSA set-up.
- cr.A, qcf P, f K, qcb P, cr.b, qcf P, f K, rdp D, MSA
- an alternate to the MSA set-up above.
- (CH) df.D,D (2nd hit), MSA
- a somewhat unreliable set-up. remember to whiff the 1st hit of df.D.D in order for this to work.
MSA Enders:
(Grounded):
- (After landing from MSA) cr.A / cr.B, qcf P, f K, qcb P, cr.A, qcf Px3, qcf K, cl.D/jp.B~D
- basic MSA ender
- (After landing from MSA) cr.A / cr.B, qcf P, f K, qcb P, cr.A, qcf P, f K, rdp D, rdp B, jp.B~D
- an alternate ender to the one above
- (After landing from MSA) hcb,f P, run-up, anything you want
- use this ender if you want to reposition the opponent to face towards you.
- (After landing from MSA) hcb,f P, run-up, cr.A, qcf P, f K, qcb P, cr.b, qcf P, f K, rdp D, MSA
- this combo exceeds past the time limit for disabling MSA, which means you can go ahead and go into another MSA
- (corner, after landing from MSA) cr.A / cr.B, qcf P, f K, qcb P...
- one of the most infamous infinites in the game, this only works when the opponent is backturned and in the corner. since duolon almost always side-switches upon an MSA entry, this makes pulling it off more manageable. takes some time to get used to the timming but once your use to it, enjoy making your opponent suffer.
- (corner, after landing from MSA) cr.A / cr.B, qcf P, f K, qcb P, cr.A / cr.B, qcf P, f K, qcb P, cr.A / cr.B, qcf P, f K, qcb P, MSA
- slightly more stylish version of his infinite
(air):
- (After landing from MSA) backdash rdp D, rdp K, nj.C
- only works in secnarios where the MSA entry launches the opponent (i.e ash: hcf C, qcfx2 P, MSA during the qcfx2 P)
Strategy
UNDER CONSTRUCTION
Match Up
UNDER CONSTRUCTION
| - Ash:
| - Duo Lon:
| - Shen:
| - Terry:
| - Joe:
| - Tizoc:
| - Ryo:
| - Robert:
| - Yuri:
| - Kim:
| - Chang:
| - Jhun:
| - Leona:
| - Ralf:
| - Clark:
| - Gato:
| - Billy:
| - Yamazaki:
| - King:
| - Mai:
| - Mary:
| - Benimaru:
| - Shingo:
| - Daimon:
| - Athena:
| - Hinako:
| - Malin:
| - K':
| - Maxima:
| - Whip:
| - Kyo:
| - Chizuru:
| - KUSANAGI:
| - Maki:
| - Adelheid:
| - Mukai:
