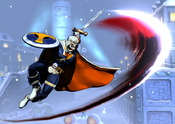
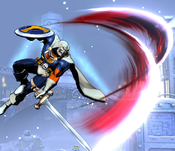
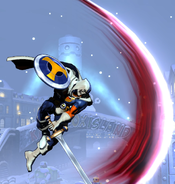
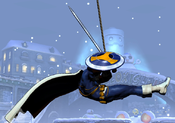
(added to web swing and charging star,added combos, added Moons and Sondelight to playyers table) |
m (added corrections, plan to expand team position chapter) |
||
| Line 175: | Line 175: | ||
|properties=- | |properties=- | ||
|description= | |description= | ||
{{clr|M|5M}} is a double-hitting attack making it great against armored attacks and has a large amount of hit-stun making it the best for hit confirming into combos. | {{clr|M|5M}} is a double-hitting attack making it great against armored attacks and has a large amount of hit-stun making it the best for hit confirming into combos but 2M is better for damage due to extra hit scaling damage worse. | ||
<br>{{clr|M|5M}}'s 2nd swing hits high making it decent anti-air but the only combos reliably into Charging Star ({{clr|H|4H}}). | <br>{{clr|M|5M}}'s 2nd swing hits high making it decent anti-air but the only combos reliably into Charging Star ({{clr|H|4H}}). | ||
}} | }} | ||
| Line 225: | Line 225: | ||
|properties= | |properties= | ||
|description= | |description= | ||
{{clr|L|2L}} has great range for a light normal, and is very fast at | {{clr|L|2L}} has great range for a light normal, and is very fast at 5 frame startup. | ||
<br> Can be thrown out to fish for hits with relative safety. {{clr|L|2L}} lowers Taskmaster's hurtbox very slightly compared to just crouching, although it is not low enough profile to evade under projectiles. | <br> Can be thrown out to fish for hits with relative safety. {{clr|L|2L}} lowers Taskmaster's hurtbox very slightly compared to just crouching, although it is not low enough profile to evade under projectiles. | ||
<br><br>2L's animation is based on Captain America's 2L. | <br><br>2L's animation is based on Captain America's 2L. | ||
| Line 298: | Line 298: | ||
|onhit=Launch | |onhit=Launch | ||
|onblock=-12 | |onblock=-12 | ||
|properties={{launch}} {{jcancel}} | |properties={{launch}}<br>{{jcancel}} (on hit)<br>{{nocancel}} (on whiff or block) | ||
|description= | |description= | ||
{{clr|S|S}} launchers opponents into the air and can be a situational but unsafe anti air. | {{clr|S|S}} launchers opponents into the air and can be a situational but unsafe anti air. | ||
<br>It's possible a cancel this move into Aim Master ( | <br>It's possible a cancel this move into Aim Master ({{clr|H|2369H}}) using Tiger Knee Input [[File:Tiger_Knee_Input_2.0.png]] and is used in some combo extensions. | ||
<br><br>Launcher's animation is based on the beginning of Captain America's Star's & Stripes. | <br><br>Launcher's animation is based on the beginning of Captain America's Star's & Stripes. | ||
}} | }} | ||
| Line 401: | Line 401: | ||
{{clr|S|j.S}} is a downward slash with a large hitbox in front of Taskmaster, and if it's used as a combo finisher should hit opponents with the early hit, slightly above Taskmaster. | {{clr|S|j.S}} is a downward slash with a large hitbox in front of Taskmaster, and if it's used as a combo finisher should hit opponents with the early hit, slightly above Taskmaster. | ||
{{clr|S|j.S}} is potentially the best aerial to land with as it does great damage while being single hit | {{clr|S|j.S}} is potentially the best aerial to land with as it does great damage while being single hit. | ||
}} | }} | ||
}} | }} | ||
| Line 432: | Line 432: | ||
*<code> Aim Master ({{clr|L|2}}{{clr|M|3}}{{clr|H|6}}X) </code>is used in some combo routes, can be used to advancing forward while covering himself with arrows, and can be use to shift momentum (if Taskmaster is swinging away from the opponent, the Aim Master input with turn him around mid-air effectively shifting his momentum). | *<code> Aim Master ({{clr|L|2}}{{clr|M|3}}{{clr|H|6}}X) </code>is used in some combo routes, can be used to advancing forward while covering himself with arrows, and can be use to shift momentum (if Taskmaster is swinging away from the opponent, the Aim Master input with turn him around mid-air effectively shifting his momentum). | ||
'''Taskmaster can cancel Web Swing ({{clr|H|6H}}) into Aim Master at any time and can control velocity depending how early or how late in the animation it canceled.''' | '''Taskmaster can cancel Web Swing ({{clr|H|6H}}) into Aim Master at any time and can control velocity depending how early or how late in the animation it canceled.''' | ||
<br>'''Early Cancel'''= Little acceleration / ''' | <br>'''Early Cancel'''= Little acceleration / '''Intermediate Cancel'''= Much acceleration / '''Late Cancel'''= Little acceleration | ||
<br>Charged Aim Master ({{clr|L|2}}{{clr|M|3}}{{clr|H|6}}X) can cancel a grounded Web Swing ({{clr|H|6H}}) early leading to a overhead fake out into {{clr|L|2L}} or {{clr|M|2M}}, or a safer throw attempt, or different combos extensions. | <br>Charged Aim Master ({{clr|L|2}}{{clr|M|3}}{{clr|H|6}}X) can cancel a grounded Web Swing ({{clr|H|6H}}) early leading to a overhead fake out into {{clr|L|2L}} or {{clr|M|2M}}, or a safer throw attempt, or different combos extensions. | ||
<br>Super Jumping ('''29''') before using Web Swing ({{clr|H|6H}}) then cancel into Aim Master ({{clr|H|236H}}) can be used to escape corners while attacking below you. | <br>Super Jumping ('''29''') before using Web Swing ({{clr|H|6H}}) then cancel into Aim Master ({{clr|H|236H}}) can be used to escape corners while attacking below you. | ||
| Line 527: | Line 527: | ||
<br>This is Taskmaster's primary tool for long-range combat, and paired with assists is sufficient to zone out slower characters. | <br>This is Taskmaster's primary tool for long-range combat, and paired with assists is sufficient to zone out slower characters. | ||
<br> '''Button strength mainly alters the trajectory of the arrows.''' | <br> '''Button strength mainly alters the trajectory of the arrows.''' | ||
*{{clr|L|236L}} is a direct horizontal shot | *{{clr|L|236L}} is a direct horizontal shot. | ||
*{{clr|M|236M}} fires at a slight upwards angle that eventually arcs down. While airborne, j.{{clr|M|236M}} fires at a down-forward angle instead of up-forward. | *{{clr|M|236M}} fires at a slight upwards angle that eventually arcs down. While airborne, j.{{clr|M|236M}} fires at a down-forward angle instead of up-forward. | ||
*{{clr|H|236H}} is fired directly upwards, and then suddenly arcs back down to the ground at superjump height. While airborne, j.{{clr|H|236H}} is shot directly down towards the ground. | *{{clr|H|236H}} is fired directly upwards, and then suddenly arcs back down to the ground at superjump height. While airborne, j.{{clr|H|236H}} is shot directly down towards the ground. | ||
| Line 1,059: | Line 1,059: | ||
*'''Midscreen''' | *'''Midscreen''' | ||
<code> Jump > (at the peak of the jump) Legion Arrow (j.236{{clr|M|M}}+{{clr|H|H}}). </code> | <code> Jump > (at the peak of the jump) Legion Arrow (j.236{{clr|M|M}}+{{clr|H|H}}). </code> | ||
<br><code> Dash > Assist Call > Web Swing ({{clr|H|6H}}) > Single Arrow Aim Master (j.{{clr|H|236H}}) > Start your combo. </code> | <br><code> Dash > Beam Assist Call > Web Swing ({{clr|H|6H}}) > Single Arrow Aim Master (j.{{clr|H|236H}}) > Start your combo. </code> | ||
*'''Shot into corner''' | *'''Shot into corner''' | ||
<code> Tiger Knee [[File:Tiger_Knee_Input_2.0.png]] Legion Arrow (236{{clr|L|L}}+{{clr|H|H}}). </code> | <code> Tiger Knee [[File:Tiger_Knee_Input_2.0.png]] Legion Arrow (236{{clr|L|L}}+{{clr|H|H}}). </code> | ||
<br><code> Assist Call > Web Swing ({{clr|H|6H}}) > immediately cancel into Single Arrow Aim Master ({{clr|H|236H}}) > Start your combo. </code> | <br><code> Assist Call > Web Swing ({{clr|H|6H}}) > immediately cancel into Single Arrow Aim Master ({{clr|H|236H}}) > Beam Hits > Start your combo. </code> | ||
}} | }} | ||
}} | }} | ||
| Line 1,263: | Line 1,263: | ||
== Videos and External Resources == | == Videos and External Resources == | ||
<youtube>https://youtu.be/oYuR1wbq-SU</youtube> <youtube>https://youtu.be/adNXt4lNc4M</youtube> | <youtube>https://youtu.be/oYuR1wbq-SU</youtube> <youtube>https://youtu.be/h4kL-e8Yyds</youtube> <youtube>https://youtu.be/CWVUFUrh-q8</youtube> <youtube>https://youtu.be/adNXt4lNc4M</youtube> | ||
== Alternate Colors == | == Alternate Colors == | ||
| Line 1,316: | Line 1,316: | ||
}} | }} | ||
{{NotablePlayersTableRow-UMVC3 | {{NotablePlayersTableRow-UMVC3 | ||
| name =2nd Team | | name =ImmaAriesBaby's<br>2nd Team | ||
| charaColorOne = {{CharaColor-UMVC3|Captain_America|3}} | | charaColorOne = {{CharaColor-UMVC3|Captain_America|3}} | ||
| charaColorTwo = {{CharaColor-UMVC3|Taskmaster|Alt}} | | charaColorTwo = {{CharaColor-UMVC3|Taskmaster|Alt}} | ||
| Line 1,338: | Line 1,338: | ||
}} | }} | ||
{{NotablePlayersTableRow-UMVC3 | {{NotablePlayersTableRow-UMVC3 | ||
| name =2nd Team | | name =HonzoGonzo's<br>2nd Team | ||
| charaColorOne = {{CharaColor-UMVC3|Felicia|2}} | | charaColorOne = {{CharaColor-UMVC3|Felicia|2}} | ||
| charaColorTwo = {{CharaColor-UMVC3|Taskmaster|3}} | | charaColorTwo = {{CharaColor-UMVC3|Taskmaster|3}} | ||
| Line 1,410: | Line 1,410: | ||
| region =Flordia<br>(East Coast) | | region =Flordia<br>(East Coast) | ||
| status =Active | | status =Active | ||
| socials = [https://twitter.com/ZonanFreely Twitter]<br>[https://www.twitch.tv/ZonanFreely Twitch] | | socials = [https://twitter.com/ZonanFreely Twitter]<br>[https://www.twitch.tv/ZonanFreely Twitch]<br>[https://www.start.gg/user/c8cdfd3a Start.gg_Profile] | ||
| notes = | | notes = | ||
| replaysLink = [https://replaytheater.app/?game=umvc3&p1=Ronan+Healy Link] | | replaysLink = [https://replaytheater.app/?game=umvc3&p1=Ronan+Healy Link] | ||
Revision as of 04:46, 22 January 2023
Introduction
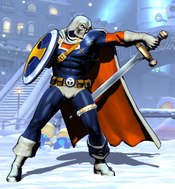
Although he does not have any actual superpowers, Tony Masters was seemingly born with an enhanced form of photographic memory called "photographic reflexes". After witnessing a person performing any physical movement, Tony is able to replicate it perfectly. He eventually created the persona of Taskmaster, working as a mercenary and using his unique ability to mimic the combat styles of superheroes and other notable fighters. While he is primarily depicted as a villain, Taskmaster is motivated mainly by money and has been shown to fight alongside heroes when it is in his interest to do so.
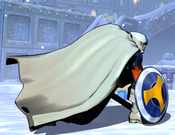
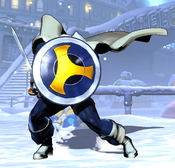
In UMvC3, Taskmaster is an all-arounder who has moves thematically borrowed from Hawkeye, Captain America, and Spider-Man, paired with a handful of original abilities. Taskmaster is slow - both his mobility and his attacks have poor speed, but he has solid range on his sword attacks and a versatile moveset. He uses Aim Master (236X) to fight from a distance, and can blow through his opponent's own projectiles with Charging Star (4H). Although they are difficult to use effectively, Taskmaster also has several Counter skills, as well as an Unblockable via the followups to his Sword Master (623X) special.
| Strengths | Weaknesses |
|---|---|
|
|
Unique Mechanics
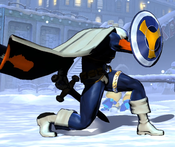
His dashing animation is somewhat unique in that he spends the first 5 frames stationary, then starts to accelerate. After the first few frames, he lowers his body (and hurtbox) while moving meaning he can potentially dodge aerial attacks, dash under opponents during incoming or aerial opponent in blockstun from assists.
As a result, plink-dashing slower than usual compared to other characters is optimal (because he accelerates later in its animation).
| Taskmaster | |
|---|---|
| Character Data | |
| Health | 1,100,000 |
| Ground Magic Series | Stronger |
| Air Chain Combo Limit | Three |
| Forward Dash Duration | 35 frames |
| Backdash Duration | 35 frames |
| Jump Duration | 46 frames |
| Superjump Duration | 81 frames |
| Walljump? | No |
| Doublejump? | No |
| Airdash? | No |
| X-Factor Damage Boost (1/2/3) | 30% / 55% / 80% |
| X-Factor Speed Boost (1/2/3) | 10% / 15% / 20% |
| Minimum Damage Scaling (Normals, Specials) | 10%, 20% |
| Minimum Damage Scaling (Hypers) | 33% |
| Minimum Damage Scaling (X-Factor) | 35% |
Move List
Assists
| Assist |
Damage | Startup | Active | Recovery |
|---|---|---|---|---|
| 50,000 x3 | 45 | 9 | 113 (as a crossover assist) 83 (as a assist) | |
| On Hit | On Block | Guard | Properties | |
| - | - | Priority: Low, Durability: 3 per projectile | ||
|
THC Hyper: Legion Arrow L+M (Horizontal). Taskmaster is unique in that all three of his assists are different versions of the same move. Regardless of the assist choice, Taskmaster's assist will be a variant of his Aim Master special, firing three arrows. The assist choice only changes the trajectory of the arrows. Additionally, Taskmaster's THC Hyper is always Legion Arrow, but the assist choice will alter the trajectory of the hyper's arrows to match that of the assist. L Assist fires the arrows directly, horizontally forward. It is the most traditional and straightforward to use. It also recovers the fastest of the three. This assist is notable because its total durability across all three arrows is 9, which is slightly higher than many similar-coverage assists like Doom's Plasma Beam or Iron Man's Unibeam. If called at roughly the same time as one of these assists from the opponent, Taskmaster's arrows will completely nullify the beam, with one surviving arrow still able to hit the opponent. | ||||
| Assist |
Damage | Startup | Active | Recovery |
|---|---|---|---|---|
| 50,000 x3 | 45 | 9 | 118 (as a crossover assist) 88 (as a assist) | |
| On Hit | On Block | Guard | Properties | |
| - | - | Priority: Low, Durability: 3 per projectile | ||
|
THC Hyper: Legion Arrow M+H (Parabolic). In this version, Taskmaster fires the arrows at a slight upwards angle. They travel through the air at roughly jump height and then start to arc back towards the ground. | ||||
| Assist |
Damage | Startup | Active | Recovery |
|---|---|---|---|---|
| 50,000 x3 | 45 | 9 | 118 (as a crossover assist) 88 (as a assist) | |
| On Hit | On Block | Guard | Properties | |
| - | - | Priority: Low, Durability: 3 per projectile | ||
|
THC Hyper: Legion Arrow L+H (Upward). Taskmaster fires his arrows almost directly upwards. The arrows reach roughly superjump height, then arc and spread out, falling back down towards the ground. The farthest reaching arrow will land a little farther than halfscreen distance. This assist stands out from the other variants in that it can hit OTG on the way down, although it is typically too slow to use this way in combos. It is also a rare example of an assist that can (technically) hit opponents at superjump height. | ||||
Ground Normals
| L |
Damage | Startup | Active | Recovery |
|---|---|---|---|---|
| 48,000 | 5 | 3 | 10 | |
| On Hit | On Block | Guard | Properties | |
| +2 | +1 | - | ||
|
5L has minimal uses other than being a situational anti air.
| ||||
| M |
Damage | Startup | Active | Recovery |
|---|---|---|---|---|
| 40,000 x2 | 8 | 2(1)3 | 17 | |
| On Hit | On Block | Guard | Properties | |
| 0 | -2 | - | ||
|
5M is a double-hitting attack making it great against armored attacks and has a large amount of hit-stun making it the best for hit confirming into combos but 2M is better for damage due to extra hit scaling damage worse.
| ||||
| H |
Damage | Startup | Active | Recovery |
|---|---|---|---|---|
| 90,000 | 11 | 3 | 20 | |
| On Hit | On Block | Guard | Properties | |
| +2 | 0 | - | ||
|
Taskmaster steps forward slightly giving 5H more range compared to 5M allowing for easy pickups from assists.
| ||||
| L |
Damage | Startup | Active | Recovery |
|---|---|---|---|---|
| 45,000 | 5 | 3 | 14 | |
| On Hit | On Block | Guard | Properties | |
| -2 | -3 | - | ||
|
2L has great range for a light normal, and is very fast at 5 frame startup.
| ||||
| M |
Damage | Startup | Active | Recovery |
|---|---|---|---|---|
| 65,000 | 8 | 3 | 19 | |
| On Hit | On Block | Guard | Properties | |
| -2 | -4 | - | ||
|
2M is Taskmaster's longest low attack. 2M is also a low-profile attack allowing Taskmaster to evade underneath many attacks that he cannot normally avoid by crouching or using other normals.
| ||||
| H |
Damage | Startup | Active | Recovery |
|---|---|---|---|---|
| 80,000 | 10 | 3 | 23 | |
| On Hit | On Block | Guard | Properties | |
| -2 | -3 | |||
|
2H launches them perfectly into Web Swing, Web Swing can miss if 5H is used because the opponent has a low profile crouch like Zero or Morrigan.
| ||||
Aerial Normals
| L j. |
Damage | Startup | Active | Recovery |
|---|---|---|---|---|
| 50,000 | 5 | 3 | 15 | |
| On Hit | On Block | Guard | Properties | |
| +13 | +12 | - | ||
|
j.L is used in many combo extensions. | ||||
| M j. |
Damage | Startup | Active | Recovery |
|---|---|---|---|---|
| 68,000 | 7 | 4 | 17 | |
| On Hit | On Block | Guard | Properties | |
| +16 | +14 | - | ||
|
j.M is used in many combo extensions and as combo filler. When comboing with this move, keep the opponent slightly below as j.M has a large hit box under his leg. j.M's animation is based on Spider-Man's j.M. | ||||
| H j. |
Damage | Startup | Active | Recovery |
|---|---|---|---|---|
| 50,000 x2 | 11 | 4 | 21 | |
| On Hit | On Block | Guard | Properties | |
| +20 | +18 | - | ||
|
j.H is double-hitting attack using as combo filler and landing against armored attacks. | ||||
| S j. |
Damage | Startup | Active | Recovery |
|---|---|---|---|---|
| 90,000 | 11 | 3 | 27 | |
| On Hit | On Block | Guard | Properties | |
| +17 | +15 | |||
|
j.S is a downward slash with a large hitbox in front of Taskmaster, and if it's used as a combo finisher should hit opponents with the early hit, slightly above Taskmaster. j.S is potentially the best aerial to land with as it does great damage while being single hit. | ||||
Command Normals
| H |
Damage | Startup | Active | Recovery |
|---|---|---|---|---|
| 80,000 | 11 | 13 | 16 | |
| On Hit | On Block | Guard | Properties | |
| +7 | -6 | |||
|
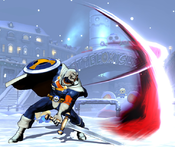
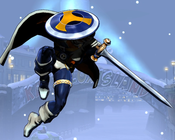
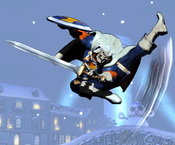
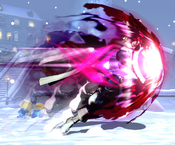
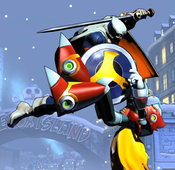
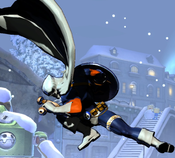
Taskmaster swings from a grappling rope, advancing forward while kicking. This is the closest thing Taskmaster has to real aerial mobility, and allows him to maintain pressure or extend combos. Web Swing (6H) can be performed on the grounded or airborne. The grounded version puts Taskmaster airborne, and he will recover from the move in a normal jump state.
Taskmaster can cancel Web Swing (6H) into Aim Master at any time and can control velocity depending how early or how late in the animation it canceled.
| ||||
| H |
Damage | Startup | Active | Recovery |
|---|---|---|---|---|
| 95,000 | 6 | 9 | 29 | |
| On Hit | On Block | Guard | Properties | |
| - | -15 | |||
|
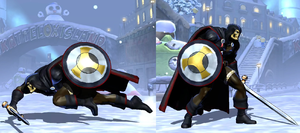
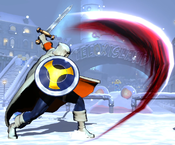
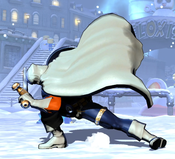
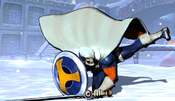
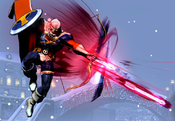
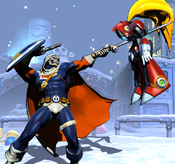
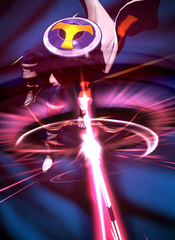
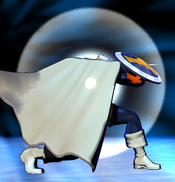
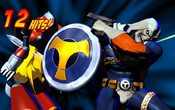
Taskmaster charges a short distance forward while protected by his shield. Like with Web Swing (6H), it is an advancing attack that can be used to approach and as a combo tool. Charging Star (4H) also has a fairly good hitbox and has a fairly good chance of beating or trading with an opponent's physical attacks as well. Taskmaster is immune to low and medium priority projectiles (even unconventional attacks like Flame Carpet) during most of this move's duration, although not quite from frame 1. Taskmaster can cancel Charging Star (4H) (on hit or whiff) with:
Charging Star's animation is based on Captain America's Charging Star. | ||||
Special Moves
| Horizontal |
Damage | Startup | Active | Recovery |
|---|---|---|---|---|
| 50,000 x1 ~ x3 | 13 ~ 21 | 1 ~ 9 | 37 ~ 21 (Grounded Version) Until Grounded (Air Version) | |
| On Hit | On Block | Guard | Properties | |
| -13 ~ +3 | -15 ~ +1 | |||
| Diagonal |
Damage | Startup | Active | Recovery |
| 50,000 x1 ~ x3 | 13 ~ 21 | 1 ~ 9 | 42 ~ 26 (Grounded Version) Until Grounded (Air Version) | |
| On Hit | On Block | Guard | Properties | |
| -18 ~ -2 | -20 ~ -4 | |||
| Vertical |
Damage | Startup | Active | Recovery |
| 50,000 x1 ~ x3 | 13 ~ 21 | 1 ~ 9 | 47 ~ 31 (Grounded Version) Until Grounded (Air Version) | |
| On Hit | On Block | Guard | Properties | |
| -23 ~ -7 | -25 ~ -9 | |||
|
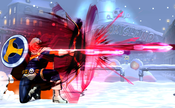
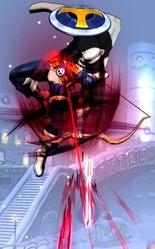
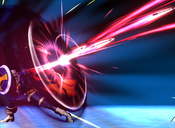
Taskmaster pulls out a bow and fires one to three arrows. This special can be charged by holding the button. Charging causes Taskmaster to fire additional arrows. In most cases, the charged version is preferable, as the additional charging time is compensated by a faster recovery, and the charged version has much higher total damage and durability. Fully charged Aim Master halts Taskmasters vertical momentum, allow him to stall. Two arrows doesn't stall him in the air and allows him to be significantly more mobile in neutral, and allows him to start combos from Aerial Aim Master.
| ||||
| S |
Damage | Startup | Active | Recovery |
|---|---|---|---|---|
| 50,000 + 70,000 | 15 | 3 | 28 | |
| On Hit | On Block | Guard | Properties | |
| - | -3 | |||
|
Sting Master (236S) is a hitgrab (blockable) in which Taskmaster stabs directly ahead with his sword. If it hits, he and the opponent are pulled into an animation in which Taskmaster deals one additional hit, ending with the opponent in a Hard Knockdown next to him (this animation is invincible and ignores projectiles and assists). Sting Master can be canceled from Charging Star (4H), and is safe on block making Charging Star (4H) safer to use in neutral. This cancel is vulnerable to opponents push-blocking the initial Charging Star leaving you wide open and in the animation of the Sting Master. This move is useful as a combo ender for Taskmaster, as he can capitalize on the Hard Knockdown with Neutral Jumping > Fully charged Aim Master (j.236H) > Legion Arrow (236L+H). | ||||
| L |
Damage | Startup | Active | Recovery |
|---|---|---|---|---|
| 50,000 | 31 | 5 | 22 | |
| On Hit | On Block | Guard | Properties | |
| - | -4 | |||
| M |
Damage | Startup | Active | Recovery |
| 50,000 | 47 | 5 | 22 | |
| On Hit | On Block | Guard | Properties | |
| - | -4 | |||
| H |
Damage | Startup | Active | Recovery |
| 50,000 | 57 | 5 | 22 | |
| On Hit | On Block | Guard | Properties | |
| - | -4 | |||
|
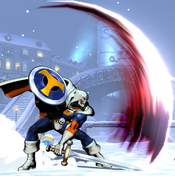
Taskmaster readies himself, then delivers a large arcing swing with his sword. Despite the animation, this move is not an overhead, and can be blocked standing or crouching. Sword Master is mainly notable because each version has a special follow-up sequence available when the initial Sword Master hit is blocked. These follow-up chains include Unblockable attacks. Unfortunately, it is not possible to access these follow-ups on hit or on whiff, and an opponent can always Pushblock the initial hit to escape the follow-up sequence, so these attacks are very rarely useful. The button strength determines the distance traveled before the downward swing:
The follow-up sequences for each move are detailed below. | ||||
Sword Master L Follow-ups
| H |
Damage | Startup | Active | Recovery |
|---|---|---|---|---|
| 30,000 | 24 | 5 | 16 | |
| On Hit | On Block | Guard | Properties | |
| +4 | - | - | ||
|
Unblockable attack. If Taskmaster gets an opponent to block the initial swing but not pushblock it, he can open them up with this short-range attack, then finish the sequence for moderate damage. | ||||
| H |
Damage | Startup | Active | Recovery |
|---|---|---|---|---|
| 10,000 + 50,000 | 15 | 5 | 1 | |
| On Hit | On Block | Guard | Properties | |
| - | - | |||
|
Sequence ender that functions almost the same as Taskmaster's regular Sting Master (236S) special. Ends in a Hard Knockdown that Taskmaster can follow up with an OTG Air Legion Arrow. | ||||
Sword Master M Follow-ups
| H |
Damage | Startup | Active | Recovery |
|---|---|---|---|---|
| 30,000 | 24 | 5 | 16 | |
| On Hit | On Block | Guard | Properties | |
| +4 | - | - | ||
|
Unblockable attack. If Taskmaster gets an opponent to block the initial swing but not pushblock it, he can open them up with this short-range attack, then finish the sequence for moderate damage. | ||||
| M |
Damage | Startup | Active | Recovery |
|---|---|---|---|---|
| 28,000 | 13 | 5 | 21 | |
| On Hit | On Block | Guard | Properties | |
| -1 | -3 | - | ||
|
Filler. | ||||
| H |
Damage | Startup | Active | Recovery |
|---|---|---|---|---|
| 30,000 | 20 | 5 | 16 | |
| On Hit | On Block | Guard | Properties | |
| +4 | +2 | - | ||
|
Filler. | ||||
| H |
Damage | Startup | Active | Recovery |
|---|---|---|---|---|
| 10,000 + 50,000 | 15 | 5 | 1 | |
| On Hit | On Block | Guard | Properties | |
| - | - | |||
|
Sequence ender that functions almost the same as Taskmaster's regular Sting Master (236S) special. Ends in a Hard Knockdown that Taskmaster can follow up with an OTG Air Legion Arrow. | ||||
Sword Master H Follow-ups
| H |
Damage | Startup | Active | Recovery |
|---|---|---|---|---|
| 30,000 | 24 | 5 | 16 | |
| On Hit | On Block | Guard | Properties | |
| +4 | - | - | ||
|
Unblockable attack. If Taskmaster gets an opponent to block the initial swing but not pushblock it, he can open them up with this short-range attack, then finish the sequence for moderate damage. | ||||
| M |
Damage | Startup | Active | Recovery |
|---|---|---|---|---|
| 28,000 | 13 | 5 | 21 | |
| On Hit | On Block | Guard | Properties | |
| -1 | -3 | - | ||
|
Filler. | ||||
| H |
Damage | Startup | Active | Recovery |
|---|---|---|---|---|
| 30,000 | 20 | 5 | 16 | |
| On Hit | On Block | Guard | Properties | |
| +4 | +2 | - | ||
|
Filler. | ||||
| H |
Damage | Startup | Active | Recovery |
|---|---|---|---|---|
| 25,000 | 21 | 3 | 22 | |
| On Hit | On Block | Guard | Properties | |
| 0 | -2 | - | ||
|
Filler. | ||||
| M |
Damage | Startup | Active | Recovery |
|---|---|---|---|---|
| 31,000 | 18 | 4 | 17 | |
| On Hit | On Block | Guard | Properties | |
| +4 | +2 | - | ||
|
Filler. | ||||
| H |
Damage | Startup | Active | Recovery |
|---|---|---|---|---|
| 10,000 + 50,000 | 15 | 5 | 1 | |
| On Hit | On Block | Guard | Properties | |
| - | - | |||
|
Sequence ender that functions almost the same as Taskmaster's regular Sting Master (236S) special. Ends in a Hard Knockdown that Taskmaster can follow up with an OTG Air Legion Arrow. | ||||
Hyper Combos
| Horizontal |
Damage | Startup | Active | Recovery |
|---|---|---|---|---|
| 20,000 x25 ~ x50 | 10+1 | 77 | 44 (Grounded Version) Until Grounded (Air Version) | |
| On Hit | On Block | Guard | Properties | |
| - | -22 | |||
| Diagonal |
Damage | Startup | Active | Recovery |
| 20,000 x25 ~ x50 | 10+1 | 77 | 44 (Grounded Version) Until Grounded (Air Version) | |
| On Hit | On Block | Guard | Properties | |
| - | -22 | |||
| Vertical |
Damage | Startup | Active | Recovery |
| 20,000 x25 ~ x50 | 10+1 | 77 | 44 (Grounded Version) Until Grounded (Air Version) | |
| On Hit | On Block | Guard | Properties | |
| - | -22 | |||
|
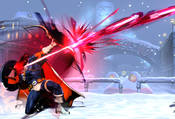
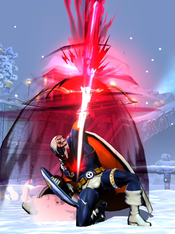
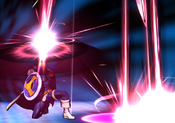
Taskmaster draws his bow and fires a barrage of up to 50 arrows, dealing heavy damage. This hyper is unique in that Taskmaster can aim the arrows by using different two-button combinations to activate the hyper:
Due to the amount of arrows, Legion Arrow can over-power other multi hitting projectile hypers like Doctor Doom's Photon Array and Sentinel's Hyper Sentinel Force. This hyper is Taskmaster's standard combo ender, and is also an important zoning threat as Taskmaster can use it to tag extra damage on to a regular arrow hit, or to punish an assist call. Like other supers Legion Arrow can trade with Snapbacks due to 1 frame startup after cinematic. | ||||
Universal Mechanics
| H j. or j. |
Damage | Startup | Active | Recovery |
|---|---|---|---|---|
| 80,000 | 1 | 1 | - | |
| On Hit | On Block | Guard | Properties | |
| - | - | |||
|
Both airthrows spikes the opponent straight down to the ground, while Taskmaster briefly floats above them.
| ||||
| Assist |
Damage | Startup | Active | Recovery |
|---|---|---|---|---|
| 50,000 | 2 | 3 | 20 | |
| On Hit | On Block | Guard | Properties | |
| - | 0 | Snapback | ||
|
Combos into Snapback:
| ||||
| Assist Hold Hold |
Damage | Startup | Active | Recovery |
|---|---|---|---|---|
| 27,000 | - | 20 | 34 | |
| On Hit | On Block | Guard | Properties | |
| - | -15 | |||
|
- | ||||
Team Position
Taskmaster is a versatile character that could reasonably be placed in any team position. Although is is most commonly placed in the Point position, Second and Anchor Taskmasters have also seen success. Taskmaster's assist is solid, although rarely the best assist on a team, and he can provide support for his teammates in the backline via that assist or by utilizing his solid DHC options. Taskmaster is a solid choice for activating X-Factor, as it can compensate for his naturally mediocre damage output (especially after throws), and also makes his projectile game into a legitimate chip damage threat.
Anchor Taskmaster has a hard time making timely solo 1 vs 3 comeback since his mix up game isn't fantastic.
Notable Synergies
Sentinel: Sentinel Force (Charge) is a generically strong assist that Taskmaster greatly benefits from having access to. Taskmaster has two approach tools in Spidey Swing and Charging Star that are actually fairly minus on block, but Taskmaster can compensate for this weakness by calling drones alongside the attack, allowing him to approach (or retreat) safely. Additionally, Sentinel assist allows Taskmaster to follow up after his OTG Hyper, as the drones will continue to juggle the opponent after the hyper ends when spaced correctly.
Players to Watch: ImmaAriesBaby (Taskmaster/Sentinel/Doom)
Other Players to Watch:
HonzoGonzo (Taskmaster/Doom/Ammy),
DJ Houshen (Felicia/Taskmaster/Vergil, Felicia/Taskmaster/Skrull),
Adelheid Stark (Taskmaster/Spencer/Ammy),
WhiteBlack (Wesker/Taskmaster/Vergil),
NeoKarsh (Wolverine/Spencer/Taskmaster),
OneWolf (Nova/Taskmaster/Vergil)
Moises (Taskmaster/Crimson Viper/Amaterasu)
Double A (Nemesis/Hulk/Taskmaster)
tabs (Taskmaster/Dante/Hawkeye)
TBA
Amaterasu's Cold Star
Crimson Viper's Seismic Hammer
Dante's Jam Session
Spenzer's Wire Grapple (Slant Shot)
Nemesis' Rocket Launcher
Vergil's Rapid Slash
Wesker's Samurai Edge (Lower)
Deadpool's Katana-Rama
Dormammu's Black Hole
Hawkeye's Quick Shot (Greyhound)
Magneto's Electromagnetic Disruptor
Shuma-Gorath's Mystic Ray
Combos
Solo Combos
X-Factor Combos
TBW
Sample Team Combos
Task/Doom/Sentinel
Nova/Taskmaster/Dante
Nova/Taskmaster/Dante pt.2
TAC Infinites
Videos and External Resources
Alternate Colors
Notable Players
| Name | Team | Region | Status | Notes | Matches |
|---|---|---|---|---|---|
| Adelheid Stark | ??? | Inactive | Link
| ||
| DJ Houshen | West Coast | Inactive? | Link
| ||
| Double A | Ohio (East Coast) |
Active | Link
| ||
| ImmaAriesBaby | Ohio (East Coast) |
Active | Link
| ||
| ImmaAriesBaby's 2nd Team |
Link
| ||||
| HonzoGonzo | California (West Coast) |
Inactive? | Link
| ||
| HonzoGonzo's 2nd Team |
Link
| ||||
| KillerKai | West Coast? | Inactive? | Link
| ||
| Moises | Chile | Inactive? | Link
| ||
| Moons | New York (East Coast) |
Inactive | Link
| ||
| NeoKarsh | ??? | Inactive? | Link
| ||
| OneWolf | Texas (East Coast) |
Active | Link
| ||
| Ronan Healy | Flordia (East Coast) |
Active | Link
| ||
| Sondelight | North Carolina (East Coast) |
Active | Link
| ||
| tabs | West Coast? | Active | Part of the Modding Community | Link
| |
| WhiteBlack | France | Inactive? | Link |
