Mr. yagami91 (talk | contribs) mNo edit summary |
Mr. yagami91 (talk | contribs) m (→Combos) |
||
| (One intermediate revision by the same user not shown) | |||
| Line 1,045: | Line 1,045: | ||
==Combos== | ==Combos== | ||
General notes: | |||
*when landing from a standing MSA, remember to do the bnb's rather than the MSA ender (some Bnb's are more favored than others in this secnario) | |||
*for the most part, counterwire combos are dependant on where you landed the move. | |||
'''BnBs:''' | '''BnBs:''' | ||
* cr.A /cl.A / cl.B, df.C, qcb P | * cr.A /cl.A / cl.B, df.C, qcb P | ||
| Line 1,064: | Line 1,068: | ||
:if you happen to anti-air an opponent with df.C then you can cancel into dp K to add on abit of extra damage. Requires you to hit the opponent as soon as there close the ground in order for this to work, thus making it not as useful but still worth trying. | :if you happen to anti-air an opponent with df.C then you can cancel into dp K to add on abit of extra damage. Requires you to hit the opponent as soon as there close the ground in order for this to work, thus making it not as useful but still worth trying. | ||
* | * qcb P (CH), st.A/qcfx2 P | ||
:CH vapour cannon into st.A or super. Unfortuantely in this game, maxima recovers too slowly to do almost anything from a CH vapour cannon and even then to get the follow-ups you have need to be in the correct space to do so, doing it near/in the corner or near the side of the screen (dpending on which side your on) will cause the opponent to cross-up. In terms of the most consistent follow-ups, st.A is your best (and safest) bet, while qcfx2 P is the better one for damage (albeit abit more risker). also remember to time qcfx2 P abit early as doing it abit too late with cause the opponent to remain grounded, only suffering just one hit and leaving you punishable in the process. | :CH vapour cannon into st.A or super. Unfortuantely in this game, maxima recovers too slowly to do almost anything from a CH vapour cannon and even then to get the follow-ups you have need to be in the correct space to do so, doing it near/in the corner or near the side of the screen (dpending on which side your on) will cause the opponent to cross-up. In terms of the most consistent follow-ups, st.A is your best (and safest) bet, while qcfx2 P is the better one for damage (albeit abit more risker). also remember to time qcfx2 P abit early as doing it abit too late with cause the opponent to remain grounded, only suffering just one hit and leaving you punishable in the process. | ||
Latest revision as of 03:03, 1 October 2022
| 鋼のヒューマンウェポン, Steel Human Weapon | |
|---|---|
| Tier Placement | C |
| Ratio Cost (Sarsen) | 2 Points (2 Points Leader) of 15 |
| Ratio Cost (China) | 2 Points of 20 |
| Best Position | Anchor |
| Good LDM? | Trash |
| Crouch Height | High |
| Wakeup Speed | 27 Frames |
| Stun Value | 1000 |
Introduction
「 Maxima 」
| Strengths | Weaknesses |
|---|---|
|
|
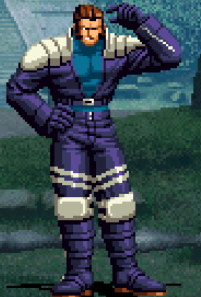
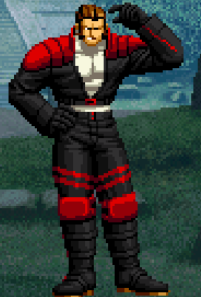
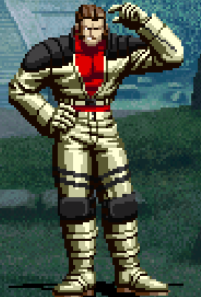
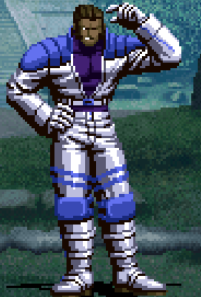
Colors

|

|

|

|
Movelist
UNDER CONSTRUCTION
Normals
Far Normals
| Damage | Counter Dmg | Guard | Guard Damage | Damage Scaling | Stun | CH Stun | Meter | Cancel Properties | Startup | Active | Recovery | Total | Hit Advantage | Block Advantage | Invulnerability |
|---|---|---|---|---|---|---|---|---|---|---|---|---|---|---|---|
| - | - | Mid | - | - | - | - | - | - | - | - | - | - | - | - | - |
Close Range Normals
| Damage | Counter Dmg | Guard | Guard Damage | Damage Scaling | Stun | CH Stun | Meter | Cancel Properties | Startup | Active | Recovery | Total | Hit Advantage | Block Advantage | Invulnerability |
|---|---|---|---|---|---|---|---|---|---|---|---|---|---|---|---|
| - | - | Mid | - | - | - | - | - | - | - | - | - | - | - | - | - |
Crouching Normals
| Damage | Counter Dmg | Guard | Guard Damage | Damage Scaling | Stun | CH Stun | Meter | Cancel Properties | Startup | Active | Recovery | Total | Hit Advantage | Block Advantage | Invulnerability |
|---|---|---|---|---|---|---|---|---|---|---|---|---|---|---|---|
| - | - | Mid | - | - | - | - | - | - | - | - | - | - | - | - | - |
| Damage | Counter Dmg | Guard | Guard Damage | Damage Scaling | Stun | CH Stun | Meter | Cancel Properties | Startup | Active | Recovery | Total | Hit Advantage | Block Advantage | Invulnerability |
|---|---|---|---|---|---|---|---|---|---|---|---|---|---|---|---|
| - | - | Low | - | - | - | - | - | - | - | - | - | - | - | - | - |
| Damage | Counter Dmg | Guard | Guard Damage | Damage Scaling | Stun | CH Stun | Meter | Cancel Properties | Startup | Active | Recovery | Total | Hit Advantage | Block Advantage | Invulnerability |
|---|---|---|---|---|---|---|---|---|---|---|---|---|---|---|---|
| - | - | Mid | - | - | - | - | - | None | - | - | - | - | - | - | - |
| Damage | Counter Dmg | Guard | Guard Damage | Damage Scaling | Stun | CH Stun | Meter | Cancel Properties | Startup | Active | Recovery | Total | Hit Advantage | Block Advantage | Invulnerability |
|---|---|---|---|---|---|---|---|---|---|---|---|---|---|---|---|
| - | - | Low | - | - | - | - | - | - | - | - | - | - | KD | - | - |
Neutral Jumping Normals
| Damage | Counter Dmg | Guard | Guard Damage | Damage Scaling | Stun | CH Stun | Meter | Cancel Properties | Startup | Active | Recovery | Total | Hit Advantage | Block Advantage | Invulnerability |
|---|---|---|---|---|---|---|---|---|---|---|---|---|---|---|---|
| - | - | Overhead | - | - | - | - | - | - | - | - | - | - | - | - | - |
Diagonal Jump Normals
| Damage | Counter Dmg | Guard | Guard Damage | Damage Scaling | Stun | CH Stun | Meter | Cancel Properties | Startup | Active | Recovery | Total | Hit Advantage | Block Advantage | Invulnerability |
|---|---|---|---|---|---|---|---|---|---|---|---|---|---|---|---|
| - | - | Overhead | - | - | - | - | - | - | - | - | - | - | - | - | - |
Throws
| Damage | Counter Dmg | Guard | Guard Damage | Damage Scaling | Stun | CH Stun | Meter | Cancel Properties | Startup | Active | Recovery | Total | Hit Advantage | Block Advantage | Invulnerability |
|---|---|---|---|---|---|---|---|---|---|---|---|---|---|---|---|
| - | - | Throw | - | - | - | - | - | - | - | - | - | - | - | - | - |
MSA
| Damage | Counter Dmg | Guard | Guard Damage | Damage Scaling | Stun | CH Stun | Meter | Cancel Properties | Startup | Active | Recovery | Total | Hit Advantage | Block Advantage | Invulnerability |
|---|---|---|---|---|---|---|---|---|---|---|---|---|---|---|---|
| - | - | Mid | - | - | - | - | - | - | - | - | - | - | - | - | Strike/Projectile |
| Damage | Counter Dmg | Guard | Guard Damage | Damage Scaling | Stun | CH Stun | Meter | Cancel Properties | Startup | Active | Recovery | Total | Hit Advantage | Block Advantage | Invulnerability |
|---|---|---|---|---|---|---|---|---|---|---|---|---|---|---|---|
| - | - | Mid | - | - | - | - | - | - | - | - | - | - | - | - | - |
Command Normals
| Damage | Counter Dmg | Guard | Guard Damage | Damage Scaling | Stun | CH Stun | Meter | Cancel Properties | Startup | Active | Recovery | Total | Hit Advantage | Block Advantage | Invulnerability |
|---|---|---|---|---|---|---|---|---|---|---|---|---|---|---|---|
| - | - | Mid | - | - | - | - | - | - | - | - | - | - | - | - | - |
Special Moves
| Version | Damage | Counter Dmg | Guard | Guard Damage | Damage Scaling | Stun | CH Stun | Meter | Cancel Properties | Startup | Active | Recovery | Total | Hit Advantage | Block Advantage | Invulnerability |
|---|---|---|---|---|---|---|---|---|---|---|---|---|---|---|---|---|
| 1st Rekka Maxima Scramble |
- | - | - | - | - | - | - | - | - | - | - | - | - | - | - | - |
| Version | Damage | Counter Dmg | Guard | Guard Damage | Damage Scaling | Stun | CH Stun | Meter | Cancel Properties | Startup | Active | Recovery | Total | Hit Advantage | Block Advantage | Invulnerability |
| 2nd Rekka Double Bomber |
- | - | - | - | - | - | - | - | - | - | - | - | - | - | - | - |
| Version | Damage | Counter Dmg | Guard | Guard Damage | Damage Scaling | Stun | CH Stun | Meter | Cancel Properties | Startup | Active | Recovery | Total | Hit Advantage | Block Advantage | Invulnerability |
| 3rd Rekka Bulldog Press |
- | - | - | - | - | - | - | - | - | - | - | - | - | - | - | - |
| Version | Damage | Counter Dmg | Guard | Guard Damage | Damage Scaling | Stun | CH Stun | Meter | Cancel Properties | Startup | Active | Recovery | Total | Hit Advantage | Block Advantage | Invulnerability |
|---|---|---|---|---|---|---|---|---|---|---|---|---|---|---|---|---|
| 1st Rekka Maxima Scramble |
- | - | - | - | - | - | - | - | - | - | - | - | - | - | - | - |
| Version | Damage | Counter Dmg | Guard | Guard Damage | Damage Scaling | Stun | CH Stun | Meter | Cancel Properties | Startup | Active | Recovery | Total | Hit Advantage | Block Advantage | Invulnerability |
| 2nd Rekka Double Bomber |
- | - | - | - | - | - | - | - | - | - | - | - | - | - | - | - |
| Version | Damage | Counter Dmg | Guard | Guard Damage | Damage Scaling | Stun | CH Stun | Meter | Cancel Properties | Startup | Active | Recovery | Total | Hit Advantage | Block Advantage | Invulnerability |
| 3rd Rekka Bulldog Press |
- | - | - | - | - | - | - | - | - | - | - | - | - | - | - | - |
| Damage | Counter Dmg | Guard | Guard Damage | Damage Scaling | Stun | CH Stun | Meter | Cancel Properties | Startup | Active | Recovery | Total | Hit Advantage | Block Advantage | Invulnerability |
|---|---|---|---|---|---|---|---|---|---|---|---|---|---|---|---|
| - | - | - | - | - | - | - | - | - | - | - | - | - | - | - | - |
Super Moves
| Damage | Counter Dmg | Guard | Guard Damage | Damage Scaling | Stun | CH Stun | Meter | Cancel Properties | Startup | Active | Recovery | Total | Hit Advantage | Block Advantage | Invulnerability |
|---|---|---|---|---|---|---|---|---|---|---|---|---|---|---|---|
| - | - | - | - | - | - | - | - | - | - | - | - | - | - | - | - |
LDM
| Damage | Counter Dmg | Guard | Guard Damage | Damage Scaling | Stun | CH Stun | Meter | Cancel Properties | Startup | Active | Recovery | Total | Hit Advantage | Block Advantage | Invulnerability |
|---|---|---|---|---|---|---|---|---|---|---|---|---|---|---|---|
| - | - | - | - | - | - | - | - | - | - | - | - | - | - | - | - |
Combos
General notes:
- when landing from a standing MSA, remember to do the bnb's rather than the MSA ender (some Bnb's are more favored than others in this secnario)
- for the most part, counterwire combos are dependant on where you landed the move.
BnBs:
- cr.A /cl.A / cl.B, df.C, qcb P
- light confirm into vapour cannon. decent confirm but the damage isn't too impressive. you can do this with heavies but the slighty added pushback on heavies and df.C will cause the vapor cannon to whiff.
- cl.B, hcb K
- low into command grab
- (j.X,) cl.C (1) / cl.D / df.C, qcf Px3 / qcb P
- maxima's main heavy starter into special combos. qcfx3 generally does more dmg than vapour cannon. also worth mentioning that you shoudln't use his command normals after heavies as they are ethier slow (f.A) or they have big pushback (df.C) that will cause special moves to whiff. If you start with cl.D or df.C, don't use a jump-in as the aformentioned buttons are too slow to combo from a jump-in.
- (j.X,) cl.C (1), qcf Px2 (SC)qcfx2 P / hcbx2 K
- Combo into super. qcfx2 P generally does more dmg
- f.A, hcbx2 K
- overhead into command grab super
- (against airborne opponents) df.C, dp K
- if you happen to anti-air an opponent with df.C then you can cancel into dp K to add on abit of extra damage. Requires you to hit the opponent as soon as there close the ground in order for this to work, thus making it not as useful but still worth trying.
- qcb P (CH), st.A/qcfx2 P
- CH vapour cannon into st.A or super. Unfortuantely in this game, maxima recovers too slowly to do almost anything from a CH vapour cannon and even then to get the follow-ups you have need to be in the correct space to do so, doing it near/in the corner or near the side of the screen (dpending on which side your on) will cause the opponent to cross-up. In terms of the most consistent follow-ups, st.A is your best (and safest) bet, while qcfx2 P is the better one for damage (albeit abit more risker). also remember to time qcfx2 P abit early as doing it abit too late with cause the opponent to remain grounded, only suffering just one hit and leaving you punishable in the process.
MSA Starters:
- qcb P (CH), MSA
- maxima's ONLY MSA set-up and not really a good one at that, mainly because you need a counter-hit in order to set it up and even then it's also space dependent.
MSA Enders:
- (After landing from MSA) dp K/qcfx2 P
- very basic MSA ender's. qcfx2 P does better dmg while dp k gives better oki.
Strategy
UNDER CONSTRUCTION
Match Up
UNDER CONSTRUCTION
| - Ash:
| - Duo Lon:
| - Shen:
| - Terry:
| - Joe:
| - Tizoc:
| - Ryo:
| - Robert:
| - Yuri:
| - Kim:
| - Chang:
| - Jhun:
| - Leona:
| - Ralf:
| - Clark:
| - Gato:
| - Billy:
| - Yamazaki:
| - King:
| - Mai:
| - Mary:
| - Benimaru:
| - Shingo:
| - Daimon:
| - Athena:
| - Hinako:
| - Malin:
| - K':
| - Maxima:
| - Whip:
| - Kyo:
| - Chizuru:
| - KUSANAGI:
| - Maki:
| - Adelheid:
| - Mukai:


