Mr. yagami91 (talk | contribs) mNo edit summary |
Mr. yagami91 (talk | contribs) m (→Combos) |
||
| (4 intermediate revisions by 2 users not shown) | |||
| Line 2: | Line 2: | ||
{| class="wikitable" style="float:right; margin-left: 10px;" | {| class="wikitable" style="float:right; margin-left: 10px;" | ||
|- | |||
! align="center" colspan="2" | 장거한 / 張巨漢, Chang Koehan | |||
|- | |- | ||
! align="center" colspan="2" | [[Image:KoF2003Portrait11-Chang.png|Center]] | ! align="center" colspan="2" | [[Image:KoF2003Portrait11-Chang.png|Center]] | ||
| Line 15: | Line 17: | ||
| '''Good LDM?''' || Great | | '''Good LDM?''' || Great | ||
|- | |- | ||
| '''Crouch Height''' || | | '''Crouch Height''' || High | ||
|- | |||
| '''Wakeup Speed''' || 27 Frames | |||
|- | |||
| '''Stun Value''' || 1000 | |||
|- | |||
|} | |} | ||
| Line 28: | Line 35: | ||
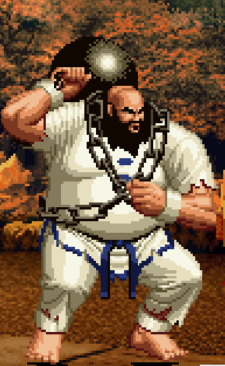
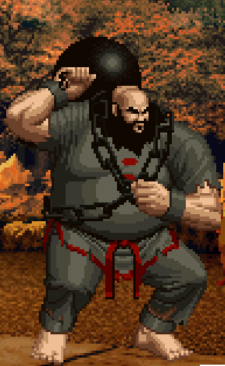
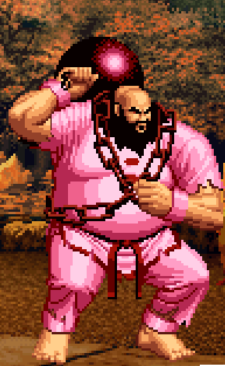
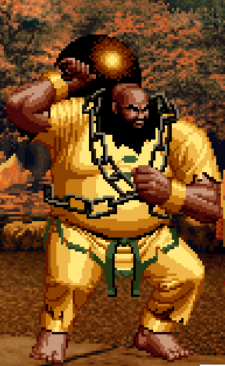
===Colors=== | ===Colors=== | ||
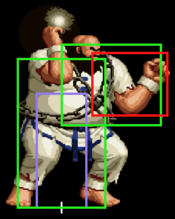
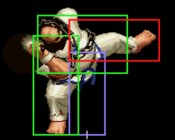
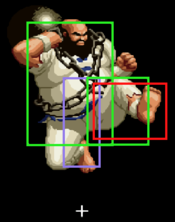
[[File:KOF2003 Chang Color A.png]] | |||
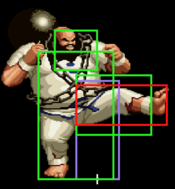
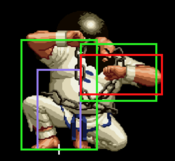
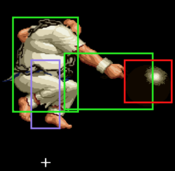
[[File:Kof2003 Chang Color B.png]] | |||
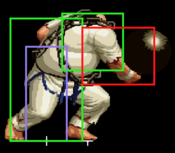
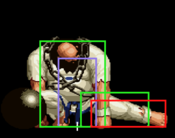
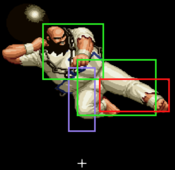
[[File:KOF2003 Chang Color C.png]] | |||
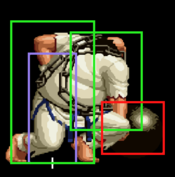
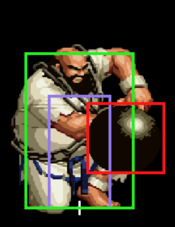
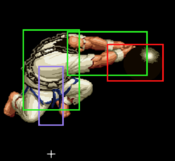
[[File:KOF2003 Chang Color D.png]] | |||
==Movelist== | ==Movelist== | ||
=== Normals === | === Normals === | ||
==== Far Normals ==== | ==== Far Normals ==== | ||
| Line 37: | Line 46: | ||
<font style="visibility:hidden" size="0"></font> | <font style="visibility:hidden" size="0"></font> | ||
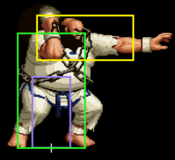
{{MoveData | {{MoveData | ||
|image= | |image=KOF2003 Chang St.LP.png | ||
|caption= | |caption= | ||
|name=st.A | |name=st.A | ||
| Line 62: | Line 71: | ||
<font style="visibility:hidden" size="0"></font> | <font style="visibility:hidden" size="0"></font> | ||
{{MoveData | {{MoveData | ||
|image= | |image=KOF2003 Chang St.LK.png | ||
|caption= | |caption= | ||
|name=st.B | |name=st.B | ||
| Line 87: | Line 96: | ||
<font style="visibility:hidden" size="0"></font> | <font style="visibility:hidden" size="0"></font> | ||
{{MoveData | {{MoveData | ||
|image= | |image=KOF2003 Chang St.HP.png | ||
|caption= | |caption= | ||
|name=st.C | |name=st.C | ||
| Line 112: | Line 121: | ||
<font style="visibility:hidden" size="0"></font> | <font style="visibility:hidden" size="0"></font> | ||
{{MoveData | {{MoveData | ||
|image= | |image=KOF2003 Chang St.HK.png | ||
|caption= | |caption= | ||
|name=st.D | |name=st.D | ||
| Line 139: | Line 148: | ||
<font style="visibility:hidden" size="0"></font> | <font style="visibility:hidden" size="0"></font> | ||
{{MoveData | {{MoveData | ||
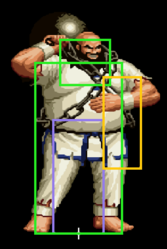
|image= | |image=KOF2003 Chang Cl.LP.png | ||
|caption= | |caption= | ||
|name=cl.A | |name=cl.A | ||
| Line 164: | Line 173: | ||
<font style="visibility:hidden" size="0"></font> | <font style="visibility:hidden" size="0"></font> | ||
{{MoveData | {{MoveData | ||
|image= | |image=KOF2003 Chang Cl.LK.png | ||
|caption= | |caption= | ||
|name=cl.B | |name=cl.B | ||
| Line 189: | Line 198: | ||
<font style="visibility:hidden" size="0"></font> | <font style="visibility:hidden" size="0"></font> | ||
{{MoveData | {{MoveData | ||
|image= | |image=KOF2003 Chang Cl.C.png | ||
|image2=KOF2003 Chang Cl.C 2.png | |||
|caption= | |caption= | ||
|name=cl.C | |name=cl.C | ||
| Line 214: | Line 224: | ||
<font style="visibility:hidden" size="0"></font> | <font style="visibility:hidden" size="0"></font> | ||
{{MoveData | {{MoveData | ||
|image= | |image=KOF2003 Chang Cl.D.png | ||
|caption= | |caption= | ||
|name=cl.D | |name=cl.D | ||
| Line 241: | Line 251: | ||
<font style="visibility:hidden" size="0"></font> | <font style="visibility:hidden" size="0"></font> | ||
{{MoveData | {{MoveData | ||
|image= | |image=KOF2003 Chang Cr.LP.png | ||
|caption= | |caption= | ||
|name=cr.A | |name=cr.A | ||
| Line 266: | Line 276: | ||
<font style="visibility:hidden" size="0"></font> | <font style="visibility:hidden" size="0"></font> | ||
{{MoveData | {{MoveData | ||
|image= | |image=KOF2003 Chang Cr.LK.png | ||
|caption= | |caption= | ||
|name=cr.B | |name=cr.B | ||
| Line 291: | Line 301: | ||
<font style="visibility:hidden" size="0"></font> | <font style="visibility:hidden" size="0"></font> | ||
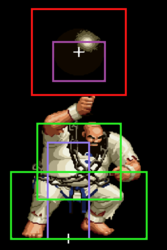
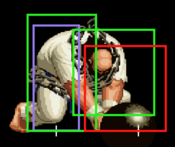
{{MoveData | {{MoveData | ||
|image= | |image=KOF2003 Chang Cr.HP.png | ||
|image2=KOF2003 Chang Cr.HP 2.png | |||
|image3=KOF2003 Chang Cr.HP 3.png | |||
|caption= | |caption= | ||
|name=cr.C | |name=cr.C | ||
| Line 316: | Line 328: | ||
<font style="visibility:hidden" size="0"></font> | <font style="visibility:hidden" size="0"></font> | ||
{{MoveData | {{MoveData | ||
|image= | |image=KOF2003 Chang Cr.HK.png | ||
|caption= | |caption= | ||
|name=cr.D | |name=cr.D | ||
| Line 444: | Line 456: | ||
<font style="visibility:hidden" size="0"></font> | <font style="visibility:hidden" size="0"></font> | ||
{{MoveData | {{MoveData | ||
|image= | |image=KOF2003 Chang J.LP.png | ||
|caption= | |caption= | ||
|name=dj.A | |name=dj.A | ||
| Line 469: | Line 481: | ||
<font style="visibility:hidden" size="0"></font> | <font style="visibility:hidden" size="0"></font> | ||
{{MoveData | {{MoveData | ||
|image= | |image=KOF2003 Chang J.LK.png | ||
|caption= | |caption= | ||
|name=dj.B | |name=dj.B | ||
| Line 494: | Line 506: | ||
<font style="visibility:hidden" size="0"></font> | <font style="visibility:hidden" size="0"></font> | ||
{{MoveData | {{MoveData | ||
|image= | |image=KOF2003 Chang J.HP.png | ||
|caption= | |caption= | ||
|name=dj.C | |name=dj.C | ||
| Line 519: | Line 531: | ||
<font style="visibility:hidden" size="0"></font> | <font style="visibility:hidden" size="0"></font> | ||
{{MoveData | {{MoveData | ||
|image= | |image=KOF2003 Chang J.HK.png | ||
|caption= | |caption= | ||
|name=dj.D | |name=dj.D | ||
| Line 620: | Line 632: | ||
<font style="visibility:hidden" size="0"></font> | <font style="visibility:hidden" size="0"></font> | ||
{{MoveData | {{MoveData | ||
|image= | |image=KOF2003 Chang Hiki Nige (DF+A).png | ||
|caption= | |caption= | ||
|name=Hiki Nige | |name=Hiki Nige | ||
| Line 645: | Line 657: | ||
<font style="visibility:hidden" size="0"></font> | <font style="visibility:hidden" size="0"></font> | ||
{{MoveData | {{MoveData | ||
|image= | |image=KOF2003 Chang Tekkyu Geki (j.F+C) 2.png | ||
|caption= | |caption= | ||
|name=Tekkyuu Geki | |name=Tekkyuu Geki | ||
| Line 671: | Line 683: | ||
<font style="visibility:hidden" size="0"></font> | <font style="visibility:hidden" size="0"></font> | ||
{{MoveData | {{MoveData | ||
|image= | |image=KOF2003 Chang Tekkyu Dai Kaiten (Mash P).png | ||
|caption= | |caption= | ||
|name=Tekkyuu Dai Kaiten | |name=Tekkyuu Dai Kaiten | ||
| Line 715: | Line 727: | ||
<font style="visibility:hidden" size="0"></font> | <font style="visibility:hidden" size="0"></font> | ||
{{MoveData | {{MoveData | ||
|image= | |image=KOF2003 Chang Tekkyu Funsaigeki (ch.B, F+P).png | ||
|caption= | |caption= | ||
|name=Tekkyuu Funsai Geki | |name=Tekkyuu Funsai Geki | ||
| Line 757: | Line 769: | ||
<font style="visibility:hidden" size="0"></font> | <font style="visibility:hidden" size="0"></font> | ||
{{MoveData | {{MoveData | ||
|image= | |image=KOF2003 Chang Tekkyu Dai Bokusatsu (QCF+K).png | ||
|image2=KOF2003 Chang Tekkyu Dai Bokusatsu (QCF+K) 2.png | |||
|caption= | |caption= | ||
|name=Tekkyuu Dai Bokusatsu | |name=Tekkyuu Dai Bokusatsu | ||
| Line 799: | Line 812: | ||
<font style="visibility:hidden" size="0"></font> | <font style="visibility:hidden" size="0"></font> | ||
{{MoveData | {{MoveData | ||
|image= | |image=KOF2003 Chang Dai Hakai Nage (HCB, F+P).png | ||
|caption= | |caption= | ||
|name=Dai Hakai Nage | |name=Dai Hakai Nage | ||
| Line 825: | Line 838: | ||
<font style="visibility:hidden" size="0"></font> | <font style="visibility:hidden" size="0"></font> | ||
{{MoveData | {{MoveData | ||
|image= | |image=KOF2003 Chang Tekkyu Dai Bousou (QCF, HCB+P).png | ||
|caption= | |caption= | ||
|name=Tekkyuu Dai Bousou | |name=Tekkyuu Dai Bousou | ||
| Line 874: | Line 887: | ||
=== LDM === | === LDM === | ||
{{MoveData | {{MoveData | ||
|image= | |image=KOF2003 Chang Tekkyu Dai Assatsu (CQF+A+C).png | ||
|image2=KOF2003 Chang Tekkyu Dai Assatsu (CQF+A+C) 2.png | |||
|caption= | |caption= | ||
|name=Tekkyuu Dai Assatsu | |name=Tekkyuu Dai Assatsu | ||
| Line 897: | Line 911: | ||
==Combos== | ==Combos== | ||
''' | '''BnBs:''' | ||
* '''cr.Ax2 / st.B / cr.B, hcb,f P''' | |||
* '''cr.Ax3, df.A / qcbx2 P / LDM''' | |||
* '''cr.C / st.D, mash A~AC''' | |||
* '''cr.D, qcf K''' | |||
if your opponent doesn't tech the KND, then go for it. | |||
'''MSA Starters:''' | |||
* '''jp.C / jp.D, MSA*** | |||
chang doesn't really have an MSA set-up outside of comboing | |||
into it from a jump-in | |||
'''MSA Enders:''' | |||
*'''any jp normal''' | |||
universal option | |||
* '''LDM''' | |||
==Strategy== | ==Strategy== | ||
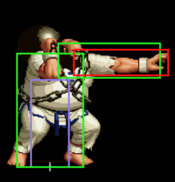
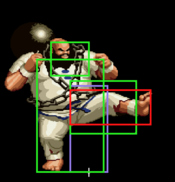
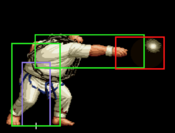
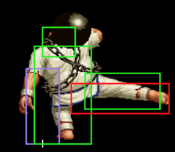
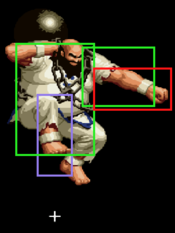
''' | Chang is designed to be played at around the mid range where his j.CD(j.f+C in this game), j.C, st.A cr.D are all effective. he wants to shut down the opponents movement with his big ass normals, b~f+P and ballspin. st.A is great for stopping hops and as a poke for your opponent to run into. j.CD has a lot of reach and works well both as an air to air and as a air to ground attack at further ranges. j.C hits more below him and comes out faster than j.CD. cr.D is a long range sweep that can be made safe by cancelling it into a immediately stopped ballspin. Once you've made the opponent sit still with your normals/hit them with something and gotten close you can start the second part of his gameplan which is closeup pressure. | ||
His best tools for when he has the opponent close and he gets to pressure them are j.B/D, cr.A, cr.B, st.B and his command grab. he gets good hop pressure with j.B/D, j.B is useful because it puts chang close to the opponent while giving him frame advantage, j.D pushes them away a bit more but has more reward on hit. You can then mix up the hopping with all the usual kof goodness like empty jump low with cr.B into ballspin to make it safer(or command grab if you're feeling sure that it will hit), empty jump command grab, another hop button. If they block something and you get pushed out a bit it's not that bad because you're still in Changs preferred range and can start using the midrange tools again. | |||
Chang really dislikes being at further ranges than the mid range because he has very little to effectively fight with at that range and he is slow and big so getting in can be a struggle if the opponent has good zoning capabilities. He also really dislikes being up close when the opponent is the one in control because he lacks a reversal (especially in this game where the belly flop super is a LDM) and his fastest button is st.B which is usually 5f startup. he also gets mixed/crossed up/IOH'd easier because he's so big. | |||
Chang essentially needs to play a lot of active defence where you try and see what kind of approach your opponent is doing so you can choose the correct tool to stop it, and he then creates advantage and pressure from successful active defence. | |||
Chang is generally strong when he can force the opponent to try and go in on him either by having a life advantage or if they don't happen to have long range tools. Chang is generally weak when he is not in advantage either because he's at a life disadvantage where he has to try and get in and open the opponent up or if they have tools to keep him out of the midrange and attack him at further ranges. | |||
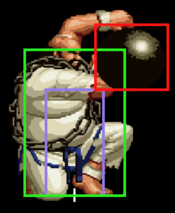
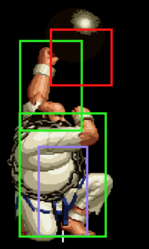
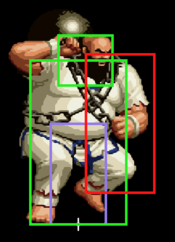
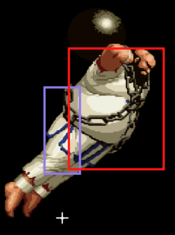
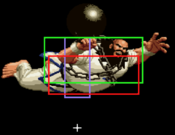
for anti airs against full jumps he has his air to air tools like j.C, j.f+C, j.A, and also a really slow upwards strike with the ball in cr.C that can work well preemptively but not so much reactively unless it was against a superjump. | |||
Ballspin another great tool for anti airing, though it is a bit trickier to use because you need to buffer it behind something but if you can get it out in time it has a big hitbox. | |||
===Match Up=== | ===Match Up=== | ||
| Line 1,052: | Line 1,095: | ||
{{Navbox-KOF2003}} | {{Navbox-KOF2003}} | ||
[[Category:The King of Fighters 2003]] | [[Category:The King of Fighters 2003]] | ||
[[Category:Chang Koehan]] | |||
Latest revision as of 02:33, 13 August 2022
Introduction
「 Chang Koehan 」
| Strengths | Weaknesses |
|---|---|
|
|
Colors
Movelist
Normals
Far Normals
| Damage | Counter Dmg | Guard | Guard Damage | Damage Scaling | Stun | CH Stun | Meter | Cancel Properties | Startup | Active | Recovery | Total | Hit Advantage | Block Advantage | Invulnerability |
|---|---|---|---|---|---|---|---|---|---|---|---|---|---|---|---|
| - | - | Mid | - | - | - | - | - | - | - | - | - | - | - | - | - |
Close Range Normals
| Damage | Counter Dmg | Guard | Guard Damage | Damage Scaling | Stun | CH Stun | Meter | Cancel Properties | Startup | Active | Recovery | Total | Hit Advantage | Block Advantage | Invulnerability |
|---|---|---|---|---|---|---|---|---|---|---|---|---|---|---|---|
| - | - | Mid | - | - | - | - | - | - | - | - | - | - | - | - | - |
Crouching Normals
| Damage | Counter Dmg | Guard | Guard Damage | Damage Scaling | Stun | CH Stun | Meter | Cancel Properties | Startup | Active | Recovery | Total | Hit Advantage | Block Advantage | Invulnerability |
|---|---|---|---|---|---|---|---|---|---|---|---|---|---|---|---|
| - | - | Mid | - | - | - | - | - | - | - | - | - | - | - | - | - |
| Damage | Counter Dmg | Guard | Guard Damage | Damage Scaling | Stun | CH Stun | Meter | Cancel Properties | Startup | Active | Recovery | Total | Hit Advantage | Block Advantage | Invulnerability |
|---|---|---|---|---|---|---|---|---|---|---|---|---|---|---|---|
| - | - | Low | - | - | - | - | - | - | - | - | - | - | - | - | - |
| Damage | Counter Dmg | Guard | Guard Damage | Damage Scaling | Stun | CH Stun | Meter | Cancel Properties | Startup | Active | Recovery | Total | Hit Advantage | Block Advantage | Invulnerability |
|---|---|---|---|---|---|---|---|---|---|---|---|---|---|---|---|
| - | - | Mid | - | - | - | - | - | None | - | - | - | - | - | - | - |
| Damage | Counter Dmg | Guard | Guard Damage | Damage Scaling | Stun | CH Stun | Meter | Cancel Properties | Startup | Active | Recovery | Total | Hit Advantage | Block Advantage | Invulnerability |
|---|---|---|---|---|---|---|---|---|---|---|---|---|---|---|---|
| - | - | Low | - | - | - | - | - | - | - | - | - | - | KD | - | - |
Neutral Jumping Normals
| Damage | Counter Dmg | Guard | Guard Damage | Damage Scaling | Stun | CH Stun | Meter | Cancel Properties | Startup | Active | Recovery | Total | Hit Advantage | Block Advantage | Invulnerability |
|---|---|---|---|---|---|---|---|---|---|---|---|---|---|---|---|
| - | - | Overhead | - | - | - | - | - | - | - | - | - | - | - | - | - |
Diagonal Jump Normals
| Damage | Counter Dmg | Guard | Guard Damage | Damage Scaling | Stun | CH Stun | Meter | Cancel Properties | Startup | Active | Recovery | Total | Hit Advantage | Block Advantage | Invulnerability |
|---|---|---|---|---|---|---|---|---|---|---|---|---|---|---|---|
| - | - | Overhead | - | - | - | - | - | - | - | - | - | - | - | - | - |
Throws
| Damage | Counter Dmg | Guard | Guard Damage | Damage Scaling | Stun | CH Stun | Meter | Cancel Properties | Startup | Active | Recovery | Total | Hit Advantage | Block Advantage | Invulnerability |
|---|---|---|---|---|---|---|---|---|---|---|---|---|---|---|---|
| - | - | Throw | - | - | - | - | - | - | - | - | - | - | - | - | - |
MSA
| Damage | Counter Dmg | Guard | Guard Damage | Damage Scaling | Stun | CH Stun | Meter | Cancel Properties | Startup | Active | Recovery | Total | Hit Advantage | Block Advantage | Invulnerability |
|---|---|---|---|---|---|---|---|---|---|---|---|---|---|---|---|
| - | - | Mid | - | - | - | - | - | - | - | - | - | - | - | - | Strike/Projectile |
| Damage | Counter Dmg | Guard | Guard Damage | Damage Scaling | Stun | CH Stun | Meter | Cancel Properties | Startup | Active | Recovery | Total | Hit Advantage | Block Advantage | Invulnerability |
|---|---|---|---|---|---|---|---|---|---|---|---|---|---|---|---|
| - | - | Mid | - | - | - | - | - | - | - | - | - | - | - | - | - |
Command Normals
| Damage | Counter Dmg | Guard | Guard Damage | Damage Scaling | Stun | CH Stun | Meter | Cancel Properties | Startup | Active | Recovery | Total | Hit Advantage | Block Advantage | Invulnerability |
|---|---|---|---|---|---|---|---|---|---|---|---|---|---|---|---|
| - | - | Mid | - | - | - | - | - | - | - | - | - | - | - | - | - |
Special Moves
| Damage | Counter Dmg | Guard | Guard Damage | Damage Scaling | Stun | CH Stun | Meter | Cancel Properties | Startup | Active | Recovery | Total | Hit Advantage | Block Advantage | Invulnerability |
|---|---|---|---|---|---|---|---|---|---|---|---|---|---|---|---|
| - | - | Mid | - | - | - | - | - | - | - | - | - | - | - | - | - |
Super Moves
| Damage | Counter Dmg | Guard | Guard Damage | Damage Scaling | Stun | CH Stun | Meter | Cancel Properties | Startup | Active | Recovery | Total | Hit Advantage | Block Advantage | Invulnerability |
|---|---|---|---|---|---|---|---|---|---|---|---|---|---|---|---|
| - | - | - | - | - | - | - | - | - | - | - | - | - | - | - | - |
LDM
| Damage | Counter Dmg | Guard | Guard Damage | Damage Scaling | Stun | CH Stun | Meter | Cancel Properties | Startup | Active | Recovery | Total | Hit Advantage | Block Advantage | Invulnerability |
|---|---|---|---|---|---|---|---|---|---|---|---|---|---|---|---|
| - | - | - | - | - | - | - | - | - | - | - | - | - | - | - | - |
Combos
BnBs:
- cr.Ax2 / st.B / cr.B, hcb,f P
- cr.Ax3, df.A / qcbx2 P / LDM
- cr.C / st.D, mash A~AC
- cr.D, qcf K
if your opponent doesn't tech the KND, then go for it.
MSA Starters:
- jp.C / jp.D, MSA***
chang doesn't really have an MSA set-up outside of comboing into it from a jump-in
MSA Enders:
- any jp normal
universal option
- LDM
Strategy
Chang is designed to be played at around the mid range where his j.CD(j.f+C in this game), j.C, st.A cr.D are all effective. he wants to shut down the opponents movement with his big ass normals, b~f+P and ballspin. st.A is great for stopping hops and as a poke for your opponent to run into. j.CD has a lot of reach and works well both as an air to air and as a air to ground attack at further ranges. j.C hits more below him and comes out faster than j.CD. cr.D is a long range sweep that can be made safe by cancelling it into a immediately stopped ballspin. Once you've made the opponent sit still with your normals/hit them with something and gotten close you can start the second part of his gameplan which is closeup pressure.
His best tools for when he has the opponent close and he gets to pressure them are j.B/D, cr.A, cr.B, st.B and his command grab. he gets good hop pressure with j.B/D, j.B is useful because it puts chang close to the opponent while giving him frame advantage, j.D pushes them away a bit more but has more reward on hit. You can then mix up the hopping with all the usual kof goodness like empty jump low with cr.B into ballspin to make it safer(or command grab if you're feeling sure that it will hit), empty jump command grab, another hop button. If they block something and you get pushed out a bit it's not that bad because you're still in Changs preferred range and can start using the midrange tools again.
Chang really dislikes being at further ranges than the mid range because he has very little to effectively fight with at that range and he is slow and big so getting in can be a struggle if the opponent has good zoning capabilities. He also really dislikes being up close when the opponent is the one in control because he lacks a reversal (especially in this game where the belly flop super is a LDM) and his fastest button is st.B which is usually 5f startup. he also gets mixed/crossed up/IOH'd easier because he's so big.
Chang essentially needs to play a lot of active defence where you try and see what kind of approach your opponent is doing so you can choose the correct tool to stop it, and he then creates advantage and pressure from successful active defence. Chang is generally strong when he can force the opponent to try and go in on him either by having a life advantage or if they don't happen to have long range tools. Chang is generally weak when he is not in advantage either because he's at a life disadvantage where he has to try and get in and open the opponent up or if they have tools to keep him out of the midrange and attack him at further ranges.
for anti airs against full jumps he has his air to air tools like j.C, j.f+C, j.A, and also a really slow upwards strike with the ball in cr.C that can work well preemptively but not so much reactively unless it was against a superjump. Ballspin another great tool for anti airing, though it is a bit trickier to use because you need to buffer it behind something but if you can get it out in time it has a big hitbox.
Match Up
UNDER CONSTRUCTION
| - Ash:
| - Duo Lon:
| - Shen:
| - Terry:
| - Joe:
| - Tizoc:
| - Ryo:
| - Robert:
| - Yuri:
| - Kim:
| - Chang:
| - Jhun:
| - Leona:
| - Ralf:
| - Clark:
| - Gato:
| - Billy:
| - Yamazaki:
| - King:
| - Mai:
| - Mary:
| - Benimaru:
| - Shingo:
| - Daimon:
| - Athena:
| - Hinako:
| - Malin:
| - K':
| - Maxima:
| - Whip:
| - Kyo:
| - Chizuru:
| - KUSANAGI:
| - Maki:
| - Adelheid:
| - Mukai:

