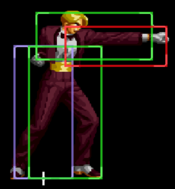
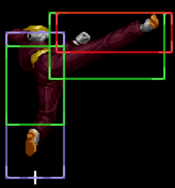
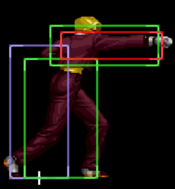
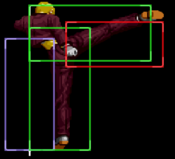
Lichmassacre (talk | contribs) m (→Movelist) |
Lichmassacre (talk | contribs) mNo edit summary |
||
| (6 intermediate revisions by 2 users not shown) | |||
| Line 1: | Line 1: | ||
{{TOClimit|3}} | {{TOClimit|3}} | ||
{| class="wikitable" style="float:right; margin-left: 10px;" | |||
|- | |||
! align="center" colspan="2" | 美しき蹴撃のイリュージョン, The Beautiful Kick's Illusion | |||
|- | |||
! align="center" colspan="2" | [[Image:KoF2003Portrait19-King.png|center]] | |||
|- | |||
| '''Tier Placement''' || A- | |||
|- | |||
| '''Ratio Cost (Sarsen)''' || 5 Points (6 Points Leader) of 15 | |||
|- | |||
| '''Ratio Cost (China)''' || 7 Points of 20 | |||
|- | |||
| '''Best Position''' || Flex | |||
|- | |||
| '''Good LDM?''' || Amazing | |||
|- | |||
| '''Crouch Height''' || Medium | |||
|- | |||
| '''Wakeup Speed''' || 27 Frames | |||
|- | |||
| '''Stun Value''' || 900 | |||
|- | |||
|} | |||
==Introduction== | ==Introduction== | ||
| Line 8: | Line 29: | ||
Undoubtedly the strongest zoner in KOF03. High, mid and low projectiles, multiple anti air options and a LDM that wins fireball wars while also shooting a low projectile. King's fast movement, frequent airborne state and ability to cover large ranges and punishes allows her to outplay most of the cast with ease. Tornado Kick & Silent Slash(qcbx2+K) gives her a lot of unsuspecting power as a zoner with strong "get off me" tools. | Undoubtedly the strongest zoner in KOF03. High, mid and low projectiles, multiple anti air options and a LDM that wins fireball wars while also shooting a low projectile. King's fast movement, frequent airborne state and ability to cover large ranges and punishes allows her to outplay most of the cast with ease. Tornado Kick & Silent Slash(qcbx2+K) gives her a lot of unsuspecting power as a zoner with strong "get off me" tools. | ||
Additionally she is almost always a great swap in choice, in and out of MSCs. | Additionally she is almost always a great swap in choice, in and out of MSCs. | ||
{{ ProConTable | {{ ProConTable | ||
| Line 21: | Line 38: | ||
===Colors=== | ===Colors=== | ||
{| | |||
! [[image:snka.gif]] | |||
! [[image:snkb.gif]] | |||
! [[image:snkc.gif]] | |||
! [[image:snkd.gif]] | |||
|- | |||
|[[File:KOF2003 King colour A.png|KOF2003 King colour A.png]] | |||
|[[File:KOF2003 King colour B.png|KOF2003 King colour B.png]] | |||
|[[File:KOF2003 King colour C.png|KOF2003 King colour C.png]] | |||
|[[File:KOF2003 King colour D.png|KOF2003 King colour D.png]] | |||
|} | |||
==Movelist== | ==Movelist== | ||
==== Far Normals ==== | ==== Far Normals ==== | ||
===== <span class="invisible-header"></span> ===== | ===== <span class="invisible-header"></span> ===== | ||
<font style="visibility:hidden" size="0"></font> | <font style="visibility:hidden" size="0"></font> | ||
{{MoveData | {{MoveData | ||
|image= | |image=KOF2003 King St.LP.png | ||
|caption= | |caption= | ||
|name=st.A | |name=st.A | ||
| Line 55: | Line 80: | ||
<font style="visibility:hidden" size="0"></font> | <font style="visibility:hidden" size="0"></font> | ||
{{MoveData | {{MoveData | ||
|image= | |image=KOF2003 King St.LK.png | ||
|caption= | |caption= | ||
|name=st.B | |name=st.B | ||
| Line 80: | Line 105: | ||
<font style="visibility:hidden" size="0"></font> | <font style="visibility:hidden" size="0"></font> | ||
{{MoveData | {{MoveData | ||
|image= | |image=KOF2003 King St.HP.png | ||
|caption= | |caption= | ||
|name=st.C | |name=st.C | ||
| Line 105: | Line 130: | ||
<font style="visibility:hidden" size="0"></font> | <font style="visibility:hidden" size="0"></font> | ||
{{MoveData | {{MoveData | ||
|image= | |image=KOF2003 King St.HK.png | ||
|caption= | |caption= | ||
|name=st.D | |name=st.D | ||
| Line 132: | Line 157: | ||
<font style="visibility:hidden" size="0"></font> | <font style="visibility:hidden" size="0"></font> | ||
{{MoveData | {{MoveData | ||
|image= | |image=KOF2003 King Cl.LP.png | ||
|caption= | |caption= | ||
|name=cl.A | |name=cl.A | ||
| Line 157: | Line 182: | ||
<font style="visibility:hidden" size="0"></font> | <font style="visibility:hidden" size="0"></font> | ||
{{MoveData | {{MoveData | ||
|image= | |image=KOF2003 King Cl.LK.png | ||
|caption= | |caption= | ||
|name=cl.B | |name=cl.B | ||
| Line 182: | Line 207: | ||
<font style="visibility:hidden" size="0"></font> | <font style="visibility:hidden" size="0"></font> | ||
{{MoveData | {{MoveData | ||
|image= | |image=KOF2003 King Cl.HP.png | ||
|caption= | |caption= | ||
|name=cl.C | |name=cl.C | ||
| Line 207: | Line 232: | ||
<font style="visibility:hidden" size="0"></font> | <font style="visibility:hidden" size="0"></font> | ||
{{MoveData | {{MoveData | ||
|image= | |image=KOF2003 King Cl.HK.png | ||
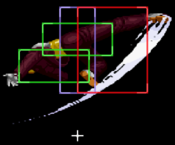
|image2=KOF2003 King Cl.HK 2.png | |||
|caption= | |caption= | ||
|name=cl.D | |name=cl.D | ||
| Line 234: | Line 260: | ||
<font style="visibility:hidden" size="0"></font> | <font style="visibility:hidden" size="0"></font> | ||
{{MoveData | {{MoveData | ||
|image= | |image=KOF2003 King Cr.LP.png | ||
|caption= | |caption= | ||
|name=cr.A | |name=cr.A | ||
| Line 259: | Line 285: | ||
<font style="visibility:hidden" size="0"></font> | <font style="visibility:hidden" size="0"></font> | ||
{{MoveData | {{MoveData | ||
|image= | |image=KOF2003 King Cr.LK.png | ||
|caption= | |caption= | ||
|name=cr.B | |name=cr.B | ||
| Line 284: | Line 310: | ||
<font style="visibility:hidden" size="0"></font> | <font style="visibility:hidden" size="0"></font> | ||
{{MoveData | {{MoveData | ||
|image= | |image=KOF2003 King Cr.HP.png | ||
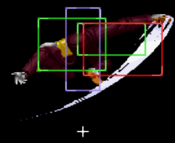
|image2=KOF2003 King Cr.HP 2.png | |||
|caption= | |caption= | ||
|name=cr.C | |name=cr.C | ||
| Line 309: | Line 336: | ||
<font style="visibility:hidden" size="0"></font> | <font style="visibility:hidden" size="0"></font> | ||
{{MoveData | {{MoveData | ||
|image= | |image=KOF2003 King Cr.HK.png | ||
|caption= | |caption= | ||
|name=cr.D | |name=cr.D | ||
| Line 437: | Line 464: | ||
<font style="visibility:hidden" size="0"></font> | <font style="visibility:hidden" size="0"></font> | ||
{{MoveData | {{MoveData | ||
|image= | |image=KOF2003 King J.LP.png | ||
|caption= | |caption= | ||
|name=dj.A | |name=dj.A | ||
| Line 462: | Line 489: | ||
<font style="visibility:hidden" size="0"></font> | <font style="visibility:hidden" size="0"></font> | ||
{{MoveData | {{MoveData | ||
|image= | |image=KOF2003 King J.LK.png | ||
|caption= | |caption= | ||
|name=dj.B | |name=dj.B | ||
| Line 487: | Line 514: | ||
<font style="visibility:hidden" size="0"></font> | <font style="visibility:hidden" size="0"></font> | ||
{{MoveData | {{MoveData | ||
|image= | |image=KOF2003 King J.HP.png | ||
|caption= | |caption= | ||
|name=dj.C | |name=dj.C | ||
| Line 512: | Line 539: | ||
<font style="visibility:hidden" size="0"></font> | <font style="visibility:hidden" size="0"></font> | ||
{{MoveData | {{MoveData | ||
|image= | |image=KOF2003 King J.HK.png | ||
|caption= | |caption= | ||
|name=dj.D | |name=dj.D | ||
| Line 612: | Line 639: | ||
=== Command Normals === | === Command Normals === | ||
{{MoveData | {{MoveData | ||
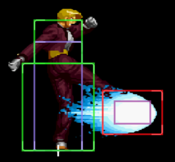
|image= | |image=KOF2003 King Sliding Kick (DF+HK).png | ||
|caption= | |caption= | ||
|name=Sliding Kick | |name=Sliding Kick | ||
| Line 638: | Line 665: | ||
<font style="visibility:hidden" size="0"></font> | <font style="visibility:hidden" size="0"></font> | ||
{{MoveData | {{MoveData | ||
|image= | |image=KOF2003 King Venom Strike high (QCF+P).png | ||
|caption= | |caption= | ||
|name=Venom Strike (High) | |name=Venom Strike (High) | ||
| Line 663: | Line 690: | ||
<font style="visibility:hidden" size="0"></font> | <font style="visibility:hidden" size="0"></font> | ||
{{MoveData | {{MoveData | ||
|image= | |image=KOF2003 King Venom Strike low (QCF+K).png | ||
|caption= | |caption= | ||
|name=Venom Strike (Low) | |name=Venom Strike (Low) | ||
| Line 687: | Line 714: | ||
<font style="visibility:hidden" size="0"></font> | <font style="visibility:hidden" size="0"></font> | ||
{{MoveData | {{MoveData | ||
|image= | |image=KOF2003 King Venom Double Strike (QCFx2+K).png | ||
|caption= | |caption= | ||
|name=Double Strike | |name=Double Strike | ||
| Line 712: | Line 739: | ||
<font style="visibility:hidden" size="0"></font> | <font style="visibility:hidden" size="0"></font> | ||
{{MoveData | {{MoveData | ||
|image= | |image=KOF2003 King Tornado Kick (HCB+LK).png | ||
|caption= | |caption= | ||
|name=Tornado Kick | |name=Tornado Kick | ||
| Line 737: | Line 764: | ||
<font style="visibility:hidden" size="0"></font> | <font style="visibility:hidden" size="0"></font> | ||
{{MoveData | {{MoveData | ||
|image= | |image=KOF2003 King Tornado Kick '95 (HCB+HK).png | ||
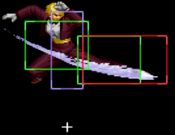
|image2=KOF2003 King Tornado Kick '95 (HCB+HK) 2.png | |||
|caption= | |caption= | ||
|name=Tornado Kick '95 | |name=Tornado Kick '95 | ||
| Line 762: | Line 790: | ||
<font style="visibility:hidden" size="0"></font> | <font style="visibility:hidden" size="0"></font> | ||
{{MoveData | {{MoveData | ||
|image= | |image=KOF2003 King Trap Shot (RDp+K).png | ||
|caption= | |caption= | ||
|name=Trap Shot | |name=Trap Shot | ||
| Line 805: | Line 833: | ||
<font style="visibility:hidden" size="0"></font> | <font style="visibility:hidden" size="0"></font> | ||
{{MoveData | {{MoveData | ||
|image= | |image=KOF2003 King Illusion Dance (QCF, HCB+K).png | ||
|caption= | |caption= | ||
|name=Illusion Dance | |name=Illusion Dance | ||
| Line 830: | Line 858: | ||
<font style="visibility:hidden" size="0"></font> | <font style="visibility:hidden" size="0"></font> | ||
{{MoveData | {{MoveData | ||
|image= | |image=KOF2003 King Silent Slash (QCBx2+K).png | ||
|caption= | |caption= | ||
|name=Silent Slash | |name=Silent Slash | ||
| Line 854: | Line 882: | ||
=== LDM === | === LDM === | ||
{{MoveData | {{MoveData | ||
|image= | |image=KOF2003 King Venom Phantom Strike (QCFx2+LP+HP).png | ||
|caption= | |caption= | ||
|name=Phantom Strike | |name=Phantom Strike | ||
| Line 892: | Line 920: | ||
==Strategy== | ==Strategy== | ||
''' | King excels in being at mid to long range space where she can punish jumps, fireballs, and grappler with her zoning tools, until they're pushed in a corner, with the perfect spacing away from the opponent that allows her to assault them freely. | ||
King's new Top Venom (qcf+P) allows her to stuff a variety of jump and other airborne options from afar when the opponent no longer feels like a grounded approach is safe. Hits most characters standing, and none crouching. A very important tool as it also also crushes lows, and is airborne, thus avoiding grabs and a variety of other attacks. Additionally her LDM, a quadruple fireball super, includes a flying low fireball within it's mix. it's a guard breaker as a result and an effective punish, as each of these fireballs will destroy any onscreen projectile. | |||
===Match Up=== | ===Match Up=== | ||
| Line 1,044: | Line 1,074: | ||
{{Navbox-KOF2003}} | {{Navbox-KOF2003}} | ||
[[Category:The King of Fighters 2003]] | [[Category:The King of Fighters 2003]] | ||
[[Category:King]] | |||
Latest revision as of 23:53, 12 August 2022
| 美しき蹴撃のイリュージョン, The Beautiful Kick's Illusion | |
|---|---|
| Tier Placement | A- |
| Ratio Cost (Sarsen) | 5 Points (6 Points Leader) of 15 |
| Ratio Cost (China) | 7 Points of 20 |
| Best Position | Flex |
| Good LDM? | Amazing |
| Crouch Height | Medium |
| Wakeup Speed | 27 Frames |
| Stun Value | 900 |
Introduction
「 King 」
Undoubtedly the strongest zoner in KOF03. High, mid and low projectiles, multiple anti air options and a LDM that wins fireball wars while also shooting a low projectile. King's fast movement, frequent airborne state and ability to cover large ranges and punishes allows her to outplay most of the cast with ease. Tornado Kick & Silent Slash(qcbx2+K) gives her a lot of unsuspecting power as a zoner with strong "get off me" tools. Additionally she is almost always a great swap in choice, in and out of MSCs.
| Strengths | Weaknesses |
|---|---|
|
|
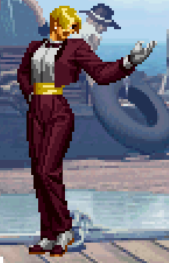
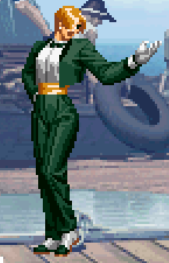
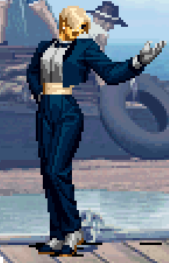
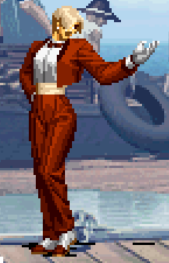
Colors
|
|
|
|
Movelist
Far Normals
| Damage | Counter Dmg | Guard | Guard Damage | Damage Scaling | Stun | CH Stun | Meter | Cancel Properties | Startup | Active | Recovery | Total | Hit Advantage | Block Advantage | Invulnerability |
|---|---|---|---|---|---|---|---|---|---|---|---|---|---|---|---|
| - | - | Mid | - | - | - | - | - | - | - | - | - | - | - | - | - |
Close Range Normals
| Damage | Counter Dmg | Guard | Guard Damage | Damage Scaling | Stun | CH Stun | Meter | Cancel Properties | Startup | Active | Recovery | Total | Hit Advantage | Block Advantage | Invulnerability |
|---|---|---|---|---|---|---|---|---|---|---|---|---|---|---|---|
| - | - | Mid | - | - | - | - | - | - | - | - | - | - | - | - | - |
Crouching Normals
| Damage | Counter Dmg | Guard | Guard Damage | Damage Scaling | Stun | CH Stun | Meter | Cancel Properties | Startup | Active | Recovery | Total | Hit Advantage | Block Advantage | Invulnerability |
|---|---|---|---|---|---|---|---|---|---|---|---|---|---|---|---|
| - | - | Mid | - | - | - | - | - | - | - | - | - | - | - | - | - |
| Damage | Counter Dmg | Guard | Guard Damage | Damage Scaling | Stun | CH Stun | Meter | Cancel Properties | Startup | Active | Recovery | Total | Hit Advantage | Block Advantage | Invulnerability |
|---|---|---|---|---|---|---|---|---|---|---|---|---|---|---|---|
| - | - | Low | - | - | - | - | - | - | - | - | - | - | - | - | - |
| Damage | Counter Dmg | Guard | Guard Damage | Damage Scaling | Stun | CH Stun | Meter | Cancel Properties | Startup | Active | Recovery | Total | Hit Advantage | Block Advantage | Invulnerability |
|---|---|---|---|---|---|---|---|---|---|---|---|---|---|---|---|
| - | - | Mid | - | - | - | - | - | None | - | - | - | - | - | - | - |
| Damage | Counter Dmg | Guard | Guard Damage | Damage Scaling | Stun | CH Stun | Meter | Cancel Properties | Startup | Active | Recovery | Total | Hit Advantage | Block Advantage | Invulnerability |
|---|---|---|---|---|---|---|---|---|---|---|---|---|---|---|---|
| - | - | Low | - | - | - | - | - | - | - | - | - | - | KD | - | - |
Neutral Jumping Normals
| Damage | Counter Dmg | Guard | Guard Damage | Damage Scaling | Stun | CH Stun | Meter | Cancel Properties | Startup | Active | Recovery | Total | Hit Advantage | Block Advantage | Invulnerability |
|---|---|---|---|---|---|---|---|---|---|---|---|---|---|---|---|
| - | - | Overhead | - | - | - | - | - | - | - | - | - | - | - | - | - |
Diagonal Jump Normals
| Damage | Counter Dmg | Guard | Guard Damage | Damage Scaling | Stun | CH Stun | Meter | Cancel Properties | Startup | Active | Recovery | Total | Hit Advantage | Block Advantage | Invulnerability |
|---|---|---|---|---|---|---|---|---|---|---|---|---|---|---|---|
| - | - | Overhead | - | - | - | - | - | - | - | - | - | - | - | - | - |
Throws
| Damage | Counter Dmg | Guard | Guard Damage | Damage Scaling | Stun | CH Stun | Meter | Cancel Properties | Startup | Active | Recovery | Total | Hit Advantage | Block Advantage | Invulnerability |
|---|---|---|---|---|---|---|---|---|---|---|---|---|---|---|---|
| - | - | Throw | - | - | - | - | - | - | - | - | - | - | - | - | - |
MSA
| Damage | Counter Dmg | Guard | Guard Damage | Damage Scaling | Stun | CH Stun | Meter | Cancel Properties | Startup | Active | Recovery | Total | Hit Advantage | Block Advantage | Invulnerability |
|---|---|---|---|---|---|---|---|---|---|---|---|---|---|---|---|
| - | - | Mid | - | - | - | - | - | - | - | - | - | - | - | - | Strike/Projectile |
| Damage | Counter Dmg | Guard | Guard Damage | Damage Scaling | Stun | CH Stun | Meter | Cancel Properties | Startup | Active | Recovery | Total | Hit Advantage | Block Advantage | Invulnerability |
|---|---|---|---|---|---|---|---|---|---|---|---|---|---|---|---|
| - | - | Mid | - | - | - | - | - | - | - | - | - | - | - | - | - |
Command Normals
| Damage | Counter Dmg | Guard | Guard Damage | Damage Scaling | Stun | CH Stun | Meter | Cancel Properties | Startup | Active | Recovery | Total | Hit Advantage | Block Advantage | Invulnerability |
|---|---|---|---|---|---|---|---|---|---|---|---|---|---|---|---|
| - | - | Mid | - | - | - | - | - | - | - | - | - | - | - | - | - |
Special Moves
| Damage | Counter Dmg | Guard | Guard Damage | Damage Scaling | Stun | CH Stun | Meter | Cancel Properties | Startup | Active | Recovery | Total | Hit Advantage | Block Advantage | Invulnerability |
|---|---|---|---|---|---|---|---|---|---|---|---|---|---|---|---|
| - | - | - | - | - | - | - | - | - | - | - | - | - | - | - | - |
| Damage | Counter Dmg | Guard | Guard Damage | Damage Scaling | Stun | CH Stun | Meter | Cancel Properties | Startup | Active | Recovery | Total | Hit Advantage | Block Advantage | Invulnerability |
|---|---|---|---|---|---|---|---|---|---|---|---|---|---|---|---|
| - | - | Mid | - | - | - | - | - | - | - | - | - | - | - | - | - |
| Damage | Counter Dmg | Guard | Guard Damage | Damage Scaling | Stun | CH Stun | Meter | Cancel Properties | Startup | Active | Recovery | Total | Hit Advantage | Block Advantage | Invulnerability |
|---|---|---|---|---|---|---|---|---|---|---|---|---|---|---|---|
| - | - | - | - | - | - | - | - | - | - | - | - | - | - | - | - |
Super Moves
| Damage | Counter Dmg | Guard | Guard Damage | Damage Scaling | Stun | CH Stun | Meter | Cancel Properties | Startup | Active | Recovery | Total | Hit Advantage | Block Advantage | Invulnerability |
|---|---|---|---|---|---|---|---|---|---|---|---|---|---|---|---|
| - | - | - | - | - | - | - | - | - | - | - | - | - | - | - | - |
LDM
| Damage | Counter Dmg | Guard | Guard Damage | Damage Scaling | Stun | CH Stun | Meter | Cancel Properties | Startup | Active | Recovery | Total | Hit Advantage | Block Advantage | Invulnerability |
|---|---|---|---|---|---|---|---|---|---|---|---|---|---|---|---|
| - | - | - | - | - | - | - | - | - | - | - | - | - | - | - | - |
Combos
BnBs:
- (cr.B, cr.A) / cl.C / cl.D, df.D, rdp K / hcb D
- (cr.B, cr.A) / cl.C / cl.D, df.D, hcb B, qcbx2 K
- Omit df.D if midscreen. Possible to land the full combo but very inconsistent.
- (cr.B, cr.A) / cl.C / cl.D, df.D, qcfx2 P
MSA Starters:
- (cr.B, cr.A) / cl.C / cl.D, df.D, hcb B, MSA
- Almost impossible link. MSA has to be done immediately otherwise it whiffs.
MSA Enders:
- (After landing from MSA) hcb B, qcbx2 K
- King will side-switch after hcb B, meaning you need to do the super in the opposite direction. Sometimes after landing from MSA, King will side-switch already, meaning she has to do hcb B in the opposite direction, but because this side-switches her, the super has to be done in the opposite direction of the initial side-switch. In the corner, none of this matters as King will remain on the same side.
Strategy
King excels in being at mid to long range space where she can punish jumps, fireballs, and grappler with her zoning tools, until they're pushed in a corner, with the perfect spacing away from the opponent that allows her to assault them freely.
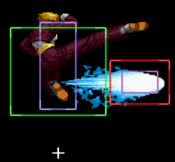
King's new Top Venom (qcf+P) allows her to stuff a variety of jump and other airborne options from afar when the opponent no longer feels like a grounded approach is safe. Hits most characters standing, and none crouching. A very important tool as it also also crushes lows, and is airborne, thus avoiding grabs and a variety of other attacks. Additionally her LDM, a quadruple fireball super, includes a flying low fireball within it's mix. it's a guard breaker as a result and an effective punish, as each of these fireballs will destroy any onscreen projectile.
Match Up
UNDER CONSTRUCTION
| - Ash:
| - Duo Lon:
| - Shen:
| - Terry:
| - Joe:
| - Tizoc:
| - Ryo:
| - Robert:
| - Yuri:
| - Kim:
| - Chang:
| - Jhun:
| - Leona:
| - Ralf:
| - Clark:
| - Gato:
| - Billy:
| - Yamazaki:
| - King:
| - Mai:
| - Mary:
| - Benimaru:
| - Shingo:
| - Daimon:
| - Athena:
| - Hinako:
| - Malin:
| - K':
| - Maxima:
| - Whip:
| - Kyo:
| - Chizuru:
| - KUSANAGI:
| - Maki:
| - Adelheid:
| - Mukai:

