UMVC3/Akuma: Difference between revisions

From SuperCombo Wiki
m (Navbox added.)
No edit summary
Line 597: Line 597:
{{Navbox-UMVC3}}
{{Navbox-UMVC3}}
[[Category:Ultimate Marvel vs Capcom 3]]
[[Category:Ultimate Marvel vs Capcom 3]]
[[Category:Akuma]]

Revision as of 22:16, 30 January 2021

Ultimate Marvel vs Capcom 3UMvC3Logo.png
UMVC3/Getting StartedUMVC3#CharactersUMVC3/GlossaryUMVC3/Game MechanicsUMVC3/Game ModesUMVC3/StrategyUMvC3HeaderButtons.png

Akuma

Umvc3 akuma face.jpg

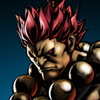
The "Master of the Fist" trained with his brother Gouken. In time Akuma would kill Gouken and work to persuade Gouken's pupil, Ryu, to be seduced by the Satsui no Hadou. Akuma is very secretive and constantly in pursuit of a true opponent to face in battle.


In a nutshell

Akuma returns in Ultimate with a game play very similar to what was seen in the past. Playing as Akuma depends on getting in close through the use of his varied special attacks and looking for strong mix-up opportunities. Although Akuma does relatively High.png damage, his Low.png life means that he can be removed from the game fairly easily if used recklessly. Akuma is most known for his Tatsumaki Zenkuyaku assist, though hit stun has been modified since the previous installment of Marvel vs. Capcom 3, which means the point character will need to have a faster reaction time.

Alternate Colors

Akuma colors.jpg


Pros and Cons

Pros

  • Very high damage output in addition to above average meter build.
  • Good support value in Tatsu assist helping with rushdown and beam DHC punishing enemy assist calls.
  • Respectable air mobility with Demon Flips.
  • Can switch up his playstyle from relentless offensive mixup game to runaway fireball game.

Cons

  • Tied for the second lowest health in the game.
  • Stubby normals make challenging opponents at range very risky.
  • Requires meter to become more of a threat.
  • Despite being an anchor character, is outclassed as an anchor somewhat.


Players to Watch

Justin Wong, Clegg Madness, SumBrwnKid, Brian Kasugano, Raid


Character Vitals

CHARACTER DATA
Health:
750,000
Double Jump:
No
Air Dash:
No
Air Dash/Jump count:
0
X-FACTOR
Level 1
Level 2
Level 3
X-Factor Damage Boost:
32.5 %
55 %
77.5 %
X-Factor Speed Boost:
7.5 %
15.0 %
22.5 %
X-Factor Duration:
10 s
15 s
20 s
MINIMUM DAMAGE SCALING
 
L Attacks
M Attacks
H Attacks
Special Moves
Hyper Combos
Normal:
10 %
10 %
10 %
20 %
33 %
X-Factor Lvl 1:
35 %
35 %
35 %
35 %
33 %
X-Factor Lvl 2:
35 %
35 %
35 %
35 %
33 %
X-Factor Lvl 3:
35 %
35 %
35 %
35 %
33 %

Video Walkthrough

Combos


corner combo with tatsu relaunch
advanced BnB's
Combos with Hawkeye and Jill assist
cool combo with vergil assist

Technology

ground throw conversion
guard break with level 3
Team BnB, tech and cool resets with Spencer

Hit/Hurtbox Guide


Move List

Assist Types

Name
Type
Damage
Special Properties
Cross-Over Combination
Alpha.png Gohadoken L
Shot.png Front.png
90,000
Proj.png
Messatsu-Gouhadou Agyo
If playing as Akuma,
hold H.png for Ungyo
Beta2.png Tatsumaki
Zankukyaku
Direct.png Front.png
40,000 X 2
+ 70,000
(132,600)
Projnull.png Strk.png
Messatsu-Goshoryu
Gamma2.png Hyakki Gojin
Direct.png Tiltdown.png
90,000
High.png Otg.png
Groundbounce.png
vs airborne
Softknockdown.png
Messatsu-Gouhadou Agyo
If playing as Akuma,
hold H.png for Ungyo

Normal Moves

Name
Command
Damage
Notes (glossary)
Standing Light
L.png
53,000
Rpdfire.png
Crouching Light
D.png + L.png
48,000
Rpdfire.png Low.png
Standing Medium
M.png
40,000 X 2
(72,000)
Crouching Medium
D.png + M.png
75,000
Standing Heavy
H.png
88,000
Crouching Heavy
D.png + H.png
85,000
Low.png
Softknockdown.png
Special
S.png
90,000
Launch.png Nocancel.png
Zugaihasatsu
"Overhead Chop"
F.png + M.png
45,000 X 2
(81,000)
High.png ( Groundbounce.png on aerial opponents)
Senpukyaku
F.png + H.png
100,000
Strk.png
Jumping Light
air L.png
53,000
High.png
Jumping Medium
air M.png
70,000
High.png
Jumping Heavy
air H.png
88,000
High.png
Jumping Special
air S.png
90,000
High.png Aircombofinisher.png
Tenmakujinkyaku
"Dive Kick"
air D.png + M.png
80,000

Throws

Name
Command
Damage
Notes (glossary)
Forward Throw
F.png + H.png
80,000
Throw.png Hardknockdown.png
Back Throw
B.png + H.png
80,000
Throw.png Hardknockdown.png
Forward Air Throw
air F.png + H.png
80,000
Airthrow.png Hardknockdown.png
Back Air Throw
air B.png + H.png
80,000
Airthrow.png Hardknockdown.png

Special Moves

Name
Command
Damage
Notes (glossary)
Gohadoken
Qcf.png + Atk.png
90,000
Proj.png
Zanku Hadoken
air Qcf.png + Atk.png
90,000
Proj.png
Atk.png used determines angle fired
Goshoryuken L
Dp.png + L.png
90,000
Strk.png
Goshoryuken M
Dp.png + M.png
55,000 + 70,000
(118,000)
Strk.png
Goshoryuken H
Dp.png + H.png
40,000 X 2 + 70,000
(132,600)
Strk.png
Tatsumaki Zankukyaku L
Qcb.png + L.png
110,000
Airok.png Strk.png
Projnull.png
Tatsumaki Zankukyaku M
Qcb.png + M.png
40,000 X 2 + 70,000
(132,600)
Airok.png Strk.png
Projnull.png
Tatsumaki Zankukyaku H
Qcb.png + H.png
35,000 X 4 + 70,000
(166,200)
Airok.png Strk.png
Projnull.png
Hyakkishu
"Demon Flip"
Rdp.png + Atk.png
0
Airok.png
Atk.png used determines distance
Hyakki Gosho
"Palm Strike"
During Hyakkishu: L
100,000
Groundbounce.png
Softknockdown.png
Hyakki Gojin
"Dive Kick"
During Hyakkishu: M
90,000
High.png
Otg.png
Groundbounce.png vs airborne
Softknockdown.png
Hyakki Goho
"Fireball"
During Hyakkishu: H
90,000
Proj.png
Ashura Senku
"Teleport"
Dp.png / Rdp.png + S.png
0
Teleport forward or back,
respectively.

Hyper Moves

Name
Command
Damage
Notes (glossary)
Messatsu-Gohado Agyo
"Rapid Fireballs"
Qcf.png + Atk.png + Atk.png
11,000 X 48
(285,600 ~ 342,900)
Proj.png
mashable
Messatsu-Gohado Ungyo
"Beam Hyper"
Qcf.png + Atk.png + Atk.png
hold H.png
18,000 X 25
(260,300 ~ 312,500)
Proj.png
Softknockdown.png
mashable
Tenma-Gozanku Agyo
"Rapid Fireballs"
air Qcf.png + Atk.png + Atk.png
11,000 X 48
(285,600 ~ 342,900)
Proj.png
mashable
Messatsu-Gohado Ungyo
"Beam Hyper"
air Qcf.png + Atk.png + Atk.png
hold H.png
18,000 X 25
(260,300 ~ 312,500)
Proj.png
Otg.png
Strk.png
mashable
Messatsu-Goshoryu
Dp.png + Atk.png + Atk.png
40,000 X 8 + 150,000
(292,000)
Strk.png
Projnull.png
Raging Demon
L.png , L.png , F.png , M.png , H.png
(465,000 ~ 507,000)
Throw.png
Hardknockdown.png
mashable
Level 3 Hyper.

Frame Data

Move Name Startup Active Recovery Adv. On Guard Adv. On Hit Notes
L.png 6 3 6 +5 +6
M.png 9 5 14 +2 +4
H.png 8 4 18 +1 +3
Crouch L.png 5 2 11 +1 +2
Crouch M.png 6 3 14 +1 +3
Crouch H.png 8 4 25 -6 -
Right.gif + M.png 21 4 19 -3 -1
Right.gif + H.png 18 5 16 +2 +10
S.png 7 3 21 -1 -
Jump L.png 8 9 7 +8 +9
Jump M.png 10 3 19 +12 +14
Jump H.png 10 3 23 +13 +15
Jump S.png 8 4 16 +15 +17
Jump Up.gif + S.png 10 4 Until Grounded
Jump Right.gif / Left.gif + S.png 10 3 Until Grounded
Jump Down.gif + S.png 9 4 15
Jump Down.gif + H.png 14 Until Grounded 8 +9 +11
Forward Throw 1 1 - - -
Back Throw 1 1 - - -
Forward Air Throw 1 1 - - -
Back Air Throw 1 1 - - -
Alpha.gif Assist 38 - 141
Beta.gif Assist 32 17(6)6 110
Gamma.gif Assist 59 11 93
Snap Back 2 4 18 +1 -
Gohadoken L.png 14 - 28 -6 -4
Gohadoken M.png 14 - 31 -9 -7
Gohadoken H.png 14 - 34 -12 -10
Zanku Hadoken L.png 10 - 35 +10 +11
Zanku Hadoken M.png 10 - 40 +10 +11
Zanku Hadoken H.png 10 - 45 +10 +11
Goshoryuken L.png 6 14 24 -15 -2
Goshoryuken M.png 4 5(1)10 30 -23 -4
Goshoryuken H.png 3 6(1)10 44 -36 -18
Tatsumaki Zankyaku L.png 8 7 18 -1 -
Tatsumaki Zankyaku M.png 8 17(6)6 14 +3 +11
Tatsumaki Zankyaku H.png 8 41(6)6 16 +1 +9
Air Tatsumaki Zankyaku L.png 5 28 Until Grounded, 6 frames grounded recovery +12 +13
Air Tatsumaki Zankyaku M.png 5 18(4)6 Until Grounded, 6 frames grounded recovery +12 +13
Air Tatsumaki Zankyaku H.png 5 42(4)6 Until Grounded, 6 frames grounded recovery +12 +13
Hyakkishu L.png 37/ Until Grounded
Hyakkishu M.png 42/ Until Grounded
Hyakkishu H.png 53/ Until Grounded
Hyakki Gosho 9 4 15 +12
Hyakki Gojin 14 Until Grounded 8 +11 +13
Hyakki Goho 10 - Until Grounded
Ashura Senku 14 20
Messatsu-Gohado Agyo 7+1 76 50 -20 -18
Messatsu-Gohado Ungyo 7+1 80 46 -34
Tenma-Gozanku Agyo 7+2 76 16 +3 -5
Tenma-Gozanku Ungyo 7+2 80 13 -1
Messatsu-Goshoryu 13+3 14(6)14(6)14 40 -22 -4
Raging Demon 5+0 40 4

Mission Mode

Strategy

Tips and Tricks

  • Throws are an important part of Akuma's game. Off of any throw, front or back, air or ground, you can instantly do an air Charged Messatsu Gouhado with {{ Qcf.png , Uf.png + Atk.png + atk}}. This will OTG for big damage.
  • Akuma's teleport is extremely useful, especially when combined with assists that hit repeatedly as he passes through you and changes sides.
  • Akuma's overhead Chop can be special cancelled, which means you can score a launcher with the S.png button into huge damage.

Combos

Assists

Alpha.pngFireball- Terrible. Don't use it.
Beta.pngTatsu- One of the best assists in the game. Fantastic for Rushdown characters since it locks them down.
Gamma.pngDive Kick- Not too bad, but since Tatsu is so good, this will never be used.
Basic Strategy

Advanced Strategy

Strategy vs. Akuma

Game Navigation

General
Controls
System
Strategy
HUD
Glossary
FAQ
Game Data
Patch Notes
Archived Information
Capcom Characters
Akuma
Amaterasu
Arthur
C. Viper
Chris
Chun-Li
Dante
Felicia
Firebrand
Frank West
Haggar
Hsien-Ko
Jill
Morrigan
Nemesis T-Type
Phoenix Wright
Ryu
Spencer
Strider Hiryu
Trish
Tron
Vergil
Viewtiful Joe
Wesker
Zero
Marvel Characters
Captain America
Deadpool
Doctor Doom
Doctor Strange
Dormammu
Ghost Rider
Hawkeye
Hulk
Iron Fist
Iron Man
Magneto
M.O.D.O.K.
Nova
Phoenix
Rocket Raccoon
Sentinel
She-Hulk
Shuma-Gorath
Spider-Man
Storm
Super-Skrull
Taskmaster
Thor
Wolverine
X-23