No edit summary |
m (fix motion tags) |
||
| Line 6: | Line 6: | ||
==Normal Moves== | ==Normal Moves== | ||
{{PJMoveListHeader}} | {{PJMoveListHeader}} | ||
{{PJMoveListRow | Standing Light Punch | n lp | 8 | 24 | -3 | 0 | 5 | All | }} | {{PJMoveListRow | Standing Light Punch | {{n}} {{lp}} | 8 | 24 | -3 | 0 | 5 | All | }} | ||
{{PJMoveListRow | Standing Strong Punch | n hp | 15 | 43 | -2 | -19 | 14 | All | }} | {{PJMoveListRow | Standing Strong Punch | {{n}} {{hp}} | 15 | 43 | -2 | -19 | 14 | All | }} | ||
{{PJMoveListRow | Crouching Light Punch | d lp | 8 | 15 | +7 | +7 | 5 | Low | }} | {{PJMoveListRow | Crouching Light Punch | {{d}} {{lp}} | 8 | 15 | +7 | +7 | 5 | Low | }} | ||
{{PJMoveListRow | Crouching Strong Punch | d hp | 17 | 36 | - | -14 | 16 | Low | }} | {{PJMoveListRow | Crouching Strong Punch | {{d}} {{hp}} | 17 | 36 | - | -14 | 16 | Low | }} | ||
{{PJMoveListRow | Standing Light Kick | n lk | 9 | 20 | +1 | +4 | 4 | All | }} | {{PJMoveListRow | Standing Light Kick | {{n}} {{lk}} | 9 | 20 | +1 | +4 | 4 | All | }} | ||
{{PJMoveListRow | Standing Strong Kick | n hk | 12 | 47 | -6 | -23 | 11 | All | }} | {{PJMoveListRow | Standing Strong Kick | {{n}} {{hk}} | 12 | 47 | -6 | -23 | 11 | All | }} | ||
{{PJMoveListRow | Crouching Light Kick | d lk | 10 | 23 | +8 | -1 | 4 | Low | }} | {{PJMoveListRow | Crouching Light Kick | {{d}} {{lk}} | 10 | 23 | +8 | -1 | 4 | Low | }} | ||
{{PJMoveListRow | Crouching Strong Kick | d hk | 19 | 40 | +1 | -18 | 10 | Low | }} | {{PJMoveListRow | Crouching Strong Kick | {{d}} {{hk}} | 19 | 40 | +1 | -18 | 10 | Low | }} | ||
{{PJMoveListRow | Jumping Light Punch | u lp | 11 | 1 | - | - | 5 | High | Recovery on landing | }} | {{PJMoveListRow | Jumping Light Punch | {{u}} {{lp}} | 11 | 1 | - | - | 5 | High | Recovery on landing | }} | ||
{{PJMoveListRow | Jumping Heavy Punch | u hp | 12 | 13 | - | - | 13 | High | Recovery on landing | }} | {{PJMoveListRow | Jumping Heavy Punch | {{u}} {{hp}} | 12 | 13 | - | - | 13 | High | Recovery on landing | }} | ||
{{PJMoveListRow | Jumping Light Kick | u lk | 13 | 1 | - | - | 4 | High | Recovery on landing | }} | {{PJMoveListRow | Jumping Light Kick | {{u}} {{lk}} | 13 | 1 | - | - | 4 | High | Recovery on landing | }} | ||
{{PJMoveListRow | Jumping Heavy Kick | u hk | 17 | 1 | - | - | 14 | High | Recovery on landing | }} | {{PJMoveListRow | Jumping Heavy Kick | {{u}} {{hk}} | 17 | 1 | - | - | 14 | High | Recovery on landing | }} | ||
{{MoveListFooter}} | {{MoveListFooter}} | ||
| Line 23: | Line 23: | ||
==Command Normals== | ==Command Normals== | ||
{{PJMoveListHeader}} | {{PJMoveListHeader}} | ||
{{PJMoveListRow | Shinai Hook | lp lp lp | 16 | 29 | +2 | -5 | 10 | All | }} | {{PJMoveListRow | Shinai Hook | {{lp}} lp {{lp}} | 16 | 29 | +2 | -5 | 10 | All | }} | ||
{{PJMoveListRow | Indicating Thrust | f hp | 20 | 41 | - | -17 | 17 | All | Blowback | }} | {{PJMoveListRow | Indicating Thrust | {{f}} {{hp}} | 20 | 41 | - | -17 | 17 | All | Blowback | }} | ||
{{PJMoveListRow | Schoolyard Killer Kick | f hk | 18 | 41 | +1 | -17 | 13 | All | }} | {{PJMoveListRow | Schoolyard Killer Kick | {{f}} {{hk}} | 18 | 41 | +1 | -17 | 13 | All | }} | ||
{{PJMoveListRow | Shinai Schooling | b hp | 21 | 37 | +4 | -13 | 16 | All | }} | {{PJMoveListRow | Shinai Schooling | {{b}} {{hp}} | 21 | 37 | +4 | -13 | 16 | All | }} | ||
{{PJMoveListRow | Serious Spinning Heel Drop | b hk | 27 | 26 | +2 | -2 | 14 | High | Overhead | }} | {{PJMoveListRow | Serious Spinning Heel Drop | {{b}} {{hk}} | 27 | 26 | +2 | -2 | 14 | High | Overhead | }} | ||
{{PJMoveListRow | Shinai Launcher | df hp | 19 | 36 | - | -12 | 14 | All | Rival Launcher | }} | {{PJMoveListRow | Shinai Launcher | {{df}} {{hp}} | 19 | 36 | - | -12 | 14 | All | Rival Launcher | }} | ||
{{PJMoveListRow | Upper Kick | df hk | 17 | 44 | - | -20 | 8 | All | Mini Launcher | }} | {{PJMoveListRow | Upper Kick | {{df}} {{hk}} | 17 | 44 | - | -20 | 8 | All | Mini Launcher | }} | ||
{{PJMoveListRow | Shinai Hazing | (air) f hp | 17 | 13 | - | - | 16 | High | Blowback, recovery on landing | }} | {{PJMoveListRow | Shinai Hazing | (air) {{f}} {{hp}} | 17 | 13 | - | - | 16 | High | Blowback, recovery on landing | }} | ||
{{MoveListFooter}} | {{MoveListFooter}} | ||
==Throws== | ==Throws== | ||
{{PJMoveListHeader}} | {{PJMoveListHeader}} | ||
{{PJMoveListRow | You idiot! | n lp + hp | 7 | 60 | - | - | 27 | - | }} | {{PJMoveListRow | You idiot! | {{n}} {{lp}} + {{hp}} | 7 | 60 | - | - | 27 | - | }} | ||
{{PJMoveListRow | Wake up, already! | d lp + hp | 7 | 60 | - | - | 35 | - | }} | {{PJMoveListRow | Wake up, already! | {{d}} {{lp}} + {{hp}} | 7 | 60 | - | - | 35 | - | }} | ||
{{PJMoveListRow | German Suplex | n lp + hp | 8 | 37 | - | - | 42 | - | Available when behind opponent | }} | {{PJMoveListRow | German Suplex | {{n}} {{lp}} + {{hp}} | 8 | 37 | - | - | 42 | - | Available when behind opponent | }} | ||
{{PJMoveListRow | Full-pelt Shrike Drop | (air) n lp + hp | 1 | - | - | - | 37 | - | }} | {{PJMoveListRow | Full-pelt Shrike Drop | (air) {{n}} {{lp}} + {{hp}} | 1 | - | - | - | 37 | - | }} | ||
{{MoveListFooter}} | {{MoveListFooter}} | ||
==Special Moves== | ==Special Moves== | ||
{{PJMoveListHeader}} | {{PJMoveListHeader}} | ||
{{PJMoveListRow | Scolding Slash (LP) | qcf lp | 21 | 45 | - | -21 | 26 | All | Blowback | }} | {{PJMoveListRow | Scolding Slash (LP) | {{qcf}} {{lp}} | 21 | 45 | - | -21 | 26 | All | Blowback | }} | ||
{{PJMoveListRow | Scolding Slash (HP) | qcf hp | 21 | 82 | - | -55 | 33 | All | Knockdown | }} | {{PJMoveListRow | Scolding Slash (HP) | {{qcf}} {{hp}} | 21 | 82 | - | -55 | 33 | All | Knockdown | }} | ||
{{PJMoveListRow | Aerial Scolding Slash (LP) | (air) qcf lp | 14 | 13 | - | +11 | 26 | All | Blowback, recovery on landing | }} | {{PJMoveListRow | Aerial Scolding Slash (LP) | (air) {{qcf}} {{lp}} | 14 | 13 | - | +11 | 26 | All | Blowback, recovery on landing | }} | ||
{{PJMoveListRow | Aerial Scolding Slash (HP) | (air) qcf hp | 14 | 13 | - | +11 | 33 | All | Blowback, recovery on landing | }} | {{PJMoveListRow | Aerial Scolding Slash (HP) | (air) {{qcf}} {{hp}} | 14 | 13 | - | +11 | 33 | All | Blowback, recovery on landing | }} | ||
{{PJMoveListRow | Counter Thrust | qcb p | 46 | 55 | - | -25 | 31 | All | Blowback, super armor from 1-49F | }} | {{PJMoveListRow | Counter Thrust | {{qcb}} {{p}} | 46 | 55 | - | -25 | 31 | All | Blowback, super armor from 1-49F | }} | ||
{{PJMoveListRow | Devastation Kick (LK) | dp lk | 10 | 13 | - | -50 | 12 | All | Cancels into Aerial Scolding Slash, recovery on landing | }} | {{PJMoveListRow | Devastation Kick (LK) | {{dp}} {{lk}} | 10 | 13 | - | -50 | 12 | All | Cancels into Aerial Scolding Slash, recovery on landing | }} | ||
{{PJMoveListRow | Devastation Kick (HK) | dp hk | 10 | 13 | - | -50 | 28~38 | Mash to increase damage, recovery on landing | }} | {{PJMoveListRow | Devastation Kick (HK) | {{dp}} {{hk}} | 10 | 13 | - | -50 | 28~38 | Mash to increase damage, recovery on landing | }} | ||
{{PJMoveListRow | Second Kick | qcb k | 15 | 76 | - | -15 | 22 | All | Blowback | }} | {{PJMoveListRow | Second Kick | {{qcb}} {{k}} | 15 | 76 | - | -15 | 22 | All | Blowback | }} | ||
{{PJMoveListRow | Rolling Smash | (air) qcf k | 20 | 13 | - | +11 | 42 | All | Fixed damage, throw tech possible, recovery on landing | }} | {{PJMoveListRow | Rolling Smash | (air) {{qcf}} {{k}} | 20 | 13 | - | +11 | 42 | All | Fixed damage, {{throw}} tech possible, recovery on landing | }} | ||
{{MoveListFooter}} | {{MoveListFooter}} | ||
==Burning Vigor Attacks== | ==Burning Vigor Attacks== | ||
{{PJMoveListHeader}} | {{PJMoveListHeader}} | ||
{{PJMoveListRow | Burning Push Ups | qcf qcf p | 29 | 59 | - | -35 | 45 | All | Fixed damage, blowback | }} | {{PJMoveListRow | Burning Push Ups | {{qcf}} qcf {{p}} | 29 | 59 | - | -35 | 45 | All | Fixed damage, blowback | }} | ||
{{PJMoveListRow | Burning Cross Counter | qcb qcb p | 27 | 46 | - | -35 | 46~101 | All | Can be held to increase damage, super armor from 1F to first active frame | }} | {{PJMoveListRow | Burning Cross Counter | {{qcb}} qcb {{p}} | 27 | 46 | - | -35 | 46~101 | All | Can be held to increase damage, super armor from 1F to first active frame | }} | ||
{{PJMoveListRow | Burning Windmill | qcf qcf k | 22 | 71 | - | -50 | 50 | All | Blowback | }} | {{PJMoveListRow | Burning Windmill | {{qcf}} qcf {{k}} | 22 | 71 | - | -50 | 50 | All | Blowback | }} | ||
{{PJMoveListRow | Burning Stoic | qcb qcb k | 52 | 73 | - | - | - | - | - | Grants passive super armor for 222F after activation | }} | {{PJMoveListRow | Burning Stoic | {{qcb}} qcb {{k}} | 52 | 73 | - | - | - | - | - | Grants passive super armor for 222F after activation | }} | ||
{{MoveListFooter}} | {{MoveListFooter}} | ||
| Line 65: | Line 65: | ||
{{PJMoveListHeader}} | {{PJMoveListHeader}} | ||
{{PJMoveListRow | Hot-Blooded Spirit Cannon | lp + lk or hp + hk | 20 | 59 | - | -35 | 48 | All | Team Up technique, damage type | }} | {{PJMoveListRow | Hot-Blooded Spirit Cannon | {{lp}} + {{lk}} or {{hp}} + {{hk}} | 20 | 59 | - | -35 | 48 | All | Team Up technique, damage type | }} | ||
{{PJMoveListRow | Cavalry Drop | p + p + k | 20 | 44 | - | -20 | 100 | All | Party Up technique | }} | {{PJMoveListRow | Cavalry Drop | {{p}} + {{p}} + {{k}} | 20 | 44 | - | -20 | 100 | All | Party Up technique | }} | ||
{{MoveListFooter}} | {{MoveListFooter}} | ||
Revision as of 00:30, 9 December 2020
Introduction
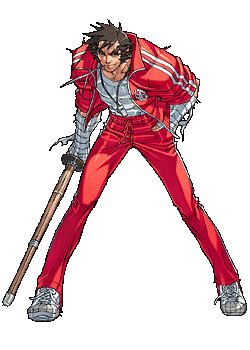
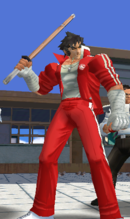
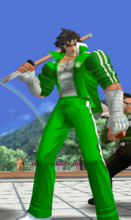
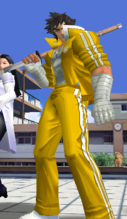
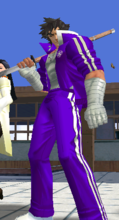
Hayato's last name is Nekketsu, which literally translates to "hot-blooded". In what is perhaps the most incredible example of nominative determinism ever, he is a fierce, hot-headed PE teacher who values love, friendship and self-improvement above all else. Hayato is a very solid pick in Project Justice, with a simple yet very effective gameplan centered around his long-ranged footsies and the only instance of a low short that confirms into full combos, which makes his poking and mixups that much scarier compared to most other characters.
Normal Moves
Name
Command
Startup
Recovery
Hit Adv
Block Adv
Damage
Guard
Notes
Standing Light Punch
8
24
-3
0
5
All
Standing Strong Punch
15
43
-2
-19
14
All
Crouching Light Punch
8
15
+7
+7
5
Low
Crouching Strong Punch
17
36
-
-14
16
Low
Standing Light Kick
9
20
+1
+4
4
All
Standing Strong Kick
12
47
-6
-23
11
All
Crouching Light Kick
10
23
+8
-1
4
Low
Crouching Strong Kick
19
40
+1
-18
10
Low
Jumping Light Punch
11
1
-
-
5
High
Recovery on landing
Jumping Heavy Punch
12
13
-
-
13
High
Recovery on landing
Jumping Light Kick
13
1
-
-
4
High
Recovery on landing
Jumping Heavy Kick
17
1
-
-
14
High
Recovery on landing
Command Normals
Name
Command
Startup
Recovery
Hit Adv
Block Adv
Damage
Guard
Notes
Shinai Hook
16
29
+2
-5
10
All
Indicating Thrust
20
41
-
-17
17
All
Blowback
Schoolyard Killer Kick
18
41
+1
-17
13
All
Shinai Schooling
21
37
+4
-13
16
All
Serious Spinning Heel Drop
27
26
+2
-2
14
High
Overhead
Shinai Launcher
19
36
-
-12
14
All
Rival Launcher
Upper Kick
17
44
-
-20
8
All
Mini Launcher
Shinai Hazing
(air) 

17
13
-
-
16
High
Blowback, recovery on landing
Throws
Name
Command
Startup
Recovery
Hit Adv
Block Adv
Damage
Guard
Notes
You idiot!
7
60
-
-
27
-
Wake up, already!
7
60
-
-
35
-
German Suplex
8
37
-
-
42
-
Available when behind opponent
Full-pelt Shrike Drop
(air) 
 +
+ 
1
-
-
-
37
-
Special Moves
Name
Command
Startup
Recovery
Hit Adv
Block Adv
Damage
Guard
Notes
Scolding Slash (LP)
21
45
-
-21
26
All
Blowback
Scolding Slash (HP)
21
82
-
-55
33
All
Knockdown
Aerial Scolding Slash (LP)
(air) 

14
13
-
+11
26
All
Blowback, recovery on landing
Aerial Scolding Slash (HP)
(air) 

14
13
-
+11
33
All
Blowback, recovery on landing
Counter Thrust
46
55
-
-25
31
All
Blowback, super armor from 1-49F
Devastation Kick (LK)
10
13
-
-50
12
All
Cancels into Aerial Scolding Slash, recovery on landing
Devastation Kick (HK)
10
13
-
-50
28~38
Mash to increase damage, recovery on landing
Second Kick
15
76
-
-15
22
All
Blowback
Rolling Smash
(air) 

20
13
-
+11
42
All
Fixed damage,  tech possible, recovery on landing
Burning Vigor Attacks
Name
Command
Startup
Recovery
Hit Adv
Block Adv
Damage
Guard
Notes
Burning Push Ups
29
59
-
-35
45
All
Fixed damage, blowback
Burning Cross Counter
27
46
-
-35
46~101
All
Can be held to increase damage, super armor from 1F to first active frame
Burning Windmill
22
71
-
-50
50
All
Blowback
Burning Stoic
52
73
-
-
-
-
-
Team Up Techniques
Name
Command
Startup
Recovery
Hit Adv
Block Adv
Damage
Guard
Notes
Hot-Blooded Spirit Cannon
20
59
-
-35
48
All
Team Up technique, damage type
Cavalry Drop
20
44
-
-20
100
All
Party Up technique
Combos
- cr.LK,LK, st.LP > st.HP > b+HP xx qcf+HP/qcf,qcf+HP
- ...df+HK, j.LP,LP > j.HP xx j.qcf+HP
- df+HP, j.LK,LK > j.HK, j.LP,LP > j.HK, j.LP,LP > j.HK xx j.qcf+HP
Videos
Skip to 3:14
