| Line 109: | Line 109: | ||
==The Basics== | ==The Basics== | ||
Zangief's main objective is to get close to his opponent and land his SPD (spinning pile driver). Getting close to people with Gief is easier said than done since he's the only non-fireball character in the game that doesn't have a quick torpedo-like move to get him across the screen. Learning | Zangief's main objective is to get close to his opponent and land his SPD (spinning pile driver). Getting close to people with Gief is easier said than done since he's the only non-fireball character in the game that doesn't have a quick torpedo-like move to get him across the screen. Learning to use your Lariats to avoid fireballs and sweeps, understanding your go to normal moves, and having the ability to land your SPD on command is necessary to play Gief at a decent level. Geif is probably the 4th or 5th best character in the game (usually behind Ryu/Ken/Sagat/Guile and maybe Sim). -x64 | ||
==Advanced Strategy== | ==Advanced Strategy== | ||
Revision as of 17:37, 30 May 2019


Zangief
Zangief, while being a name impossible to render in the Russian language, is a massive Russian wrestler famed for beating bears in the yearly Hell in a Cell matches in Moscow. This generally involves trapping their heads between his legs and then sitting down, or spinning around with his arms outstretched as you used to do as a child in order to get a head rush.
In a nutshell
Zangief is a get-in-or-die-trying character. Your match will either be a painful experience at distance walking into projectiles or long range fists, or a close range glorious explosion of nearly unstoppable throwing. If you like to grapple your opponent into submission and don't mind working for your reward by taking a bunch of hits to do so, Zangief is your man.
Character Specific Information
Color Options
| Default | Start |
 |

|
Moves List
Normal Moves
- Standing Normal Moves (st.)
- Close Standing Normal Moves (cl.)
- Crouching Normal Moves (cr.)
- Jumping Normal Moves (nj.)
- Diagonal Jumping Normal Moves (j.)
Unique Moves
Throw Moves
Special Moves
The Basics
Zangief's main objective is to get close to his opponent and land his SPD (spinning pile driver). Getting close to people with Gief is easier said than done since he's the only non-fireball character in the game that doesn't have a quick torpedo-like move to get him across the screen. Learning to use your Lariats to avoid fireballs and sweeps, understanding your go to normal moves, and having the ability to land your SPD on command is necessary to play Gief at a decent level. Geif is probably the 4th or 5th best character in the game (usually behind Ryu/Ken/Sagat/Guile and maybe Sim). -x64
Advanced Strategy
SPD: In the CPS1 games (WW, CE, and HF) Gief's SPD does not have a recovery animation, which means it can be used and abused as a consequence-free negative edge/button up throw (like T-Hawk in Super Turbo). What this means is holding down a punch button, doing a tick throw SPD out of a normal or the end of a lariat, and then releasing the button as your SPD throw instead of tapping it, preferably ending in a crouching position. When you do this correctly, you ether get the SPD or you just sit there crouching while your opponent does an invincible special move that you are now in position to punish. Mastered correctly, there is absolutely no way out of an SPD loop in the corner using this method against most of the cast. Most people will use ether standing far LK or crouching LP for their ticks into SPD because both of these moves have no recovery. Used correctly as a safe meaty outside of their throw range, you can beat out every single move in the game besides a blanka ball (1st frame startup so he can't be safe jumped or safe meatied) or a competing SPD from a mirror match Gief.
Important Normals: Your far standing LK is pretty important. You can ether negative edge SPD out of a standing LK tick or link it into a crouching HK for an easy mixup. Crouching LP is very easy to chain cancel and link into couching HK sweep or standing LK. Your close standing LP isn't as good as the ST version of Gief but it still comes out fast and has a hitbox above you, which can save you in a lot of tight spots. You can tick into SPD from pretty much all of Gief's crouching normals, but you'll want to stick to the light and medium punches and kicks most of the time (you have to be very close to use HP/HK as a tick). Forward jumping HP is usually your go to jump in, but jumping MP can be used if you need something quicker with a little more height. Jumping in with any of the kick buttons can set up some good SPD ticks. Your body press (down HP) is probably the best crossup in the game and is very easy to stun with (crossup HP, LP,LP,LP,HK will dizzy most of the time and is ridiculously easy to perform). Your crouching HK sweep comes out very fast and has nice length, which lets you trade or punish other low moves.
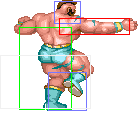
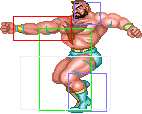
Lariat: Your Punch and Kick lariats are very important. Gief has fairly poor anti-air, so knowing that you can virtually guarantee a trade with a punch lariat from a crouching position against most jump-ins is a big deal (trading damage for a knockdown is the name of the game for Gief). Both of Geif's Lariats in HF start up on the first frame, which is why the punch lariat (better hitbox than kick lariat) works so well as a last second anti-air. Both Punch and Kick lariats can be used to go through projectiles and both of them have no recovery, which means you can block if the lariat ends and you have a meaty projectile or limb on you. Kick lariat in HF is famous for not having any leg hurtbox, which means it cannot be sweeped. What most people don't realize though is that kick lariat's arms have very poor hitboxes, which makes them fairly easy to hit out of. Learning how to mix your lariat usage is key to getting close to fireball chuckers and starting your SPD games.
-x64
Combos
-j.d.HP,c.MK,Lariat
-j.d.HP,c.LPx2.s.LK,c.HK
Match-ups
Vs. Balrog (boxer):
Use his Crouching Roundhouse against Boxer legs
Vs. Blanka:
Punish his Vertical Roll with headbutt
Vs. Chun-Li:
His best match up due to her short pokes,but now she had a Kikkoken,is useless anyway thanks to your Double Lariat,now the problem will be about beign trapped with her Kikkoken and crouching Roundhouse strategy if you jump.
Vs. Dhalsim:
Double Lariat can evade projectiles,you will care about his teleport but its a nice opportunity to SPD him
Vs. E. Honda:
Double Lariat can defeat Sumo Torpedo,your main problem will be the Sumo Splash.
Vs. Guile:
Double Lariat can evade Sonic Boom but watch out with Guile's long pokes and Flash Kick
Vs. Ken:
Punish SRK with SPD and evade Fireball with Double Lariat,also crouch Fierce its great against Hurricane Kick
Vs. M. Bison (dictator):
Headbutt can defeat Stomp,but watch out with Dictador long pokes,Quick Double Lariat its more effective against Psycho Crusher startups.
Vs. Ryu:
He is like ken,but he had a better Fireball and a worst SRK.
Vs. Sagat:
Double Lariat evade Tiger Shots,specially low ones.
Vs. Vega (claw):
Headbutt can defeat Flying Barcelona
Vs. Zangief (self):
Hitboxes
Standing Normals
- Standing LP:
| Damage | 12 | 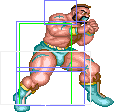 |
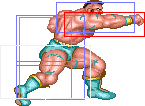 |

|
| Stun | 1~7 | |||
| Stun Timer | 40 | |||
| Chain Cancel | No | |||
| Special Cancel | No | |||
| Frame Advantage | +6 | |||
| Frame Count | 2 | 4 | 5 | |
| Simplified | 1+2 | 4 | 5 | |
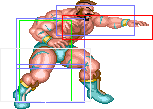
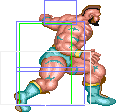
- Standing MP:
| Damage | 18 | 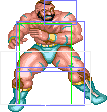 |
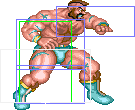 |
 |
|
| Stun | 5~11 | ||||
| Stun Timer | 60 | ||||
| Chain Cancel | No | ||||
| Special Cancel | No | ||||
| Frame Advantage | +12 | ||||
| Frame Count | 2 | 2 | 3 | 5 | |
| Simplified | 1+4 | 3 | 5 | ||
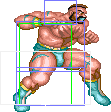
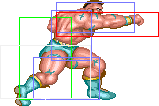
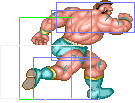
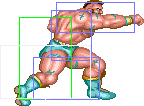
- Standing HP:
| Damage | ? |  |
 |
 |
 |
 |
 |

|
| Stun | 11~17 | |||||||
| Stun Timer | 80 | |||||||
| Chain Cancel | No | |||||||
| Special Cancel | No | |||||||
| Frame Advantage | -11 | |||||||
| Frame Count | 3 | 3 | 6 | 10 | 8 | 6 | 5 | |
| Simplified | 1+6 | 4 | 29 | |||||
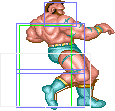
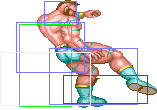
- Standing LK:
| Damage | 12 | 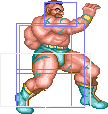 |
 |
|
| Stun | 1~7 | |||
| Stun Timer | 40 | |||
| Chain Cancel | No | |||
| Special Cancel | Yes | |||
| Frame Advantage | +10 | |||
| Frame Count | 2 | 2 | 5 | |
| Simplified | 1+4 | 5 | ||
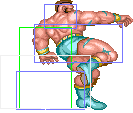
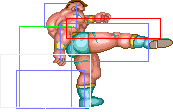
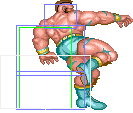
- Standing MK:
| Damage | 18 |  |
 |
 |
 |

|
| Stun | 5~11 | |||||
| Stun Timer | 60 | |||||
| Chain Cancel | No | |||||
| Special Cancel | No | |||||
| Frame Advantage | +7 | |||||
| Frame Count | 3 | 3 | 4 | 4 | 5 | |
| Simplified | 1+6 | 4 | 9 | |||
- Standing HK:
| Damage | 22 |  |
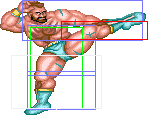 |

| |
| Stun | 11~17 | ||||
| Stun Timer | 80 | ||||
| Chain Cancel | No | ||||
| Special Cancel | No | ||||
| Frame Advantage | +5 | ||||
| Frame Count | 4 | 8 | 11 | ||
| Simplified | 1+4 | 8 | 11 | ||
Close Standing Normals
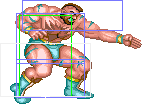
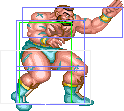
- Close Standing LP:
| Damage | ? |  |
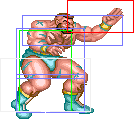 |
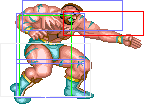 |
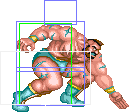 |
 |
 |

|
| Stun | 1~7 | |||||||
| Stun Timer | 40 | |||||||
| Chain Cancel | No | |||||||
| Special Cancel | No | |||||||
| Frame Advantage | +3 | |||||||
| Frame Count | 2 | 2 | 2 | 2 | 4 | 4 | 5 | |
| Simplified | 1+2 | 4 | 15 | |||||
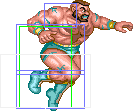
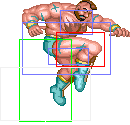
- Close Standing LK:
| Damage | 12 | 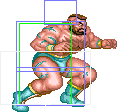 |
 |
 |
 |
 |

|
| Stun | 1~7 | ||||||
| Stun Timer | 40 | ||||||
| Chain Cancel | No | ||||||
| Special Cancel | No | ||||||
| Frame Advantage | +2 | ||||||
| Frame Count | 3 | 2 | 2 | 8 | 4 | 1 | |
| Simplified | 1+7 | 8 | 5 | ||||
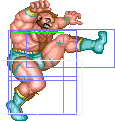
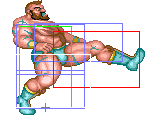
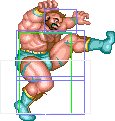
- Close Standing MK:
| Damage | 18 |  |
 |
 |
 |

|
| Stun | 5~11 | |||||
| Stun Timer | 60 | |||||
| Chain Cancel | No | |||||
| Special Cancel | No | |||||
| Frame Advantage | +2 | |||||
| Frame Count | 3 | 3 | 4 | 4 | 5 | |
| Simplified | 1+6 | 4 | 9 | |||
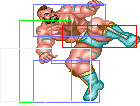
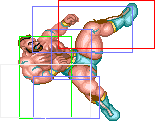
- Close Standing HK:
| Damage | 22+6 | 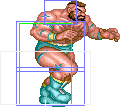 |
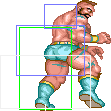 |
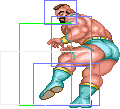 |
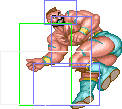 |
 |
 |
 |
 |
 |
 |
|
| Stun | 10~16+1~7 | |||||||||||
| Stun Timer | 80+70 | |||||||||||
| Chain Cancel | No | |||||||||||
| Special Cancel | No | |||||||||||
| Frame Advantage | -17 | |||||||||||
| Frame Count | 2 | 2 | 2 | 3 | 6 | 8 | 8 | 10 | 8 | 5 | ||
| Simplified | 1+9 | 14 | 31 | |||||||||
Crouching Normals
- Crouching LP:
| Damage | 6 |  |

|
| Stun | 1~7 | ||
| Stun Timer | 40 | ||
| Chain Cancel | Yes | ||
| Special Cancel | Yes | ||
| Frame Advantage | -4 | ||
| Frame Count | 3 | 5 | |
- Crouching MP:
| Damage | 18 |  |
 |
 |
 |

|
| Stun | 5~11 | |||||
| Stun Timer | 60 | |||||
| Chain Cancel | No | |||||
| Special Cancel | No | |||||
| Frame Advantage | +12 | |||||
| Frame Count | 3 | 3 | 8 | 4 | 5 | |
| Simplified | 1+6 | 8 | 9 | |||
- Crouching HP:
| Damage | 22 |  |
 |
 |
 |

|
| Stun | 11~17 | |||||
| Stun Timer | 80 | |||||
| Chain Cancel | No | |||||
| Special Cancel | No | |||||
| Frame Advantage | -11 | |||||
| Frame Count | 3 | 3 | 8 | 10 | 13 | |
| Simplified | 1+6 | 8 | 23 | |||
- Crouching LK:
| Damage | 12 |  |
 |

|
| Stun | 1~7 | |||
| Stun Timer | 40 | |||
| Chain Cancel | No | |||
| Special Cancel | Yes | |||
| Frame Advantage | +3 | |||
| Frame Count | 3 | 4 | 7 | |
- Crouching MK:
| Damage | 18 |  |
 |

|
| Stun | 5~11 | |||
| Stun Timer | 60 | |||
| Chain Cancel | No | |||
| Special Cancel | Yes | |||
| Frame Advantage | +5 | |||
| Frame Count | 3 | 6 | 9 | |
- Crouching HK:
| Damage | 22 |  |
 |

|
| Stun | 11~17 | |||
| Stun Timer | 80 | |||
| Chain Cancel | No | |||
| Special Cancel | No | |||
| Frame Advantage | +1 | |||
| Frame Count | 4 | 8 | 13 | |
Aerial Normals
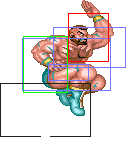
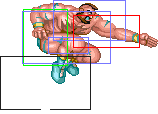
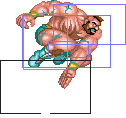
- Neutral/Diagonal Jumping LP:
| Damage | 14 | 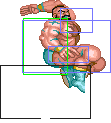 |
 |
 |
|
| Stun | 1~7 | ||||
| Stun Timer | 40 | ||||
| Frame Count | 2 | 3 | 8 | ∞ | |
| Simplified | 2 | 11 | ∞ | ||
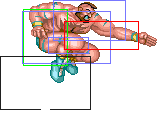
- Diagonal Jumping LP:
| Damage | 16 |  |
 |
 |

|
| Stun | 1~7 | ||||
| Stun Timer | 40 | ||||
| Frame Count | 2 | 3 | 8 | ∞ | |
| Simplified | 2 | 11 | ∞ | ||
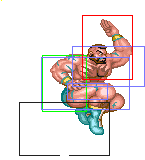
- Neutral Jumping MP:
| Damage | 20 |  |
 |
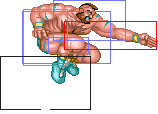 |

|
| Stun | 5~11 | ||||
| Stun Timer | 50 | ||||
| Frame Count | 2 | 3 | 8 | ∞ | |
| Simplified | 2 | 11 | ∞ | ||
- Diagonal Jumping MP:
| Damage | 20 |  |
 |
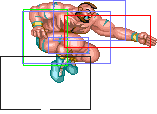 |

|
| Stun | 5~11 | ||||
| Stun Timer | 50 | ||||
| Frame Count | 2 | 3 | 8 | ∞ | |
| Simplified | 2 | 11 | ∞ | ||
- Neutral Jumping HP:
| Damage | 24 |  |
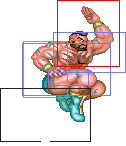 |
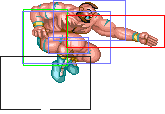 |

|
| Stun | 11~17 | ||||
| Stun Timer | 60 | ||||
| Frame Count | 2 | 3 | 8 | ∞ | |
| Simplified | 2 | 11 | ∞ | ||
- Diagonal Jumping HP:
| Damage | 22 | 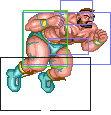 |
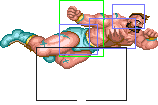 |
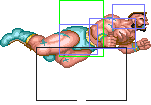 |
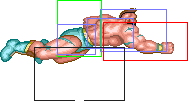 |
 |
 |

|
| Stun | 11~17 | |||||||
| Stun Timer | 60 | |||||||
| Frame Count | 1 | 3 | 3 | 7 | 3 | 3 | ∞ | |
| Simplified | 1+7 | 4 | ∞ | |||||
- Neutral Jumping LK:
| Damage | 14 | 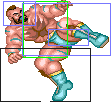 |
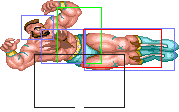
|
| Stun | 1~7 | ||
| Stun Timer | 40 | ||
| Frame Count | 3 | ∞ | |
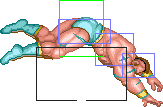
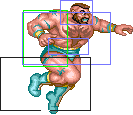
- Diagonal Jumping LK:
| Damage | 16 |  |
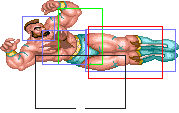 |
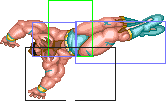 |
 |
 |
|
| Stun | 1~7 | ||||||
| Stun Timer | 40 | ||||||
| Frame Count | 3 | 16 | 8 | 6 | 4 | ∞ | |
| Simplified | 3 | 16 | ∞ | ||||
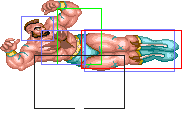
- Neutral Jumping MK:
| Damage | 20 |  |
 |
 |
 |
 |

|
| Stun | 5~11 | ||||||
| Stun Timer | 50 | ||||||
| Frame Count | 3 | 16 | 8 | 6 | 4 | ∞ | |
| Simplified | 3 | 16 | ∞ | ||||
- Diagonal Jumping MK:
| Damage | 20 |  |
 |
 |
 |
 |

|
| Stun | 5~11 | ||||||
| Stun Timer | 50 | ||||||
| Frame Count | 3 | 16 | 8 | 6 | 4 | ∞ | |
| Simplified | 3 | 16 | ∞ | ||||
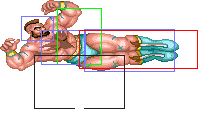
- Neutral Jumping HK:
| Damage | 24 |  |
 |
 |
 |
 |

|
| Stun | 11~17 | ||||||
| Stun Timer | 60 | ||||||
| Frame Count | 3 | 8 | 8 | 6 | 4 | ∞ | |
| Simplified | 3 | 8 | ∞ | ||||
- Diagonal Jumping HK:
| Damage | 22 |  |
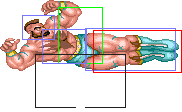 |
 |
 |
 |

|
| Stun | 11~17 | ||||||
| Stun Timer | 60 | ||||||
| Frame Count | 3 | 8 | 8 | 6 | 4 | ∞ | |
| Simplified | 3 | 8 | ∞ | ||||
Unique Moves
- Headbutt: (Jump straight up, ↖/↑/↗ + Strong/Fierce)
Strong
| Damage | 14 |  |
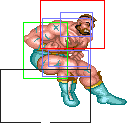 |

|
| Stun | 5~11 | |||
| Stun Timer | 50 | |||
| Frame Count | 3 | 8 | ∞ | |
Fierce
| Damage | 14 |  |
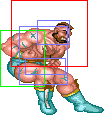 |

|
| Stun | 11~17 | |||
| Stun Timer | 60 | |||
| Frame Count | 3 | 6 | ∞ | |
Flying Body Attack a.k.a. Chest Splash: (Jump diagonally, ↙/↓/↘ + Fierce)
| Damage | 14 | 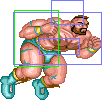 |
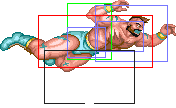
|
| Stun | 5~11 | ||
| Stun Timer | 60 | ||
| Frame Count | 5 | ∞ | |
Double Knee Drop: (Jump diagonally, ↙/↓/↘ + Short)
| Damage | 14 | 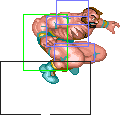 |
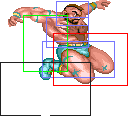
|
| Stun | 5~11 | ||
| Stun Timer | 40 | ||
| Frame Count | 5 | ∞ | |
Throws
Standing Normal Grabs Throwboxes:
| Throw | Hold | 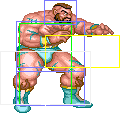
| |||
| Damage | 32 | Damage | 16+(4*n) | ||
| Duration | - | Duration | 300 | ||
| Stun | 7~13 | Stun | - | ||
| Stun Timer | 100 | Stun Timer | - | ||
| Range (from axis) | 69 | Range (from axis) | 69 | ||
| Range advantage | 24 | Range advantage | 24 | ||
Pile Driver (←/→ + Strong): 32
Iron Claw (←/→ + Fierce): 16,4*n
Brain Buster (←/→ + Forward): 32
Kamitsuki a.k.a. Bite (←/→ + Roundhouse): 16,4*n
Crouch Grabs Throwboxes:
| Throw | Hold | 
| |||
| Damage | 28 | Damage | 16+(4*n) | ||
| Duration | - | Duration | 300 | ||
| Stun | 5~11 | Stun | 5~11 | ||
| Stun Timer | 100 | Stun Timer | - | ||
| Range (from axis) | 69 | Range (from axis) | 69 | ||
| Range advantage | 24 | Range advantage | 24 | ||
Stomach Claw (↙/↓/↘ + Strong/Fierce): 16,4*n
Deadly Driver (↙/↓/↘ + Strong): 28
Leg Throw (↙/↓/↘ + Fierce): 28
Special Moves
- Double Lariat: Press all Punch Buttons
| Damage | 22 | File:Sf2hf-zangief-dl-s1.png | 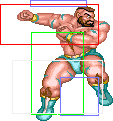 |
 |
 |
 |
 |
 |
 |
 |
 |
 |
 |

|
| Stun | 13~19 | |||||||||||||
| Stun Timer | 120 | |||||||||||||
| Frame Advantage | -25 | |||||||||||||
| Frame Count | 4 | 3 | 5 | 5 | 5 | 5 | 5 | 5 | 5 | 5 | 5 | 5 | 3 | |
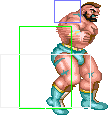
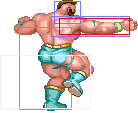
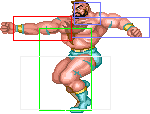
- Quick Double Lariat: Press all Kick Buttons
| Damage | 22 | 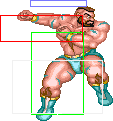 |
 |
 |
 |
 |
 |
 |
 |
 |
 |
 |
 |

|
| Stun | 13~19 | |||||||||||||
| Stun Timer | 120 | |||||||||||||
| Frame Advantage | -16 | |||||||||||||
| Frame Count | 4 | 4 | 3 | 4 | 2 | 4 | 3 | 4 | 2 | 3 | 3 | 3 | 4 | |
- Spinning Piledriver: (360 + P)
| Damage | 50 | 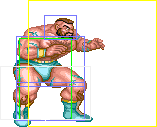
| |
| Duration | 130 | ||
| Stun | 5~11 | ||
| Stun Timer | 60 | ||
| Range (from axis) | 64 | ||
| Range advantage | 35 | ||
Misc Animations
| Walk back | Neutral | Walk Fwd | Crouch |
 |
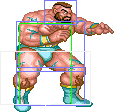 |
 |

|
- Standing reel:
 |
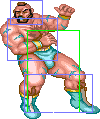 |
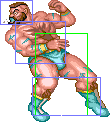 |
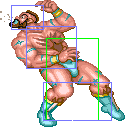 |

|
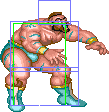
- Standing gut reel:
 |
 |
 |

|
- Crouching reel:
 |

|
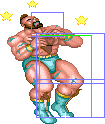
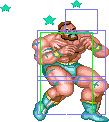
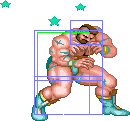
- Dizzy:
 |
 |
 |
|
| General | Game Mechanics | Strategy | Tiers | |
| The Characters | Balrog (Boxer) | Blanka | Chun-Li | Dhalsim | E. Honda | Guile | Ken | M. Bison (Dictator) | Ryu | Sagat | Vega (Claw) | Zangief |
