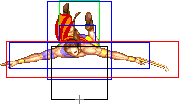
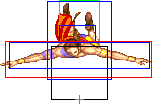
(→Special Moves: jump hitboxes + framedata + description) |
|||
| Line 899: | Line 899: | ||
Vega goes off the wall and shoots directly at the opponent with a claw. You do not have any control once in the air. Doing this with Jab will make him fly higher- this will hit jumpers, but completely miss someone on the ground. This move has a small chance of catching someone by surprise, but leaves you vulnerable if blocked. The best use of this move is against people who jump up to counter your Wall Dive, like Chun Li or M.Bison often do. | Vega goes off the wall and shoots directly at the opponent with a claw. You do not have any control once in the air. Doing this with Jab will make him fly higher- this will hit jumpers, but completely miss someone on the ground. This move has a small chance of catching someone by surprise, but leaves you vulnerable if blocked. The best use of this move is against people who jump up to counter your Wall Dive, like Chun Li or M.Bison often do. | ||
===Misc Animations=== | |||
====Jump Animations==== | |||
*<b>Neutral/Back Jump:</b> | |||
{{STDiagramHeader}} | |||
{{STDiagramCell|}} |{{STDiagramImageCell| 1 | OVega_bj1_nj1_fj1.png}} |{{STDiagramImageCell| 1 | OVega_bj2&8_nj2&8_fj2&12.png}} |{{STDiagramImageCell| 1 | OVega_bj3_nj3_fj3.png}} |{{STDiagramImageCell| 1 | OVega_bj4_nj4_fj4&10.png}} |{{STDiagramImageCell| 1 | OVega_bj5_nj5.png}} |{{STDiagramImageCell| 1 | OVega_bj6_nj6.png}} |{{STDiagramImageCell| 1 | OVega_bj7_nj7.png}} |{{STDiagramImageCell| 1 | OVega_bj2&8_nj2&8_fj2&12.png}} | |||
|- | |||
{{STDiagramCell| Frame Count (Neutral)}} |{{STDiagramCell| 2}} |{{STDiagramCell| 1}} |{{STDiagramCell| 1}} |{{STDiagramCell| 22}} |{{STDiagramCell| 4}} |{{STDiagramCell| 10}} |{{STDiagramCell| 1}} |{{STDiagramCell| 7*}} | |||
|- | |||
{{STDiagramCell| Simplified (Neutral)}} |{{STDiagramCellColSpan| 2 | 3}} |{{STDiagramCellColSpan| 4 | 37}} |{{STDiagramCell| 1}} |{{STDiagramCell| 7*}} | |||
|- | |||
{{STDiagramCell| Frame Count (Back)}} |{{STDiagramCell| 2}} |{{STDiagramCell| 1}} |{{STDiagramCell| 1}} |{{STDiagramCell| 22}} |{{STDiagramCell| 4}} |{{STDiagramCell| 10}} |{{STDiagramCell| 1}} |{{STDiagramCell| 7*}} | |||
|- | |||
{{STDiagramCell| Simplified (Back)}} |{{STDiagramCellColSpan| 2 | 3}} |{{STDiagramCellColSpan| 4 | 37}} |{{STDiagramCell| 1}} |{{STDiagramCell| 7*}} | |||
|} | |||
*<b>Forward Jump:</b> | |||
{{STDiagramHeader}} | |||
{{STDiagramCell|}} |{{STDiagramImageCell| 1 | OVega_bj1_nj1_fj1.png}} |{{STDiagramImageCell| 1 | OVega_bj2&8_nj2&8_fj2&12.png}} |{{STDiagramImageCell| 1 | OVega_bj3_nj3_fj3.png}} |{{STDiagramImageCell| 1 | OVega_bj4_nj4_fj4&10.png}} |{{STDiagramImageCell| 1 | OVega_fj5.png}} |{{STDiagramImageCell| 1 | OVega_fj6.png}} |{{STDiagramImageCell| 1 | OVega_fj7.png}} |{{STDiagramImageCell| 1 | OVega_fj8.png}} |{{STDiagramImageCell| 1 | OVega_fj9.png}} |{{STDiagramImageCell| 1 | OVega_bj4_nj4_fj4&10.png}} |{{STDiagramImageCell| 1 | OVega_fj11.png}} |{{STDiagramImageCell| 1 | OVega_bj2&8_nj2&8_fj2&12.png}} | |||
|- | |||
{{STDiagramCell| Frame Count}} |{{STDiagramCell| 2}} |{{STDiagramCell| 1}} |{{STDiagramCell| 1}} |{{STDiagramCell| 14}} |{{STDiagramCell| 5}} |{{STDiagramCell| 4}} |{{STDiagramCell| 3}} |{{STDiagramCell| 4}} |{{STDiagramCell| 5}} |{{STDiagramCell| 0+}} |{{STDiagramCell| 1}} |{{STDiagramCell| 7*}} | |||
|- | |||
{{STDiagramCell| Simplified}} |{{STDiagramCellColSpan| 2 | 3}} |{{STDiagramCellColSpan| 8 | 36+}} |{{STDiagramCell| 1}} |{{STDiagramCell| 7*}} | |||
|} | |||
Claw's prejump is of average speed, but he has the overall fastest jump on the game. This makes Claw a very "slippery" character that is also very hard to be zoned out.<br> | |||
Claw, just like Chun, has the abillity to do wall jumps. Thats why the Forward Jump has a '+' on the final frame of the aerial jumping part: that animation will have longer duration in case it's a wall jump.<br> | |||
{{STSharedJumpDescription}} | |||
==The Basics== | ==The Basics== | ||
Revision as of 13:46, 29 March 2019
Introduction
Picking Old Vega
To select O.Vega, choose Vega and then press ← → → ← Jab/Fierce, pressing Short simultaneously with the punch button for the alternate color.
| Normal | Secondary |
 |

|
--Born2SPD
New & Old Versions Comparison
To select O.Vega, choose Vega and then press ← → → ← Jab/Fierce, pressing Short simultaneously with the punch button for the alternate color.
Here is the list of differences:
- Obvious stuff: O.Vega can not tech throws, does not have the Scarlet Terror special move and Super;
- O.Vega cannot pick his claw back up once it has been knocked off;
- O.Vega has some differences in some of his normals:
- Close Standing Strong can be special canceled;
- Close Standing Forward can be special canceled;
- Far Standing Forward can be special canceled;
- O.Vega's Flying Barcelona Attack have a buggy input detection: the kick button is ignored while on prejump frames;
- O.Vega's Flying Barcelona Attack have a "suck-in" property on hit: the opponent always falls in the direction of the wall O.Vega dived from;
O.Vega is not worthy, mainly because the loss of Scarlet Terror, which is Vega's dedicated anti air/counter move and the only proper reversal. His new cancels aren't that great, and his suck in Wall Dive isn't really beneficial because you normally don't want opponents to be pushed towards you, especially in the corner. Also, the opponent's body is still turned the correct way so you can't create any confusion on what side you hit. The only minor interesting bit to this glitch is that since the opponent's body sucks in towards you, you can force him to lose charge by sliding underneath but it's so obvious and inefficient that it can hardly be counted as a benefit.
Moves Analysis
Disclaimer: To better understand the diagrams, read this.
Losing the claw makes all punch attacks (including specials) to do less damage. Also, ground punch normals and some specials will have worse priority.
Normal Moves
Ground Normals
- Close/Far Standing Jab:
| Normal | Clawless |  |
 |
Normal | Clawless | 
| |
| Damage | 4[1] | 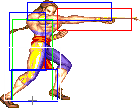 |
| ||||
| Stun | 0~5 | ||||||
| Stun Timer | 40 | ||||||
| Chain Cancel | No | ||||||
| Special Cancel | Yes | ||||||
| Frame Advantage | +4 | ||||||
| Frame Count | 2 | 2 | 4 | 5 | |||
| Simplified | 1 + 4 | 4 | 5 | ||||
Very short range, misses crouching opponents. Sometimes useful as quick anti-air against late crossups.
- Crouching Jab:
| Normal | Clawless |  |
 |
 |
Normal | Clawless | |
| Damage | 4[1] |  |

| ||||
| Stun | 0~5 | ||||||
| Stun Timer | 40 | ||||||
| Chain Cancel | No | ||||||
| Special Cancel | Yes | ||||||
| Frame Advantage | +4 | ||||||
| Frame Count | 1 | 1 | 1 | 4 | |||
| Simplified | 1 + 3 | 4 | |||||
 |
 |
 |

| |
| Frame Count | 1 | 1 | 2 | 1 |
| Simplified | 5 | |||
Very quick and long range. These do not combo, but the window to counter is very narrow. This move goes past the opponent and whiffs at point blank range.
- Close Standing Strong: (Base max activation range: 49)
| Normal | Clawless |  |
 |
Normal | Clawless | 
| |
| Damage | 20[1] | 18[1] |  |

| |||
| Stun | 5~11 | ||||||
| Stun Timer | 60 | ||||||
| Chain Cancel | No | ||||||
| Special Cancel | Yes* | ||||||
| Frame Advantage | +5 | ||||||
| Frame Count | 2 | 3 | 4 | 9 | |||
| Simplified | 1 + 5 | 4 | 9 | ||||
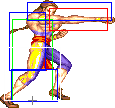
A high claw that misses crouching characters. Unlike a normal Strong, you can combo after it. Note that only O.Vega can special cancel this move.
- Far Standing Strong:
| Normal | Clawless | 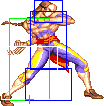 |
 |
Normal | Clawless |  |

| |
| Damage | 20[1] | 18[1] |  |

| ||||
| Stun | 5~11 | |||||||
| Stun Timer | 60 | |||||||
| Chain Cancel | No | |||||||
| Special Cancel | No | |||||||
| Frame Advantage | +2 | |||||||
| Frame Count | 3 | 4 | 6 | 5 | 5 | |||
| Simplified | 1 + 7 | 6 | 10 | |||||
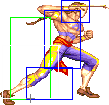
Lunges forward with good range. Hitbox has a little more height than Far Standing Fierce, but less horizontal reach.
- Crouching Strong:
| Normal | Clawless |  |
 |
 |
Normal | Clawless | |
| Damage | 18[1] | 16[1] |  |

| |||
| Stun | 5~11 | ||||||
| Stun Timer | 60 | ||||||
| Chain Cancel | No | ||||||
| Special Cancel | Yes | ||||||
| Frame Advantage | +4 | ||||||
| Frame Count | 1 | 1 | 1 | 4 | |||
| Simplified | 1 + 3 | 4 | |||||
 |
 |
 |

| |
| Frame Count | 3 | 3 | 3 | 1 |
| Simplified | 10 | |||
Like the Crouching Jab, but slightly slower, with a bit more range & more damaging. Also misses at point blank range.
- Close Standing Fierce: (Base max activation range: 53)
| Normal | Clawless |  |
 |
 |
Normal | Clawless |  |

| |
| Damage | 26[1] | 24[1] | 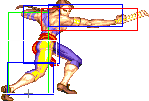 |
| |||||
| Stun | 10~16 | ||||||||
| Stun Timer | 80 | ||||||||
| Chain Cancel | No | ||||||||
| Special Cancel | No | ||||||||
| Frame Advantage | +6 | ||||||||
| Frame Count | 2 | 2 | 2 | 6 | 5 | 5 | |||
| Simplified | 1 + 6 | 6 | 10 | ||||||
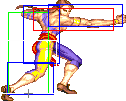
Somewhat like Close Standing Strong. Not really useful.
- Far Standing Fierce:
| Normal | Clawless |  |
 |
 |
Normal | Clawless | 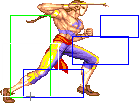 |

| |
| Damage | 26[1] | 24[1] |  |

| |||||
| Stun | 10~16 | ||||||||
| Stun Timer | 80 | ||||||||
| Chain Cancel | No | ||||||||
| Special Cancel | No | ||||||||
| Frame Advantage | +0 / +3 | ||||||||
| Frame Count | 4 | 4 | 3 | 6 | 6 | 7 | |||
| Simplified | 1 + 8 | 9 | 13 | ||||||
This is Vega's longest range move, and does good damage. It has a lot of startup time and stays out a long time. You can press it early from 1/2 screen and catch people walking in or trying to fireball.
- Crouching Fierce:
| Normal | Clawless |  |
 |
 |
Normal | Clawless | |
| Damage | 26[1] | 20[1] |  |

| |||
| Stun | 10~16 | ||||||
| Stun Timer | 80 | ||||||
| Chain Cancel | No | ||||||
| Special Cancel | No | ||||||
| Frame Advantage | +1 | ||||||
| Frame Count | 4 | 2 | 2 | 8 | |||
| Simplified | 1 + 8 | 8 | |||||
 |
 |
 |

| |
| Frame Count | 4 | 4 | 4 | 1 |
| Simplified | 13 | |||
A crouching upwards-angled claw. This is decent anti-air against people with low jumps like Zangief or Balrog, and you keep your charges too. After a blockstring, you can throw this out and catch the opponent jumping on the way up.
- Close Standing Short: (Base max activation range: 41)
| Normal | Clawless |  |
 |

| |
| Stun | 4[1] | ||||
| Stun | 0~5 | ||||
| Stun Timer | 40 | ||||
| Chain Cancel | No | ||||
| Special Cancel | Yes | ||||
| Frame Advantage | +4 | ||||
| Frame Count | 4 | 4 | 5 | ||
| Simplified | 1 + 4 | 4 | 5 | ||
A quick knee. Different animation than Far Short, but works the same.
- Far Standing Short:
| Normal | Clawless |  |
 |
 |
 |
 |

| |
| Stun | 4[1] | |||||||
| Stun | 0~5 | |||||||
| Stun Timer | 40 | |||||||
| Chain Cancel | No | |||||||
| Special Cancel | Yes | |||||||
| Frame Advantage | +4 | |||||||
| Frame Count | 2 | 2 | 4 | 3 | 1 | 1 | ||
| Simplified | 1 + 4 | 4 | 5 | |||||
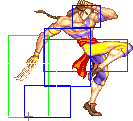
A very quick knee attack with good priority. Useful for tick throwing. This attack goes over a lot of low shorts and low medium kicks, making it very useful in footsie games.
- Crouching Short:
| Normal | Clawless |  |
 |
 |
 |
 |
 |

| |
| Stun | 12[1] | ||||||||
| Stun | 0~5 | ||||||||
| Stun Timer | 40 | ||||||||
| Chain Cancel | No | ||||||||
| Special Cancel | Yes | ||||||||
| Frame Advantage | +4 | ||||||||
| Frame Count | 1 | 1 | 1 | 1 | 4 | 4 | 1 | ||
| Simplified | 1 + 4 | 4 | 5 | ||||||
OK to push away someone that's too close.
- Close Standing Forward: (Base max activation range: 49)
| Normal | Clawless |  |
 |

| |
| Damage | 20[1] | 18[1] | |||
| Stun | 5~11 | ||||
| Stun Timer | 60 | ||||
| Chain Cancel | No | ||||
| Special Cancel | Yes* | ||||
| Frame Advantage | +3 | ||||
| Frame Count | 5 | 6 | 9 | ||
| Simplified | 1 + 5 | 6 | 9 | ||
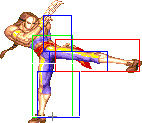
Vega does a different kick than Far Forward, but it works the same. Note that only O.Vega can special cancel this move.
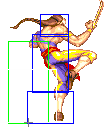
- Far Standing Forward:
| Normal | Clawless | 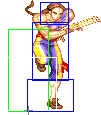 |
 |
 |
 |

| |
| Damage | 20[1] | 18[1] | |||||
| Stun | 5~11 | ||||||
| Stun Timer | 60 | ||||||
| Chain Cancel | No | ||||||
| Special Cancel | Yes* | ||||||
| Frame Advantage | +2 | ||||||
| Frame Count | 2 | 3 | 6 | 5 | 5 | ||
| Simplified | 1 + 5 | 6 | 10 | ||||
A straight kick with decent range. This beats some attacks that stuff your low claws, like Balrog's Crouching Forward. Note that only O.Vega can special cancel this move.
- Crouching Forward:
| Normal | Clawless |  |
 |
 |
 |
 |
 |

| |
| Stun | 16[1] | ||||||||
| Stun | 5~11 | ||||||||
| Stun Timer | 60 | ||||||||
| Chain Cancel | No | ||||||||
| Special Cancel | Yes | ||||||||
| Frame Advantage | +7 | ||||||||
| Frame Count | 1 | 1 | 1 | 1 | 4 | 6 | 1 | ||
| Simplified | 1 + 4 | 4 | 7 | ||||||
A very useful low kick. You can always link another Crouching Forward or a Crouching Strong after this to keep opponents at your preferred distance. You can whiff these on purpose if they like to Psychic DP your claw pokes.
- Close Standing Roundhouse: (Base max activation range: 33)
| Normal | Clawless |  |
 |
 |
 |

| |
| Stun | 24[1] | 22[1] | |||||
| Stun | 10~16 | ||||||
| Stun Timer | 80 | ||||||
| Chain Cancel | No | ||||||
| Special Cancel | No | ||||||
| Frame Advantage | +6 | ||||||
| Frame Count | 3 | 3 | 6 | 5 | 5 | ||
| Simplified | 1 + 6 | 6 | 10 | ||||
Animates the same as a normal Far Forward. Leaves Vega at frame advantage.
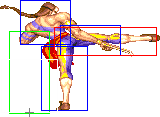
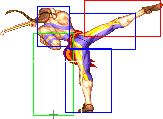
- Far Standing Roundhouse:
| Normal | Clawless |  |
 |
 |
 |
 |
 |
 |
 |

| |
| Stun | 24[1] | 18[1] | |||||||||
| Stun | 10~16 | ||||||||||
| Stun Timer | 80 | ||||||||||
| Chain Cancel | No | ||||||||||
| Special Cancel | No | ||||||||||
| Frame Advantage | -3 | ||||||||||
| Frame Count | 2 | 2 | 2 | 2 | 8 | 4 | 4 | 4 | 5 | ||
| Simplified | 1 + 8 | 8 | 17 | ||||||||
High anti-air kick with great range. Hits many air moves including T.Hawk's dive, Honda's butt slam, and Fei's chicken wing. It can beat a lot of different aerial moves but it has a fairly slow startup so you need to press it early.
- Crouching Roundhouse:
| Normal | Clawless |  |
 |
 |
 |
 |

| |
| Stun | 20[1] | |||||||
| Stun | 5~11 | |||||||
| Stun Timer | 130 | |||||||
| Chain Cancel | No | |||||||
| Special Cancel | No | |||||||
| Frame Advantage | -9 | |||||||
| Frame Count | 3 | 2 | 2 | 17 | 13 | 1 | ||
| Simplified | 1 + 7 | 17 | 14 | |||||
A Slide. This can be punished up close, but is safe at long distance. Often trades hits with fireballs.
Aerial Normals
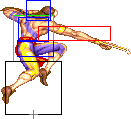
- Neutral Jumping Jab:
| Normal | Clawless |  |
 |
 |

| ||
| Damage | 4[1] | ||||||
| Stun | 1~7(-2) | ||||||
| Stun Timer | 40 | ||||||
| Frame Count | 1 | 30 | 3 | ∞ | |||
| Simplified | 1 | 30 | ∞ | ||||
High claw attack with excellent startup.
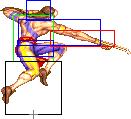
- Diagonal Jumping Jab:
| Normal | Clawless |  |
 |
 |
 |
 |

| |
| Damage | 4[1] | |||||||
| Stun | 1~7(-2) | |||||||
| Stun Timer | 40 | |||||||
| Frame Count | 1 | 4 | 10 | 5 | 4 | ∞ | ||
| Simplified | 5 | 10 | ∞ | |||||
High claw attack. Not useful because it's totally outprioritized by neutral Jumping Strong.
- Neutral Jumping Strong:
| Normal | Clawless |  |
 |
 |
 |

| |
| Damage | 20[1] | 18[1] | |||||
| Stun | 5~11 | ||||||
| Stun Timer | 50(+10) | ||||||
| Frame Count | 3 | 14 | 4 | 4 | ∞ | ||
| Simplified | 3 | 14 | ∞ | ||||
Same animation as J.Jab. This has some use in air-to-air vs. high jumpers like Chun Li or M.Bison.
- Diagonal Jumping Strong:
| Normal | Clawless |  |
 |
 |
 |
 |

| |
| Damage | 20[1] | |||||||
| Stun | 5~11 | |||||||
| Stun Timer | 50(+10) | |||||||
| Frame Count | 1 | 4 | 10 | 5 | 4 | ∞ | ||
| Simplified | 5 | 10 | ∞ | |||||
Same animation as Diagonal Jumping Jab but with better damage potential. This move has the longest horizontal range of all Vega's jumping moves. When you're jumping shoto/sagat fireballs from long range, you can use this to catch the tip of their extended arms.
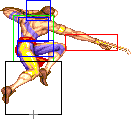
- Neutral Jumping Fierce:
| Normal | Clawless |  |
 |
 |
 |
 |

| |
| Damage | 26[1] | 24[1] | ||||||
| Stun | 11~17(-1) | |||||||
| Stun Timer | 60(+20) | |||||||
| Frame Count | 1 | 4 | 10 | 5 | 4 | ∞ | ||
| Simplified | 5 | 10 | ∞ | |||||
Vega's aerial move with better horizontal priority. Can beat a lot ait-to-air by anticipation.
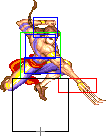
- Diagonal Jumping Fierce:
| Normal | Clawless |  |
 |
 |
 |
 |
 |

| |
| Damage | 26[1] | ||||||||
| Stun | 3~9 | ||||||||
| Stun Timer | 40 | ||||||||
| Frame Count | 2 | 4 | 10 | 5 | 4 | 3 | ∞ | ||
| Simplified | 6 | 10 | ∞ | ||||||
Good combo opener, very good priority and hits low to the ground, making it excellent for safe jumps.
- Neutral Jumping Short:
| Normal | Clawless |  |
 |
 |
 |
 |

| |
| Damage | 4[1] | |||||||
| Stun | 1~7(-2) | |||||||
| Stun Timer | 40 | |||||||
| Frame Count | 1 | 1 | 20 | 2 | 2 | ∞ | ||
| Simplified | 2 | 20 | ∞ | |||||
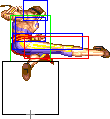
A worse version of Neutral Jumping Forward but with more attacking frames. Avoid this move.
- Diagonal Jumping Short:
| Normal | Clawless |  |
 |
 |
 |
 |

| ||
| Damage | 12[1] | ||||||||
| Stun | 1~7(-2) | ||||||||
| Stun Timer | 40 | ||||||||
| Frame Count | 1 | 1 | 20 | 2 | 2 | ∞ | |||
| Simplified | 2 | 20 | ∞ | ||||||
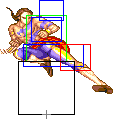
Low range, low damage, not very useful.
- Neutral Jumping Forward:
| Normal | Clawless |  |
 |
 |
 |
 |

| |
| Damage | 18[1] | |||||||
| Stun | 5~11 | |||||||
| Stun Timer | 50(+10) | |||||||
| Frame Count | 1 | 1 | 10 | 2 | 2 | ∞ | ||
| Simplified | 2 | 10 | ∞ | |||||
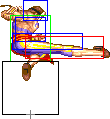
Counters a lot of special moves like Honda's Torpedo or Blanka's Horizontal Ball.
- Diagonal Jumping Forward:
| Normal | Clawless |  |
 |
 |
 |
 |

| |
| Damage | 16[1] | |||||||
| Stun | 5~11 | |||||||
| Stun Timer | 50(+10) | |||||||
| Frame Count | 1 | 2 | 10 | 2 | 2 | ∞ | ||
| Simplified | 3 | 10 | ∞ | |||||
It's not a bad move, it has a decent priority, but since Fierce is straight better then use that instead.
- Neutral Jumping Roundhouse:
| Normal | Clawless |  |
 |
 |
 |
 |
 |

| |
| Damage | 26[1] | ||||||||
| Stun | 11~17(-1) | ||||||||
| Stun Timer | 60(+20) | ||||||||
| Frame Count | 1 | 4 | 10 | 5 | 3 | 2 | ∞ | ||
| Simplified | 5 | 10 | ∞ | ||||||
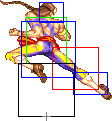
Like the Diagonal Jumping Roundhouse but with bigger hitbox.
- Diagonal Jumping Roundhouse:
| Normal | Clawless |  |
 |
 |
 |
 |
 |

| |
| Damage | 26[1] | ||||||||
| Stun | 3~9 | ||||||||
| Stun Timer | 40 | ||||||||
| Frame Count | 1 | 4 | 12 | 4 | 3 | 2 | ∞ | ||
| Simplified | 5 | 12 | ∞ | ||||||
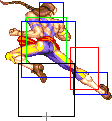
Best jumping attack with decent range. Vega can sometimes cross up with this but it's extremely difficult.
Unique Moves
- Wall Jump: (In air near corner/wall, any direction away from the corner/wall)

| |
| Frame Count | 6 |
It should be noted, that like Chun, Claw has a command wall jump, you can actually do this during an air normals startup, active, or recovery frames. And you can do another normal after jumping off the wall. Likewise, you can air throw, then jump off the wall, and attack or air throw again.
Throws
Vega can throw using Strong and Fierce. He can air throw that way as well. The direction of the joystick determines the direction the enemy gets thrown at. All his ground throws have the same range and do 32 points of damage (plus two more if behind in rounds).
- Rainbow Suplex: (←/→ + Strong/Fierce)
| Damage | 32 | 
| |
| Stun | 7~13 | ||
| Stun Timer | 100 | ||
| Range | (from axis) | 48 | |
| (from throwable box) | 20 | ||
- Stardust Drop: (Min activation height: 48/48 upwards/downwards, ↖/↙/←/→/↘/↗ + Strong/Fierce)
| Damage | 32 | 
| |
| Stun | 7~13 | ||
| Stun Timer | 100 | ||
| Range | (from axis) | 62 | |
| (from throwable box) | 34 | ||
Special Moves
- Back Slash a.k.a. Punch Back Flip: (Jab + Strong + Fierce)
Detailed Input: (Can be done crouching, all buttons must be pressed on the same frame, negative edge not possible)
 |
 |
 |
 |
 |
 |
 |

| |
| Frame Count | 1 | 7 | 8 | 19 | 3 | 8 | 8 | 9 |
| Simplified | 54 | 9 | ||||||
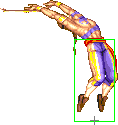
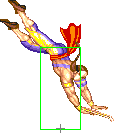
The punch version is a double flip which lasts longer. It is completely invincible, but have a brief vulnerable period at the end. It is handy for getting out of tick situations, but if you over-use it, the opponent will catch on and sweep you as it's ending.
- Short Back Slash a.k.a. Kick Back Flip: (Short + Forward + Roundhouse)
Detailed Input: (Can be done crouching, all buttons must be pressed on the same frame, negative edge not possible)
 |
 |
 |
 |
 |

| |
| Frame Count | 1 | 8 | 8 | 8 | 5 | 9 |
| Simplified | 30 | 9 | ||||
The kick version is great at the last second as your opponent is rising; you can bait them into missing a reversal or throw attempt.
- Rolling Crystal Flash: (Charge ←, →, P)
Detailed Input: (Charge ← for at least 71f, [0~7f] → [0~10/9/7f] Jab/Strong/Fierce. It is needed to wait at least 1 frame after leaving the charge direction to enter with the P button)
- Startup:
 |

| |
| Frame Count | 5 | 5 |
| Simplified | 10 | |
- Active part 1:
- Jab Version: This does not occur.
- Strong Version: This happens only once.
- Fierce Version: This happens twice.
| Damage | 4[1] |  |
 |
 |
 |

|
| Stun | 0~6 | |||||
| Stun Timer | 30 | |||||
| Frame Count | 4 | 3 | 3 | 1 | 2 | |
| Simplified | 4 | 6 | 1 | 2 | ||
- Active part 2 + Recovery:
| Damage | 4[1] |  |
 |
 |
 |
 |

|
| Stun | 0~6 | ||||||
| Stun Timer | 30 | ||||||
| Frame Count | 4 | 3 | 3 | 3 | 2 | 2 | |
| Simplified | 4 | 6 | 3 | 4 | |||
Fierce roll is 4 hits of chip damage and good for finishing off a low-life opponent (note pun). Fierce & Strong rolls are not reliable and will often not combo all the hits even at close range. Jab roll should be your only one used, and is nice at pressuring from long range. All rolls can be followed up with C.Jab or C.Strong which will combo.
Rolls have curious priority that is not common knowledge. When done from close, priority is bad and rolls can be easily countered with most normals & special moves. However, when done from maximum range so that just the tip of the extended claw hits, the priority is excellent and will stuff nearly anything, including a wakeup Dragon Punch. It's very important to learn the range and timing so you can Jab Roll a knocked down opponent and have your claw extended as his wake-up invincibility ends.
- Wall Dive: (Charge ↓, ↑, K)
Detailed Input: (Charge ↓ for at least 61f, [0~7f] ↑ [0~11/9/7/3f] Short/Forward/Roundhouse/any K if you are at a jumpable state. It is needed to wait at least 1 frame after leaving the charge direction to enter with the K button)
NOTE: O.Vega's Flying Barcelona Attack have a buggy input detection: the kick button is ignored while on prejump frames. To avoid this bug you can kara-cancel the kick button, by activating the dive on the kick button's release or by pianoing all kick buttons.
 |
 |
 |
 |
 |

| |
| Frame Count | 1 | 2 | 1 | 6+ | 5 | 40 |
| Simplified | 10+ | 5 | 40 | |||
- Flying Barcelona Attack: (P, while diving from Wall Dive)
- Izuna Drop: (↖/↙/←/→/↘/↗ + P, while diving from Wall Dive)
| Damage | 34 | 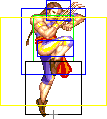
| |
| Stun | 7~13 | ||
| Stun Timer | 100 | ||
| Range | (from axis) | 53 | |
| (from throwable box) | 25 | ||
- Landing frames:
 |
 |
 |

| |
| Frame Count | 2 | 2 | 9 | 6 |
| Simplified | 13 | 6 | ||
By pressing ↖ or ↗, you control which wall Vega will jump to. With ↑ Vega will always go to the nearest wall. Once airbourne, you have control over your speed by holding ← or →.
Vega is slow when jumping towards the wall, then faster when he flies off it. You can minimize the delay by being at maximum range from your opponent and touching a side of the screen.
This move is useless against some characters, and dominates others. Every character has basic standing & jumping normals that will counter the wall dive, so use it on wakeup, against fireballs, to run away when you're leading in health, and to bait counter-attacks.
Ryu - at full screen, you can Wall Dive in anticipation, and safely hold back if he does nothing, or catch him with the throw if he does a fireball.
Ken - Ken's Fierce DP will hit you even if you're holding back, so limit to ambiguous crossups.
Honda - if he's being a defensive turtle, you can crossup dive to cancel his headbutt charge, then come in from straight above to avoid the butt slam.
Chun - J.Short easily stuffs dives from any range. Get her with fakes or on wake-up only.
Blanka - Vertical Ball destroys the dive in every possible situation.
Zangief - His 3P Lariat beats most attacks, but you can hit his head cleanly with the tip of your claw while flying over him.
Guile - Flash kick still hits you even when he's facing the wrong direction, so use fakes from max range and Slide him if he falls for it.
Dhalsim - His normals hit you out of dives easily, but he has no wakeup options besides teleporting away.
Fei Long - Like Guile, limit yourself to fakes to bait a Flame Kick.
Cammy - Roundhouse Cannon Spike will get you from very long range, but if you cross up and attack from on top, you can make it miss.
T. Hawk - Same as Cammy - angle your dive high and fast to get behind his long range Rising Hawk.
Dee Jay - His Triple Kick is weak if you're right on top of him, so try to get him in a corner then go off that corner wall, to fall right on his head.
Balrog - Headbutts and C.Fierce beat dives every time, and fakes are easy for him to dash punch. Use very sparingly.
Vega - Vega can Flipkick a dive, or 3K backflip through one if he's crossed up or on wakeup. As long as you crossup, it's pretty safe to use.
Sagat - High fireballs tend to hit you if you're trying to ↗ cross him up. Stay on the ground against him.
Bison - He has no reversal and his air moves lose if you do the claw high and early. Dive on him all day long.
- Sky High Claw: (Charge ↓, ↑, P)
Detailed Input: (Charge ↓ for at least 61f, [0~7f] ↑ [0~11/9/7/3f] Jab/Strong/Fierce/any P if you are at a jumpable state. It is needed to wait at least 1 frame after leaving the charge direction to enter with the K button)
| Normal | Clawless |  |
 |
 |
 |
 |

| |
| Damage | 16[2] | 16[1] | ||||||
| Stun | 0~6 | |||||||
| Stun Timer | 30 | |||||||
| Frame Count | 1 | 2 | 1 | 6+ | 5 | 33- | ||
| Simplified | 10+ | 5 | 33- | |||||
- Claw attack: (P, while diving from Sky High Claw. The strength of the attack is determined by the P button you activated the Dive, not the one you're using to attack)
- Knockback/Vega dives full screen, crosses the opponent, but does not touches the end of screen, lands:
 |
 |
 |
 |
 |
 |

| |
| Frame Count | 5 | 4 | 3 | 4 | 5 | 23+/0 | 12 |
| Simplified | 44+/6+ | 12 | |||||
- Vega dives full screen, touches the end of screen and then lands:
 |

| |
| Frame Count (Jab) | 20 | 12 |
| Frame Count (Strong) | 13 | 12 |
| Frame Count (Fierce) | 8 | 12 |
By pressing ↖ or ↗, you control which wall Vega will jump to. With ↑ Vega will always go to the nearest wall.
Vega goes off the wall and shoots directly at the opponent with a claw. You do not have any control once in the air. Doing this with Jab will make him fly higher- this will hit jumpers, but completely miss someone on the ground. This move has a small chance of catching someone by surprise, but leaves you vulnerable if blocked. The best use of this move is against people who jump up to counter your Wall Dive, like Chun Li or M.Bison often do.
Misc Animations
Jump Animations
- Neutral/Back Jump:
 |
 |
 |
 |
 |
 |
 |

| |
| Frame Count (Neutral) | 2 | 1 | 1 | 22 | 4 | 10 | 1 | 7* |
| Simplified (Neutral) | 3 | 37 | 1 | 7* | ||||
| Frame Count (Back) | 2 | 1 | 1 | 22 | 4 | 10 | 1 | 7* |
| Simplified (Back) | 3 | 37 | 1 | 7* | ||||
- Forward Jump:
 |
 |
 |
 |
 |
 |
 |
 |
 |
 |
 |

| |
| Frame Count | 2 | 1 | 1 | 14 | 5 | 4 | 3 | 4 | 5 | 0+ | 1 | 7* |
| Simplified | 3 | 36+ | 1 | 7* | ||||||||
Claw's prejump is of average speed, but he has the overall fastest jump on the game. This makes Claw a very "slippery" character that is also very hard to be zoned out.
Claw, just like Chun, has the abillity to do wall jumps. Thats why the Forward Jump has a '+' on the final frame of the aerial jumping part: that animation will have longer duration in case it's a wall jump.
The landing recovery has a special property which allows it to be canceled into certain actions. At the first landing frame, you can perform throws (including command throws), and on the second landing frame, you can start another jump, attack with a normal or special move, or block. Blocking not being until the second landing frame, as well as hitbox-hurtbox interactions having priority over throwbox-throw hurtbox is why sweeps work as anti airs in this game.
Things are different when jumping over your opponent, however. In that situation it's possible to walk back/forward, to jump again or to even block on the first landing frame! Strangely, if a throw is timed on the first landing frame of a jump that crosses over, a throwbox will never come out, even though that input will result in a normal coming out 2 frames later (like it normally would). Anyway, being able to block on the first landing frame can help a little bit on some safe jump crossup setups, or maybe in other situations as well if your character has a huge jump arc.
