|
|
| Line 420: |
Line 420: |
| Jumping C/D, Standing C/D, hcf,hcf+B/D, hcf+D, dp+D (Rush 2+)<br> | | Jumping C/D, Standing C/D, hcf,hcf+B/D, hcf+D, dp+D (Rush 2+)<br> |
| Jumping C/D, Standing C/D, hcf,hcf+B/D, hcf+D, hcf+C (See Notes)<br> | | Jumping C/D, Standing C/D, hcf,hcf+B/D, hcf+D, hcf+C (See Notes)<br> |
| | |
| | =Unblockable setup list= |
| | |
| | ===Unblockable dp+A timing after hcb,f+P=== |
| | |
| | |
| | |
| | '''Kyo |
| | |
| | *''dp+C, qcf+K, dp+A |
| | |
| | |
| | '''Benimaru, Daimon, Leona, Shingo |
| | |
| | *''qcf+K, dp+C, dp+A |
| | |
| | |
| | '''Ralf, Clark, Joe, Ryo |
| | |
| | *''qcf+K, qcf+K, dp+A |
| | |
| | |
| | '''Kim |
| | |
| | *''qcb+B, CD xx dp+A |
| | |
| | |
| | '''Chang |
| | |
| | *''CD xx dp+C , CD xx dp+A |
| | |
| | |
| | '''Choi |
| | |
| | *''qcb+B, qcf+K, dp+A |
| | |
| | |
| | '''Terry, Yashiro |
| | |
| | *''qcb+B, ABC, dp+A |
| | |
| | |
| | '''Andy, Chizuru, Shermie, Billy |
| | |
| | *''qcb+B, dp+C, dp+A |
| | |
| | |
| | '''Athena |
| | |
| | *''qcf+K, ABC, dp+A |
| | |
| | |
| | '''Kensou |
| | |
| | *''qcf+K, qcb+B, dp+A |
| | |
| | |
| | '''Chin |
| | |
| | *''Roll, Roll, dp+A |
| | |
| | |
| | '''Mai |
| | |
| | *''j+CD (as coming down), CD xx dp+A |
| | |
| | |
| | '''King |
| | |
| | *''dp+C, ABC, dp+A |
| | |
| | |
| | '''Chris |
| | |
| | *''backdash, qcb+D, dp+A |
| | |
| | |
| | '''Yamazaki |
| | |
| | *''qcf+K, far D, dp+A |
| | |
| | |
| | '''Mary, Robert |
| | |
| | *''CD xx qcb+D, dp+A |
| | |
| | |
| | '''Yuri |
| | |
| | *''hcf+A, dp+A |
| | |
| | |
| | '''Iori |
| | |
| | *''CD xx qcb+D, CD xx dp+A |
| | |
| | |
| | === Unblockable dp+A timing after hcf+C === |
| | |
| | |
| | |
| | '''Kyo, Benimaru, Choi, Chin, King |
| | |
| | *''2D, dp+A |
| | |
| | |
| | '''Daimon |
| | |
| | *''B , dp+A |
| | |
| | |
| | '''Leona |
| | |
| | *''backdash, dp+A |
| | |
| | |
| | '''Ralf, Clark, Kim, Athena, Ryo |
| | |
| | *''A, dp+A |
| | |
| | |
| | '''Chang, Shermie, Billy |
| | |
| | *''ABC, dp+A |
| | |
| | |
| | '''Terry, Joe, Kensou, Yashiro, Yamazaki, Robert |
| | |
| | *''CD xx dp+A |
| | |
| | |
| | '''Andy |
| | |
| | *''D, dp+A |
| | |
| | |
| | '''Chizuru |
| | |
| | *''dp+C, dp+A |
| | |
| | |
| | '''Yuri |
| | |
| | *''Run, dp+A |
| | |
|
| |
|
| =Strategies= | | =Strategies= |
|
| |
|
| [[Category:The King of Fighters '97]] | | [[Category:The King of Fighters '97]] |
Introduction
Movelist
|
|
Frames
|
Advantage
|
Cancel
|
Block
|
Hitbox
|
Notes
|
| Standing Close
|

|
4/4/5
|
+3/+1
|
|
HL
|
|
|

|
7/4/9
|
-1/-3
|
|
HL
|
|
|

|
4/4/13
|
+3/+1
|
|
HL
|
|
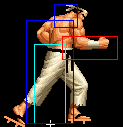
Fast, cancelable, great as a meaty. More range than close D, so you can use cr.A, cl.C as a block string.
|

|
4/8/14
|
-2/-4
|
|
HL
|
|
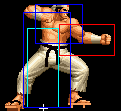
Best meaty, and if not too meaty or out in the open, you actually have a good amount of time to hit-check hcb,f+P off of it. Same speed as close C, cancelable.
|
| Standing Far
|

|
4/5/6
|
+1/-1
|
|
HL
|
|
Fast, really good anti-air against short hop.
|

|
4/5/10
|
-3/-5
|
|
L
|
|
One of the best st.Bs in KOF97. Fast, low, long range, cancelable.
|

|
9/9/16
|
-5/-7
|
|
HL
|
|
Nice and big, stays out a long time. Can stop short hops.
|

|
5/6/16
|
-2/-4
|
|
HL
|
|
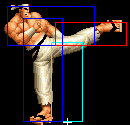
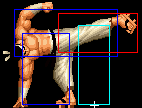
The best anti-air normal in the game. Beats most jump moves and many ground moves from afar. Far better than its KOF98 counterpart. It will whiff over crouching characters, so watch that.
|
 + +
|
15/4/26
|
KD/-8
|
S,Su
|
HL
|
|
Big ass cancelable move. often used to cancel into his qcf+K counter and bait CD counters.
|
| Crouching
|

|
3/5/5
|
+2/0
|
|
HL
|
|
#1 poke if you're too close for standing B. Cancelable.
|

|
4/5/6
|
+1/-1
|
|
L
|
|
Good poke if you're too close for standing B as well. Links into super easily since it has a long animation/advantage.
|

|
5/4/19
|
-3/-5
|
|
HL
|
|
|

|
4/7/12
|
KD/-1
|
|
L
|
|
A sweep! Can be meatied pretty easily.
|
| Jump
|

|
5/13/-
|
-/-
|
|
H
|
|
Pretty good air-to-air.
|

|
8/17/-
|
-/-
|
|
H
|
|
Stays out for a long time, can be used as a crossup if it's very meaty, or your opponent is close to the corner, or in the corner and you are player 2. Good setup for his grab mixups.
|

|
9/8/-
|
-/-
|
|
H
|
|
Crosses up, has a pretty hefty hitbox (what doesn't?).
|

|
7/7/-
|
-/-
|
|
H
|
|
Godly jump move. Good for jumping in, or air-to-air jumping back. Can be used as an instant overhead (short hop only).
|
 + +
|
15/4/-
|
KD/-
|
|
HL
|
|
CD in the air!
|
| Command Normals
|
f+
|
22/4/26
|
-10/-12
|
|
HL
|
|
|
Not overhead! Active frames and last two start-up frames cancel projectiles.
|
df+
|
3/4+9/16
|
KD/-11
|
|
HL
|
|
|
Great anti-air. It doesn't beat as much stuff as standing D, but it will trade with most things, enabling you to perform a ground pound combo. Remember if it trades, you will have to re-buffer your qcb+B/qcf+B afterwards so the ground pound will hit OTG.
|
| Command Normals
|
hcf+
|
5/7/41
|
|
|
HL
|
[[image:|center]]
|
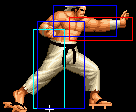
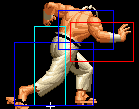
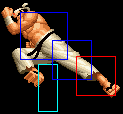
A Overhead Slam (hcf+A)
Beats pretty much everything above the top half of the screen, his arm is not hittable. It can be air blocked if the opponent is jumping up or back, though. Can be comboed from d/f+C on an opponent in the air. Ends in a back turned, un-rollable knockdown, and sets up for a meaty (unblockable) Ground Pound (dp+A).
|
hcf+
|
12/4/37
|
|
|
HL
|
[[image:|center]]
|
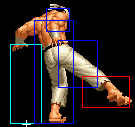
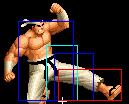
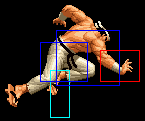
C Overhead Slam (hcf+C)
Catches ground pokes, but is punishable by some fast long range things. Good to use as a combo ender if you aren't comfortable using hcb,f+P. Can hit OTG. Ends in a back turned, un-rollable knockdown, and sets up for a meaty (unblockable) Ground Pound (dp+A).
|
hcb,f+
|
0
|
|
|
Grab
|
[[image:|center]]
|
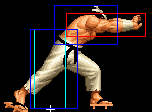
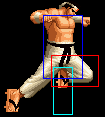
Ragdoll Toss (hcb,f+P)
Instant command throw. Range: 42px. Not rollable, and sets up for a meaty (unblockable) Ground Pound (dp+A).
|
dp+
|
0
|
|
|
Grab
|
[[image:|center]]
|
Trip Slam (dp+K)
Instant command throw. Range: 32px. Rarely used in KOF97.
|
dp+
|
27/1/44
|
|
|
L
|
[[image:|center]]
|
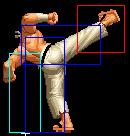
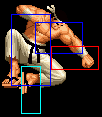
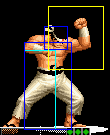
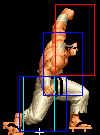
Ground Pound (dp+P)
C version is a ground pound fake. It is 'blocked' by crouching, but there is no blockstun. You don't even need to hold d/b, just crouch. This can hit OTG (on the ground) after an anti-air d/f+C canceled into a non-blockable move (like a throw or utility move). It is also unblockable if done as a meaty attack, but the window is small and the setups vary from character to character. The knockdown can be rolled, but if they miss, you can combo a hcf+C in the corner.
|
dp+
|
35
|
|
|
--
|
[[image:|center]]
|
qcb+
|
16+17
|
|
|
--
|
[[image:|center]]
|
Ground roll (qcb+K)
Invincible during the roll, but completely vulnerable at the end of the roll. Usually used for the ground pound combo bug or to gain meter after a knockdown. Can be canceled into to roll through some auto-guard moves or CD counters.
|
qcb+
|
23+18
|
|
|
--
|
qcf+
|
2/12/15
|
|
|
--
|
[[image:|center]]
|
Counter (qcf+K)
Will counter any mid/high hitting normal attack or CD counter. Usually used to cancel into to make moves safeer (like standing CD) and to bait CD counters at the same time. Ends in a back turned, un-rollable knockdown, and sets up for a meaty (unblockable) Ground Pound (dp+A).
|
| DMs
|
hcbx2+
|
0
|
|
|
Grab
|
[[image:|center]]
|
Super Ragdoll Toss (hcbx2+P)
Instant command throw. Range: 43px. Less frequently used than the other SDM due to shorter range.
|
hcfx2+
|
0
|
|
|
Grab
|
[[image:|center]]
|
[[image:|center]]
|
Super Armor Throw (hcf,hcf+K~hcf+K~dp+K)
Instant command throw. Range: 62px (the second longest range in KOF97). Redirected to st.D, qcf+K or hcf+K when missed.
|
Throws
| Move Name
|
Motion
|
Nickname
|
Description
|
| Juuji Shime
|
Near f or b + C
|
|
|
| Okuri Ashi Barai
|
Near f or b + D
|
|
|
| Tsukami Tataki Tsuke
|
Near 1 Body of Distance f or b + C
|
|
|
Special Moves
| Move Name
|
Motion
|
Nickname
|
Description
|
| Takra Tsubushi
|
f+A
|
|
|
| Zuju Barai
|
df+C
|
|
|
| Jirai Shin
|
dp+A
|
|
|
| Fake Jirai Shin
|
dp+C
|
|
|
| Chou Ousoto Gari
|
dp+K(Close)
|
|
|
| Chou Ukemi
|
qcb+K
|
|
|
| Neko Gaeshi
|
qcf+K
|
|
|
| Kumo Tsukami Nage
|
hcf+A
|
|
Use against airborne opponents
|
| Kiri kabu Gaeshi
|
hcf+C
|
|
|
| Tenchi Gaeshi
|
hcb, f+P(Close)
|
|
|
| Uru Nage
|
hcb, f+K
|
|
|
Super Moves
| Move Name
|
Motion
|
Nickname
|
Description
|
| Jigoku Gukuraku Otoshi
|
hcb , hcb + A or C
|
Heaven To Hell Drop
|
|
| Arashi no Yama (Nekko Meki)
|
hcf , hcf + B or D
|
Mountain of Storms (Root Puller)
|
|
| Arashi no Yama (Zoku Kiri Kabu Gaeshi)
|
hcf + B or D
|
Mountain of Storms (Continued Sliced Stump Return)
|
after Nekko Meki
|
| Arashi no Yama (Nekko Meki Ura Nage)
|
dp + B or D
|
Mountain of Storms (Root Puller Reverse Throw)
|
DM version after Kiri Kabu
|
| Arashi no Yama (Zoku Tenchi Gaeshi)
|
dp + B or D
|
Mountain of Storms (Continued Heaven and Hell Return)
|
SDM version after Kiri Kabu
|
Combos
Jumping C/D, Standing C/D, hcb,f+C (Rush 2+)
Jumping C/D, Standing C/D, dp+B/D (Rush 2+)
Jumping C/D, Standing C/D, hcf+C (Rush 3)
Jumping C/D, Standing C/D, hcf+A (Rush 3)
CD/Crouching D, hcf+C (Rush 2)
f+A, hcf+C (Rush 2)
Standing C/D, df+C, hcb,f+C (Rush 2+)
Standing C/D, df+C, hcb,hcb+A/C (Rush 2+)
Jumping C/D, Standing C/D, hcb,hcb+A/C (Rush 2+)
Jumping C/D, Standing C/D, hcf,hcf+B/D, hcf+D, dp+D (Rush 2+)
Jumping C/D, Standing C/D, hcf,hcf+B/D, hcf+D, hcf+C (See Notes)
Unblockable setup list
Unblockable dp+A timing after hcb,f+P
Kyo
Benimaru, Daimon, Leona, Shingo
Ralf, Clark, Joe, Ryo
Kim
Chang
Choi
Terry, Yashiro
Andy, Chizuru, Shermie, Billy
Athena
Kensou
Chin
Mai
- j+CD (as coming down), CD xx dp+A
King
Chris
Yamazaki
Mary, Robert
Yuri
Iori
Unblockable dp+A timing after hcf+C
Kyo, Benimaru, Choi, Chin, King
Daimon
Leona
Ralf, Clark, Kim, Athena, Ryo
Chang, Shermie, Billy
Terry, Joe, Kensou, Yashiro, Yamazaki, Robert
Andy
Chizuru
Yuri
Strategies
