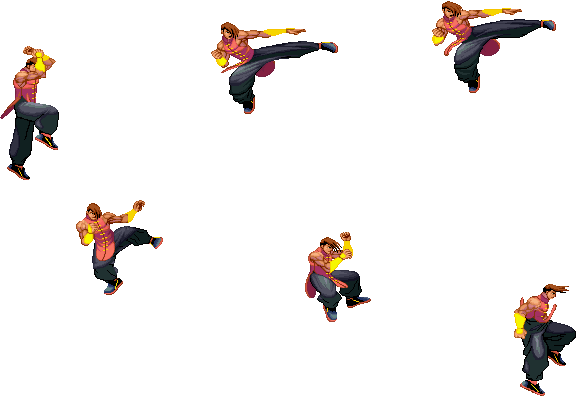
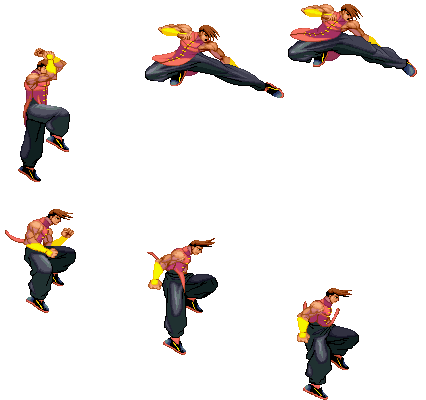
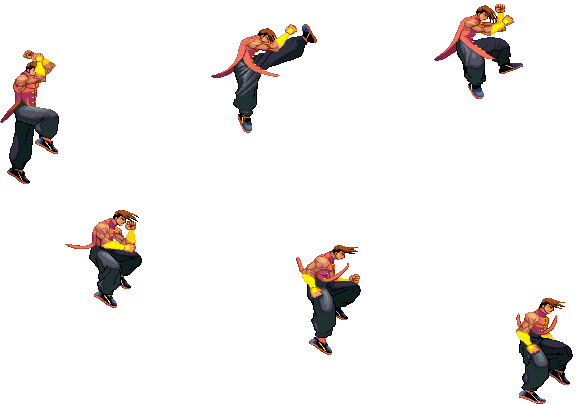
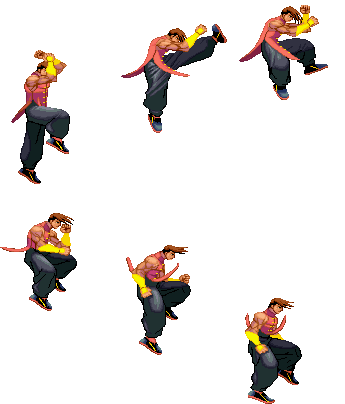
| Line 1,085: | Line 1,085: | ||
| align="center" | '''Move''' || align="center" | '''Motion''' || align="center" | '''Damage''' || align="center" | '''Blocked Damage''' || align="center" | '''Stun Damage''' || align="center" | '''Super Cancel''' | | align="center" | '''Move''' || align="center" | '''Motion''' || align="center" | '''Damage''' || align="center" | '''Blocked Damage''' || align="center" | '''Stun Damage''' || align="center" | '''Super Cancel''' | ||
|- | |- | ||
| align="center" | Byakko-Soushouda | | align="center" | Byakko-Soushouda || align="center" | QCB+LP || align="center" | 150(100) || align="center" | 19(14) || align="center" | 21(15) || align="center" | Yes | ||
|- | |- | ||
|} | |} | ||
'''Frame Data''' | '''Frame Data''' | ||
| Line 1,096: | Line 1,093: | ||
| align="center" | '''Move''' || align="center" | '''Startup''' || align="center" | '''Hit''' || align="center" | '''Recovery''' || align="center" | '''Blocked Advantage''' || align="center" | '''Hit Advantage''' || align="center" | '''Crouching Hit Advantage''' || align="center" | '''Guard''' || align="center" | '''Parry''' | | align="center" | '''Move''' || align="center" | '''Startup''' || align="center" | '''Hit''' || align="center" | '''Recovery''' || align="center" | '''Blocked Advantage''' || align="center" | '''Hit Advantage''' || align="center" | '''Crouching Hit Advantage''' || align="center" | '''Guard''' || align="center" | '''Parry''' | ||
|- | |- | ||
| align="center" | Byakko-Soushouda | | align="center" | Byakko-Soushouda || align="center" | 21 || align="center" | 13 || align="center" | 10 || align="center" | -17 || align="center" | Down || align="center" | Down || align="center" | HL || align="center" | HL | ||
|} | |} | ||
'''Gauge Increase''' | '''Gauge Increase''' | ||
| Line 1,107: | Line 1,100: | ||
| align="center" | '''Move''' || align="center" | '''Miss''' || align="center" | '''Blocked''' || align="center" | '''Hit''' || align="center" | '''Parry (Gauge for opponent)''' | | align="center" | '''Move''' || align="center" | '''Miss''' || align="center" | '''Blocked''' || align="center" | '''Hit''' || align="center" | '''Parry (Gauge for opponent)''' | ||
|- | |- | ||
| align="center" | Byakko-Soushouda | | align="center" | Byakko-Soushouda || align="center" | 3 || align="center" | 7 || align="center" | 15 || align="center" | 4 | ||
|} | |} | ||
''Comments here'' | ''Comments here'' | ||
| Line 1,170: | Line 1,159: | ||
| align="center" | '''Move''' || align="center" | '''Motion''' || align="center" | '''Damage''' || align="center" | '''Blocked Damage''' || align="center" | '''Stun Damage''' || align="center" | '''Super Cancel''' | | align="center" | '''Move''' || align="center" | '''Motion''' || align="center" | '''Damage''' || align="center" | '''Blocked Damage''' || align="center" | '''Stun Damage''' || align="center" | '''Super Cancel''' | ||
|- | |- | ||
| align="center" | Kaibou (Short) || align="center" | F, D ,DF+LK || align="center" | | | align="center" | Kaibou (Short) || align="center" | F, D ,DF+LK || align="center" | - || align="center" | - || align="center" | - || align="center" | No | ||
|- | |- | ||
| align="center" | Kaibou (Forward) || align="center" | F, D ,DF+MK || align="center" | | | align="center" | Kaibou (Forward) || align="center" | F, D ,DF+MK || align="center" | - || align="center" | - || align="center" | - || align="center" | No | ||
|- | |- | ||
| align="center" | Kaibou (Roundhouse) || align="center" | F, D ,DF+HK || align="center" | | | align="center" | Kaibou (Roundhouse) || align="center" | F, D ,DF+HK || align="center" | - || align="center" | - || align="center" | - || align="center" | No | ||
|} | |} | ||
'''Frame Data''' | '''Frame Data''' | ||
| Line 1,181: | Line 1,170: | ||
| align="center" | '''Move''' || align="center" | '''Startup''' || align="center" | '''Hit''' || align="center" | '''Recovery''' || align="center" | '''Blocked Advantage''' || align="center" | '''Hit Advantage''' || align="center" | '''Crouching Hit Advantage''' || align="center" | '''Guard''' || align="center" | '''Parry''' | | align="center" | '''Move''' || align="center" | '''Startup''' || align="center" | '''Hit''' || align="center" | '''Recovery''' || align="center" | '''Blocked Advantage''' || align="center" | '''Hit Advantage''' || align="center" | '''Crouching Hit Advantage''' || align="center" | '''Guard''' || align="center" | '''Parry''' | ||
|- | |- | ||
| align="center" | Kaibou (Short) || align="center" | | | align="center" | Kaibou (Short) || align="center" | 8 || align="center" | 29 || align="center" | - || align="center" | - || align="center" | - || align="center" | - || align="center" | - || align="center" | - | ||
|- | |- | ||
| align="center" | Kaibou (Forward) || align="center" | | | align="center" | Kaibou (Forward) || align="center" | 10 || align="center" | 34 || align="center" | - || align="center" | - || align="center" | - || align="center" | - || align="center" | - || align="center" | - | ||
|- | |- | ||
| align="center" | Kaibou (Roundhouse) || align="center" | | | align="center" | Kaibou (Roundhouse) || align="center" | 10 || align="center" | 43 || align="center" | - || align="center" | - || align="center" | - || align="center" | - || align="center" | - || align="center" | - | ||
|} | |} | ||
'''Gauge Increase''' | '''Gauge Increase''' | ||
| Line 1,192: | Line 1,181: | ||
| align="center" | '''Move''' || align="center" | '''Miss''' || align="center" | '''Blocked''' || align="center" | '''Hit''' || align="center" | '''Parry (Gauge for opponent)''' | | align="center" | '''Move''' || align="center" | '''Miss''' || align="center" | '''Blocked''' || align="center" | '''Hit''' || align="center" | '''Parry (Gauge for opponent)''' | ||
|- | |- | ||
| align="center" | Kaibou (Short) || align="center" | | | align="center" | Kaibou (Short) || align="center" | - || align="center" | - || align="center" | - || align="center" | - | ||
|- | |- | ||
| align="center" | Kaibou (Forward) || align="center" | | | align="center" | Kaibou (Forward) || align="center" | - || align="center" | - || align="center" | - || align="center" | - | ||
|- | |- | ||
| align="center" | Kaibou (Roundhouse) || align="center" | | | align="center" | Kaibou (Roundhouse) || align="center" | - || align="center" | - || align="center" | - || align="center" | - | ||
|} | |} | ||
''Comments here'' | ''Comments here'' | ||
| Line 1,204: | Line 1,193: | ||
{| border="1em" cellspacing="0" width="70%" style="border: 1px solid #999; background: #F2F2F2;" | {| border="1em" cellspacing="0" width="70%" style="border: 1px solid #999; background: #F2F2F2;" | ||
|- | |- | ||
| align="center" | '''Move''' || align="center" | '''Motion''' || align="center" | '''Damage''' || align="center" | '''Blocked Damage''' || align="center" | '''Stun Damage''' || align="center" | ''' | | align="center" | '''Move''' || align="center" | '''Motion''' || align="center" | '''Damage''' || align="center" | '''Blocked Damage''' || align="center" | '''Stun Damage''' || align="center" | '''Throw Range''' || align="center" | '''Super Cancel''' | ||
| | |||
| align="center" | | |||
|- | |- | ||
| align="center" | Zenpou-Tenshin | | align="center" | Zenpou-Tenshin || align="center" | HCB+K || align="center" | - || align="center" | - || align="center" | - || align="center" | 31 || align="center" | No | ||
|- | |||
|} | |} | ||
'''Frame Data''' | '''Frame Data''' | ||
| Line 1,217: | Line 1,202: | ||
| align="center" | '''Move''' || align="center" | '''Startup''' || align="center" | '''Hit''' || align="center" | '''Recovery''' || align="center" | '''Blocked Advantage''' || align="center" | '''Hit Advantage''' || align="center" | '''Crouching Hit Advantage''' || align="center" | '''Guard''' || align="center" | '''Parry''' | | align="center" | '''Move''' || align="center" | '''Startup''' || align="center" | '''Hit''' || align="center" | '''Recovery''' || align="center" | '''Blocked Advantage''' || align="center" | '''Hit Advantage''' || align="center" | '''Crouching Hit Advantage''' || align="center" | '''Guard''' || align="center" | '''Parry''' | ||
|- | |- | ||
| align="center" | Zenpou-Tenshin | | align="center" | Zenpou-Tenshin || align="center" | 7 || align="center" | 2 || align="center" | 26 || align="center" | - || align="center" | +15 || align="center" | +15 || align="center" | Impossible || align="center" | Impossible | ||
|} | |} | ||
'''Gauge Increase''' | '''Gauge Increase''' | ||
| Line 1,228: | Line 1,209: | ||
| align="center" | '''Move''' || align="center" | '''Miss''' || align="center" | '''Blocked''' || align="center" | '''Hit''' || align="center" | '''Parry (Gauge for opponent)''' | | align="center" | '''Move''' || align="center" | '''Miss''' || align="center" | '''Blocked''' || align="center" | '''Hit''' || align="center" | '''Parry (Gauge for opponent)''' | ||
|- | |- | ||
| align="center" | Zenpou-Tenshin | | align="center" | Zenpou-Tenshin || align="center" | 0 || align="center" | - || align="center" | 0 || align="center" | - | ||
|- | |||
|- | |||
|} | |} | ||
''Comments here'' | ''Comments here'' | ||
| Line 1,243: | Line 1,220: | ||
| align="center" | '''Move''' || align="center" | '''Motion''' || align="center" | '''Damage''' || align="center" | '''Blocked Damage''' || align="center" | '''Stun Damage''' || align="center" | '''Super Cancel''' | | align="center" | '''Move''' || align="center" | '''Motion''' || align="center" | '''Damage''' || align="center" | '''Blocked Damage''' || align="center" | '''Stun Damage''' || align="center" | '''Super Cancel''' | ||
|- | |- | ||
| align="center" | Senkyuutai (Short) || align="center" | | | align="center" | Senkyuutai (Short) || align="center" | QCF+LK || align="center" | 130(80+50(45)) || align="center" | 16(10+6(6)) || align="center" | 12(7+5(5)) || align="center" | No | ||
|- | |- | ||
| align="center" | Senkyuutai (Forward) || align="center" | | | align="center" | Senkyuutai (Forward) || align="center" | QCF+MK || align="center" | 140(80+60(55)) || align="center" | 18(10+8(7)) || align="center" | 20(9+11(9)) || align="center" | No | ||
|- | |- | ||
| align="center" | Senkyuutai (Roundhouse) || align="center" | | | align="center" | Senkyuutai (Roundhouse) || align="center" | QCF+HK || align="center" | 150(80+70(65)) || align="center" | 19(10+9(8)) || align="center" | 16(11+5(3)) || align="center" | No | ||
|} | |} | ||
'''Frame Data''' | '''Frame Data''' | ||
| Line 1,254: | Line 1,231: | ||
| align="center" | '''Move''' || align="center" | '''Startup''' || align="center" | '''Hit''' || align="center" | '''Recovery''' || align="center" | '''Blocked Advantage''' || align="center" | '''Hit Advantage''' || align="center" | '''Crouching Hit Advantage''' || align="center" | '''Guard''' || align="center" | '''Parry''' | | align="center" | '''Move''' || align="center" | '''Startup''' || align="center" | '''Hit''' || align="center" | '''Recovery''' || align="center" | '''Blocked Advantage''' || align="center" | '''Hit Advantage''' || align="center" | '''Crouching Hit Advantage''' || align="center" | '''Guard''' || align="center" | '''Parry''' | ||
|- | |- | ||
| align="center" | Senkyuutai (Short) || align="center" | | | align="center" | Senkyuutai (Short) || align="center" | 8・12 || align="center" | 4・4 || align="center" | 34 || align="center" | -25 || align="center" | Down || align="center" | Down || align="center" | HL/HL || align="center" | HL/HL | ||
|- | |- | ||
| align="center" | Senkyuutai (Forward) || align="center" | | | align="center" | Senkyuutai (Forward) || align="center" | 4~16・8~20 || align="center" | 4・4 || align="center" | 28 || align="center" | -19 || align="center" | Down || align="center" | Down || align="center" | HL/HL || align="center" | HL/HL | ||
|- | |- | ||
| align="center" | Senkyuutai (Roundhouse) || align="center" | | | align="center" | Senkyuutai (Roundhouse) || align="center" | 3~29・5~31・7~33 || align="center" | 4・4 || align="center" | 25 || align="center" | -16 || align="center" | Down || align="center" | Down || align="center" | HL/HL || align="center" | HL/HL | ||
|} | |} | ||
'''Gauge Increase''' | '''Gauge Increase''' | ||
| Line 1,265: | Line 1,242: | ||
| align="center" | '''Move''' || align="center" | '''Miss''' || align="center" | '''Blocked''' || align="center" | '''Hit''' || align="center" | '''Parry (Gauge for opponent)''' | | align="center" | '''Move''' || align="center" | '''Miss''' || align="center" | '''Blocked''' || align="center" | '''Hit''' || align="center" | '''Parry (Gauge for opponent)''' | ||
|- | |- | ||
| align="center" | Senkyuutai (Short) || align="center" | | | align="center" | Senkyuutai (Short) || align="center" | 3 || align="center" | 14(13+1) || align="center" | 20(19+1) || align="center" | 8(4+4) | ||
|- | |- | ||
| align="center" | Senkyuutai (Forward) || align="center" | 3 | | align="center" | Senkyuutai (Forward) || align="center" | 3 || align="center" | 14(13+1) || align="center" | 20(19+1) || align="center" | 8(4+4) | ||
|- | |- | ||
| align="center" | Senkyuutai (Roundhouse) || align="center" | | | align="center" | Senkyuutai (Roundhouse) || align="center" | 3 || align="center" | 14(13+1) || align="center" | 20(19+1) || align="center" | 8(4+4) | ||
|} | |} | ||
''Comments here'' | ''Comments here'' | ||
Revision as of 19:16, 4 July 2017
Introdution
Specific Character Information
- Stamina: 1020
- Stun Bar Length (pixels): 64 (Normal)
- Stun Bar Recovery (frames it takes to recover 1 pixel): 24th frame
- Taunt: Increases damage for the next hit/combo by 31.3% and increases damage for the next throw by 6.3%. One taunt is the maximum.
- Best Kara-Throw: (Roundhouse) HK
- Standard Throw Range (pixels): 18
- Kara-Throw Range (pixels): 31
- Dash Forward (frames) / Moving Distance: 23 / 2
- Dash Backward (frames) / Moving Distance: 27 / 2/5
- Normal Wake up (frames): 57
- Quick Stand (frames): 41
Character Colors
- Jab: Default
- Strong: Blue
- Fierce: Orange
- Short: White and Red
- Forward: Silver
- Roundhouse: Violet
- Jab + Forward + Fierce: Black
Moves List
Throws
Command Normals
Target Combos
Special Moves
Super Arts
Move Analysis
- All those sprites are taken from the site http://www.zweifuss.ca/
- All Framedatas in "Move Analisys" section are taken from Game Restaurant , this means the Framedata isn't from the Dreamcast version like Karathrow site, it's from Arcade version.
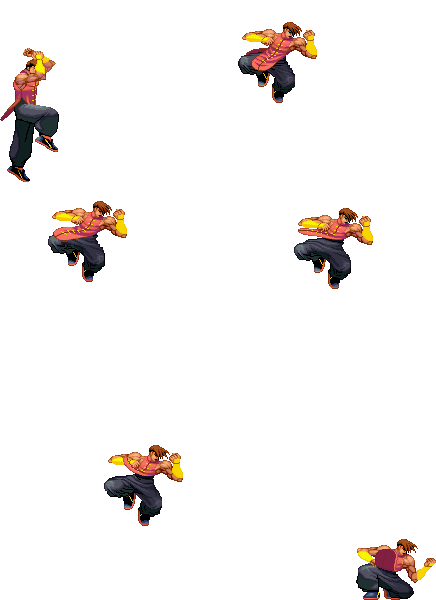
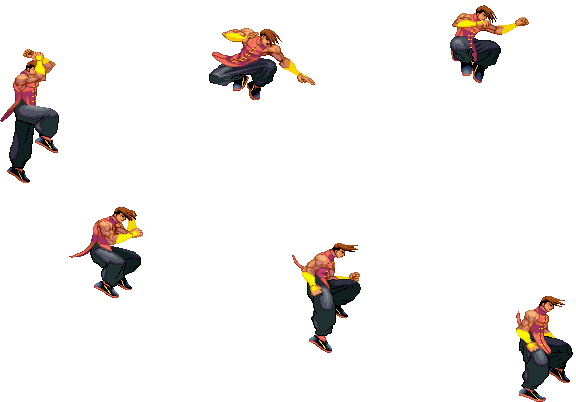
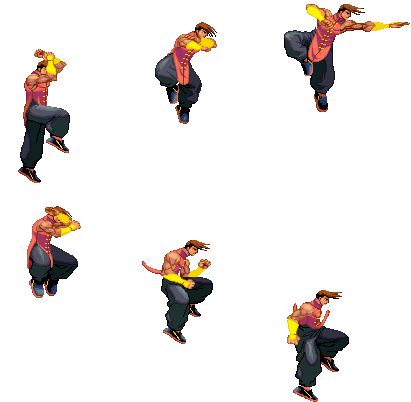
Please note that the images show in this section are for the 1st frame it hits, so this means the opponent is taking the hit in the image shown on the move. I use the 1st frame of every move (except taunt, dash, jump, wakeup and 2nd throw image sprites) because you will see the maximum range of every attack (mostly of the attacks). Note also that those images are ACCURATE, they are exactly the first frame it hits, so enemy takes damage but they still dont make the "pain" frame.
General
- Move: Move name
- Motion: What you must do to execute the move
- Damage: Damage it does (in pixels)
- Stun Damage: Stun Damage it does (in pixels)
- Chains into itself: If you can combo into the same movement
- Special Cancel: If you can cancel the move into a Special Move
- Super Cancel: If you can cancel the move into a Super Art
- Throw Range: Range of the throw (in pixels)
- Num.: Super Art number
- Super Art: Super Art name
- Super Art Stock: Number of Gauge Bars the Super Art have, also the lenght of each bar (in pixels)
Frame Data
- Startup: Number of frames it takes to start the move
- Hit: Number of frames that can hit the opponent
- Recovery: Number of frames it takes to recover from the move
- Blocked Advantage: Number of frames you are in advantage/disvantage after opponent have been blocked the hit
- Hit Advantage: Number of frames you are in advantage/disvantage after opponent have been take the hit
- Crouching Hit Advantage: Number of frames you are in advantage/disvantage after opponent have been take the hit while he's crouching
- + # : You have # frames of advantage
- - # : You have # frames of disvantage
- # ~ # : Advantage/disvantage can vary from # to #
- Down: Enemy gets knocked down
- Guard: How opponent must guard the move, High (H), Low (L) or both (HL)
- Parry: How opponent must parry the move, High (H), Low (L) or both (HL)
Gauge Increase
- Miss: Gauge you gain if you miss the move (in pixels)
- Blocked: Gauge you gain if the move gets blocked (in pixels)
- Hit: Gauge you gain if you hit the opponent with the move (in pixels)
- Parry: Gauge opponent gains when he parry the move (in pixels)
Basic Moves
| Move | Start-up frames | In ground frames | In air frames | Recovery frames | Total frames |
|---|---|---|---|---|---|
| Dash Forward | 2? | 8? | - | 6? | 16 |
Comments here
| Move | Start-up frames | In ground frames | In air frames | Recovery frames | Total frames |
|---|---|---|---|---|---|
| Dash Backwards | 4? | 4? | - | 6? | 13 |
Comments here
| Move | Motion | Startup Frames |
| Jump | BU or U or FU | 3 |
Comments here
| Move | Motion | Startup Frames |
| Super Jump | DBU or DU or DFU | 5 |
Comments here
| Move | Motion | Frames |
| Normal Wakeup | - | 75 |
Comments here
| Move | Motion | Frames |
| Quick Stand | Tap D when hitting the ground | 48 |
Comments here
| Move | Motion | Damage | Stun Damage | Chains into itself | Special Cancel | Super Cancel |
| Taunt | HP+HK | 5/5 | 3/3 | No | No | No |
Frame Data
| Startup | Hit | Recovery | Blocked Advantage | Hit Advantage | Crouching Hit Advantage | Guard | Parry |
| 15/9 | 1/1 | 27 | ? | ? | ? | HL | HL |
Gauge Increase
| Miss | Blocked | Hit | Parry (Gauge for opponent) |
| 4(6) | ? | ? | 8(4+4) |
Comments here
| Move | Motion |
| Parry (High) | Tap F when about taking a hit |
| Parry (Low) | Tap D when about taking a hit |
| Parry (Air) | Tap F in air when about taking a hit |
Frame Data
| Move | Frames you're frozen | Frames opponent is frozen | Frame Advantage when parry is successful | Frames before you can try another parry |
| Parry (High) | 16 | 16 | +4(LP/LK) +3(MP/MK) +2(HP/HK) 0(Special/Super) -16(Fireball) | 24(19 when attack comes from the air)*,** |
| Parry (Low) | 16 | 16 | +4(LP/LK) +3(MP/MK) +2(HP/HK) 0(Special/Super) -16(Fireball) | 24(19 when attack comes from the air)*,** |
| Parry (Air) | 16 | 16 | +4(LP/LK) +3(MP/MK) +2(HP/HK) 0(Special/Super) -16(Fireball) | 21(19 when attack comes from the air)*,** |
| * (If a parry attempt is successful, the 19/21/24 frame restriction is taken away and you can attempt another parry immediately) |
| ** (If another attack connects within 2 frames of your parry, it will automatically be parried) |
Gauge Increase
| Move | Gauge Increase |
| Parry (High) | 4*** |
| Parry (Low) | 4*** |
| Parry (Air) | 4*** |
| *** (You gain 4 of gauge for whatever attack parried, and for whatever hit you parry during multihit attack) |
You can buffer any motion during High or Low parry, but NOT during Air parry, also parry resets the juggle count (and thus resets all scaling).
- Parry information is taken from Shoryuken Forums, more exactly, from user JinraiPVC. Thanks for this information dude
Normal Moves
Standing Normals
| Move | Motion | Damage | Stun Damage | Chains into itself | Special Cancel | Super Cancel |
| Far Jab | LP | 20 | 3 | Yes | Yes | Yes |
Frame Data
| Startup | Hit | Recovery | Blocked Advantage | Hit Advantage | Crouching Hit Advantage | Guard | Parry |
| 3 | 2 | 6 | +4 | +4 | +4 | HL | HL |
Gauge Increase
| Miss | Blocked | Hit | Parry (Gauge for opponent) |
| 0 | 1 | 2 | 4 |
Comments here
| Move | Motion | Damage | Stun Damage | Chains into itself | Special Cancel | Super Cancel |
| Far Strong | MP | 50 | 5 | No | No | No |
Frame Data
| Startup | Hit | Recovery | Blocked Advantage | Hit Advantage | Crouching Hit Advantage | Guard | Parry |
| 5 | 4 | 12 | -2 | -1 | 0 | HL | H |
Gauge Increase
| Miss | Blocked | Hit | Parry (Gauge for opponent) |
| 2 | 5 | 10 | 4 |
Comments here
| Move | Motion | Damage | Stun Damage | Chains into itself | Special Cancel | Super Cancel |
| Far Fierce | HP | 120 | 15 | No | No | No |
Frame Data
| Startup | Hit | Recovery | Blocked Advantage | Hit Advantage | Crouching Hit Advantage | Guard | Parry |
| 9 | 6 | 12 | -5 | -3 | -1 | HL | H |
Gauge Increase
| Miss | Blocked | Hit | Parry (Gauge for opponent) |
| 3 | 9 | 18 | 4 |
Comments here
| Move | Motion | Damage | Stun Damage | Chains into itself | Special Cancel | Super Cancel |
| Close Strong | (Close to opponent) MP | 55 | 5 | No | Yes | Yes |
Frame Data
| Startup | Hit | Recovery | Blocked Advantage | Hit Advantage | Crouching Hit Advantage | Guard | Parry |
| 4 | 3 | 7 | +6 | +7 | +8 | HL | H |
Gauge Increase
| Miss | Blocked | Hit | Parry (Gauge for opponent) |
| 2 | 5 | 10 | 4 |
Comments here
| Move | Motion | Damage | Stun Damage | Chains into itself | Special Cancel | Super Cancel |
| Close Fierce | (Close to opponent) HP | 100 | 14 | No | Yes | No |
Frame Data
| Startup | Hit | Recovery | Blocked Advantage | Hit Advantage | Crouching Hit Advantage | Guard | Parry |
| 5 | 3 | 13 | -2 | -1 | 0 | HL | H |
Gauge Increase
| Miss | Blocked | Hit | Parry (Gauge for opponent) |
| 3 | 8 | 17 | 4 |
Comments here
| Move | Motion | Damage | Stun Damage | Chains into itself | Special Cancel | Super Cancel |
| Short | LK | 30 | 3 | No | Yes | Yes |
Frame Data
| Startup | Hit | Recovery | Blocked Advantage | Hit Advantage | Crouching Hit Advantage | Guard | Parry |
| 3 | 3 | 6 | +2 | +2 | +2 | HL | HL |
Gauge Increase
| Miss | Blocked | Hit | Parry (Gauge for opponent) |
| 0 | 1 | 2 | 4 |
Comments here
| Move | Motion | Damage | Stun Damage | Chains into itself | Special Cancel | Super Cancel |
| Forward | MK | 80 | 9 | No | No | No |
Frame Data
| Startup | Hit | Recovery | Blocked Advantage | Hit Advantage | Crouching Hit Advantage | Guard | Parry |
| 9 | 3 | 15 | -4 | -3 | -2 | HL | H |
Gauge Increase
| Miss | Blocked | Hit | Parry (Gauge for opponent) |
| 2 | 5 | 10 | 4 |
Comments here
| Move | Motion | Damage | Stun Damage | Chains into itself | Special Cancel | Super Cancel |
| Roundhouse | HK | 100 | 11 | No | No | No |
Frame Data
| Startup | Hit | Recovery | Blocked Advantage | Hit Advantage | Crouching Hit Advantage | Guard | Parry |
| 14 | 3 | 22 | -8 | -6 | -4 | HL | H |
Gauge Increase
| Miss | Blocked | Hit | Parry (Gauge for opponent) |
| 3 | 9 | 18 | 4 |
Comments here
| Move | Motion | Damage | Stun Damage | Chains into itself | Special Cancel | Super Cancel |
| Close Forward | (Close to opponent) MK | 80 | 9 | No | Yes | Yes |
Frame Data
| Startup | Hit | Recovery | Blocked Advantage | Hit Advantage | Crouching Hit Advantage | Guard | Parry |
| 7 | 3 | 15 | -2 | Down | Down | HL | H |
Gauge Increase
| Miss | Blocked | Hit | Parry (Gauge for opponent) |
| 2 | 5 | 10 | 4 |
Comments here
Jumping Normals
| Move | Motion | Damage | Stun Damage | Chains into itself | Special Cancel | Super Cancel |
| Jump Jab | (Air) LP | 40 | 7 | No | No | No |
Frame Data
| Startup | Hit | Recovery | Blocked Advantage | Hit Advantage | Crouching Hit Advantage | Guard | Parry |
| 2 | Until landing | - | -4~+7 | -4~+7 | +2~+7 | H | H |
Gauge Increase
| Miss | Blocked | Hit | Parry (Gauge for opponent) |
| 0 | 1 | 2 | 4 |
Comments here
| Move | Motion | Damage | Stun Damage | Chains into itself | Special Cancel | Super Cancel |
| Jump Strong | (Air) MP | 80 | 9(11 if neutral jump) | No | No | No |
Frame Data
| Startup | Hit | Recovery | Blocked Advantage | Hit Advantage | Crouching Hit Advantage | Guard | Parry |
| 3 | 6(7 if neutral jump) | - | -2~+10 | +5/+6~+10 | +5/+6~+10 | H | H |
Gauge Increase
| Miss | Blocked | Hit | Parry (Gauge for opponent) |
| 2 | 5 | 10 | 4 |
Comments here
| Move | Motion | Damage | Stun Damage | Chains into itself | Special Cancel | Super Cancel |
| Jump Fierce | (Air) HP | 100 | 13 | No | No | No |
Frame Data
| Startup | Hit | Recovery | Blocked Advantage | Hit Advantage | Crouching Hit Advantage | Guard | Parry |
| 5 | 4 | - | -2~+10 | -2~+10 | +5~+10 | H | H |
Gauge Increase
| Miss | Blocked | Hit | Parry (Gauge for opponent) |
| 3 | 9 | 18 | 4 |
Comments here
| Move | Motion | Damage | Stun Damage | Chains into itself | Special Cancel | Super Cancel |
| Neutral Jump Fierce | (Air) HP | 120 | 15 | No | No | No |
Frame Data
| Startup | Hit | Recovery | Blocked Advantage | Hit Advantage | Crouching Hit Advantage | Guard | Parry |
| 8 | 5 | - | +4~+10 | +4~+10 | +9~+10 | H | H |
Gauge Increase
| Miss | Blocked | Hit | Parry (Gauge for opponent) |
| 3 | 9 | 18 | 4 |
Comments here
| Move | Motion | Damage | Stun Damage | Chains into itself | Special Cancel | Super Cancel |
| Jump Short | (Air) LK | 40 | 5 | No | No | No |
Frame Data
| Startup | Hit | Recovery | Blocked Advantage | Hit Advantage | Crouching Hit Advantage | Guard | Parry |
| 3(4 if neutral jump) | 12 | +1~+7 | +1~+7 | +6~+7/+7 | - | H | H |
Gauge Increase
| Miss | Blocked | Hit | Parry (Gauge for opponent) |
| 0 | 1 | 2 | 4 |
Comments here
| Move | Motion | Damage | Stun Damage | Chains into itself | Special Cancel | Super Cancel |
| Jump Forward | (Air) MK | 70 | 9 | No | No | No |
Frame Data
| Startup | Hit | Recovery | Blocked Advantage | Hit Advantage | Crouching Hit Advantage | Guard | Parry |
| 6 | 7 | - | -3~+10 | -3~+10 | +5~+10 | H | H |
Gauge Increase
| Miss | Blocked | Hit | Parry (Gauge for opponent) |
| 2 | 5 | 10 | 4 |
Comments here
| Move | Motion | Damage | Stun Damage | Chains into itself | Special Cancel | Super Cancel |
| Neutral Jump Forward | (Air) MK | 70 | 9 | No | No | No |
Frame Data
| Startup | Hit | Recovery | Blocked Advantage | Hit Advantage | Crouching Hit Advantage | Guard | Parry |
| 6 | 7 | - | -3~+10 | -3~+10 | +5~+10 | H | H |
Gauge Increase
| Miss | Blocked | Hit | Parry (Gauge for opponent) |
| 2 | 5 | 10 | 4 |
Comments here
| Move | Motion | Damage | Stun Damage | Chains into itself | Special Cancel | Super Cancel |
| Jump Roundhouse | (Air) HK | 110 | 13 | No | No | No |
Frame Data
| Startup | Hit | Recovery | Blocked Advantage | Hit Advantage | Crouching Hit Advantage | Guard | Parry |
| 5 | 5 | - | 0~+10 | 0~+10 | +5~+10 | H | H |
Gauge Increase
| Miss | Blocked | Hit | Parry (Gauge for opponent) |
| 3 | 9 | 18 | 4 |
Comments here
| Move | Motion | Damage | Stun Damage | Chains into itself | Special Cancel | Super Cancel |
| Neutral Jump Roundhouse | (Air) HK | 110 | 13 | No | No | No |
Frame Data
| Startup | Hit | Recovery | Blocked Advantage | Hit Advantage | Crouching Hit Advantage | Guard | Parry |
| 5 | 5 | - | -1~+10 | -1~+10 | +4~+10 | H | H |
Gauge Increase
| Miss | Blocked | Hit | Parry (Gauge for opponent) |
| 3 | 9 | 18 | 4 |
Comments here
| Move | Motion | Damage | Stun Damage | Chains into itself | Special Cancel | Super Cancel |
| Universal Overhead | MP+MK | 40 | 3 | No | No | No |
Frame Data
| Startup | Hit | Recovery | Blocked Advantage | Hit Advantage | Crouching Hit Advantage | Guard | Parry |
| 15 | 10 | 5 | -5~+7 | 0~+8 | +1~+9 | H | H |
Gauge Increase
| Miss | Blocked | Hit | Parry (Gauge for opponent) |
| 0 | 1 | 2 | 4 |
Comments here
Throws
| Move | Motion | Damage | Stun Damage | Throw Range | Kara-Throw | Kara-Throw Range |
| Hiza Geri | LP+LK | 160(40x6) | 18(3x6) | 18 | S.HK / S.LK / F.MK / Far S.HP / Close F.HP | 31 / 28 / 26 / 22 / 22 |
Frame Data
| Startup | Hit | Recovery | Blocked Advantage | Hit Advantage | Crouching Hit Advantage | Guard | Parry |
| 2 | 1 | 21 | - | - | - | LP+LK | - |
Gauge Increase
| Miss | Blocked | Hit |
| 0 | 7 (for the player who blocked) | 12(6x2) |
Comments here
| Move | Motion | Damage | Stun Damage | Throw Range | Kara-Throw | Kara-Throw Range |
| Youhon Shiun | F+LP+LK | 120 | 11 | 18 | S.HK / S.LK / F.MK / Far S.HP / Close F.HP | 31 / 28 / 26 / 22 / 22 |
Frame Data
| Startup | Hit | Recovery | Blocked Advantage | Hit Advantage | Crouching Hit Advantage | Guard | Parry |
| 2 | 1 | 21 | - | - | - | F+LP+LK | - |
Gauge Increase
| Miss | Blocked | Hit |
| 0 | 7 (for the player who blocked) | 7 |
Comments here
| Move | Motion | Damage | Stun Damage | Throw Range | Kara-Throw | Kara-Throw Range |
| Monkey Flip | B+LP+LK | 120 | 11 | 18 | S.HK / S.LK / F.MK / Far S.HP / Close F.HP | 31 / 28 / 26 / 22 / 22 |
Frame Data
| Startup | Hit | Recovery | Blocked Advantage | Hit Advantage | Crouching Hit Advantage | Guard | Parry |
| 2 | 1 | 21 | - | - | - | B+LP+LK | - |
Gauge Increase
| Miss | Blocked | Hit |
| 0 | 7 (for the player who blocked) | 7 |
Comments here
Crouching Normals
| Move | Motion | Damage | Stun Damage | Chains into itself | Special Cancel | Super Cancel |
| Crouch Jab | D+LP | 20 | 3 | Yes | Yes | Yes |
Frame Data
| Startup | Hit | Recovery | Blocked Advantage | Hit Advantage | Crouching Hit Advantage | Guard | Parry |
| 3 | 2 | 6 | +4 | +4 | +4 | HL | HL |
Gauge Increase
| Miss | Blocked | Hit | Parry (Gauge for opponent) |
| 0 | 1 | 2 | 4 |
Comments here
| Move | Motion | Damage | Stun Damage | Chains into itself | Special Cancel | Super Cancel |
| Crouch Strong | D+MP | 70 | 5 | No | No | No |
Frame Data
| Startup | Hit | Recovery | Blocked Advantage | Hit Advantage | Crouching Hit Advantage | Guard | Parry |
| 5 | 2 | 11 | +2 | +3 | +4 | HL | HL |
Gauge Increase
| Miss | Blocked | Hit | Parry (Gauge for opponent) |
| 2 | 5 | 10 | 4 |
Comments here
| Move | Motion | Damage | Stun Damage | Chains into itself | Special Cancel | Super Cancel |
| Crouch Fierce | D+HP | 110 | 8(2 hits) | No | No | No |
Frame Data
| Startup | Hit | Recovery | Blocked Advantage | Hit Advantage | Crouching Hit Advantage | Guard | Parry |
| 8 | 7 | 12 | 0 | +1 | +2 | HL | HL |
Gauge Increase
| Miss | Blocked | Hit | Parry (Gauge for opponent) |
| 3 | 8 | 17 | 8(4+4) |
Comments here
| Move | Motion | Damage | Stun Damage | Chains into itself | Special Cancel | Super Cancel |
| Crouch Short | D+LK | 30 | 3 | Yes | Yes | Yes |
Frame Data
| Startup | Hit | Recovery | Blocked Advantage | Hit Advantage | Crouching Hit Advantage | Guard | Parry |
| 4 | 1 | 8 | +2 | +2 | +2 | L | L |
Gauge Increase
| Miss | Blocked | Hit | Parry (Gauge for opponent) |
| 0 | 1 | 2 | 4 |
Comments here
| Move | Motion | Damage | Stun Damage | Chains into itself | Special Cancel | Super Cancel |
| Crouch Forward | D+MK | 50 | 3 | No | Yes | Yes |
Frame Data
| Startup | Hit | Recovery | Blocked Advantage | Hit Advantage | Crouching Hit Advantage | Guard | Parry |
| 7 | 2 | 13 | -1 | 0 | +1 | L | L |
Gauge Increase
| Miss | Blocked | Hit | Parry (Gauge for opponent) |
| 2 | 5 | 10 | 4 |
Comments here
| Move | Motion | Damage | Stun Damage | Chains into itself | Special Cancel | Super Cancel |
| Crouch Roundhouse | D+HK | 90 | 3 | No | No | No |
Frame Data
| Startup | Hit | Recovery | Blocked Advantage | Hit Advantage | Crouching Hit Advantage | Guard | Parry |
| 10 | 3 | 20 | -7 | Down | Down | L | L |
Gauge Increase
| Miss | Blocked | Hit | Parry (Gauge for opponent) |
| 3 | 9 | 18 | 4 |
Comments here
Command Normals
| Move | Motion | Damage | Stun Damage | Chains into itself | Special Cancel | Super Cancel |
| Senpuu Kyaku | F+MK | 80 | 11 | No | No | No |
Frame Data
| Startup | Hit | Recovery | Blocked Advantage | Hit Advantage | Crouching Hit Advantage | Guard | Parry |
| 19 | 6 | 8 | -1 | 0 | +1 | HL | H |
Gauge Increase
| Miss | Blocked | Hit | Parry (Gauge for opponent) |
| 2 | 3 | 7 | 4 |
Comments here
| Move | Motion | Damage | Stun Damage | Chains into itself | Special Cancel | Super Cancel |
| Raigeki Shuu | B+MK | 70 | 7 | No | No | No |
Frame Data
| Startup | Hit | Recovery | Blocked Advantage | Hit Advantage | Crouching Hit Advantage | Guard | Parry |
| 6/6/8 | Until Landing | - | +1 | +2 | +3 | HL | H |
Gauge Increase
| Miss | Blocked | Hit | Parry (Gauge for opponent) |
| 2 | 3 | 7 | 4 |
Comments here
| Move | Motion | Damage | Stun Damage | Chains into itself | Special Cancel | Super Cancel |
| Koushu | F+HP | 120 | 15 | No | No | No |
Frame Data
| Startup | Hit | Recovery | Blocked Advantage | Hit Advantage | Crouching Hit Advantage | Guard | Parry |
| 9 | 6 | 12 | -5 | -3 | -1 | HL | H |
Gauge Increase
| Miss | Blocked | Hit | Parry (Gauge for opponent) |
| 3 | 5 | 13 | 4 |
Comments here
Target Combo
| Move | Motion | Damage | Stun Damage | Chains into itself | Special Cancel | Super Cancel |
| Target Combo | Jump MK -> Jump DF+MK | 70+30 | 9+3 | No/No | No/No | No/No |
Frame Data
| Startup | Hit | Recovery | Blocked Advantage | Hit Advantage | Crouching Hit Advantage | Guard | Parry |
| - | - | - | - | - | - | HL/HL | H/H |
Gauge Increase
| Miss | Blocked | Hit | Parry (Gauge for opponent) |
| 2+? | 5+1 | 10+1 | 8(4+4) |
Comments here
| Move | Motion | Damage | Stun Damage | Chains into itself | Special Cancel | Super Cancel |
| Target Combo | Close LK -> Close MK -> Close HK | 30+50+60 | 3+5+9 | No/No/No | Yes/No/No | Yes/No/No |
Frame Data
| Startup | Hit | Recovery | Blocked Advantage | Hit Advantage | Crouching Hit Advantage | Guard | Parry |
| 3 | - | - | -4/0 | -3/+1 | -2/+2 | HL/HL/HL | HL/H/H |
Gauge Increase
| Miss | Blocked | Hit | Parry (Gauge for opponent) |
| 0+? | 1+1 | 2+1 | 12(4+4+4) |
Comments here
| Move | Motion | Damage | Stun Damage | Chains into itself | Special Cancel | Super Cancel |
| Target Combo | Close MP -> Close HP -> Close B+HP | 55(50 Far)+50+60 | 5+5+7 | No/No/No | Yes/No/No(Close) No/No/No(Far) | Yes/No/Yes(Close) No/No/Yes(Far) |
Frame Data
| Startup | Hit | Recovery | Blocked Advantage | Hit Advantage | Crouching Hit Advantage | Guard | Parry |
| 4 | - | - | -5/-2 | -3/Down | -1/Down | HL/HL/HL | H/H/H |
Gauge Increase
| Miss | Blocked | Hit | Parry (Gauge for opponent) |
| 2+? | 5+1 | 10+1 | 8(4+4) |
Comments here
Special Moves
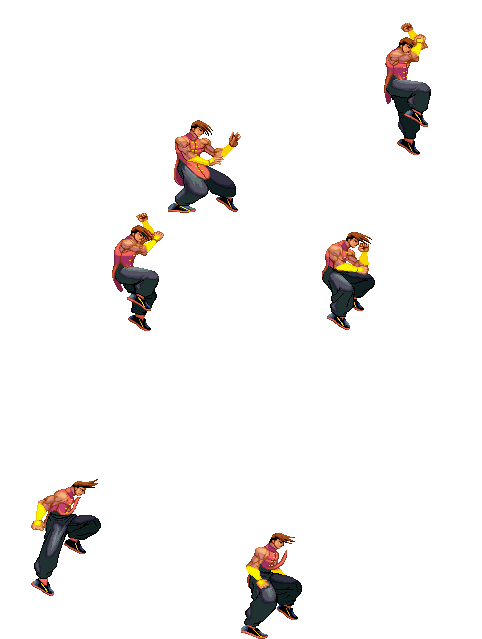
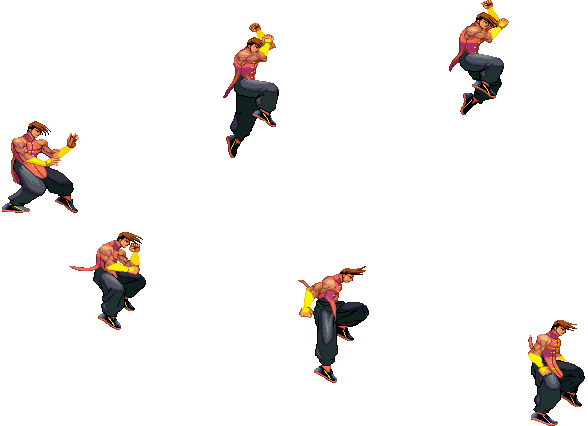
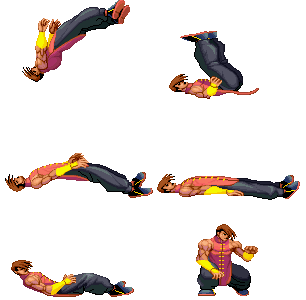
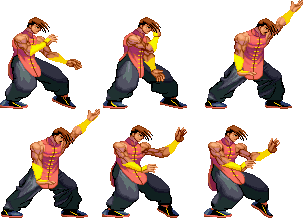
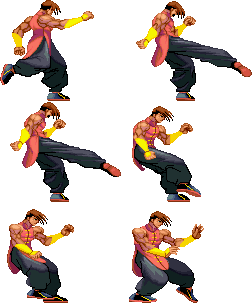
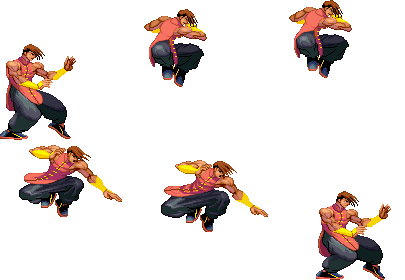
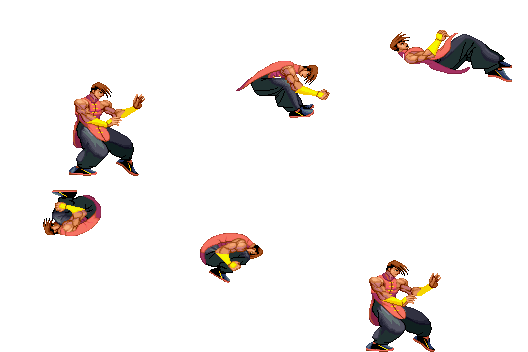
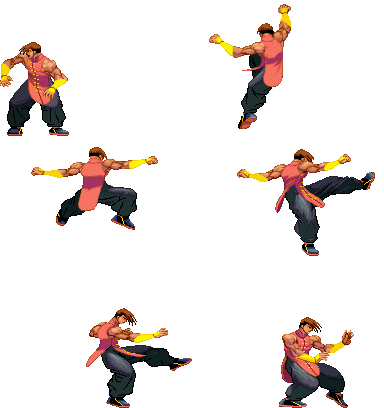
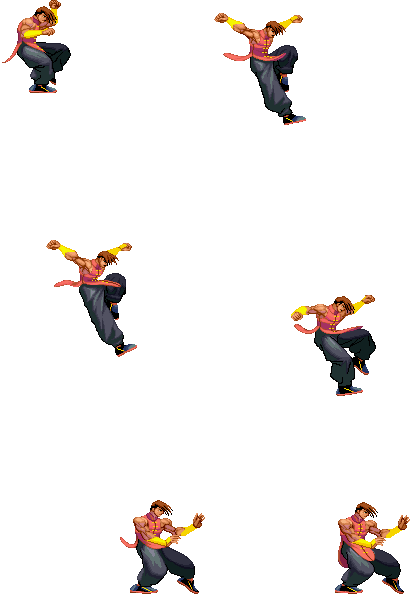
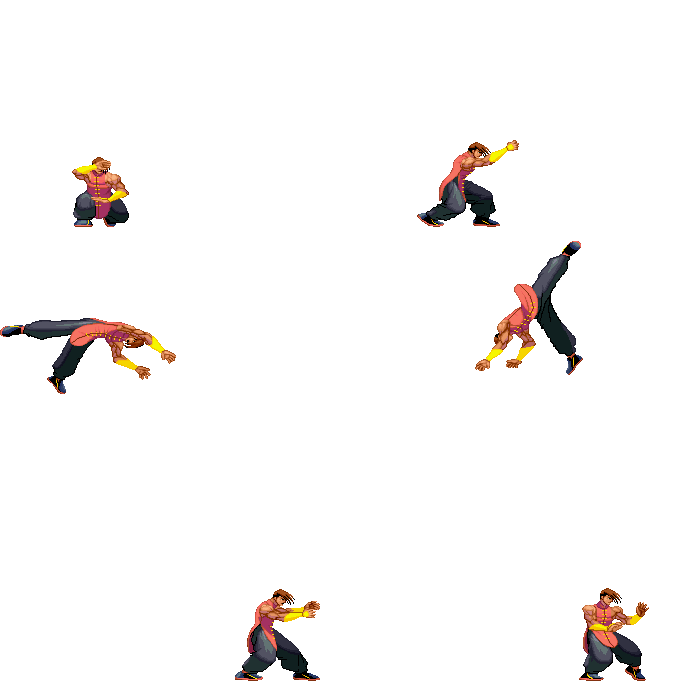
Please note that in this section you will see mainly 3 images for the special moves, this means the image on the left its done with LP (or LK), the image on the center its done with MP (or MK), and the image on the right its done with HP (or HK). Also its the same "rule" as the sections above, its the 1rst frame it hits for every of the moves.
| Move | Motion | Damage | Blocked Damage | Stun Damage | Super Cancel |
| Byakko-Soushouda | QCB+LP | 150(100) | 19(14) | 21(15) | Yes |
Frame Data
| Move | Startup | Hit | Recovery | Blocked Advantage | Hit Advantage | Crouching Hit Advantage | Guard | Parry |
| Byakko-Soushouda | 21 | 13 | 10 | -17 | Down | Down | HL | HL |
Gauge Increase
| Move | Miss | Blocked | Hit | Parry (Gauge for opponent) |
| Byakko-Soushouda | 3 | 7 | 15 | 4 |
Comments here
| Move | Motion | Damage | Blocked Damage | Stun Damage | Super Cancel |
| Tourou-Zan (Jab) | QCF+LP x 3 | 30+35+90(150 if hits) | 2+2+6 | 5+5+7(13 if hits) | No |
| Tourou-Zan (Strong) | QCF+MP x 3 | 35+40+95(170 if hits) | 2+3+6 | 5+5+7(13 if hits) | No |
| Tourou-Zan (Fierce) | QCF+HP x 3 | 40+45+100(180 if hits) | 3+3+6 | 5+5+7(13 if hits) | No |
Frame Data
| Move | Startup | Hit | Recovery | Blocked Advantage | Hit Advantage | Crouching Hit Advantage | Guard | Parry |
| Tourou-Zan (Jab) | 8/6/7 | 5/5/4 | 22/25/29 | -1/-4/-7 | +1/-2/Down | +3/0/Down | HLx3 | Hx3 |
| Tourou-Zan (Strong) | 8/7/7 | 5/5/5 | 26/29/32 | -5/-8/-11 | -3/-6/Down | +1/-4/Down | HLx3 | Hx3 |
| Tourou-Zan (Fierce) | 8/8/7 | 5/5/6 | 30/33/35 | -9/-12/-15 | -7/-10/Down | -4/-8/Down | HLx3 | Hx3 |
Gauge Increase
| Move | Miss | Blocked | Hit | Parry (Gauge for opponent) |
| Tourou-Zan (Jab) | 3/0/0 | 11/1/1 | 17/1/1 | 12(4+4+4) |
| Tourou-Zan (Strong) | 3/0/0 | 7/1/1 | 12/2/2 | 12(4+4+4) |
| Tourou-Zan (Fierce) | 3/0/0 | 7/1/1 | 12/2/2 | 12(4+4+4) |
Transcision Frames
| Move | Jab -> Strong | Strong -> Fierce |
| Tourou-Zan (Jab) | 20 | 19 |
| Tourou-Zan (Strong) | 19 | 19 |
| Tourou-Zan (Fierce) | 18 | 19 |
Comments here
| Move | Motion | Damage | Blocked Damage | Stun Damage | Super Cancel |
| Kaibou (Short) | F, D ,DF+LK | - | - | - | No |
| Kaibou (Forward) | F, D ,DF+MK | - | - | - | No |
| Kaibou (Roundhouse) | F, D ,DF+HK | - | - | - | No |
Frame Data
| Move | Startup | Hit | Recovery | Blocked Advantage | Hit Advantage | Crouching Hit Advantage | Guard | Parry |
| Kaibou (Short) | 8 | 29 | - | - | - | - | - | - |
| Kaibou (Forward) | 10 | 34 | - | - | - | - | - | - |
| Kaibou (Roundhouse) | 10 | 43 | - | - | - | - | - | - |
Gauge Increase
| Move | Miss | Blocked | Hit | Parry (Gauge for opponent) |
| Kaibou (Short) | - | - | - | - |
| Kaibou (Forward) | - | - | - | - |
| Kaibou (Roundhouse) | - | - | - | - |
Comments here
| Move | Motion | Damage | Blocked Damage | Stun Damage | Throw Range | Super Cancel |
| Zenpou-Tenshin | HCB+K | - | - | - | 31 | No |
Frame Data
| Move | Startup | Hit | Recovery | Blocked Advantage | Hit Advantage | Crouching Hit Advantage | Guard | Parry |
| Zenpou-Tenshin | 7 | 2 | 26 | - | +15 | +15 | Impossible | Impossible |
Gauge Increase
| Move | Miss | Blocked | Hit | Parry (Gauge for opponent) |
| Zenpou-Tenshin | 0 | - | 0 | - |
Comments here
| Move | Motion | Damage | Blocked Damage | Stun Damage | Super Cancel |
| Senkyuutai (Short) | QCF+LK | 130(80+50(45)) | 16(10+6(6)) | 12(7+5(5)) | No |
| Senkyuutai (Forward) | QCF+MK | 140(80+60(55)) | 18(10+8(7)) | 20(9+11(9)) | No |
| Senkyuutai (Roundhouse) | QCF+HK | 150(80+70(65)) | 19(10+9(8)) | 16(11+5(3)) | No |
Frame Data
| Move | Startup | Hit | Recovery | Blocked Advantage | Hit Advantage | Crouching Hit Advantage | Guard | Parry |
| Senkyuutai (Short) | 8・12 | 4・4 | 34 | -25 | Down | Down | HL/HL | HL/HL |
| Senkyuutai (Forward) | 4~16・8~20 | 4・4 | 28 | -19 | Down | Down | HL/HL | HL/HL |
| Senkyuutai (Roundhouse) | 3~29・5~31・7~33 | 4・4 | 25 | -16 | Down | Down | HL/HL | HL/HL |
Gauge Increase
| Move | Miss | Blocked | Hit | Parry (Gauge for opponent) |
| Senkyuutai (Short) | 3 | 14(13+1) | 20(19+1) | 8(4+4) |
| Senkyuutai (Forward) | 3 | 14(13+1) | 20(19+1) | 8(4+4) |
| Senkyuutai (Roundhouse) | 3 | 14(13+1) | 20(19+1) | 8(4+4) |
Comments here
EX Moves
| Move | Motion | Gauge Needed | Damage | Blocked Damage | Stun Damage | Super Cancel |
| Tourou Zan (EX) | QCB+KK | 40 | 200(60+35(x4)+30) | 19(8+2(x5)) | 20(7+3(x5)) | Yes |
Frame Data
| Move | Startup | Hit | Recovery | Blocked Advantage | Hit Advantage | Crouching Hit Advantage | Guard | Parry |
| Tourou Zan (EX) | 4 | 2 | 13 | -3 | -1 | -1 | HL | H |
Gauge Increase
| Move | Miss | Blocked | Hit | Parry (Gauge for opponent) |
| Tourou Zan (EX) | - | - | - | 24(4+4+4+4+4+4) |
Comments here
| Move | Motion | Gauge Needed | Damage | Blocked Damage | Stun Damage | Super Cancel |
| Senkyuutai (EX) | (Air) QCB+KK | 40 | 240(80(x10)) | 5(5(x10)) | 15(5(x10)) | No |
Frame Data
| Move | Startup | Hit | Recovery | Blocked Advantage | Hit Advantage | Crouching Hit Advantage | Guard | Parry |
| Senkyuutai (EX) | 6 | 1 | 12 | - | Down | Down | HL | H |
Gauge Increase
| Move | Miss | Blocked | Hit | Parry (Gauge for opponent) |
| Senkyuutai (EX) | - | - | - | 20(4+4+4+4+4) |
Comments here
Super Arts
| Super Art | Super Art Name | Super Art Stock | Motion | Damage | Blocked Damage | Stun Damage | Damage/Gauge |
| I | Raishin-Mahhaken | 1 bar (120) | QCF QCF+P | 465* | 43** | 8 |
| * 90+70+50+70+50+70+160 Damage is when all hits connect. |
| ** 16+6+8+4+3+3+(3x6) Damage is when all hits connect. |
Frame Data
| Startup | Hit | Recovery | Blocked Advantage | Hit Advantage | Crouching Hit Advantage | Guard | Parry |
| 7 | 4 | 37/36 | +1 | Down | Down | HLx7~9 | HLx7~9 |
Comments here
| Super Art | Super Art Name | Super Art Stock | Motion | Damage | Blocked Damage | Stun Damage | Damage/Gauge |
| II | Tenshin-Senkyutai | 2 bar (104 each bar) | QCF QCF+K | 315* | 18** | 0 | 4,75 |
| * 100+20+30+30+100+50+60 Damage is when all hits connect. |
| ** 5+3+0+0+3+3+3 Damage is when all hits connect. |
Frame Data
| Startup | Hit | Recovery | Blocked Advantage | Hit Advantage | Crouching Hit Advantage | Guard | Parry |
| 1 | 3~67 | 37/36 | -69 | Down | Down | HLx3~6 | HLx3~6 |
| Super Art | Super Art Name | Super Art Stock | Motion | Damage | Blocked Damage | Stun Damage | Damage/Gauge |
| III | Sei-ei Enbu | 1 bar (64) | QCF QCF+P | - | - | - | - |
Frame Data
| Startup | Hit | Recovery | Blocked Advantage | Hit Advantage | Crouching Hit Advantage | Guard | Parry |
| 16 | - | - | - | - | - | - | - |
300 frames (5 seconds) lenght
Combos
General
- crouching MK / close MP / close HP (1 hit) xx (EX) Mantis Slashes
- stand LK xx EX Mantis Slashes
- crouching or standing LP x2 / crouching LK x2 xx EX Mantis Slashes
- close MK -> MK Senkyutai -> standing LP
- close MP / close HP (1 hit) xx EX Senkyutai
- EX Senkyutai -> close MP or stand LP
- Rageki Shu -> close MP xx (EX) Mantis Slashes or Target Combo 2
- close MP -> stand LK xx EX Mantis Slashes
Super Art 1
- crouching MK xx Raishin Mahhaken
- crouching LP x2 xx Raishin Mahhaken
Super Art 2
- close MK -> Tenshin Senkyutai
- Byakko Soushouda xx Tenshin Senkyutai
- Target Combo 2 xx Tenshin Senkyutai
- crouching LP x2 xx Tenshin Senkyutai
Super Art 3
[ ] means repeat until time runs out.
Combos Into
-j.HK/j.MKxdiveKick, close MK sjc. SAIII, MK senkyutai
-in corner j.HK/j.MKxdiveKick, close MK sjc. SAIII, HP Mantis Slash
Already Activated
- point blank UOH, [LP slash1]
- far UOH, LK, [HP Slash1, LP Slash2, LK]
- in corner [HP Slash1, LP Slash2, kick chain]
- [hp.slash,lp.slash,low.lk] ,c.MK,3 Slashes
Resets
- knockdown, [crossup divekick, cr.MP, cr.HK]
- knockdown, [crossup divekick, cr.MP, cr.MK, Slashes]
Frame Data
Normal Moves, Command Normals, Other
| Move | Parry | Damage | Stun | Cancel Ability | Startup | Active | Recover | Frame Adv. Block | Frame Adv. Hit | Frame Adv. Hit Crouching |
| Light Punch | HL | 20 | 3 | C*Sp*Su | 3 | 1 | 6 | 4 | 4 | 4 |
| Medium Punch | H | 55 | 5 | Sp*Su | 4 | 2 | 7 | 6 | 7 | 8 |
| Hard Punch | H | 40+60 | 7+7 | Sp*Su | 5 | 2*2 | 13 | 2 | 1 | 0 |
| Light Kick | HL | 30 | 3 | Sp*Su | 3 | 2 | 6 | 2 | 2 | 2 |
| Medium Kick | H | 80 | 9 | - | 7 | 2 | 15 | -2 | Down | Down |
| Hard Kick | H | 100 | 11 | - | 14 | 2 | 22 | -8 | -6 | -4 |
| Far Medium Punch | H | 50 | 5 | - | 5 | 3 | 12 | -2 | -1 | 0 |
| Far Hard Punch | H | 120 | 15 | - | 9 | 5 | 21 | -5 | -3 | -1 |
| Far Medium Kick | H | 80 | 9 | - | 9 | 2 | 15 | -4 | -3 | -2 |
| Crouching Light Punch | HL | 20 | 3 | C*Sp*Su | 3 | 1 | 6 | 4 | 4 | 4 |
| Crouching Medium Punch | L | 70 | 5 | - | 5 | 1 | 11 | 2 | 3 | 4 |
| Crouching Hard Punch | HL | 50+60 | 3+5 | - | 8 | 6*2 | 12 | 0 | 1 | 2 |
| Crouching Light Kick | L | 30 | 3 | Sp*Su | 4 | 1 | 8 | 2 | 2 | 2 |
| Crouching Medium Kick | L | 50 | 3 | Sp*Su | 7 | 1 | 13 | -1 | 0 | 1 |
| Crouching Hard Kick | L | 90 | 3 | - | 10 | 2 | 20 | -7 | Down | Down |
| Jump Up Medium Punch | H | 80 | 11 | - | 3 | 6 | - | - | - | - |
| Jump Up Hard Punch | H | 120 | 15 | - | 8 | 4 | - | - | - | - |
| Jump Toward Light Punch | H | 40 | 7 | - | 2 | - | - | - | - | - |
| Jump Toward Medium Punch | H | 80 | 9 | - | 3 | 5 | - | - | - | - |
| Jump Toward Hard Punch | H | 100 | 13 | - | 5 | 3 | - | - | - | - |
| Jump Toward Light Kick | H | 40 | 5 | - | 3 | 11 | - | - | - | - |
| Jump Toward Medium Kick | H | 70 | 9 | - | 6 | 6 | - | - | - | - |
| Jump Toward Hard Kick | H | 110 | 13 | - | 5 | 4 | - | - | - | - |
| Neutral Medium Kick | H | 70 | 9 | - | 6 | 6 | - | - | - | - |
| Toward + Medium Kick | H | 80 | 11 | - | 19 | 5 | 8 | -1 | - | - |
| Dive Kick | H | 70 | 7 | - | 6/8/6 | - | - | - | - | - |
| Throw | - | 40x6 | 5x6 | - | 2 | 1 | 21 | - | - | - |
| Back Throw | - | 120 | 11 | - | 2 | 1 | 21 | - | - | - |
| Toward Throw | - | 120 | 11 | - | 2 | 1 | 21 | - | - | - |
| Universal Overhead | H | 40 | 3 | - | 16 ~ 25 | 9 | 5 | -5 ~ +7 | 0 ~ +8 | +1 ~ +9 |
| Taunt | HL | 5 | 0 | - | 22 | 9 | 27 | - | - | - |
| Move | Parry | Damage | Stun | Cancel Ability | Startup | Active | Recover | Frame Adv. Block | Frame Adv. Hit | Frame Adv. Hit Crouching |
Special Moves and Super Arts
| Move | Parry | Damage | Stun | Cancel Ability | Startup | Active | Recover | Frame Adv. Block |
| Mantis Slash Light Punch (Tourou Zan) | H | 30 | 5 | - | 8 | 4 | 22 | -1 |
| - | H | 35+90 | 5+7 | - | - | 4*3 | 25*29 | - |
| Mantis Slash Medium Punch (Tourou Zan) | H | 35 | 5 | - | 8 | 4 | 26 | -5 |
| - | H | 40+95 | 5+7 | - | - | 4*4 | 29*32 | - |
| Mantis Slash Hard Punch (Tourou Zan) | H | 40 | 5 | - | 8 | 4 | 30 | -9 |
| - | H | 45+100 | 5+7 | - | - | 4*5 | 33*35 | - |
| Mantis Slash EX (Tourou Zan) | H | 40 | 9 | - | 7 | 1 | 27 | -4 |
| - | H | 50x4 | 5x4 | - | - | 1*1*1*3 | 28*30*33*25 | - |
| Roll Kick Light (Senkyuutai) | HL | 80+50 | 7+5 | - | 8 | 3*3 | 34 | -25 |
| Roll Kick Medium (Senkyuutai) | HL | 80+60 | 9+11 | - | 4 | 3*3 | 28 | -19 |
| Roll Kick Hard (Senkyuutai) | HL | 80+70 | 11+5 | - | 3 | 3*3 | 25 | -16 |
| Roll Kick EX (Senkyuutai) | HL | 90+20+90 | 11+5+3 | - | 3 | 1*1*3 | 25 | -16 |
| Palm (Byakko Soushouda) | H | 150 | 21 | Su | 21 | 12 | 10 | -3 |
| Command Dash Light Kick (Kaihou) | - | - | - | - | - | 28 | - | - |
| Command Dash Medium Kick (Kaihou) | - | - | - | - | - | 33 | - | - |
| Command Dash Hard Kick (Kaihou) | - | - | - | - | - | 42 | - | - |
| Flip Grab (Zenpou Tenshin) | - | 0 | - | - | 7 | 1 | 26 | - |
| SA1 — Raishin-Mahhaken | H | 90 | 0 | - | 7 | 3 | 1 | 1 |
| 2 ~ 4 | H | 75+50+70 | 0 | - | 30 | 1*1*1 | - | - |
| 5 ~ 6 | H | 50+70 | 0 | - | - | 1*1 | - | - |
| 7 | H | 160 | 0 | - | - | 5 | 37 | - |
| SA2 — Tenshin-Senkyutai | HL | 100 | 5 | - | 1 | 2~66 | - | - |
| 2 | HL | 20 | 3 | - | - | 3 | - | - |
| 3 ~ 4 | HL | 30+30 | 0 | - | - | 1*2 | - | - |
| 5 | HL | 100 | 3 | - | - | 3 | - | - |
| 6 | HL | 50+70 | 3 | - | - | 3 | - | - |
| 7 | HL | 60 | 3 | - | - | 2 | 52~57 | -69 |
| SA3 — Sei-ei Enbu | - | - | - | - | 16 | - | - | - |
| Move | Parry | Damage | Stun | Cancel Ability | Startup | Active | Recover | Frame Adv. Block |
Strategies
Overview
Basics
Super Art Selection
Main Super Art is 2 due that his 2 medium stock can be used for a lot of EX Mantis Slashes and Super Art 3 as his alternative due to Seien Enbu mixups for big hitbox characters.
Super Art choices tend to be match-up specific so I'll here's a list of what SA to use against said character:
Alex- SAIII
Chun Li- SAII
Dudley- SAII
Elena- SAII
Gouki/Akuma- SAII
Hugo- SAIII
Ibuki- SAII
Ken- SAII
Makoto- SAIII
Necro- SAIII
Oro- SAII
Q- SAIII
Remy- SAII
Ryu- SAII
Sean- SAII
Twelve- SAII
Urien- SAIII
Yang- SAII
Yun- SAII
Note- Super Arts are honestly personal preference and can be switched interchangeably between the two. Just depends on the player:
SAII- Meter, Stun,for medium and small characters SAIII- Mixups, Damage,for large characters
Kara-Techniques
Zoning
Mixups
Additional Notes
See this video made by DJ-B13.All Yang's setups are there.
SF3 3rd Strike Tricks of the Trade: Yang
- Why you should play Yang
In order to play Yang you have to play very patiently. Look for your openings and punish very well. Yang may seem like a simple character. But he is not simple by any means. He is extremely reactionary. You have to be able to punish whiffs as you see them or you wont be able to play Yang effectively. Yang has really simple combos but has a really hard style to get a grasp to. Knowing combos is only half the battle. But thats where I will start first.
~3s masta
- How to play Yang effectively
If you choose to play yang you must learn several things.
1. Yangs mix up game 2. Reaction(this is very important) 3. Spacing 4. Playing it safe.
These are the keys to playing Yang and playing Yang well. Learning combos and learning strats are all apart of learning your character and your characters weaknesses and strengths. Frame data also helps alot with learning your character because you can learn what is safe and what isnt. Read up on how to read frame data in order to further study Yang or any other character that you wish to play and master.
~ 3s masta
Yang frame data: http://web.archive.org/web/20040415192834/www.karathrow.com/yang.html
This is the site to look at for Character frame data. Study the numbers very very much. It helps win matches in the long run
~ 3s masta


