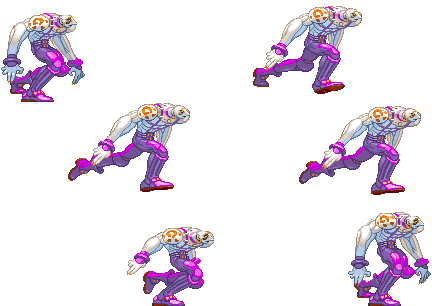
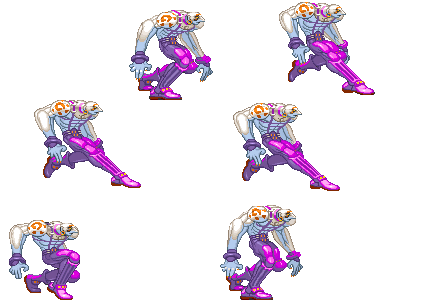
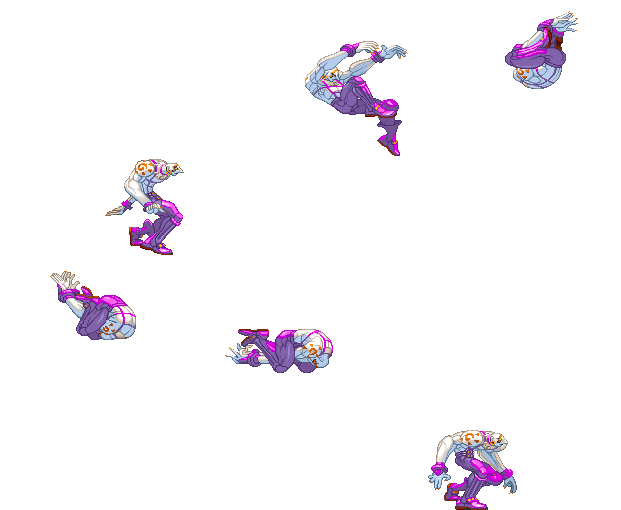
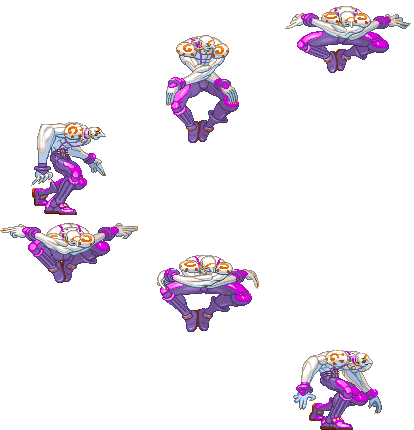
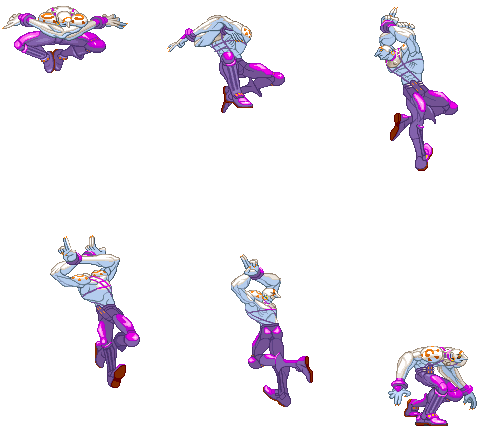
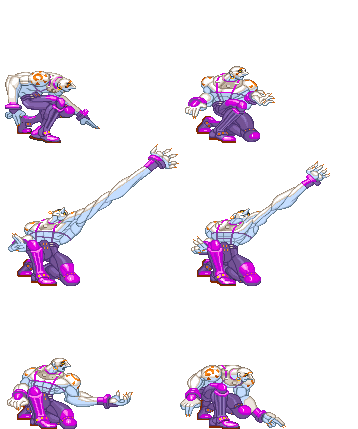
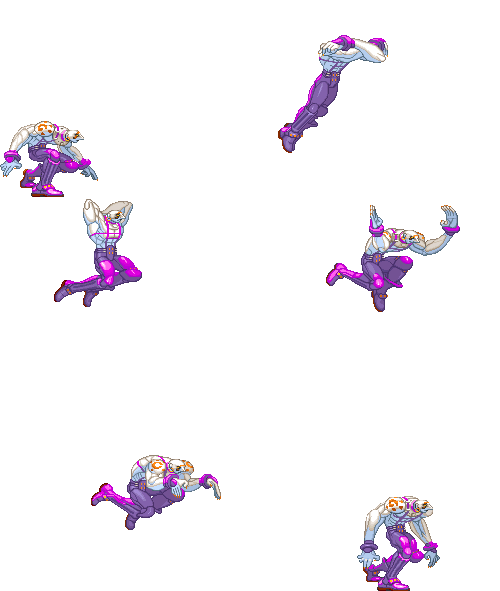
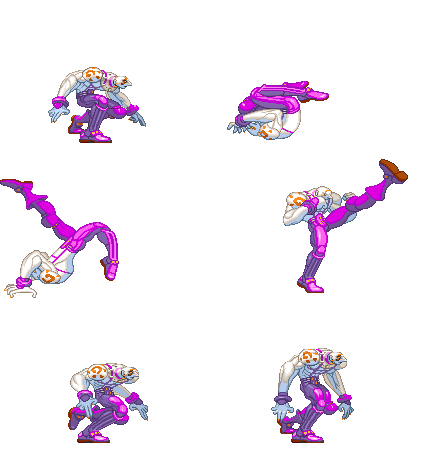
| Line 1,694: | Line 1,694: | ||
''Comments here'' | ''Comments here'' | ||
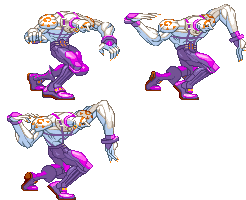
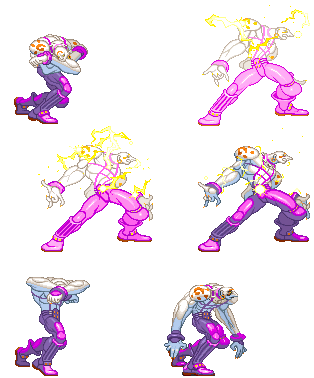
[[Image:(necrojdlk).gif|none]] | |||
{| border="1em" cellspacing="0" width="65%" style="border: 1px solid #999; background: #F2F2F2;" | |||
[[Image:( | |||
{| border="1em" cellspacing="0" width=" | |||
|- | |- | ||
| align="center" | '''Move''' || align="center" | '''Motion''' || align="center" | '''Damage''' || align="center" | '''Stun Damage''' || align="center" | '''Chains into itself''' || align="center" | '''Special Cancel''' || align="center" | '''Super Cancel''' | | align="center" | '''Move''' || align="center" | '''Motion''' || align="center" | '''Damage''' || align="center" | '''Stun Damage''' || align="center" | '''Chains into itself''' || align="center" | '''Special Cancel''' || align="center" | '''Super Cancel''' | ||
|- | |- | ||
| align="center" | | | align="center" | Neutral Jump Roundhouse || align="center" | (Air) HK || align="center" | 130 || align="center" | 13 || align="center" | No || align="center" | No || align="center" | No | ||
|} | |} | ||
'''Frame Data''' | '''Frame Data''' | ||
| Line 1,709: | Line 1,706: | ||
| align="center" | '''Startup''' || align="center" | '''Hit''' || align="center" | '''Recovery''' || align="center" | '''Blocked Advantage''' || align="center" | '''Hit Advantage''' || align="center" | '''Crouching Hit Advantage''' || align="center" | '''Guard''' || align="center" | '''Parry''' | | align="center" | '''Startup''' || align="center" | '''Hit''' || align="center" | '''Recovery''' || align="center" | '''Blocked Advantage''' || align="center" | '''Hit Advantage''' || align="center" | '''Crouching Hit Advantage''' || align="center" | '''Guard''' || align="center" | '''Parry''' | ||
|- | |- | ||
| align="center" | | | align="center" | 7 || align="center" | 5 || align="center" | - || align="center" | - || align="center" | - || align="center" | - || align="center" | H || align="center" | H | ||
|} | |} | ||
'''Gauge Increase''' | '''Gauge Increase''' | ||
| Line 1,716: | Line 1,713: | ||
| align="center" | '''Miss''' || align="center" | '''Blocked''' || align="center" | '''Hit''' || align="center" | '''Parry (Gauge for opponent)''' | | align="center" | '''Miss''' || align="center" | '''Blocked''' || align="center" | '''Hit''' || align="center" | '''Parry (Gauge for opponent)''' | ||
|- | |- | ||
| align="center" | | | align="center" | 3 || align="center" | 6 || align="center" | 14 || align="center" | 4 | ||
|} | |} | ||
''Comments here'' | ''Comments here'' | ||
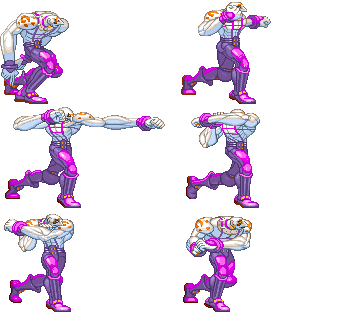
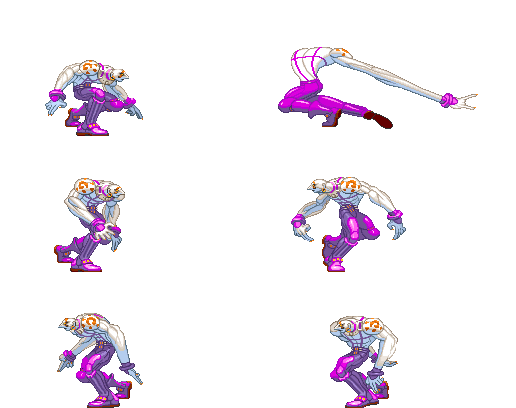
[[Image:( | [[Image:(necrojdmk).gif|none]] | ||
{| border="1em" cellspacing="0" width=" | {| border="1em" cellspacing="0" width="65%" style="border: 1px solid #999; background: #F2F2F2;" | ||
|- | |- | ||
| align="center" | '''Move''' || align="center" | '''Motion''' || align="center" | '''Damage''' || align="center" | '''Stun Damage''' || align="center" | '''Chains into itself''' || align="center" | '''Special Cancel''' || align="center" | '''Super Cancel''' | | align="center" | '''Move''' || align="center" | '''Motion''' || align="center" | '''Damage''' || align="center" | '''Stun Damage''' || align="center" | '''Chains into itself''' || align="center" | '''Special Cancel''' || align="center" | '''Super Cancel''' | ||
|- | |- | ||
| align="center" | | | align="center" | Neutral Jump Roundhouse || align="center" | (Air) HK || align="center" | 130 || align="center" | 13 || align="center" | No || align="center" | No || align="center" | No | ||
|} | |} | ||
'''Frame Data''' | '''Frame Data''' | ||
| Line 1,733: | Line 1,730: | ||
| align="center" | '''Startup''' || align="center" | '''Hit''' || align="center" | '''Recovery''' || align="center" | '''Blocked Advantage''' || align="center" | '''Hit Advantage''' || align="center" | '''Crouching Hit Advantage''' || align="center" | '''Guard''' || align="center" | '''Parry''' | | align="center" | '''Startup''' || align="center" | '''Hit''' || align="center" | '''Recovery''' || align="center" | '''Blocked Advantage''' || align="center" | '''Hit Advantage''' || align="center" | '''Crouching Hit Advantage''' || align="center" | '''Guard''' || align="center" | '''Parry''' | ||
|- | |- | ||
| align="center" | | | align="center" | 7 || align="center" | 5 || align="center" | - || align="center" | - || align="center" | - || align="center" | - || align="center" | H || align="center" | H | ||
|} | |} | ||
'''Gauge Increase''' | '''Gauge Increase''' | ||
| Line 1,740: | Line 1,737: | ||
| align="center" | '''Miss''' || align="center" | '''Blocked''' || align="center" | '''Hit''' || align="center" | '''Parry (Gauge for opponent)''' | | align="center" | '''Miss''' || align="center" | '''Blocked''' || align="center" | '''Hit''' || align="center" | '''Parry (Gauge for opponent)''' | ||
|- | |- | ||
| align="center" | | | align="center" | 3 || align="center" | 6 || align="center" | 14 || align="center" | 4 | ||
|} | |} | ||
''Comments here'' | ''Comments here'' | ||
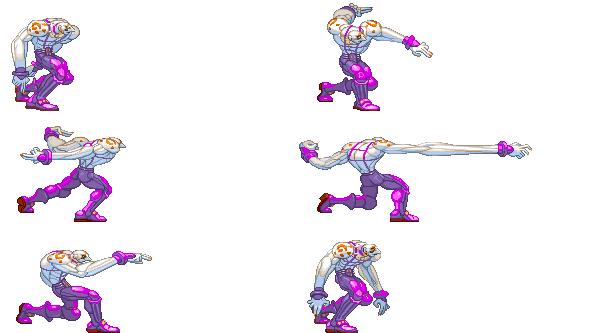
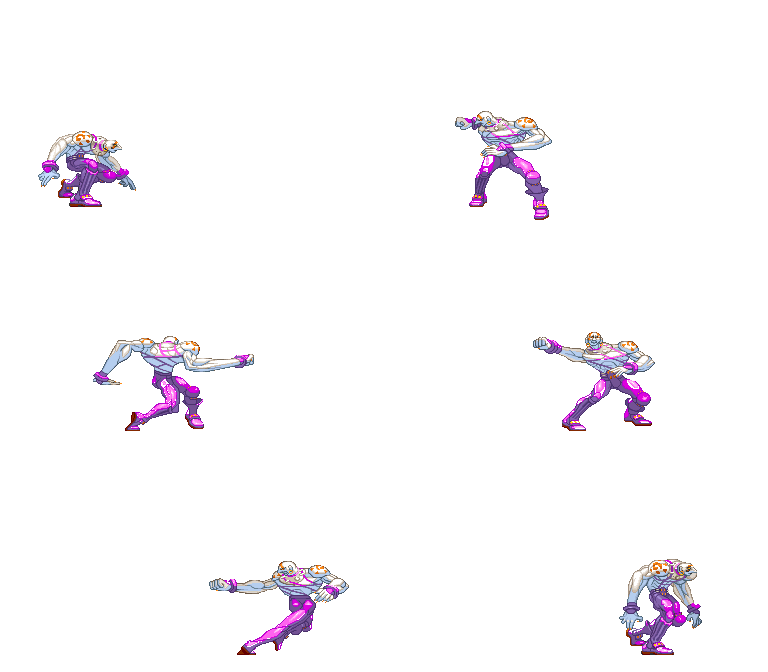
[[Image:(necrojdhk).gif|none]] | |||
[[Image:( | {| border="1em" cellspacing="0" width="65%" style="border: 1px solid #999; background: #F2F2F2;" | ||
{| border="1em" cellspacing="0" width=" | |||
|- | |- | ||
| align="center" | '''Move''' || align="center" | '''Motion''' || align="center" | '''Damage''' || align="center" | '''Stun Damage''' || align="center" | '''Chains into itself''' || align="center" | '''Special Cancel''' || align="center" | '''Super Cancel''' | | align="center" | '''Move''' || align="center" | '''Motion''' || align="center" | '''Damage''' || align="center" | '''Stun Damage''' || align="center" | '''Chains into itself''' || align="center" | '''Special Cancel''' || align="center" | '''Super Cancel''' | ||
|- | |- | ||
| align="center" | | | align="center" | Neutral Jump Roundhouse || align="center" | (Air) HK || align="center" | 130 || align="center" | 13 || align="center" | No || align="center" | No || align="center" | No | ||
|} | |} | ||
'''Frame Data''' | '''Frame Data''' | ||
| Line 1,757: | Line 1,753: | ||
| align="center" | '''Startup''' || align="center" | '''Hit''' || align="center" | '''Recovery''' || align="center" | '''Blocked Advantage''' || align="center" | '''Hit Advantage''' || align="center" | '''Crouching Hit Advantage''' || align="center" | '''Guard''' || align="center" | '''Parry''' | | align="center" | '''Startup''' || align="center" | '''Hit''' || align="center" | '''Recovery''' || align="center" | '''Blocked Advantage''' || align="center" | '''Hit Advantage''' || align="center" | '''Crouching Hit Advantage''' || align="center" | '''Guard''' || align="center" | '''Parry''' | ||
|- | |- | ||
| align="center" | 7 || align="center" | 5 || align="center" | | | align="center" | 7 || align="center" | 5 || align="center" | - || align="center" | - || align="center" | - || align="center" | - || align="center" | H || align="center" | H | ||
|} | |} | ||
'''Gauge Increase''' | '''Gauge Increase''' | ||
| Line 1,768: | Line 1,764: | ||
''Comments here'' | ''Comments here'' | ||
[[Image:( | ==== Crouching Normals ==== | ||
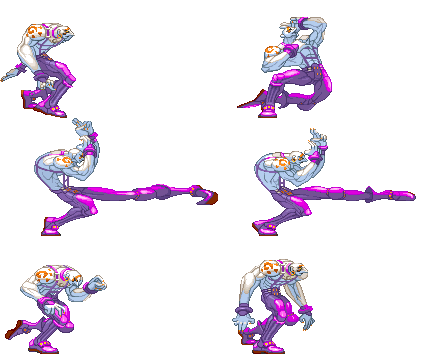
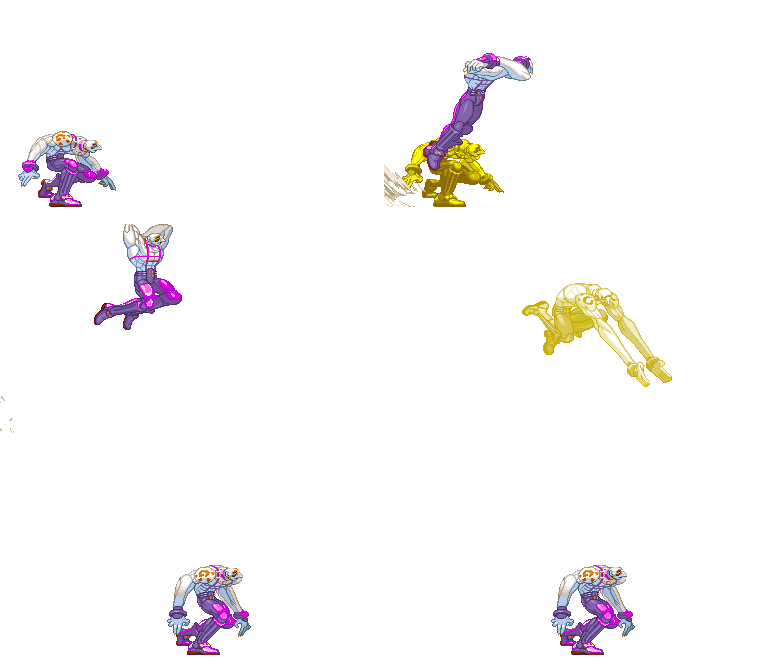
[[Image:(necroclp).gif|none]] | |||
{| border="1em" cellspacing="0" width="60%" style="border: 1px solid #999; background: #F2F2F2;" | {| border="1em" cellspacing="0" width="60%" style="border: 1px solid #999; background: #F2F2F2;" | ||
|- | |- | ||
| align="center" | '''Move''' || align="center" | '''Motion''' || align="center" | '''Damage''' || align="center" | '''Stun Damage''' || align="center" | '''Chains into itself''' || align="center" | '''Special Cancel''' || align="center" | '''Super Cancel''' | | align="center" | '''Move''' || align="center" | '''Motion''' || align="center" | '''Damage''' || align="center" | '''Stun Damage''' || align="center" | '''Chains into itself''' || align="center" | '''Special Cancel''' || align="center" | '''Super Cancel''' | ||
|- | |- | ||
| align="center" | Crouch | | align="center" | Crouch Jab || align="center" | D+LP || align="center" | 20 || align="center" | 3 || align="center" | Yes || align="center" | Yes || align="center" | Yes | ||
|} | |} | ||
'''Frame Data''' | '''Frame Data''' | ||
| Line 1,780: | Line 1,779: | ||
| align="center" | '''Startup''' || align="center" | '''Hit''' || align="center" | '''Recovery''' || align="center" | '''Blocked Advantage''' || align="center" | '''Hit Advantage''' || align="center" | '''Crouching Hit Advantage''' || align="center" | '''Guard''' || align="center" | '''Parry''' | | align="center" | '''Startup''' || align="center" | '''Hit''' || align="center" | '''Recovery''' || align="center" | '''Blocked Advantage''' || align="center" | '''Hit Advantage''' || align="center" | '''Crouching Hit Advantage''' || align="center" | '''Guard''' || align="center" | '''Parry''' | ||
|- | |- | ||
| align="center" | | | align="center" | 4 || align="center" | 3 || align="center" | 5 || align="center" | +3 || align="center" | +3 || align="center" | +3 || align="center" | HL || align="center" | HL | ||
|} | |} | ||
'''Gauge Increase''' | '''Gauge Increase''' | ||
| Line 1,792: | Line 1,791: | ||
[[Image:( | [[Image:(necrocmp).gif|none]] | ||
{| border="1em" cellspacing="0" width="60%" style="border: 1px solid #999; background: #F2F2F2;" | {| border="1em" cellspacing="0" width="60%" style="border: 1px solid #999; background: #F2F2F2;" | ||
|- | |- | ||
| align="center" | '''Move''' || align="center" | '''Motion''' || align="center" | '''Damage''' || align="center" | '''Stun Damage''' || align="center" | '''Chains into itself''' || align="center" | '''Special Cancel''' || align="center" | '''Super Cancel''' | | align="center" | '''Move''' || align="center" | '''Motion''' || align="center" | '''Damage''' || align="center" | '''Stun Damage''' || align="center" | '''Chains into itself''' || align="center" | '''Special Cancel''' || align="center" | '''Super Cancel''' | ||
|- | |- | ||
| align="center" | Crouch | | align="center" | Crouch Strong || align="center" | D+MP || align="center" | 90 || align="center" | 7 || align="center" | No || align="center" | Yes || align="center" | Yes | ||
|} | |} | ||
'''Frame Data''' | '''Frame Data''' | ||
| Line 1,804: | Line 1,803: | ||
| align="center" | '''Startup''' || align="center" | '''Hit''' || align="center" | '''Recovery''' || align="center" | '''Blocked Advantage''' || align="center" | '''Hit Advantage''' || align="center" | '''Crouching Hit Advantage''' || align="center" | '''Guard''' || align="center" | '''Parry''' | | align="center" | '''Startup''' || align="center" | '''Hit''' || align="center" | '''Recovery''' || align="center" | '''Blocked Advantage''' || align="center" | '''Hit Advantage''' || align="center" | '''Crouching Hit Advantage''' || align="center" | '''Guard''' || align="center" | '''Parry''' | ||
|- | |- | ||
| align="center" | | | align="center" | 5 || align="center" | 4 || align="center" | 7 || align="center" | +3 || align="center" | +4 || align="center" | +5 || align="center" | HL || align="center" | HL | ||
|} | |} | ||
'''Gauge Increase''' | '''Gauge Increase''' | ||
| Line 1,816: | Line 1,815: | ||
[[Image:( | [[Image:(necrochp).gif|none]] | ||
{| border="1em" cellspacing="0" width="60%" style="border: 1px solid #999; background: #F2F2F2;" | {| border="1em" cellspacing="0" width="60%" style="border: 1px solid #999; background: #F2F2F2;" | ||
|- | |- | ||
| align="center" | '''Move''' || align="center" | '''Motion''' || align="center" | '''Damage''' || align="center" | '''Stun Damage''' || align="center" | '''Chains into itself''' || align="center" | '''Special Cancel''' || align="center" | '''Super Cancel''' | | align="center" | '''Move''' || align="center" | '''Motion''' || align="center" | '''Damage''' || align="center" | '''Stun Damage''' || align="center" | '''Chains into itself''' || align="center" | '''Special Cancel''' || align="center" | '''Super Cancel''' | ||
|- | |- | ||
| align="center" | Crouch | | align="center" | Crouch Fierce || align="center" | D+HP || align="center" | 130 || align="center" | 13 || align="center" | No || align="center" | Yes || align="center" | Yes | ||
|} | |} | ||
'''Frame Data''' | '''Frame Data''' | ||
| Line 1,828: | Line 1,827: | ||
| align="center" | '''Startup''' || align="center" | '''Hit''' || align="center" | '''Recovery''' || align="center" | '''Blocked Advantage''' || align="center" | '''Hit Advantage''' || align="center" | '''Crouching Hit Advantage''' || align="center" | '''Guard''' || align="center" | '''Parry''' | | align="center" | '''Startup''' || align="center" | '''Hit''' || align="center" | '''Recovery''' || align="center" | '''Blocked Advantage''' || align="center" | '''Hit Advantage''' || align="center" | '''Crouching Hit Advantage''' || align="center" | '''Guard''' || align="center" | '''Parry''' | ||
|- | |- | ||
| align="center" | | | align="center" | 7 || align="center" | 5 || align="center" | 17 || align="center" | -8 || align="center" | -6 || align="center" | -4 || align="center" | HL || align="center" | HL | ||
|} | |} | ||
'''Gauge Increase''' | '''Gauge Increase''' | ||
| Line 1,839: | Line 1,838: | ||
''Comments here'' | ''Comments here'' | ||
[[Image:(necroclk).gif|none]] | |||
[[Image:( | {| border="1em" cellspacing="0" width="60%" style="border: 1px solid #999; background: #F2F2F2;" | ||
{| border="1em" cellspacing="0" width=" | |||
|- | |- | ||
| align="center" | '''Move''' || align="center" | '''Motion''' || align="center" | '''Damage''' || align="center" | '''Stun Damage''' || align="center" | '''Chains into itself''' || align="center" | '''Special Cancel''' || align="center" | '''Super Cancel''' | | align="center" | '''Move''' || align="center" | '''Motion''' || align="center" | '''Damage''' || align="center" | '''Stun Damage''' || align="center" | '''Chains into itself''' || align="center" | '''Special Cancel''' || align="center" | '''Super Cancel''' | ||
|- | |- | ||
| align="center" | | | align="center" | Crouch Short || align="center" | D+LK || align="center" | 20 || align="center" | 3 || align="center" | Yes || align="center" | Yes || align="center" | Yes | ||
|} | |} | ||
'''Frame Data''' | '''Frame Data''' | ||
| Line 1,852: | Line 1,850: | ||
| align="center" | '''Startup''' || align="center" | '''Hit''' || align="center" | '''Recovery''' || align="center" | '''Blocked Advantage''' || align="center" | '''Hit Advantage''' || align="center" | '''Crouching Hit Advantage''' || align="center" | '''Guard''' || align="center" | '''Parry''' | | align="center" | '''Startup''' || align="center" | '''Hit''' || align="center" | '''Recovery''' || align="center" | '''Blocked Advantage''' || align="center" | '''Hit Advantage''' || align="center" | '''Crouching Hit Advantage''' || align="center" | '''Guard''' || align="center" | '''Parry''' | ||
|- | |- | ||
| align="center" | | | align="center" | 5 || align="center" | 3 || align="center" | 7 || align="center" | +1 || align="center" | +1 || align="center" | +1 || align="center" | L || align="center" | L | ||
|} | |} | ||
'''Gauge Increase''' | '''Gauge Increase''' | ||
| Line 1,859: | Line 1,857: | ||
| align="center" | '''Miss''' || align="center" | '''Blocked''' || align="center" | '''Hit''' || align="center" | '''Parry (Gauge for opponent)''' | | align="center" | '''Miss''' || align="center" | '''Blocked''' || align="center" | '''Hit''' || align="center" | '''Parry (Gauge for opponent)''' | ||
|- | |- | ||
| align="center" | | | align="center" | 0 || align="center" | 1 || align="center" | 2 || align="center" | 4 | ||
|} | |} | ||
''Comments here'' | ''Comments here'' | ||
[[Image:( | [[Image:(necrocmk).gif|none]] | ||
{| border="1em" cellspacing="0" width=" | {| border="1em" cellspacing="0" width="60%" style="border: 1px solid #999; background: #F2F2F2;" | ||
|- | |- | ||
| align="center" | '''Move''' || align="center" | '''Motion''' || align="center" | '''Damage''' || align="center" | '''Stun Damage''' || align="center" | '''Chains into itself''' || align="center" | '''Special Cancel''' || align="center" | '''Super Cancel''' | | align="center" | '''Move''' || align="center" | '''Motion''' || align="center" | '''Damage''' || align="center" | '''Stun Damage''' || align="center" | '''Chains into itself''' || align="center" | '''Special Cancel''' || align="center" | '''Super Cancel''' | ||
|- | |- | ||
| align="center" | | | align="center" | Crouch Forward || align="center" | D+MK || align="center" | 85 || align="center" | 3 || align="center" | No || align="center" | Yes || align="center" | Yes | ||
|} | |} | ||
'''Frame Data''' | '''Frame Data''' | ||
| Line 1,876: | Line 1,874: | ||
| align="center" | '''Startup''' || align="center" | '''Hit''' || align="center" | '''Recovery''' || align="center" | '''Blocked Advantage''' || align="center" | '''Hit Advantage''' || align="center" | '''Crouching Hit Advantage''' || align="center" | '''Guard''' || align="center" | '''Parry''' | | align="center" | '''Startup''' || align="center" | '''Hit''' || align="center" | '''Recovery''' || align="center" | '''Blocked Advantage''' || align="center" | '''Hit Advantage''' || align="center" | '''Crouching Hit Advantage''' || align="center" | '''Guard''' || align="center" | '''Parry''' | ||
|- | |- | ||
| align="center" | | | align="center" | 6 || align="center" | 5 || align="center" | 17 || align="center" | -3 || align="center" | -3 || align="center" | -1 || align="center" | L || align="center" | L | ||
|} | |} | ||
'''Gauge Increase''' | '''Gauge Increase''' | ||
| Line 1,883: | Line 1,881: | ||
| align="center" | '''Miss''' || align="center" | '''Blocked''' || align="center" | '''Hit''' || align="center" | '''Parry (Gauge for opponent)''' | | align="center" | '''Miss''' || align="center" | '''Blocked''' || align="center" | '''Hit''' || align="center" | '''Parry (Gauge for opponent)''' | ||
|- | |- | ||
| align="center" | | | align="center" | 2 || align="center" | 4 || align="center" | 8 || align="center" | 4 | ||
|} | |} | ||
''Comments here'' | ''Comments here'' | ||
[[Image:( | |||
{| border="1em" cellspacing="0" width=" | [[Image:(necrochk).gif|none]] | ||
{| border="1em" cellspacing="0" width="60%" style="border: 1px solid #999; background: #F2F2F2;" | |||
|- | |- | ||
| align="center" | '''Move''' || align="center" | '''Motion''' || align="center" | '''Damage''' || align="center" | '''Stun Damage''' || align="center" | '''Chains into itself''' || align="center" | '''Special Cancel''' || align="center" | '''Super Cancel''' | | align="center" | '''Move''' || align="center" | '''Motion''' || align="center" | '''Damage''' || align="center" | '''Stun Damage''' || align="center" | '''Chains into itself''' || align="center" | '''Special Cancel''' || align="center" | '''Super Cancel''' | ||
|- | |- | ||
| align="center" | | | align="center" | Crouch Roundhouse || align="center" | D+HK || align="center" | 130 || align="center" | 3 || align="center" | No || align="center" | No || align="center" | No | ||
|} | |} | ||
'''Frame Data''' | '''Frame Data''' | ||
| Line 1,899: | Line 1,898: | ||
| align="center" | '''Startup''' || align="center" | '''Hit''' || align="center" | '''Recovery''' || align="center" | '''Blocked Advantage''' || align="center" | '''Hit Advantage''' || align="center" | '''Crouching Hit Advantage''' || align="center" | '''Guard''' || align="center" | '''Parry''' | | align="center" | '''Startup''' || align="center" | '''Hit''' || align="center" | '''Recovery''' || align="center" | '''Blocked Advantage''' || align="center" | '''Hit Advantage''' || align="center" | '''Crouching Hit Advantage''' || align="center" | '''Guard''' || align="center" | '''Parry''' | ||
|- | |- | ||
| align="center" | | | align="center" | 6 || align="center" | 5 || align="center" | 26 || align="center" | -13 || align="center" | Down || align="center" | Down || align="center" | L || align="center" | L | ||
|} | |} | ||
'''Gauge Increase''' | '''Gauge Increase''' | ||
| Line 1,909: | Line 1,908: | ||
|} | |} | ||
''Comments here'' | ''Comments here'' | ||
=== Target Combo === | === Target Combo === | ||
Revision as of 19:19, 30 June 2017
Introduction
Blanka and Dhalsim fusion anyone?
Specific Character Information
- Stamina: 1120
- Stun Bar Length (dots): 64 (Normal)
- Stun Bar Recovery (frames it takes to recover 1 dot): 23
- Taunt: Increases damage for the next hit/combo by 31.3%. One taunt is the maximum.
- Best Kara-Throw: B.HK / S.MP / B.MK
- Standard Throw Range (pixels): 26
- Kara Throw Range (pixels): 34/32/20
- Dash Forward (frames) / Moving Distance: 22 / 3
- Dash Backward (frames) / Moving Distance: 18 / 3
- Normal Wake up (frames): 59
- Quick Stand (frames): 53
Moves List
Normal Moves
Command Normals
| Jab Elbow | B + LP |
| Strong Elbow | B + MP |
| Elbow Cannon | DB + HP |
| Uppercut | B + HP |
| Knee Dagger | B + LK |
| Knee Attack | B + MK |
| Knee Missile | B + HK |
| Drill Kick | in air, D + K |
Target Combos
- B+LK -> MP
Special Moves
| Denpa Blast | DP + P | |
| Tornado Hook | HCF + P | (EX) |
| Snake Fang | HCF + K | |
| Flying Viper | QCB + P | (EX) |
| Rising Cobra | QCB + K | (EX) |
Super Arts
| I | Magnetic Storm | QCFx2 + P | 1 stock |
| II | Slam Dance | QCFx2 + P | 1 stock |
| III | Electric Snake | QCFx2 + P | 2 stocks |
Combos
- BNB
- B+MK xx MP Tornado Hook xx SA1/SA3
- D+LK xx LP Tornado Hook
- BNB Hit Confirms
- B+MP xx SA1/SA3
- BNB Punishers
- Misc. Combos
- B+HP > DB+HP
- B+HP > B+HK
- B+LK -> MP xx SA1/SA3
- HP Tornado Hook > SA2
- D+LK xx LP Denpa Blast xx SA1/SA3
- meaty UOH > SA1
- very meaty UOH > SA3
- j.HK > SA3
- Corner Neutral Throw Combos
- N LP+LK, MP, SAI (Urien)
- N LP+LK, MK
- N LP+LK, db.HP, s.LP (Ryu,Yun,Akuma,Sean,Oro)
- N LP+LK, dp.LP,db.HP,s.LP (Q)
- N LP+LK, db.HP,b.MP (Twelve,Remy,Makoto,Q)
Frame Data
Legend
"Name": This is used to identify each move, so you know what stats are for what move. A question I get asked often is why do I say Toward and Away instead of Foward and Back. Its because I get confused. Foward to me means medium kick, not toward.
"StUp" (Start Up): This indicates the number of frames it takes for the hit box of an attack to open.
"BkAd" (Block Advantage): When an attack is blocked, you have a certain number of recovery frames before you can move, attack, or block again. A positive number indicates the number of frames you can move or attack before your opponent can; as a negative number indicates the number of frames your opponent can move or attack before you can. The higher, the better. This number is used to determine if a move is safe or not, and for linking purposes. I only have block advantage for special moves right now. If you see RR, it means Rather Random...
"HtAd" (Hit Advantage): This is the same as block advantage, except this is when your attack hits the opponent instead of your attack being blocked. This does make a difference in most moves as far as frame advantage goes. Generally this number is greater then the block advantage depending on the attack strength. The numbers comparable to the block advantage is +0 on jabs and shorts, +1 on strongs and fowards, and +2 on fierces and roundhouses, this rule doesn't apply all the time.
"CHAd" (Crouching Hit Advantage): This is the same as block advantage, except this is when your attack hits a crouching oppoenent instead of your attack being blocked. Generally this number is greater then the block advantage depending on the attack strength. The numbers comparable to the block advantage is +0 on jabs and shorts, +2 on strongs and fowards, and +4 on fierces and roundhouses, this rule doesn't apply all the time.
"SlCn" (Special Cancel): If the animation of the move can be canceled into a special, then it is a special cancel.
"SpCn" (Super Cancel): If the animation of the move can be canceled into a super, then it is a super cancel. For special moves, it will only have super cancel.
"Grd" (Guard): This is just stating what form of guard must be used to defend this move. It will either be H (High), L (Low), HL (Both), T (Techable), U (Unblockable).
"Pry" (Parry): This is just stating what form of parry must be used to defend this move. It will either be H (High), L (Low), HL (Both), U (Unparryable).
"Dmg" (Damage): This is the amount of damage the attack does on Hugo to a crouching Gouki (Akuma). This is so you can see the maximum and minimum damage the attack is capable of doing. This damage though is done on standing characters. the MinDmg is the damage done on a crouching Gouki, and the MaxDmg is the damage done on Hugo. Note that some moves just can't hit a crouching Gouki, and that the damage for throws doesn't change whether the oppnent is crouching or standing.
"JPT" (Juggle Potential Take): This is the amount of juggle potential that is lost when this attack hits during a juggle. Default juggle potential is always 6. Soon as juggle potential reachs 0, you can't juggle the opponent anymore (There are exceptions). If an attack has a juggle potential take of 6, you basically won't be able to juggle anymore (of course, there are exceptions).
"UFN" (Usefulness): This is my personal rating on the attack. The higher (1-5) the number, the more useful it is. This rating is determined by not only the provided information about the attack, but other information that I don't give like the range of an attack, its priority, the size of the attack box as well as the length of time it stays out.
"MLth" (Meter Length): This is the size of the super meter. Generally (Besides Ibuki) a Standing Strong will give you 2 points of meter.
"Stks" (Stocks): How meny stocks of meter are avalible in this super art.
-LiSyaoran
Moves List
Normal Moves
| Name | State | [StUp] | BkAd | HtAd | CHAd | SlCn | SpCn | Grd | Pry | Dmg Min-Max |
(JPT) | UFN |
|---|---|---|---|---|---|---|---|---|---|---|---|---|
| Jab | Standing | [5] | +2 | +2 | +2 | Yes | Yes | HL | HL | 3-6 | (1) | 3 |
| Crouch | [6] | +3 | +3 | +3 | Yes | Yes | HL | HL | 3-6 | (1) | 3 | |
| Jumping | [4] | - | - | - | - | - | H | H | 5-8 | (3) | 3 | |
| Vertical | [5] | - | - | - | - | - | H | H | 3-6 | (3) | 2 | |
| Strong | Stand | [8] | +0 | +1 | +2 | No | Yes | HL | H | 6-11 | (3) | 4 |
| Crouch | [8] | +0 | +1 | +2 | No | No | HL | HL | 7-13 | (6) | 2 | |
| Jump | [9] | - | - | - | - | - | H | H | 10-17 | (3) | 3 | |
| Vertical | [8] | - | - | - | - | - | H | H | 9-15 | (3) | 2 | |
| Fierce | Stand | [15] | -13 | -11 | -9 | No | No | HL | H | 12-22 | (6) | 3 |
| Crouch | [16] | -7 | -5 | -3 | No | No | HL | HL | 11-19 | (1) | 3 | |
| Jump | [13] | - | - | - | - | - | H | H | 12-22 | (3) | 3 | |
| Short | Stand | [4] | +1 | +1 | +1 | Yes | Yes | HL | HL | 5-8 | (1) | 3 |
| Crouch | [6] | +2 | +2 | +2 | Yes | Yes | L | L | 4-7 | (X) | 4 | |
| Jump | [2] | - | - | - | - | - | H | H | 3-6 | (3) | 3 | |
| Forward | Standing | [9] | -1 | +0 | +1 | No | No | HL | HL | 9-15 | (3) | 3 |
| Crouch | [12] | -5 | -4 | -3 | No | No | L | L | 7-13 | (X) | 3 | |
| Jump | [10] | - | - | - | - | - | H | H | 9-15 | (3) | 2 | |
| Rdhouse | Stand | [18] | -8 | -6 | -4 | No | No | HL | H | 14-24 | (6) | 2 |
| Crouch | [13] | -12 | D | D | No | No | L | L | 12-22 | (-) | 2 | |
| Jump | [15] | - | - | - | - | - | H | H | 15-26 | (3) | 2 |
Command Normals
| Name | [StUp] | BkAd | HtAd | CHAd | SlCn | SpCn | Grd | Pry | Dmg Min-Max |
(JPT) | UFN |
|---|---|---|---|---|---|---|---|---|---|---|---|
| A.Jab | [3] | +3 | +3 | +3 | Yes | Yes | HL | HL | 6-11 | (1) | 3 |
| A.Strong | [4] | +1 | +2 | +3 | Yes | Yes | HL | H | 9-15 | (1) | 4 |
| A.Fierce | [11] | -3 | D | D | No | No | HL | HL | 16-28 | (3) | 3 |
| A.Short | [3] | +3 | +3 | +3 | Yes | Yes | HL | HL | 5-9 | (1) | 3 |
| A.Forward | [5] | +3 | +4 | +5 | Yes | Yes | HL | H | 7-13 | (3) | 4 |
| A.Rdhouse | [12] | +10 | +12 | +14 | No | No | HL | H | 18-31 | (6) | 3 |
| DA.Fierce | [9] | +2 | D | D | No | No | HL | HL | 18-31 | (1) | 4 |
| D.Short(in air) | [9] | - | - | - | - | - | H | H | 6(1)-11(3) | (3/3) | 2 |
| D.Forward(in air) | [9] | - | - | - | - | - | H | H | 7(2)-13(3) | (3/3) | 3 |
| D.Rdhouse(in air) | [9] | - | - | - | - | - | H | H | 10(2)-17(3) | (3/3) | 4 |
Special Moves
| Name | State | [StUp] | BkAd | SpCn | Grd | Pry | Dmg Min-Max |
(JPT) | UFN |
|---|---|---|---|---|---|---|---|---|---|
| Electric Blast | Jab | [6] | -10 | Yes | HL | H | 7-13 | (3) | 3 |
| Strong | [8] | -26 | Yes | HL | H | 20-32 | (3per) | 2 | |
| Fierce | [10] | -24 | Yes | HL | H | 27-41 | (3per) | 2 | |
| Flying Viper | Jab | [26] | -3 | No | H | H | 15-36 | (-) | 3 |
| Strong | [26] | -2 | No | H | H | 18-31 | (-) | 3 | |
| Fierce | [28] | -2 | No | H | H | 20-35 | (-) | 2 | |
| EX | [24] | +2 | No | H | H | 25-42 | (1/-) | 3 | |
| Snake Fang | Short | [12] | -15 | No | L | U | 18-24 | (X) | 3 |
| Foward | [12] | -17 | No | L | U | 19-26 | (X) | 2 | |
| Rdhouse | [12] | -19 | No | L | U | 20-28 | (X) | 2 | |
| Tornado Hook | Jab | [6] | +1 | Yes | HL | H | 14-25 | (3per) | 4 |
| Strong | [10] | -4 | Yes | HL | H | 15-28 | (3per) | 3 | |
| Fierce | [17] | -18 | Yes | HL | H | 17-31 | (3per) | 2 | |
| EX | [8] | -9 | No | HL | H | 27-49 | (3per) | 3 | |
| Rising Cobra | Short | [23] | -6 | No | H | H | 16-28 | (-) | 3 |
| Foward | [25] | -6 | No | H | H | 19-33 | (-) | 2 | |
| Rdhouse | [27] | -6 | No | H | H | 22-37 | (-) | 2 | |
| EX | [25] | -3 | No | H | H | 25-35 | (1/-) | 3 |
| Name | [StUp] | BkAd | Grd | Pry | Dmg Min-Max |
(JPT) | UFN | MLth | Stks |
|---|---|---|---|---|---|---|---|---|---|
| Magnetic Storm | [2] | -12 | HL | HL | 42-70 | (?) | 3 | Working | 1 |
| Slam Dance | [3] | - | U | U | 58-80 | (X) | 2 | Working | 1 |
| Electric Snake | [4] | -11 | L | L | 34-52 | (1) | 4 | Working | 2 |
Move Analysis
- All those sprites are taken from the site http://www.zweifuss.ca/
- All Framedatas in "Move Analisys" section are taken from Game Restaurant , this means the Framedata isn't from the Dreamcast version like Karathrow site, it's from Arcade version.
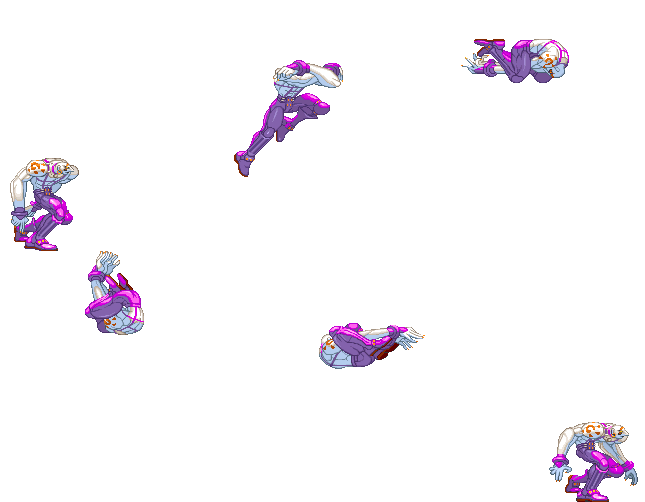
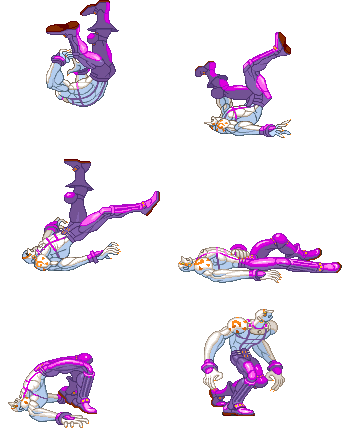
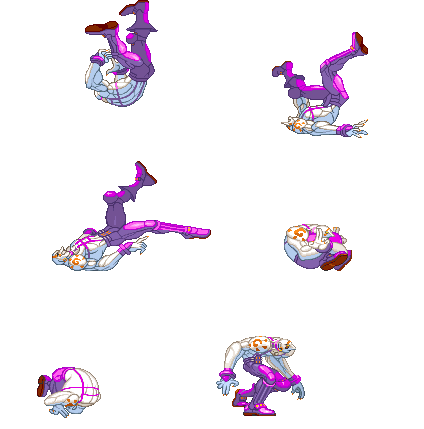
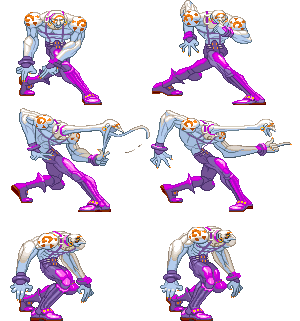
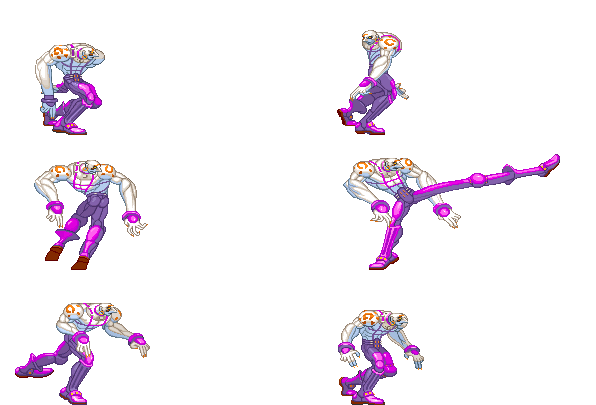
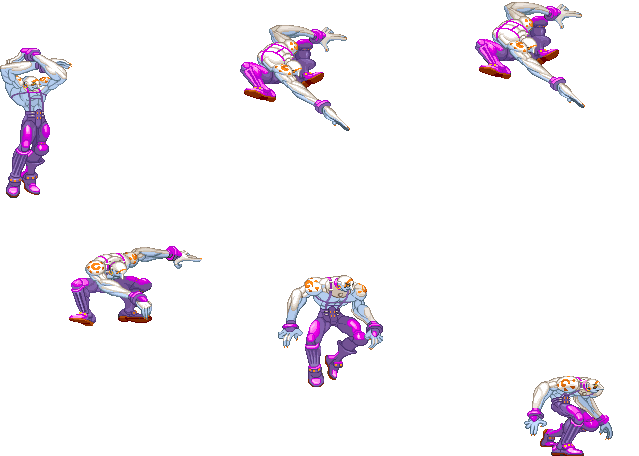
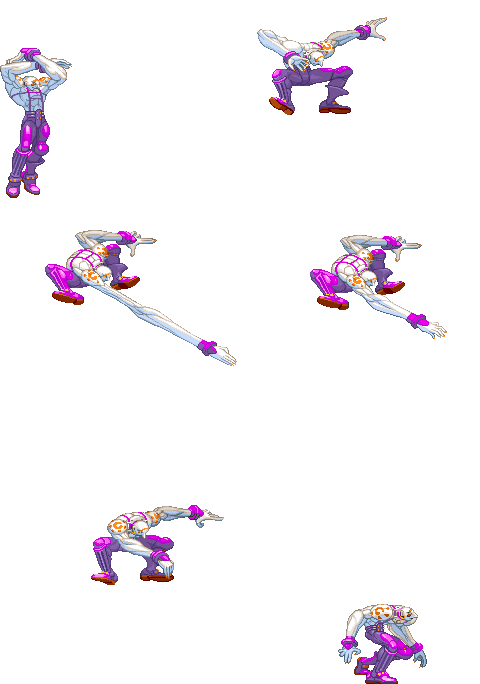
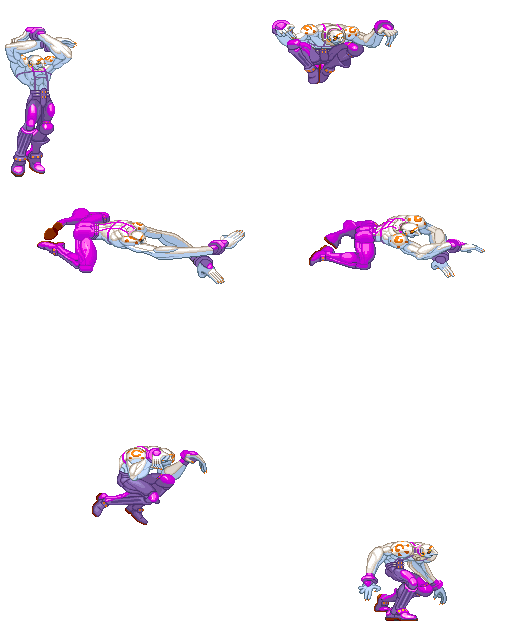
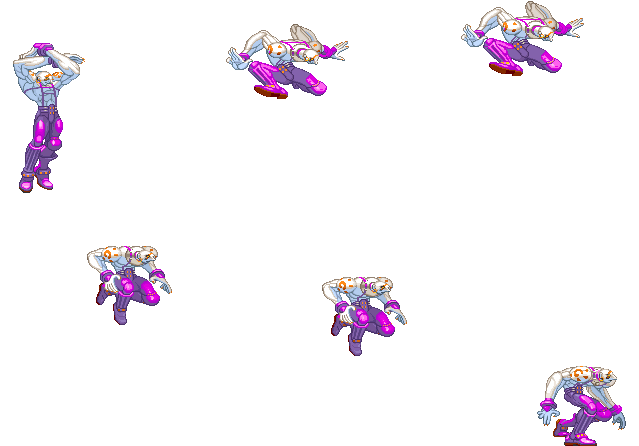
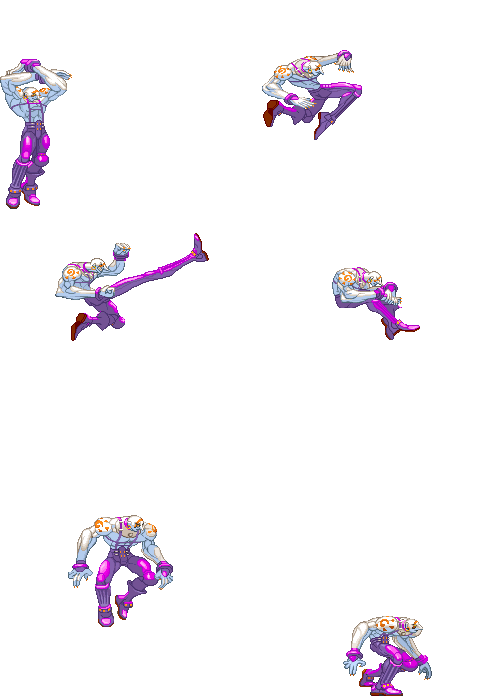
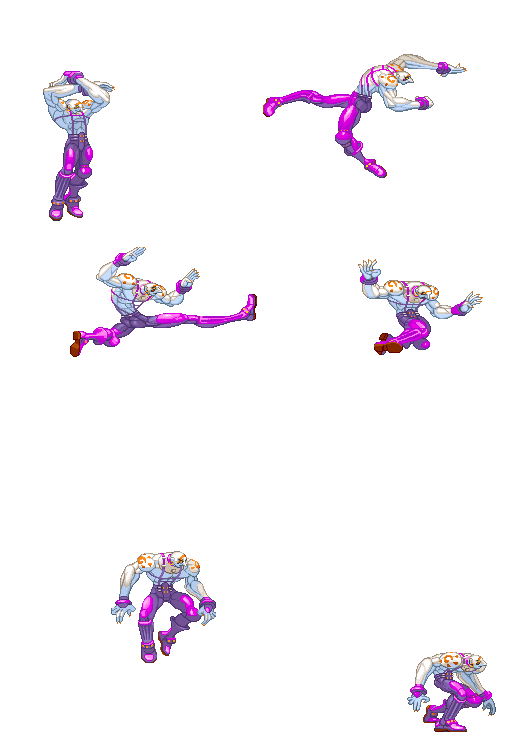
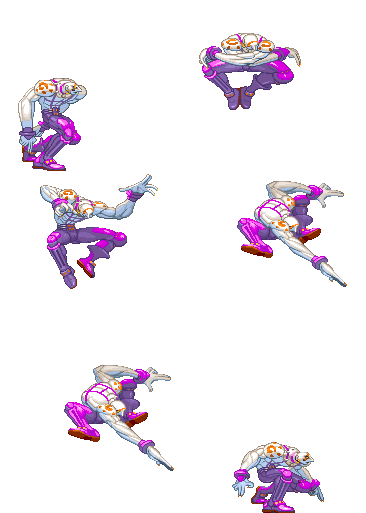
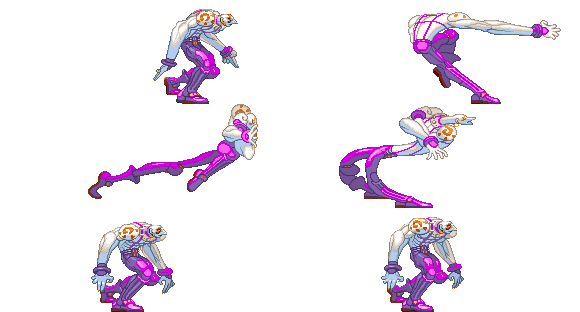
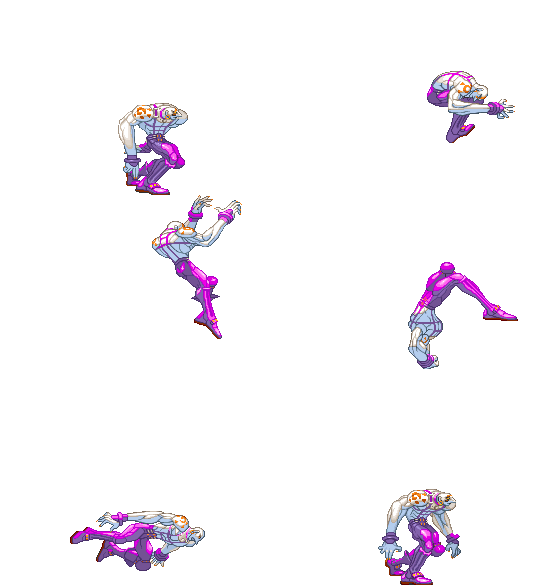
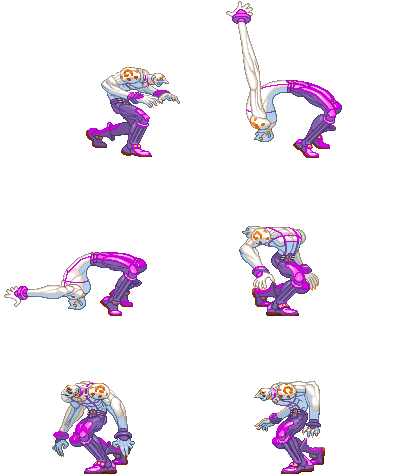
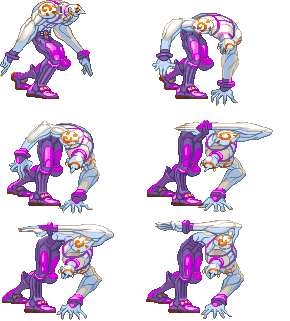
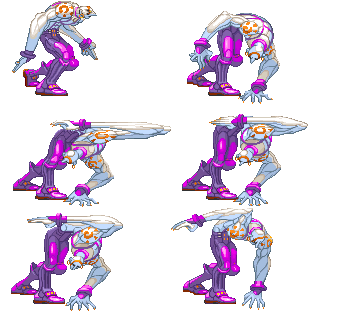
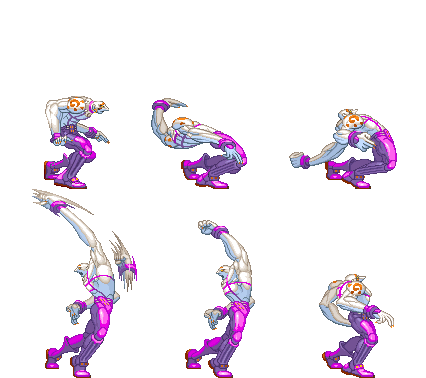
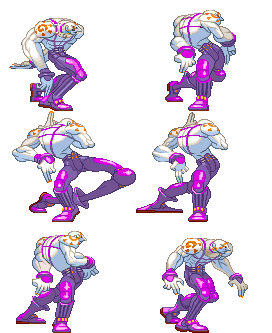
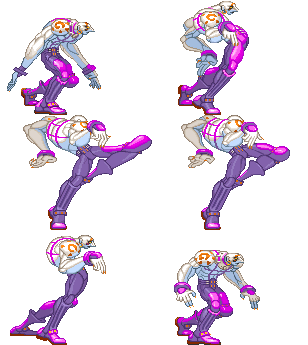
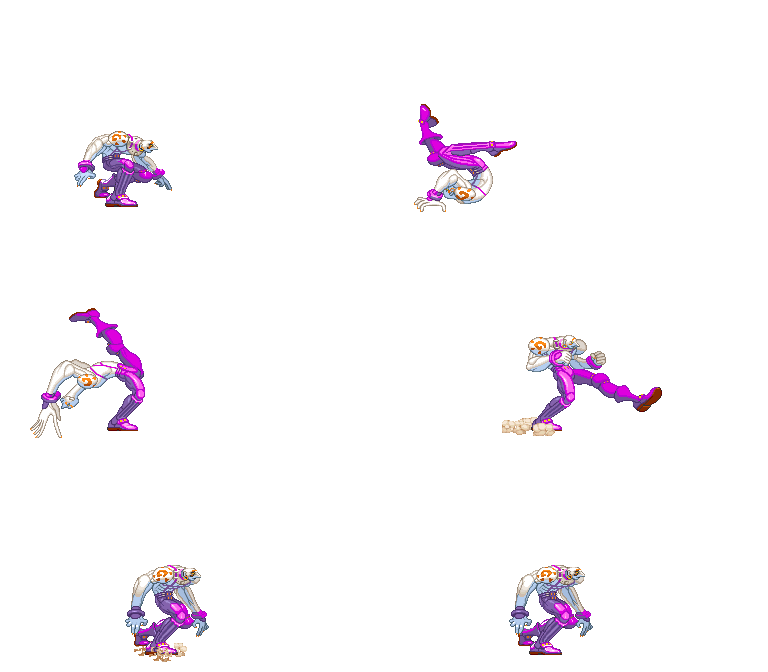
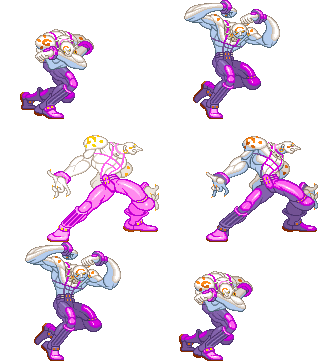
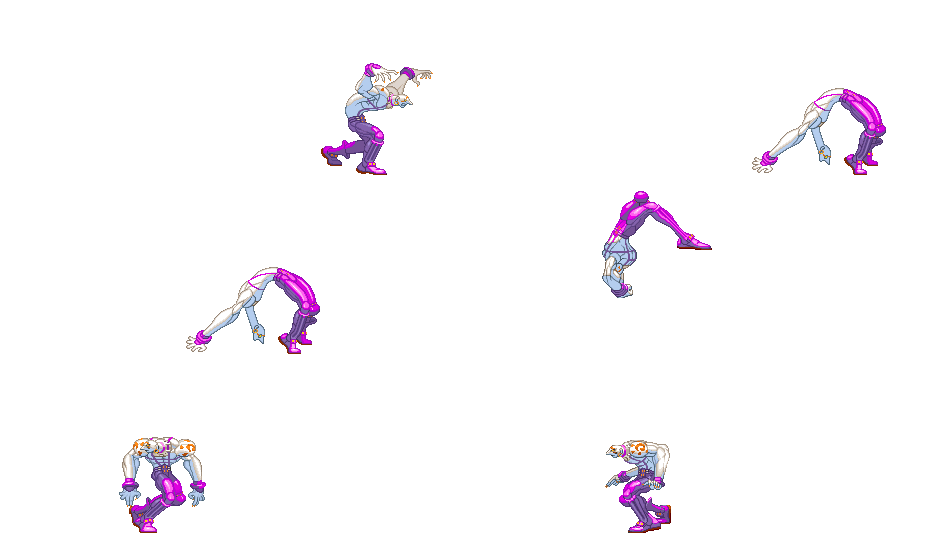
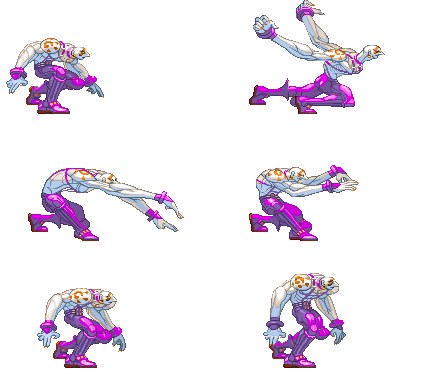
Please note that the images show in this section are for the 1st frame it hits, so this means the opponent is taking the hit in the image shown on the move. I use the 1st frame of every move (except taunt, dash, jump, wakeup and 2nd throw image sprites) because you will see the maximum range of every attack (mostly of the attacks). Note also that those images are ACCURATE, they are exactly the first frame it hits, so enemy takes damage but they still dont make the "pain" frame.
General
- Move: Move name
- Motion: What you must do to execute the move
- Damage: Damage it does (in pixels)
- Stun Damage: Stun Damage it does (in pixels)
- Chains into itself: If you can combo into the same movement
- Special Cancel: If you can cancel the move into a Special Move
- Super Cancel: If you can cancel the move into a Super Art
- Throw Range: Range of the throw (in pixels)
- Num.: Super Art number
- Super Art: Super Art name
- Super Art Stock: Number of Gauge Bars the Super Art have, also the lenght of each bar (in pixels)
Frame Data
- Startup: Number of frames it takes to start the move
- Hit: Number of frames that can hit the opponent
- Recovery: Number of frames it takes to recover from the move
- Blocked Advantage: Number of frames you are in advantage/disvantage after opponent have been blocked the hit
- Hit Advantage: Number of frames you are in advantage/disvantage after opponent have been take the hit
- Crouching Hit Advantage: Number of frames you are in advantage/disvantage after opponent have been take the hit while he's crouching
- + # : You have # frames of advantage
- - # : You have # frames of disvantage
- # ~ # : Advantage/disvantage can vary from # to #
- Down: Enemy gets knocked down
- Guard: How opponent must guard the move, High (H), Low (L) or both (HL)
- Parry: How opponent must parry the move, High (H), Low (L) or both (HL)
Gauge Increase
- Miss: Gauge you gain if you miss the move (in pixels)
- Blocked: Gauge you gain if the move gets blocked (in pixels)
- Hit: Gauge you gain if you hit the opponent with the move (in pixels)
- Parry: Gauge opponent gains when he parry the move (in pixels)
Basic Moves
| Move | Start-up frames | In ground frames | In air frames | Recovery frames | Total frames |
|---|---|---|---|---|---|
| Dash Forward | 2? | 8? | - | 6? | 16 |
Comments here
| Move | Start-up frames | In ground frames | In air frames | Recovery frames | Total frames |
|---|---|---|---|---|---|
| Dash Backwards | 4? | 4? | - | 6? | 13 |
Comments here
| Move | Motion | Startup Frames |
| Jump | BU or U or FU | 3 |
Comments here
| Move | Motion | Startup Frames |
| Super Jump | DBU or DU or DFU | 5 |
Comments here
| Move | Motion | Frames |
| Normal Wakeup | - | 75 |
Comments here
| Move | Motion | Frames |
| Quick Stand | Tap D when hitting the ground | 48 |
Comments here
| Move | Motion | Damage | Stun Damage | Chains into itself | Special Cancel | Super Cancel |
| Taunt | HP+HK | 5/5 | 3/3 | No | No | No |
Frame Data
| Startup | Hit | Recovery | Blocked Advantage | Hit Advantage | Crouching Hit Advantage | Guard | Parry |
| 15/9 | 1/1 | 27 | ? | ? | ? | HL | HL |
Gauge Increase
| Miss | Blocked | Hit | Parry (Gauge for opponent) |
| 4(6) | ? | ? | 8(4+4) |
Comments here
| Move | Motion |
| Parry (High) | Tap F when about taking a hit |
| Parry (Low) | Tap D when about taking a hit |
| Parry (Air) | Tap F in air when about taking a hit |
Frame Data
| Move | Frames you're frozen | Frames opponent is frozen | Frame Advantage when parry is successful | Frames before you can try another parry |
| Parry (High) | 16 | 16 | +4(LP/LK) +3(MP/MK) +2(HP/HK) 0(Special/Super) -16(Fireball) | 24(19 when attack comes from the air)*,** |
| Parry (Low) | 16 | 16 | +4(LP/LK) +3(MP/MK) +2(HP/HK) 0(Special/Super) -16(Fireball) | 24(19 when attack comes from the air)*,** |
| Parry (Air) | 16 | 16 | +4(LP/LK) +3(MP/MK) +2(HP/HK) 0(Special/Super) -16(Fireball) | 21(19 when attack comes from the air)*,** |
| * (If a parry attempt is successful, the 19/21/24 frame restriction is taken away and you can attempt another parry immediately) |
| ** (If another attack connects within 2 frames of your parry, it will automatically be parried) |
Gauge Increase
| Move | Gauge Increase |
| Parry (High) | 4*** |
| Parry (Low) | 4*** |
| Parry (Air) | 4*** |
| *** (You gain 4 of gauge for whatever attack parried, and for whatever hit you parry during multihit attack) |
You can buffer any motion during High or Low parry, but NOT during Air parry, also parry resets the juggle count (and thus resets all scaling).
- Parry information is taken from Shoryuken Forums, more exactly, from user JinraiPVC. Thanks for this information dude
Normal Moves
Standing Normals
| Move | Motion | Damage | Stun Damage | Chains into itself | Special Cancel | Super Cancel |
| Far Jab | LP | 30 | 3 | Yes | Yes | Yes |
Frame Data
| Startup | Hit | Recovery | Blocked Advantage | Hit Advantage | Crouching Hit Advantage | Guard | Parry |
| 5 | 1 | 8 | +2 | +2 | +2 | HL | HL |
Gauge Increase
| Miss | Blocked | Hit | Parry (Gauge for opponent) |
| 0 | 1 | 2 | 4 |
Comments here
| Move | Motion | Damage | Stun Damage | Chains into itself | Special Cancel | Super Cancel |
| Far Strong | MP | 50 | 11 | No | No | No |
Frame Data
| Startup | Hit | Recovery | Blocked Advantage | Hit Advantage | Crouching Hit Advantage | Guard | Parry |
| 8 | 1 | 12 | 0 | +1 | +2 | HL | H |
Gauge Increase
| Miss | Blocked | Hit | Parry (Gauge for opponent) |
| 2 | 6 | 11 | 4 |
Comments here
| Move | Motion | Damage | Stun Damage | Chains into itself | Special Cancel | Super Cancel |
| Far Fierce | HP | 100 | 11 | No | No | No |
Frame Data
| Startup | Hit | Recovery | Blocked Advantage | Hit Advantage | Crouching Hit Advantage | Guard | Parry |
| 15 | 11 | 28 | -13 | -11 | -9 | HL | H |
Gauge Increase
| Miss | Blocked | Hit | Parry (Gauge for opponent) |
| 3 | 10 | 19 | 4 |
Comments here
| Move | Motion | Damage | Stun Damage | Chains into itself | Special Cancel | Super Cancel |
| Short | LK | 40 | 5 | Yes | Yes | Yes |
Frame Data
| Startup | Hit | Recovery | Blocked Advantage | Hit Advantage | Crouching Hit Advantage | Guard | Parry |
| 4 | 1 | 9 | +1 | +1 | +1 | HL | HL |
Gauge Increase
| Miss | Blocked | Hit | Parry (Gauge for opponent) |
| 0 | 1 | 2 | 4 |
Comments here
| Move | Motion | Damage | Stun Damage | Chains into itself | Special Cancel | Super Cancel |
| Forward | MK | 70 | 3 | No | No | No |
Frame Data
| Startup | Hit | Recovery | Blocked Advantage | Hit Advantage | Crouching Hit Advantage | Guard | Parry |
| 9 | 1 | 14 | -1 | 0 | +1 | HL | H |
Gauge Increase
| Miss | Blocked | Hit | Parry (Gauge for opponent) |
| 2 | 6 | 11 | 4 |
Comments here
| Move | Motion | Damage | Stun Damage | Chains into itself | Special Cancel | Super Cancel |
| Roundhouse | HK | 110 | 13 | No | No | No |
Frame Data
| Startup | Hit | Recovery | Blocked Advantage | Hit Advantage | Crouching Hit Advantage | Guard | Parry |
| 18 | 1 | 24 | -8 | -6 | -4 | HL | H |
Gauge Increase
| Miss | Blocked | Hit | Parry (Gauge for opponent) |
| 3 | 10 | 19 | 4 |
Comments here
Jumping Normals
| Move | Motion | Damage | Stun Damage | Chains into itself | Special Cancel | Super Cancel |
| Jump Jab | (Air) LP | 50(60 if neutral jump) | 7 | No | No | No |
Frame Data
| Startup | Hit | Recovery | Blocked Advantage | Hit Advantage | Crouching Hit Advantage | Guard | Parry |
| 4(5 if neutral jump) | Until landing | - | - | - | - | H | H |
Gauge Increase
| Miss | Blocked | Hit | Parry (Gauge for opponent) |
| 0 | 1 | 2 | 4 |
Comments here
| Move | Motion | Damage | Stun Damage | Chains into itself | Special Cancel | Super Cancel |
| Jump Strong | (Air) MP | 100 | 11 | No | No | No |
Frame Data
| Startup | Hit | Recovery | Blocked Advantage | Hit Advantage | Crouching Hit Advantage | Guard | Parry |
| 5(6 if neutral jump) | 5 | - | - | - | - | H | H |
Gauge Increase
| Miss | Blocked | Hit | Parry (Gauge for opponent) |
| 2 | 4 | 8 | 4 |
Comments here
| Move | Motion | Damage | Stun Damage | Chains into itself | Special Cancel | Super Cancel |
| Jump Fierce | (Air) HP | 130 | 15 | No | No | No |
Frame Data
| Startup | Hit | Recovery | Blocked Advantage | Hit Advantage | Crouching Hit Advantage | Guard | Parry |
| 6 | 4 | - | - | - | - | H | H |
Gauge Increase
| Miss | Blocked | Hit | Parry (Gauge for opponent) |
| 3 | 6 | 14 | 4 |
Comments here
| Move | Motion | Damage | Stun Damage | Chains into itself | Special Cancel | Super Cancel |
| Neutral Jump Fierce | (Air) HP | 130 | 15 | No | No | No |
Frame Data
| Startup | Hit | Recovery | Blocked Advantage | Hit Advantage | Crouching Hit Advantage | Guard | Parry |
| 7 | 3 | - | - | - | - | H | H |
Gauge Increase
| Miss | Blocked | Hit | Parry (Gauge for opponent) |
| 3 | 6 | 14 | 4 |
Comments here
| Move | Motion | Damage | Stun Damage | Chains into itself | Special Cancel | Super Cancel |
| Jump Short | (Air) LK | 50 | 5(7 if neutral jump) | No | No | No |
Frame Data
| Startup | Hit | Recovery | Blocked Advantage | Hit Advantage | Crouching Hit Advantage | Guard | Parry |
| 4(5 if neutral jump) | 10(19 if neutral jump) | - | - | - | - | H | H |
Gauge Increase
| Miss | Blocked | Hit | Parry (Gauge for opponent) |
| 0 | 1 | 2 | 4 |
Comments here
| Move | Motion | Damage | Stun Damage | Chains into itself | Special Cancel | Super Cancel |
| Jump Forward | (Air) MK | 90 | 9 | No | No | No |
Frame Data
| Startup | Hit | Recovery | Blocked Advantage | Hit Advantage | Crouching Hit Advantage | Guard | Parry |
| 5 | 6 | - | - | - | - | H | H |
Gauge Increase
| Miss | Blocked | Hit | Parry (Gauge for opponent) |
| 2 | 4 | 8 | 4 |
Comments here
| Move | Motion | Damage | Stun Damage | Chains into itself | Special Cancel | Super Cancel |
| Neutral Jump Forward | (Air) MK | 90 | 9 | No | No | No |
Frame Data
| Startup | Hit | Recovery | Blocked Advantage | Hit Advantage | Crouching Hit Advantage | Guard | Parry |
| 5 | 6 | - | - | - | - | H | H |
Gauge Increase
| Miss | Blocked | Hit | Parry (Gauge for opponent) |
| 2 | 4 | 8 | 4 |
Comments here
| Move | Motion | Damage | Stun Damage | Chains into itself | Special Cancel | Super Cancel |
| Jump Roundhouse | (Air) HK | 125 | 13 | No | No | No |
Frame Data
| Startup | Hit | Recovery | Blocked Advantage | Hit Advantage | Crouching Hit Advantage | Guard | Parry |
| 6 | 4 | - | - | - | - | H | H |
Gauge Increase
| Miss | Blocked | Hit | Parry (Gauge for opponent) |
| 3 | 6 | 14 | 4 |
Comments here
| Move | Motion | Damage | Stun Damage | Chains into itself | Special Cancel | Super Cancel |
| Neutral Jump Roundhouse | (Air) HK | 130 | 13 | No | No | No |
Frame Data
| Startup | Hit | Recovery | Blocked Advantage | Hit Advantage | Crouching Hit Advantage | Guard | Parry |
| 7 | 5 | - | - | - | - | H | H |
Gauge Increase
| Miss | Blocked | Hit | Parry (Gauge for opponent) |
| 3 | 6 | 14 | 4 |
Comments here
| Move | Motion | Damage | Stun Damage | Chains into itself | Special Cancel | Super Cancel |
| Universal Overhead | MP+MK | 40 | 3 | No | No | No |
Frame Data
| Startup | Hit | Recovery | Blocked Advantage | Hit Advantage | Crouching Hit Advantage | Guard | Parry |
| 15 | 8 | 7 | -5~+7 | 0~+8 | +1~+9 | H | H |
Gauge Increase
| Miss | Blocked | Hit | Parry (Gauge for opponent) |
| 0 | 1 | 2 | 4 |
Comments here
Throws
| Move | Motion | Damage | Stun Damage | Throw Range | Kara-Throw | Kara-Throw Range |
| Hiza Geri | LP+LK | 160(40x6) | 12(3x6) | 24 | C+MK/C+HK/B+MK/MK/HK | 37/37/34/32/32 |
Frame Data
| Startup | Hit | Recovery | Blocked Advantage | Hit Advantage | Crouching Hit Advantage | Guard | Parry |
| 2 | 1 | 21 | - | - | - | LP+LK | - |
Gauge Increase
| Miss | Blocked | Hit |
| 0 | 7 (for the player who blocked) | 12(6x2) |
Comments here
| Move | Motion | Damage | Stun Damage | Throw Range | Kara-Throw | Kara-Throw Range |
| Seoi Nage | F+LP+LK | 120 | 9 | 24 | C+MK/C+HK/B+MK/MK/HK | 37/37/34/32/32 |
Frame Data
| Startup | Hit | Recovery | Blocked Advantage | Hit Advantage | Crouching Hit Advantage | Guard | Parry |
| 2 | 1 | 21 | - | - | - | LP+LK | - |
Gauge Increase
| Miss | Blocked | Hit |
| 0 | 7 (for the player who blocked) | 7 |
Comments here
| Move | Motion | Damage | Stun Damage | Throw Range | Kara-Throw | Kara-Throw Range |
| Jigoku Guruma | B+LP+LK | 110 | 15 | 24 | C+MK/C+HK/B+MK/MK/HK | 37/37/34/32/32 |
Frame Data
| Startup | Hit | Recovery | Blocked Advantage | Hit Advantage | Crouching Hit Advantage | Guard | Parry |
| 2 | 1 | 21 | - | - | - | LP+LK | - |
Gauge Increase
| Miss | Blocked | Hit |
| 0 | 7 (for the player who blocked) | 7 |
Comments here
Command Normals
| Move | Motion | Damage | Stun Damage | Chains into itself | Special Cancel | Super Cancel |
| Back Jab | B+LP | 50 | 5 | No | Yes | Yes |
Frame Data
| Startup | Hit | Recovery | Blocked Advantage | Hit Advantage | Crouching Hit Advantage | Guard | Parry |
| 3 | 1 | 6 | +3 | +3 | +3 | HL | HL |
Gauge Increase
| Miss | Blocked | Hit | Parry (Gauge for opponent) |
| 0 | 1 | 2 | 4 |
Comments here
| Move | Motion | Damage | Stun Damage | Chains into itself | Special Cancel | Super Cancel |
| Back Strong | B+MP | 70 | 11 | No | Yes | Yes |
Frame Data
| Startup | Hit | Recovery | Blocked Advantage | Hit Advantage | Crouching Hit Advantage | Guard | Parry |
| 4 | 2 | 10 | +1 | +2 | +3 | HL | H |
Gauge Increase
| Miss | Blocked | Hit | Parry (Gauge for opponent) |
| 2 | 6 | 11 | 4 |
Comments here
| Move | Motion | Damage | Stun Damage | Chains into itself | Special Cancel | Super Cancel |
| Back Fierce | B+HP | 130 | 15 | No | No | No |
Frame Data
| Startup | Hit | Recovery | Blocked Advantage | Hit Advantage | Crouching Hit Advantage | Guard | Parry |
| 11 | 4 | 15 | -3 | Down | Down | HL | HL |
Gauge Increase
| Miss | Blocked | Hit | Parry (Gauge for opponent) |
| 3 | 10 | 19 | 4 |
Comments here
| Move | Motion | Damage | Stun Damage | Chains into itself | Special Cancel | Super Cancel |
| Back Short | B+LK | 45 | 7 | Yes | Yes | Yes |
Frame Data
| Startup | Hit | Recovery | Blocked Advantage | Hit Advantage | Crouching Hit Advantage | Guard | Parry |
| 3 | 2 | 7 | +3 | +3 | +3 | HL | HL |
Gauge Increase
| Miss | Blocked | Hit | Parry (Gauge for opponent) |
| 0 | 1 | 2 | 4 |
Comments here
| Move | Motion | Damage | Stun Damage | Chains into itself | Special Cancel | Super Cancel |
| Back Forward | B+MK | 80 | 13 | No | Yes | Yes |
Frame Data
| Startup | Hit | Recovery | Blocked Advantage | Hit Advantage | Crouching Hit Advantage | Guard | Parry |
| 5 | 1 | 10 | +3 | +4 | +5 | HL | H |
Gauge Increase
| Miss | Blocked | Hit | Parry (Gauge for opponent) |
| 2 | 6 | 11 | 4 |
Comments here
| Move | Motion | Damage | Stun Damage | Chains into itself | Special Cancel | Super Cancel |
| Back Roundhouse | B+HK | 140 | 17 | No | No | No |
Frame Data
| Startup | Hit | Recovery | Blocked Advantage | Hit Advantage | Crouching Hit Advantage | Guard | Parry |
| 12 | 1 | 16 | +10 | +12 | +14 | HL | H |
Gauge Increase
| Miss | Blocked | Hit | Parry (Gauge for opponent) |
| 3 | 10 | 19 | 4 |
Comments here
| Move | Motion | Damage | Stun Damage | Chains into itself | Special Cancel | Super Cancel |
| Crouch Jab | D+LP | 140 | 11 | No | No | No |
Frame Data
| Startup | Hit | Recovery | Blocked Advantage | Hit Advantage | Crouching Hit Advantage | Guard | Parry |
| 9 | 1 | 4 | +2 | Down | Down | HL | HL |
Gauge Increase
| Miss | Blocked | Hit | Parry (Gauge for opponent) |
| 3 | 10 | 19 | 4 |
Comments here
| Move | Motion | Damage | Stun Damage | Chains into itself | Special Cancel | Super Cancel |
| Neutral Jump Roundhouse | (Air) HK | 130 | 13 | No | No | No |
Frame Data
| Startup | Hit | Recovery | Blocked Advantage | Hit Advantage | Crouching Hit Advantage | Guard | Parry |
| 7 | 5 | - | - | - | - | H | H |
Gauge Increase
| Miss | Blocked | Hit | Parry (Gauge for opponent) |
| 3 | 6 | 14 | 4 |
Comments here
| Move | Motion | Damage | Stun Damage | Chains into itself | Special Cancel | Super Cancel |
| Neutral Jump Roundhouse | (Air) HK | 130 | 13 | No | No | No |
Frame Data
| Startup | Hit | Recovery | Blocked Advantage | Hit Advantage | Crouching Hit Advantage | Guard | Parry |
| 7 | 5 | - | - | - | - | H | H |
Gauge Increase
| Miss | Blocked | Hit | Parry (Gauge for opponent) |
| 3 | 6 | 14 | 4 |
Comments here
Crouching Normals
| Move | Motion | Damage | Stun Damage | Chains into itself | Special Cancel | Super Cancel |
| Crouch Jab | D+LP | 20 | 3 | Yes | Yes | Yes |
Frame Data
| Startup | Hit | Recovery | Blocked Advantage | Hit Advantage | Crouching Hit Advantage | Guard | Parry |
| 4 | 3 | 5 | +3 | +3 | +3 | HL | HL |
Gauge Increase
| Miss | Blocked | Hit | Parry (Gauge for opponent) |
| 0 | 1 | 2 | 4 |
Comments here
| Move | Motion | Damage | Stun Damage | Chains into itself | Special Cancel | Super Cancel |
| Crouch Strong | D+MP | 90 | 7 | No | Yes | Yes |
Frame Data
| Startup | Hit | Recovery | Blocked Advantage | Hit Advantage | Crouching Hit Advantage | Guard | Parry |
| 5 | 4 | 7 | +3 | +4 | +5 | HL | HL |
Gauge Increase
| Miss | Blocked | Hit | Parry (Gauge for opponent) |
| 2 | 4 | 8 | 4 |
Comments here
| Move | Motion | Damage | Stun Damage | Chains into itself | Special Cancel | Super Cancel |
| Crouch Fierce | D+HP | 130 | 13 | No | Yes | Yes |
Frame Data
| Startup | Hit | Recovery | Blocked Advantage | Hit Advantage | Crouching Hit Advantage | Guard | Parry |
| 7 | 5 | 17 | -8 | -6 | -4 | HL | HL |
Gauge Increase
| Miss | Blocked | Hit | Parry (Gauge for opponent) |
| 3 | 6 | 14 | 4 |
Comments here
| Move | Motion | Damage | Stun Damage | Chains into itself | Special Cancel | Super Cancel |
| Crouch Short | D+LK | 20 | 3 | Yes | Yes | Yes |
Frame Data
| Startup | Hit | Recovery | Blocked Advantage | Hit Advantage | Crouching Hit Advantage | Guard | Parry |
| 5 | 3 | 7 | +1 | +1 | +1 | L | L |
Gauge Increase
| Miss | Blocked | Hit | Parry (Gauge for opponent) |
| 0 | 1 | 2 | 4 |
Comments here
| Move | Motion | Damage | Stun Damage | Chains into itself | Special Cancel | Super Cancel |
| Crouch Forward | D+MK | 85 | 3 | No | Yes | Yes |
Frame Data
| Startup | Hit | Recovery | Blocked Advantage | Hit Advantage | Crouching Hit Advantage | Guard | Parry |
| 6 | 5 | 17 | -3 | -3 | -1 | L | L |
Gauge Increase
| Miss | Blocked | Hit | Parry (Gauge for opponent) |
| 2 | 4 | 8 | 4 |
Comments here
| Move | Motion | Damage | Stun Damage | Chains into itself | Special Cancel | Super Cancel |
| Crouch Roundhouse | D+HK | 130 | 3 | No | No | No |
Frame Data
| Startup | Hit | Recovery | Blocked Advantage | Hit Advantage | Crouching Hit Advantage | Guard | Parry |
| 6 | 5 | 26 | -13 | Down | Down | L | L |
Gauge Increase
| Miss | Blocked | Hit | Parry (Gauge for opponent) |
| 3 | 6 | 14 | 4 |
Comments here
Target Combo
| Move | Motion | Damage | Stun Damage | Chains into itself | Special Cancel | Super Cancel |
| Target Combo | Close MP -> Close HP | 45+50 | 7+11 | No | Yes/Yes | Yes/Yes |
Frame Data
| Startup | Hit | Recovery | Blocked Advantage | Hit Advantage | Crouching Hit Advantage | Guard | Parry |
| 4 | - | - | -3 | -2 | -1 | HL/HL | H/H |
Gauge Increase
| Miss | Blocked | Hit | Parry (Gauge for opponent) |
| 2+? | 4+1 | 8+1 | 8(4+4) |
Comments here
Special Moves
Please note that in this section you will see mainly 3 images for the special moves, this means the image on the left its done with LP (or LK), the image on the center its done with MP (or MK), and the image on the right its done with HP (or HK). Also its the same "rule" as the sections above, its the 1rst frame it hits for every of the moves.
| Move | Motion | Damage | Blocked Damage | Stun Damage | Super Cancel |
| Flying Viper (Jab) | QCB+LP | 150(100)(60) | 19(6)(4) | 11 | Yes |
| Flying Viper (Strong) | QCB+MP | 165(110+55) | 21(14+7) | 15(11+5) | Yes/No |
| Flying Viper (Fierce) | QCB+HP | 185(80+60+50) | 21(10+8+3) | 17(11+3+3) | Yes/Yes/No |
Frame Data
| Move | Startup | Hit | Recovery | Blocked Advantage | Hit Advantage | Crouching Hit Advantage | Guard | Parry |
| Flying Viper (Jab) | 2 | 8 | 26 | -17 | Down | Down | HL | HL |
| Flying Viper (Strong) | 3 | 2/12 | 28 | -24 | Down | Down | HL/HL | HL/HL |
| Flying Viper (Fierce) | 1 | 2/2/7 | 32 | -31 | Down | Down | HL/HL/HL | HL/HL/HL |
Gauge Increase
| Move | Miss | Blocked | Hit | Parry (Gauge for opponent) |
| Flying Viper (Jab) | 3 | 10 | 15 | 4 |
| Flying Viper (Strong) | 3 | 11(10+1) | 17(15+2) | 8(4+4) |
| Flying Viper (Fierce) | 3 | 12(10+1+1) | 19(15+2+2) | 12(4+4+4) |
Comments here
| Move | Motion | Damage | Blocked Damage | Stun Damage | Super Cancel |
| Rising Cobra (Short) | QCB+LK | 115(80+30) | 12(10+2) | 10(7+3) | Yes/No |
| Rising Cobra (Forward) | QCB+MK | 140(60+30(x3)) | 14(8+2(x3)) | 15(7+3(x3)) | Yes/No/No/No |
| Rising Cobra (Roundhouse) | QCB+HK | 160(60+30(x4)) | 16(8+2(x4)) | 17(7+3(x4)) | Yes/No/No/No/No |
Frame Data
| Move | Startup | Hit | Recovery | Blocked Advantage | Hit Advantage | Crouching Hit Advantage | Guard | Parry |
| Rising Cobra (Short) | 6 | 2 | 14 | -5 | -3 | -3 | HL/HL | H/H |
| Rising Cobra (Forward) | 6 | 2 | 15 | -6 | -4 | -4 | HL/HL/HL/HL | H/H/H/H |
| Rising Cobra (Roundhouse) | 6 | 2 | 15 | -7 | -5 | -5 | HL/HL/HL/HL/HL | H/H/H/H/H |
Gauge Increase
| Move | Miss | Blocked | Hit | Parry (Gauge for opponent) |
| Rising Cobra (Short) | 3 | 9(8+1) | 15(13+2) | 8(4+4) |
| Rising Cobra (Forward) | 3 | 11(8+1x3) | 19(13+2x3) | 16(4+4+4+4) |
| Rising Cobra (Roundhouse) | 3 | 12(8+1x4) | 21(13+2x4) | 20(4+4+4+4+4) |
Comments here
| Move | Motion | Damage | Blocked Damage | Stun Damage | Super Cancel |
| Tornado Hook (Jab) | HCF+LP | 150(100)(60) | 19(6)(4) | 11 | Yes |
| Tornado Hook (Strong) | HCF+MP | 165(110+55) | 21(14+7) | 15(11+5) | Yes/No |
| Tornado Hook (Fierce) | HCF+HP | 185(80+60+50) | 21(10+8+3) | 17(11+3+3) | Yes/Yes/No |
Frame Data
| Move | Startup | Hit | Recovery | Blocked Advantage | Hit Advantage | Crouching Hit Advantage | Guard | Parry |
| Tornado Hook (Jab) | 2 | 8 | 26 | -17 | Down | Down | HL | HL |
| Tornado Hook (Strong) | 3 | 2/12 | 28 | -24 | Down | Down | HL/HL | HL/HL |
| Tornado Hook (Fierce) | 1 | 2/2/7 | 32 | -31 | Down | Down | HL/HL/HL | HL/HL/HL |
Gauge Increase
| Move | Miss | Blocked | Hit | Parry (Gauge for opponent) |
| Tornado Hook (Jab) | 3 | 10 | 15 | 4 |
| Tornado Hook (Strong) | 3 | 11(10+1) | 17(15+2) | 8(4+4) |
| Tornado Hook (Fierce) | 3 | 12(10+1+1) | 19(15+2+2) | 12(4+4+4) |
Comments here
| Move | Motion | Damage | Blocked Damage | Stun Damage | Super Cancel |
| Denji Blast (Jab) | F, D, DF+LP | 150(100)(60) | 19(6)(4) | 11 | Yes |
| Denji Blast (Strong) | F, D, DF+MP | 165(110+55) | 21(14+7) | 15(11+5) | Yes/No |
| Denji Blast (Fierce) | F, D, DF+HP | 185(80+60+50) | 21(10+8+3) | 17(11+3+3) | Yes/Yes/No |
Frame Data
| Move | Startup | Hit | Recovery | Blocked Advantage | Hit Advantage | Crouching Hit Advantage | Guard | Parry |
| Denji Blast (Jab) | 2 | 8 | 26 | -17 | Down | Down | HL | HL |
| Denji Blast (Strong) | 3 | 2/12 | 28 | -24 | Down | Down | HL/HL | HL/HL |
| Denji Blast (Fierce) | 1 | 2/2/7 | 32 | -31 | Down | Down | HL/HL/HL | HL/HL/HL |
Gauge Increase
| Move | Miss | Blocked | Hit | Parry (Gauge for opponent) |
| Denji Blast (Jab) | 3 | 10 | 15 | 4 |
| Denji Blast (Strong) | 3 | 11(10+1) | 17(15+2) | 8(4+4) |
| Denji Blast (Fierce) | 3 | 12(10+1+1) | 19(15+2+2) | 12(4+4+4) |
Comments here
| Move | Motion | Damage | Blocked Damage | Stun Damage | Super Cancel |
| Snake Fang (Short) | HCF+LK | 115(80+30) | 12(10+2) | 10(7+3) | Yes/No |
| Snake Fang (Forward) | HCF+MK | 140(60+30(x3)) | 14(8+2(x3)) | 15(7+3(x3)) | Yes/No/No/No |
| Snake Fang (Roundhouse) | HCF+HK | 160(60+30(x4)) | 16(8+2(x4)) | 17(7+3(x4)) | Yes/No/No/No/No |
Frame Data
| Move | Startup | Hit | Recovery | Blocked Advantage | Hit Advantage | Crouching Hit Advantage | Guard | Parry |
| Snake Fang (Short) | 6 | 2 | 14 | -5 | -3 | -3 | HL/HL | H/H |
| Snake Fang (Forward) | 6 | 2 | 15 | -6 | -4 | -4 | HL/HL/HL/HL | H/H/H/H |
| Snake Fang (Roundhouse) | 6 | 2 | 15 | -7 | -5 | -5 | HL/HL/HL/HL/HL | H/H/H/H/H |
Gauge Increase
| Move | Miss | Blocked | Hit | Parry (Gauge for opponent) |
| Snake Fang (Short) | 3 | 9(8+1) | 15(13+2) | 8(4+4) |
| Snake Fang (Forward) | 3 | 11(8+1x3) | 19(13+2x3) | 16(4+4+4+4) |
| Snake Fang (Roundhouse) | 3 | 12(8+1x4) | 21(13+2x4) | 20(4+4+4+4+4) |
Comments here
| Move | Motion | Damage | Blocked Damage | Stun Damage | Super Cancel |
| German Suplex (Short) | HCF+LK behind oponnent | 115(80+30) | 12(10+2) | 10(7+3) | Yes/No |
| German Suplex (Forward) | HCF+MK behind oponnent | 140(60+30(x3)) | 14(8+2(x3)) | 15(7+3(x3)) | Yes/No/No/No |
| German Suplex (Roundhouse) | HCF+HK behind oponnent | 160(60+30(x4)) | 16(8+2(x4)) | 17(7+3(x4)) | Yes/No/No/No/No |
Frame Data
| Move | Startup | Hit | Recovery | Blocked Advantage | Hit Advantage | Crouching Hit Advantage | Guard | Parry |
| German Suplex (Short) | 6 | 2 | 14 | -5 | -3 | -3 | HL/HL | H/H |
| German Suplex (Forward) | 6 | 2 | 15 | -6 | -4 | -4 | HL/HL/HL/HL | H/H/H/H |
| German Suplex (Roundhouse) | 6 | 2 | 15 | -7 | -5 | -5 | HL/HL/HL/HL/HL | H/H/H/H/H |
Gauge Increase
| Move | Miss | Blocked | Hit | Parry (Gauge for opponent) |
| German Suplex (Short) | 3 | 9(8+1) | 15(13+2) | 8(4+4) |
| German Suplex (Forward) | 3 | 11(8+1x3) | 19(13+2x3) | 16(4+4+4+4) |
| German Suplex (Roundhouse) | 3 | 12(8+1x4) | 21(13+2x4) | 20(4+4+4+4+4) |
Comments here
EX Moves
| Move | Motion | Gauge Needed | Damage | Blocked Damage | Stun Damage | Super Cancel |
| Tornado Hook (EX) | HCF+PP | 40 | 120(60+60) | 8(4+4) | 6(3+3) | Yes |
Frame Data
| Move | Startup | Hit | Recovery | Blocked Advantage | Hit Advantage | Crouching Hit Advantage | Guard | Parry |
| Tornado Hook (EX) | 10 | 1 | 38 | -6 | Down | Down | HL | H |
Gauge Increase
| Move | Miss | Blocked | Hit | Parry (Gauge for opponent) |
| Tornado Hook (EX) | - | - | - | 8(4+4) |
Comments here
| Move | Motion | Gauge Needed | Damage | Blocked Damage | Stun Damage | Super Cancel |
| Flying Viper (EX) | QCF+PP | 40 | 210(80+50+40+40) | 24(10+6+5+3) | 20(11+3(x3)) | Yes |
Frame Data
| Move | Startup | Hit | Recovery | Blocked Advantage | Hit Advantage | Crouching Hit Advantage | Guard | Parry |
| Flying Viper (EX) | 1 | 2/2/2/14 | 38 | -36 | Down | Down | HL | HL |
Gauge Increase
| Move | Miss | Blocked | Hit | Parry (Gauge for opponent) |
| Flying Viper (EX) | - | - | - | 16(4+4+4+4) |
Comments here
| Move | Motion | Gauge Needed | Damage | Blocked Damage | Stun Damage | Super Cancel |
| Rising Cobra (EX) | QCB+KK | 40 | 200(60+35(x4)+30) | 19(8+2(x5)) | 20(7+3(x5)) | Yes |
Frame Data
| Move | Startup | Hit | Recovery | Blocked Advantage | Hit Advantage | Crouching Hit Advantage | Guard | Parry |
| Rising Cobra (EX) | 4 | 2 | 13 | -3 | -1 | -1 | HL | H |
Gauge Increase
| Move | Miss | Blocked | Hit | Parry (Gauge for opponent) |
| Rising Cobra (EX) | - | - | - | 24(4+4+4+4+4+4) |
Comments here
Super Arts
| Super Art | Super Art Name | Super Art Stock | Motion | Damage | Blocked Damage | Stun Damage | Damage/Gauge |
| I | Magnetic Storm | 1 bar (88) | QCF QCF+P (Press P Repeatdly) | 370* | 50** | 0 | 3,57(x2) |
| * 160+30+40+40+40+20 Damage is when all hits connect. |
| ** 10+0+2+2+2+0 Damage is when all hits connect. |
Frame Data
| Startup | Hit | Recovery | Blocked Advantage | Hit Advantage | Crouching Hit Advantage | Guard | Parry |
| 2 | 4+(3+3)×5+8 | 22 | -12 | Down | Down | HLx | HLx |
Comments here
| Super Art | Super Art Name | Super Art Stock | Motion | Damage | Blocked Damage | Stun Damage | Damage/Gauge |
| II | Slam Dance | 1 bar (104) | QCF QCF+P | 470* | 21** | 15 | 4,75 |
| * 120+120+260 Damage is when all hits connect. |
| ** 7+7+7 Damage is when all hits connect. |
Frame Data
| Startup | Hit | Recovery | Blocked Advantage | Hit Advantage | Crouching Hit Advantage | Guard | Parry |
| 3 | 6 | 8 | - | Down | Down | - | - |
Comments here
| Super Art | Super Art Name | Super Art Stock | Motion | Damage | Blocked Damage | Stun Damage | Damage/Gauge |
| III | Electric Snake | 2 bars (72 each bar) | QCF QCF+K | 280* | 35** | 27 | 3,62(x3) |
| * 100+100+95 Damage is when all hits connect. |
| ** 12+12+11 Damage is when all hits connect. |
Frame Data
| Startup | Hit | Recovery | Blocked Advantage | Hit Advantage | Crouching Hit Advantage | Guard | Parry |
| 3+11+21 | 3 | 39 | -11 | Down | Down | Lx3 | Lx3 |
Comments here
Strategies
Overview
Basics
Super Art Selection
Super Art 3 is the main due to their ground projectile properties and EX moves capacity
- SA1
- 1 Short-Medium stock and Corner Super Cancel Hit Confirm
- Hard to Parry
- Can whiff with Medium and Small hitbox characters
- Use on: Twins,Ibuki,Urien and Hugo They have the larger hitboxes
- SA2
- 1 Short stock
- Bad Throw Range
- Use on: N/A
- SA3
- 2 shory-medium stocks for EX Moves,low mixups options
- Large Recovery
- Use on: All (with the possible exception of hitbox characters)
Kara-Techniques
Zoning
Mixups
Various Mixups
UOH Mixup
There's lots of ways to setup the UOH but I tend to find that Necro's UOH has a really shitty priority compared to other characters. Some people might disagree with me but it always seems that way to me, especially vs chars with good wakeup moves. But in any case, here's some nice ways to setup/use UOH off the top of my head.
Enemy In the Corner
Any cancelable move -> Lp. nado -> db. fierce -> s. lp -> UOH (confirm)-> super
Close db. fierce -> s. lp -> UOH -> super
Close db. fierce -> b. mp -> UOH -> super (Hugo, Alex, Makoto, Remy, Q, Twelve)
Neutral Throw -> (walk up)s. lp ->(walk up) UOH -> super(doesnt work on Urien)
Neutral Throw -> (walk up)s. mp ->(walkup) UOH -> super(doesnt work on Urien)
You In The Corner
Snake Fang -> db. fierce -> s. lp -> UOH -> super
Snake Fang -> lp. nado -> db. fierce -> s. lp -> UOH -> super (Dudley/Hugo) [I'm not sure who else this works on, need a confirm]
Snake Fang -> lp. nado -> db. fierce -> b. mp -> UOH -> super (Hugo)
Snake Fang -> el snake (3 hits)-> db. fierce -> b. mp ->(walk up) -> UOH -> super (Makoto only) - [It's pretty unrealistic to have two full bars vs Makoto, but its a possibility. But after the b. mp I'd probably go for the ex. flying viper whiff/1hit/2 hit mixup instead].
Can't think up any more, if anyone else can it'd be appreciated.
Whiff Mixup
I was inspired by Pino AB7's match vs RX seen here (3:28 - 3:36) to try out a whiff mixup on wakeup vs chars without shoryukens. But not any normal whiff stuff, but usage of the b. lp/ b. mp. The thing about b. lp and b. mp is that they have the same animation, except b. mp is a little slower and his arm comes out farther. But, if u spam it along with b. lp, its very hard to tell which is which. Because of that, they make a very good move to confuse the opponent as to what you'll do on wakeup. I haven't tried this on a lot of characters yet, but the setup goes roughly:
Corner throw -> lp tornado hook -> whiff mixup OR
lp tornado hook -> lp tornado hook(whiff) -> whiff mixup
Whatever you do you wanna get some kind of knockdown in the corner that puts them in the air. During their descent, you do a tornado hook to get a bit closer and then put on the whiff mixup.
So what IS this whiff mixup? Well essentially, since Necro kind of "leans" forward as he does b. lp/ b. mp it can confuse your opponent to know how close/far you really are to them. Also, if you tap the buttons individually you stay in place. But if you HOLD back as you do it, you kind of move backwards out of throw range. Finally, you use the fast spam of the b. lp to confuse your opponent as to whether you'll throw, whiff, hit high/low etc. People also dont often quick roll in the corner, so you can be safe to expect only their slowest recovery. Even if they do quick roll, you can just change the # of times you do the b + lp.
If the list says (hit) then that's the only attack that will hit in the string. I haven't solidified what works 100% vs who but you can do any of these things:
Whiff Mixup List
(b. lp)*3 -> b. mp -> throw
Walk -> (b. lp)*3 -> b. mp(hit) xx SA
Walk -> (b .lp)*2 -> b. mp -> throw
(b. lp)*2 -> b. mp -> c. lk -> throw
Walk -> (b. lp)*2 -> b. mp -> c. lk (hit) xx SA
(b. lp)*2 -> b. lk -> b. lp -> throw
Walk -> (b. lp)*2 -> b. mp -> b. lk (hit) -> s. mp xx SA
I mean you can really go on forever with this. The possibilities are endless, hence the extreme usefulness of it. Vs. chars with good wakeup moves, ie: srks, you can still spam, and then at the last moment either block, parry, dash back, or make it seem like you're in range with the b. mp and then they'll shoryuken right over your head. Then punish at will.
Rising Cobra Usage(RX Style)
Second thing I was working on was something I got inspired by from RX. I noticed that in a lot of RX's matches, that when the enemy is really low on HP after some serious asswoopin juggling. He goes just out of throw range, and does the s. RH axe kick on them, and they eat it every-single-time. So I was thinking...Necro has that same axe kick(Rising Cobra)! It's one of the most infrequently used moves by all Necro players: qcb + k. I was working around with it and I found out that you can actually vary the time at which the kick will hit the enemy, depending on which button you press, whether you cancel it or not, or your distance from your opponent.
For example, if you do the mk. axe kick from a deep canceled c. lk, it'll hit them in the head. If you move back just a little bit, it hits at the VERY end of the move, at their feet. From max range the move will always whiff. So the range and the active frames on the move are very very ambiguous and can be abused similar to Urien's s. rh. Just poke slightly out of throw range and cancel into it. People with fast reflexes might try to parry it, and get fooled by its timing(which also changes depending on the button pressed) and eat the move. Other people might not see the move coming at all and still eat it. Or, you can whiff it and confuse them, and then capitalize with c. lk xx super or something.
I know this strat is kind of poorly written, but I think its pretty useful cosidering that most people rarely use the kick, and even less people know how to see it coming. So be RX and axe kick people into their deaths lol.
Additional Notes
- Personal Action: Attack up.
Strategies
What NECRO can punish !
Now these are listed with stun as priority, sometimes you won't be going for stun so change punish. (such as instead of 'Fierce Hook, back forward, SA3' (50 damage on ryu), go 'fierce hook back forward EX hook' (53 damage on ryu and less meter wasted)). Also I'm sure there can be improvements etc so let me know if I messed up/missed anything. Also some of the descriptions are vague, as far as range, I tell you whats possible, you take it to training to learn it and find out what I mean by 'close range'. Yes I ignored Sean and SA's people don't use.
Akuma-
Sweep Reversal super, Command Throw (Snake Fang)
Jab/Strong/Fierce Shoryuken Fierce Hook, back forward, strong hook, super.
Jab/Strong/Fierce Hadouken If very close range reversal super on hit or block.
Short/Forward Tatsumaki Back forward, strong hook, super, works but not practical, can back short, strong, super chain reliably. Roundhouse tatsumaki (5 hits), nothing you can do except red parry.
Dive Kick into sweep Reversal super.
SA1 Reversal super if really close range only.
Alex-
SA2 Jump Forward, MK divekick, it goes just over him and puts you in perfect safe position to Fierce hook, back Roundhouse, strong hook, super.
Sweep Reversal Super.
Blocked Headbutt Grab Standing strong, super. Whiffs on crouch, crouching short, into whatever.
Forward/Roundhouse/EX Elbow slide Reversal Super.
EX Knee If done point blank (such as wakeup) then it will cross over, and you can fierce hook in the opposite direction, helps to walk forward a pixel or so. Fierce hook, back Roundhouse, strong hook, super.
Chun li-
SA2 Parry last hit, Fierce hook, back forward, strong hook, super.
Sweep Reversal Super.
EX Spinning Bird Kick If crouching the last hits will whiff and you can Fierce hook, back forward, strong hook, super. If you were standing then crouching short super.
Jab/Strong/EX Fireball Reversal Super. Fierce is safe, and they all look the same, except ex, so only go for the ex reversal imo.
Dudley-
SA1 Fierce hook, back forward, strong hook, super.
SA3 Reversal Super.
Fierce/EX Machine gun blow Strong hook, super.
Strong Machine gun blow Reversal Super.
Ducking upper Standing strong, super.
Ducking straight back strong, super. If you are crouching it whiffs, do whatever depending on reaction time.
Jab/Strong/EX Uppercut Fierce hook, back forward, strong hook, super.
Fierce Uppercut Back forward, strong hook, super.
Elena-
Any Shoryu Fierce hook combo.
Any Special Sweep Kick things Reversal super-able, hard to distinguish between light/medium and roundhouse though.
Down Forward Roundhouse (slide thing) Standing Strong, super.
Sweep Reversal Super.
SA2 Strong hook, super.
Hugo-
Sweep Medium to close range reversal super, at max range its completely safe.
EX clothesline Fierce hook, back roundhouse, strong hook, super.
Short/Forward/Roundhouse clothesline Back strong, super.
SA3 Fierce hook, back roundhouse, strong hook, super.
Standing Roundhouse Reversal super.
Down Roundhouse Fierce hook, back roundhouse, strong hook, super.
Forward Fierce Reversal super.
Down fierce Fierce hook, back roundhouse, strong hook, super.
Ibuki-
All Shoryus - Back forward combo
Jab/Strong/Fierce/EX Slide Tackle Back forward, strong hook, super.
EX ground kicks Reversal Super.
Forward Roundhouse Safe on block. If whiffed (whiffs if you are crouching) can crouching short, into super or hook but you have to react very fast.
Close Roundhouse Reversal Super.
Blocked Command Grab Reversal Super.
Ken-
Jab Shoryuken Back roundhouse, strong, super.
Strong/Fierce Shoryuken Fierce hook, back forward, strong hook, super.
Short/Forward/Roundhouse ground Tatsumakis Reversal super.
Jab/Strong/Fierce Hadouken If very close range reversal super on hit or block.
EX Hadouken If very close range reversal super on block.
Sweep Reversal super any range. Command Throw (Snake Fang)
SA3 Back forward, strong hook, super.
Makoto-
Sweep (down fierce) Close, back forward, strong hook, super. Far, reversal sa3.
Hayate back forward, strong hook, super.
SA1 Back forward, strong hook, super.
SA2 Reversal fierce hook, back forward, strong hook, super. If you can comfortably handle the large chip damage on the last hit, between the third and the fourth hit you can hit back forward, strong hook, super.
Necro-
Snake Fang (command throw) Reversal super.
Sweep Reversal Super, any range.
SA1 Strong hook, super.
SA3 Point blank reversal super.
Fierce Medium range Reversal super.
Oro-
Any Shoryu - can be Fierce hook combod, trick for Ex timing, dash forward then do fierce hook backwards.
Sweep Reversal super if done really close.
Command Grab Reversal Super.
Standing Roundhouse Close range, reversal super.
Q-
SA1 Reversal Fierce hook, back forward, strong hook, super. Just do back forward, strong hook, super in most situations.
SA2 - Fierce hook, back forward, strong hook, super
Overhead Dash Punches Reversal super.
EX Dash Punch Fierce hook, back forward, strong hook, super.
Sweep Dash Punches Back forward, strong hook, super.
EX Dash Sweep Fierce hook, back forward, strong hook, super.
Back Roundhouse Reversal Super.
Down Roundhouse Reversal super.
Standing Fierce Reversal super, make sure to know the difference between standing and back fierce visually.
Remy-
SA2 Odd crossover so just back forward combo.
EX/Roundhouse Flash Kicks Fierce hook combo.
Short/Forward Flash Kicks Back forward combo.
Sweep Reversal Super.
Standing Roundhouse Medium to close range reversal super.
Ryu-
Jab/Strong/Fierce/EX Shoryuken Fierce hook, back forward, strong hook, super.
Tatsumakis Short and Roundhouse versions can be punished with back forward, strong hook, super. But the forward tatsumaki pushes back too far for that, so reversal super is best.
Jab/Strong/Fierce Hadouken If very close range reversal super on hit or block.
Sweep Reversal super any range. Command Throw (Snake Fang)
Short/Forward/Roundhouse/EX Sidekicks - can all be reversal supered, and if very close range back forward, strong hook, super.
SA1 Reversal super only very close range.
SA2 Fierce hook, back forward, strong hook, super.
SA3 In that rare situation where denjin hit, very close range, but you werent stunnedstanding strong super.
Twelve-
SA1 Reversal super.
Standing Roundhouse Reversal super up to Almost max range.
Sweep Reversal Super.
Crouching Fierce Reversal Super.
Strong/Fierce Arm Whips (3 and 5 hits) Reversal Super.
Urien-
Crouching Fierce If blocked high, standing strong, super. If blocked low (last hit whiffs, less knock back) back strong, super. If urien was as close as possible and you blocked it low then back forward, strong hook, super.
Short tackle Reversal super.
Forward/Roundhouse tackle Standing strong, super.
EX tackle Back forward, strong hook, super.
Short/Forward/Roundhouse/EX Kneedrop if hit above the knees, stranding strong, super.
Sweep Reversal super.
Taunt Reversal super. (block taunt low)
Standing Roundhouse Reversal super.
Yang-
Sweep Reversal super. Not easy.
Standing Roundhouse Medium to close range reversal super.
Any slashes going to last hit Back strong, super.
SA2 Walk forward a bit, then backwards fierce hook, back forward, strong hook, super.
Any roll Back forward, strong hook, super.
Yun-
Dash Punches Back forward, strong hook, super.
Fierce shoulder Reversal super.
Forward Fierce Reversal super.
Close Sweep Reversal super.
Standing Roundhouse (including sweep chain combo) Reversal super.
Characters that can duck standing strong !
This is one of necro's best tools, but it will also get you killed if not used right, whiffing it over people's heads is easily punished by good players.
Miss everytime - Yun, Yang, Oro, Ibuki, Chun li, Elena, Twelve
Random chance from breathing Ryu, Remy, Sean, Ken
Always hits Akuma, Urien, Q, Dudley, Hugo, Alex
How OTHER characters punish Necro !
Some of these are useless, at least in my opinion, such as punishing Jab electricity with Makoto's strong hayate - it requires reversal timing, you can't drum it, and it's an easy 70%+ stun punish if messed up, but I tell you all thats possible. Also, though strong hook IS punishable, it looks the exact same as jab hook, so be careful and make sure you know its a strong hook before you try to punish them.
Akuma-
Snake Fang (command throw) max range is safe, close range reversal SA1.
Sweep Really close range only, reversal SA1
Jab Electricity Reversal SA1, if any other strength, crouching forward into whatever.
Strong hook Reversal SA1
Fierce Hook Standing Fierce (close) into whatever. Raging Demon.
Standing Roundhouse Really close, on block, reversal SA1
Standing Fierce Close on block or hit Reversal SA1
SA3 Really close range, Reversal SA1
SA1- Crouching forward into whatever. Raging Demon.
Alex-
Snake Fang (command throw) Reversal EX Elbow Slide.
Sweep Reversal EX elbow slide.
Jab Electricity- Ex Elbow slide or Flash Chop, SA2 will reversal but throw will whiff.
Strong Hook Reversal SA2/ EX flash chop.
Fierce Hook Close forward, SA2. Fierce Powerbomb.
Standing Fierce Reversal EX elbow slide.
SA1 Close forward, SA2.
SA3 EX flash chop/EX elbow slide.
Chun Li-
Snake Fang (command throw) Reversal SA2
Jab electricity Reversal SA2, any other electicity cr.forward SA2.
Strong hook Reversal SA2
Fierce hook Back fierce, SA2
Standing Roundhouse Reversal SA2 on hit or block, any range.
Standing Fierce Reversal SA2 on hit or block, max range SA2 wont reach.
Sweep Reversal SA2
SA3 Reversal SA2
SA1 Back Fierce, super.
Dudley-
Snake Fang (command throw) Reversal EX MGB, or Reversal command dash SA1/SA3.
Sweep Medium to close range Reversal command dash super.
Jab electricity Reversal SA3, if not reversal the first hit will whiff (the most damage) but will still punish. SA1 doesnt punish.
Strong hook Reversal SA1/SA3.
Fierce Hook Standing Roundhouse into whatever.
Standing Roundhouse If it was throw range you can reversal SA3 but the first hit whiffs.
Standing Fierce Command dash Super, as long as you are in range.
Elena-
Snake Fang (command throw) Reversal SA2.
Sweep Close reversal SA2.
Jab Electricity Reversal SA1/SA2.
Strong Hook Reversal SA1/SA2.
Fierce Hook Crouching Strong into whatever.
Standing Roundhouse Close Range Reversal SA2.
Standing Fierce Close Range Reversal SA2.
SA1 Crouching strong into whatever.
SA3 If close Reversal SA1/SA2.
Hugo-
Jab Electricity Reversal SA3, Reversal EX clothesline.
Sweep If done in throw range Reversal SA3.
Strong Hook Reversal SA1/SA3, Moonsault press.
Fierce Hook SA1, SA3.
Standing Fierce If done in throw range reversal SA3/EX clothesline.
SA1 Reversal SA1/SA3.
SA3 If done close, Reversal SA3/Ex clothesline.
Ibuki-
Snake Fang (command throw) Reversal SA3 or close range EX slide.
Sweep Reversal SA3 if in range.
Jab Electricity Reversal SA3 or EX kicks.
Strong Hook Reversal SA3.
Fierce Hook Standing forward into whatever.
Standing Roundhouse Reversal SA3 if in range.
Standing Fierce Reversal SA3 if in range.
SA1 Standing forward into whatever.
SA3 Reversal SA3 or EX kicks.if in range.
Ken
SA3 Reversal Shippu if in range.
SA1 Crouching Forward, Shippu.
Electricity Reversal Shippu. If strength was more than jab, can down forward shippu.
Snake Fang (command grab) Reversal shippu if in range.
Back Fierce Reversal Shippu. (wtf)
Sweep Reversal Shippu if in range.
Strong Hook Reversal Shippu.
Fierce Tornado Hook Crouching forward, strong shoryu, super.
Standing Fierce Reversal Shippu on hit or block if in range.
Standing Roundhouse Reversal Shippu on hit or block if in range.
Makoto-
Snake Fang (command throw) Dash in throw (not karakusa) or Fierce Hayate.
Sweep Fierce Hayate.
Jab Electricity Reversal Strong Hayate. Reversal SA1.
Strong Hook Reversal SA1.
Fierce Hook Standing Fierce into whatever.
Standing Fierce Reversal Fierce Hayate if close.
SA1 Crouching Strong/Karakusa into whatever.
SA3 Reversal SA1 if really close range.
Necro-
Snake Fang (command throw) Reversal super.
Sweep Reversal Super, any range.
SA1 Strong hook, super.
SA3 Point blank reversal super.
Fierce Medium range Reversal super.
Oro-
Snake Fang (command throw) If done at closest range EX shoryu will land two hits.
Jab Electricity Reversal Ex shoryu for two hits.
Fierce Hook Close strong into ggpo.
SA1 Close strong or standing forward.
SA3 If done close, Reversal EX shoryu will land all 4 hits.
Q-
Snake Fang (command throw) Reversal SA1 if in range of first hit. Reversal EX dash punch.
Sweep Reversal SA1 if in range of first hit.
Jab Electricity Reversal SA1/SA2. Reversal Strong or EX claws.
Strong Hook Reversal SA2.
Fierce Hook Close Standing Forward into whatever. Roundhouse C&DB.
Standing Roundhouse At throw range Reversal SA1.
Standing Fierce Reversal SA1 if in range of first hit.
SA1 Reversal SA1/SA2
SA3 Reversal SA1 if in range of first hit, Reversal SA2 if done at throw range.
Remy-
Snake Fang (command throw) Close range Reversal EX kick LoVs.
Jab Electricity Reversal SA1/SA2 EX LoV kicks or EX upkicks (one hit).
Strong Hook Reversal SA1/SA2.
Fierce Hook Crouching strong/Down fierce into whatever.
Standing Fierce Medium Range Reversal SA1/EX kick LoVs.
SA1 Crouching strong into whatever.
SA3 - Medium Range Reversal SA1/EX kick LoVs. Reversal SA2 if in range.
Ryu-
Snake Fang (command throw) Reversal SA1.
Sweep at throw range can reversal SA1.
Jab Electricity Reversal EX Hadouken, SA1.
Strong Hook Reversal SA2.
Fierce Hook Fierce into whatever.
Standing Roundhouse Close range Reversal SA1.
Standing Fierce Close range hit or block Reversal SA1.
SA1 Crouching Forward, Tatsu/SA1/. Reversal SA2.
SA3 Close Range Reversal SA1.
Twelve-
Snake Fang (command throw) If done at the closest range possible to not miss, Reversal SA1.
Sweep If done at throw range Reversal SA1.
Fierce Hook Reversal SA1.
Standing Fierce Throw Range, Reversal SA1.
SA1 Reversal SA1.
SA3 Reversal SA1 if close range.
Urien-
Snake Fang (command throw) Reversal EX tackle.
Sweep Reversal EX Tackle.
Jab Electricity Reversal EX tackle.
Strong Hook Reversal EX aegis (lol.)
Fierce Hook Down fierce into ggpo.
Standing Fierce if medium range Reversal EX tackle.
SA1 One hit of crouching fierce into EX headbutt or standing strong into whatever.
SA3 If close range Reversal EX or short tackle.
Yang-
Snake Fang (command throw) Reversal SA2 or EX slashes (first hit whiffs at max range but the next 4 connect).
Sweep Close Range reversal SA2 or EX slashes.
Jab Electricity Reversal SA2 or EX slashes.
Strong Hook Reversal SA2.
Fierce Hook Crouching forward into whatever.
Standing Fierce Close Range Reversal SA2/EX slashes.
SA1 Crouching forward into whatever.
SA3 Close Range Reversal SA2/EX slashes.
Yun-
Snake Fang (command throw) Reversal EX shoulder.
Sweep Jab dash punch if in range or EX shoulder.
Jab Electricity Jab dash punch.
Fierce Hook close forward into GJ.
Standing Roundhouse/Fierce Reversal jab dash punch if in range.
SA1 Jab dash punch or EX shoulder.
SA3 Reversal EX shoulder or jab dash punch if in range.
In other words necro's only safe super hit confirm is back strong, and back short-strong (back short is parryable high and low), no low and no overheads, save really well spaced uoh, for most matchups


