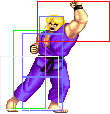
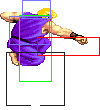
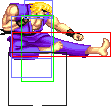
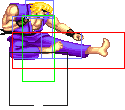
|
|
| Line 297: |
Line 297: |
| {| border="1em" cellspacing="0" style="border: 1px solid #999;" | | {| border="1em" cellspacing="0" style="border: 1px solid #999;" |
| |- valign="bottom" | | |- valign="bottom" |
| | align="center" | [[File:Sf2hf-ken-crlp-r3.png]] || align="center" | [[File:Sf2hf-ken-crhp-s1.png]] || align="center" | [[File:Sf2hf-ken-crhp-s2.png]] || align="center" | [[File:Sf2hf-ken-crhp-a.png]] || align="center" | [[File:Sf2hf-ken-crhp-s2.png]] || align="center" | [[File:Sf2hf-ken-crhp-s1.png]] || align="center" | [[File:Sf2hf-ken-crlp-r3.png]] | | | align="center" | [[File:Sf2hf-ken-crlp-r3.png]] || align="center" | [[File:Sf2hf-ken-crhp-s1.png]] || align="center" | [[File:Sf2hf-ken-crhp-s2.png]] || align="center" | [[File:Sf2hf-ken-crhp-a1.png]] || align="center" | [[File:Sf2hf-ken-crhp-a2.png]] || align="center" | [[File:Sf2hf-ken-crhp-s2.png]] || align="center" | [[File:Sf2hf-ken-crhp-s1.png]] || align="center" | [[File:Sf2hf-ken-crlp-r3.png]] |
| |- | | |- |
| | align="center" | 1 || align="center" | 3 || align="center" | 4 || align="center" bgcolor="blue" | 6 || align="center" | 10 || align="center" | 7 || align="center" | 1 | | | align="center" | 1 || align="center" | 3 || align="center" | 4 || align="center" bgcolor="blue" | 6 || align="center" | 10 || align="center" | 7 || align="center" | 1 |
Ken
Shoryuken! A millionaire (by birthright, not effort) playboy with bleached hair (but not eyebrows - representing his 3/4ths Japanese heritage), Ken gets the Money, the Glory, and the Girl. He trained with his rival and friend, Ryu, in a Japanese Dojo under the tutelage of Gouken, a very powerful martial artist who famously went on to simply wake up from being dead. Ken favours a flashy, gung-ho fighting style over the more stoic and traditional Ryu.
In a nutshell
While certainly an overall poorer character than Ryu in SF2HF, Ken is not far behind. In some matchups his slower fireballs and wider arcing Dragon Punch can actually be helpful, and his very doable 'Touch of Death' combos mean one solid hit can always spell an opponent's doom.
Character Specific Information
Damage Scaling Factor:
25/32
Color Options
| Default |
Start
|
 |

|
Moves List
Normal Moves
- Standing Normal Moves (st.)
Standing Light Punch
{{#motion: lp }}
14
-
4
40
6
3
11*
+0/+1
{{#motion: }}
Standing Medium Punch
{{#motion: mp }}
18
8
60
7
2
7*
+10/+11
{{#motion: }}
Standing Hard Punch
{{#motion: hp }}
22
14
80
7
10
18*
-5/-4
{{#motion: }}
Standing Light Kick
{{#motion: lk }}
14
-
4
40
8
4
7*
+3/+4
{{#motion: }}
Standing Medium Kick
{{#motion: mk }}
18
8
60
8
4
7*
+1/+2
{{#motion: }}
Standing Hard Kick
{{#motion: hk }}
22
14
80
8
11
21*
-9/-8
{{#motion: }}
- Close Standing Normal Moves (cl.)
Close Light Punch
{{#motion: (near opponent) lp }}
16
-
4
40
6
2
9*
+3/+4
{{#motion: }}
Close Medium Punch
{{#motion: (near opponent) mp }}
16
8
60
4
4
3*
+12/+13
{{#motion: specialcancel }}
Close Hard Punch
{{#motion: (near opponent) hp }}
16
8
60
4
4
3*
+12/+13
{{#motion: specialcancel }}
Close Light Kick
{{#motion: (near opponent) lk }}
16
-
4
40
15
4
13*
-3/-2
{{#motion: }}
Close Medium Kick
{{#motion: (near opponent) mk }}
20,20
8,8
60,60
13
6
13*
+8/+9
{{#motion: }}
Close Hard Kick
{{#motion: (near opponent) hk }}
16
8
60
4
4
3*
+12/+13
{{#motion: specialcancel }}
- Crouching Normal Moves (cr.)
Crouching Light Punch
{{#motion: d + lp }}
14
-
4
40
10
3
7*
+4/+5
{{#motion: low }}
Crouching Medium Punch
{{#motion: d + mp }}
18
8
60
8
3
17*
-1/+0
{{#motion: }}
Crouching Hard Punch
{{#motion: d + hp }}
22
14
80
9
6
18*
-1/+0
{{#motion: }}
Crouching Light Kick
{{#motion: d + lk }}
14
-
4
40
6
4
7*
+3/+4
{{#motion: low }}
Crouching Medium Kick
{{#motion: d + mk }}
18
8
60
6
4
7*
+8/+9
{{#motion: low }}
Crouching Hard Kick
{{#motion: d + hk }}
22
8
130
9
4
18*
+1/+2
{{#motion: low knockdown }}
- Jumping Normal Moves (nj.)
Neutral Jump Light Punch
{{#motion: u + lp }}
16
4
40
6
20
∞
-
{{#motion: high }}
Neutral Jump Medium Punch
{{#motion: u + mp }}
20
8
50
6
12
∞
-
{{#motion: high }}
Neutral Jump Hard Punch
{{#motion: u + hp }}
24
14
60
1*
3*
∞
-
{{#motion: high }}
Neutral Jump Light Kick
{{#motion: u + lk }}
16
4
40
6
20
∞
-
{{#motion: high }}
Neutral Jump Medium Kick
{{#motion: u + mk }}
20
8
50
6
12
∞
-
{{#motion: high }}
Neutral Jump Hard Kick
{{#motion: u + hk }}
24
14
60
6
6
∞
-
{{#motion: high }}
- Diagonal Jumping Normal Moves (j.)
Diagonal Jump Light Punch
{{#motion: ub / uf + lp }}
16
4
40
6
20
∞
-
{{#motion: high }}
Diagonal Jump Medium Punch
{{#motion: ub / uf + mp }}
20
8
50
6
12
∞
-
{{#motion: high }}
Diagonal Jump Hard Punch
{{#motion: ub / uf + hp }}
22
14
60
6
6
∞
-
{{#motion: high }}
Diagonal Jump Light Kick
{{#motion: ub / uf + lk }}
14
4
40
6
20
∞
-
{{#motion: high }}
Diagonal Jump Medium Kick
{{#motion: ub / uf + mk }}
18
8
50
6
12
∞
-
{{#motion: high }}
Diagonal Jump Hard Kick
{{#motion: ub / uf + hk }}
22
14
60
6
6
∞
-
{{#motion: high }}
Unique Moves
Throws
Seoi Nage
{{#motion: b / f + mp or hp }}
30
-
10
99
-
-
-
-
{{#motion: throw }}
Tsukami Nage
{{#motion: b / f + mk or hk }}
22 + (4*n)
-
14
80
-
-
-
-
{{#motion:

}}
Special Moves
Hadoken
{{#motion: qcf + lp }}
?
?
?
?
14
?
37
?
{{#motion: }}
Hadoken
{{#motion: qcf + mp }}
?
?
?
?
14
?
37
?
{{#motion: }}
Hadoken
{{#motion: qcf + hp }}
?
?
?
?
14
?
37
?
{{#motion: }}
Shoryuken
{{#motion: dp + lp }}
?
?
?
?
1
18
17/20/27 + 6
?
{{#motion: }}
Shoryuken
{{#motion: dp + mp }}
?
?
?
?
1
26
17/20/27 + 6
?
{{#motion: }}
Shoryuken
{{#motion: dp + hp }}
?
?
?
?
1
30
17/20/27 + 6
?
{{#motion: }}
Tatsumaki Senpu Kyaku
{{#motion: qcb + lk }}
?
?
?
?
11
1,2,2,(2),1,2,2,(2),1,2
14 + 6
?
{{#motion: }}
Tatsumaki Senpu Kyaku
{{#motion: qcb + mk }}
?
?
?
?
11
1,2,2,(2),1,2,2,(2),1,2,2,(2),1,2
14 + 6
?
{{#motion: }}
Tatsumaki Senpu Kyaku
{{#motion: qcb + hk }}
?
?
?
?
11
1,2,2,(2),1,2,2,(2),1,2,2,(2),1,2,2,(2),1,2
14 + 6
?
{{#motion: }}
Air Tatsumaki Senpu Kyaku
{{#motion: qcb + lk }}
?
?
?
?
3
?
13/14/15 + 6
?
{{#motion: Aironly }}
Air Tatsumaki Senpu Kyaku
{{#motion: qcb + mk }}
?
?
?
?
3
?
13/14/15 + 6
?
{{#motion: Aironly }}
Air Tatsumaki Senpu Kyaku
{{#motion: qcb + hk }}
?
?
?
?
3
?
13/14/15 + 6
?
{{#motion: Aironly }}
Hitboxes
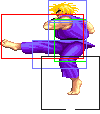
Standing Normals
Close Standing Normals
Crouching Normals
Aerial Normals
- Neutral/Diagonal Jumping LP:
Unique Moves
- Rock Crush a.k.a. Headbutt: (On ground and close, ←/→ + MP)
Throws
- Wild Fang a.k.a. Bite: (←/→ + HP)
| Damage |
20+(4*n) |

|
| Duration |
130
|
| Stun |
5~11
|
| Stun Timer |
60
|
| Range (from axis) |
64
|
| Range advantage |
35
|
Special Moves
Startup:
Active:
LP version:
MP version:
HP version:
Startup:
- Tatsumaki Senpuu Kyaku: ↓↙← + Kick
Startup:
Active:
Recovery:
Misc Animations
The Basics
Advanced Strategy
Combos
Bread And Butter
- j.HK, s.HP xx DP+HP (Touch of Death)
Match-ups
Same as Ryu's strategy versus E. Honda: from about halfscreen away, throw slow fireballs, and sweep with cr.HK to hit with the very tip of the toe as Honda lands. You should be a little more careful chucking fireballs than with Ryu however, since Ken's fireball has more recovery time than Ryu's.


