Introduction
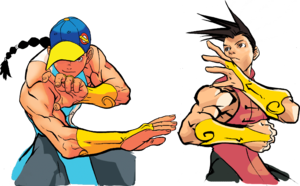
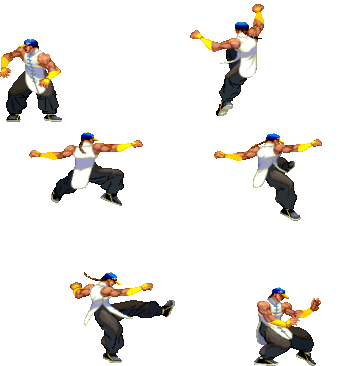
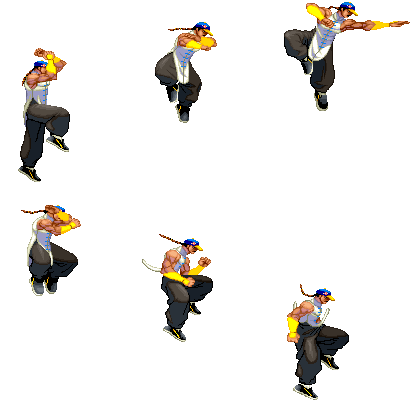
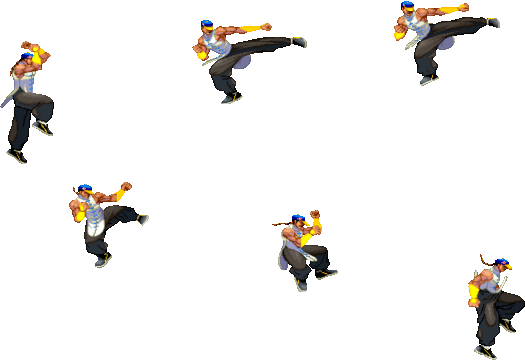
Yun is a skilled martial artist of Chinese Kung Fu. Hailing from Hong Kong, he's an upbeat skateboarder and the older twin brother of Yang. Compared to his cocky younger brother, Yun is much more playful and easygoing.
With the best super in the game under his belt, Yun is a force to be reckoned with. He also touts some potent mobility tools in a fast superjump, variable divekicks, fast walkspeed. His offense is quite strong, giving him access to solid mixup game of variable timings to throw off parries and a command grab that allows conversions afterwards. His conversion capabilities are notable too, getting good damage even from light attacks. Even without Genei Jin activate, he still has some powerful tools but with it his abilities skyrocket and he can take control of the game in a flash.
Super Arts
SA1: Tenshin Senkyuutai
1f startup, invincible, 2 medium bar super. It deals 315 (around 25%) damage, and has Yang rolling the ground, only starting the attack once an opponent is within nearly point blank range. The super itself is pretty decent - easily combos, can be used as a reversal, allows for an optional free side switch, automatic oki, etc. Generally the super of choice.
SA2: Sourai Rengeki
Sourai Rengeki would likely be Yun's first choice if Genei Jin wasn't so dominant. it has great range meaning you can combo consistently and use to punish whiffs from midscreen, good corner carry and allows for oki afterwards. it's only real weakness is that it deals small damage compared to other supers.
SA3: Genei Jin
SA3 is your choice if you want to play Yun optimally. Touted as the most powerful super in 3rd Strike (and even beyond), Yun becomes an oppressive powerhouse of immeasurable potential when Genei Jin is active. It fills very quickly(allowing Yun to build meter from the enders of long Genei Jin combos so he can already have almost half a bar by the time his opponent can act again), allows for versitile and strong combos with great corner carry and positioning afterwards, can be easily confirmed into, lasts for quite a bit, speeds up all of Yun's moves and give his normals Super properties (higher priority to the point of being able to trade/beat Supers).
| Strengths | Weaknesses |
|---|---|
|
|
| Yun & Yang | |
|---|---|
| Vitals | |
| Life Points | 1080 |
| Stun Points | 64 |
| Super Art Stock/Size | |
| SA1 | 1/120 |
| SA2 | 3/88 |
| SA3 | 1/72 |
| Ground Movement | |
| Forward Dash duration/distance | 23 (27) (144px) |
| Back Dash duration/distance | 29 (31) (202px) |
| Jumping | |
| Back Jump duration | 39(4+33+2) |
| Neutral Jump duration | 39(4+33+2) |
| Forward Jump duration | 39(4+33+2) |
| Back Super Jump duration | 48(5+41+2) |
| Neutral Super Jump duration | 43(5+36+2) |
| Forward Super Jump duration | 43(5+36+2) |
| Wake up | |
| Wake up duration | 60 |
| Quick rise duration | 41 |
| New Generation Frame Data Glossary | |
|---|---|
| Active |
How many frames a move remains active (can hurt opponents) for. Consecutive sets of active frames on a multi-hit move are separated by an asterisk (ex: 3*5). If there is a gap between sets of active frames, the gap is denoted by a number in parentheses (ex: 2(4)2) |
| Attack |
Attack level is L for low attacks (must be blocked crouching), H is for High attacks (which can be blocked high or low) and M for overhead (must be blocked standing). T is for throw attacks (which cannot be blocked). |
| Cancel options |
Available cancel options.
|
| Damage |
Attack damage on hit in life points. Notation may denote multi-hit or "sweet spot" damage values on certain frames. |
| Hit/Block |
These are frame advantage values when the attack hits or is blocked. If the number is positive, then the move will end before the defender can act again. If the number is negative, the defender will be able to act before the attacker and maybe even punish. D refers to knockdown on hit. "Cr. Hit" is an additional frame advantage value denoting if the advantage on hit changes when the defender is being hit while crouching. |
| Kara Range |
Almost all normal attacks can be canceled into a special or a multi-button command within three frames of startup. During that time, some attacks will shift position forward or backward and affect the reach of the special or command accordingly. This is denoted in pixels of range. There are a handful of moves in the game that can be kara-canceled after this initial window and will be denoted as a late kara-cancel. |
| Link |
A combo that is performed by inputting the second move after the first move has completely recovered (as opposed to cancelling the first move's animation). In 3S, the final frame of a move's hitstun allows a character to block a normal or special move, as well as some projectile supers. Therefore, an attack's frame advantage must be 2 frames greater than the followup move's startup in order to link. |
| Parry |
This field will show a value of A if the attack can be parried standing or crouching, H if it must be parried standing or L if it must be parried crouching. |
| Recovery |
How many frames it takes for a move to finish after it's been active. |
| Startup |
How many frames it takes before the move becomes 'active' or has a hitbox. 3S uses classic startup notation, which does not include the first active frame. A move with 3 startup becomes active on frame 4. |
| Stun |
Amount of stun added to the opponent's stun bar on hit. |
| Throw range |
Range in pixels from the center of the character to the center of the opponent which allows a grab to connect. |
Frame Data
Standing Normals
5LP (far)
| Startup | Active | Recovery | Hit | Cr. Hit | ||
|---|---|---|---|---|---|---|
| 3 | 2 | 6 | 4 | 4 | ||
| Damage | Stun | Attack | Parry | Block | ||
| 3 | 3 | H | A | 4 | ||
| ||||||
5MP (cl)
| Startup | Active | Recovery | Hit | Cr. Hit | ||
|---|---|---|---|---|---|---|
| 4 | 3 | 7 | 7 | 8 | ||
| Damage | Stun | Attack | Parry | Block | ||
| 10 | 5 | - | H | 6 | ||
| ||||||
5MP (far)
| Startup | Active | Recovery | Hit | Cr. Hit | ||
|---|---|---|---|---|---|---|
| 5 | 4 | 12 | -2 | -1 | ||
| Damage | Stun | Attack | Parry | Block | ||
| 8 | 5 | - | H | -3 | ||
| ||||||
5HP (cl)
| Startup | Active | Recovery | Hit | Cr. Hit | ||
|---|---|---|---|---|---|---|
| 6 | 6 | 13 | -1 | - | ||
| Damage | Stun | Attack | Parry | Block | ||
| 16 | 13 | - | H | -2 | ||
| ||||||
5HP (far)
| Startup | Active | Recovery | Hit | Cr. Hit | ||
|---|---|---|---|---|---|---|
| 9 | 2 | 23 | -3 | -1 | ||
| Damage | Stun | Attack | Parry | Block | ||
| 23 | 15 | - | H | -5 | ||
| ||||||
5LK
| Startup | Active | Recovery | Hit | Cr. Hit | ||
|---|---|---|---|---|---|---|
| 3 | 3 | 6 | 2 | 2 | ||
| Damage | Stun | Attack | Parry | Block | ||
| 6 | 3 | - | A | 2 | ||
| ||||||
5MK (cl)
| Startup | Active | Recovery | Hit | Cr. Hit | ||
|---|---|---|---|---|---|---|
| 7 | 4 | 15 | D | D | ||
| Damage | Stun | Attack | Parry | Block | ||
| 14 | 9 | - | H | -2 | ||
| ||||||
5HK
| Startup | Active | Recovery | Hit | Cr. Hit | ||
|---|---|---|---|---|---|---|
| 14 | 4 | 22 | D | D | ||
| Damage | Stun | Attack | Parry | Block | ||
| 17 | 11 | - | H | -5 | ||
| ||||||
Command Normals
6MK
| Startup | Active | Recovery | Hit | Cr. Hit | ||
|---|---|---|---|---|---|---|
| 19 | 6 | 8 | - | 1 | ||
| Damage | Stun | Attack | Parry | Block | ||
| 14 | 11 | - | H | -1 | ||
| ||||||
Crouching Normals
2LP
| Startup | Active | Recovery | Hit | Cr. Hit | ||
|---|---|---|---|---|---|---|
| 3 | 2 | 6 | 4 | 4 | ||
| Damage | Stun | Attack | Parry | Block | ||
| 3 | 3 | H | A | 4 | ||
| ||||||
2MP
| Startup | Active | Recovery | Hit | Cr. Hit | ||
|---|---|---|---|---|---|---|
| 4 | 5 | 6 | 6 | 7 | ||
| Damage | Stun | Attack | Parry | Block | ||
| 12 | 5 | - | A | 5 | ||
| ||||||
2HP
| Startup | Active | Recovery | Hit | Cr. Hit | ||
|---|---|---|---|---|---|---|
| 5 | 4 | 15 | 3 | 5 | ||
| Damage | Stun | Attack | Parry | Block | ||
| 17 | 7 | - | A | 1 | ||
| ||||||
2LK
| Startup | Active | Recovery | Hit | Cr. Hit | ||
|---|---|---|---|---|---|---|
| 4 | 1 | 8 | 2 | 2 | ||
| Damage | Stun | Attack | Parry | Block | ||
| 5 | 3 | - | L | 2 | ||
| ||||||
2MK
| Startup | Active | Recovery | Hit | Cr. Hit | ||
|---|---|---|---|---|---|---|
| 6 | 3 | 12 | - | 1 | ||
| Damage | Stun | Attack | Parry | Block | ||
| 8 | 3 | - | L | -1 | ||
| ||||||
2HK
| Startup | Active | Recovery | Hit | Cr. Hit | ||
|---|---|---|---|---|---|---|
| 10 | 3 | 20 | D | D | ||
| Damage | Stun | Attack | Parry | Block | ||
| 16 | 3 | L | L | -7 | ||
| ||||||
Jumping Normals
j.LP
| Startup | Active | Recovery | Hit | Cr. Hit |
|---|---|---|---|---|
| 2 | - | - | - | - |
| Damage | Stun | Attack | Parry | Block |
| 7 | 7 | - | H | - |
j.MP
| Startup | Active | Recovery | Hit | Cr. Hit | ||
|---|---|---|---|---|---|---|
| 3 | 6 | - | - | - | ||
| Damage | Stun | Attack | Parry | Block | ||
| 14 | 9 | - | H | - | ||
| ||||||
8HP
| Startup | Active | Recovery | Hit | Cr. Hit | ||
|---|---|---|---|---|---|---|
| 8 | 5 | - | - | - | ||
| Damage | Stun | Attack | Parry | Block | ||
| 21 | 15 | - | H | - | ||
| ||||||
j.HP
| Startup | Active | Recovery | Hit | Cr. Hit | ||
|---|---|---|---|---|---|---|
| 5 | 4 | - | - | - | ||
| Damage | Stun | Attack | Parry | Block | ||
| 17 | 13 | - | H | - | ||
| ||||||
j.LK
| Startup | Active | Recovery | Hit | Cr. Hit |
|---|---|---|---|---|
| 4 | 12 | - | - | - |
| Damage | Stun | Attack | Parry | Block |
| 7 | 5 | - | H | - |
j.MK
| Startup | Active | Recovery | Hit | Cr. Hit | ||
|---|---|---|---|---|---|---|
| 6 | 7 | - | - | - | ||
| Damage | Stun | Attack | Parry | Block | ||
| 12 | 9 | - | H | - | ||
| ||||||
j.HK
| Startup | Active | Recovery | Hit | Cr. Hit | ||
|---|---|---|---|---|---|---|
| 5 | 5 | - | - | - | ||
| Damage | Stun | Attack | Parry | Block | ||
| 19 | 13 | - | H | - | ||
| ||||||
3LK
| LK | Startup | Active | Recovery | Hit | Cr. Hit | ||
|---|---|---|---|---|---|---|---|
| 6 | - | - | - | - | |||
| Damage | Stun | Attack | Parry | Block | |||
| 12 | 7 | - | H | - | |||
| |||||||
| MK | Startup | Active | Recovery | Hit | Cr. Hit | ||
| 8 | - | - | - | - | |||
| Damage | Stun | Attack | Parry | Block | |||
| 12 | 7 | - | H | - | |||
| |||||||
| HK | Startup | Active | Recovery | Hit | Cr. Hit | ||
| 6 | - | - | - | - | |||
| Damage | Stun | Attack | Parry | Block | |||
| 12 | 7 | - | H | - | |||
| |||||||
Throws
LPLK
| Startup | Active | Recovery | Hit | Cr. Hit | ||
|---|---|---|---|---|---|---|
| 2 | 1 | 21 | D | D | ||
| Damage | Stun | Attack | Parry | Block | ||
| 27 | 17 | - | - | - | ||
| ||||||
4/6LPK
| Startup | Active | Recovery | Hit | Cr. Hit | ||
|---|---|---|---|---|---|---|
| 2 | 1 | 21 | D | D | ||
| Damage | Stun | Attack | Parry | Block | ||
| 21 | 8 | - | - | - | ||
| ||||||
Universal Overhead
MPMK
| Startup | Active | Recovery | Hit | Cr. Hit |
|---|---|---|---|---|
| 15 | 9 | 6 | - | - |
| Damage | Stun | Attack | Parry | Block |
| 7 | 3 | - | H | - |
Special Moves
623P
| LP | Startup | Active | Recovery | Hit | Cr. Hit | ||
|---|---|---|---|---|---|---|---|
| 14 | 6 | 13 | - | - | |||
| Damage | Stun | Attack | Parry | Block | |||
| 19 | 9 | - | A | -1 | |||
| |||||||
| MP | Startup | Active | Recovery | Hit | Cr. Hit | ||
| 18 | 6 | 15 | - | - | |||
| Damage | Stun | Attack | Parry | Block | |||
| 22 | 9 | - | A | -3 | |||
| |||||||
| HP | Startup | Active | Recovery | Hit | Cr. Hit | ||
| 22 | 6 | 17 | - | - | |||
| Damage | Stun | Attack | Parry | Block | |||
| 24 | 9 | - | A | -5 | |||
| |||||||
236P
| LP | Startup | Active | Recovery | Hit | Cr. Hit | ||
|---|---|---|---|---|---|---|---|
| 7 | 5 | 22 | - | - | |||
| Damage | Stun | Attack | Parry | Block | |||
| 17 | 9 | - | A | -11~-7 | |||
| |||||||
| MP | Startup | Active | Recovery | Hit | Cr. Hit | ||
| 10 | 11 | 16 | - | - | |||
| Damage | Stun | Attack | Parry | Block | |||
| 19 | 9 | - | A | -11~-1 | |||
| |||||||
| HP | Startup | Active | Recovery | Hit | Cr. Hit | ||
| 13 | 15 | 12 | - | - | |||
| Damage | Stun | Attack | Parry | Block | |||
| 21 | 9 | - | A | -11~+3 | |||
| |||||||
236K
| LK | Startup | Active | Recovery | Hit | Cr. Hit | ||
|---|---|---|---|---|---|---|---|
| 8 | 8 | 34 | D | D | |||
| Damage | Stun | Attack | Parry | Block | |||
| 22 | 11 | H | A | -35 | |||
| |||||||
| MK | Startup | Active | Recovery | Hit | Cr. Hit | ||
| 16 | 8 | 28 | D | D | |||
| Damage | Stun | Attack | Parry | Block | |||
| 24 | 19 | H | A | -29 | |||
| |||||||
| HK | Startup | Active | Recovery | Hit | Cr. Hit | ||
| 29 | 8 | 25 | D | D | |||
| Damage | Stun | Attack | Parry | Block | |||
| 25 | 15 | H | A | -26 | |||
| |||||||
214P
| Startup | Active | Recovery | Hit | Cr. Hit | ||
|---|---|---|---|---|---|---|
| 24 | 10 | 4 | - | - | ||
| Damage | Stun | Attack | Parry | Block | ||
| 32 | 23 | - | A | 0 | ||
| ||||||
214PP
| Startup | Active | Recovery | Hit | Cr. Hit |
|---|---|---|---|---|
| - | - | - | - | - |
| Damage | Stun | Attack | Parry | Block |
| - | - | - | - | - |
63214K
| Startup | Active | Recovery | Hit | Cr. Hit | ||
|---|---|---|---|---|---|---|
| 7 | 2 | 26 | - | - | ||
| Damage | Stun | Attack | Parry | Block | ||
| - | - | - | - | - | ||
| ||||||
Super Arts
236236P (SA1)
| Startup | Active | Recovery | Hit | Cr. Hit |
|---|---|---|---|---|
| 1 | 16 | 36 | - | - |
| Damage | Stun | Attack | Parry | Block |
| 64 | 22 | - | H | -27 |
236236P (SA2)
| Startup | Active | Recovery | Hit | Cr. Hit |
|---|---|---|---|---|
| 4 | 5 | 25 | - | - |
| Damage | Stun | Attack | Parry | Block |
| 54 | 11 | - | H | -18 |
236236P (SA3)
| Startup | Active | Recovery | Hit | Cr. Hit |
|---|---|---|---|---|
| 10 | - | - | - | - |
| Damage | Stun | Attack | Parry | Block |
| - | - | - | - | - |
Genei Jin Frame Data
- Note: in Genei Jin, Yun can cancel the recovery of moves by stepping
 /
/ which changes frame data further. This is the data without that accounted for
Standing Normals
5LP (cl)
| Startup | Active | Recovery | Hit | Cr. Hit | ||
|---|---|---|---|---|---|---|
| 2 | 1 | 2 | 9 | 9 | ||
| Damage | Stun | Attack | Parry | Block | ||
| 3 | 0 | - | A | 9 | ||
| ||||||
5LP (far)
| Startup | Active | Recovery | Hit | Cr. Hit | ||
|---|---|---|---|---|---|---|
| 3 | 1 | 2 | 9 | 9 | ||
| Damage | Stun | Attack | Parry | Block | ||
| 3 | 0 | - | A | 9 | ||
| ||||||
5MP (cl)
| Startup | Active | Recovery | Hit | Cr. Hit | ||
|---|---|---|---|---|---|---|
| 3 | 2 | 4 | 4 | 4 | ||
| Damage | Stun | Attack | Parry | Block | ||
| 7 | 0 | - | H | 4 | ||
| ||||||
5MP (far)
| Startup | Active | Recovery | Hit | Cr. Hit | ||
|---|---|---|---|---|---|---|
| 3 | 3 | 2 | 15 | 16 | ||
| Damage | Stun | Attack | Parry | Block | ||
| 7 | 0 | - | H | 14 | ||
| ||||||
5HP (cl)
| Startup | Active | Recovery | Hit | Cr. Hit | ||
|---|---|---|---|---|---|---|
| 6 | 4 | 1 | 19 | 20 | ||
| Damage | Stun | Attack | Parry | Block | ||
| 13 | 0 | - | H | 18 | ||
| ||||||
5HP (far)
| Startup | Active | Recovery | Hit | Cr. Hit | ||
|---|---|---|---|---|---|---|
| 6 | 2 | 4 | 16 | 17 | ||
| Damage | Stun | Attack | Parry | Block | ||
| 10 | 0 | - | H | 15 | ||
| ||||||
5LK
| Startup | Active | Recovery | Hit | Cr. Hit | ||
|---|---|---|---|---|---|---|
| 3 | 2 | 1 | 9 | 9 | ||
| Damage | Stun | Attack | Parry | Block | ||
| 5 | 0 | - | A | 9 | ||
| ||||||
5MK (cl)
| Startup | Active | Recovery | Hit | Cr. Hit | ||
|---|---|---|---|---|---|---|
| 5 | 9 | 1 | D | D | ||
| Damage | Stun | Attack | Parry | Block | ||
| 5 | 0 | - | H | 15 | ||
| ||||||
5MK (far)
| Startup | Active | Recovery | Hit | Cr. Hit | ||
|---|---|---|---|---|---|---|
| 6 | 2 | 7 | 6 | 7 | ||
| Damage | Stun | Attack | Parry | Block | ||
| 7 | 0 | - | H | 5 | ||
| ||||||
5HK
| Startup | Active | Recovery | Hit | Cr. Hit | ||
|---|---|---|---|---|---|---|
| 8 | 6 | 5 | D | D | ||
| Damage | Stun | Attack | Parry | Block | ||
| 8 | 0 | - | H | 7 | ||
| ||||||
Command Normals
6MK
| Startup | Active | Recovery | Hit | Cr. Hit | ||
|---|---|---|---|---|---|---|
| 13 | 9 | 8 | -3 | -2 | ||
| Damage | Stun | Attack | Parry | Block | ||
| 14 | 0 | - | H | -4 | ||
| ||||||
6HP
| Startup | Active | Recovery | Hit | Cr. Hit | ||
|---|---|---|---|---|---|---|
| 9 | 3 | 8 | D | D | ||
| Damage | Stun | Attack | Parry | Block | ||
| 10 | 0 | - | H | 6 | ||
| ||||||
Crouching Normals
2LP
| Startup | Active | Recovery | Hit | Cr. Hit | ||
|---|---|---|---|---|---|---|
| 2 | 2 | 1 | 14 | 15 | ||
| Damage | Stun | Attack | Parry | Block | ||
| 3 | 0 | - | A | 13 | ||
| ||||||
2MP
| Startup | Active | Recovery | Hit | Cr. Hit | ||
|---|---|---|---|---|---|---|
| 3 | 2 | 1 | 13 | 14 | ||
| Damage | Stun | Attack | Parry | Block | ||
| 7 | 0 | - | A | 12 | ||
| ||||||
2HP
| Startup | Active | Recovery | Hit | Cr. Hit | ||
|---|---|---|---|---|---|---|
| 3 | 3 | 1 | 13 | 14 | ||
| Damage | Stun | Attack | Parry | Block | ||
| 14 | 0 | - | A | 12 | ||
| ||||||
2LK
| Startup | Active | Recovery | Hit | Cr. Hit | ||
|---|---|---|---|---|---|---|
| 2 | 2 | 1 | 14 | 15 | ||
| Damage | Stun | Attack | Parry | Block | ||
| 3 | 0 | - | L | 13 | ||
| ||||||
2MK
| Startup | Active | Recovery | Hit | Cr. Hit | ||
|---|---|---|---|---|---|---|
| 3 | 2 | 8 | - | 9 | ||
| Damage | Stun | Attack | Parry | Block | ||
| 5 | 0 | - | L | 7 | ||
| ||||||
2HK
| Startup | Active | Recovery | Hit | Cr. Hit | ||
|---|---|---|---|---|---|---|
| 8 | 2 | 9 | D | D | ||
| Damage | Stun | Attack | Parry | Block | ||
| 8 | 0 | - | L | 5 | ||
| ||||||
Jumping Normals
j.LP
| Startup | Active | Recovery | Hit | Cr. Hit |
|---|---|---|---|---|
| 2 | 33 | - | - | - |
| Damage | Stun | Attack | Parry | Block |
| 7 | 0 | - | H | - |
j.MP
| Startup | Active | Recovery | Hit | Cr. Hit | ||
|---|---|---|---|---|---|---|
| 3 | 6 | - | - | - | ||
| Damage | Stun | Attack | Parry | Block | ||
| 14 | 0 | - | H | - | ||
| ||||||
8HP
| Startup | Active | Recovery | Hit | Cr. Hit | ||
|---|---|---|---|---|---|---|
| 8 | 5 | - | - | - | ||
| Damage | Stun | Attack | Parry | Block | ||
| 21 | 0 | - | H | - | ||
| ||||||
j.HP
| Startup | Active | Recovery | Hit | Cr. Hit | ||
|---|---|---|---|---|---|---|
| 5 | 4 | - | - | - | ||
| Damage | Stun | Attack | Parry | Block | ||
| 17 | 0 | - | H | - | ||
| ||||||
j.LK
| Startup | Active | Recovery | Hit | Cr. Hit |
|---|---|---|---|---|
| 4 | 12 | - | - | - |
| Damage | Stun | Attack | Parry | Block |
| 7 | 0 | - | H | - |
j.MK
| Startup | Active | Recovery | Hit | Cr. Hit | ||
|---|---|---|---|---|---|---|
| 6 | 7 | - | - | - | ||
| Damage | Stun | Attack | Parry | Block | ||
| 12 | 0 | - | H | - | ||
| ||||||
j.HK
| Startup | Active | Recovery | Hit | Cr. Hit | ||
|---|---|---|---|---|---|---|
| 5 | 5 | - | - | - | ||
| Damage | Stun | Attack | Parry | Block | ||
| 16 | 0 | - | H | - | ||
| ||||||
3LK
| LK | Startup | Active | Recovery | Hit | Cr. Hit | ||
|---|---|---|---|---|---|---|---|
| 6 | - | - | - | - | |||
| Damage | Stun | Attack | Parry | Block | |||
| 10 | 0 | - | H | - | |||
| |||||||
| MK | Startup | Active | Recovery | Hit | Cr. Hit | ||
| 6 | - | - | - | - | |||
| Damage | Stun | Attack | Parry | Block | |||
| 10 | 0 | - | H | - | |||
| |||||||
| HK | Startup | Active | Recovery | Hit | Cr. Hit | ||
| 6 | - | - | - | - | |||
| Damage | Stun | Attack | Parry | Block | |||
| 10 | 0 | - | H | - | |||
| |||||||
Target Combos
Throws
LPLK
| Startup | Active | Recovery | Hit | Cr. Hit | ||
|---|---|---|---|---|---|---|
| 2 | 1 | 21 | D | D | ||
| Damage | Stun | Attack | Parry | Block | ||
| 35 | 17 | - | - | - | ||
| ||||||
4/6LPK
| Startup | Active | Recovery | Hit | Cr. Hit | ||
|---|---|---|---|---|---|---|
| 2 | 1 | 21 | D | D | ||
| Damage | Stun | Attack | Parry | Block | ||
| 21 | 8 | - | - | - | ||
| ||||||
Universal Overhead
MPMK
| Startup | Active | Recovery | Hit | Cr. Hit |
|---|---|---|---|---|
| 13 | 9 | 8 | - | - |
| Damage | Stun | Attack | Parry | Block |
| 7 | 0 | - | H | - |
Special Moves
623P
| LP | Startup | Active | Recovery | Hit | Cr. Hit | ||
|---|---|---|---|---|---|---|---|
| 7 | 9 | 8 | - | - | |||
| Damage | Stun | Attack | Parry | Block | |||
| 13 | 0 | - | A | 5 | |||
| |||||||
| MP | Startup | Active | Recovery | Hit | Cr. Hit | ||
| 8 | 6 | 15 | - | - | |||
| Damage | Stun | Attack | Parry | Block | |||
| 17 | 0 | - | A | 5 | |||
| |||||||
| HP | Startup | Active | Recovery | Hit | Cr. Hit | ||
| 10 | 6 | 17 | - | - | |||
| Damage | Stun | Attack | Parry | Block | |||
| 17 | 0 | - | A | 3 | |||
| |||||||
236P
| LP | Startup | Active | Recovery | Hit | Cr. Hit | ||
|---|---|---|---|---|---|---|---|
| 7 | 15 | 7 | - | - | |||
| Damage | Stun | Attack | Parry | Block | |||
| 13 | 0 | - | A | -6~+8 | |||
| |||||||
| MP | Startup | Active | Recovery | Hit | Cr. Hit | ||
| 13/10 | 15 | 7 | - | - | |||
| Damage | Stun | Attack | Parry | Block | |||
| 13 | 0 | - | A | -6~+8 | |||
| |||||||
| HP | Startup | Active | Recovery | Hit | Cr. Hit | ||
| 17/16 | 15 | 7 | - | - | |||
| Damage | Stun | Attack | Parry | Block | |||
| 13 | 0 | - | A | -6~+8 | |||
| |||||||
623K
| LK | Startup | Active | Recovery | Hit | Cr. Hit | ||
|---|---|---|---|---|---|---|---|
| 6 | 4 | 20 | - | - | |||
| Damage | Stun | Attack | Parry | Block | |||
| 13 | 0 | - | A | -11 | |||
| |||||||
| MK | Startup | Active | Recovery | Hit | Cr. Hit | ||
| 6 | 4 | 21 | - | - | |||
| Damage | Stun | Attack | Parry | Block | |||
| 13 | 0 | - | A | -12 | |||
| |||||||
| HK | Startup | Active | Recovery | Hit | Cr. Hit | ||
| 6 | 4 | 22 | - | - | |||
| Damage | Stun | Attack | Parry | Block | |||
| 13 | 0 | - | A | -13 | |||
| |||||||
214P
| Startup | Active | Recovery | Hit | Cr. Hit | ||
|---|---|---|---|---|---|---|
| 10 | 6 | 1 | - | - | ||
| Damage | Stun | Attack | Parry | Block | ||
| 21 | 0 | - | A | 13 | ||
| ||||||
63214K
| Startup | Active | Recovery | Hit | Cr. Hit | ||
|---|---|---|---|---|---|---|
| 5 | 2 | 26 | - | - | ||
| Damage | Stun | Attack | Parry | Block | ||
| - | - | - | - | - | ||
| ||||||
