Introduction
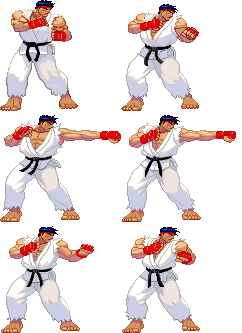
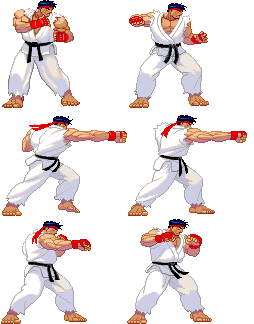
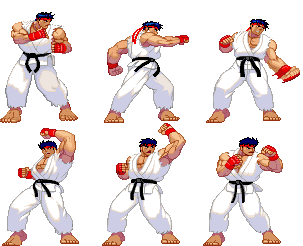
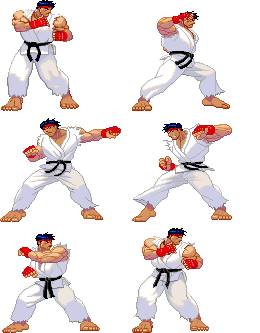
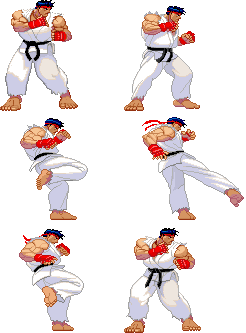
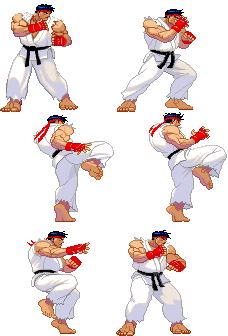
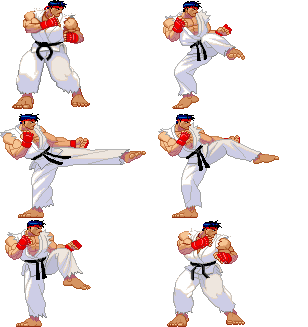
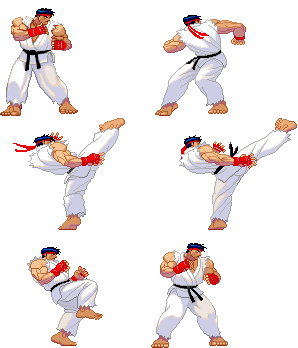
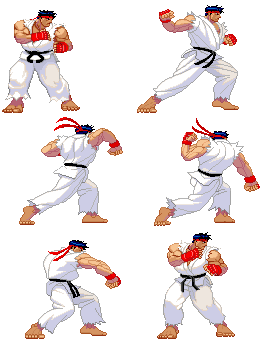
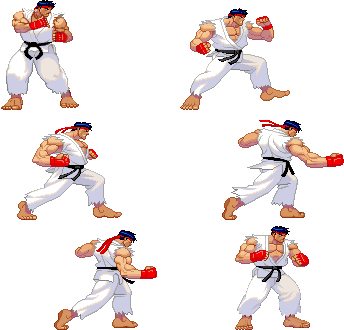
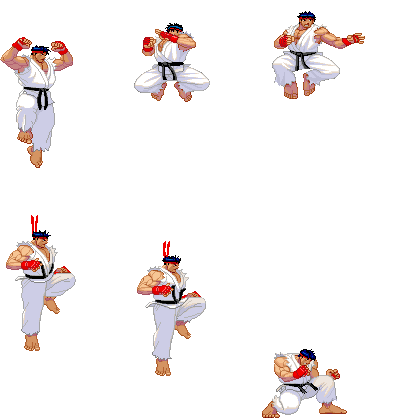
Ryu, the long time rival and friend of ken and the icon of the whole franchise.
He's still your all around, versatile character, with very effective pokes, anti airs, and pressure normals. The things that makes him worse than ken are rather few, but significant - ryu doesn't have any super with the same amalgamation of utility, range and source abundancy as ken's sa3, with his best super for confirms not being as fast and having character-dependent inconsistency in combos. Ryu also doesn't have as good of a meterless damage as ken, due to his absence of double dp links. Ryu also has worse mobility, with slower walk speeds and a shorter backdash. Ryu, however, has his own ways to compensate for his weaknesses, somewhat higher stun damage, additionally useful and powerful super in sa3 and a much better tatsu for confirms.
Super Arts
SAI (Shinkuu Hadouken)
An upgraded version of the Hadouken that can hit up to 5 times
SAII (Shin Shoryuken)
An upgraded version of the Shoryuken. If the first hit connects, the move does a huge amount of damage and sends your opponent flying into the air. If it does not, the move turns into a low-damage, multi-hit Shoryuken
SAIII (Denjin Hadouken)
An unblockable attack (must be parried), Ryu will charge up an electric fireball for max 3 seconds if the punch button was held. The fastest Denjin Hadouken fireball may come out in 75 frames if perfect 360 motions was performed
| Strengths | Weaknesses |
|---|---|
|
|
| Ryu | |
|---|---|
| Vitals | |
| Life Points | 1200 |
| Stun Points | 64 |
| Super Art Stock/Size | |
| SA1 | 2/112 |
| SA2 | 1/128 |
| SA3 | 1/96 |
| Ground Movement | |
| Forward Dash duration/distance | 13 (17) (95px) |
| Back Dash duration/distance | 15 (47px) |
| Jumping | |
| Back Jump duration | 42(4+36+2) |
| Neutral Jump duration | 41(4+34+2) |
| Forward Jump duration | 41(4+35+2) |
| Back Super Jump duration | 46(6+39+2) |
| Neutral Super Jump duration | 45(6+38+2) |
| Forward Super Jump duration | 45(6+38+2) |
| Wake up | |
| Wake up duration | 77 |
| Quick rise duration | 50 |
| New Generation Frame Data Glossary | |
|---|---|
| Active |
How many frames a move remains active (can hurt opponents) for. Consecutive sets of active frames on a multi-hit move are separated by an asterisk (ex: 3*5). If there is a gap between sets of active frames, the gap is denoted by a number in parentheses (ex: 2(4)2) |
| Attack |
Attack level is L for low attacks (must be blocked crouching), H is for High attacks (which can be blocked high or low) and M for overhead (must be blocked standing). T is for throw attacks (which cannot be blocked). |
| Cancel options |
Available cancel options.
|
| Damage |
Attack damage on hit in life points. Notation may denote multi-hit or "sweet spot" damage values on certain frames. |
| Hit/Block |
These are frame advantage values when the attack hits or is blocked. If the number is positive, then the move will end before the defender can act again. If the number is negative, the defender will be able to act before the attacker and maybe even punish. D refers to knockdown on hit. "Cr. Hit" is an additional frame advantage value denoting if the advantage on hit changes when the defender is being hit while crouching. |
| Kara Range |
Almost all normal attacks can be canceled into a special or a multi-button command within three frames of startup. During that time, some attacks will shift position forward or backward and affect the reach of the special or command accordingly. This is denoted in pixels of range. There are a handful of moves in the game that can be kara-canceled after this initial window and will be denoted as a late kara-cancel. |
| Link |
A combo that is performed by inputting the second move after the first move has completely recovered (as opposed to cancelling the first move's animation). In 3S, the final frame of a move's hitstun allows a character to block a normal or special move, as well as some projectile supers. Therefore, an attack's frame advantage must be 2 frames greater than the followup move's startup in order to link. |
| Parry |
This field will show a value of A if the attack can be parried standing or crouching, H if it must be parried standing or L if it must be parried crouching. |
| Recovery |
How many frames it takes for a move to finish after it's been active. |
| Startup |
How many frames it takes before the move becomes 'active' or has a hitbox. 3S uses classic startup notation, which does not include the first active frame. A move with 3 startup becomes active on frame 4. |
| Stun |
Amount of stun added to the opponent's stun bar on hit. |
| Throw range |
Range in pixels from the center of the character to the center of the opponent which allows a grab to connect. |
Frame Data
Standing Normals
5LP (cl)
| Startup | Active | Recovery | Hit | Cr. Hit | ||
|---|---|---|---|---|---|---|
| 3 | 3 | 5 | 3 | 3 | ||
| Damage | Stun | Attack | Parry | Block | ||
| 5 | 3 | - | A | 3 | ||
| ||||||
5LP (far)
| Startup | Active | Recovery | Hit | Cr. Hit | ||
|---|---|---|---|---|---|---|
| 4 | 3 | 4 | 4 | 4 | ||
| Damage | Stun | Attack | Parry | Block | ||
| 3 | 3 | - | A | 4 | ||
| ||||||
5MP (cl)
| Startup | Active | Recovery | Hit | Cr. Hit | ||
|---|---|---|---|---|---|---|
| 5 | 4 | 10 | 2 | 3 | ||
| Damage | Stun | Attack | Parry | Block | ||
| 19 | 7 | - | H | 1 | ||
| ||||||
5MP (far)
| Startup | Active | Recovery | Hit | Cr. Hit | ||
|---|---|---|---|---|---|---|
| 5 | 4 | 9 | 5 | 6 | ||
| Damage | Stun | Attack | Parry | Block | ||
| 17 | 11 | - | H | 4 | ||
| ||||||
5HP (cl)
| Startup | Active | Recovery | Hit | Cr. Hit | ||
|---|---|---|---|---|---|---|
| 4 | 4 | 17 | -2 | 0 | ||
| Damage | Stun | Attack | Parry | Block | ||
| 23 | 15 | - | H | -4 | ||
| ||||||
5HP (far)
| Startup | Active | Recovery | Hit | Cr. Hit | ||
|---|---|---|---|---|---|---|
| 11 | 3 | 18 | -1 | 1 | ||
| Damage | Stun | Attack | Parry | Block | ||
| 23 | 13 | - | H | -3 | ||
| ||||||
5LK
| Startup | Active | Recovery | Hit | Cr. Hit | ||
|---|---|---|---|---|---|---|
| 4 | 4 | 7 | 2 | 2 | ||
| Damage | Stun | Attack | Parry | Block | ||
| 7 | 3 | - | A | 2 | ||
| ||||||
5MK (cl)
| Startup | Active | Recovery | Hit | Cr. Hit | ||
|---|---|---|---|---|---|---|
| 4 | 5 | 11 | 4 | 6 | ||
| Damage | Stun | Attack | Parry | Block | ||
| 19 | 11 | - | H | 2 | ||
| ||||||
5MK (far)
| Startup | Active | Recovery | Hit | Cr. Hit | ||
|---|---|---|---|---|---|---|
| 6 | 4 | 15 | -4 | -3 | ||
| Damage | Stun | Attack | Parry | Block | ||
| 16 | 9 | - | H | -5 | ||
| ||||||
5HK
| Startup | Active | Recovery | Hit | Cr. Hit | ||
|---|---|---|---|---|---|---|
| 8 | 5 | 18 | -3 | -1 | ||
| Damage | Stun | Attack | Parry | Block | ||
| 24 | 13 | - | H | -5 | ||
| ||||||
Command Normals
6MP
| Startup | Active | Recovery | Hit | Cr. Hit | ||
|---|---|---|---|---|---|---|
| 14 | 12 | 9 | 1 | 3 | ||
| Damage | Stun | Attack | Parry | Block | ||
| 15 | 15 | - | H | -1 | ||
| ||||||
6HP
| Startup | Active | Recovery | Hit | Cr. Hit | ||
|---|---|---|---|---|---|---|
| 18 | 6 | 13 | 4 | 6 | ||
| Damage | Stun | Attack | Parry | Block | ||
| 24 | 13 | - | H | 2 | ||
| ||||||
Crouching Normals
2LP
| Startup | Active | Recovery | Hit | Cr. Hit | ||
|---|---|---|---|---|---|---|
| 4 | 3 | 5 | 3 | 3 | ||
| Damage | Stun | Attack | Parry | Block | ||
| 3 | 3 | - | A | 3 | ||
| ||||||
2MP
| Startup | Active | Recovery | Hit | Cr. Hit | ||
|---|---|---|---|---|---|---|
| 5 | 4 | 7 | 4 | 5 | ||
| Damage | Stun | Attack | Parry | Block | ||
| 16 | 7 | - | A | 3 | ||
| ||||||
2HP
| Startup | Active | Recovery | Hit | Cr. Hit | ||
|---|---|---|---|---|---|---|
| 5 | 5 | 19 | -6 | -4 | ||
| Damage | Stun | Attack | Parry | Block | ||
| 23 | 13 | - | A | -8 | ||
| ||||||
2LK
| Startup | Active | Recovery | Hit | Cr. Hit | ||
|---|---|---|---|---|---|---|
| 5 | 3 | 7 | 1 | 1 | ||
| Damage | Stun | Attack | Parry | Block | ||
| 3 | 3 | - | L | 1 | ||
| ||||||
2MK
| Startup | Active | Recovery | Hit | Cr. Hit | ||
|---|---|---|---|---|---|---|
| 7 | 5 | 16 | -2 | -1 | ||
| Damage | Stun | Attack | Parry | Block | ||
| 14 | 3 | - | L | -3 | ||
| ||||||
2HK
| Startup | Active | Recovery | Hit | Cr. Hit | ||
|---|---|---|---|---|---|---|
| 7 | 5 | 25 | D | D | ||
| Damage | Stun | Attack | Parry | Block | ||
| 23 | 3 | - | L | -13 | ||
| ||||||
Jumping Normals
j.LP
| Startup | Active | Recovery | Hit | Cr. Hit | ||
|---|---|---|---|---|---|---|
| 4 | - | - | -5~7 | 4~7 | ||
| Damage | Stun | Attack | Parry | Block | ||
| 8 | 7 | - | H | -5~7 | ||
| ||||||
8MP
| Startup | Active | Recovery | Hit | Cr. Hit | ||
|---|---|---|---|---|---|---|
| 5 | 5 | - | 0~10 | 8~10 | ||
| Damage | Stun | Attack | Parry | Block | ||
| 17 | 11 | - | H | 0~10 | ||
| ||||||
j.MP
| Startup | Active | Recovery | Hit | Cr. Hit | ||
|---|---|---|---|---|---|---|
| 4 | 8 | - | 4~10 | 10 | ||
| Damage | Stun | Attack | Parry | Block | ||
| 15 | 13 | - | H | 4~10 | ||
| ||||||
8HP
| Startup | Active | Recovery | Hit | Cr. Hit | ||
|---|---|---|---|---|---|---|
| 6 | 3 | - | 6~13 | 12~13 | ||
| Damage | Stun | Attack | Parry | Block | ||
| 24 | 15 | - | H | 6~13 | ||
| ||||||
j.HP
| Startup | Active | Recovery | Hit | Cr. Hit | ||
|---|---|---|---|---|---|---|
| 6 | 4 | - | 3~13 | 10~13 | ||
| Damage | Stun | Attack | Parry | Block | ||
| 24 | 15 | - | H | 3~13 | ||
| ||||||
8LK
| Startup | Active | Recovery | Hit | Cr. Hit | ||
|---|---|---|---|---|---|---|
| 4 | 19 | - | -6~7 | 0~7 | ||
| Damage | Stun | Attack | Parry | Block | ||
| 8 | 7 | - | H | -6~7 | ||
| ||||||
j.LK
| Startup | Active | Recovery | Hit | Cr. Hit | ||
|---|---|---|---|---|---|---|
| 4 | 10 | - | -6~7 | 0~7 | ||
| Damage | Stun | Attack | Parry | Block | ||
| 8 | 5 | - | H | -6~7 | ||
| ||||||
8MK
| Startup | Active | Recovery | Hit | Cr. Hit | ||
|---|---|---|---|---|---|---|
| 5 | 6 | - | -2~10 | 6~10 | ||
| Damage | Stun | Attack | Parry | Block | ||
| 16 | 9 | - | H | -2~10 | ||
| ||||||
j.MK
| Startup | Active | Recovery | Hit | Cr. Hit | ||
|---|---|---|---|---|---|---|
| 5 | 6 | - | -2~10 | 6~10 | ||
| Damage | Stun | Attack | Parry | Block | ||
| 16 | 9 | - | H | -2~10 | ||
| ||||||
8HK
| Startup | Active | Recovery | Hit | Cr. Hit | ||
|---|---|---|---|---|---|---|
| 6 | 5 | - | 2~13 | 10~13 | ||
| Damage | Stun | Attack | Parry | Block | ||
| 23 | 13 | - | H | 2~13 | ||
| ||||||
j.HK
| Startup | Active | Recovery | Hit | Cr. Hit | ||
|---|---|---|---|---|---|---|
| 6 | 4 | - | 2~13 | 8~13 | ||
| Damage | Stun | Attack | Parry | Block | ||
| 21 | 13 | - | H | 2~13 | ||
| ||||||
Target Combos
Throws
LPLK
| Startup | Active | Recovery | Hit | Cr. Hit | ||
|---|---|---|---|---|---|---|
| 2 | 1 | 21 | 45 | - | ||
| Damage | Stun | Attack | Parry | Block | ||
| 21 | 8 | - | - | - | ||
| ||||||
4LPLK
| Startup | Active | Recovery | Hit | Cr. Hit | ||
|---|---|---|---|---|---|---|
| 2 | 1 | 21 | 70 | - | ||
| Damage | Stun | Attack | Parry | Block | ||
| 19 | 14 | - | - | - | ||
| ||||||
Universal Overhead
MPMK
| Startup | Active | Recovery | Hit | Cr. Hit | ||
|---|---|---|---|---|---|---|
| 15 | 9 | 6 | 0~8 | 1~9 | ||
| Damage | Stun | Attack | Parry | Block | ||
| 7 | 3 | - | H | -5~2 | ||
| ||||||
Special Moves
236P
| LP | Startup | Active | Recovery | Hit | Cr. Hit | ||
|---|---|---|---|---|---|---|---|
| 9 | - | 36 | -8 | -7 | |||
| Damage | Stun | Attack | Parry | Block | |||
| 10 | 3 | - | H | -9 | |||
| |||||||
| MP | Startup | Active | Recovery | Hit | Cr. Hit | ||
| 9 | - | 36 | -8 | -7 | |||
| Damage | Stun | Attack | Parry | Block | |||
| 10 | 3 | - | H | -9 | |||
| |||||||
| HP | Startup | Active | Recovery | Hit | Cr. Hit | ||
| 9 | - | 36 | -8 | -7 | |||
| Damage | Stun | Attack | Parry | Block | |||
| 10 | 3 | - | H | -9 | |||
| |||||||
623P
| LP | Startup | Active | Recovery | Hit | Cr. Hit | ||
|---|---|---|---|---|---|---|---|
| 3 | 11 | 29 | D | D | |||
| Damage | Stun | Attack | Parry | Block | |||
| 24 | 13 | - | A | -14~-24 | |||
| |||||||
| MP | Startup | Active | Recovery | Hit | Cr. Hit | ||
| 3 | 14 | 34 | D | D | |||
| Damage | Stun | Attack | Parry | Block | |||
| 27 | 15 | - | A | -20~-32 | |||
| |||||||
| HP | Startup | Active | Recovery | Hit | Cr. Hit | ||
| 3 | 18 | 38 | D | D | |||
| Damage | Stun | Attack | Parry | Block | |||
| 30 | 17 | - | A | -29~-38 | |||
| |||||||
214K
| LK | Startup | Active | Recovery | Hit | Cr. Hit | ||
|---|---|---|---|---|---|---|---|
| 10 | 3 | 22 | D | D | |||
| Damage | Stun | Attack | Parry | Block | |||
| 23 | 15 | - | H | -12 | |||
| |||||||
| MK | Startup | Active | Recovery | Hit | Cr. Hit | ||
| 11 | 10 | 19 | D | D | |||
| Damage | Stun | Attack | Parry | Block | |||
| 26 | 15 | - | H | -8 | |||
| |||||||
| HK | Startup | Active | Recovery | Hit | Cr. Hit | ||
| 11 | 10 | 22 | D | D | |||
| Damage | Stun | Attack | Parry | Block | |||
| 30 | 15 | - | H | -11 | |||
| |||||||
214K (air)
| LK | Startup | Active | Recovery | Hit | Cr. Hit | ||
|---|---|---|---|---|---|---|---|
| 7 | 8 | - | D | D | |||
| Damage | Stun | Attack | Parry | Block | |||
| 17 | 9 | - | H | -2~-6 (?) | |||
| |||||||
| MK | Startup | Active | Recovery | Hit | Cr. Hit | ||
| 7 | 12 | - | D | D | |||
| Damage | Stun | Attack | Parry | Block | |||
| 19 | 9 | - | H | -2~-6 (?) | |||
| |||||||
| HK | Startup | Active | Recovery | Hit | Cr. Hit | ||
| 7 | 12 | - | D | D | |||
| Damage | Stun | Attack | Parry | Block | |||
| 21 | 9 | - | H | -2~-6 (?) | |||
| |||||||
41236K
| LK | Startup | Active | Recovery | Hit | Cr. Hit | ||
|---|---|---|---|---|---|---|---|
| 10 | 3 | 28 | D | D | |||
| Damage | Stun | Attack | Parry | Block | |||
| 21 | 17 | - | H | -12 | |||
| |||||||
| MK | Startup | Active | Recovery | Hit | Cr. Hit | ||
| 13 | 3 | 27 | - | - | |||
| Damage | Stun | Attack | Parry | Block | |||
| 24 | 17 | - | H | -11 | |||
| |||||||
| HK | Startup | Active | Recovery | Hit | Cr. Hit | ||
| 16 | 3 | 26 | - | - | |||
| Damage | Stun | Attack | Parry | Block | |||
| 28 | 17 | - | H | -10 | |||
| |||||||
Super Arts
236236P (SA1)
| Startup | Active | Recovery | Hit | Cr. Hit |
|---|---|---|---|---|
| 3 | - | 49 | D | D |
| Damage | Stun | Attack | Parry | Block |
| 50 | - | - | H | -12 |
236236P (SA2)
| Startup | Active | Recovery | Hit | Cr. Hit |
|---|---|---|---|---|
| 1 | 15 | 40 | D | D |
| Damage | Stun | Attack | Parry | Block |
| 94 | 17 | - | A | -25 |
236236P (far SA2)
| Startup | Active | Recovery | Hit | Cr. Hit |
|---|---|---|---|---|
| 1 | 13 | 35 | D | D |
| Damage | Stun | Attack | Parry | Block |
| 33 | 13 | - | A | -27 |
236236P (SA3)
| Startup | Active | Recovery | Hit | Cr. Hit |
|---|---|---|---|---|
| 2~9 | - | 51 | -31 | -31 |
| Damage | Stun | Attack | Parry | Block |
| 10 | 17 | - | H | - |
Denjin Charge Levels
236236P (SA3)
| Startup | Active | Recovery | Hit | Cr. Hit |
|---|---|---|---|---|
| 10~33 | - | 51 | -24 | -24 |
| Damage | Stun | Attack | Parry | Block |
| 20 | 34 | - | H | - |
236236P (SA3)
| Startup | Active | Recovery | Hit | Cr. Hit |
|---|---|---|---|---|
| 34~81 | - | 51 | -16 | -16 |
| Damage | Stun | Attack | Parry | Block |
| 27 | 48 | - | H | - |
236236P (SA3)
| Startup | Active | Recovery | Hit | Cr. Hit |
|---|---|---|---|---|
| 82~161 | - | 51 | -10 | -10 |
| Damage | Stun | Attack | Parry | Block |
| 36 | 65 | - | H | - |
236236P (SA3)
| Startup | Active | Recovery | Hit | Cr. Hit |
|---|---|---|---|---|
| 162~212 | - | 51 | Stunned | Stunned |
| Damage | Stun | Attack | Parry | Block |
| 43 | MAX | - | H | - |

