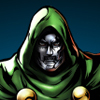

Doctor Doom
Victor Von Doom, the nemesis of the Fantastic Four, is the ruler of the nation Latveria. A scientist, genius, and practitioner of the occult, Doom hides behind the mask of his metal armor which he uses to hide the scars of his own scientific miscalculations. Doom is bent on conquering the world tandum with proving his intelligence to be greater then that of his rival, Fantastic Four's Reed Richards.
In a nutshell
Doom is a strong keepaway character but his real tallent comes from his abilty to perform a mixup to inflict heavy damage. He has one of the best beam projectile in the game, and his fast startup Molecular Shield can really help keep would-be attackers off of him. His ability to air dash cancel many of his air normals gives him excellent mixups after blocked Dive Kicks, and his throws can lead to big damage combos. If a strong keepaway character with sneaky close range tricks is your style, join Doom's army.
Character Vitals
Move List
Assist Types
Normal Moves
dashcancel
(72,000)
dashcancel
101,700
dashcancel
dashcancel
dashcancel
rpdfire for more missiles
airdashcancel
(81,000)
airdashcancel
(143,200)
groundbounce
hardknockdown
airdashcancel
Throws
Special Moves
(68,600 ~ 81,700)
otg on air version only
softknockdown
range determines hits;
closer range, more hits.
(93,500 ~ 113,600)
otg on air version only
softknockdown
range determines hits;
closer range, more hits.
(122,200 ~ 143,000)
otg on air version only
softknockdown
range determines hits;
closer range, more hits.
"Doom Rocks"
(103,100)
"Doom Rocks"
(111,800)
"Doom Rocks"
(118,900)
"Finger Lasers"
(112,600 at 5 hits)
atk used determines speed
Hyper Moves
(340,000)
"Finger Lasers"
( 287,900 ~ 345,800)
otg on air version only
Mashable.
"The Shower"
"The Blender"
Level 3 Hyper.
Mission Mode
Strategy
Tips and Tricks
- Doctor Doom's {{#motion: S}} foot dive now causes a Hard knockdown that you can easily use to go into a combo, making it a great move to throw out every once in a while.
- Both versions of his dive kick can be canceled into an air dash for additional pressure and mixups. The H version can be canceled into an air dash at a low height, while the S version has a much more strict timing requirement. Doing an air dash downward after slamming the opponent down allows you to OTG with s.{{#motion: h}}.
- Doom gets the combo of his choice after a forward throw in the corner, but he gets a huge combo starting with standing Medium off of his backward throw even midscreen. Be cautious about pressing back and Heavy if you are unsure, as the Hidden Missiles move could come out and leave you wide open.
- Doom can only use his Photon Array once per jump. As such, his dominance is much more suited to ground play. Make sure you mix in Plasma Beams and his Heavy Gun to keep people guessing when you do jump.
- When using Doom's Hidden Missiles, call an assist to cover him.
- When using Doom's Hidden Missiles assist, try calling him from full screen and then dashing in so the camera zooms a bit. Doom will be left off screen and your opponent wont even see the missiles coming!
- Though Doom's dash isn't cancelable, you can cancel any of his ground attacks into a front or back dash. This can help you continue the pressure or retreat. If you jump cancel the dash, you can even combo.
- Doom's assists are really good in this game, each with their own optimum context. His Plasma Beam assist is a great slow-startup beam useful for keepaway and setting up cross up unblockables. The Hidden Missiles assist is a great one for just throwing out when it's safe as it does the full 8 shots and is his most damaging assist of all, coupled with a massive delay between firing and hitting giving you a lot of time to start a combo or teleport etc. His molecular shield has really quick startup and is good for those get-the-hell off me situations, but does the least damage of the three.
- While his slow speed and robotic feel would suggest otherwise, Dr Doom is a total combo machine. This is mainly due to the massive amount of relaunch potential from his hugely dash-cancellable air normals and 2 great OTG ground normals. A popular technique is to launch, throw out 2x {{#motion: m}} and a {{#motion: h}} Foot Dive, cancel with a {{#motion: df}} air-dash and hit with one more {{#motion: m}} before landing. This leaves you in a perfect condition to juggle and re-launch with his Hard Kick launcher without having to OTG. This is great because it does great damage and works mid-screen all of the time, unlike doing a standard 2x {{#motion: m}}, {{#motion: s}} in the air and OTGing with standing {{#motion: m}} or {{#motion: h}} which only works in the corner. It also cuts out the extra damage and hitstun scaling that comes with an OTG relaunch.
Combos
Corner only: j.{{#motion: f + h}}, {{#motion: df + atk + atk}}, c.{{#motion: m}}, c.{{#motion: h}}, {{#motion: s}}, j.{{#motion: f + h}}, j.{{#motion: s}}, {{#motion: d + atk + atk}}, s.{{#motion: h}} (2 hits), {{#motion: s}}, j.{{#motion: m}} (2 hits), j.{{#motion: m}} (2 hits), j.{{#motion: f + h}}, j.{{#motion: s}}, {{#motion: d + atk + atk}}, s.{{#motion: h}} (2 hits), {{#motion: dp + h}}, {{#motion: dp + atk + atk}} or {{#motion: qcf + atk + atk}} - 760,000~ damage with level 1 ender, 999,000~ damage with level 3 ender
Basic Strategy
Doctor Doom's goal is to push an opponent into the corner. His corner combos/mixups are truly frightening when compared to his midscreen options. However, this isn't an easy task since you will have to deal with projectiles, rushdown, & your opponents' assists thrown your way. You will have to make use of his zoning moves, normals, throws, dash-cancels, jump-cancels into airdashes, & airdash cancels to push the opponent in the corner.
