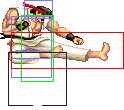
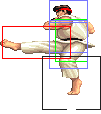
Street Fighter 2: Champion Edition/Ryu

From SuperCombo Wiki
Street Fighter 2: Champion EditionSf2ce-logo.png
Street Fighter 2: Champion Edition#Game ElementsStreet Fighter 2: Champion Edition#Game ElementsStreet Fighter 2: Champion Edition#CharactersStreet Fighter 2: Champion Edition#System InfoStreet Fighter 2: Champion Edition#MiscellaneousStreet Fighter 2: Champion Edition#Basic StrategyMvC3HeaderButtons.png

Sf2ceRyu.gif You must defeat Sheng Long to stand a chance.

Introduction

Ryu is a practitioner of a martial art called Ansatsuken. He travels the world always searching for challenges and worthy opponents in order to improve his technique. Ryu was trained in the same dojo as his rival and best friend Ken, under the guidance of their master Gouken. He won the first World Warrior tournament against the "emperor of Muay Thai" Sagat and now he's back for the second edition of the challenge to prove his skills again.

Ryu and Ken have many similarities in his techniques but also some crucial differences. While Ken favours a more wild and carefree style (maybe a reflex of his rebel and irreverent personality), Ryu is more stoic and applied to his art, having developed his skills beyond most fighters in the world. Game-wise, they have some differences in hitboxes, his Hadouken is faster and bears more dizzy properties than his pal Ken's, his Hurricane Kick is a powerful strategic attack and his Shoryuken, while not as good as Ken's version, does huge damage and serves as an efficient anti-air when used properly.

Color Options

Start Default
Ryu-mp.gif Ryu-old1.gif

Moves List

Normal Moves

  • Arm Throw (Seoi Nage): close, b or f + Medium or Hard Punch
  • Back Roll (Tomoe Nage): close, b or f + Medium or Hard Kick
  • Axe Kick: close, Hard Kick
  • Drop Knee: Light Kick in air

Special Moves

  • Fireball (Hadouken): d, df, f + Punch (Faster than Ken's Hadouken)
  • Dragon Punch (Shoryuken): f, d, df + Punch
  • Hurricane Kick (Tatsumaki Senpuu Kyaku): d, db, b + Kick

The Basics

  • Anti-Airs: Shoryuken, crouching High Punch, standing High Kick
  • High Pokes: standing Medium Punch
  • Low Pokes: crouching Medium Kick

Combos

  • cr.MK xx Hadouken or Shoryuken
  • s.HP xx LP/MP Shoryuken (the HP Shoryuken second hit always whiffs. Use MP instead.)
  • Diagonal Jumping HK cr.LK xx LP/MP Shoryuken
  • Diagonal Jumping HK (crossup) s.HP xx LP/MP Shoryuken (a.k.a. Touch of Dead or simply ToD)
  • cr.LP CPS1 Chain s.HP xx Hadouken

Hitboxes

Standing Normals

  • Standing LP:
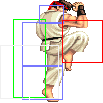
Damage 6 Sf2ce-ryu-lp-s1.png Sf2ce-ryu-lp-a.png Sf2ce-ryu-lp-s1.png Sf2ce-ryu-lp-r1.png
Stun 1~7
Stun Timer 40
Chain Cancel Yes
Special Cancel Yes
Frame Advantage +6
Frame Count 2 4 4 1
Simplified 1+2 4 5
  • Standing MP:
Damage 16 Sf2ce-ryu-mp-s1.png Sf2ce-ryu-mp-s2.png Sf2ce-ryu-mp-a.png Sf2ce-ryu-mp-s2.png Sf2ce-ryu-mp-s1.png Sf2ce-ryu-lp-r2.png
Stun 5~11
Stun Timer 60
Chain Cancel No
Special Cancel Yes
Frame Advantage +10
Frame Count 1 2 4 3 3 1
Simplified 1+3 4 7
  • Standing HP:
Damage 26 Sf2ce-ryu-mp-s1.png Sf2ce-ryu-mp-s2.png Sf2ce-ryu-hp-a.png Sf2ce-ryu-mp-s2.png Sf2ce-ryu-mp-s1.png Sf2ce-ryu-lp-r2.png
Stun 11~17
Stun Timer 80
Chain Cancel No
Special Cancel No
Frame Advantage -6
Frame Count 3 2 6 10 12 1
Simplified 1+5 6 23
  • Standing LK:
Damage 8 Sf2ce-ryu-mp-s1.png Sf2ce-ryu-lk-s2.png Sf2ce-ryu-lk-a.png Sf2ce-ryu-lk-s2.png Sf2ce-ryu-mp-s1.png
Stun 1~7
Stun Timer 40
Chain Cancel Yes
Special Cancel No
Frame Advantage +3
Frame Count 3 3 8 4 1
Simplified 1+6 8 5
  • Standing MK:
Damage 16 Sf2ce-ryu-mp-s1.png Sf2ce-ryu-lk-s2.png Sf2ce-ryu-mk-a.png Sf2ce-ryu-lk-s2.png Sf2ce-ryu-mp-s1.png
Stun 5~11
Stun Timer 60
Chain Cancel No
Special Cancel Yes
Frame Advantage +1
Frame Count 5 6 12 6 1
Simplified 1+11 12 7
  • Standing HK:
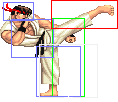
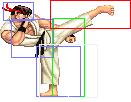
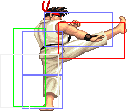
Damage 22 Sf2ce-ryu-hk-s1.png Sf2ce-ryu-hk-a1.png Sf2ce-ryu-hk-a2.png Sf2ce-ryu-hk-r1.png Sf2ce-ryu-hk-r2.png
Stun 11~17
Stun Timer 80
Chain Cancel No
Special Cancel No
Frame Advantage -2
Frame Count 2 4 8 10 7
Simplified 2+1 12 17

Close Standing Normals

  • Close Standing LP:
Damage 6 Sf2ce-ryu-cllp-s1.png Sf2ce-ryu-cllp-a.png Sf2ce-ryu-cllp-s1.png
Stun 1~7
Stun Timer 40
Chain Cancel Yes
Special Cancel Yes
Frame Advantage +6
Frame Count 1+2 4 5
  • Close Standing MP:
Damage 16 Sf2ce-ryu-mp-s1.png Sf2ce-ryu-clmp-s.png Sf2ce-ryu-clmp-a.png Sf2ce-ryu-clmp-r1.png Sf2ce-ryu-clmp-r2.png Sf2ce-ryu-clmp-s.png Sf2ce-ryu-mp-s1.png
Stun 5~11
Stun Timer 60
Chain Cancel No
Special Cancel Yes
Frame Advantage +2
Frame Count 1 2 2 6 4 3 4
Simplified 1+3 2 17
  • Close Standing HP:
Damage 22 Sf2ce-ryu-clhp-s.png Sf2ce-ryu-clhp-a1.png Sf2ce-ryu-clhp-a2.png Sf2ce-ryu-clhp-r1.png Sf2ce-ryu-clhp-r2.png
Stun 11~17
Stun Timer 80
Chain Cancel No
Special Cancel Yes
Frame Advantage -8
Frame Count 3 2 6 10 13
Simplified 1+3 8 23
  • Close Standing LK:
Damage 8 Sf2ce-ryu-mp-s1.png Sf2ce-ryu-cllk-s1.png Sf2ce-ryu-cllk-a1.png Sf2ce-ryu-cllk-s1.png Sf2ce-ryu-mp-s1.png
Stun 1~7
Stun Timer 40
Chain Cancel Yes
Special Cancel Yes
Frame Advantage +5
Frame Count 2 3 6 3 1
Simplified 1+5 6 4
  • Close Standing MK:
Damage 16 Sf2ce-ryu-clmk-s1.png Sf2ce-ryu-clmk-s2.png Sf2ce-ryu-clmk-a.png Sf2ce-ryu-clmk-s2.png Sf2ce-ryu-clmk-s1.png Sf2ce-ryu-mk-r1.png
Stun 5~11
Stun Timer 60
Chain Cancel No
Special Cancel No
Frame Advantage +6
Frame Count 2 1 6 4 4 1
Simplified 1+3 6 9
  • Close Standing HK:
Damage 24,6 Sf2ce-ryu-mp-s1.png Sf2ce-ryu-clhk-s1.png Sf2ce-ryu-clhk-a1.png Sf2ce-ryu-clhk-a2.png Sf2ce-ryu-clhk-s1.png Sf2ce-ryu-mp-s1.png
Stun 11~17
Stun Timer 80
Chain Cancel No
Special Cancel No
Frame Advantage +8
Frame Count 3 4 8 4 10 1
Simplified 1+7 12 11

Crouching Normals

  • Crouching LP:
Damage 6 Sf2ce-ryu-crlp-s1.png Sf2ce-ryu-crlp-a.png Sf2ce-ryu-crlp-s1.png Sf2ce-ryu-crlp-r1.png
Stun 1~7
Stun Timer 40
Chain Cancel Yes
Special Cancel Yes
Frame Advantage +6
Frame Count 2 4 4 1
Simplified 1+2 4 5
  • Crouching MP:
Damage 14 Sf2ce-ryu-crmp-s1.png Sf2ce-ryu-crmp-s2.png Sf2ce-ryu-crmp-a.png Sf2ce-ryu-crmp-s2.png Sf2ce-ryu-crmp-s1.png Sf2ce-ryu-crlp-r1.png
Stun 5~11
Stun Timer 60
Chain Cancel No
Special Cancel Yes
Frame Advantage +10
Frame Count 1 2 4 3 3 1
Simplified 1+3 4 7


  • Crouching HP:
Damage 22 Sf2ce-ryu-crhp-s1.png Sf2ce-ryu-crhp-a1.png Sf2ce-ryu-crhp-a2.png Sf2ce-ryu-crhp-r1.png Sf2ce-ryu-crhp-s1.png Sf2ce-ryu-crhp-r2.png
Stun 11~17
Stun Timer 80
Chain Cancel No
Special Cancel Yes
Frame Advantage -11
Frame Count 3 3 8 10 12 1
Simplified 1+3 11 23
  • Crouching LK:
Damage 6 Sf2ce-ryu-crlk-s1.png Sf2ce-ryu-crlk-a.png Sf2ce-ryu-crlk-s1.png Sf2ce-ryu-crlp-r1.png
Stun 1~7
Stun Timer 40
Chain Cancel Yes
Special Cancel Yes
Frame Advantage +6
Frame Count 2 4 4 1
Simplified 1+2 4 5
  • Crouching MK:
Damage 14 Sf2ce-ryu-crlk-s1.png Sf2ce-ryu-crlk-s2.png Sf2ce-ryu-crmk-a.png Sf2ce-ryu-crlk-s2.png Sf2ce-ryu-crlk-s1.png Sf2ce-ryu-crlp-r1.png
Stun 5~11
Stun Timer 60
Chain Cancel No
Special Cancel Yes
Frame Advantage +6
Frame Count 1 2 6 4 4 1
Simplified 1+3 6 9
  • Crouching HK:
Damage 22 Sf2ce-ryu-crhk-s1.png Sf2ce-ryu-crhk-a.png Sf2ce-ryu-crhk-s2.png Sf2ce-ryu-crhk-r1.png Sf2ce-ryu-crhk-r2.png
Stun 11~17
Stun Timer 80
Chain Cancel No
Special Cancel Yes
Frame Advantage +2
Frame Count 3 6 6 8 11
Simplified 1+3 6 25

Aerial Normals

  • Neutral Jumping LP:
Damage 10 Sf2ce-ryu-njlp-s1.png Sf2ce-ryu-njlp-a.png
Stun 1~7
Stun Timer 40
Frame Count 2
  • Diagonal Jumping LP:
Damage 8 Sf2ce-ryu-njlp-s1.png Sf2ce-ryu-djlp-a.png
Stun 1~7
Stun Timer 40
Frame Count 2
  • Neutral/Diagonal Jumping MP:
Damage 16 Sf2ce-ryu-njlp-s1.png Sf2ce-ryu-jmp-s2.png Sf2ce-ryu-jmp-a.png Sf2ce-ryu-jmp-s2.png Sf2ce-ryu-jmp-r1.png Sf2ce-ryu-jmp-r2.png Sf2ce-ryu-jmp-r3.png
Stun 5~11
Stun Timer 50
Frame Count 2 2 20 4 4 4
Simplified 4 20
  • Neutral Jumping HP:
Damage 24 Sf2ce-ryu-njlp-s1.png Sf2ce-ryu-jmp-s2.png Sf2ce-ryu-njhp-a.png Sf2ce-ryu-jmp-s2.png Sf2ce-ryu-jmp-r1.png Sf2ce-ryu-jmp-r2.png Sf2ce-ryu-jmp-r3.png
Stun 11~17
Stun Timer 60
Frame Count 2 2 20 4 4 4
Simplified 4 20
  • Diagonal Jumping HP:
Damage 22 Sf2ce-ryu-njlp-s1.png Sf2ce-ryu-jmp-s2.png Sf2ce-ryu-njhp-a.png Sf2ce-ryu-jmp-s2.png Sf2ce-ryu-jmp-r1.png Sf2ce-ryu-jmp-r2.png Sf2ce-ryu-jmp-r3.png
Stun 11~17
Stun Timer 60
Frame Count 2 2 8 4 4 4
Simplified 4 8
  • Neutral Jumping LK:
Damage 10 Sf2ce-ryu-njlk-s1.png Sf2ce-ryu-njlk-a.png Sf2ce-ryu-njlk-r1.png
Stun 1~7
Stun Timer 40
Frame Count 3 40
  • Diagonal Jumping LK:
Damage 8 Sf2ce-ryu-djlk-s1.png Sf2ce-ryu-djlk-s2.png Sf2ce-ryu-djlk-a.png
Stun 1~7
Stun Timer 40
Frame Count 2 3
Simplified 5
  • Neutral Jumping MK:
Damage 16 Sf2ce-ryu-njmk-s1.png Sf2ce-ryu-njmk-a.png Sf2ce-ryu-jmp-r1.png Sf2ce-ryu-jmp-r2.png Sf2ce-ryu-jmp-r3.png
Stun 5~11
Stun Timer 50
Frame Count 5 13 6 6
Simplified 5 13
  • Diagonal Jumping MK:
Damage 16 Sf2ce-ryu-djlk-s1.png Sf2ce-ryu-djmk-s1.png Sf2ce-ryu-djmk-a.png Sf2ce-ryu-djmk-s1.png Sf2ce-ryu-jmp-r1.png Sf2ce-ryu-jmp-r2.png Sf2ce-ryu-jmp-r3.png
Stun 5~11
Stun Timer 50
Frame Count 2 3 13 3 3 3
Simplified 5 13
  • Neutral Jumping HK:
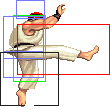
Damage 24 Sf2ce-ryu-njhk-s1.png Sf2ce-ryu-njhk-a1.png Sf2ce-ryu-njhk-a2.png Sf2ce-ryu-njhk-r1.png Sf2ce-ryu-njhk-r2.png Sf2ce-ryu-jmp-r1.png Sf2ce-ryu-jmp-r2.png
Stun 11~17
Stun Timer 60
Frame Count 2 4 4 3 3 3
Simplified 2 8
  • Diagonal Jumping HK:
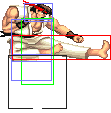
Damage 22 Sf2ce-ryu-djlk-s1.png Sf2ce-ryu-djmk-s1.png Sf2ce-ryu-djhk-a.png Sf2ce-ryu-djmk-s1.png Sf2ce-ryu-jmp-r1.png Sf2ce-ryu-jmp-r2.png Sf2ce-ryu-jmp-r3.png
Stun 11~17
Stun Timer 60
Frame Count 2 3 7 3 3 3
Simplified 5 7

Throws

  • Seoi Nage: (←/→ + HP) and Tomoe Nage: (←/→ + HK)
Damage 32 Sf2ce-ryu-throw.png
Duration 130
Stun 7~13
Stun Timer 100
Range (from axis) 48
Range advantage 19

Special Moves

  • Hadoken: (↓↘→ + P)

Startup:

Sf2ce-ryu-hdk-s1.png Sf2ce-ryu-hdk-s2.png Sf2ce-ryu-hdk-s3.png Sf2ce-ryu-hdk-s4.png
Frame Count 2 6 1 1

Active:

LP version:

Damage 12 Sf2ce-ryu-hdk-lp-a1.png Sf2ce-ryu-hdk-lp-a2.png Sf2ce-ryu-hdk-lp-a3.png Sf2ce-ryu-hdk-lp-a4.png
Stun 13~19
Stun Timer 120
Frame Advantage -
Frame Count 1 1 2 2..
Simplified 40

MP version:

Damage 14 Sf2ce-ryu-hdk-mp-a1.png Sf2ce-ryu-hdk-mp-a2.png Sf2ce-ryu-hdk-mp-a3.png Sf2ce-ryu-hdk-mp-a4.png
Stun 13~19
Stun Timer 120
Frame Advantage -
Frame Count 1 1 2 2..
Simplified 40

HP version:

Damage 16 Sf2ce-ryu-hdk-hp-a1.png Sf2ce-ryu-hdk-hp-a2.png Sf2ce-ryu-hdk-hp-a3.png Sf2ce-ryu-hdk-hp-a4.png
Stun 13~19
Stun Timer 120
Frame Advantage -
Frame Count 1 1 2 2..
Simplified 40


  • Shoryuken: →↓↘ + Punch

Startup:

Damage 32 Sf2ce-ryu-srk-s1.png Sf2ce-ryu-srk-a1.png Sf2ce-ryu-srk-a2.png Sf2ce-ryu-srk-r1.png Sf2ce-ryu-srk-r2.png Sf2ce-ryu-srk-r3.png
Stun 13~19
Stun Timer 120
Frame Advantage -18/-26/-40
Jab 4 4 14 6 11 5
Strong 4 4 22 6 14 5
Fierce 4 4 26 6 21 5
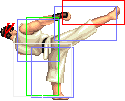
  • Tatsumaki Senpuu Kyaku: ↓↙← + Kick

Startup:

Damage 22 Sf2ce-ryu-tsk-s1.png Sf2ce-ryu-tsk-s2.png Sf2ce-ryu-tsk-s3.png
Stun 13~19
Stun Timer 120
Frame Advantage -1
Frame Count 4 4 3


Active:

Sf2ce-ryu-tsk-a1.png Sf2ce-ryu-tsk-m1.png Sf2ce-ryu-tsk-a2.png Sf2ce-ryu-tsk-m2.png
Frame Count 3 3 3 3

Short: 1 Time
Foward: 2 Times
Rounhouse: 3 Times

Recovery:

Sf2ce-ryu-tsk-r1.png Sf2ce-ryu-tsk-r2.png Sf2ce-ryu-tsk-r3.png Sf2ce-ryu-tsk-r4.png
Frame Count 4 4 4 0

Misc Animations

Walk back Neutral Walk Fwd Crouch
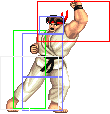
Sf2ce-ryu-bwd.png Sf2ce-ryu-cllp-n.png Sf2ce-ryu-fwd.png Sf2ce-ryu-cr-n.png
  • Standing reel:
Sf2ce-ryu-reel1.png Sf2ce-ryu-reel2.png Sf2ce-ryu-reel3.png Sf2ce-ryu-reel4.png
  • Standing gut reel:
Sf2ce-ryu-gutreel1.png Sf2ce-ryu-gutreel2.png Sf2ce-ryu-gutreel3.png Sf2ce-ryu-gutreel4.png
  • Crouching reel:
Sf2ce-ryu-creel1.png Sf2ce-ryu-creel2.png Sf2ce-ryu-creel3.png
  • Dizzy:
Sf2ce-ryu-dizzy1.png Sf2ce-ryu-dizzy2.png Sf2ce-ryu-dizzy3.png

Advanced Strategy

Ryu is perhaps the most balanced char of the game and one of its top tiers. His moves and techniques include ofensive and defensive capabilities thus making Ryu a good beginner's choice. But once you understand and master his techniques, Ryu can be pretty much invincible or at least a tough as nails challenge. Contrary to his pal Ken, Ryu can win his fights both from close or far distances, has a faster projectile, a much better Hurricane Kick and a slower Shoryuken.

Ryu can avoid most of the common traps from other chars, thanks to his Hurricane Kick. The move has many invincible frames both at start and at the end, making a counter attack very difficult, let alone the almost sure trade that always ends in Ryu's favours. Ryu can pass through fireballs easily with his Tatsu, being it one of the most important techinques a Ryu player should master. Also, he can handle most fireball wars easily, being Sagat's Tiger Shots the only exception. Don't be ashamed to pressure with Hadoukens since they're an important zoning tool and a way to induce your opponent to make mistakes.

Unfortunately nobody is perfect. Ryu's Shoryuken isn't near as reliable nor as fast as Ken's one, not to mention it can be safe jumped. But this doesn't means it's an useless move. The player just have to be more careful on how and when to apply it, since it's slower and have limited range. It's a good anti-air but sometimes the Hurricane Kick works even better. If the opponent is near you, Shoryuken him with no mercy but if your enemy is jumping from a certain distance, it may be wiser to use a Tatsu since there's a huge chance you'll whiff and be punished. The Touch of Dead (ToD) combo doesn't work like Ken's one, but you can do it under certain circunstances or against certain adversaries. Basically, you must do it starting with a cross up, or it will whiffs. Standing HP + Shoryuken combos must be done with LP or MP because the HP Shoryuken is a 2 hit attack in this Street Fighter version and whiffs the second hit most of time. And speaking about combos, the air "HP xx s.HP xx Hadouken" is his best one: easy execution, high damage and instant dizzy in 99% of the cases.

Footsies and pokes are basically the same for both Ken and Ryu. Use them wisely.

Match-Ups

Ryu's match-ups according the "official" SF2CE Tier List:

  • against Ryu: 5
  • against Ken: 6
  • against Chun Li: 7
  • against E. Honda: 8
  • against Zangief: 5
  • against Blanka: 5
  • against Dhalsim: 4
  • against Guile: 7
  • against Balrog: 9
  • against Vega: 4
  • against Sagat: 3
  • against Bison: 4


Vs. Ryu

Avoid the temptation of start up the round throwing a fireball because you can simply initiate a chain reaction that will end up in a lost match. The opponent may jump and inflict you a 3-hit dizzying combo and then a cross up ToD, to tragic consequences. Your best bet is start the round blocking/footsing and waiting for your opponent's reaction. The fireballs can be countered by Hurricane Kicks and even if you end up trading hits, you'll be at an advantage since your move takes more life and will knock your enemy down, thus openning some possibilities. Cross ups are generaly a good idea but beware the distances: The wrong one will result in a reversal Shoryuken or Hurricane Kick. Do it carefully. If Ryu is near you, you must always work having in mind that he can't help the desire to Tatsu you. Be careful with your footsies and Hadoukens and avoid patterns. If cornered, the Hurricane Kick is your way out if done at the right timing. If you corner your adversary, set a fireball trap but remember he also have the very same Hurricane Kick.

Vs. Ken

2 Things to worry: Ken's speed and combos. Ken's moves are faster and favours a chaotic playing style. Be aware of his footsies and Hurricane Kick (specially if used as a mixup tool). Ryu wins a fireball war, so if your opponent is fool enough to engage it with you, do it until he learns his lesson. If Ken try to jump at you, counter it with a Shoryuken or Tatsu, according the distance. Fireball traps are effective against Ken but again, be careful. Keep Ken far with your fireballs and wait until he tries to get closer to you. Once you're close, wait until he throws a fireball then Tatsu him. Ken's Shoryuken has a long range so be careful when jumping at him.

Vs. E.Honda

A good pattern is to throw a spiritball and roundhouse sweep him as he jumps over it. This is an effective method but may become monotonous. The best way to handle Honda is to use combos as you jump in, #5 works well if attacking from a distance, or if you are close enough #4 is best for it can hit him in the back even if he starts a headbutt. A sure way to counter his fierce headbutt if you can see it coming is to simply jump straight up and throw him after you land. (He takes much longer to recover from his headbutt than you do from your jump.

Vs. Chun Li

Beware her uncanny ability to throw. Don't attempt to many jump over throws for she will most likely out throw you. The best method is to stay patient and wait for her to make a mistake, use your Dragonpunch for it works well. Also beware using to many roundhouse footsweeps for she can run in behind them and throw you. When fighting a Chun who likes to stay on the ground your forward sweep is very effective esp. if you throw in an occasional barrage of ducking jab kicks. The jab will knock her out of her forward sweep. If you are well experienced in using the DP you can use it to also knock her out of her forward sweep for considerably more damage. Another good way to deal with defensive or ground based Chun Li players is to jump in from about the standard two body widths and try for a combo, #5 is best. If she tries to walk under and throw you, you can easily go for a hemorrhoid

Vs. Blanka

The best way to do this is to use a lot of jab punches as you move around the screen. This should make him think twice about using the ball like there is no tomorrow. When jumping in try to distance your attacks so that they just barely hit him and hold them until you are level with his face. This will make you much harder to hit or ball out of the air. Another good attack is to get in close and go for combo #4. Try to never let your opponent get within two body widths from you for at this range he can easily jump over your spiritball and roundhouse kick you, even if he has poor timing. If Blanka gets close try faking a spiritball this will usually draw him of sides and make him easy prey for an uppercut.

Vs. Zangief

Try never to jump in unless he is standing up or there is no choice for he can airplanepunch you out of almost everything. When you do jump it is better to use attacks that compact your body and make you harder to airplane punch you out of. The best tactic is to use lost of low kicks especially a few forward kicks and then a roundhouse after you lure them into foot sweep range. Don't underestimate your jab kick it knocks him out of everything save the 360. If he uses the airplane punch and then 360's you as it wares off, the best way to deter this is the helicopter kick.

Fortunately, the ToD combo works straight forward on Zangief and it's a good option when you dizzy him. Just remember that the Shoryuken must be connected real fast in order to finish the combo correctly.

Vs. Guile

Like Zangief don't underestimate your jab kick for it can deflect his infamous forward leg sweep. Also try to time your helicopter kicks so they hit him as he throws a sonic boom. Finally don't throw a spiritball into a sonic boom if Guile is to close for he can backhand you after the projectiles collide. A good attack to counter his axe-kick is to jump in and execute a combo.

You must time your first hit so that your punch just enters his head as he starts to stand up. (this will only work if Guile is standing up from being knocked down.)

Vs. Dhalsim

First be wary of the number of helicopter kicks you use from long range for Dhalsim can block them and easily throw you. You can however use them to go over his fireballs just like sonicbooms if your close enough, if not your thrown. Finally when you jump in over a fireball wait until you almost land before throwing a punch or kick this will hit his fierce punch or slide. If your opponent adapts to this technique and starts kicking you out of the air try using the jump in fierce punch. This will crunch your body up and make you harder to hit. If you plan on doing this try being a bit closer to him before you jump.

Vs. Balrog (Boxer)

The key to Balrog is low attacks, with an occasional spiritball. If he uses lost of charging punches wait until his arm is right about to touch you and execute a helicopter kick, this should hit him. Also when jumping in try to do it either from a distance as you would against Blanka or from very close (within two body widths) and go for hemorrhoid attacks. Due to the distance of Balrog's standing punches he is very vulnerable to hemorrhoid attacks.

Vs. Vega (Claw)

Throw lots of Spiritballs to lure him into a jump, then Dragonpunch. If you jump in do it from semi close range for his claw can stab you at a distance. Try going for a lot of hemorrhoids, for they can lead into a combo that can destroy him. The best defense for his wall attacks is a small dragon punch or if you are unsure of you uppercut ability a jumping away roundhouse kick should do nicely, or even a helicopter kick right before he get to you. May end in a double hit but that is better than being slammed.

Vs. Sagat

Fight much as you would another Ryu except beware of throwing a spiritball at to close a range for he can Tiger Knee over it and hit you. If he throws lots of low tigers the best defense is either a helicopter kick or a jump attack from about three body widths. When you jump in hold you attack until you are about to land. This will make you harder to hit and make him easier to strike. If he throws lots of high tigers you can counter this by simply ducking under them and using the fierce punch. This will hit him as long as yourÔ****Tiger Uppercut- only takes off damage if HE hits YOU with the top of his fist. The best way to counter this is to jump in so your attack will just barely strike him (roundhouse is best) and execute the kick as soon as you see Sagat start to go into the uppercut motion.

NOTE: The ToD combo works on Sagat without the need to crossup him. Only remember Ryu's Shoryuken isn't as fast as Ken's one so you must be quick, otherwise it will whiff.

Vs. M. Bison (Dictador)

The best strategy against M.Bison is to throw lots of spiritballs just as against Vega, then Dragonpunch. If he happens to hit with a torpedo body and starts going back and forth wait for him to approach as you stand up and Dragonpunch him. (this will only work if you hit the front part of his body)