Note: All frame data gathered by using the method described at http://code.google.com/p/macrolua/wiki/FrameDataExamples. Some differs from TAkiba's, and is noted by a *.
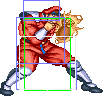
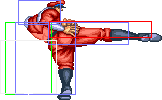
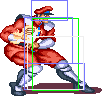
Standing Moves
| Damage |
4 |
 |
 |
|
| Rnd Dmg Table |
0x020
|
| Stun |
1~7
|
| Stun Timer |
40
|
| Chain Cancel |
Yes
|
| Special Cancel |
Yes
|
| On Hit |
+5
|
| Frame Count |
4 |
4 |
5
|
| Damage |
18 |
 |
 |
 |

|
| Rnd Dmg Table |
0x020
|
| Stun |
5~11
|
| Stun Timer |
60
|
| Chain Cancel |
No
|
| Special Cancel |
No
|
| On Hit |
+6
|
| Frame Count |
3 |
4 |
4 |
9
|
| Simplified |
7 |
4 |
9*
|
| Damage |
26 |
|
|
 |
|
| Rnd Dmg Table |
0x020
|
| Stun |
11~17
|
| Stun Timer |
80
|
| Chain Cancel |
No
|
| Special Cancel |
No
|
| On Hit |
-3
|
| Frame Count |
5 |
4 |
6 |
20
|
| Simplified |
9 |
6 |
20
|
| Damage |
8 |
 |
 |
 |
|
|
| Rnd Dmg Table |
0x020
|
| Stun |
1~7
|
| Stun Timer |
40
|
| Chain Cancel |
No
|
| Special Cancel |
No
|
| On Hit |
+5
|
| Frame Count |
3 |
2 |
4 |
4 |
1
|
| Simplified |
5 |
4 |
5
|
| Damage |
16 |
|
|
 |
|
|
| Rnd Dmg Table |
0x020
|
| Stun |
5~11
|
| Stun Timer |
60
|
| Chain Cancel |
No
|
| Special Cancel |
No
|
| On Hit |
+5
|
| Frame Count |
4 |
3 |
5 |
8 |
1
|
| Simplified |
7 |
5 |
9
|
| Damage |
24 |
|
|
 |
|
|
| Rnd Dmg Table |
0x020
|
| Stun |
11~17
|
| Stun Timer |
80
|
| Chain Cancel |
No
|
| Special Cancel |
No
|
| On Hit |
-1
|
| Frame Count |
4 |
5 |
6 |
17 |
1
|
| Simplified |
9 |
6 |
18
|
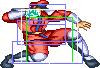
Crouching Moves
| Damage |
4 |
 |
 |
 |
|
| Rnd Dmg Table |
0x020
|
| Stun |
1~7
|
| Stun Timer |
40
|
| Chain Cancel |
Yes
|
| Special Cancel |
Yes
|
| On Hit |
+6
|
| Frame Count |
2 |
2 |
4 |
4
|
| Simplified |
4 |
4 |
4
|
| Damage |
18 |
|
|
 |
|
| Rnd Dmg Table |
0x020
|
| Stun |
5~11
|
| Stun Timer |
60
|
| Chain Cancel |
No
|
| Special Cancel |
No
|
| On Hit |
+6
|
| Frame Count |
3 |
2 |
4 |
9
|
| Simplified |
5 |
4 |
9*
|
| Damage |
26 |
|
|
 |
|
| Rnd Dmg Table |
0x020
|
| Stun |
11~17
|
| Stun Timer |
80
|
| Chain Cancel |
No
|
| Special Cancel |
No
|
| On Hit |
-3
|
| Frame Count |
5 |
4 |
6 |
20
|
| Simplified |
9 |
6 |
20
|
| Damage |
8 |
 |
 |
|
| Rnd Dmg Table |
0x020
|
| Stun |
1~7
|
| Stun Timer |
40
|
| Chain Cancel |
No
|
| Special Cancel |
No
|
| On Hit |
+5
|
| Frame Count |
5 |
4 |
5
|
Hits low.
| Damage |
16 |
|
 |
|
| Rnd Dmg Table |
0x020
|
| Stun |
5~11
|
| Stun Timer |
60
|
| Chain Cancel |
No
|
| Special Cancel |
No
|
| On Hit |
+6
|
| Frame Count |
5 |
8 |
5
|
Hits low.
| Damage |
24 |
 |
 |
|
| Rnd Dmg Table |
0x020
|
| Stun |
5~11
|
| Stun Timer |
130
|
| Chain Cancel |
No
|
| Special Cancel |
No
|
| On Hit |
KD
|
| On Block |
-22
|
| Frame Count |
7 |
29 |
17
|
Hits low. Slides roughly 3/4 the screen, knocking down on hit. Extremely unsafe unless connecting very late in the active frames.
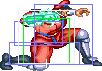
Aerial Moves
- Neutral/Diagonal Jumping Jab:
| Damage |
8/7 |
 |
 |
|
|
| Rnd Dmg Table |
0x020
|
| Stun |
1~7
|
| Stun Timer |
40
|
| Special Cancel |
No
|
| Frame Count |
2 |
40 |
6 |
∞
|
| Simplified |
2 |
40 |
∞
|
- Neutral/Diagonal Jumping Strong:
| Damage |
16/14 |
|
 |
|
|
| Rnd Dmg Table |
0x020
|
| Stun |
5~11
|
| Stun Timer |
60
|
| Special Cancel |
No
|
| Frame Count |
3 |
20 |
6 |
∞
|
| Simplified |
3 |
20 |
∞
|
| Damage |
24 |
|
 |
|
|
| Rnd Dmg Table |
0x020
|
| Stun |
11~17
|
| Stun Timer |
80
|
| Special Cancel |
No
|
| Frame Count |
5 |
8 |
6 |
∞
|
| Simplified |
5 |
8 |
∞
|
| Damage |
22 |
|
 |
|
|
| Rnd Dmg Table |
0x020
|
| Stun |
11~17
|
| Stun Timer |
80
|
| Special Cancel |
No
|
| Frame Count |
5 |
8 |
6 |
∞
|
| Simplified |
5 |
8 |
∞
|
| Damage |
10 |
 |
 |
|
| Rnd Dmg Table |
0x020
|
| Stun |
1~7
|
| Stun Timer |
40
|
| Special Cancel |
No
|
| Frame Count |
2 |
40 |
∞
|
| Damage |
18 |
 |
|
 |
|
| Rnd Dmg Table |
0x020
|
| Stun |
5~11
|
| Stun Timer |
60
|
| Special Cancel |
No
|
| Frame Count |
1 |
2 |
20 |
∞
|
| Simplified |
3 |
20 |
∞
|
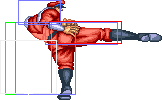
- Neutral Jumping Roundhouse:
| Damage |
26 |
|
|
 |
|
| Rnd Dmg Table |
0x020
|
| Stun |
11~17
|
| Stun Timer |
80
|
| Special Cancel |
No
|
| Frame Count |
3 |
2 |
8 |
∞
|
| Simplified |
5 |
8 |
∞
|
| Damage |
8 |
 |
 |
|
|
| Rnd Dmg Table |
0x020
|
| Stun |
1~7
|
| Stun Timer |
40
|
| Special Cancel |
No
|
| Frame Count |
2 |
40 |
5 |
∞
|
| Simplified |
2 |
40 |
∞
|
- Diagonal Jumping Forward:
| Damage |
16 |
|
 |
|
|
| Rnd Dmg Table |
0x020
|
| Stun |
5~11
|
| Stun Timer |
60
|
| Special Cancel |
No
|
| Frame Count |
3 |
20 |
5 |
∞
|
| Simplified |
3 |
20 |
∞
|
- Diagonal Jumping Roundhouse:
| Damage |
24 |
|
 |
|
|
| Rnd Dmg Table |
0x020
|
| Stun |
11~17
|
| Stun Timer |
80
|
| Special Cancel |
No
|
| Frame Count |
5 |
8 |
5 |
∞
|
| Simplified |
5 |
8 |
∞
|
Throws
M.Bison can only throw with Strong and Fierce. He has no kick throws.
- Deadly Throw: (←/→ + Strong/Fierce)
| Damage |
32 |
|
| Stun |
7~13
|
| Stun Timer |
99
|
| Range (from axis) |
52
|
| Range advantage |
24
|
Both punch throws are the same.
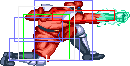
Special Moves
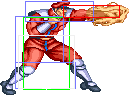
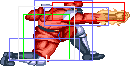
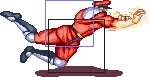
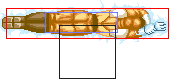
Psycho Crusher: (Charge ←, →, P) [charge time: 59f]
|
 |
 |
 |
|
| Frame Count |
2 |
2 |
2 |
7
|
| Simplified |
13
|
- Active part 1:
- Jab Version: This happens 2 times.
- Strong Version: This happens 3 times.
- Fierce Version: This happens 5 times.
| Damage (Jab) |
24 |
 |
 |
 |
|
| Damage (Strong) |
26
|
| Damage (Fierce) |
28
|
| Random dmg table |
0x040
|
| Stun |
13~19
|
| Stun Timer |
120
|
| Frame Advantage |
KD
|
| Frame Count |
3 |
3 |
3 |
3
|
| Simplified |
12
|
|
|
|
|
| Frame Count |
3 |
3 |
2
|
| Simplified |
8
|
- Strong Version: No extra animation.
- Fierce Version:
|
|
| Frame Count |
2
|
|
|
 |
|
| Frame Count |
4 |
5 |
7
|
| Simplified |
16
|
Japanese Champion Edition tuned down the special, this is still a really good move if used correctly.
LP Psycho Crusher is good chipping tool and fairly safe to use. MP Psycho Crusher can set up tick throws and crossing up folks who are getting up. HP Psycho Crusher is good at chasing people down, trading with projectiles up close, getting far away from the corner. It's also really good at hitting people from behind, either as they're getting up or coming down from a jump, since his legs can hit. HP Psycho Crusher is only somewhat safe if you do it when your opponent is far away from the corner though, and even then, some characters can still turn around and smack you before you land. Some characters can even hit you -in-between- the blocked hits of the Psycho Crusher, though in my 13 or so years of playing this game, I've only seen this occur -once-.
Bison's only special move with invincibility, though only 2 frames.
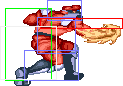
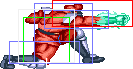
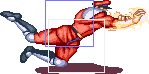
Double Knee Press: (Charge ←, →, K) [charge time: 107f]
|
 |
 |
|
| Frame Count |
2/3/4 |
3 |
3
|
| Simplified |
8/9/10
|
| Damage (Jab) |
24,16 |
 |
 |
|
| Damage (Strong) |
26,16
|
| Damage (Fierce) |
28,16
|
| Random dmg table |
0x020
|
| Stun |
13~19,1~7
|
| Stun Timer |
120,50
|
| Frame Advantage |
+4/+3/+2
|
| Frame Count |
8 |
8 |
1
|
| Simplified |
17
|
|

|
| Frame Count |
10/11/12
|
Notes: Another move that has been severely toned down from Champion Edition, even more so than the Psycho Crusher, this is still Bison's main attack move. He no longer gets frame advantage after it and can no longer combo after it, but it's still his best method of keeping pressure on the opponent. A MK Double Knee Press, followed by c.MK, s.MK, MK Double Knee Press is still decently good pressure. You ca draw out retaliation attacks after the c.MK, either by doing c.LP or doing nothing. All versions of the Double Knee Press are relatively safe if you do them from far away, which is the only place you should be doing them. c.LP x 2, s.LP, MK Double Knee Press is M.Bison's most damaging and most reliable combo to perform when an opponent is dizzy. Don't use this attack against a crouch-blocking Blanka, since his sprite is so low to the ground that only one hit connects really fast and it will throw off your timing.
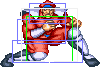
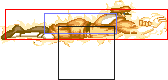
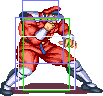
Head Stomp: (Charge ↓, ↑, K) [charge time: 59f]
|
 |
 |
 |
|
| Frame Count |
2 |
12 |
8 |
8
|
| Simplified |
30
|
| Damage |
14 |
|
| Random dmg table |
0x020
|
| Stun |
11~17
|
| Stun Timer |
60
|
|
|
| Frame Count |
∞
|
- Forward/Roundhouse Version:
| Damage (Frwrd) |
16 |
|
| Damage (Rh) |
18
|
| Random dmg table |
0x020
|
| Stun |
11~17
|
| Stun Timer |
60
|
| Frame Count |
∞
|
|
 |
 |
|
 |
 |
 |
|
|
| Frame Count |
7 (IF) |
7 (IF) + 1 |
6 |
6 |
6 |
6 |
∞ |
6
|
Your main anti-projectile move. Use it to safely counter the projectiles of Ken, Dhalsim, or Chun-li on reaction from a full-screen away, which is where you'll be using this most of the time. You can counter Ryu or Sagat's with it, but only if you anticipate and launch the moment you see them throw their projectile. Guile's projectile cannot be reliably countered with this attack if you're at full screen - he may not be able to counter you back, but he should be able to block. The Head Press has some use as a low move counter in close, but only rarely, and not against anyone who has an instantaneous anti-air.
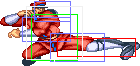
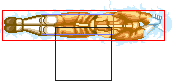
Somersault Skull Diver: (P, during the Bounce/Recovery animation of Head Stomp)
| Damage |
22 |
 |
 |
|
| Random dmg table |
0x060
|
| Stun |
11~17
|
| Stun Timer |
60
|
| Frame Count |
3 |
∞ |
6
|
| Damage |
24 |
|
 |
|
|
|
| Random dmg table |
0x060
|
| Stun |
11~17
|
| Stun Timer |
60
|
| Frame Count |
4 |
20 |
6 |
∞ |
6
|
| Damage |
26 |
|
 |
|
|
|
| Random dmg table |
0x060
|
| Stun |
11~17
|
| Stun Timer |
60
|
| Frame Count |
6 |
8 |
6 |
∞ |
6
|
The follow up to the Head Press is a very useful move. You can combo off of it if you land it deep enough. It's also great for goading certain people, especially characters with air throws - after a blocked Head Press, you should NEVER EVER be air thrown out of this, since you can -always- smack them before they reach you. It's great against characters who don't have instantaneous anti-air, or characters' whose anti-air doesn't hit behind.
Misc Animations
| Walk back |
Neutral |
Walk Fwd |
Crouch
|
 |
 |
 |
|


