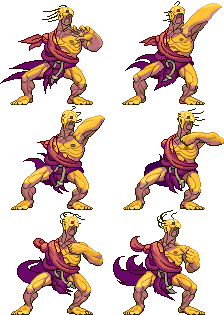
LK (high)
Startup
Active
Recovery
Block
Hit
Cr. Hit
Damage
Stun
Kara
Guard
Parry
11
1(14)1
19
-4
0
2
10*(8)
3*(2)
-
H*H
H*H
Cancel Options
Self Meter Gain
Whiff
Hit
Block
Opponent Meter Gain
Hit
Block
-
3
19
13
4
0
2nd high kick comes out automatically if not holding Safe on block, except against particularly fast/far ranged punish supers
LK (low end)
Startup
Active
Recovery
Block
Hit
Cr. Hit
Damage
Stun
Kara
Guard
Parry
11
1(19)2
30
-12
D
D
10*(8)
3*(3)
-
H*L
H*L
Cancel Options
Self Meter Gain
Whiff
Hit
Block
Opponent Meter Gain
Hit
Block
-
-
-
-
-
-
Hold Doesn't combo, but can mess up parry attempts in exchange for safety
MK
Startup
Active
Recovery
Block
Hit
Cr. Hit
Damage
Stun
Kara
Guard
Parry
13
1(15)1
21
-2
0
2
10*8
3*2
-
H*H
H*H
Cancel Options
Self Meter Gain
Whiff
Hit
Block
Opponent Meter Gain
Hit
Block
-
3
19
13
4
0
Safe on block against most characters; can follow up with 3rd kick after confirming a hit
+ MK (3rd High)
Startup
Active
Recovery
Block
Hit
Cr. Hit
Damage
Stun
Kara
Guard
Parry
-
1
21
-7
1
3
8
5
-
H
H
Cancel Options
Self Meter Gain
Whiff
Hit
Block
Opponent Meter Gain
Hit
Block
-
-
-
-
-
-
Press
The timing of the 3rd hit doesn't change regardless of when it is input during this 6f window
Full active frame data: 1(15)1(15)1
+ MK (3rd Low)
Startup
Active
Recovery
Block
Hit
Cr. Hit
Damage
Stun
Kara
Guard
Parry
-
2
30
-12
D
D
8
3
-
L
L
Cancel Options
Self Meter Gain
Whiff
Hit
Block
Opponent Meter Gain
Hit
Block
-
-
-
-
-
-
Press
The timing of the 3rd hit doesn't change regardless of when it is input during this 6f window
Only combos against crouching opponents (easily confirmed after the first 2 hits connect)
Full active frame data: 1(15)1(21)2
HK (high)
Startup
Active
Recovery
Block
Hit
Cr. Hit
Damage
Stun
Kara
Guard
Parry
14
1(13)1(15)1
24
-8
0
2
10*8*(13)
3*4*(4)
-
H*H*H
H*H*H
Cancel Options
Self Meter Gain
Whiff
Hit
Block
Opponent Meter Gain
Hit
Block
su (2nd hit only, into SA2 fireball or SA3)
3
20
14
4
0
Third high kick comes out automatically if not holding
HK (low end)
Startup
Active
Recovery
Block
Hit
Cr. Hit
Damage
Stun
Kara
Guard
Parry
-
2
30
-12
D
D
12
3
-
L
L
Cancel Options
Self Meter Gain
Whiff
Hit
Block
Opponent Meter Gain
Hit
Block
-
3
20
14
4
0
Hold
Frame data is for the 3rd low kick only, not the entire sequence
Can't be comboed into, but can mess up parry attempts at the risk of being more unsafe on block
Full active frame data: 1(13)1(18)2
EX (high)
Startup
Active
Recovery
Block
Hit
Cr. Hit
Damage
Stun
Kara
Guard
Parry
7
1(9)1(9)1(10)1
28
-11
D
D
8*8*8*(11)
3*4*4*(2)
-
H*H*H*H
H*H*H*H
Cancel Options
Self Meter Gain
Whiff
Hit
Block
Opponent Meter Gain
Hit
Block
-
-40
-40
-40
0
0
After the first kick, any followups can be low by holding A high kick will only combo into a low followup on crouching opponents
A successful low followup can always combo into further high or low kicks
Whiffs against short crouching characters; later hits can whiff on more characters depending on range
-23 on hit if only the final kick whiffs
EX (low end)
Startup
Active
Recovery
Block
Hit
Cr. Hit
Damage
Stun
Kara
Guard
Parry
-
2
30
-16
D
D
10
3
-
L
L
Cancel Options
Self Meter Gain
Whiff
Hit
Block
Opponent Meter Gain
Hit
Block
-
-
-
-
-
-
Frame data when the final kick is a low (any of the 2nd-4th hits can alternate between high and low)
Active frames for 3 high kicks + low ender: 1(9)1(9)1(14)2 

