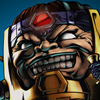

M.O.D.O.K.
TBW
In a nutshell
MODOK is unorthodox in both character design and fighting style. While the Mental Organism Designed Only for Killing’s plethora of projectiles, defensive command normal, and unprecedented length of flight time would immediately suggest a zoning character, the meta-game points to a different strategic standpoint: that of technical rushdown. By understanding and combining the diverse properties of MODOK’s moves in combos, particularly those with jump cancels or S modifications, players can surprise opponents with a relatively large character that can swiftly yet mysteriously decimate most any other character’s health points.
Players to Watch
TA|Moonz, El Gato, Rubeks
The Ultimate Transition
MODOK received only two character-specific changes, and they’re both buffs: Cancel air normals into air dashes (a corollary to MODOK’s jump-cancelling ground normals), and Killer Illumination is now mashable.
Note that the game-wide “no blocking during air dashes” and “Down-back air dashes are slower” rules impact MODOK as well; however, most of the time effective MODOK players are air-dashing close to the ground against a blocking or stunned opponent, rendering tactical alterations minimal.
Character Specific Information
Video Walkthrough
Technology
full screen punish with beams and dhc
strong incoming mixups with strider
jamming bomb snap back set ups
jill and modok set up
using low assists to set up offense
full screen zero level 3 buster dhc to modok
Combos
Team Spencer/MODOK/Doom combos
TAC Infinite
Move List
Assist Types
Normal Moves
(67,100)
chipdamage
puddle hits low
otg
chipdamage
softknockdown
occasional strk
- Absorbs physical and projectile damage if active player character is not blocking
- Is instantly destroyed by supers
- Inhibits enemy pass-through while permitting active player character pass-through
- Requires single jump or move equivalent to bypass
- Has no effect on teleports
b + s
- Expends 1 Understanding Charge
- Absorbs physical and projectile damage if active player character is not blocking
- Is instantly destroyed by supers
- Inhibits enemy pass-through while permitting active player character pass-through
- Requires double jump, super jump, or move equivalent to bypass
- Has no effect on teleports
(57,700)
groundbounce
Throws
Special Moves
(81,200)
proj
softknockdown
(103,000)
proj
softknockdown
(122,600)
proj
softknockdown
qcf + s
(163,600)
stagger vs grounded
softknockdown vs airborne
softknockdown
atk determines angle
h has minor homing ability
softknockdown
homing
reverses enemy controls :
b swaps with f
u swaps with d
Analyze Cube
atk determines location
adds 1 Understanding Charge on hit
Initiates Flight mode.
can be aimed with any direction
Hyper Moves
1: 8,000 X 26 (145,100)
2: 8,000 X 34 (177,100)
3: 8,000 X 40 (201,100)
4: 8,000 X 50 (241,100)
5: 8,000 X 58 (273,100)
6: 8,000 X 68 (313,100)
7: 8,000 X 76 (345,100)
8: 8,000 X 85 (381,100)
9: 8,000 X 100 (441,100)
proj
consumes all Understanding Charges;
number of charges determines blast level.
372,000 at 66 hits
hardknockdown
mashable
(72,700 ~ 305,000)
Can be aimed
Mashable
Scales by 97%
Strategy
Tips and Tricks
- Once you've struck with Analyze Cube, deploy a Big Barrier, park M.O.D.O.K. inside of it, consider entering low flight, and then shower your opponent with more Analyze Cubes. If they fall for this tactic, you may be able to easily whittle down their health while recycling Big Barriers (regularly re-deploying them as they run out), while also building meter and Levels of Understanding. Remember what tactics your opponent uses to attempt to overcome this, so you can exploit holes in their attack plan later in the match.
- After AIR Hyper Battering Ram during a Launcher combo, try a Down Aerial Exchange to switch M.O.D.O.K. out, continue a damaging combo, and even bring M.O.D.O.K. back in during the same combo for a Flight-sustained Analyze Cube spree!
- Learn how the air versions of MODOK’s specials operate. The lack of self-visibility can make things confusing for an opponent while MODOK is in air, so a quick transition to a higher altitude may make formerly insignificant Bombs and Cubes suddenly effective.
- If you deploy a Barrier and your opponent attempts to super-punish, try activating Command Flight. The opening frames of Command Flight will change to ground blocking frames against an incoming attack.
- The secret to full-screen poking as MODOK is not Psionic Blast L. That special, while fast, drops an opponent too quickly to hit-confirm into a combo or hyper move. Instead, use Psionic High Blast, which expends 1 LOU with each use. It puts a grounded opponent in a stagger state if struck, allowing MODOK to do whatever is desired.
- Open a match with Killer Illumination to surprise trigger-happy opponents.
Combos
Basic Strategy
Players can and must take advantage of down-time (the period between when one opponent partner is defeated and the next partner hops in). What projectile to use? You could certainly try Balloon Bomb L near the corner and then double dash underneath it as the opponent hops in for an easy cross-up. Perhaps a Big Barrier could pen them in or absorb their attacks.
If the player is not establishing/maintaining an advantage as MODOK, he might ask himself this simple question: am I using every single move available to me? Common to most fighting game keepaway players is a tendency toward only the one or two simplest projectile options, which telegraphs attack patterns and leaves the character open to counterattacks. Know and use all of MODOK’s moves to maximize dominance. In particular, many opponents become frustrated by the repetition of only one or two moves and will rush in after being hit more than twice. Prepare another version of the move you’re using to disrupt them, use a different projectile, use a super, or empty-jump/crouch randomly to fool an opponent and bait an unsafe move.
Advanced Strategy
Strategy vs. M.O.D.O.K.
Heroes vs. Heralds Strategy
Consider special-cancelling cards to turn a stream of Cubes and Blasts into a flood. Get an HC Gauge-building card on board as well to cover the cost of special cancels.
