Jaime Deleon (talk | contribs) |
Jaime Deleon (talk | contribs) |
||
| Line 7: | Line 7: | ||
=Gameplay Overview= | =Gameplay Overview= | ||
In order to use Rock effectively you need to use all his tools wisely. Main things you'll be aiming for are his links from his normals into his B kick super, using his command grab and counters for mixups. Rock has really low vitality so he can't really take too many hits. Rock has some tough match ups but if you play him correctly you'll be able to beat the majority of the cast. Just learn what beats what in certain match ups and you should be able to overcome an opponent. | |||
=Move List= | =Move List= | ||
Revision as of 11:18, 27 April 2012
Introduction
To come.
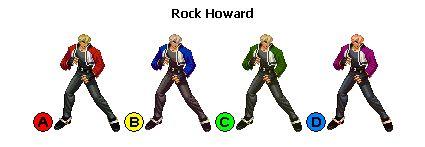
Character Colors
Gameplay Overview
In order to use Rock effectively you need to use all his tools wisely. Main things you'll be aiming for are his links from his normals into his B kick super, using his command grab and counters for mixups. Rock has really low vitality so he can't really take too many hits. Rock has some tough match ups but if you play him correctly you'll be able to beat the majority of the cast. Just learn what beats what in certain match ups and you should be able to overcome an opponent.
Move List
Command Normal Moves
Special Command Moves
| Command | Move | Weak Damage | Strong Damage |
| Reppu-ken | 12 | 10/18 (2 hits) | |
| Crack Counter | 12 | 16 | |
| Hard Edge | 12 | 18 | |
| Rage Run | 20 | -- | |
| ch. |
Rising Tackle | 18 | 21 |
| File:360a.png + |
Evac Toss | -- | 20 |
| Rasetsu | -- | 11 | |
| Raging Storm | 33 | 46 | |
| Shinning Knuckle | 32 | 47/55 (more dmg in corner) | |
| Neo Deadly Rave | -- | 49/59 (more dmg in corner) |
Attributes
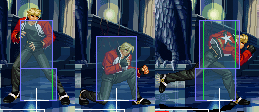
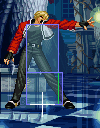
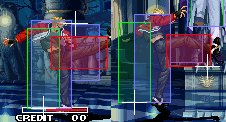
Hitboxes and Frame Data
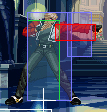
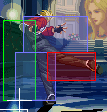
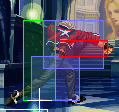
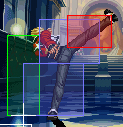
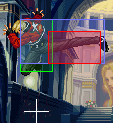
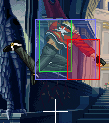
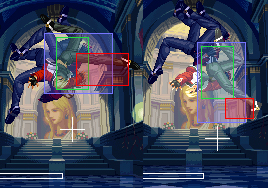
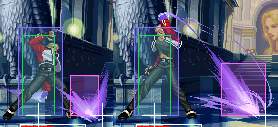
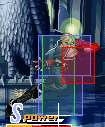
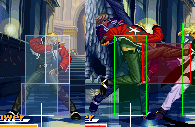
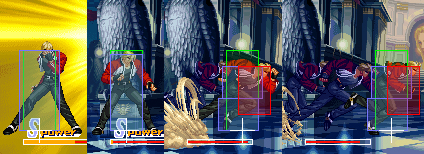
Legend:
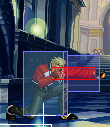
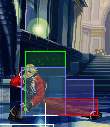
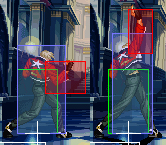
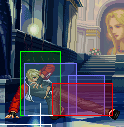
Hit Box: Area that will hit the opponent
Hurt Box: Area where you can get hit. A move is invincible if the Hurt Box is absent.
Throw Box/Range: Active throw frames and range. Your opponent will be thrown in this field if not in block or hit stun.
Projectile Box: Hit box on a projectile attack
Guard/Counter Box: The Guard Box or Counter Box. This appears when blocking or using a counter move.
Push Box: Has no bearing on hurt/hit boxes. Just allows characters to not pass through each other.
Command = the input for the attack.
Start Up = How many start up frames a move/attack has.
Hit = When the attack hits.
Block = When the attack is blocked.
+ signifies how many advantage frames the attacker has.
- signifies how many disadvantage frames the attacker has.
KD means the attack will knock the opponent down.
Standing, Crouching and Running
Taunt
| Command | Total Frames |
| Normal |
35 |
| Command | Total Frames |
| Close |
9 |
| Command | Total Frames |
| 12 |
| Command | Total Frames |
| 11 |
| Command | Start Up | Hit | Guard |
| Close |
3 | +6 | +6 |
| Command | Start Up | Hit | Guard |
| Close |
3 | +2 | +2 |
| Command | Start Up | Hit | Guard |
| Close |
5 | -8 | -8 |
| Command | Start Up | Hit | Guard |
| Close |
10 | -6 | -6 |
| -- | -8 | -8 |
| Command | Start Up | Hit | Guard |
| Far |
3 | +4 | +4 |
| Command | Start Up | Hit | Guard |
| Far |
7 | -3 | -3 |
| Command | Start Up | Hit | Guard |
| Far |
10 | -6 | -6 |
| Command | Start Up | Hit | Guard |
| Far |
11 | -9 | -9 |
| Command | Start Up | Hit | Guard |
| 4 | +3 | +3 |
| Command | Start Up | Hit | Guard |
| 4 | +5 | +5 |
| Command | Start Up | Hit | Guard |
| 5 | -3 | -3 |
| Command | Start Up | Hit | Guard |
| 8 | KD | -12 |
| Command |
| Command |
| Command |
| Command |
| Command | Start Up | Hit | Guard |
| 21 | -2 | +4 |
| Command | Start Up | Hit | Guard |
| 9 | -11 | -5 |
| Command | Start Up | Hit | Guard |
| 29 | KD | -16 |
| Command | Start Up | Hit | Guard |
| 12 | -3 | -3 |
| Command | Start Up | Hit | Guard |
| 13 | 0 | 0 |
| Command | Start Up | Hit | Guard |
| 11 | KD | -5 |
| Command | Start Up | Hit | Guard |
| 17 | KD | -12 |
| Command | Start Up | Hit | Guard |
| 22 | KD | -3 |
| Command | Start Up | Hit | Guard |
| 22 | -- | -- |
| Command | Start Up | Hit | Guard |
| 3 | KD | -- |
| Command | Start Up | Hit | Guard |
| 3 | KD | -- |
| Command | Start Up | Hit | Guard |
| Charge |
3 | KD | -29 |
| Command | Start Up | Hit | Guard |
| Charge |
3 | KD | -32 |
| Command | Start Up | Hit | Guard |
| File:360a.png + |
11 | KD | -- |
| Command | Start Up | Hit | Guard |
| 13 | KD | -23 |
| Command | Start Up | Hit | Guard |
| 18 | KD | -51 |
| Command | Start Up | Hit | Guard |
| 1 | KD | -13 |
| Command | Start Up | Hit | Guard |
| 0 | KD | -15 |
| Command | Start Up | Hit | Guard |
| 0 | KD | -2 |
Attack Notes
![]() +
+ ![]()
Ground projectile C version does a point blank ground projectile then sends out a Reppu-ken. The Reppu-ken he sends is weaker than the normal Reppu-ken
![]() +
+ ![]()
![]() counters mid & high attacks, while
counters mid & high attacks, while ![]() counters low attacks.
counters low attacks.
![]() +
+ ![]()
A version has Rock do a quick short dash with an elbow attack. C has him follow-up with a punch. The C version is slower than the A version.
![]() +
+ ![]()
B version has him dash then do an overhead punch, while D will warp him behind his opponent. The B version is very risky as the punch has some start-up delay. The D version is a good set-up for his 360+C.
File:360a.png + ![]()
Command throw & is Break-able with AB. There are 3 things to do with this move:-
1- Just doing 360+C will have Rock throw his opponent to the opposite side of the screen.
2- Breaking the move with AB will allow Rock to follow up with a special move or super.
3- Holding AB during the Evac Toss will have Rock charge up his fist for an energy blast. The timing is strict to get this follow-up to connect. This follow-up is the Rasetsu.
Combos
Combos anywhere (No meter):
1) Close standing ![]() /
/![]() +
+![]() /
/![]() /
/![]() +
+![]() +
+![]() cancel into
cancel into ![]() /
/![]() +
+ ![]() /
/![]() .
.
2) Jump ![]()
![]() /
/![]() , land, close standing
, land, close standing ![]() , cancel into
, cancel into![]() +
+![]()
3) File:360a.png + ![]() into press (hold)
into press (hold) ![]() +
+ ![]() , then release to hit.
, then release to hit.
4) File:360a.png + ![]() into press (break)
into press (break) ![]() +
+ ![]() , (
, (![]() +
+ ![]() /
/![]() )/run in
)/run in ![]() +
+ ![]() /TOP attack (
/TOP attack (![]() +
+ ![]() ).
).
Combos anywhere (1 bar of meter):
1) Jumping ![]() /
/![]() , land, close standing
, land, close standing ![]() , cancel into
, cancel into![]() x2+
x2+![]() or Neo Deadly Rave
or Neo Deadly Rave
Combos anywhere (Full meter):
Combos mid-screen (No meter):
1) Jump ![]() crossup
crossup ![]() , land, close standing
, land, close standing ![]() cancel into
cancel into ![]() /
/![]() +
+ ![]() /
/![]() .
.
2) Jump ![]() crossup
crossup ![]() , land, close standing
, land, close standing ![]() , close standing
, close standing ![]() /
/![]() +
+ ![]() cancel into
cancel into ![]() +
+![]()
3) ![]() +
+ ![]() (get behind them) into File:360a.png +
(get behind them) into File:360a.png + ![]() into press (break)
into press (break) ![]() +
+ ![]() , (
, (![]() +
+ ![]() /
/![]() )/run in
)/run in ![]() +
+ ![]() /walk in
/walk in ![]() +
+ ![]() /TOP attack (
/TOP attack (![]() +
+ ![]() ).
).
Combos mid-screen (1 bar of meter):
Combos mid-screen (Full meter):
Corner only (No meter):
1) Jumping C/D-->Down+AB-->QCFx2+P
2) Jumping C-->Standing A-->Standing C-->QCF+C
Corner only (1 Bar of meter):
1) Jumping C-->Standing A-->Standing C-->QCFx2+K
Corner only (Full meter):
1) Jumping C-->Standing A-->Standing C-->Neo Deadly Rave
Back to corner:
1) 360+C, Break-->QCB+A-->QCFx2+D-->C Rising Tackle
*Time this combo to get 15 hits total
2) 360+C, Break-->QCFx2+C
3) 360+C, Break-->Rising Tackle-->QCFx2+D-->C Rising Tackle
Overall Strategy
Coming soon.
Matchup Notes
Coming soon.
Rock vs Rock:
Rock vs Dong:
Rock vs Hotaru:
Rock vs Butt (Marco):
Rock vs Hokutomaru:
Rock vs Kevin:
Rock vs Freeman:
Rock vs Tizoc(The Griffon/Griffon Mask):
Rock vs Jenet:
Rock vs Gato:
Rock vs Jae:
Rock vs Terry:
Rock vs Grant:
Rock vs Kain:
Advanced Tactics
Rock has a special ability to combo after any type of arial hit connects. This video explains it in more detail:
http://www.youtube.com/watch?v=FWc2ikH3u30
More info coming soon.
