(→Combos) |
No edit summary |
||
| Line 4: | Line 4: | ||
TBW | TBW | ||
| | | | ||
Firebrand uses flight mixups and projectiles to open an opponent's defenses. While he may not deal much damage, his combos are quite long, and his crossups, divekick, and ability to swoop through the opponent make it so he can frequently start new combos every few seconds. When his abilities are boosted by his speed boost hyper, he becomes one of the fastest and hardest to hit characters in the game, especially with X-Factor activated.}} | |||
Revision as of 01:52, 10 December 2011


Firebrand
TBW
In a nutshell
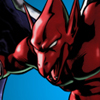
Firebrand uses flight mixups and projectiles to open an opponent's defenses. While he may not deal much damage, his combos are quite long, and his crossups, divekick, and ability to swoop through the opponent make it so he can frequently start new combos every few seconds. When his abilities are boosted by his speed boost hyper, he becomes one of the fastest and hardest to hit characters in the game, especially with X-Factor activated.
Character Vitals
Video Walkthrough
Move List
Assist Types
Normal Moves
nocancel
groundbounce
softknockdown ;
Leaves Firebrand in Flight.
Throws
+ 20,000
Special Moves
per Flame Hit
otg proj ;
strk and otg
only on Flame hit.
Hit + 70,000
softknockdown wallbounce ;
wallbounce caused only by last hit.
wallbounce results in a
hardknockdown . However, if
wallbounce has already been used
up in the Combo, a "fake" wallbounce
occurs that results in a softknockdown .
Firebrand will always drag opponent all
the way to the wall. The further from
the wall, the more damage he will do.
m version passes through opponent.
stagger (ground only)
softknockdown (air only) ;
Leaves Firebrand in Flight.
l goes straight up.
m goes up/forward.
h goes up/back.
another Hell Dive (up to 3).
l goes straight down.
m goes down/forward.
h goes down/back.
Leaves Firebrand in Flight.
Hyper Moves
proj ; Mashable.
When performed in the air,
leaves Firebrand in Flight.
Strategy
Tips and Tricks
- Firebrand has an unlisted move, performed with {{#motion: b}} {{#motion: b}} against a wall. This wall cling is great for avoiding moves and opponents, and saving time on your flight.
- Learn the ranges of all versions of Hell's Elevator and Hell Dive. Not only are these great mobility tools, but at certain ranges they can make for amazing ambiguous cross-ups.
- Perform a ground throw into the corner puts you at exactly the right range for an OTG Hell Spitfire {{#motion: h}}. Use this for relaunches out of your throw.
- While using the Devil's Claw dive kick, you are put into flight mode. On hit, use Hell Dive {{#motion: l}} to land with enough time to easily combo off of the dive kick. If the opponent blocks the dive kick in the corner, you can repeatedly use it (spam it) to add a lot of pressure. Use this in conjunction with assists or the Chaos Tide level 3 Hyper to lock the opponent down, or use Hell Dives to mix the opponent up or escape.
- With X-Factor level 3 and/or Luminous Body, Chaos Tide can be used to effectively lock the opponent down from full screen, causing a lot of chip damage. One way to do this is to press {{#motion: h}} to trigger the Red Arremer clone's Demon Missile {{#motion: h}} swoop, then immediately cancel into a Hell Spitfire {{#motion: l}} , causing a fireball / swoop loop.
Combos
- Firebrand Basic Bread and Butter
L M H S Air M M H Air d + h air qcb + L land d + H S Air M H qcf + S Land Backdash S air M H S Dark Fire
Basic Strategy
Advanced Strategy
Firebrand is a dangerously fast and mobile character, especially when he activates Luminous Body. The good news is that his overall damage isn't obscene, meaning he'll often have to attempt resets. However, due to his speed, he can often cross you up two times before you realize it, or go for a throw. However, given his relatively short melee range and low health, his approaches can often be stuffed with decent anti-air moves and normal attacks.
...to be continued...
