No edit summary |
No edit summary |
||
| Line 28: | Line 28: | ||
{{#if: {{{description|}}} | {{!}} style="width:100%; text-align:left" colspan={{#if: {{{version|}}} | 6 | 5 }} {{!}} | {{#if: {{{description|}}} | {{!}} style="width:100%; text-align:left" colspan={{#if: {{{version|}}} | 6 | 5 }} {{!}} | ||
{{{description}}} | {{{description}}} | ||
{{!}} | }} | ||
{{#if: {{{description|}}} | {{!}} {{!}} | |||
{|class="mw-collapsible mw-collapsed wikitable" style="white-space:nowrap; margin-left: 0px; margin-right: auto; text-align: center" | {|class="mw-collapsible mw-collapsed wikitable" style="white-space:nowrap; margin-left: 0px; margin-right: auto; text-align: center" | ||
|+ Additional Info | |+ Additional Info | ||
| Line 45: | Line 46: | ||
{{#if: {{{additionalinfo|}}} | {{!}} style="width:100%; text-align:left" colspan=5 {{!}} | {{#if: {{{additionalinfo|}}} | {{!}} style="width:100%; text-align:left" colspan=5 {{!}} | ||
{{{additionalinfo}}} }} | {{{additionalinfo}}} }} | ||
| | |} | ||
}} | }} | ||
</includeonly><noinclude> | </includeonly><noinclude> | ||
Revision as of 16:28, 9 January 2025
Placeholder examples.
| Startup | Active | Recovery | Base Damage | Stand Damage | |
|---|---|---|---|---|---|
| 3 | 2 | 2 | 4 | 1 | |
| Guard | Hit Adv. | Block Adv. | Pushblock Adv. | Cancel Options | |
| Mid | +5 | +7 | +4 | SP, SU, TA | |
|
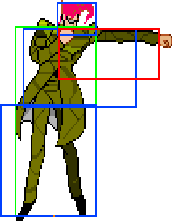
Quick jab that can combo into most of your other normals. Can combo into s+j.B on airborne opponents. Somewhat alright as a close anti-air.
|
{ | ||||
| Startup | Active | Recovery | Base Damage | Stand Damage | |
|---|---|---|---|---|---|
| 5 | 5 | 13 | - | - | |
| Guard | Hit Adv. | Block Adv. | Pushblock Adv. | Cancel Options | |
| Low | -1 | -2 | -10 | SP, SU, TA | |
|
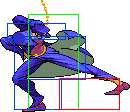
Your main Stand Off hitconfirm.
|
{ | ||||
| Startup | Active | Recovery | Base Damage | Stand Damage | |
|---|---|---|---|---|---|
| 12 | 3 (1) 8 | 13 | 7x2 | 5, 7 | |
| Guard | Hit Adv. | Block Adv. | Pushblock Adv. | Cancel Options | |
| Mid | -1 | -1 | -7 | SP, SU, TA, 236S | |
|
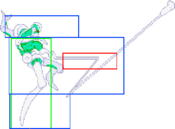
Extremely good hitbox anti-air, with a bit of disjoint as frosting on the cake |
{ | ||||
| 623A | Startup | Active | Recovery | Base Damage | Stand Damage | |
|---|---|---|---|---|---|---|
| 10 | Until ceiling (Bullet) Until ground (Glass) | 32 Total | 12 (Bullet) 3 (Glass) | 0 (Bullet) 6 (Glass) | ||
| Guard | Hit Adv. | Block Adv. | Pushblock Adv. | Cancel Options | ||
| Mid (Bullet) High (Glass) | varies | varies | varies | - | ||
| 623B/C | Startup | Active | Recovery | Base Damage | Stand Damage | |
| 12 | Until ceiling (Bullet) Until ground (Glass) | 33 Total | 12 (Bullet) 3 (Glass) | 0 (Bullet) 6 (Glass) | ||
| Guard | Hit Adv. | Block Adv. | Pushblock Adv. | Cancel Options | ||
| Mid (Bullet) High (Glass) | varies | varies | varies | - | ||
|
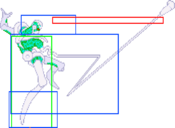
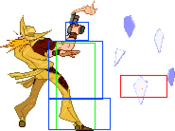
Fires an upwards shot, which creates a shower of falling glass upon hitting the ceiling. |
{ | |||||
