No edit summary |
No edit summary Tag: Manual revert |
||
| Line 29: | Line 29: | ||
{{{description}}}}} | {{{description}}}}} | ||
{{#if: {{{description|}}} | | {{#if: {{{description|}}} | | ||
{|class="mw-collapsible mw-collapsed wikitable" style="white-space:nowrap; margin-left: 0px; margin-right: auto; text-align: center" | {|class="mw-collapsible mw-collapsed wikitable" style="white-space:nowrap; margin-left: 0px; margin-right: auto; text-align: center" | ||
|+ Additional Info | |+ Additional Info | ||
| Line 47: | Line 47: | ||
{{{additionalinfo}}} }} | {{{additionalinfo}}} }} | ||
|} | |} | ||
| | | | ||
}} | }} | ||
</includeonly><noinclude> | </includeonly><noinclude> | ||
Revision as of 19:04, 7 January 2025
Placeholder examples.
| Startup | Active | Recovery | Base Damage | Stand Damage |
|---|---|---|---|---|
| 3 | 2 | 2 | 4 | 1 |
| Guard | Hit Adv. | Block Adv. | Pushblock Adv. | Cancel Options |
| Mid | +5 | +7 | +4 | SP, SU, TA |
|
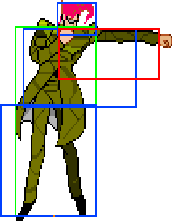
Quick jab that can combo into most of your other normals. Can combo into s+j.B on airborne opponents. Somewhat alright as a close anti-air.
{ | ||||
| Startup | Active | Recovery | Base Damage | Stand Damage |
|---|---|---|---|---|
| 5 | 5 | 13 | - | - |
| Guard | Hit Adv. | Block Adv. | Pushblock Adv. | Cancel Options |
| Low | -1 | -2 | -10 | SP, SU, TA |
|
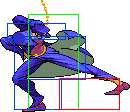
Your main Stand Off hitconfirm.
{ | ||||
| Startup | Active | Recovery | Base Damage | Stand Damage |
|---|---|---|---|---|
| 12 | 3 (1) 8 | 13 | 7x2 | 5, 7 |
| Guard | Hit Adv. | Block Adv. | Pushblock Adv. | Cancel Options |
| Mid | -1 | -1 | -7 | SP, SU, TA, 236S |
|
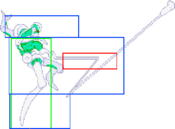
Extremely good hitbox anti-air, with a bit of disjoint as frosting on the cake { | ||||
| 623A | Startup | Active | Recovery | Base Damage | Stand Damage |
|---|---|---|---|---|---|
| 10 | Until ceiling (Bullet) Until ground (Glass) | 32 Total | 12 (Bullet) 3 (Glass) | 0 (Bullet) 6 (Glass) | |
| Guard | Hit Adv. | Block Adv. | Pushblock Adv. | Cancel Options | |
| Mid (Bullet) High (Glass) | varies | varies | varies | - | |
| 623B/C | Startup | Active | Recovery | Base Damage | Stand Damage |
| 12 | Until ceiling (Bullet) Until ground (Glass) | 33 Total | 12 (Bullet) 3 (Glass) | 0 (Bullet) 6 (Glass) | |
| Guard | Hit Adv. | Block Adv. | Pushblock Adv. | Cancel Options | |
| Mid (Bullet) High (Glass) | varies | varies | varies | - | |
|
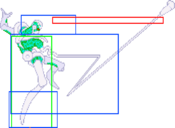
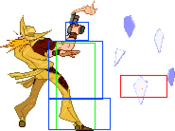
Fires an upwards shot, which creates a shower of falling glass upon hitting the ceiling. A version fires straight up, B fires just in front of Hoingo, C fires around half a screen away. A core tool in your setups, and a good supplement to your zoning and keepaway. While it can be used as a solid antiair and techchase tool, it really starts to shine when used in combination with your other projectiles, since the recovery allows Hoingo to move shortly after the glass spawns. The shards hit high, making it a key part of your strongest setups. While the A version is a niche techchase and antiair option at best, the B and C versions are really good ways to encourage your opponent to move in certain ways. The B version is the one you'll be using most in setups and when punishing moves like DIO's teleports. In addition, it's a good way to make your opponent think twice before approaching you. The C version is a good way to cover a large part of the screen provided you get the move out safely, and the glass falls at the perfect spot to setup unblockables against roll-happy opponents and ones knocked down by Truck. The air version of the move behaves similarly to the grounded versions, but there's no variations depending on what button is pressed: the bullet always comes out at a 45° angle, meaning that generally the glass will spawn further the closer you are to the ground. You can use it as an additional zoning tool in your arsenal, and you can even use a TK'd Air Glass as an alternative to C Glass, since it'll follow a similar trajectory while also being somewhat safer due to Hoingo being airborne. Other than that, the fact that it eats your momentum is a nice way to mess with your landing timing to mess with your opponent while also putting a projectile on the screen. Just be careful not to overuse this, as wary opponents will be able to punish this hard. The glass shards do a lot of chip and Stand Gauge damage, build lots of meter, and have a notoriously weird preblock activation range, causing opponents to get stuck while trying to walk while the glass is out. { | |||||
