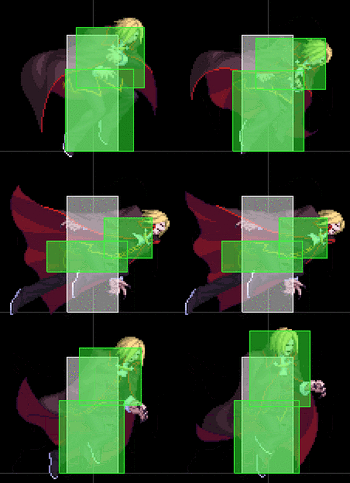
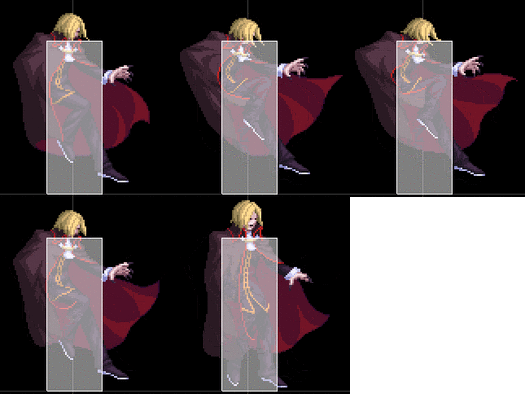
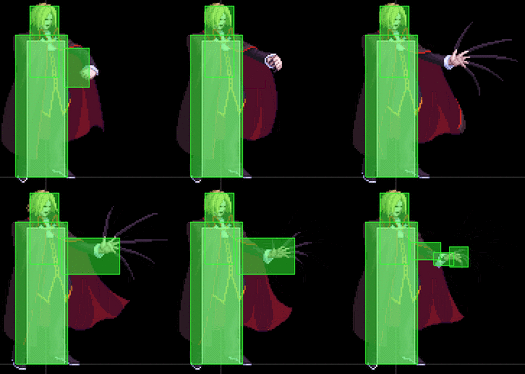
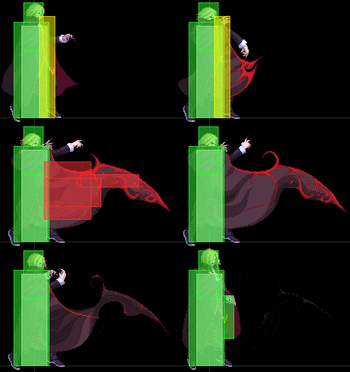
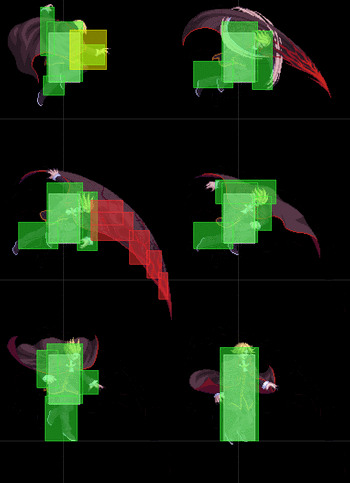
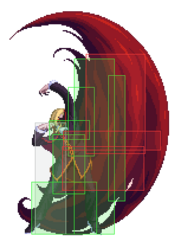
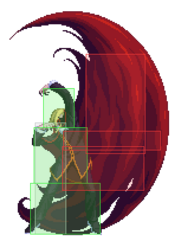
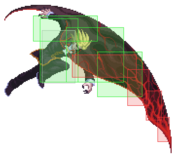
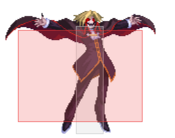
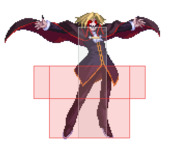
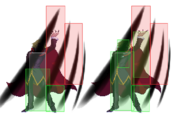
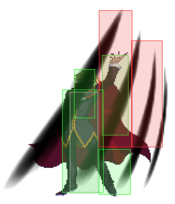
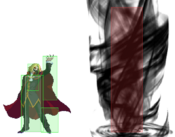
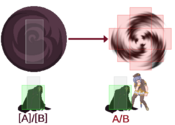
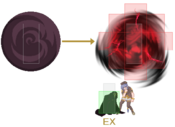
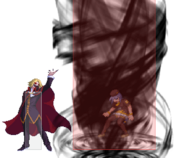
(I am using this Sandbox page to slowly build a wiki page for the Mizumi Wiki because code is easier to read on the Supercombo Wiki. Do not attempt to alter anything on this page.) |
(This update to the page is just for tinkering purposes only, this is the last version of the wiki page at Mizuumi Wiki before I realised the Mizuumi Wiki uses the False Startup format.) |
||
| Line 1: | Line 1: | ||
{{Template:Boss Character Disclaimer-MBAACC}} | |||
{{FP Overview | {{FP Overview | ||
|intro={{Character Label|MBAACC|Melty Blood/MBAACC|E-Warachia}} | |intro={{Character Label|MBAACC|Melty Blood/MBAACC|E-Warachia}} | ||
is an unplayable Boss Character version of {{Character Label|MBAACC|Melty Blood/MBAACC|C-Warachia}} | is an unplayable Boss Character version of {{Character Label|MBAACC|Melty Blood/MBAACC|C-Warachia}}. | ||
|pros= | |pros= | ||
*''' | *'''Apotheosis of a Tank''': E-Wara has ridiculously high HP at around 15327 Net Health, 1125 points higher than Akiha's Net Health (Akiha has the highest HP of any selectable character in the game at around 14202 Net Health). | ||
*'''Absurd Meter Gain and Mechanics''': Being an Eclipse Moon character, E.Wara constantly gains ~3.3% meter every 60 frames. He also rapidly gets alot of meter from doing pretty much anything. | |||
*'''Biblically Accurate Framedata''': E.Wara is essentially just C.Wara with "fair and balanced" frame data riddled with ludicrously good disjoint, clash boxes in most of his moves, and amongst other improvements. E.Wara even boasts some infinites (ie, 236A xN). | |||
*'''Biblically Accurate Dashes''': For whatever reason, E.Wara has absurd grounded dashes. his backdash leaves him completely invincible, whereas his front dash has small hurtboxes. | |||
*'''Mix & Match''': E.Wara like any Eclipse Moon character has mechanics from C + H + F moons, allowing for more variety in play. | |||
|cons= | |cons= | ||
*''' | *'''Literally Unplayable''': E.Wara cannot be played normally in game without using a mod to make him selectable, meaning you cannot even use him online. | ||
*'''Missing Character Defining Moves''': E.Wara has no arial specials apart from his j.421x, and he loses 2[C] and 5[C], they are within his code, but they go unused (probably because E-Wara was originally made in Act Cadenza, which would explain a lot of his quirks like his Sub-par mobility). | |||
*'''Sub-par Mobility''': His forward and backward walk speed are ABSURDLY slow as they never get a speed boost after the start up. To give you an idea of how bad his walk speeds are, Nanaya (char with worst Main walk speed) has 400 units (Forward) and 350 units (Back), whereas E-Wara has 384 (Forward) and 256 (Back). | |||
|border=no|tablewidth=102 | |border=no|tablewidth=102 | ||
*'''AI Takeover''': For whatever reason, E.Wara has a small chance to do a random action upon wakeup (ie, Shield Bunker, Grab, Teleport, etc) which can either work in or against his favour. These moves do not show up on input readers. | |||
|flex_header=(Eclipse Moon) Night of Wallachia | |flex_header=(Eclipse Moon) Night of Wallachia | ||
|flex_data=[[File:MBAACC_Warachia_Portrait.webp]] | |flex_data=[[File:MBAACC_Warachia_Portrait.webp]] | ||
<table style="width: 100%; border-collapse: collapse;"> | <table style="width: 100%; border-collapse: collapse;"> | ||
<tr style=" | <tr style="text: #00ffff;"><td style="text-align: right;">[[Melty_Blood/Advanced_Mechanics#Health%20Values|'''Health Mechanics''']] | ||
<tr><td style="text-align: right;">[[Melty_Blood/Advanced_Mechanics# | <tr style="background: #f9f9f9;"><td style="text-align: right;">'''Net Health''':</td><td style="width:48%; text-align: left;"> 15327.0134908 (S+++)</td></tr> | ||
<tr style="background: #f9f9f9;"><td style="text-align: right;">'''Dash Startup''':</td><td style="width:48%; text-align: left;"> | <tr style="background: #f9f9f9;"><td style="text-align: right;">'''100% HP Guard Value''':</td><td style="width:48%; text-align: left;"> 0.900</td></tr> | ||
<tr style="background: #f9f9f9;"><td style="text-align: right;">'''75% HP Guard Value''':</td><td style="width:48%; text-align: left;"> 0.900</td></tr> | |||
<tr style="background: #f9f9f9;"><td style="text-align: right;">'''50% HP Guard Value''':</td><td style="width:48%; text-align: left;"> 0.750</td></tr> | |||
<tr style="background: #f9f9f9;"><td style="text-align: right;">'''25% HP Guard Value''':</td><td style="width:48%; text-align: left;"> 0.650</td></tr> | |||
<td style="text-align: right;">[[Melty_Blood/Advanced_Mechanics#Guard_Meter|'''Guard Gauge Mechanics''']] | |||
<tr style="background: #f9f9f9;"><td style="text-align: right;">'''Max Value''':</td><td style="width:48%; text-align: left;"> 10000</td></tr> | |||
<tr style="background: #f9f9f9;"><td style="text-align: right;">'''Heal Base Value''':</td><td style="width:48%; text-align: left;"> UNKNOWNN</td></tr> | |||
<tr style="background: #f9f9f9;"><td style="text-align: right;">'''Heal Acceleration''':</td><td style="width:48%; text-align: left;"> UNKNOWNN</td></tr> | |||
<tr style="background: #f9f9f9;"><td style="text-align: right;">'''Heal Delay Time''':</td><td style="width:48%; text-align: left;"> UNKNOWNN</td></tr> | |||
<tr style="background: #f9f9f9;"><td style="text-align: right;">'''Crush Recover Time''':</td><td style="width:48%; text-align: left;"> UNKNOWNN</td></tr> | |||
<tr style="background: #f9f9f9;"><td style="text-align: right;">'''Blockstring Correction''':</td><td style="width:48%; text-align: left;"> UNKNOWNN</td></tr> | |||
<td style="text-align: right;">[[Melty_Blood/Advanced_Mechanics#Guard_Meter|'''Guard Quality Mechanics''']] | |||
<tr style="background: #f9f9f9;"><td style="text-align: right;">'''Max Value''':</td><td style="width:48%; text-align: left;"> 1.500</td></tr> | |||
<tr style="background: #f9f9f9;"><td style="text-align: right;">'''Heal Base Value''':</td><td style="width:48%; text-align: left;"> UNKNOWNN</td></tr> | |||
<tr style="background: #f9f9f9;"><td style="text-align: right;">'''Heal Delay Time''':</td><td style="width:48%; text-align: left;"> UNKNOWNN</td></tr> | |||
<tr style="text: #00ffff;"><td style="text-align: right;">'''Wakeup Timings''' | |||
<tr style="background: #f9f9f9;"><td style="text-align: right;">'''Prone''':</td><td style="width:48%; text-align: left;"> UNKNOWN</td></tr> | |||
<tr style="background: #f9f9f9;"><td style="text-align: right;">'''Supine''':</td><td style="width:48%; text-align: left;"> UNKNOWN</td></tr> | |||
<tr><td style="text-align: right;">'''Grounded Movement''' | |||
<tr style="background: #f9f9f9;"><td style="text-align: right;">'''Forward Walk Speed (Constant)''':</td><td style="width:48%; text-align: left;"> 384 units</td></tr> | |||
<tr style="background: #f9f9f9;"><td style="text-align: right;">'''Backward Walk Speed (Constant)''':</td><td style="width:48%; text-align: left;"> 256 units</td></tr> | |||
<tr style="background: #f9f9f9;"><td style="text-align: right;">'''Forward Dash Startup''':</td><td style="width:48%; text-align: left;"> 5f</td></tr> | |||
<tr style="background: #f9f9f9;"><td style="text-align: right;">'''Forward Dash Speed''':</td><td style="width:48%; text-align: left;">1720 units (20 accel, max speed 2048 units) </td></tr> | |||
<tr style="background: #f9f9f9;"><td style="text-align: right;">'''Back Dash Startup''':</td><td style="width:48%; text-align: left;"> 24f</td></tr> | |||
<tr style="background: #f9f9f9;"><td style="text-align: right;">'''Back Dash Speed''':</td><td style="width:48%; text-align: left;"> 1824 units (60 accel)</td></tr> | |||
<tr><td style="text-align: right;">'''Arial Movement''' | |||
<tr style="background: #f9f9f9;"><td style="text-align: right;">'''Arial Forward Dash Startup''':</td><td style="width:48%; text-align: left;"> 7f</td></tr> | |||
<tr style="background: #f9f9f9;"><td style="text-align: right;">'''Arial Back Dash Startup''':</td><td style="width:48%; text-align: left;"> 11f</td></tr> | |||
<tr style="background: #f9f9f9;"><td style="text-align: right;">'''Landing Recovery after Arial Dash''':</td><td style="width:48%; text-align: left;"> 8f</td></tr> | |||
<tr><td style="text-align: right;">'''Jump Related Framedata''' | |||
<tr style="background: #f9f9f9;"><td style="text-align: right;">'''Pre-Jump''':</td><td style="width:48%; text-align: left;"> 3f</td></tr> | |||
<tr style="background: #f9f9f9;"><td style="text-align: right;">'''Jump Startup''':</td><td style="width:48%; text-align: left;"> 1f</td></tr> | |||
<tr style="background: #f9f9f9;"><td style="text-align: right;">'''Pre-Hop (7)''':</td><td style="width:48%; text-align: left;"> 4f</td></tr> | |||
<tr style="background: #f9f9f9;"><td style="text-align: right;">'''Pre-Hop (9)''':</td><td style="width:48%; text-align: left;"> 3f</td></tr> | |||
<tr style="background: #f9f9f9;"><td style="text-align: right;">'''Hop Startup''':</td><td style="width:48%; text-align: left;"> 1f</td></tr> | |||
<tr style="background: #f9f9f9;"><td style="text-align: right;">'''Hyperjump Startup''':</td><td style="width:48%; text-align: left;"> 11f</td></tr> | |||
<tr style="background: #f9f9f9;"><td style="text-align: right;">'''Hyperhop Startup''':</td><td style="width:48%; text-align: left;"> 7f</td></tr> | |||
</table> | |||
}} | |||
'''NOTICE: THIS PAGE IS A WORK IN PROGRESS. IT IS MISSING SOME FRAME DATA AND DESCRIPTIONS. REFRAIN FROM USING IT UNTIL THIS NOTICE IS GONE.''' | |||
PROGRESS: 97.5% Complete, need to add in Circuit Values, Cancel Values, and descriptions. Combos are being worked upon. | |||
=== Normal Combos === | === Normal Combos === | ||
Refer to [[#Starters| Starters]] and [[#Enders | Enders]] when performing these combos. | Refer to [[#Starters| Starters]] and [[#Enders | Enders]] when performing these combos. | ||
WIP | |||
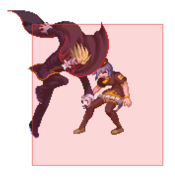
E-Wara can do (almost) all the combos C-Wara can do, but some specific things E-Wara can do that C-Wara cant are linking specials into themselves, the 236A xN infinite loop, and the {236B > 236A} xN infinite loop. | |||
== Move Descriptions == | == Move Descriptions == | ||
{{AttackData-MB/Infobox}} | {{AttackData-MB/Infobox}} | ||
=== | === Mobility Miscellaneous === | ||
===== <span class="invisible-header">Ground Dash</span> ===== | |||
{{MoveData | |||
|image=MBAACC_E_Warachia_66.gif | |||
|image2=MBAACC_E_Warachia_44.gif | |||
|caption=Forward Dash | |||
|caption2=Backwards Dash | |||
|name=Ground Dash | |||
|linkname=66/44 | |||
|data= | |||
}} | |||
==== Standing Normals ==== | ==== Standing Normals ==== | ||
===== <span class="invisible-header">5A</span> ===== | ===== <span class="invisible-header">5A</span> ===== | ||
{{MoveData | {{MoveData | ||
|image= | |image=MBAACC_E_Warachia_5A.gif | ||
|caption= | |caption= | ||
|name=5A | |name=5A | ||
| Line 32: | Line 97: | ||
|data= | |data= | ||
{{AttackData-MB | {{AttackData-MB | ||
|damage= | |damage=300 | ||
|reddamage= | |reddamage=(198) | ||
|proration= | |proration=78% (O) | ||
|circuit= | |circuit= | ||
|cancel= | |cancel= | ||
|guard= | |guard=LH | ||
|startup= | |startup=3 | ||
|active= | |active=3 | ||
|recovery= | |recovery=9 | ||
|frameAdv= | |frameAdv=0 | ||
|invuln= | |invuln= | ||
|description= | |description= | ||
| Line 49: | Line 114: | ||
===== <span class="invisible-header">5B</span> ===== | ===== <span class="invisible-header">5B</span> ===== | ||
{{MoveData | {{MoveData | ||
|image= | |image=MBAACC_E_Warachia_5B.gif | ||
|caption= | |caption= | ||
|name=5B | |name=5B | ||
| Line 55: | Line 120: | ||
|data= | |data= | ||
{{AttackData-MB | {{AttackData-MB | ||
|damage= | |damage=600, 450 (948) | ||
|reddamage= | |reddamage={{Tooltip | text=(608) | hovertext=396, 212 }} | ||
|proration= | |proration=80% x2 (O) | ||
|circuit= | |circuit= | ||
|cancel= | |cancel= | ||
|guard= | |guard=LH | ||
|startup= | |startup=7 | ||
|active= | |active=8 | ||
|recovery= | |recovery=14 | ||
|frameAdv= | |frameAdv=-5 | ||
|invuln= | |invuln=Clashes during startup frames | ||
|description= | |description= | ||
}} | }} | ||
| Line 72: | Line 137: | ||
===== <span class="invisible-header">5C</span> ===== | ===== <span class="invisible-header">5C</span> ===== | ||
{{MoveData | {{MoveData | ||
|image= | |image=MBAACC_E_Warachia_5C.gif | ||
|caption= | |caption= | ||
|name=5C | |name=5C | ||
|linkname=5C | |linkname=5C | ||
|input= | |input= | ||
|data= | |data= | ||
{{AttackData-MB | {{AttackData-MB | ||
|version= | |version= | ||
|damage= | |damage=600, 500, 400 (1459) | ||
|reddamage= | |reddamage={{Tooltip | text=(855) | hovertext=330, 319, 206 }} | ||
|proration= | |proration=100% x3 | ||
|circuit= | |circuit= | ||
|cancel= | |cancel= | ||
|guard= | |guard=LH (1), LHA (2) | ||
|startup= | |startup=8 | ||
|active= | |active=9 | ||
|recovery= | |recovery=13 | ||
|frameAdv= | |frameAdv=2 | ||
|invuln= | |invuln= Clashes on Frames 3-5 | ||
|description= | |description= | ||
}} | |||
}} | }} | ||
| Line 98: | Line 163: | ||
===== <span class="invisible-header">2A</span> ===== | ===== <span class="invisible-header">2A</span> ===== | ||
{{MoveData | {{MoveData | ||
|image= | |image=MBAACC_E_Warachia_2A.gif | ||
|caption= | |caption= | ||
|name=2A | |name=2A | ||
| Line 104: | Line 169: | ||
|data= | |data= | ||
{{AttackData-MB | {{AttackData-MB | ||
|damage= | |damage=300 | ||
|reddamage= | |reddamage=(165) | ||
|proration= | |proration=76% (O) | ||
|circuit= | |circuit= | ||
|cancel= | |cancel= | ||
|guard= | |guard=L | ||
|startup= | |startup=4 | ||
|active= | |active=3 | ||
|recovery= | |recovery=10 | ||
|frameAdv= | |frameAdv=-1 | ||
|invuln= | |invuln= | ||
|description= | |description= | ||
}} | }} | ||
}} | }} | ||
| Line 121: | Line 186: | ||
===== <span class="invisible-header">2B</span> ===== | ===== <span class="invisible-header">2B</span> ===== | ||
{{MoveData | {{MoveData | ||
|image= | |image=MBAACC_E_Warachia_2B.gif | ||
|caption= | |caption= | ||
|name=2B | |name=2B | ||
| Line 127: | Line 192: | ||
|data= | |data= | ||
{{AttackData-MB | {{AttackData-MB | ||
|damage= | |damage=750, 750 (1330) | ||
|reddamage= | |reddamage={{Tooltip | text=(936) | hovertext=528, 408 }} | ||
|proration= | |proration=80% x2 (O) | ||
|circuit= | |circuit= | ||
|cancel= | |cancel= | ||
|guard= | |guard=LH | ||
|startup= | |startup=6 | ||
|active= | |active=6 | ||
|recovery= | |recovery=17 | ||
|frameAdv= | |frameAdv=-4 | ||
|invuln= | |invuln=Clashes on Frames 5-10 | ||
|description= | |description= | ||
}} | }} | ||
| Line 144: | Line 209: | ||
===== <span class="invisible-header">2C</span> ===== | ===== <span class="invisible-header">2C</span> ===== | ||
{{MoveData | {{MoveData | ||
|image= | |image=MBAACC_E_Warachia_2C.gif | ||
|caption= | |caption= | ||
|name=2C | |name=2C | ||
|linkname=2C | |linkname=2C | ||
|input= | |input= | ||
|data= | |data= | ||
{{AttackData-MB | {{AttackData-MB | ||
|version= | |version= | ||
|damage= | |damage=800, 600 (1055) | ||
|reddamage= | |reddamage={{Tooltip | text=(737) | hovertext=550, 187 }} | ||
|proration= | |proration=50% x2 (O) | ||
|circuit= | |circuit= | ||
|cancel= | |cancel= | ||
|guard= | |guard=L | ||
|startup= | |startup=8 | ||
|active= | |active=9 | ||
|recovery= | |recovery=18 | ||
|frameAdv= | |frameAdv=-4 | ||
|invuln= | |invuln= Clashes on Frames 4-6 | ||
|description= | |description= | ||
}} | }} | ||
}} | |||
==== Aerial Normals ==== | ==== Aerial Normals ==== | ||
===== <span class="invisible-header">j.A</span> ===== | ===== <span class="invisible-header">j.A</span> ===== | ||
{{MoveData | {{MoveData | ||
|image= | |image=MBAACC_E_Warachia_jA.gif | ||
|caption= | |caption= | ||
|name=j.A | |name=j.A | ||
| Line 177: | Line 241: | ||
|data= | |data= | ||
{{AttackData-MB | {{AttackData-MB | ||
|damage= | |damage=300 | ||
|reddamage= | |reddamage=(110) | ||
|proration= | |proration=75% (O) | ||
|circuit= | |circuit= | ||
|cancel= | |cancel= | ||
|guard= | |guard=LHA | ||
|startup= | |startup=4 | ||
|active= | |active=4 | ||
|recovery= | |recovery=4 | ||
|frameAdv= | |frameAdv= | ||
|invuln= | |invuln= | ||
| Line 194: | Line 258: | ||
===== <span class="invisible-header">j.B</span> ===== | ===== <span class="invisible-header">j.B</span> ===== | ||
{{MoveData | {{MoveData | ||
|image= | |image=MBAACC_E_Warachia_jB.gif | ||
|caption= | |caption= | ||
|name=j.B | |name=j.B | ||
| Line 201: | Line 265: | ||
{{AttackData-MB | {{AttackData-MB | ||
|damage=600, 400 (967) | |damage=600, 400 (967) | ||
|reddamage=( | |reddamage={{Tooltip | text=(532) | hovertext=330, 202 }} | ||
|proration=95% | |proration=95% x2 (M) | ||
|circuit= | |circuit= | ||
|cancel= | |cancel= | ||
|guard=HA | |guard=HA | ||
|startup= | |startup=6 | ||
|active= | |active=8 | ||
|recovery= | |recovery=18 | ||
|frameAdv= | |frameAdv= | ||
|invuln= | |invuln= Clashes on Frames 1-6 | ||
|description= | |description= | ||
}} | }} | ||
| Line 217: | Line 281: | ||
===== <span class="invisible-header">j.C</span> ===== | ===== <span class="invisible-header">j.C</span> ===== | ||
{{MoveData | {{MoveData | ||
|image= | |image=MBAACC_E_Warachia_jC.gif | ||
|caption= | |caption= | ||
|name=j.C | |name=j.C | ||
| Line 223: | Line 287: | ||
|data= | |data= | ||
{{AttackData-MB | {{AttackData-MB | ||
|damage= | |damage=400, 400, 400 (1162) | ||
|reddamage= | |reddamage={{Tooltip | text=(766) | hovertext=264, 255, 247 }} | ||
|proration= | |proration=100% x3 | ||
|circuit= | |circuit= | ||
|cancel= | |cancel= | ||
|guard= | |guard=HA | ||
|startup= | |startup=9 | ||
|active= | |active=8 | ||
|recovery= | |recovery=8 | ||
|frameAdv= | |frameAdv= | ||
|invuln= | |invuln= Clashes on Frames 1-3 | ||
|description= | |description= | ||
}} | }} | ||
}} | }} | ||
==== Command Normals ==== | ==== Command Normals ==== | ||
| Line 250: | Line 313: | ||
|data= | |data= | ||
{{AttackData-MB | {{AttackData-MB | ||
|version= | |version=6C | ||
|damage= | |damage=1000 | ||
|reddamage= | |reddamage=(770) | ||
|proration= | |proration=100% (O) | ||
|circuit= | |circuit= | ||
|cancel= | |cancel= | ||
|guard= | |guard=LH | ||
|startup= | |startup=12 | ||
|active= | |active=6 | ||
|recovery= | |recovery=17 | ||
|frameAdv= | |frameAdv=-3 | ||
|invuln= | |invuln= | ||
|description= | |description= | ||
| Line 266: | Line 329: | ||
{{AttackData-MB | {{AttackData-MB | ||
|header=no | |header=no | ||
|version= | |version=6[C] | ||
|damage= | |damage=1500 | ||
|reddamage= | |reddamage=(1100) | ||
|proration= | |proration=60% (O) | ||
|circuit= | |circuit= | ||
|cancel= | |cancel= | ||
|guard= | |guard=H | ||
|startup= | |startup=29 | ||
|active= | |active=7 | ||
|recovery= | |recovery=19 | ||
|frameAdv= | |frameAdv=-8 | ||
|invuln= | |invuln= | ||
|description= | |description= | ||
| Line 290: | Line 353: | ||
|data= | |data= | ||
{{AttackData-MB | {{AttackData-MB | ||
|damage= | |damage=1000 | ||
|reddamage= | |reddamage=(660) | ||
|proration= | |proration=60% (O) | ||
|circuit= | |circuit= | ||
|cancel= | |cancel= | ||
|guard= | |guard=HA | ||
|startup= | |startup=21 | ||
|active= | |active=2 | ||
|recovery= | |recovery=15 | ||
|frameAdv= | |frameAdv= | ||
|invuln= | |invuln= | ||
| Line 304: | Line 367: | ||
}} | }} | ||
}} | }} | ||
=== Universal Mechanics === | === Universal Mechanics === | ||
| Line 310: | Line 372: | ||
{{MoveData | {{MoveData | ||
|image=MBCWarachiaThrow.png | |image=MBCWarachiaThrow.png | ||
|image2=MBAACC_E_Warachia_5B.gif | |||
|caption= | |caption= | ||
|name=Ground Throw | |name=Ground Throw | ||
| Line 316: | Line 379: | ||
|data= | |data= | ||
{{AttackData-MB | {{AttackData-MB | ||
|damage= | |header=no | ||
|reddamage= | |version=Successful Grab | ||
|proration= | |damage=1300 | ||
|reddamage=(660) | |||
|proration=50% | |||
|circuit= | |circuit= | ||
|cancel= | |cancel= | ||
|guard= | |guard=U | ||
|startup= | |startup=3 | ||
|active= | |active=1 | ||
|recovery= | |recovery=39 | ||
|frameAdv= | |frameAdv=71 | ||
|invuln= | |invuln= Fully invulnerable starting from Frame 4 | ||
|description= | |description= | ||
}} | |||
{{AttackData-MB | |||
|header=no | |||
|version="Boss-Exclusive Failed Grab Auto Move" | |||
|damage= 600, 450 (948) | |||
|reddamage={{Tooltip | text=(608) | hovertext=396, 212 }} | |||
|proration=80% (O) | |||
|circuit= | |||
|cancel= | |||
|guard=LH | |||
|startup=10 | |||
|active=8 | |||
|recovery=25 | |||
|frameAdv=-5 | |||
|invuln= Clashes on Frames 4-10 | |||
|description= Visually the same as 5B | |||
}} | }} | ||
}} | }} | ||
| Line 334: | Line 415: | ||
{{MoveData | {{MoveData | ||
|image=MBCWarachiaThrowAir.png | |image=MBCWarachiaThrowAir.png | ||
|image2=MBAACC_E_Warachia_jB.gif | |||
|caption= | |caption= | ||
|name=Air Throw | |name=Air Throw | ||
| Line 340: | Line 422: | ||
|data= | |data= | ||
{{AttackData-MB | {{AttackData-MB | ||
|damage= | |header=no | ||
|reddamage= | |version=Successful Grab | ||
|proration= | |damage=1200 (1056) | ||
|reddamage=(532) | |||
|proration=100% | |||
|circuit= | |||
|cancel= | |||
|guard=U | |||
|startup=1 | |||
|active=1 | |||
|recovery={{Tooltip | text=8 | hovertext=Landing Recovery }} | |||
|frameAdv= | |||
|invuln=Frames 3-41 | |||
|description= | |||
}} | |||
{{AttackData-MB | |||
|header=no | |||
|version="Boss-Exclusive Failed Grab Auto Move" | |||
|damage=600, 400 (967) | |||
|reddamage={{Tooltip | text=(532) | hovertext=330, 202 }} | |||
|proration=95% x2 (M) | |||
|circuit= | |||
|cancel= | |||
|guard=HA | |||
|startup=8 | |||
|active=8 | |||
|recovery=8 | |||
|frameAdv= | |||
|invuln= Clashes on Frames 3-8 | |||
|description= Visually the same as j.B | |||
}} | |||
}} | |||
===== <span class="invisible-header">Shield Counter</span> ===== | |||
{{MoveData | |||
|image=MBHWarachiaSC.png | |||
|image2=MBHWarachiaSCAir.png | |||
|caption= | |||
|name=Shield Counter | |||
|linkname=Shield Counter | |||
|input=236D after a successful Shield (Air OK) | |||
|data= | |||
{{AttackData-MB | |||
|version=Ground | |||
|damage=1500 (1025) | |||
|reddamage=(227) | |||
|proration=69% | |||
|circuit= | |||
|cancel= | |||
|guard=LH | |||
|startup={{Tooltip | text=8| hovertext=Technically 18 if you count the Hitstop Frames}} | |||
|active=4 | |||
|recovery=18 | |||
|frameAdv=-4 | |||
|invuln= {{Tooltip | text=Fully Invincible| hovertext=First Frame of Hitstop - 5 Frames after move ends}} | |||
|description=You thought F.Wara's Shield Counter was cracked? This one is fully invincible before the "startup" even begins AND the invincibility stays for 5 frames after the move ends! If it wasn't for the fact its slightly minus on block, this Shield Counter would be meme worthy! | |||
}} | |||
{{AttackData-MB | |||
|header=no | |||
|version=Aerial | |||
|damage=1500 (884) | |||
|reddamage=(843) | |||
|proration=59% | |||
|circuit= | |circuit= | ||
|cancel= | |cancel= | ||
|guard= | |guard=HA | ||
|startup= | |startup={{Tooltip | text=8| hovertext=Technically 21 if you count the Hitstop Frames}} | ||
|active= | |active=2 | ||
|recovery= | |recovery={{Tooltip | text=2| hovertext=Landing Recovery}} | ||
|frameAdv= | |frameAdv= | ||
|invuln= | |invuln=Fully Invincible till 2nd hit frame | ||
|description= | |description= | ||
}} | }} | ||
| Line 365: | Line 507: | ||
{{AttackData-MB | {{AttackData-MB | ||
|version=Bunker | |version=Bunker | ||
|damage= | |damage=1500 | ||
|reddamage= | |reddamage=(770) | ||
|proration= | |proration=100% | ||
|circuit=0.0%<br>(-50.0% in blockstun) | |circuit=0.0%<br>(-50.0% in blockstun) | ||
|cancel= | |cancel= | ||
|guard= | |guard=LH | ||
|startup= | |startup=18 | ||
|active= | |active=7 | ||
|recovery= | |recovery=38 | ||
|frameAdv= | |frameAdv=-2 | ||
|invuln= | |invuln=Clashes on Frames 1-6 | ||
|description= | |description= | ||
}} | }} | ||
{{AttackData-MB | {{AttackData-MB | ||
|header=no | |header=no | ||
|version= | |version=(Clash) | ||
|damage= | |damage=1500 | ||
|reddamage= | |reddamage=(770) | ||
|proration= | |proration=100% | ||
|circuit= | |circuit= | ||
|cancel= | |cancel= | ||
|guard= | |guard=LH | ||
|startup= | |startup=3 | ||
|active= | |active=7 | ||
|recovery= | |recovery=38 | ||
|frameAdv= | |frameAdv=-1 | ||
|invuln= | |invuln= | ||
}} | }} | ||
| Line 475: | Line 617: | ||
{{AttackData-MB | {{AttackData-MB | ||
|version=A | |version=A | ||
|damage= | |damage=500 x3 (1452) | ||
|reddamage= | |reddamage={{Tooltip | text=(798) | hovertext=275, 266, 257 }} | ||
|proration= | |proration=100% x3 | ||
|circuit= | |circuit= | ||
|cancel= | |cancel= | ||
|guard= | |guard=LHA (2nd and 3rd hit whiff on crouchers) | ||
|startup= | |startup=9 | ||
|active= | |active=3 | ||
|recovery= | |recovery=17 | ||
|frameAdv= | |frameAdv=18 | ||
|invuln= | |invuln= | ||
|description= | |description= | ||
| Line 491: | Line 633: | ||
|header=no | |header=no | ||
|version=B | |version=B | ||
|damage= | |damage=700 x3 (2034) | ||
|reddamage= | |reddamage={{Tooltip | text=(1023) | hovertext=352, 341, 330 }} | ||
|proration= | |proration=100% x3 | ||
|circuit= | |circuit= | ||
|cancel= | |cancel= | ||
|guard= | |guard=LHA | ||
|startup= | |startup=15 | ||
|active= | |active=3 | ||
|recovery= | |recovery=24 | ||
|frameAdv= | |frameAdv=11 | ||
|invuln= | |invuln= | ||
|description= | |description= | ||
| Line 507: | Line 649: | ||
|header=no | |header=no | ||
|version=EX | |version=EX | ||
|damage= | |damage=620 x5 (2728) | ||
|reddamage= | |reddamage={{Tooltip | text=(1690) | hovertext=385, 310, 285, 259, 235, 216 }} | ||
|proration= | |proration= 95% (M) x6 | ||
|circuit= | |circuit=-100.0% | ||
|cancel= | |cancel= | ||
|guard= | |guard=LHA | ||
|startup= | |startup=4+18 | ||
|active= | |active=6 | ||
|recovery= | |recovery=35 | ||
|frameAdv= | |frameAdv=18 | ||
|invuln= | |invuln= First Frame till Frame 16 (last I-Frame) of 2nd startup. | ||
|description= | |description= | ||
}} | }} | ||
| Line 534: | Line 676: | ||
{{AttackData-MB | {{AttackData-MB | ||
|version=A | |version=A | ||
|damage= | |damage=1300 | ||
|reddamage= | |reddamage=(1100) | ||
|proration= | |proration=70% | ||
|circuit= | |circuit= | ||
|cancel= | |cancel= | ||
|guard= | |guard=LH | ||
|startup= | |startup=10 | ||
|active= | |active=4 | ||
|recovery= | |recovery=12 | ||
|frameAdv= | |frameAdv=2 | ||
|invuln= | |invuln= | ||
|description= | |description= | ||
| Line 550: | Line 692: | ||
|header=no | |header=no | ||
|version=B | |version=B | ||
|damage= | |damage=800 x3 (1947) | ||
|reddamage= | |reddamage={{Tooltip | text=(1336) | hovertext=550, 420, 336 }} | ||
|proration= | |proration=90% x3 (M) | ||
|circuit= | |circuit= | ||
|cancel= | |cancel= | ||
|guard= | |guard=LHA | ||
|startup= | |startup=10 | ||
|active= | |active={{Tooltip | text=2, 1| hovertext=Frames 11-12, Frame 15}} | ||
|recovery= | |recovery=16 | ||
|frameAdv= | |frameAdv=1 | ||
|invuln= | |invuln= | ||
|description= | |description= | ||
| Line 566: | Line 708: | ||
|header=no | |header=no | ||
|version=EX | |version=EX | ||
|damage= | |damage=650 x6 (2547) | ||
|reddamage= | |reddamage={{Tooltip | text=(1504) | hovertext=385, 293, 256, 220, 189, 161 }} | ||
|proration= | |proration=90% x6 (M) | ||
|circuit= | |circuit=-100.0% | ||
|cancel= | |cancel= | ||
|guard= | |guard=LH | ||
|startup= | |startup=1+9 | ||
|active= | |active=6 | ||
|recovery= | |recovery=30 | ||
|frameAdv= | |frameAdv=-13 | ||
|invuln= | |invuln=Frame 1 of first Startup to Frame 10 of 2nd Startup (First Attack Frame) | ||
|description= | |description= | ||
}} | }} | ||
| Line 586: | Line 728: | ||
|image2=MBCWarachia214B.png | |image2=MBCWarachia214B.png | ||
|image3=MBCWarachia214C.png | |image3=MBCWarachia214C.png | ||
| | |caption3=Summons persist if Warachia is hit, Warachia cannot use 22A/22[A]/22B/22[B] while summons are out. | ||
|name=Replicant Coordinator (Id) | |name=Replicant Coordinator (Id) | ||
|linkname=214X | |linkname=214X | ||
| Line 592: | Line 734: | ||
|data= | |data= | ||
{{AttackData-MB | {{AttackData-MB | ||
|version=A | |version=A (Akiha) | ||
|damage= | |damage=800 | ||
|reddamage= | |reddamage=(495) | ||
|proration= | |proration=80% (O) | ||
|circuit= | |circuit= | ||
|cancel= | |cancel= | ||
|guard= | |guard=HA | ||
|startup= | |startup=35 | ||
|active= | |active=2 | ||
|recovery= | |recovery=6 | ||
|frameAdv= | |frameAdv=2 | ||
|invuln= | |invuln= | ||
|description= Summons Akiha to do her 623B. Hits high and ground bounces on hit. | |description= Summons Akiha to do her 623B. Hits high and ground bounces on hit. | ||
| Line 608: | Line 750: | ||
{{AttackData-MB | {{AttackData-MB | ||
|header=no | |header=no | ||
|version=B | |version=B (Nanaya) | ||
|damage=1200 | |||
|reddamage=(715) | |||
|proration=80% (O) | |||
|damage= | |||
|reddamage= | |||
|proration= | |||
|circuit= | |circuit= | ||
|cancel= | |cancel= | ||
|guard= | |guard=LHA | ||
|startup= | |startup=57 | ||
|active= | |active={{Tooltip | text=3| hovertext=Frames 58-60}} | ||
|recovery= | |recovery={{Tooltip | text=30 | hovertext=Full Duration }} | ||
|frameAdv= | |frameAdv=1 | ||
|invuln= | |invuln= | ||
|description=Summons Nanaya to do his 214B. Useful as a zoning tool and for summon mixup. | |description= Summons Nanaya to do his 214B. Useful as a zoning tool and for summon mixup. | ||
}} | }} | ||
{{AttackData-MB | {{AttackData-MB | ||
|header=no | |header=no | ||
|version=C | |version=C (Nrvnqsr Chaos) | ||
|damage= | |damage=1600 | ||
|reddamage= | |reddamage=(1320) | ||
|proration= | |proration=80% (O) | ||
|circuit= | |circuit= | ||
|cancel= | |cancel= | ||
|guard= | |guard=LH | ||
|startup= | |startup=46 | ||
|active= | |active={{Tooltip | text=3| hovertext=Frames 45-47}} | ||
|recovery= | |recovery={{Tooltip | text=32 | hovertext=Full Duration }} | ||
|frameAdv= | |frameAdv=-13 | ||
|invuln= | |invuln= | ||
|description= Summons Nrvnqsr Chaos to do a one hit version of his 63214C. Useful as a summon mixup. | |||
|description=Summons | |||
}} | }} | ||
}} | }} | ||
| Line 690: | Line 800: | ||
|startup= | |startup= | ||
|active= | |active= | ||
|recovery= | |recovery=30 | ||
|frameAdv= | |frameAdv= | ||
invuln= | |invuln=Invincible till Frame 45 | ||
|description= A teleport with little usage. Should not really be used at all, except in a few mixups. Unlike the playable waras, this teleport doesn't teleport you back, instead you teleport onto the same spot you stood. | |description= A teleport with little usage. Should not really be used at all, except in a few mixups. Unlike the playable waras, this teleport doesn't teleport you back, instead you teleport onto the same spot you stood. | ||
}} | }} | ||
{{AttackData-MB | {{AttackData-MB | ||
| Line 708: | Line 817: | ||
|startup= | |startup= | ||
|active= | |active= | ||
|recovery= | |recovery=37 | ||
|frameAdv= | |frameAdv= | ||
|invuln= | |invuln=Invincible till Frame 46 | ||
|description=Teleports a little forward. | |description=Teleports a little forward. | ||
}} | }} | ||
| Line 724: | Line 833: | ||
|startup= | |startup= | ||
|active= | |active= | ||
|recovery= | |recovery=43 | ||
|frameAdv= | |frameAdv= | ||
|invuln= | |invuln=Invincible till Frame 46 | ||
|description=Teleports far forward. Longest recovery. | |description=Teleports far forward. Longest recovery. | ||
}} | }} | ||
| Line 743: | Line 852: | ||
{{AttackData-MB | {{AttackData-MB | ||
|version=A | |version=A | ||
|damage= | |damage=250 x9 (1753) | ||
|reddamage= | |reddamage={{Tooltip | text=(1544) | hovertext=220, 187, 181, 175, 168, 162, 156, 150, 145 }} | ||
|proration= | |proration=100% | ||
|circuit= | |circuit= | ||
|cancel= | |cancel= | ||
|guard= | |guard=LHA | ||
|startup= | |startup=16 | ||
|active= | |active=21 | ||
|recovery= | |recovery={{Tooltip | text=Complicated, see hovertip | hovertext=Recovery ends on Frame 28, return to Neutral on Frame 29 }} | ||
|frameAdv= | |frameAdv=-2 | ||
|invuln= | |invuln= | ||
|description= | |description= | ||
| Line 759: | Line 868: | ||
|header=no | |header=no | ||
|version=[A] | |version=[A] | ||
|damage= | |damage=250 x9 (1753) | ||
|reddamage= | |reddamage={{Tooltip | text=(1544) | hovertext=220, 187, 181, 175, 168, 162, 156, 150, 145 }} | ||
|proration= | |proration=100% | ||
|circuit= | |circuit= | ||
|cancel= | |cancel= | ||
|guard= | |guard=LHA | ||
|startup= | |startup=15 | ||
|active= | |active=21 | ||
|recovery= | |recovery={{Tooltip | text=Complicated, see hovertip | hovertext=Recovery ends on Frame 26, return to Neutral on Frame 27 }} | ||
|frameAdv= | |frameAdv=-2 | ||
|invuln= | |invuln= | ||
|description= A version summons a tornado right in front of you. The charged version goes ahead a little further. | |description= A version summons a tornado right in front of you. The charged version goes ahead a little further. | ||
| Line 776: | Line 885: | ||
|header=no | |header=no | ||
|version=B | |version=B | ||
|damage= | |damage=250 x9 (1753) | ||
|reddamage= | |reddamage={{Tooltip | text=(1544) | hovertext=220, 187, 181, 175, 168, 162, 156, 150, 145 }} | ||
|proration= | |proration=100% | ||
|circuit= | |circuit= | ||
|cancel= | |cancel= | ||
|guard= | |guard=LHA | ||
|startup= | |startup=15 | ||
|active= | |active=21 | ||
|recovery= | |recovery={{Tooltip | text=Complicated, see hovertip | hovertext=Recovery ends on Frame 28, return to Neutral on Frame 29 }} | ||
|frameAdv= | |frameAdv=-2 | ||
|invuln= | |invuln= | ||
|description= | |description= | ||
| Line 792: | Line 901: | ||
|header=no | |header=no | ||
|version=[B] | |version=[B] | ||
|damage= | |damage=250 x9 (1753) | ||
|reddamage= | |reddamage={{Tooltip | text=(1544) | hovertext=220, 187, 181, 175, 168, 162, 156, 150, 145 }} | ||
|proration= | |proration=100% | ||
|circuit= | |circuit= | ||
|cancel= | |cancel= | ||
|guard= | |guard=LHA | ||
|startup= | |startup=14 | ||
|active= | |active=21 | ||
|recovery= | |recovery={{Tooltip | text=Complicated, see hovertip | hovertext=Recovery ends on Frame 25, return to Neutral on Frame 26 }} | ||
|frameAdv= | |frameAdv=-2 | ||
|invuln= | |invuln= | ||
|description=B version summons a tornado a little further than 22[A]. 22[B] hits even further out. Can be used as a combo tool after 5[C]. 9 hits. Hits mid. | |description=B version summons a tornado a little further than 22[A]. 22[B] hits even further out. Can be used as a combo tool after 5[C]. 9 hits. Hits mid. | ||
| Line 808: | Line 917: | ||
|header=no | |header=no | ||
|version=EX | |version=EX | ||
|damage= | |damage=250 xN | ||
|reddamage= | |reddamage= Varies | ||
|proration= | |proration=100% | ||
|circuit= | |circuit=-100.0% | ||
|cancel= | |cancel= | ||
|guard= | |guard=LHA | ||
|startup= | |startup=4+14 | ||
|active= | |active={{Tooltip | text=61| hovertext=Frames 15-25 (10), Frames 28-29 (2), Frames 32-33 (2), Frames 36-37 (2), Frames 40-41 (2), Frames 44-45 (2), Frames 48-49 (2), Frames 52-53 (2), Frames 56-57 (2), Frames 60-61 (2), Frames 64-65 (2), Frames 68-69 (2), Frames 72-75 (4)}} | ||
|recovery= | |recovery={{Tooltip | text=Complicated, see hovertip | hovertext=Recovery ends on Frame 45, return to Neutral on Frame 46 }} | ||
|frameAdv= | |frameAdv={{Tooltip | text=-3 | hovertext=(point blank, becomes plus if even a single pixel away) }} | ||
|invuln= | |invuln= | ||
|description= | |description= | ||
| Line 835: | Line 944: | ||
{{AttackData-MB | {{AttackData-MB | ||
|version=A<br>/ [A] | |version=A<br>/ [A] | ||
|damage= | |damage=350 xN | ||
|reddamage= | |reddamage=Varies | ||
|proration= | |proration=100% | ||
|circuit= | |circuit= | ||
|cancel= | |cancel= | ||
|guard= | |guard=LHA | ||
|startup= | |startup=12 | ||
|active={{Tooltip | text= | |active={{Tooltip | text=44| hovertext=Frames 13-24 (11), Frames 27-57}} | ||
|recovery= | |recovery=44 | ||
|frameAdv= | |frameAdv= | ||
|invuln= | |invuln= Frame 9 - Frame 77 | ||
}} | }} | ||
{{AttackData-MB | {{AttackData-MB | ||
|header=no | |header=no | ||
|version=B<br>/ [B] | |version=B<br>/ [B] | ||
|damage= | |damage=280 xN | ||
|reddamage= | |reddamage=Varies | ||
|proration= | |proration=100% | ||
|circuit= | |circuit= | ||
|cancel= | |cancel= | ||
|guard= | |guard=LHA | ||
|startup= | |startup=12 | ||
|active= | |active=48 | ||
|recovery= | |recovery=62 | ||
|frameAdv= | |frameAdv= | ||
|invuln= | |invuln= Frame 9 - Frame 99 | ||
|description=* EX is used as a ender in combos; A/B versions should never be used except to kill. | |description=* EX is used as a ender in combos; A/B versions should never be used except to kill. | ||
| Line 868: | Line 976: | ||
{{AttackData-MB | {{AttackData-MB | ||
|header=no | |header=no | ||
|version= | |version=EX | ||
|damage= | |damage=500 xN | ||
|reddamage= | |reddamage=Varies | ||
|proration= | |proration=100% | ||
|circuit=-100% | |circuit=-100.0% | ||
|cancel= | |cancel= | ||
|guard= | |guard=LHA | ||
|startup= | |startup=1+13 | ||
|active= | |active=133 | ||
|recovery= | |recovery=4 | ||
|frameAdv= | |frameAdv= | ||
|invuln= | |invuln=Frame 11 (2nd startup)-Frame 129 | ||
|description=Untechable knockdown, fantastic ender that gives you meaty and in certain cases, even lets you OTG them! | |description=Untechable knockdown, fantastic ender that gives you meaty and in certain cases, even lets you OTG them! | ||
}} | }} | ||
}} | }} | ||
=== Arc Drive === | === Arc Drive === | ||
| Line 896: | Line 1,001: | ||
|data= | |data= | ||
{{AttackData-MB | {{AttackData-MB | ||
|damage= | |damage=600, 500 x10, 7000 (4150) | ||
|reddamage= | |reddamage={{Tooltip | text=(3180)| hovertext=}} | ||
|proration= | |proration=50% | ||
|circuit=removes all | |circuit=removes all | ||
|cancel= | |cancel= | ||
|guard= | |guard=LHA | ||
|startup= | |startup=6+12 | ||
|active= | |active={{Tooltip | text=4, 9*9, 1, 31 | hovertext=Frames 19-22, Frames 24-31, Frames 34-41, Frames 44-51, Frames 54-61, Frames 64-71, Frames 74-81, Frames 84-91, Frames 94-101, Frames 104-111, Frames 114-121, Frame 126, Frames 185-215}} | ||
|recovery= | |recovery=Ends on Frame 167 (not counting super flash) | ||
|frameAdv= | |frameAdv=-18 | ||
|invuln= | |invuln=Frame 1-157 (not counting super flash) | ||
|description=One of the more useful arc drives in the game. It is a multi-hitting tornado that ends in a large untechable knockdown that gives you time to setup j.214c/heat > 214b/etc. It has full invincibility from start to finish and is great for punishing moves full screen. Is unsafe on block, but it is hard to punish fullscreen. | |description=One of the more useful arc drives in the game. It is a multi-hitting tornado that ends in a large untechable knockdown that gives you time to setup j.214c/heat > 214b/etc. It has full invincibility from start to finish and is great for punishing moves full screen. Is unsafe on block, but it is hard to punish fullscreen. | ||
}} | }} | ||
}} | }} | ||
=== Another Arc Drive === | === Another Arc Drive === | ||
| Line 921: | Line 1,025: | ||
|data= | |data= | ||
{{AttackData-MB | {{AttackData-MB | ||
|damage={{Tooltip | text= | |damage={{Tooltip | text=220*21| hovertext=Tornado}}, {{Tooltip | text=500| hovertext=Akiha}}, {{Tooltip | text=1000| hovertext=Nanaya}}, {{Tooltip | text=1800*2| hovertext=Warc}}, {{Tooltip | text=1300| hovertext=Nero}}, {{Tooltip | text=4000| hovertext=Smile}} (5014) | ||
|reddamage={{Tooltip | text= | |reddamage={{Tooltip | text=180*21| hovertext=Tornado}}, {{Tooltip | text=250| hovertext=Akiha}}, {{Tooltip | text=650| hovertext=Nanaya}}, {{Tooltip | text=1300*2| hovertext=Warc}}, {{Tooltip | text=1000| hovertext=Nero}}, {{Tooltip | text=3200| hovertext=Smile}} (3660) | ||
|proration={{Tooltip | text= | |proration={{Tooltip | text=100%*21| hovertext=Tornado}}, {{Tooltip | text=88%| hovertext=Akiha}}, {{Tooltip | text=75%| hovertext=Nanaya}},<br>{{Tooltip | text=85% (M)*2| hovertext=Warc}}, {{Tooltip | text=70%| hovertext=Nero}}, {{Tooltip | text=100%| hovertext=Smile}} | ||
|circuit=removes all | |circuit=removes all | ||
|cancel= | |cancel= | ||
|guard= | |guard=LHA | ||
|startup= | |startup=5+12 | ||
|active= | |active={{Tooltip | text=2 (2)*50 (4) 2| hovertext=whiff}} / {{Tooltip | text=2 (2)*4 1 (1) 2| hovertext=block}} | ||
|recovery= | |recovery=46 | ||
|frameAdv= | |frameAdv=-27 | ||
|invuln= | |invuln=Full 1-2; 5-81 | ||
|description=Similar to the above, adds various 214X style summons for more damage if this hits on the ground. If the opponent is already airborne, these will whiff and the resulting damage will be less than normal Arc Drive. | |description=Similar to the above, adds various 214X style summons for more damage if this hits on the ground. If the opponent is already airborne, these will whiff and the resulting damage will be less than normal Arc Drive. | ||
}} | }} | ||
| Line 946: | Line 1,050: | ||
|data= | |data= | ||
{{AttackData-MB | {{AttackData-MB | ||
|damage= | |damage=470*30, 290*11 (3733 ~ 6998) | ||
|reddamage= | |reddamage=400*30, 200*11 (3090 ~ 5775) | ||
|proration= | |proration=50% + 50% * remaining BH time | ||
|circuit=removes all | |circuit=removes all | ||
|cancel= | |cancel= | ||
|guard= | |guard=U | ||
|startup= | |startup=6+9 | ||
|active= | |active=variable (2) variable (2) 63 | ||
|recovery= | |recovery=46 | ||
|frameAdv= | |frameAdv= | ||
|invuln= | |invuln=Full until 24f before recovery | ||
|description= | |description=Performs a large unblockable attack similar to j.421C, moving forward then back across the screen. If either of these attacks connects, a final blockable fullscreen attack will trigger after the second pass. Circuit Breaks the opponent on superflash; this effect is unavoidable. | ||
While difficult, it's sometimes possible to maneuver around the first two attacks and punish Wara's recovery. Characters with sufficient invulnerability can also attempt to invul through hits, including use of EX moves so long as their superflash (and thus meter spend) triggers before the Last Arc superflash. Depending on spacing, cancelling into bunker may allow you to get out after a couple hits. Getting hit while armored will still trigger the final attack sequence. More practically, Wara's Last Arc damage is heavily dependent on maximizing the number of hits that connect. Opponents can greatly reduce damage taken by jumping to take an air hit rather than getting hit on the ground, sometimes reducing damage by more than 50%. In some circumstances this can even leave Wara punishable on hit: | |||
*Air hits will often lead to knockdown before the second pass, which will OTG. This will usually still connect to the final attack, but that sequence becomes ground techable. This typically leaves Wara -8~9 on neutral tech. | |||
*Knockdown will sometimes instead occur from the second pass with enough time to enter wakeup before the final sequence, or it may connect on a downed opponent in the middle of its hitbox and thus give the opponent time to recover before the final sequence. This will greatly reduce damage and leave Wara -28 on block. | |||
The spinner is a projectile and is not actually Wara. Wara's true position remains where he was when the Last Arc was triggered, which can cause unexpected cross ups while trying to avoiding the spinner. | |||
Wara's Last Arc is in counterhit state for the duration of its recovery. | |||
}} | }} | ||
}} | }} | ||
Latest revision as of 17:12, 8 December 2024
This character is a Boss Character in MBAACC and is unplayable under normal circumstances, requiring external mods (or in the case of E-Riesbyfe, being on the final boss fight in her Alternate Scenario) to be used.
This page is for informational purposes only.
If you looked for this page thinking that this character was playable, TURN BACK NOW.
|
xE-Warachia Melty Blood/MBAACC is an unplayable Boss Character version of xC-Warachia Melty Blood/MBAACC. |
|
| Pros | Cons |
|
|
| Health Mechanics | |
| Net Health: | 15327.0134908 (S+++) |
| 100% HP Guard Value: | 0.900 |
| 75% HP Guard Value: | 0.900 |
| 50% HP Guard Value: | 0.750 |
| 25% HP Guard Value: | 0.650 |
| Guard Gauge Mechanics | |
| Max Value: | 10000 |
| Heal Base Value: | UNKNOWNN |
| Heal Acceleration: | UNKNOWNN |
| Heal Delay Time: | UNKNOWNN |
| Crush Recover Time: | UNKNOWNN |
| Blockstring Correction: | UNKNOWNN |
| Guard Quality Mechanics | |
| Max Value: | 1.500 |
| Heal Base Value: | UNKNOWNN |
| Heal Delay Time: | UNKNOWNN |
| Wakeup Timings | |
| Prone: | UNKNOWN |
| Supine: | UNKNOWN |
| Grounded Movement | |
| Forward Walk Speed (Constant): | 384 units |
| Backward Walk Speed (Constant): | 256 units |
| Forward Dash Startup: | 5f |
| Forward Dash Speed: | 1720 units (20 accel, max speed 2048 units) |
| Back Dash Startup: | 24f |
| Back Dash Speed: | 1824 units (60 accel) |
| Arial Movement | |
| Arial Forward Dash Startup: | 7f |
| Arial Back Dash Startup: | 11f |
| Landing Recovery after Arial Dash: | 8f |
| Jump Related Framedata | |
| Pre-Jump: | 3f |
| Jump Startup: | 1f |
| Pre-Hop (7): | 4f |
| Pre-Hop (9): | 3f |
| Hop Startup: | 1f |
| Hyperjump Startup: | 11f |
| Hyperhop Startup: | 7f |
NOTICE: THIS PAGE IS A WORK IN PROGRESS. IT IS MISSING SOME FRAME DATA AND DESCRIPTIONS. REFRAIN FROM USING IT UNTIL THIS NOTICE IS GONE.
PROGRESS: 97.5% Complete, need to add in Circuit Values, Cancel Values, and descriptions. Combos are being worked upon.
Normal Combos
Refer to Starters and Enders when performing these combos.
WIP
E-Wara can do (almost) all the combos C-Wara can do, but some specific things E-Wara can do that C-Wara cant are linking specials into themselves, the 236A xN infinite loop, and the {236B > 236A} xN infinite loop.
Move Descriptions
Template:AttackData-MB/Infobox
Mobility Miscellaneous
Ground Dash
Standing Normals
5A
| Damage | Red Damage | Proration | Cancel | Guard | |
|---|---|---|---|---|---|
| 300 | (198) | 78% (O) | - | LH | |
| First Active | Active | Recovery | Frame Adv | Circuit | Invuln |
| 3 | 3 | 9 | 0 | - | - |
5B
| Damage | Red Damage | Proration | Cancel | Guard | |
|---|---|---|---|---|---|
| 600, 450 (948) | (608) | 80% x2 (O) | - | LH | |
| First Active | Active | Recovery | Frame Adv | Circuit | Invuln |
| 7 | 8 | 14 | -5 | - | Clashes during startup frames |
5C
| Damage | Red Damage | Proration | Cancel | Guard | |
|---|---|---|---|---|---|
| 600, 500, 400 (1459) | (855) | 100% x3 | - | LH (1), LHA (2) | |
| First Active | Active | Recovery | Frame Adv | Circuit | Invuln |
| 8 | 9 | 13 | 2 | - | Clashes on Frames 3-5 |
Crouching Normals
2A
| Damage | Red Damage | Proration | Cancel | Guard | |
|---|---|---|---|---|---|
| 300 | (165) | 76% (O) | - | L | |
| First Active | Active | Recovery | Frame Adv | Circuit | Invuln |
| 4 | 3 | 10 | -1 | - | - |
2B
| Damage | Red Damage | Proration | Cancel | Guard | |
|---|---|---|---|---|---|
| 750, 750 (1330) | (936) | 80% x2 (O) | - | LH | |
| First Active | Active | Recovery | Frame Adv | Circuit | Invuln |
| 6 | 6 | 17 | -4 | - | Clashes on Frames 5-10 |
2C
| Damage | Red Damage | Proration | Cancel | Guard | |
|---|---|---|---|---|---|
| 800, 600 (1055) | (737) | 50% x2 (O) | - | L | |
| First Active | Active | Recovery | Frame Adv | Circuit | Invuln |
| 8 | 9 | 18 | -4 | - | Clashes on Frames 4-6 |
Aerial Normals
j.A
| Damage | Red Damage | Proration | Cancel | Guard | |
|---|---|---|---|---|---|
| 300 | (110) | 75% (O) | - | LHA | |
| First Active | Active | Recovery | Frame Adv | Circuit | Invuln |
| 4 | 4 | 4 | - | - | - |
j.B
| Damage | Red Damage | Proration | Cancel | Guard | |
|---|---|---|---|---|---|
| 600, 400 (967) | (532) | 95% x2 (M) | - | HA | |
| First Active | Active | Recovery | Frame Adv | Circuit | Invuln |
| 6 | 8 | 18 | - | - | Clashes on Frames 1-6 |
j.C
| Damage | Red Damage | Proration | Cancel | Guard | |
|---|---|---|---|---|---|
| 400, 400, 400 (1162) | (766) | 100% x3 | - | HA | |
| First Active | Active | Recovery | Frame Adv | Circuit | Invuln |
| 9 | 8 | 8 | - | - | Clashes on Frames 1-3 |
Command Normals
6C
| 6C | Damage | Red Damage | Proration | Cancel | Guard | |
|---|---|---|---|---|---|---|
| 1000 | (770) | 100% (O) | - | LH | ||
| First Active | Active | Recovery | Frame Adv | Circuit | Invuln | |
| 12 | 6 | 17 | -3 | - | - | |
| 6[C] | Damage | Red Damage | Proration | Cancel | Guard | |
| 1500 | (1100) | 60% (O) | - | H | ||
| First Active | Active | Recovery | Frame Adv | Circuit | Invuln | |
| 29 | 7 | 19 | -8 | - | - | |
j.2C
| Damage | Red Damage | Proration | Cancel | Guard | |
|---|---|---|---|---|---|
| 1000 | (660) | 60% (O) | - | HA | |
| First Active | Active | Recovery | Frame Adv | Circuit | Invuln |
| 21 | 2 | 15 | - | - | - |
Universal Mechanics
Ground Throw
| Successful Grab | Damage | Red Damage | Proration | Cancel | Guard | |
|---|---|---|---|---|---|---|
| 1300 | (660) | 50% | - | U | ||
| First Active | Active | Recovery | Frame Adv | Circuit | Invuln | |
| 3 | 1 | 39 | 71 | - | Fully invulnerable starting from Frame 4 | |
| "Boss-Exclusive Failed Grab Auto Move" | Damage | Red Damage | Proration | Cancel | Guard | |
| 600, 450 (948) | (608) | 80% (O) | - | LH | ||
| First Active | Active | Recovery | Frame Adv | Circuit | Invuln | |
| 10 | 8 | 25 | -5 | - | Clashes on Frames 4-10 | |
|
Visually the same as 5B | ||||||
Air Throw
| Successful Grab | Damage | Red Damage | Proration | Cancel | Guard | |
|---|---|---|---|---|---|---|
| 1200 (1056) | (532) | 100% | - | U | ||
| First Active | Active | Recovery | Frame Adv | Circuit | Invuln | |
| 1 | 1 | 8 | - | - | Frames 3-41 | |
| "Boss-Exclusive Failed Grab Auto Move" | Damage | Red Damage | Proration | Cancel | Guard | |
| 600, 400 (967) | (532) | 95% x2 (M) | - | HA | ||
| First Active | Active | Recovery | Frame Adv | Circuit | Invuln | |
| 8 | 8 | 8 | - | - | Clashes on Frames 3-8 | |
|
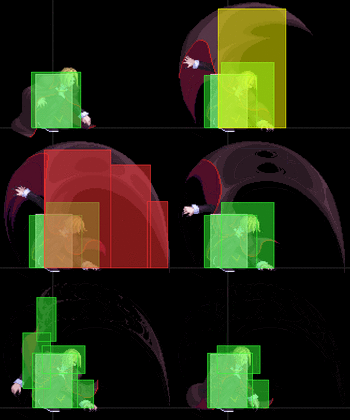
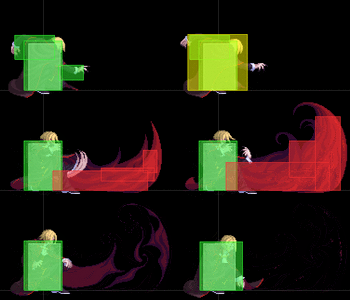
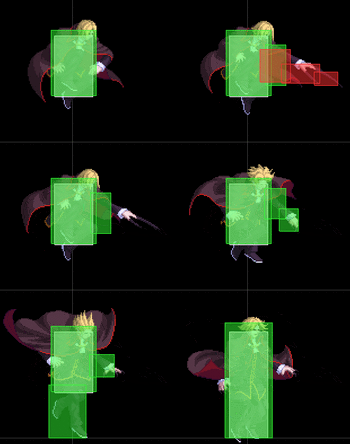
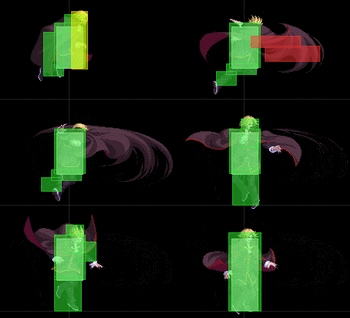
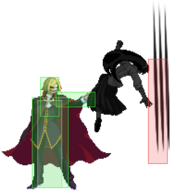
Visually the same as j.B | ||||||
Shield Counter
| Ground | Damage | Red Damage | Proration | Cancel | Guard | |
|---|---|---|---|---|---|---|
| 1500 (1025) | (227) | 69% | - | LH | ||
| First Active | Active | Recovery | Frame Adv | Circuit | Invuln | |
| 8 | 4 | 18 | -4 | - | Fully Invincible | |
|
You thought F.Wara's Shield Counter was cracked? This one is fully invincible before the "startup" even begins AND the invincibility stays for 5 frames after the move ends! If it wasn't for the fact its slightly minus on block, this Shield Counter would be meme worthy! | ||||||
| Aerial | Damage | Red Damage | Proration | Cancel | Guard | |
| 1500 (884) | (843) | 59% | - | HA | ||
| First Active | Active | Recovery | Frame Adv | Circuit | Invuln | |
| 8 | 2 | 2 | - | - | Fully Invincible till 2nd hit frame | |
Shield Bunker
| Bunker | Damage | Red Damage | Proration | Cancel | Guard | |
|---|---|---|---|---|---|---|
| 1500 | (770) | 100% | - | LH | ||
| First Active | Active | Recovery | Frame Adv | Circuit | Invuln | |
| 18 | 7 | 38 | -2 | 0.0% (-50.0% in blockstun) |
Clashes on Frames 1-6 | |
| (Clash) | Damage | Red Damage | Proration | Cancel | Guard | |
| 1500 | (770) | 100% | - | LH | ||
| First Active | Active | Recovery | Frame Adv | Circuit | Invuln | |
| 3 | 7 | 38 | -1 | - | - | |
Heat
| Damage | Red Damage | Proration | Cancel | Guard | |
|---|---|---|---|---|---|
| 100 | 0 | 100% | - | U | |
| First Active | Active | Recovery | Frame Adv | Circuit | Invuln |
| 21 | 8 | 25 | - | -100.0% (min) | Full 1-28 |
|
This is the largest Heat hitbox in the game, though most of that reach is behind him. Tied for second longest Heat startup with V.Sion and Aoko. | |||||
Circuit Spark
| Ground | Damage | Red Damage | Proration | Cancel | Guard | |
|---|---|---|---|---|---|---|
| 100 | 0 | 100% | - | U | ||
| First Active | Active | Recovery | Frame Adv | Circuit | Invuln | |
| 11 | 10 | 20 | - | removes all | Full 1-39 | |
| Air | Damage | Red Damage | Proration | Cancel | Guard | |
| 100 | 0 | 100% | - | U | ||
| First Active | Active | Recovery | Frame Adv | Circuit | Invuln | |
| 12 | 10 | 15 | - | removes all | Strike 1-30 | |
|
Universal burst mechanic. Unlike Crescent/Full Heat activation, the hitbox and frame data doesn't vary between characters. However, you can be thrown out of this move if you input it in the air. | ||||||
Special Moves
Grounded Specials
236X
| A | Damage | Red Damage | Proration | Cancel | Guard | |
|---|---|---|---|---|---|---|
| 500 x3 (1452) | (798) | 100% x3 | - | LHA (2nd and 3rd hit whiff on crouchers) | ||
| First Active | Active | Recovery | Frame Adv | Circuit | Invuln | |
| 9 | 3 | 17 | 18 | - | - | |
| B | Damage | Red Damage | Proration | Cancel | Guard | |
| 700 x3 (2034) | (1023) | 100% x3 | - | LHA | ||
| First Active | Active | Recovery | Frame Adv | Circuit | Invuln | |
| 15 | 3 | 24 | 11 | - | - | |
| EX | Damage | Red Damage | Proration | Cancel | Guard | |
| 620 x5 (2728) | (1690) | 95% (M) x6 | - | LHA | ||
| First Active | Active | Recovery | Frame Adv | Circuit | Invuln | |
| 4+18 | 6 | 35 | 18 | -100.0% | First Frame till Frame 16 (last I-Frame) of 2nd startup. | |
623X
| A | Damage | Red Damage | Proration | Cancel | Guard | |
|---|---|---|---|---|---|---|
| 1300 | (1100) | 70% | - | LH | ||
| First Active | Active | Recovery | Frame Adv | Circuit | Invuln | |
| 10 | 4 | 12 | 2 | - | - | |
| B | Damage | Red Damage | Proration | Cancel | Guard | |
| 800 x3 (1947) | (1336) | 90% x3 (M) | - | LHA | ||
| First Active | Active | Recovery | Frame Adv | Circuit | Invuln | |
| 10 | 2, 1 | 16 | 1 | - | - | |
| EX | Damage | Red Damage | Proration | Cancel | Guard | |
| 650 x6 (2547) | (1504) | 90% x6 (M) | - | LH | ||
| First Active | Active | Recovery | Frame Adv | Circuit | Invuln | |
| 1+9 | 6 | 30 | -13 | -100.0% | Frame 1 of first Startup to Frame 10 of 2nd Startup (First Attack Frame) | |
214X
| A (Akiha) | Damage | Red Damage | Proration | Cancel | Guard | |
|---|---|---|---|---|---|---|
| 800 | (495) | 80% (O) | - | HA | ||
| First Active | Active | Recovery | Frame Adv | Circuit | Invuln | |
| 35 | 2 | 6 | 2 | - | - | |
|
Summons Akiha to do her 623B. Hits high and ground bounces on hit. | ||||||
| B (Nanaya) | Damage | Red Damage | Proration | Cancel | Guard | |
| 1200 | (715) | 80% (O) | - | LHA | ||
| First Active | Active | Recovery | Frame Adv | Circuit | Invuln | |
| 57 | 3 | 30 | 1 | - | - | |
|
Summons Nanaya to do his 214B. Useful as a zoning tool and for summon mixup. | ||||||
| C (Nrvnqsr Chaos) | Damage | Red Damage | Proration | Cancel | Guard | |
| 1600 | (1320) | 80% (O) | - | LH | ||
| First Active | Active | Recovery | Frame Adv | Circuit | Invuln | |
| 46 | 3 | 32 | -13 | - | - | |
|
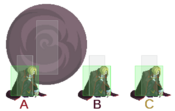
Summons Nrvnqsr Chaos to do a one hit version of his 63214C. Useful as a summon mixup. | ||||||
421X
| A | Damage | Red Damage | Proration | Cancel | Guard | |
|---|---|---|---|---|---|---|
| - | - | - | - | - | ||
| First Active | Active | Recovery | Frame Adv | Circuit | Invuln | |
| - | - | 30 | - | - | Invincible till Frame 45 | |
|
A teleport with little usage. Should not really be used at all, except in a few mixups. Unlike the playable waras, this teleport doesn't teleport you back, instead you teleport onto the same spot you stood. | ||||||
| B | Damage | Red Damage | Proration | Cancel | Guard | |
| - | - | - | - | - | ||
| First Active | Active | Recovery | Frame Adv | Circuit | Invuln | |
| - | - | 37 | - | - | Invincible till Frame 46 | |
|
Teleports a little forward. | ||||||
| C | Damage | Red Damage | Proration | Cancel | Guard | |
| - | - | - | - | - | ||
| First Active | Active | Recovery | Frame Adv | Circuit | Invuln | |
| - | - | 43 | - | - | Invincible till Frame 46 | |
|
Teleports far forward. Longest recovery. | ||||||
22X
| A | Damage | Red Damage | Proration | Cancel | Guard | |
|---|---|---|---|---|---|---|
| 250 x9 (1753) | (1544) | 100% | - | LHA | ||
| First Active | Active | Recovery | Frame Adv | Circuit | Invuln | |
| 16 | 21 | Complicated, see hovertip | -2 | - | - | |
| [A] | Damage | Red Damage | Proration | Cancel | Guard | |
| 250 x9 (1753) | (1544) | 100% | - | LHA | ||
| First Active | Active | Recovery | Frame Adv | Circuit | Invuln | |
| 15 | 21 | Complicated, see hovertip | -2 | - | - | |
|
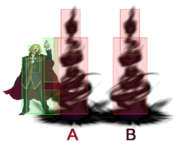
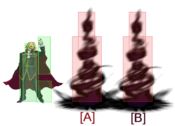
A version summons a tornado right in front of you. The charged version goes ahead a little further. | ||||||
| B | Damage | Red Damage | Proration | Cancel | Guard | |
| 250 x9 (1753) | (1544) | 100% | - | LHA | ||
| First Active | Active | Recovery | Frame Adv | Circuit | Invuln | |
| 15 | 21 | Complicated, see hovertip | -2 | - | - | |
| [B] | Damage | Red Damage | Proration | Cancel | Guard | |
| 250 x9 (1753) | (1544) | 100% | - | LHA | ||
| First Active | Active | Recovery | Frame Adv | Circuit | Invuln | |
| 14 | 21 | Complicated, see hovertip | -2 | - | - | |
|
B version summons a tornado a little further than 22[A]. 22[B] hits even further out. Can be used as a combo tool after 5[C]. 9 hits. Hits mid. | ||||||
| EX | Damage | Red Damage | Proration | Cancel | Guard | |
| 250 xN | Varies | 100% | - | LHA | ||
| First Active | Active | Recovery | Frame Adv | Circuit | Invuln | |
| 4+14 | 61 | Complicated, see hovertip | -3 | -100.0% | - | |
Aerial Specials
j.421X
| A / [A] |
Damage | Red Damage | Proration | Cancel | Guard | |
|---|---|---|---|---|---|---|
| 350 xN | Varies | 100% | - | LHA | ||
| First Active | Active | Recovery | Frame Adv | Circuit | Invuln | |
| 12 | 44 | 44 | - | - | Frame 9 - Frame 77 | |
| B / [B] |
Damage | Red Damage | Proration | Cancel | Guard | |
| 280 xN | Varies | 100% | - | LHA | ||
| First Active | Active | Recovery | Frame Adv | Circuit | Invuln | |
| 12 | 48 | 62 | - | - | Frame 9 - Frame 99 | |
Combo enders. If you do this move by accident and they block it, hold the button after doing it, you will appear at the same horizontal position as you started from instead of directly in front of your opponent. If you combo into it w/o killing someone, you are minus but not punishable unless only some hits connect, your back is to the corner, or you do the held version which has more recovery. Hits mid. | ||||||
| EX | Damage | Red Damage | Proration | Cancel | Guard | |
| 500 xN | Varies | 100% | - | LHA | ||
| First Active | Active | Recovery | Frame Adv | Circuit | Invuln | |
| 1+13 | 133 | 4 | - | -100.0% | Frame 11 (2nd startup)-Frame 129 | |
|
Untechable knockdown, fantastic ender that gives you meaty and in certain cases, even lets you OTG them! | ||||||
Arc Drive
| Damage | Red Damage | Proration | Cancel | Guard | |
|---|---|---|---|---|---|
| 600, 500 x10, 7000 (4150) | (3180) | 50% | - | LHA | |
| First Active | Active | Recovery | Frame Adv | Circuit | Invuln |
| 6+12 | 4, 9*9, 1, 31 | Ends on Frame 167 (not counting super flash) | -18 | removes all | Frame 1-157 (not counting super flash) |
|
One of the more useful arc drives in the game. It is a multi-hitting tornado that ends in a large untechable knockdown that gives you time to setup j.214c/heat > 214b/etc. It has full invincibility from start to finish and is great for punishing moves full screen. Is unsafe on block, but it is hard to punish fullscreen. | |||||
Another Arc Drive
| Damage | Red Damage | Proration | Cancel | Guard | |
|---|---|---|---|---|---|
| 220*21, 500, 1000, 1800*2, 1300, 4000 (5014) | 180*21, 250, 650, 1300*2, 1000, 3200 (3660) | 100%*21, 88%, 75%, 85% (M)*2, 70%, 100% |
- | LHA | |
| First Active | Active | Recovery | Frame Adv | Circuit | Invuln |
| 5+12 | 2 (2)*50 (4) 2 / 2 (2)*4 1 (1) 2 | 46 | -27 | removes all | Full 1-2; 5-81 |
|
Similar to the above, adds various 214X style summons for more damage if this hits on the ground. If the opponent is already airborne, these will whiff and the resulting damage will be less than normal Arc Drive. | |||||
Last Arc
| Damage | Red Damage | Proration | Cancel | Guard | |
|---|---|---|---|---|---|
| 470*30, 290*11 (3733 ~ 6998) | 400*30, 200*11 (3090 ~ 5775) | 50% + 50% * remaining BH time | - | U | |
| First Active | Active | Recovery | Frame Adv | Circuit | Invuln |
| 6+9 | variable (2) variable (2) 63 | 46 | - | removes all | Full until 24f before recovery |
|
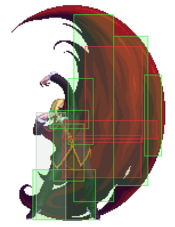
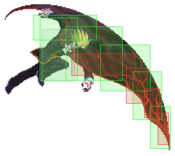
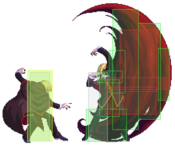
Performs a large unblockable attack similar to j.421C, moving forward then back across the screen. If either of these attacks connects, a final blockable fullscreen attack will trigger after the second pass. Circuit Breaks the opponent on superflash; this effect is unavoidable. While difficult, it's sometimes possible to maneuver around the first two attacks and punish Wara's recovery. Characters with sufficient invulnerability can also attempt to invul through hits, including use of EX moves so long as their superflash (and thus meter spend) triggers before the Last Arc superflash. Depending on spacing, cancelling into bunker may allow you to get out after a couple hits. Getting hit while armored will still trigger the final attack sequence. More practically, Wara's Last Arc damage is heavily dependent on maximizing the number of hits that connect. Opponents can greatly reduce damage taken by jumping to take an air hit rather than getting hit on the ground, sometimes reducing damage by more than 50%. In some circumstances this can even leave Wara punishable on hit:
The spinner is a projectile and is not actually Wara. Wara's true position remains where he was when the Last Arc was triggered, which can cause unexpected cross ups while trying to avoiding the spinner. Wara's Last Arc is in counterhit state for the duration of its recovery. | |||||
