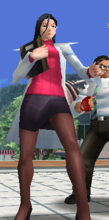
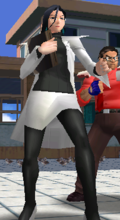
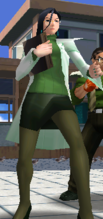
(Added Colors section) |
No edit summary |
||
| Line 5: | Line 5: | ||
==Normal Moves== | ==Normal Moves== | ||
{{PJMoveListHeader}} | |||
{{PJMoveListRow | | {{n}} {{lp}} | 7 | 14 | +2 | +10 | 4 | All | }} | |||
Rival Launcher | {{PJMoveListRow | | {{n}} {{hp}} | 11 | 40 | +1 | -16 | 10 | All | }} | ||
{{PJMoveListRow | | {{d}} {{lp}} | 8 | 21 | -2 | +1 | 4 | Crouching | }} | |||
{{PJMoveListRow | | {{d}} {{hp}} | 14 | 27 | +2 | -5 | 10 | Crouching | }} | |||
{{PJMoveListRow | | {{n}} {{lk}} | 10 | 25 | +4 | -1 | 5 | All | }} | |||
{{PJMoveListRow | | {{n}} {{hk}} | 14 | 46 | +3 | -22 | 13 | All | }} | |||
{{PJMoveListRow | | {{d}} {{lk}} | 12 | 29 | +8 | -7 | 5 | Crouching | }} | |||
{{PJMoveListRow | | {{d}} {{hk}} | 17 | 38 | - | -16 | 14 | Crouching | Knockdown }} | |||
{{PJMoveListRow | | {{u}} {{lp}} | 12 | On landing, 1 | - | - | 4 | Standing | }} | |||
{{PJMoveListRow | | {{u}} {{hp}} | 13 | On landing, 1 | - | - | 10 | Standing | }} | |||
{{PJMoveListRow | | {{u}} {{lk}} | 13 | On landing, 1 | - | - | 5 | Standing | }} | |||
{{PJMoveListRow | | {{u}} {{hk}} | 17 | On landing, 1 | - | - | 13 | Standing | }} | |||
{{MoveListFooter}} | |||
==Command Normals== | |||
{{PJMoveListHeader}} | |||
{{PJMoveListRow | | {{f}} {{hp}} | 15 | 40 | - | -16 | 13 | All | Blowback }} | |||
{{PJMoveListRow | | {{f}} {{hk}} | 14 | 58 | - | -34 | 17 | All | Blowback }} | |||
{{PJMoveListRow | | {{b}} {{hk}} | 22 | 30 | +2 | -6 | 16 | Standing | Overhead }} | |||
{{PJMoveListRow | | {{df}} {{hk}} | 16 | 40 | - | -16 | 11 | All | Rival Launcher }} | |||
{{PJMoveListRow | | (Air) {{f}} {{hk}} | 19 | On landing, 1 | - | - | 16 | Standing | Slamming }} | |||
{{MoveListFooter}} | |||
==Universals/Generics== | |||
{{PJMoveListHeader}} | |||
{{PJMoveListRow | | {{p}} while facing away from opponent | 10 | 16 | +2 | +8 | 5 | All | }} | |||
{{PJMoveListRow | | {{k}} while facing away from opponent | 9 | 37 | - | -13 | 10 | All | Blowback }} | |||
{{PJMoveListRow | | {{lp}} while running | 12 | 31 | - | -7 | 8 | Standing | Overhead, Blowback }} | |||
{{PJMoveListRow | | {{lk}} while running | 12 | 28 | - | -6 | 5 | Crouching | Blowback }} | |||
{{PJMoveListRow | | {{hk}} while running | 12 | 32 | - | -8 | 7 | Standing | Overhead, Blowback }} | |||
{{MoveListFooter}} | |||
==Throws== | |||
{{PJMoveListHeader}} | |||
{{PJMoveListRow | | {{lp}} + {{hp}}, near opponent | 7 | 46 | - | - | 30 | - | Standing Throw }} | |||
{{PJMoveListRow | | {{d}} + {{lp}} + {{hp}}, near opponent | 7 | 46 | - | - | 37 | - | Crouching Throw }} | |||
{{PJMoveListRow | | {{lp}} + {{hp}}, when behind opponent | 19 | 36 | - | - | 41 | - | Back Throw }} | |||
{{PJMoveListRow | | (Air) {{lp}} + {{hp}}, near opponent | 1 | - | - | - | 35 | - | Air Throw }} | |||
{{MoveListFooter}} | |||
==Special Moves== | ==Special Moves== | ||
Shokushin | {{PJMoveListHeader}} | ||
{{PJMoveListRow | Palpation / Shokushin | {{qcf}} {{p}} | 11 | 47/45 | - | - | 8~48 | - | {{lk}} - Crouching Throw, {{hk}} - Standing Throw, Press {{k}} to add up to 6 hits, Blowback on 6th hit }} | |||
Shusseki Kakunin | {{PJMoveListRow | Attendance Check / Shusseki Kakunin (weak) | {{qcb}} {{lp}} | 33 | 39 | - | -17 | 23 | Crouching | Blowback }} | ||
{{PJMoveListRow | Attendance Check / Shusseki Kakunin (strong) | {{qcb}} {{hp}} | 33 | 42 | - | -18 | 29 | All | Blowback }} | |||
Kaishin | {{PJMoveListRow | Hospital Rounds / Kaishin (weak) | {{qcb}} {{lk}} | 21 | On landing, 21 | - | -12 | 8 | All | Blowback, can be repeated twice }} | ||
{{PJMoveListRow | Hospital Rounds / Kaishin (strong) | {{qcb}} {{hk}} | 21 | On landing, 21 | - | -16 | 8 | All | Blowback, can be repeated twice }} | |||
{{PJMoveListRow | Aerial Hospital Rounds / Kaishin | (Air) {{qcb}} {{k}} | 20 | On landing, 21 | - | - | 8 | All | Blowback, can be repeated twice }} | |||
{{PJMoveListRow | Ascending Cleave / Shouten Sekkai (weak) | {{dp}} {{lk}} | 14 | On landing, 13 | - | -15 | 11 | All | Mini Launcher }} | |||
Shouten Sekkai | {{PJMoveListRow | Ascending Cleave / Shouten Sekkai (strong) | {{dp}} {{hk}} | 14 | On landing, 13 | - | -15 | 11 | All | Blowback }} | ||
{{PJMoveListRow | Follow up | {{---}} {{hk}} | 13 | On landing, 13 | - | +7 | 17 | All | Slamming }} | |||
{{PJMoveListRow | Aerial Ascending Cleave / Shouten Sekkai (weak) | (Air) {{dp}} {{lk}} | 9 | On landing, 13 | - | - | 11 | All | Blowback }} | |||
{{PJMoveListRow | Aerial Ascending Cleave / Shouten Sekkai (strong) | (Air) {{dp}} {{hk}} | 9 | On landing, 13 | - | - | 11 | All | Blowback }} | |||
{{PJMoveListRow | Follow up | {{---}} {{hk}} | 13 | On landing, 13 | - | +10 | 11 | All | Slamming }} | |||
{{PJMoveListRow | One Wing Stance / Katayoku no Kamae (weak) | {{qcf}} {{lk}} | 19 | 34 | - | - | 32 | All | Physical Standing attack counter, active 19~50F, Blowback on hit }} | |||
{{PJMoveListRow | One Wing Stance / Katayoku no Kamae (strong) | {{qcf}} {{hk}} | 19 | 27 | - | - | 43 | All | Physical Standing attack counter, active 19~78F, Blowback on hit }} | |||
{{PJMoveListRow | Stretching / Shinshin | {{b}} + {{lk}} + {{hk}} | 29 | On landing, 1 | - | +18 | 14 | All | Slamming }} | |||
{{MoveListFooter}} | |||
==Burning Vigor Attacks== | |||
{{PJMoveListHeader}} | |||
{{PJMoveListRow | Final Prescription / Dead Nursing | {{qcf}} {{qcf}} {{p}} | 16 | 70 | - | - | 52 | All | Throw connects whether Standing or Crouching }} | |||
{{PJMoveListRow | Stairway to Heaven | {{qcf}} {{qcf}} {{k}} | 12 | On landing, 1 | - | - | 39 | All | Slamming }} | |||
{{PJMoveListRow | Pathway to Hell | {{qcb}} {{qcb}} {{k}} | 19 | On landing, 13 | - | -18 | 58 | All | Fixed damge on 2nd and 3rd hit }} | |||
{{MoveListFooter}} | |||
==Team Up Techniques== | |||
{{PJMoveListHeader}} | |||
{{PJMoveListRow | Ultimate Remedy Art | {{lp}} + {{lk}} (or {{hp}} + {{hk}}) | 25 | 49 | - | -23 | 14 | All | Team Up Technique, Heal Type, Recovery frames may vary }} | |||
{{PJMoveListRow | Purging Tempest | {{p}} + {{p}} + {{k}} (or {{k}} + {{k}} + {{p}}) | 21 | 61 | - | -37 | 100 | All | Party Up Technique }} | |||
{{MoveListFooter}} | |||
==Combos== | ==Combos== | ||
Revision as of 18:56, 8 May 2021
Introduction
Normal Moves
Name
Command
Startup
Recovery
Hit Adv
Block Adv
Damage
Guard
Notes
7
14
+2
+10
4
All
11
40
+1
-16
10
All
8
21
-2
+1
4
Crouching
14
27
+2
-5
10
Crouching
10
25
+4
-1
5
All
14
46
+3
-22
13
All
12
29
+8
-7
5
Crouching
17
38
-
-16
14
Crouching
Knockdown
12
On landing, 1
-
-
4
Standing
13
On landing, 1
-
-
10
Standing
13
On landing, 1
-
-
5
Standing
17
On landing, 1
-
-
13
Standing
Command Normals
Name
Command
Startup
Recovery
Hit Adv
Block Adv
Damage
Guard
Notes
15
40
-
-16
13
All
Blowback
14
58
-
-34
17
All
Blowback
22
30
+2
-6
16
Standing
Overhead
16
40
-
-16
11
All
Rival Launcher
(Air) 

19
On landing, 1
-
-
16
Standing
Slamming
Universals/Generics
Name
Command
Startup
Recovery
Hit Adv
Block Adv
Damage
Guard
Notes
10
16
+2
+8
5
All
9
37
-
-13
10
All
Blowback
12
31
-
-7
8
Standing
Overhead, Blowback
12
28
-
-6
5
Crouching
Blowback
12
32
-
-8
7
Standing
Overhead, Blowback
Throws
Name
Command
Startup
Recovery
Hit Adv
Block Adv
Damage
Guard
Notes
7
46
-
-
30
-
Standing Throw
7
46
-
-
37
-
Crouching Throw
19
36
-
-
41
-
Back Throw
(Air)  +
+  , near opponent
1
-
-
-
35
-
Air Throw
Special Moves
Name
Command
Startup
Recovery
Hit Adv
Block Adv
Damage
Guard
Notes
Palpation / Shokushin
11
47/45
-
-
8~48
-
Attendance Check / Shusseki Kakunin (weak)
33
39
-
-17
23
Crouching
Blowback
Attendance Check / Shusseki Kakunin (strong)
33
42
-
-18
29
All
Blowback
Hospital Rounds / Kaishin (weak)
21
On landing, 21
-
-12
8
All
Blowback, can be repeated twice
Hospital Rounds / Kaishin (strong)
21
On landing, 21
-
-16
8
All
Blowback, can be repeated twice
Aerial Hospital Rounds / Kaishin
(Air) 

20
On landing, 21
-
-
8
All
Blowback, can be repeated twice
Ascending Cleave / Shouten Sekkai (weak)
14
On landing, 13
-
-15
11
All
Mini Launcher
Ascending Cleave / Shouten Sekkai (strong)
14
On landing, 13
-
-15
11
All
Blowback
Follow up
13
On landing, 13
-
+7
17
All
Slamming
Aerial Ascending Cleave / Shouten Sekkai (weak)
(Air) 

9
On landing, 13
-
-
11
All
Blowback
Aerial Ascending Cleave / Shouten Sekkai (strong)
(Air) 

9
On landing, 13
-
-
11
All
Blowback
Follow up
13
On landing, 13
-
+10
11
All
Slamming
One Wing Stance / Katayoku no Kamae (weak)
19
34
-
-
32
All
Physical Standing attack counter, active 19~50F, Blowback on hit
One Wing Stance / Katayoku no Kamae (strong)
19
27
-
-
43
All
Physical Standing attack counter, active 19~78F, Blowback on hit
Stretching / Shinshin
29
On landing, 1
-
+18
14
All
Slamming
Burning Vigor Attacks
Name
Command
Startup
Recovery
Hit Adv
Block Adv
Damage
Guard
Notes
Final Prescription / Dead Nursing
16
70
-
-
52
All
Throw connects whether Standing or Crouching
Stairway to Heaven
12
On landing, 1
-
-
39
All
Slamming
Pathway to Hell
19
On landing, 13
-
-18
58
All
Fixed damge on 2nd and 3rd hit
Team Up Techniques
Name
Command
Startup
Recovery
Hit Adv
Block Adv
Damage
Guard
Notes
Ultimate Remedy Art
25
49
-
-23
14
All
Team Up Technique, Heal Type, Recovery frames may vary
Purging Tempest
21
61
-
-37
100
All
Party Up Technique
Combos
Videos
Skip to 0:26


