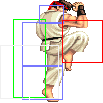
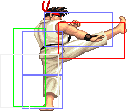
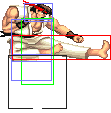
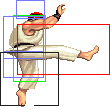
Line 736: | Line 736: | ||
=Match-Ups= | =Match-Ups= | ||
==Vs. Ryu== | ==Vs. Ryu== | ||
Avoid the temptation of start up the round throwing a fireball because you can simply initiate a chain reaction that will end up in a lost match. The opponent may jump and inflict you a 3-hit dizzying combo and then a cross up ToD, to tragic consequences. Your best bet is start the round blocking/footsing and waiting for your opponent's reaction. The fireballs can be countered by Hurricane Kicks and even if you end up trading hits, you'll be at an advantage since your move takes more life and will knock your enemy down, thus openning some possibilities. Cross ups are generaly a good idea but beware the distances: The wrong one will result in a reversal Shoryuken or Hurricane Kick. Do it carefully. If Ryu is near you, you must always work having in mind that he can't help the desire to Tatsu you. Be careful with your footsies and Hadoukens and avoid patterns. If cornered, the Hurricane Kick is your way out if done at the right timing. If you corner your adversary, set a fireball trap but remember he also have the very same Hurricane Kick. | |||
==Vs. Ken== | ==Vs. Ken== |
Revision as of 14:30, 6 July 2016


Introduction
Color Options
Start | Default |
![]() |
![]() |
Moves List
Normal Moves
Arm Throw (Seoi Nage): close, b or f + Medium or Hard Punch
Back Roll (Tomoe Nage): close, b or f + Medium or Hard Kick
Axe Kick: close, Hard Kick
Drop Knee: Light Kick in air
Special Moves
Fireball (Hadouken): d, df, f + Punch
-Faster than Ken's
Dragon Punch (Shoryuken): f, d, df + Punch
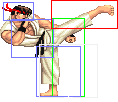
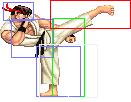
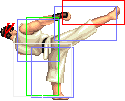
Hurricane Kick (Tatsumaki Senpuu Kyaku): d, db, b + Kick
The Basics
Anti-Airs: Shoryuken,crouching High Punch,standing High Kick
High Pokes: standing Medium Punch
Low Pokes: crouching Medium Kick
Combos
- cr.MK xx Hadoken or Shoryuken
- cr.LP CPS1 Chain s.HP xx Hadoken
Hitboxes
Standing Normals
- Standing LP:
Damage | 6 | ![]() |
![]() |
![]() |
![]() |
Stun | 1~7 | ||||
Stun Timer | 40 | ||||
Chain Cancel | Yes | ||||
Special Cancel | Yes | ||||
Frame Advantage | +6 | ||||
Frame Count | 2 | 4 | 4 | 1 | |
Simplified | 1+2 | 4 | 5 |
- Standing MP:
Damage | 16 | ![]() |
![]() |
![]() |
![]() |
![]() |
![]() |
Stun | 5~11 | ||||||
Stun Timer | 60 | ||||||
Chain Cancel | No | ||||||
Special Cancel | Yes | ||||||
Frame Advantage | +10 | ||||||
Frame Count | 1 | 2 | 4 | 3 | 3 | 1 | |
Simplified | 1+3 | 4 | 7 |
- Standing HP:
Damage | 26 | ![]() |
![]() |
![]() |
![]() |
![]() |
![]() |
Stun | 11~17 | ||||||
Stun Timer | 80 | ||||||
Chain Cancel | No | ||||||
Special Cancel | No | ||||||
Frame Advantage | -6 | ||||||
Frame Count | 3 | 2 | 6 | 10 | 12 | 1 | |
Simplified | 1+5 | 6 | 23 |
- Standing LK:
Damage | 8 | ![]() |
![]() |
![]() |
![]() |
![]() |
Stun | 1~7 | |||||
Stun Timer | 40 | |||||
Chain Cancel | Yes | |||||
Special Cancel | No | |||||
Frame Advantage | +3 | |||||
Frame Count | 3 | 3 | 8 | 4 | 1 | |
Simplified | 1+6 | 8 | 5 |
- Standing MK:
Damage | 16 | ![]() |
![]() |
![]() |
![]() |
![]() |
Stun | 5~11 | |||||
Stun Timer | 60 | |||||
Chain Cancel | No | |||||
Special Cancel | Yes | |||||
Frame Advantage | +1 | |||||
Frame Count | 5 | 6 | 12 | 6 | 1 | |
Simplified | 1+11 | 12 | 7 |
- Standing HK:
Damage | 22 | ![]() |
![]() |
![]() |
![]() |
![]() |
Stun | 11~17 | |||||
Stun Timer | 80 | |||||
Chain Cancel | No | |||||
Special Cancel | No | |||||
Frame Advantage | -2 | |||||
Frame Count | 2 | 4 | 8 | 10 | 7 | |
Simplified | 2+1 | 12 | 17 |
Close Standing Normals
- Close Standing LP:
Damage | 6 | ![]() |
![]() |
![]() |
Stun | 1~7 | |||
Stun Timer | 40 | |||
Chain Cancel | Yes | |||
Special Cancel | Yes | |||
Frame Advantage | +6 | |||
Frame Count | 1+2 | 4 | 5 |
- Close Standing MP:
Damage | 16 | ![]() |
![]() |
![]() |
![]() |
![]() |
![]() |
![]() |
Stun | 5~11 | |||||||
Stun Timer | 60 | |||||||
Chain Cancel | No | |||||||
Special Cancel | Yes | |||||||
Frame Advantage | +2 | |||||||
Frame Count | 1 | 2 | 2 | 6 | 4 | 3 | 4 | |
Simplified | 1+3 | 2 | 17 |
- Close Standing HP:
Damage | 22 | ![]() |
![]() |
![]() |
![]() |
![]() |
Stun | 11~17 | |||||
Stun Timer | 80 | |||||
Chain Cancel | No | |||||
Special Cancel | Yes | |||||
Frame Advantage | -8 | |||||
Frame Count | 3 | 2 | 6 | 10 | 13 | |
Simplified | 1+3 | 8 | 23 |
- Close Standing LK:
Damage | 8 | ![]() |
![]() |
![]() |
![]() |
![]() | |
Stun | 1~7 | ||||||
Stun Timer | 40 | ||||||
Chain Cancel | Yes | ||||||
Special Cancel | Yes | ||||||
Frame Advantage | +5 | ||||||
Frame Count | 2 | 3 | 6 | 3 | 1 | ||
Simplified | 1+5 | 6 | 4 |
- Close Standing MK:
Damage | 16 | ![]() |
![]() |
![]() |
![]() |
![]() |
![]() |
Stun | 5~11 | ||||||
Stun Timer | 60 | ||||||
Chain Cancel | No | ||||||
Special Cancel | Yes | ||||||
Frame Advantage | +6 | ||||||
Frame Count | 2 | 1 | 6 | 4 | 4 | 1 | |
Simplified | 1+3 | 6 | 9 |
- Close Standing HK:
Damage | 24,6 | ![]() |
![]() |
![]() |
![]() |
![]() |
![]() |
Stun | 11~17 | ||||||
Stun Timer | 80 | ||||||
Chain Cancel | No | ||||||
Special Cancel | No | ||||||
Frame Advantage | +8 | ||||||
Frame Count | 3 | 4 | 8 | 4 | 10 | 1 | |
Simplified | 1+7 | 12 | 11 |
Crouching Normals
- Crouching LP:
Damage | 6 | ![]() |
![]() |
![]() |
![]() |
Stun | 1~7 | ||||
Stun Timer | 40 | ||||
Chain Cancel | Yes | ||||
Special Cancel | Yes | ||||
Frame Advantage | +6 | ||||
Frame Count | 2 | 4 | 4 | 1 | |
Simplified | 1+2 | 4 | 5 |
- Crouching MP:
Damage | 14 | ![]() |
![]() |
![]() |
![]() |
![]() |
![]() |
Stun | 5~11 | ||||||
Stun Timer | 60 | ||||||
Chain Cancel | No | ||||||
Special Cancel | Yes | ||||||
Frame Advantage | +10 | ||||||
Frame Count | 1 | 2 | 4 | 3 | 3 | 1 | |
Simplified | 1+3 | 4 | 7 |
- Crouching HP:
Damage | 22 | ![]() |
![]() |
![]() |
![]() |
![]() |
![]() |
Stun | 11~17 | ||||||
Stun Timer | 80 | ||||||
Chain Cancel | No | ||||||
Special Cancel | Yes | ||||||
Frame Advantage | -11 | ||||||
Frame Count | 3 | 3 | 8 | 10 | 12 | 1 | |
Simplified | 1+3 | 11 | 23 |
- Crouching LK:
Damage | 6 | ![]() |
![]() |
![]() |
![]() |
Stun | 1~7 | ||||
Stun Timer | 40 | ||||
Chain Cancel | Yes | ||||
Special Cancel | Yes | ||||
Frame Advantage | +6 | ||||
Frame Count | 2 | 4 | 4 | 1 | |
Simplified | 1+2 | 4 | 5 |
- Crouching MK:
Damage | 14 | ![]() |
![]() |
![]() |
![]() |
![]() |
![]() |
Stun | 5~11 | ||||||
Stun Timer | 60 | ||||||
Chain Cancel | No | ||||||
Special Cancel | Yes | ||||||
Frame Advantage | +6 | ||||||
Frame Count | 1 | 2 | 6 | 4 | 4 | 1 | |
Simplified | 1+3 | 6 | 9 |
- Crouching HK:
Damage | 22 | ![]() |
![]() |
![]() |
![]() |
![]() |
Stun | 11~17 | |||||
Stun Timer | 80 | |||||
Chain Cancel | No | |||||
Special Cancel | Yes | |||||
Frame Advantage | +2 | |||||
Frame Count | 3 | 6 | 6 | 8 | 11 | |
Simplified | 1+3 | 6 | 25 |
Aerial Normals
- Neutral Jumping LP:
Damage | 10 | ![]() |
![]() |
Stun | 1~7 | ||
Stun Timer | 40 | ||
Frame Count | 2 | ∞ |
- Diagonal Jumping LP:
Damage | 8 | ![]() |
![]() |
Stun | 1~7 | ||
Stun Timer | 40 | ||
Frame Count | 2 | ∞ |
- Neutral/Diagonal Jumping MP:
Damage | 16 | ![]() |
![]() |
![]() |
![]() |
![]() |
![]() |
![]() |
Stun | 5~11 | |||||||
Stun Timer | 50 | |||||||
Frame Count | 2 | 2 | 20 | 4 | 4 | 4 | ∞ | |
Simplified | 4 | 20 | ∞ |
- Neutral Jumping HP:
Damage | 24 | ![]() |
![]() |
![]() |
![]() |
![]() |
![]() |
![]() |
Stun | 11~17 | |||||||
Stun Timer | 60 | |||||||
Frame Count | 2 | 2 | 20 | 4 | 4 | 4 | ∞ | |
Simplified | 4 | 20 | ∞ |
- Diagonal Jumping HP:
Damage | 22 | ![]() |
![]() |
![]() |
![]() |
![]() |
![]() |
![]() |
Stun | 11~17 | |||||||
Stun Timer | 60 | |||||||
Frame Count | 2 | 2 | 8 | 4 | 4 | 4 | ∞ | |
Simplified | 4 | 8 | ∞ |
- Neutral Jumping LK:
Damage | 10 | ![]() |
![]() |
![]() |
Stun | 1~7 | |||
Stun Timer | 40 | |||
Frame Count | 3 | 40 | ∞ |
- Diagonal Jumping LK:
Damage | 8 | ![]() |
![]() |
![]() |
Stun | 1~7 | |||
Stun Timer | 40 | |||
Frame Count | 2 | 3 | ∞ | |
Simplified | 5 | ∞ |
- Neutral Jumping MK:
Damage | 16 | ![]() |
![]() |
![]() |
![]() |
![]() |
Stun | 5~11 | |||||
Stun Timer | 50 | |||||
Frame Count | 5 | 13 | 6 | 6 | ∞ | |
Simplified | 5 | 13 | ∞ |
- Diagonal Jumping MK:
Damage | 16 | ![]() |
![]() |
![]() |
![]() |
![]() |
![]() |
![]() |
Stun | 5~11 | |||||||
Stun Timer | 50 | |||||||
Frame Count | 2 | 3 | 13 | 3 | 3 | 3 | ∞ | |
Simplified | 5 | 13 | ∞ |
- Neutral Jumping HK:
Damage | 24 | ![]() |
![]() |
![]() |
![]() |
![]() |
![]() |
![]() |
Stun | 11~17 | |||||||
Stun Timer | 60 | |||||||
Frame Count | 2 | 4 | 4 | 3 | 3 | 3 | ∞ | |
Simplified | 2 | 8 | ∞ |
- Diagonal Jumping HK:
Damage | 22 | ![]() |
![]() |
![]() |
![]() |
![]() |
![]() |
![]() |
Stun | 11~17 | |||||||
Stun Timer | 60 | |||||||
Frame Count | 2 | 3 | 7 | 3 | 3 | 3 | ∞ | |
Simplified | 5 | 7 | ∞ |
Throws
- Seoi Nage: (←/→ + HP) and Tomoe Nage: (←/→ + HK)
Damage | 32 | ![]() | |
Duration | 130 | ||
Stun | 7~13 | ||
Stun Timer | 100 | ||
Range (from axis) | 48 | ||
Range advantage | 19 |
Special Moves
- Hadoken: (↓↘→ + P)
Startup:
![]() |
![]() |
![]() |
![]() | |
Frame Count | 2 | 6 | 1 | 1 |
Active:
LP version:
Damage | 12 | ![]() |
![]() |
![]() |
![]() |
Stun | 13~19 | ||||
Stun Timer | 120 | ||||
Frame Advantage | - | ||||
Frame Count | 1 | 1 | 2 | 2.. | |
Simplified | 40 |
MP version:
Damage | 14 | ![]() |
![]() |
![]() |
![]() |
Stun | 13~19 | ||||
Stun Timer | 120 | ||||
Frame Advantage | - | ||||
Frame Count | 1 | 1 | 2 | 2.. | |
Simplified | 40 |
HP version:
Damage | 16 | ![]() |
![]() |
![]() |
![]() |
Stun | 13~19 | ||||
Stun Timer | 120 | ||||
Frame Advantage | - | ||||
Frame Count | 1 | 1 | 2 | 2.. | |
Simplified | 40 |
- Shoryuken: →↓↘ + Punch
Startup:
Damage | 32 | ![]() |
![]() |
![]() |
![]() |
![]() |
![]() |
Stun | 13~19 | ||||||
Stun Timer | 120 | ||||||
Frame Advantage | -18/-26/-40 | ||||||
Jab | 4 | 4 | 14 | 6 | 11 | 5 | |
Strong | 4 | 4 | 22 | 6 | 14 | 5 | |
Fierce | 4 | 4 | 26 | 6 | 21 | 5 |
- Tatsumaki Senpuu Kyaku: ↓↙← + Kick
Startup:
Damage | 22 | ![]() |
![]() |
![]() |
Stun | 13~19 | |||
Stun Timer | 120 | |||
Frame Advantage | -1 | |||
Frame Count | 4 | 4 | 3 |
Active:
![]() |
![]() |
![]() |
![]() | |
Frame Count | 3 | 3 | 3 | 3 |
Short: 1 Time
Foward: 2 Times
Rounhouse: 3 Times
Recovery:
![]() |
![]() |
![]() |
![]() | |
Frame Count | 4 | 4 | 4 | 0 |
Misc Animations
Walk back | Neutral | Walk Fwd | Crouch |
![]() |
![]() |
![]() |
![]() |
- Standing reel:
![]() |
![]() |
![]() |
![]() |
- Standing gut reel:
![]() |
![]() |
![]() |
![]() |
- Crouching reel:
![]() |
![]() |
![]() |
- Dizzy:
![]() |
![]() |
![]() |
Advanced Strategy
Ryu is perhaps the most balanced char of the game and one of its top tiers. His moves and techniques include ofensive and defensive capabilities thus making Ryu a good beginner's choice. But once you understand and master his techniques, Ryu can be pretty much invincible or at least a tough as nails challenge. Contrary to his pal Ken, Ryu can win his fights both from close or far distances, has a faster projectile, a much better Hurricane Kick and a slower Shoryuken.
Ryu can avoid most of the common traps from other chars, thanks to his Hurricane Kick. The move has many invincible frames both at start and at the end, making a counter attack very difficult, let alone the almost sure trade that always ends in Ryu's favours. Ryu can pass through fireballs easily with his Tatsu, being it one of the most important techinques a Ryu player should master. Also, he can handle most fireball wars easily, being Sagat's Tiger Shots the only exception. Don't be ashamed to pressure with Hadoukens since they're an important zoning tool and a way to induce your opponent to make mistakes.
Unfortunately nobody is perfect. Ryu's Shoryuken isn't near as reliable nor as fast as Ken's one, not to mention it can be safe jumped. But this doesn't means it's an useless move. The player just have to be more careful on how and when to apply it, since it's slower and have limited range. It's a good anti-air but sometimes the Hurricane Kick works even better. If the opponent is near you, Shoryuken him with no mercy but if your enemy is jumping from a certain distance, it may be wiser to use a Tatsu since there's a huge chance you'll whiff and be punished. The Touch of Dead (ToD) combo doesn't work like Ken's one, but you can do it under certain circunstances or against certain adversaries. Basically, you must do it starting with a cross up, or it will whiffs. Standing HP + Shoryuken combos must be done with LP or MP because the HP Shoryuken is a 2 hit attack in this Street Fighter version and whiffs the second hit most of time. And speaking about combos, the air "HP xx s.HP xx Hadouken" is his best one: easy execution, high damage and instant dizzy in 99% of the cases.
Footsies and pokes are basically the same for both Ken and Ryu. Use them wisely.
Match-Ups
Vs. Ryu
Avoid the temptation of start up the round throwing a fireball because you can simply initiate a chain reaction that will end up in a lost match. The opponent may jump and inflict you a 3-hit dizzying combo and then a cross up ToD, to tragic consequences. Your best bet is start the round blocking/footsing and waiting for your opponent's reaction. The fireballs can be countered by Hurricane Kicks and even if you end up trading hits, you'll be at an advantage since your move takes more life and will knock your enemy down, thus openning some possibilities. Cross ups are generaly a good idea but beware the distances: The wrong one will result in a reversal Shoryuken or Hurricane Kick. Do it carefully. If Ryu is near you, you must always work having in mind that he can't help the desire to Tatsu you. Be careful with your footsies and Hadoukens and avoid patterns. If cornered, the Hurricane Kick is your way out if done at the right timing. If you corner your adversary, set a fireball trap but remember he also have the very same Hurricane Kick.
Vs. Ken
Vs. E.Honda
Vs. Chun Li
Vs. Blanka
Vs. Zangief
Vs. Guile
Vs. Dhalsim
Vs. Boxer
Vs. Claw
Vs. Sagat
Vs. Dictador
General | Game Mechanics | Strategy | Tiers | |
The Characters | Balrog (Boxer) | Blanka | Chun-Li | Dhalsim | E. Honda | Guile | Ken | M. Bison (Dictator) | Ryu | Sagat | Vega (Claw) | Zangief |