User:Dazed/testing: Difference between revisions

From SuperCombo Wiki
Line 174: Line 174:
[http://wiki.shoryuken.com/Hulk_Frame_Data_(UMvC3) Click me for Frame Data!]
[http://wiki.shoryuken.com/Hulk_Frame_Data_(UMvC3) Click me for Frame Data!]
=== Normals ===
=== Normals ===
{{UMvC3MoveListRow2.0
|photo=[[File:250Hulk_5L.png]]
|name=Standing Light
|command=L
|damage=85,000
|guard=-
|properties=-
|startup=9
|active=3
|recovery=14
|hit=+2
|block=-1
|notes=Hulk's standing jab. Same startup as crouching L and this move is often used to continue combos (ie jM ,jM ,L ), but it's large hitbox can somewhat be used as an anti-air or punishing tool (ie blocked uncancelable footdive) or even as a crossunder midscreen! Crouching L is usually the better move for CQC situations though.
}}
{{UMvC3MoveListRow2.0
|photo=[[File:250Hulk_5M.png]]
|name=Standing Medium
|command=M
|damage=90,000
|guard=-
|properties=Strk armored
|startup=13
|active=3
|recovery=33
|hit=-10
|block=-10
|notes=Standing M has armor from frames 3-15, the fastest armor in Hulk's repertoire. For confirm/combo purposes it has considerable hitstun and can chain to Impact Punch for massive damage. Standing M's high & forward reaching hitbox can also anti-air linear approaches. Unfortunately standing M doesn't have the all around reach of standing H and it's hitbox can potentially whiff on all but 20 characters when they are crouching, somewhat limiting it's use on grounded foes. It can be canceled to special moves, which opens up some options.
}}
{{UMvC3MoveListRow2.0
|photo=[[File:200Hulk_5H.png]]
|name=Standing Heavy
|command=H
|damage=120,000
|guard=-
|properties=groundbounce hardknockdown armored
|startup=15
|active=4
|recovery=37
|hit=-
|block=-15
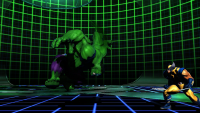
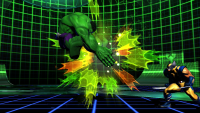
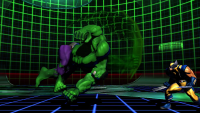
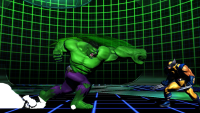
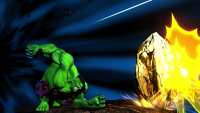
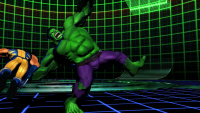
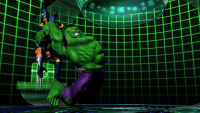
|notes=An infamous normal in UMvC, standing H has super armor from frames 6-18. Not only does it have a huge hitbox that can potentially smash foes behind Hulk (when hurtboxes permit), but it's groundbounce/hardknockdown properties gives Hulk ample time to confirm an action afterwards, sometimes even on trades! Standing H's armor isn't as fast as standing M so the move isn't necessarily going to save Hulk in every situation, some normals hit twice quick enough to counter it handily. Standing H can also option select into ground throws, making Hulk one of the most dangerous start of round characters!
}}
{{UMvC3MoveListRow2.0
|photo=[[File:200Hulk_2L.png]]
|name=Crouching Light
|command=d + L
|damage=58,000
|guard=low
|properties=low
|startup=9
|active=3
|recovery=19
|hit=-3
|block=-6
|notes=This move should see some use in Hulk's neutral, as it's his '''only''' low. Although crouching L's 9f startup may seem undesirable compared to the average 5, it's range somewhat makes up for it and Hulk can follow it up to even more frametraps (for instance, it can be chained to standing heavy or canceled to G.Charge(AA)H-H). Ideally you are using this move to catch foes attempting to jump when covered by a lockdown assist.
}}
{{UMvC3MoveListRow2.0
|photo=[[File:200Hulk_2M.png]]
|name=Crouching Medium
|command=d + M
|damage=85,000
|guard=-
|properties=-
|startup=14
|active=3
|recovery=26
|hit=-5
|block=-9
|notes=Crouching M is good for continuing a ground chain combo started by L.png and won't have the same problem with some crouching characters as standing M. It's real value lies in the fact that it moves Hulk forward almost a character length, which open up some shenanigans Hulk can initiate more effectively than with standing H. A good one is for when Hulk has the foe on incoming: if their character has poor air options Hulk can safely call a lockdown assist and use crouching M to sandwich them between him and the assist for a tricky crossup!
}}
{{UMvC3MoveListRow2.0
|photo=[[File:200Hulk_2H.png]]
|name=Crouching Heavy
|command=d + H
|damage=100,000
|guard=-
|properties=Strk
|startup=12
|active=4
|recovery=34
|hit=-
|block=-12
|notes=Crouching H is faster for covering the immediate area in front of Hulk than standing H, but it doesn't hit low and doesn't have the far range of Hulk's armor moves. It does a large amount of damage, but not as much in combos as standing M into Impact Punch (although it can extend after G.Wave OTG on some characters). It lowers Hulk's hurtbox a bit, but that alone won't warrant using this move all that often.
}}
{{UMvC3MoveListRow2.0
|photo=[[File:200Hulk_5S.png]]
|name=Launcher/Special
|command=S
|damage=40,000+90,000 (121,000)
|guard=-
|properties=strk first hit Launch on second hit Nocancel
|startup=10
|active=2(2)3
|recovery=36
|hit=-
|block=-13
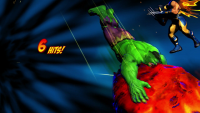
|notes=Hulk's launcher. Although the hitbox and speed aren't bad, it is too unsafe on block to use for those purposes. For combo extension S is a possible followup after G.Wave OTG in the corner for optimal damage, or for when an assist is unavailable; although the spacing for doing so will typically be considerably harder than just doing G.Charge(AA). If only the first hit is blocked, S can be jump canceled.
}}
===Air Normals===
{{UMvC3MoveListRow2.0
|photo=[[File:200Hulk_jL.png]]
|name=Jumping Light
|command=(Air) L
|damage=60,000
|guard=High
|properties=High
|startup=7
|active=3
|recovery=18
|hit=+15
|block=+13
|notes=Air L won't really instant overhead too many characters beyond the obvious larger ones (convert with jLHS), but it does work as a fuzzy on most average-sized characters. jL doesn't have the hitbox to use as an air-to-air without cover. You can chain it into itself once as a gimmicky double overhead.
}}
{{UMvC3MoveListRow2.0
|photo=[[File:200Hulk_jM.png]]
|name=Jumping Medium
|command=(Air) M
|damage=90,000
|guard=High
|properties=High
|startup=13
|active=3
|recovery=19
|hit=19
|block=+20
|notes=jM is rather slow to use for most things other than combos and conversions. You can try to set-up a guardbreak on incoming with it's large hitbox, but jS and G.Quake do that more easily.
}}
{{UMvC3MoveListRow2.0
|photo=[[File:200Hulk_jH.png]]
|name=Jumping Heavy
|command=(Air) H
|damage=110,000
|guard=High
|properties=High Stagger
|startup=16
|active=5
|recovery=18
|hit=-
|block=-2
|notes="The Clap", jH will stagger grounded foes on hit and has a large hitbox Hulk might use to outrange some pokes and surprise aerial foes (too close and he's airgrabbed though). jH will also halt Hulk's aerial momentum, leaving him to fall striaght down afterwards. This will affect Hulk's placement relative to the foe after an aerial rave midscreen, which is why some combos will involve the player omitting jH so that Hulk will be closer after the hard knockdown. While falling from jump height, Hulk has time to surprise some foes with jL.
}}
{{UMvC3MoveListRow2.0
|photo=[[File:200Hulk_jS.png]]
|name=Jumping Special
|command=(Air) S
|damage=130,000
|guard=High
|properties=High Groundbounce Softknockdown
|startup=17
|active=3
|recovery=36
|hit=-
|block=+16
|notes=Although jS has a large hitbox that easily crosses up and massive frame adv. on block, it's startup is obviously too poor to use this move with impunity. jS can be used to set-up a gimmicky guard-break on incoming and it's groundbounce allows Hulk to complete aerial conversions.
}}
===Command Normals===
{{UMvC3MoveListRow2.0
|photo=[[File:200Hulk_6M.png]]
|name=Impact Punch
|command=f + M / f + M (Charge)
|damage=115,000 / 140,000
|guard=-
|properties=Strk [[File:Forcedwallbounce.png]] Softknockdown armored Chipdamage
|startup=16-46
|active=5
|recovery=28
|hit=+4
|block=-7
|notes=Impact Punch is a new addition for Hulk in UMvC3. As it's special cancelable and armored, Hulk can use it to begin or continue his shenanigans. Hulk can hold the charge to trick foes into attacking, only for it to be absorbed by the armor. Another use for holding the charge is as a Kara cancel to G.Tornado. When fully charged, Impact Punch will force a wallbounce on hit.
}}
===TAC/Air Exchange===
{| class="wikitable" style="text-align: center;"
|-
|-
! Command
! Command
! Screen
! Startup
! Strategy/Notes
! Active
! Demo1
! Recovery
! Demo1 Caption
! Attributes
! Demo2
! Demo2 Caption
|-
| {{#motion: L }}
| [[File:Hulk 5L.png|179px]]
|style="vertical-align:top;" align="left"| Hulk's standing jab. Same startup as crouching{{#motion: L }} and this move is often used to continue combos (ie j{{#motion: M }},j{{#motion: M }},{{#motion: L }}), but it's large hitbox can somewhat be used as an anti-air or punishing tool (ie blocked uncancelable footdive) or even as a crossunder midscreen! Crouching{{#motion: L }} is usually the better move for CQC situations though.
| [[File:Hulk Lcrossunder2.gif]]
| ''Standing[[File:L.png]] crossunder''
| -
| -
|-
| {{#motion: M }}
| [[File:Hulk M.png]]
|style="vertical-align:top;" align="left"| Standing {{#motion: M }} has armor from frames 3-15, the fastest armor in Hulk's repertoire. For confirm/combo purposes it has considerable hitstun and can chain to Impact Punch for massive damage. Standing [[File:M.png]]'s high & forward reaching hitbox can also anti-air linear approaches. Unfortunately standing {{#motion: M }} doesn't have the all around reach of standing [[File:H.png]] and it's hitbox can potentially whiff on all but 20 characters when they are crouching, somewhat limiting it's use on grounded foes. It can be canceled to special moves, which opens up some options.
| [[File:Hulk Mwhiff.gif]]
| ''Be careful if they're crouching!''
| -
| -
|-
| {{#motion: H }}
| [[File:Hulk H.png]]
|style="vertical-align:top;" align="left"| An infamous normal in UMvC3, standing [[File:H.png]] not only has a huge hitbox that can potentially smash foes behind Hulk (when hurtboxes permit), but it's groundbounce/hardknockdown properties gives Hulk ample time to confirm an action afterwards, sometimes even on trades! As it's armor doesn't start until frame 6, the move isn't necessarily going to save Hulk in every situation. As it moves Hulk forward slightly, standing [[File:H.png]] is worth empty canceling (or "Kara") into other moves. For instance, Kara-[[File:H.png]] into G.Tornado will effectively increase it's range and fool foes who were expecting to block (this works especially well when you condition foes to block by bullying them with Hulk's armor and low). Standing [[File:H.png]] also serves as an option select for Hulk's ground throws, making Hulk one of the most dangerous start of round characters!
| [[File:Hulk Hhitbox.gif]]
| ''Large area of effect.''
| -
| -
|-
| [[File:down.gif]][[File:L.png]]
| [[File:Hulk dL.png]]
|style="vertical-align:top;" align="left"| This move should see some use in Hulk's neutral, as it's his ''only'' low. Although crouching[[File:L.png]]'s 9f startup may seem undesirable compared to the average 5, it's range somewhat makes up for it and Hulk can follow it up to even more frametraps (for instance, it can be chained to standing heavy or canceled to G.Charge(AA)H-H). Ideally you are using this move to catch foes attempting to jump when covered by a lockdown assist.
| -
| -
| -
| -
|-
| [[File:down.gif]]{{#motion: M }}
| [[File:Hulk dM.png]]
|style="vertical-align:top;" align="left"| Crouching[[File:M.png]] is good for continuing a ground chain combo started by [[File:L.png]] and won't have the same problem with some crouching characters as standing[[File:M.png]]. It's real value lies in the fact that it moves Hulk forward almost a character length, which open up some shenanigans Hulk can initiate more effectively than with standing[[File:H.png]]. A good one is for when Hulk has the foe on incoming: if their character has poor air options Hulk can safely call a lockdown assist and use crouching[[File:M.png]] to sandwich them between him and the assist for a tricky crossup!
| [[File:Hulk karaMhcb.gif]]
| ''Kara-[[File:M.png]] G.Tornado''
| [[File:Hulk karaMcrossunder.gif]]
| ''[[File:M.png]] crossup''
|-
| [[File:down.gif]]{{#motion: H }}
| [[File:Hulk dH.png]]
|style="vertical-align:top;" align="left"| Crouching[[File:H.png]] is faster for covering the immediate area in front of Hulk than standing[[File:H.png]], but it doesn't hit low and doesn't have the far range of Hulk's armor moves. It does a large amount of damage, but not as much in combos as standing[[File:M.png]] into Impact Punch (although it can extend after G.Wave OTG on some characters). It lowers Hulk's hurtbox a bit, but that alone won't warrant using this move all that often.
| -
| -
| -
| -
|-
|-
| {{#motion: S }}
| {{#motion: u }}/{{#motion: f }}/{{#motion: b }}/{{#motion: d + S }}
| [[File:Hulk S.png]]
| 9
|style="vertical-align:top;" align="left"| Hulk's launcher. Although the hitbox and speed aren't bad, it is too unsafe on block to use for those purposes. For combo extension [[File:S.png]] is a possible followup after G.Wave OTG in the corner for optimal damage, or for when an assist is unavailable; although the spacing for doing so will typically be considerably harder than just doing G.Charge(AA).
| 6
| -
| Until Grounded
| -
| Tags available ally.
| -
| -
|-
| (Charge) [[File:right.gif]]{{#motion: M }}
| [[File:Hulk fM.png]]
|style="vertical-align:top;" align="left"| Impact Punch is a new addition for Hulk in UMvC3. Hulk can hold the charge to trick foes into attacking, only for it to be absorbed by the armor. Another use for holding the charge is as a Kara cancel to G.Tornado. When fully charged, Impact Punch will force a wallbounce on hit.
| -
| -
| -
| -
|}
|}


===Aerial Normals===
===Specials===
{| class="wikitable" style="text-align: center;"
 
{|class="wikitable" style="width:1100px;"
|- style="font-weight: bold;"
|style="width:200px; font-size:115%;" align="center"| <b>Gamma Wave</b><br><small>{{#motion: [Charge] f + atk }}</small>
|style="width:50px;"| Version
|style="width:150px;"| Damage
|style="width:100px;"| Guard
|style="width:70px;"| Startup
|style="width:70px;"| Active
|style="width:70px;"| Recovery
|style="width:70px;"| On Hit
|style="width:70px;"| On Block
|style="width:150px;"| Properties
|-
|-
! Command
|align="center" rowspan="8"|
! Screen
 
! Strategy/Notes
[[File:200Hulk_4Charge6L.png]]
! Demo1
 
! Demo1 Caption
[[File:200Hulk_4Charge6M.png]]
! Demo2
 
! Demo2 Caption
[[File:200Hulk_4Charge6H.png]]
|-
|-
| [Air]{{#motion: l }}
|colspan="9"| 45f charge. Each projectile = 5 low prioriy durability points.
| [[File:Hulk jL.png]]
|style="vertical-align:top;" align="left"| Air[[File:L.png]] won't really instant overhead too many characters beyond the obvious larger ones (convert with j[[File:L.png]][[File:H.png]][[File:S.png]]), but it does work as a fuzzy on most average-sized characters. j[[File:L.png]] doesn't have the hitbox to use as an air-to-air without cover. You can chain it into itself once as a gimmicky double overhead. 
| -
| -
| -
| -
|-
|-
| [Air]{{#motion: M }}
| {{#motion: l }}
| [[File:Hulk jM.png]]
| 40,000x2 (76,000)
|style="vertical-align:top;" align="left"| j[[File:M.png]] is rather slow to use for most things other than combos and conversions. You can try to set-up a guardbreak on incoming with it's large hitbox, but j[[File:S.png]] and G.Quake do that more easily.
| {{#motion: - }}
| -
| 19
| -
| 23
| -
| 34
| -
| -
| -1
| {{#motion: Proj Otg softknockdown }}
|-
|colspan="9"| Of the three strengths of Gamma Wave, L is arguably the most useful overall. It's quicker startup affords Hulk much more time than M or H to position himself properly before attempting G.Charge(AA) extension. Also this Gamma Wave is only -1f on block, making it one of Hulk's safest options. Try to make it a habit of buffering this move during the blockstrings you wish to end safely.
|-
|-
| [Air]{{#motion: H }}
| {{#motion: m }}
| [[File:Hulk jH.png]]
| 40,000x3 (108,300)
|style="vertical-align:top;" align="left"| "The Clap", j[[File:H.png]], will stagger grounded foes on hit and has a large hitbox Hulk might use to outrange some pokes and surprise aerial foes (too close and he's airgrabbed though). j[[File:H.png]] will also halt Hulk's aerial momentum, leaving him to fall striaght down afterwards. This will affect Hulk's placement relative to the foe after an aerial rave midscreen, which is why some combos will involve the player omitting j[[FIle:H.png]] so that Hulk will be closer after the hard knockdown. While falling from jump height, Hulk has time to surprise some foes with j[[File:L.png]].
| {{#motion: - }}
| -
| 23
| -
| 28
| -
| 36
| -
| -
| -5
| {{#motion: Proj Otg softknockdown }}
|-
|colspan="9"| The M strength of Gamma Wave covers a moderate amount of distance, but without as much commitment as the H strength. Because of the larger coverage, this and the H strength of Gamma Wave can be looped indefinitely on assist characters that are caught (naturally you would avoid being reckless with this as the foe can still get up and rush Hulk).
|-
|-
| [Air]{{#motion: S }}
| {{#motion: h }}
| [[File:Hulk jS.png]]
| 40,000x4 (137,400)
|style="vertical-align:top;" align="left"| Although j[[File:S.png]] has a large hitbox that easily crosses up and massive frame adv. on block, it's startup is obviously too poor to use this move with impunity. This move can be used to set-up a gimmicky guard-break on incoming and it's groundbounce allows Hulk to complete aerial conversions.
| {{#motion: - }}
| -
| 27
| -
| 32
| -
| 36
| -
| -
| -6
| {{#motion: Proj Otg softknockdown }}
|-
|colspan="9"| This strength of Gamma Wave will go almost full screen and as with the others, it's durability matches or bypasses some projectiles quite nicely when they are out on the same time. Unfortunately that usually won't be the case due to it's slow startup and the projectile's somewhat slow speed (compared to beams). This move's large amount of frames also makes it into a too-risky commitment the foe could easily blow up on a read. Use H Gamma Wave judiciously and with coverage.
|}
|}


===Special Moves===
{{UMvC3MoveListRow2.1
{| class="wikitable" style="text-align: center;"
|photo=[[File:200Hulk_236X.png]]
|name=Gamma Charge
|command=qcf + atk
|ldamage=50,000x3 (135,400)
|lguard=-
|lstartup=9
|lactive=6
|lrecovery=36
|lhit=-12
|lblock=-12
|mdamage=50,000x4 (171,800)
|mguard=-
|mstartup=9
|mactive=8
|mrecovery=39
|mhit=-15
|mblock=-15
|hdamage=50,000x5 (204,600)
|hguard=-
|hstartup=9
|hactive=10
|hrecovery=42
|hhit=-18
|hblock=-18
|properties=Strk armored
|notes=Gamma Charge is basically a "shoulder tackle" Hulk can use to approach the opponent. Gamma Charge has one hit of armor and can be followed up with one of three specials, though the move is usually unsafe and should be covered by an assist. In some situations, Gamma Charge is excellent for finishing off weak foes with chip damage and for discouraging wake-up Hard Tags when covered by a lock down assist. Hulk can jump cancel his ground dash into Gamma Charge to deceive enemies who call assists or attempt to set up a move thinking they have enough distance.
If Hulk lands this move on two characters, unfortunately the best he can do without X-Factor or assists would be to combo into the L followup and then Gamma Tsunami (or Gamma Crush if cornered or at a lucky placement midscreen) into a DHC.
Damage, active frames and distance covered all depend on the strength used, all have 9f startup. L goes the least distance, so it is mostly used in certain extensions or with quick assists. M. will typically see the least use of the three strengths of Gamma Charge as it doesn't offer the most distance or is as good for combo extension. H covers the most distance, does the most damage and has the most active frames of the three strengths of Gamma Charge, making it the most useful in Hulk's neutral.
}}
 
{|class="wikitable" style="width:1100px;"
|- style="font-weight: bold;"
|style="width:200px; font-size:115%;" align="center"| <b>Gamma Charge 2nd Followup</b><br><small>{{#motion: qcf + atk ->atk }}</small>
|style="width:50px;"| Version
|style="width:150px;"| Damage
|style="width:100px;"| Guard
|style="width:70px;"| Startup
|style="width:70px;"| Active
|style="width:70px;"| Recovery
|style="width:70px;"| On Hit
|style="width:70px;"| On Block
|style="width:150px;"| Properties
|-
|-
! Command
|align="center" rowspan="8"| [[File:200Hulk_236XL.png]]
! Screen
 
! Strategy/Notes
[[File:200Hulk_236XM.png]]
! Demo1
 
! Demo1 Caption
[[File:200Hulk_236XH.png]]
! Demo2
! Demo2 Caption
|-
|-
| {{#motion: b }}[Charge]{{#motion: f + l }}
|colspan="9"| Must input during frames 9-25 of G.Charge. Hyper Armor in frames 3-15. Like many of Hulk's attacks, these followups are mostly unsafe and should be covered by an assist. As these specials have hyper armor, Hulk can hit characters out of attacks that would ordinarily defeat super armor (including multi-hit moves such as Flame Carpet and Spiral Swords!).
| [[File:Hulk bChargefL.png]]
|style="vertical-align:top;" align="left"| Of the three strengths of Gamma Wave, [[File:L.png]] is arguably the most useful overall. It's quicker startup affords Hulk much more time than [[File:M.png]]or[[File:H.png]] to position himself properly before attempting G.Charge(AA) extension. Also this Gamma Wave is only -1f on block, making it one of Hulk's safest options. Try to make it a habit of buffering this move during the blockstrings you wish to end safely.
|
| -
| -
|
|-
|-
| {{#motion: b }}[Charge]{{#motion: f + M }}
| {{#motion: l }}
| [[File:Hulk bChargefMH.png]]
| 70,000
|style="vertical-align:top;" align="left"| The [[File:M.png]] strength of Gamma Wave covers a moderate amount of distance, but without as much commitment as the [[File:H.png]] strength. Because of the larger coverage, this and the [[File:H.png]] strength of Gamma Wave can be looped indefinitely on assist characters that are caught (naturally you would avoid being reckless with this as the foe can still get up and rush Hulk).
| {{#motion: - }}
|  
| 9
| 10
| 27
| -
| -
| -
| -11
|  
| {{#motion: Strk armored }}
|-  
|-  
| {{#motion: b }}[Charge]{{#motion: f + H }}
|colspan="9"| The L followup is an additional "shoulder charge" that hits foes horizontally in front of him and knocks them down. If done on an airborne character, Hulk has enough advantage to link a snapback, or Gamma Charge(AA) for a full combo. L's hitbox can be also be used as a cross-up on the foe's incoming if done with enough delay that their back isn't to the wall.  
| [[File:Hulk bChargefMH.png]]
|style="vertical-align:top;" align="left"| This strength of Gamma Wave will go almost full screen and as with the others, it's durability matches or bypasses some projectiles quite nicely when they are out on the same time. Unfortunately that usually won't be the case due to it's slow startup and the projectile's somewhat slow speed (compared to beams). This move's large amount of frames also makes it into a too-risky commitment the foe could easily blow up on a read. Use [[File:H.png]] Gamma Wave judiciously and with coverage.
| -
| -
| -
|
|-
|-
| {{#motion: qcf + L }}
| {{#motion: m }}
| [[File:Hulk qcfAtk.png]]
| 70,000
|style="vertical-align:top;" align="left"| Gamma Charge is basically a "shoulder tackle" Hulk can use to approach the opponent. Gamma Charge has one hit of armor and can be followed up with one of three specials, though the move is usually unsafe and should be covered by an assist. In some situations, Gamma Charge is excellent for finishing off weak foes with chip damage and for discouraging wake-up Hard Tags when covered by a lock down assist. Damage, active frames and distance covered all depend on the strength used, all have 9f startup. [[File:L.png]] goes the least distance, so it is mostly used in certain extensions or with quick assists.
| {{#motion: - }}
| 7
| 19
| 35
| -
| -
| -
| -28
| -
| {{#motion: Strk armored }}
|  
|-  
|colspan="9"| The M followup isn't good for much other than it's high anti-air hitbox. It is unsafe solo and renders Hulk airborne so he can't hyper out.
|-
|-
| {{#motion: qcf + M }}
| {{#motion: h }}
| [[File:Hulk qcfAtk.png]]
| 70,000
|style="vertical-align:top;" align="left"| The [[File:M.png]] will typically see the least use of the three strengths of Gamma Charge as it doesn't offer the most distance or safety.
| {{#motion: - }}
|  
| 9
| 10
| 32
| -
| -
| -
| -16
|
| {{#motion: Strk armored }}
|-
|-  
| {{#motion: qcf + H }}
|colspan="9"| H followup is a "dash back" that leaves Hulk a little over a character distance from an enemy after a point-blank Gamma Charge. Despite the distance, even this move isn't safe without an assist, as it has enough recovery for some characters to dash up and punish Hulk. This followup can be used for incoming mixup midscreen, but requires X-Factor to convert if solo.
| [[File:Hulk qcfAtk.png]]
|style="vertical-align:top;" align="left"| [[File:H.png]] covers the most distance, does the most damage and has the most active frames of the three strengths of Gamma Charge, arguably making it the most useful in Hulk's neutral. Hulk can jump cancel his ground dash into Gamma Charge to deceive enemies who call assists or attempt to set up a move thinking they have enough distance. If Hulk lands this move on two characters, unfortunately the best he can do without X-Factor or assists would be to combo into the L followup and then Gamma Tsunami (or Gamma Crush if cornered or at a lucky placement midscreen) into a DHC.
|
| -
| -
|
|-
| [ {{#motion: qcf + atk }} ] {{#motion: L }}
| [[File:Hulk qcfAtkL.png]]
|style="vertical-align:top;" align="left"| These followups can be done from any strength of Gamma Charge. As with many of Hulk's attacks, they are mostly unsafe and should be covered by an assist, though Hulk can cancel the recovery to Gamma Crush and DHC. The [[File:L.png]] followup is an additional "shoulder charge" that hits foes horizontally in front of him and knocks them down. If done on an airborne character, Hulk has enough advantage to link a snapback, or Gamma Charge(AA) for a full combo. As it has hyper armor, [[File:L.png]] can hit other characters out of attacks that would normally defeat Hulk's armor (including multi-hit moves such as Flame Carpet and Spiral Swords!). [[File:L.png]]'s hitbox can be also be used as a cross-up on the foe's incoming if done with enough delay that their back isn't to the wall.
|
|
| -
|
|-
| [ {{#motion: qcf + atk }} ] {{#motion: M }}
| [[File:Hulk qcfAtkM.png]]
|style="vertical-align:top;" align="left"| This followup isn't good for much other than it's high anti-air hitbox. It is unsafe solo and renders Hulk airborne so he can't hyper out. This move is useful in the rare situation you are covered by a lockdown assist, but don't want to leave yourself too close to the foe via [[File:L.png]] followup.
|
| -
| -
|
|-
| [ {{#motion: qcf + atk }} ] {{#motion: H }}
| [[File:Hulk qcfAtkH.png]]
|style="vertical-align:top;" align="left"| [[File:H.png]] followup is a "dash back" that leaves Hulk a little over a character distance from an enemy after a point-blank Gamma Charge. Despite the distance, even this move isn't safe without an assist, as it has enough recovery for some characters to dash up and punish Hulk. This followup can be used for incoming mixup midscreen, but requires X-Factor to convert if solo.
|
| -
| -
|
|-
| {{#motion: dp + L }}
| [[File:Hulk dpL.png]]
|style="vertical-align:top;" align="left"| Gamma Charge (AA) is an armored attack with a "dragon punch" style hitbox. Like the grounded horizontal Gamma Charge, this move has three followups of it's own depending on the button pressed afterwards. GCharge(AA) is excellent for frametraps as Hulk is airborne and [[File:H.png]] followup will groundbounce a foe pressing buttons, while leaving Hulk at frame advantage if blocked. The main differences between the strengths are their damage, active frames, peak height and the width of their hitboxes as Hulk rises. Because [[File:L.png]] GCharge(AA) has the widest hitbox close to the ground, it is the most practical of them all for Gamma Wave extension, even being the only strength that can be landed on some characters.
|
| -
| -
|
|-
| {{#motion: dp + M }}
| [[File:Hulk dpM.png]]
|style="vertical-align:top;" align="left"| The [[File:M.png]] strength is between the other two in stats and will probably see the least usage, in neutral. On some characters like Shuma and Jill, it is the optimal option for Gamma Wave extension.
|
| -
| -
|
|-
| {{#motion: dp + H }}
| [[File:Hulk dpH.png]]
|style="vertical-align:top;" align="left"| [[File:H.png]] G.Charge(AA) is sometimes used in the neutral for frametraps and mixup (Hulk can soar above the foe and do another followup to cross-up). At the start of round it can counter players mashing grab or buttons. It does the most damage for Gamma Wave extension, although with the most risk.
|
| -
| -
|
|-
| [ {{#motion: dp + atk }} ] {{#motion: L }}
| [[File:Hulk dpAtkL.png]]
|style="vertical-align:top;" align="left"| Easily the worst of G.Charge(AA)'s followups. It leaves both Hulk and the foe airborne and doesn't recover until Hulk touches ground.
|
|
|
|
|-
| [ {{#motion: dp + atk }} ] {{#motion: M }}
| [[File:Hulk dpAtkM.png]]
|style="vertical-align:top;" align="left"| This followup is a wallbounce on hit. Useful for mid-screen combos to bring the other character closer to the corner and for corner Gamma Wave extension. As it moves Hulk forward, you could use this for mixup after a high G.Charge(AA) (on incoming, a crouching character, or someone waking up); Hulk can easily be thrown out of it though.
|
| -
|
|
|-
| [ {{#motion: dp + atk }} ] {{#motion: H }}
| [[File:Hulk dpAtkH.png]]
|style="vertical-align:top;" align="left"| [[File:H.png]] followup is a groundbounce/hard-knockdown, making it the typical ender to a confirm with G.Charge(AA) to start an easy combo. The second time this attack is used in a combo, it becomes a soft-knockdown (unless groundbounce is reset). Hulk is positive on block afterwards and can even frametrap after it with a normal or another special. Take care to not have it whiff due to pushblock. Hulk also cannot cancel it's recovery long enough to hyper if someone decides to punish via XFGC, be conservative if you are playing someone with a habit of doing this.
|
| -
|
|
|-
| {{#motion: hcb + L }}
| [[File:Hulk hcbLM.png]]
|style="vertical-align:top;" align="left"| Gamma Tornado is Hulk's command grab. All three strengths can be mashed for extra damage. Generally their range, startup and recovery leave something to be desired, but Hulk can hyper cancel their recovery. The [[File:L.png]] strength has the quickest startup, but the least range. This and the [[File:M.png]] strength throw the other character full-screen. 
|
| -
| -
|
|-
| {{#motion: hcb + M }}
| [[File:Hulk hcbLM.png]]
|style="vertical-align:top;" align="left"| The [[File:M.png]] strength has more range, but slightly more startup. Both command grabs can be Kara'd into, however this adds even more startup. Condition foes to block and generally fear Hulk before going for risks.
|
| -
| -
|
|-
| {{#motion: hcb + H }}
| [[File:Hulk hcbH.png]]
|style="vertical-align:top;" align="left"| This strength of Gamma Tornado is for catching aerial characters. Unlike the other two strengths, Hulk won't throw the other character full screen and can convert solo depending.
|
| -
| -
|
|-
| {{#motion: qcf + }}[[file:a1.png]]/[[file:a2.png]]
| [[File:Hulk snapback.png]]
|style="vertical-align:top;" align="left"| Tags out foe character to the one chosen by the assist button. Foe assist call and tag-outs are locked for 4 seconds. Hulk's snapback emulates the hitbox of his standing medium attack, rending it terrible on crouching characters at some ranges. Hulk's best best for punishing XFGC is usually to be at a far enough range to attempt a G.Charge(AA) frametrap.
|
| -
|
|
|}
|}


===Hyper Combos===
{{UMvC3MoveListRow2.1
{| class="wikitable" style="text-align: center;"
|photo=[[File:200Hulk_623L.png]]
 
[[File:200Hulk_623M.png]]
 
[[File:200Hulk_623H.png]]
|name=Gamma Charge (AA)
|command=dp + atk
|ldamage=50,000x3 (135,400
|lguard=-
|lstartup=5
|lactive=6
|lrecovery=38
|lhit=-20
|lblock=-22
|mdamage=50,000x4 (171,800)
|mguard=-
|mstartup=5
|mactive=19
|mrecovery=44
|mhit=-25
|mblock=-29
|hdamage=50,000x5 (204,600)
|hguard=-
|hstartup=5
|hactive=25
|hrecovery=48
|hhit=-39
|hblock=-43
|properties=Strk
|notes=Gamma Charge (AA) is an armored attack with a "dragon punch" style hitbox. Like the grounded horizontal Gamma Charge, this move has three followups of it's own depending on the button pressed afterwards. The main differences between the strengths are their damage, active frames, peak height and the width of their hitboxes as Hulk rises.
 
 
Because L GCharge(AA) has the widest hitbox close to the ground, it is the most practical of them all for Gamma Wave extension, even being the only strength that can be landed on some characters.
 
The M strength is between the other two in stats and will probably see the least usage, in neutral. On some characters like Shuma and Jill, it is the optimal option for Gamma Wave extension.
 
H G.Charge(AA) is sometimes used in the neutral for frametraps and mixup (Hulk can soar above the foe and do another followup to cross-up). At the start of round it can counter players mashing grab or buttons. It does the most damage for Gamma Wave extension, although with the most risk.
}}
 
{|class="wikitable" style="width:1100px;"
|- style="font-weight: bold;"
|style="width:200px; font-size:115%;" align="center"| <b>Gamma Charge(Anti-Air) Second Followup</b><br><small>{{#motion: dp + atk -> atk }}</small>
|style="width:50px;"| Version
|style="width:150px;"| Damage
|style="width:100px;"| Guard
|style="width:70px;"| Startup
|style="width:70px;"| Active
|style="width:70px;"| Recovery
|style="width:70px;"| On Hit
|style="width:70px;"| On Block
|style="width:150px;"| Properties
|-
|-
! Command
|align="center" rowspan="7"| [[File:200Hulk_623XL.png]]
! Screen
 
! Strategy/Notes
[[File:200Hulk_623XM.png]]
! Demo1
 
! Demo1 Caption
[[File:200Hulk_623XH.png]]
! Demo2
| {{#motion: l }}
! Demo2 Caption
| 70,000
| {{#motion: - }}
| 10
| 6
| Until grounded, +10f
| +6
| -28
| {{#motion: Strk }}
|-
|colspan="9"| Must input during frames 5-25 of G.Charge(AA). Easily the least noteworthy of G.Charge(AA)'s followups. It leaves both Hulk and the foe airborne and doesn't recover until Hulk touches ground. Not very useful for much other than situational combo extension.
|-
|-
| {{#motion: qcf + atk atk }}
| {{#motion: m }}
| [[File:Hulk qcfAtkAtk.png]]
| 70,000
|style="vertical-align:top;" align="left"| Acting almost like a massive Gamma Wave, Gamma Tsunami does more damage the closer Hulk is and the further it hits the foe, dealing comparable damage to Gamma Crush as a combo ender if done after a wallbounce that takes Hulk's back to the wall. On assists, G.Tsunami leaves them down long enough for Hulk to OTG with Gamma Wave or another Tsunami for massive damage. G.Tsunami is unsafe on block if done in CQC distance.
| {{#motion: - }}
|  
| 10
| 6
| Until grounded, +10f
| -
| -
|  
| +2
|  
| {{#motion: Wallbounce Softknockdown }}
|-
|colspan="9"| Must input during frames 5-25 of G.Charge(AA). This followup is a wallbounce on hit. Useful for mid-screen combos to bring the other character closer to the corner and for corner Gamma Wave extension. As it moves Hulk forward, you could use this for mixup after a high G.Charge(AA) (on incoming, a crouching character, or someone waking up); Hulk can easily be thrown out of it though.
|-
|-
| {{#motion: qcb + atk atk }}
| {{#motion: h }}
| [[File:Hulk qcbAtkAtk.png]]
| 70,000
|style="vertical-align:top;" align="left"| Hulk rises, then drops back down with a meteor where the other character is. Gamma Crush does massive damage and is one of the most invulnerable hypers in UMvC3. Blatantly unsafe, it is high-risk/low-reward to attempt this move in the neutral without a safe DHC close by and some of Hulk's bad matchups have ways around it. Hulk can situationally link moves after G.Crush via assists (Hidden Missiles) or THC. 
| {{#motion: - }}
|
| 10
|
| 6
|
| Until grounded, +10f
|
|-
| {{#motion: dp + atk atk }}
| [[File:Hulk dpAtkAtk.png]]
|style="vertical-align:top;" align="left"| Hulk pounds the ground and after some time, rocks cascade in-front of him. Gamma Quake leaves Hulk safe on block, but it takes too much time to activate in the neutral to use without an assist (even with distance, usually the other character can grab). G.Quake can end combos in places you don't want to use G.Tsunami and with assists (Drones etc) Hulk can link another hyper. If one bar is being used, there isn't as much reason to use this hyper over G.Crush in the corner or G.Tsunami after a wallbounce. On incoming, Hulk can use this hyper to force the enemy to block and even 'guardbreak' with [[File:H.png]]G.Tornado if they pushblock the last few rocks.
|
| -
| -
|
| +5
|
| {{#motion: Groundbounce Hardknockdown Softknockdown (2nd) }}
|-
|colspan="9"| Must input during frames 5-25 of G.Charge(AA). H followup is a groundbounce/hard-knockdown, making it the typical ender to a confirm with G.Charge(AA) to start an easy combo. The second time this attack is used in a combo, it becomes a soft-knockdown (unless groundbounce is reset). Hulk is positive on block afterwards and can even frametrap after it with a normal or another special. Take care to not have it whiff due to pushblock. Hulk also cannot cancel it's recovery long enough to hyper if someone decides to punish via XFGC, be conservative if you are playing someone with a habit of doing this.
|}
|}


===Assists===
{|class="wikitable" style="width:1100px;"
{| class="wikitable" style="text-align: center;"
|- style="font-weight: bold;"
|style="width:200px; font-size:115%;" align="center"| <b>Gamma Tornado</b><br><small>{{#motion: hcb + atk }}</small>
|style="width:50px;"| Version
|style="width:150px;"| Damage
|style="width:100px;"| Guard
|style="width:70px;"| Startup
|style="width:70px;"| Active
|style="width:70px;"| Recovery
|style="width:150px;"| Properties
|-
|-
! Name
|align="center" rowspan="4"| [[File:200Hulk_63214L.png]]
! Command
! Screen
! Strategy/Notes
! Demo1
! Demo1 Caption
! Demo2
|-
| [[File:Alpha.gif]]
| [Charge]{{#motion: f + M }}
|
| style="vertical-align:top;" align="left"| OTG. Soft knockdown. Each projectile = 5 low priority durability points. Gamma Wave as an assist retains it's soft knockdown and durability properties, making it somewhat suitable for combo extension. It pales as a horizontal assist compared to beams though. This assist allows Hulk to use Gamma Tsunami during a THC (G.Tsunami recovers the fastest and yields the most corner-carry).
|
|
|
|-
| [[File:Beta.gif]]
| {{#motion: dp + M }}
|
| style="vertical-align:top;" align="left"| Armor (1 hit) during frames 23-32. Gamma Charge (AA) as an assist has armor in the right enough active frames that it can be used as a "get off me" move. It sends the other character high, limiting conversion to mostly characters with aerial groundbounces. This assist makes Hulk use Gamma Quake in a THC.
|
|
|
|-
| [[File:Gamma.gif]]
| {{#motion: qcf + M }}
|
| style="vertical-align:top;" align="left"| Armor (1 hit) during frames 27-36. This assist is just Gamma Charge (horizontal) with slow armor. Gamma Crush becomes Hulk's THC.
|
|
|
|}


=== Throw ===
[[File:200Hulk_63214H.png]]
{| class="wikitable" style="text-align: center;"
| {{#motion: l }}
|rowspan="3"| (Mashable) 92,000 (2 hits) ~ 200,000 (11 hits)
|rowspan="3"| {{#motion: Throw }}
| 11
| 2
| 28
|rowspan="3"| {{#motion: Throw Hardknockdown }}
|-
|-
! Command
| {{#motion: m }}
! Screen
| 16
! Strategy/Notes
| 2
! Screen
| 23
! Strategy/Notes
|-
|-
| {{#motion: airok }}{{#motion: f }} OR {{#motion: b + H }}
| {{#motion: h }}
| [[File:Hulk groundgrab.png]]
| 18
|style="vertical-align:top;" align="left"| Hulk's normal grab has standing heavy as an option select. As a weakness, it is an immediate hard knockdown that would too fast to OTG normally. It is important to have a mixup ready for their wakeup, although some teams can combo off the grab instead. Either an assist must be called before hand (Mystic Ray or Stone Smite) or Hulk must have meter and THC (the other THC must be a fast OTG).
| 2
| [[File:Hulk airgrab.png]]
| 21
| style="vertical-align:top;" align="left"| Unlike his ground throw, Hulk's air-grabs afford generous time to OTG with Gamma Wave. When solo, the most damage Hulk can get is a G.Wave to G.Crush. Having access to a THC means Hulk can combo from an airgrab almost anytime, and can even sideswitch if the other hyper(s) are fast enough. It is also easier to throw other characters into assists, even more so with the aerial back grab (ie Drones, air back grab)
|-  
|colspan="9"| Gamma Tornado is Hulk's command grab. All three strengths can be mashed for extra damage. Because their range, startup and recovery leave something to be desired, conditioning the foe to fear Hulk is the only way to land these. The L strength has less range and startup. The M strength has more range and startup. This and the M strength throw the other character full-screen. The H strength of Gamma Tornado is for catching aerial characters. Unlike the other two strengths, Hulk won't throw the other character full screen and can convert solo with (dash)jLHS depending.
|}
|}


=== Assist Types ===
===Hyper Combos===
{{UMvC3MoveListRow2.0
|photo=[[File:200Hulk_236XX.png]]
|name=Gamma Tsunami
|command=qcb + atk atk
|damage=80,0000x4 (275,000)
|guard=-
|properties=Proj Otg Softknockdown
|startup=6+15
|active=24
|recovery=39
|hit=-
|block=-11
|notes=Acting almost like a massive Gamma Wave, Gamma Tsunami does more damage the closer Hulk is and the further it hits the foe, dealing comparable damage to Gamma Crush as a combo ender if done after a wallbounce that takes Hulk's back to the wall. On assists, G.Tsunami leaves them down long enough for Hulk to OTG with Gamma Wave or another Tsunami for massive damage. G.Tsunami is unsafe on block if done in CQC distance. Each projectile = 3 high priority durability points.
}}


{{UMvC3CharacterAssists
{{UMvC3MoveListRow2.0
  | Gamma Wave | shot front| 40,000 X 3 <br> (108,300) | proj otg <br> softknockdown | Gamma Tsunami
|photo=[[File:200Hulk_623XX.png]]
  | Anti-Air Gamme Charge | direct upward | 40,000 X 4 <br> (137,400) | strk | Gamma Quake
|name=Gamma Quake
  | Gamma Charge | direct front | 40,000 X 4 <br> (137,400) | strk | Gamma Crush
|command=dp + atk atk
|damage=35,000x11 (301,400)
|guard=-
|properties=Proj Otg Hardknockdown (1-10) Softknockdown (11)
|startup=5+10
|active=81
|recovery=89
|hit=-
|block=+13
|notes=Hulk pounds the ground and after some time, rocks cascade in-front of him. Gamma Quake leaves Hulk safe on block, but it takes too much time to activate in the neutral to use without an assist (even with distance, usually the other character can grab). G.Quake can end combos in places you don't want to use G.Tsunami and with assists (Drones etc) Hulk can link another hyper. If one bar is being used, there isn't as much reason to use this hyper over G.Crush in the corner or G.Tsunami after a wallbounce. On incoming, Hulk can use this hyper to force the enemy to block and even 'guardbreak' with H G.Tornado if they pushblock the last few rocks. Rocks hit after 34 frames. Each projectile = 3 high priority durability points
}}
}}


=== Normal Moves ===
{{UMvC3MoveListRow2.0
|photo=[[File:200Hulk_214XX.png]]
|name=Gamma Crush
|command=qcb + atk atk
|damage=60,000x8 (404,700)
|guard=-
|properties=Hardknockdown Otg (2-8)
|startup=6+9
|active=56
|recovery=48
|hit=-
|block=-25
|notes=Hulk rises, then drops back down with a meteor where the other character is. Gamma Crush does massive damage and is one of the most invulnerable hypers in UMvC3. Blatantly unsafe, it is high-risk/low-reward to attempt this move in the neutral without a safe DHC close by and some of Hulk's bad matchups have ways around it. Hulk can situationally link moves after G.Crush via assists (Hidden Missiles) or THC. Frames 1-73 invincible
}}


{{UMvC3MoveListHeader}}
===Misc===
{{MoveListRow | Standing Light | l | 85,000 |  }}
{{MoveListRow | Crouching Light | d + l | 58,000 | low }}
{{MoveListRow | Standing Medium | m | 90,000 | strk armored }}
{{MoveListRow | Crouching Medium | d + m | 85,000 | }}
{{MoveListRow | Standing Heavy | h | 120,000 | groundbounce <br> hardknockdown <br> armored}}
{{MoveListRow | Crouching Heavy | d + h | 100,000 | strk }}
{{MoveListRow | Special | s | 40,000 + 90,000 <br> (121,000) | strk on first hit <br> launch on second hit; <br> nocancel }}
{{MoveListRow | Impact Punch | f + m | 115,000 | strk }}
{{MoveListRow | Impact Punch (charged) | f + m (hold M ) | 140,000 | [[File:forcedwallbounce.png]] <br> softknockdown <br> armored <br> chipdamage }}
{{MoveListRow | Jumping Light | air l | 60,000 | high }}
{{MoveListRow | Jumping Medium | air m | 90,000 | high }}
{{MoveListRow | Jumping Heavy | air h | 110,000 | high <br> stagger }}
{{MoveListRow | Jumping Special | air s | 130,000 | high <br> groundbounce <br> aircombofinisher }}
{{MoveListFooter}}


=== Throws ===
{|class="wikitable" style="width:1000px;"
|- style="font-weight: bold;"
|style="width:200px; font-size:115%;" align="center"| <b>Throw</b><br><small>{{#motion: airok f / b + H }}</small>
|style="width:75px;"| Damage
|style="width:60px;"| Startup
|style="width:60px;"| Active
|style="width:150px;"| Properties
|-
|align="center" rowspan="2"| [[File:200Hulk_grab.png]]
| 80,000
| 1
| 1
| {{#motion: Throw Hardknockdown }}
|-
|colspan="4"| Hulk's normal grab has standing heavy as an option select. As a weakness, it is an immediate hard knockdown that would too fast to OTG normally. It is important to have a mixup ready for their wakeup, although some teams can combo off the grab instead. Either an assist must be called before hand (Mystic Ray or Stone Smite) or Hulk must have meter and THC (the other THC must be a fast OTG).
|-
|align="center" rowspan="2"| [[File:200Hulk_Airgrab.png]]
| 80,000
| 1
| 1
| {{#motion: Airthrow Hardknockdown }}
|-
|colspan="4"| Unlike his ground throw, Hulk's air-grabs afford generous time to OTG with Gamma Wave. When solo, the most damage Hulk can get is a G.Wave to G.Crush. Having access to a THC means Hulk can combo from an airgrab almost anytime, and can even sideswitch if the other hyper(s) are fast enough. It is also easier to throw other characters into assists, even more so with the aerial back grab (ie Drones, air back grab).
|}


{{UMvC3MoveListHeader}}
{{UMvC3MoveListRow2.0
{{MoveListRow | Forward Throw | f + h | 80,000 | throw hardknockdown }}
|photo=[[File:200Hulk_Snap.png]]
{{MoveListRow | Back Throw | b + h | 80,000 | throw hardknockdown }}
|name=Snapback
{{MoveListRow | Forward Air Throw | air f + h | 80,000 | airthrow hardknockdown }}
|command=qcf + [[File:A1.png]]/[[File:A2.png]]
{{MoveListRow | Back Air Throw | air b + h | 80,000 | airthrow hardknockdown }}
|damage=10,000
{{MoveListFooter}}
|guard=-
|properties=Snapback
|startup=1
|active=3
|recovery=33
|hit=-
|block=-10
|notes=Hulk's snapback emulates the hitbox of his standing medium attack, rending it terrible on crouching characters at some ranges. Hulk's best best for punishing XFGC is usually to be at a far enough range to attempt a G.Charge(AA) frametrap. Tags out enemy character to the one chosen by the assist button. Foe assist call and tag-outs are locked for 4 seconds.
}}


=== Special Moves ===
{{UMvC3MoveListRow2.0
 
|photo=[[File:200Hulk_Tagin.png]]
{{UMvC3MoveListHeader}}
|name=Hardtag
{{MoveListRow | Gamma Charge L | qcf + l | 50,000 X 3 <br> (135,400) | strk <br> armored }}
|command=[Hold 14f] [[File:A1.png]]/[[File:A2.png]]
{{MoveListRow | Gamma Charge M | qcf + m | 50,000 X 4 <br> (171,800) | strk <br> armored }}
|damage=33,000
{{MoveListRow | Gamma Charge H | qcf + h | 50,000 X 5 <br> (204,600) | strk <br> armored }}
|guard=High
{{MoveListRow | Gamma Charge 2nd | Gamma Charge, then atk | 70,000 | strk <br> armored <br> Button pressed determines direction: <br> L goes f <br> M goes u <br> H goes b }}
|properties=High Softknockdown
{{MoveListRow | Anti-Air Gamma Charge L | dp + l | 50,000 X 3 <br> (135,400) | strk }}
|startup=1
{{MoveListRow | Anti-Air Gamma Charge M | dp + m | 50,000 X 4 <br> (171,800) | strk }}
|active=21
{{MoveListRow | Anti-Air Gamma Charge H | dp + h | 50,000 X 5 <br> (204,600) | strk }}
|recovery=35
{{MoveListRow | Anti-Air Gamma Charge 2nd L | Anti-Air Gamma Charge, then l | 70,000 | strk , <br> Charges uf }}
|hit=-
{{MoveListRow | Anti-Air Gamma Charge 2nd M | Anti-Air Gamma Charge, then m | 70,000 | wallbounce softknockdown , <br> charges f }}
|block=-11
{{MoveListRow | Anti-Air Gamma Charge 2nd H | Anti-Air Gamma Charge, then h | 70,000 | groundbounce softknockdown <br> Charges df }}
|notes=Must hold down A1/A2 for 14 frames. If the hardtag "jump-in" hits late enough to give him enough frame advantage, Hulk can link G.Charge(AA) for a full combo! As a result, some characters can hard tag to Hulk during a combo to use him as a "damage engine"
{{MoveListRow | Gamma Tornado | hcb + atk | 92,000 (2 hits) ~ 200,000 (11 hits) | throw hardknockdown <br> mashable <br> L and M are ground throw, <br> H is anti-air throw.}}
}}
{{MoveListRow | Gamma Wave l | charge b , f + l | 40,000 X 2 <br> (76,000) | proj otg <br> softknockdown }}
{{MoveListRow | Gamma Wave m | charge b , f + m | 40,000 X 3 <br> (108,300) | proj otg <br> softknockdown }}
{{MoveListRow | Gamma Wave h | charge b , f + h | 40,000 X 4 <br> (137,400) | proj otg <br> softknockdown }}
{{MoveListFooter}}
 
===Hyper Moves===
 
{{UMvC3MoveListHeader}}
{{MoveListRow | Gamma Tsunami | qcf + atk + atk | 80,000 X 4 <br> (275,000) | proj otg <br> softknockdown }}
{{MoveListRow | Gamma Quake | dp + atk + atk | 35,000 X X 11 <br> (301,400) | proj otg <br> hardknockdown on hits 1 - 10 ; <br> softknockdown on final hit }}
{{MoveListRow | Gamma Crush | qcb + atk + atk | 60,000 X 8 <br> (403,700) | hardknockdown }}
{{MoveListFooter}}

Revision as of 02:04, 6 January 2015

Standing {{#motion: h}}
H
Damage Guard Startup Active Recovery On Hit On Block Properties
File:Hulk H.png 120,000 - 15 4 37 - -15 groundbounce hardknockdown armored
An infamous normal in UMvC3, standing H not only has a huge hitbox that can potentially smash foes behind Hulk (when hurtboxes permit), but it's groundbounce/hardknockdown properties gives Hulk ample time to confirm an action afterwards, sometimes even on trades! As it's armor doesn't start until frame 6, the move isn't necessarily going to save Hulk in every situation. As it moves Hulk forward slightly, standing H.png is worth Kara canceling into other moves. For instance, Kara-H.png into G.Tornado will effectively increase it's range and fool foes who were expecting to block (this works especially well when you condition foes to block by bullying them with Hulk's armor and low). Standing H can also option select into ground throws, making Hulk one of the most dangerous start of round characters!
Standing {{#motion: h}}
H
Damage Guard Startup Active Recovery On Hit On Block Properties
File:480Hulk H.png 120,000 - 15 4 37 - -15 groundbounce hardknockdown armored
An infamous normal in UMvC3, standing H not only has a huge hitbox that can potentially smash foes behind Hulk (when hurtboxes permit), but it's groundbounce/hardknockdown properties gives Hulk ample time to confirm an action afterwards, sometimes even on trades! As it's armor doesn't start until frame 6, the move isn't necessarily going to save Hulk in every situation. As it moves Hulk forward slightly, standing H.png is worth Kara canceling into other moves. For instance, Kara-H.png into G.Tornado will effectively increase it's range and fool foes who were expecting to block (this works especially well when you condition foes to block by bullying them with Hulk's armor and low). Standing H can also option select into ground throws, making Hulk one of the most dangerous start of round characters!
Gamma Wave
{{#motion: [Charge] f + atk }}
Version Damage Guard Startup Active Recovery On Hit On Block Properties

File:Hulk bChargefL.png

File:Hulk bChargefMH.png

File:Hulk bChargefMH.png

{{#motion: l }} 40,000x2 (76,000) {{#motion: - }} 19 23 34 - -1 {{#motion: Proj Otg softknockdown }}
Of the three strengths of Gamma Wave, L is arguably the most useful overall. It's quicker startup affords Hulk much more time than M or H to position himself properly before attempting G.Charge(AA) extension. Also this Gamma Wave is only -1f on block, making it one of Hulk's safest options. Try to make it a habit of buffering this move during the blockstrings you wish to end safely.
{{#motion: m }} 40,000x3 (108,300) {{#motion: - }} 23 28 36 - -5 {{#motion: Proj Otg softknockdown }}
The M strength of Gamma Wave covers a moderate amount of distance, but without as much commitment as the H strength. Because of the larger coverage, this and the H strength of Gamma Wave can be looped indefinitely on assist characters that are caught (naturally you would avoid being reckless with this as the foe can still get up and rush Hulk).
{{#motion: h }} 40,000x4 (137,400) {{#motion: - }} 27 32 36 - -6 {{#motion: Proj Otg softknockdown }}
This strength of Gamma Wave will go almost full screen and as with the others, it's durability matches or bypasses some projectiles quite nicely when they are out on the same time. Unfortunately that usually won't be the case due to it's slow startup and the projectile's somewhat slow speed (compared to beams). This move's large amount of frames also makes it into a too-risky commitment the foe could easily blow up on a read. Use H Gamma Wave judiciously and with coverage.
Gamma Wave
{{#motion: [Charge] f + atk }}
Version Damage Guard Startup Active Recovery On Hit On Block Properties

File:Hulk bChargefL.png


File:Hulk bChargefMH.png


File:Hulk bChargefMH.png

{{#motion: l }} 40,000x2 (76,000) {{#motion: - }} 19 23 34 - -1 {{#motion: Proj Otg softknockdown }}
Of the three strengths of Gamma Wave, L is arguably the most useful overall. It's quicker startup affords Hulk much more time than M or H to position himself properly before attempting G.Charge(AA) extension. Also this Gamma Wave is only -1f on block, making it one of Hulk's safest options. Try to make it a habit of buffering this move during the blockstrings you wish to end safely.
{{#motion: m }} 40,000x3 (108,300) {{#motion: - }} 23 28 36 - -5 {{#motion: Proj Otg softknockdown }}
The M strength of Gamma Wave covers a moderate amount of distance, but without as much commitment as the H strength. Because of the larger coverage, this and the H strength of Gamma Wave can be looped indefinitely on assist characters that are caught (naturally you would avoid being reckless with this as the foe can still get up and rush Hulk).
{{#motion: h }} 40,000x4 (137,400) {{#motion: - }} 27 32 36 - -6 {{#motion: Proj Otg softknockdown }}
This strength of Gamma Wave will go almost full screen and as with the others, it's durability matches or bypasses some projectiles quite nicely when they are out on the same time. Unfortunately that usually won't be the case due to it's slow startup and the projectile's somewhat slow speed (compared to beams). This move's large amount of frames also makes it into a too-risky commitment the foe could easily blow up on a read. Use H Gamma Wave judiciously and with coverage.
Name
Screen
Type
Damage
Special Properties
Crossover-Combination
Strategy
Alpha.png Gamma Wave
{{#motion: shot front }}
{{#motion: 40,000 X 3
(108,300) }}
proj otg
softknockdown
{{#motion: Gamma Tsunami }}
While somewhat suitable for combo extension, G.Wave pales as a horizontal assist compared to beams due to long startup. G.Tsunami as a THC recovers fastest and yields the most corner-carry.
Anti-Air Gamme Charge
Beta.png direct upward
{{#motion: 40,000 X 4
(137,400) }}
{{#motion: strk }}
Gamma Quake
{{#motion: Armor during frames 23-32. G.Charge(AA) as an assist has armor early enough that it can be used as a "get off me" move. It sends the foe high, limiting conversion mostly to characters with aerial groundbounce attacks. }}
Gamma Charge
direct front
Gamma.png 40,000 X 4
(137,400)
{{#motion: strk }}
{{#motion: Gamma Crush }}
Armor during frames 27-36. This is just Gamma Charge with slow armor. Gamma Crush in a THC ends rather fast if Hulk is not the point character (due to assist attacks not creating hitstop).
{{#motion: {{{19}}} }}
{{{20}}}
{{{21}}}

Strategy (Intermediate-Advanced) (WIP)

Click me for Frame Data!

Normals

Command Screen Strategy/Notes Demo1 Demo1 Caption Demo2 Demo2 Caption
{{#motion: H }} File:Hulk H.png An infamous normal in UMvC3, standing H.png not only has a huge hitbox that can potentially smash foes behind Hulk (when hurtboxes permit), but it's groundbounce/hardknockdown properties gives Hulk ample time to confirm an action afterwards, sometimes even on trades! As it's armor doesn't start until frame 6, the move isn't necessarily going to save Hulk in every situation. As it moves Hulk forward slightly, standing H.png is worth empty canceling (or "Kara") into other moves. For instance, Kara-H.png into G.Tornado will effectively increase it's range and fool foes who were expecting to block (this works especially well when you condition foes to block by bullying them with Hulk's armor and low). Standing H.png also serves as an option select for Hulk's ground throws, making Hulk one of the most dangerous start of round characters! File:Hulk Hhitbox.gif Large area of effect. - -\-
Standing Light
L
Damage Guard Startup Active Recovery On Hit On Block Properties
250Hulk 5L.png 85,000 - 9 3 14 +2 -1 -
Hulk's standing jab. Same startup as crouching L and this move is often used to continue combos (ie jM ,jM ,L ), but it's large hitbox can somewhat be used as an anti-air or punishing tool (ie blocked uncancelable footdive) or even as a crossunder midscreen! Crouching L is usually the better move for CQC situations though.
Standing Medium
M
Damage Guard Startup Active Recovery On Hit On Block Properties
250Hulk 5M.png 90,000 - 13 3 33 -10 -10 Strk armored
Standing M has armor from frames 3-15, the fastest armor in Hulk's repertoire. For confirm/combo purposes it has considerable hitstun and can chain to Impact Punch for massive damage. Standing M's high & forward reaching hitbox can also anti-air linear approaches. Unfortunately standing M doesn't have the all around reach of standing H and it's hitbox can potentially whiff on all but 20 characters when they are crouching, somewhat limiting it's use on grounded foes. It can be canceled to special moves, which opens up some options.
Standing Heavy
H
Damage Guard Startup Active Recovery On Hit On Block Properties
200Hulk 5H.png 120,000 - 15 4 37 - -15 groundbounce hardknockdown armored
An infamous normal in UMvC, standing H has super armor from frames 6-18. Not only does it have a huge hitbox that can potentially smash foes behind Hulk (when hurtboxes permit), but it's groundbounce/hardknockdown properties gives Hulk ample time to confirm an action afterwards, sometimes even on trades! Standing H's armor isn't as fast as standing M so the move isn't necessarily going to save Hulk in every situation, some normals hit twice quick enough to counter it handily. Standing H can also option select into ground throws, making Hulk one of the most dangerous start of round characters!
Crouching Light
d + L
Damage Guard Startup Active Recovery On Hit On Block Properties
200Hulk 2L.png 58,000 low 9 3 19 -3 -6 low
This move should see some use in Hulk's neutral, as it's his only low. Although crouching L's 9f startup may seem undesirable compared to the average 5, it's range somewhat makes up for it and Hulk can follow it up to even more frametraps (for instance, it can be chained to standing heavy or canceled to G.Charge(AA)H-H). Ideally you are using this move to catch foes attempting to jump when covered by a lockdown assist.
Crouching Medium
d + M
Damage Guard Startup Active Recovery On Hit On Block Properties
200Hulk 2M.png 85,000 - 14 3 26 -5 -9 -
Crouching M is good for continuing a ground chain combo started by L.png and won't have the same problem with some crouching characters as standing M. It's real value lies in the fact that it moves Hulk forward almost a character length, which open up some shenanigans Hulk can initiate more effectively than with standing H. A good one is for when Hulk has the foe on incoming: if their character has poor air options Hulk can safely call a lockdown assist and use crouching M to sandwich them between him and the assist for a tricky crossup!
Crouching Heavy
d + H
Damage Guard Startup Active Recovery On Hit On Block Properties
200Hulk 2H.png 100,000 - 12 4 34 - -12 Strk
Crouching H is faster for covering the immediate area in front of Hulk than standing H, but it doesn't hit low and doesn't have the far range of Hulk's armor moves. It does a large amount of damage, but not as much in combos as standing M into Impact Punch (although it can extend after G.Wave OTG on some characters). It lowers Hulk's hurtbox a bit, but that alone won't warrant using this move all that often.
Launcher/Special
S
Damage Guard Startup Active Recovery On Hit On Block Properties
200Hulk 5S.png 40,000+90,000 (121,000) - 10 2(2)3 36 - -13 strk first hit Launch on second hit Nocancel
Hulk's launcher. Although the hitbox and speed aren't bad, it is too unsafe on block to use for those purposes. For combo extension S is a possible followup after G.Wave OTG in the corner for optimal damage, or for when an assist is unavailable; although the spacing for doing so will typically be considerably harder than just doing G.Charge(AA). If only the first hit is blocked, S can be jump canceled.

Air Normals

Jumping Light
(Air) L
Damage Guard Startup Active Recovery On Hit On Block Properties
200Hulk jL.png 60,000 High 7 3 18 +15 +13 High
Air L won't really instant overhead too many characters beyond the obvious larger ones (convert with jLHS), but it does work as a fuzzy on most average-sized characters. jL doesn't have the hitbox to use as an air-to-air without cover. You can chain it into itself once as a gimmicky double overhead.
Jumping Medium
(Air) M
Damage Guard Startup Active Recovery On Hit On Block Properties
200Hulk jM.png 90,000 High 13 3 19 19 +20 High
jM is rather slow to use for most things other than combos and conversions. You can try to set-up a guardbreak on incoming with it's large hitbox, but jS and G.Quake do that more easily.
Jumping Heavy
(Air) H
Damage Guard Startup Active Recovery On Hit On Block Properties
200Hulk jH.png 110,000 High 16 5 18 - -2 High Stagger
"The Clap", jH will stagger grounded foes on hit and has a large hitbox Hulk might use to outrange some pokes and surprise aerial foes (too close and he's airgrabbed though). jH will also halt Hulk's aerial momentum, leaving him to fall striaght down afterwards. This will affect Hulk's placement relative to the foe after an aerial rave midscreen, which is why some combos will involve the player omitting jH so that Hulk will be closer after the hard knockdown. While falling from jump height, Hulk has time to surprise some foes with jL.
Jumping Special
(Air) S
Damage Guard Startup Active Recovery On Hit On Block Properties
200Hulk jS.png 130,000 High 17 3 36 - +16 High Groundbounce Softknockdown
Although jS has a large hitbox that easily crosses up and massive frame adv. on block, it's startup is obviously too poor to use this move with impunity. jS can be used to set-up a gimmicky guard-break on incoming and it's groundbounce allows Hulk to complete aerial conversions.

Command Normals

Impact Punch
f + M / f + M (Charge)
Damage Guard Startup Active Recovery On Hit On Block Properties
200Hulk 6M.png 115,000 / 140,000 - 16-46 5 28 +4 -7 Strk Forcedwallbounce.png Softknockdown armored Chipdamage
Impact Punch is a new addition for Hulk in UMvC3. As it's special cancelable and armored, Hulk can use it to begin or continue his shenanigans. Hulk can hold the charge to trick foes into attacking, only for it to be absorbed by the armor. Another use for holding the charge is as a Kara cancel to G.Tornado. When fully charged, Impact Punch will force a wallbounce on hit.

TAC/Air Exchange

Command Startup Active Recovery Attributes
{{#motion: u }}/{{#motion: f }}/{{#motion: b }}/{{#motion: d + S }} 9 6 Until Grounded Tags available ally.

Specials

Gamma Wave
{{#motion: [Charge] f + atk }}
Version Damage Guard Startup Active Recovery On Hit On Block Properties

200Hulk 4Charge6L.png

200Hulk 4Charge6M.png

200Hulk 4Charge6H.png

45f charge. Each projectile = 5 low prioriy durability points.
{{#motion: l }} 40,000x2 (76,000) {{#motion: - }} 19 23 34 - -1 {{#motion: Proj Otg softknockdown }}
Of the three strengths of Gamma Wave, L is arguably the most useful overall. It's quicker startup affords Hulk much more time than M or H to position himself properly before attempting G.Charge(AA) extension. Also this Gamma Wave is only -1f on block, making it one of Hulk's safest options. Try to make it a habit of buffering this move during the blockstrings you wish to end safely.
{{#motion: m }} 40,000x3 (108,300) {{#motion: - }} 23 28 36 - -5 {{#motion: Proj Otg softknockdown }}
The M strength of Gamma Wave covers a moderate amount of distance, but without as much commitment as the H strength. Because of the larger coverage, this and the H strength of Gamma Wave can be looped indefinitely on assist characters that are caught (naturally you would avoid being reckless with this as the foe can still get up and rush Hulk).
{{#motion: h }} 40,000x4 (137,400) {{#motion: - }} 27 32 36 - -6 {{#motion: Proj Otg softknockdown }}
This strength of Gamma Wave will go almost full screen and as with the others, it's durability matches or bypasses some projectiles quite nicely when they are out on the same time. Unfortunately that usually won't be the case due to it's slow startup and the projectile's somewhat slow speed (compared to beams). This move's large amount of frames also makes it into a too-risky commitment the foe could easily blow up on a read. Use H Gamma Wave judiciously and with coverage.
Gamma Charge
qcf + atk
Version Damage Guard Startup Active Recovery On Hit On Block Properties
200Hulk 236X.png L.png 50,000x3 (135,400) - 9 6 36 -12 -12 Strk armored
M.png 50,000x4 (171,800) - 9 8 39 -15 -15
H.png 50,000x5 (204,600) - 9 10 42 -18 -18
Gamma Charge is basically a "shoulder tackle" Hulk can use to approach the opponent. Gamma Charge has one hit of armor and can be followed up with one of three specials, though the move is usually unsafe and should be covered by an assist. In some situations, Gamma Charge is excellent for finishing off weak foes with chip damage and for discouraging wake-up Hard Tags when covered by a lock down assist. Hulk can jump cancel his ground dash into Gamma Charge to deceive enemies who call assists or attempt to set up a move thinking they have enough distance.

If Hulk lands this move on two characters, unfortunately the best he can do without X-Factor or assists would be to combo into the L followup and then Gamma Tsunami (or Gamma Crush if cornered or at a lucky placement midscreen) into a DHC. Damage, active frames and distance covered all depend on the strength used, all have 9f startup. L goes the least distance, so it is mostly used in certain extensions or with quick assists. M. will typically see the least use of the three strengths of Gamma Charge as it doesn't offer the most distance or is as good for combo extension. H covers the most distance, does the most damage and has the most active frames of the three strengths of Gamma Charge, making it the most useful in Hulk's neutral.

Gamma Charge 2nd Followup
{{#motion: qcf + atk ->atk }}
Version Damage Guard Startup Active Recovery On Hit On Block Properties
200Hulk 236XL.png

200Hulk 236XM.png

200Hulk 236XH.png

Must input during frames 9-25 of G.Charge. Hyper Armor in frames 3-15. Like many of Hulk's attacks, these followups are mostly unsafe and should be covered by an assist. As these specials have hyper armor, Hulk can hit characters out of attacks that would ordinarily defeat super armor (including multi-hit moves such as Flame Carpet and Spiral Swords!).
{{#motion: l }} 70,000 {{#motion: - }} 9 10 27 - -11 {{#motion: Strk armored }}
The L followup is an additional "shoulder charge" that hits foes horizontally in front of him and knocks them down. If done on an airborne character, Hulk has enough advantage to link a snapback, or Gamma Charge(AA) for a full combo. L's hitbox can be also be used as a cross-up on the foe's incoming if done with enough delay that their back isn't to the wall.
{{#motion: m }} 70,000 {{#motion: - }} 7 19 35 - -28 {{#motion: Strk armored }}
The M followup isn't good for much other than it's high anti-air hitbox. It is unsafe solo and renders Hulk airborne so he can't hyper out.
{{#motion: h }} 70,000 {{#motion: - }} 9 10 32 - -16 {{#motion: Strk armored }}
H followup is a "dash back" that leaves Hulk a little over a character distance from an enemy after a point-blank Gamma Charge. Despite the distance, even this move isn't safe without an assist, as it has enough recovery for some characters to dash up and punish Hulk. This followup can be used for incoming mixup midscreen, but requires X-Factor to convert if solo.
Gamma Charge (AA)
dp + atk
Version Damage Guard Startup Active Recovery On Hit On Block Properties
200Hulk 623L.png

200Hulk 623M.png

200Hulk 623H.png

L.png 50,000x3 (135,400 - 5 6 38 -20 -22 Strk
M.png 50,000x4 (171,800) - 5 19 44 -25 -29
H.png 50,000x5 (204,600) - 5 25 48 -39 -43
Gamma Charge (AA) is an armored attack with a "dragon punch" style hitbox. Like the grounded horizontal Gamma Charge, this move has three followups of it's own depending on the button pressed afterwards. The main differences between the strengths are their damage, active frames, peak height and the width of their hitboxes as Hulk rises.


Because L GCharge(AA) has the widest hitbox close to the ground, it is the most practical of them all for Gamma Wave extension, even being the only strength that can be landed on some characters.

The M strength is between the other two in stats and will probably see the least usage, in neutral. On some characters like Shuma and Jill, it is the optimal option for Gamma Wave extension.

H G.Charge(AA) is sometimes used in the neutral for frametraps and mixup (Hulk can soar above the foe and do another followup to cross-up). At the start of round it can counter players mashing grab or buttons. It does the most damage for Gamma Wave extension, although with the most risk.

Gamma Charge(Anti-Air) Second Followup
{{#motion: dp + atk -> atk }}
Version Damage Guard Startup Active Recovery On Hit On Block Properties
200Hulk 623XL.png

200Hulk 623XM.png

200Hulk 623XH.png

{{#motion: l }} 70,000 {{#motion: - }} 10 6 Until grounded, +10f +6 -28 {{#motion: Strk }}
Must input during frames 5-25 of G.Charge(AA). Easily the least noteworthy of G.Charge(AA)'s followups. It leaves both Hulk and the foe airborne and doesn't recover until Hulk touches ground. Not very useful for much other than situational combo extension.
{{#motion: m }} 70,000 {{#motion: - }} 10 6 Until grounded, +10f - +2 {{#motion: Wallbounce Softknockdown }}
Must input during frames 5-25 of G.Charge(AA). This followup is a wallbounce on hit. Useful for mid-screen combos to bring the other character closer to the corner and for corner Gamma Wave extension. As it moves Hulk forward, you could use this for mixup after a high G.Charge(AA) (on incoming, a crouching character, or someone waking up); Hulk can easily be thrown out of it though.
{{#motion: h }} 70,000 {{#motion: - }} 10 6 Until grounded, +10f - +5 {{#motion: Groundbounce Hardknockdown Softknockdown (2nd) }}
Must input during frames 5-25 of G.Charge(AA). H followup is a groundbounce/hard-knockdown, making it the typical ender to a confirm with G.Charge(AA) to start an easy combo. The second time this attack is used in a combo, it becomes a soft-knockdown (unless groundbounce is reset). Hulk is positive on block afterwards and can even frametrap after it with a normal or another special. Take care to not have it whiff due to pushblock. Hulk also cannot cancel it's recovery long enough to hyper if someone decides to punish via XFGC, be conservative if you are playing someone with a habit of doing this.
Gamma Tornado
{{#motion: hcb + atk }}
Version Damage Guard Startup Active Recovery Properties
200Hulk 63214L.png

200Hulk 63214H.png

{{#motion: l }} (Mashable) 92,000 (2 hits) ~ 200,000 (11 hits) {{#motion: Throw }} 11 2 28 {{#motion: Throw Hardknockdown }}
{{#motion: m }} 16 2 23
{{#motion: h }} 18 2 21
Gamma Tornado is Hulk's command grab. All three strengths can be mashed for extra damage. Because their range, startup and recovery leave something to be desired, conditioning the foe to fear Hulk is the only way to land these. The L strength has less range and startup. The M strength has more range and startup. This and the M strength throw the other character full-screen. The H strength of Gamma Tornado is for catching aerial characters. Unlike the other two strengths, Hulk won't throw the other character full screen and can convert solo with (dash)jLHS depending.

Hyper Combos

Gamma Tsunami
qcb + atk atk
Damage Guard Startup Active Recovery On Hit On Block Properties
200Hulk 236XX.png 80,0000x4 (275,000) - 6+15 24 39 - -11 Proj Otg Softknockdown
Acting almost like a massive Gamma Wave, Gamma Tsunami does more damage the closer Hulk is and the further it hits the foe, dealing comparable damage to Gamma Crush as a combo ender if done after a wallbounce that takes Hulk's back to the wall. On assists, G.Tsunami leaves them down long enough for Hulk to OTG with Gamma Wave or another Tsunami for massive damage. G.Tsunami is unsafe on block if done in CQC distance. Each projectile = 3 high priority durability points.
Gamma Quake
dp + atk atk
Damage Guard Startup Active Recovery On Hit On Block Properties
200Hulk 623XX.png 35,000x11 (301,400) - 5+10 81 89 - +13 Proj Otg Hardknockdown (1-10) Softknockdown (11)
Hulk pounds the ground and after some time, rocks cascade in-front of him. Gamma Quake leaves Hulk safe on block, but it takes too much time to activate in the neutral to use without an assist (even with distance, usually the other character can grab). G.Quake can end combos in places you don't want to use G.Tsunami and with assists (Drones etc) Hulk can link another hyper. If one bar is being used, there isn't as much reason to use this hyper over G.Crush in the corner or G.Tsunami after a wallbounce. On incoming, Hulk can use this hyper to force the enemy to block and even 'guardbreak' with H G.Tornado if they pushblock the last few rocks. Rocks hit after 34 frames. Each projectile = 3 high priority durability points
Gamma Crush
qcb + atk atk
Damage Guard Startup Active Recovery On Hit On Block Properties
200Hulk 214XX.png 60,000x8 (404,700) - 6+9 56 48 - -25 Hardknockdown Otg (2-8)
Hulk rises, then drops back down with a meteor where the other character is. Gamma Crush does massive damage and is one of the most invulnerable hypers in UMvC3. Blatantly unsafe, it is high-risk/low-reward to attempt this move in the neutral without a safe DHC close by and some of Hulk's bad matchups have ways around it. Hulk can situationally link moves after G.Crush via assists (Hidden Missiles) or THC. Frames 1-73 invincible

Misc

Throw
{{#motion: airok f / b + H }}
Damage Startup Active Properties
200Hulk grab.png 80,000 1 1 {{#motion: Throw Hardknockdown }}
Hulk's normal grab has standing heavy as an option select. As a weakness, it is an immediate hard knockdown that would too fast to OTG normally. It is important to have a mixup ready for their wakeup, although some teams can combo off the grab instead. Either an assist must be called before hand (Mystic Ray or Stone Smite) or Hulk must have meter and THC (the other THC must be a fast OTG).
200Hulk Airgrab.png 80,000 1 1 {{#motion: Airthrow Hardknockdown }}
Unlike his ground throw, Hulk's air-grabs afford generous time to OTG with Gamma Wave. When solo, the most damage Hulk can get is a G.Wave to G.Crush. Having access to a THC means Hulk can combo from an airgrab almost anytime, and can even sideswitch if the other hyper(s) are fast enough. It is also easier to throw other characters into assists, even more so with the aerial back grab (ie Drones, air back grab).
Snapback
qcf + A1.png/A2.png
Damage Guard Startup Active Recovery On Hit On Block Properties
200Hulk Snap.png 10,000 - 1 3 33 - -10 Snapback
Hulk's snapback emulates the hitbox of his standing medium attack, rending it terrible on crouching characters at some ranges. Hulk's best best for punishing XFGC is usually to be at a far enough range to attempt a G.Charge(AA) frametrap. Tags out enemy character to the one chosen by the assist button. Foe assist call and tag-outs are locked for 4 seconds.
Hardtag
[Hold 14f] A1.png/A2.png
Damage Guard Startup Active Recovery On Hit On Block Properties
200Hulk Tagin.png 33,000 High 1 21 35 - -11 High Softknockdown
Must hold down A1/A2 for 14 frames. If the hardtag "jump-in" hits late enough to give him enough frame advantage, Hulk can link G.Charge(AA) for a full combo! As a result, some characters can hard tag to Hulk during a combo to use him as a "damage engine"