EclipticEve (talk | contribs) |
EclipticEve (talk | contribs) (→Close Normals: wowie, normals on the page) |
||
| Line 3: | Line 3: | ||
==Normal Moves== | ==Normal Moves== | ||
===Close Normals=== | ===Close Normals=== | ||
=====<font style="visibility:hidden; float:right">c.LP</font>===== | |||
{{MoveData | |||
|name=Close LP | |||
|input=c.{{lp}} | |||
|image=(ryucloselp).gif | |||
|data= | |||
{{AttackData-3S | |||
|startup= | |||
|active= | |||
|recovery= | |||
|onHit= | |||
|onHitCrouch= | |||
|onBlock= | |||
|parry= | |||
|damage= | |||
|stun= | |||
|description= | |||
* Cancel options: | |||
}} | |||
}} | |||
=====<font style="visibility:hidden; float:right">c.MP</font>===== | |||
{{MoveData | |||
|name=Close MP | |||
|input=c.{{mp}} | |||
|image=(ryuclosemp).gif | |||
|data= | |||
{{AttackData-3S | |||
|startup= | |||
|active= | |||
|recovery= | |||
|onHit= | |||
|onHitCrouch= | |||
|onBlock= | |||
|parry= | |||
|damage= | |||
|stun= | |||
|description= | |||
* Cancel options: | |||
}} | |||
}} | |||
=====<font style="visibility:hidden; float:right">c.HP</font>===== | |||
{{MoveData | |||
|name=Close HP | |||
|input=c.{{hp}} | |||
|image=(ryuclosehp).gif | |||
|data= | |||
{{AttackData-3S | |||
|startup= | |||
|active= | |||
|recovery= | |||
|onHit= | |||
|onHitCrouch= | |||
|onBlock= | |||
|parry= | |||
|damage= | |||
|stun= | |||
|description= | |||
* Cancel options: | |||
}} | |||
}} | |||
=====c.LK===== | |||
c.{{lk}} is the same as f.{{lk}}. | |||
=====<font style="visibility:hidden; float:right">c.MK</font>===== | |||
{{MoveData | |||
|name=Close MK | |||
|input=c.{{mk}} | |||
|image=(ryuclosemk).gif | |||
|data= | |||
{{AttackData-3S | |||
|startup= | |||
|active= | |||
|recovery= | |||
|onHit= | |||
|onHitCrouch= | |||
|onBlock= | |||
|parry= | |||
|damage= | |||
|stun= | |||
|description= | |||
* Cancel options: | |||
}} | |||
}} | |||
=====c.HK===== | |||
c.{{hk}} is the same as f.{{hk}}. | |||
===Far Normals=== | ===Far Normals=== | ||
Revision as of 21:09, 2 February 2023
Introduction
Moves List
Normal Moves
Close Normals
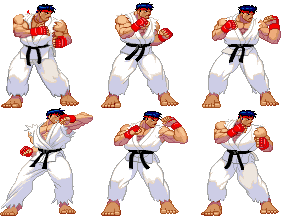
c.LP
| Startup | Active | Recovery | Block | Hit | Cr. Hit | Damage | Stun | Kara | Guard Level | Parry Level |
|---|---|---|---|---|---|---|---|---|---|---|
| - | - | - | - | - | - | - | - | - | - | - |
| Cancel Options | Self Meter Gain | Whiff | Hit | Block / Tech | Opponent Meter Gain | Hit | Block / Tech | |||
| - | - | - | - | - | - | |||||
| ||||||||||
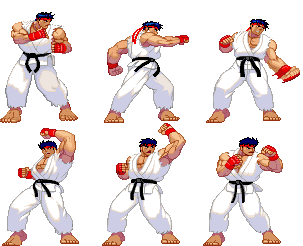
c.MP
| Startup | Active | Recovery | Block | Hit | Cr. Hit | Damage | Stun | Kara | Guard Level | Parry Level |
|---|---|---|---|---|---|---|---|---|---|---|
| - | - | - | - | - | - | - | - | - | - | - |
| Cancel Options | Self Meter Gain | Whiff | Hit | Block / Tech | Opponent Meter Gain | Hit | Block / Tech | |||
| - | - | - | - | - | - | |||||
| ||||||||||
c.HP
| Startup | Active | Recovery | Block | Hit | Cr. Hit | Damage | Stun | Kara | Guard Level | Parry Level |
|---|---|---|---|---|---|---|---|---|---|---|
| - | - | - | - | - | - | - | - | - | - | - |
| Cancel Options | Self Meter Gain | Whiff | Hit | Block / Tech | Opponent Meter Gain | Hit | Block / Tech | |||
| - | - | - | - | - | - | |||||
| ||||||||||
c.LK
c.![]() is the same as f.
is the same as f.![]() .
.
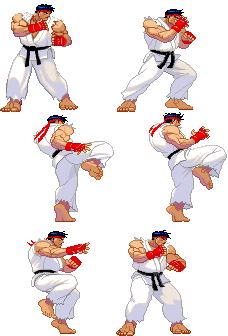
c.MK
| Startup | Active | Recovery | Block | Hit | Cr. Hit | Damage | Stun | Kara | Guard Level | Parry Level |
|---|---|---|---|---|---|---|---|---|---|---|
| - | - | - | - | - | - | - | - | - | - | - |
| Cancel Options | Self Meter Gain | Whiff | Hit | Block / Tech | Opponent Meter Gain | Hit | Block / Tech | |||
| - | - | - | - | - | - | |||||
| ||||||||||
c.HK
c.![]() is the same as f.
is the same as f.![]() .
.
Far Normals
Crouching Normals
Jumping Normals
Command Normals
Special Moves
Hadouken
Shoryuken
Tatsumaki Senpukyaku
Joudan Sokuto Geri
Super Moves
Shinku Hadouken
Shin Shoryuken
Denjin Hadouken
The Basics
Choose Denjin Hadouken (Super Art 3) because in 2I it has two stocks which not only allows for more denjin set ups than in NG or 3S, but it also means you have better ways to damage your opponent once you have them dizzy (For example, jumping fierce, crouching fierce, EX tatsu).
Denjin set ups:
EX hadouken xx denjin (on your opponent's wake up)
Crouching forward kick, EX hadouken xx denjin
EX blade kick, shoryuken (and then either xx denjin or (EX) hadouken xx denjin on wake up)


