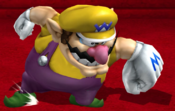
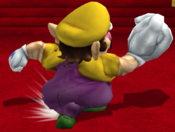
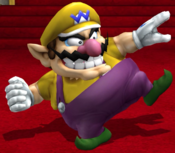
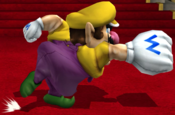
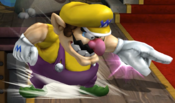
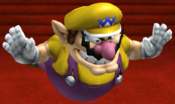
No edit summary |
|||
| Line 221: | Line 221: | ||
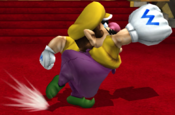
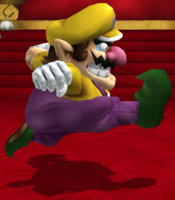
|image=P+_Wario_Fmash.png | |image=P+_Wario_Fmash.png | ||
|name=Forward Smash | |name=Forward Smash | ||
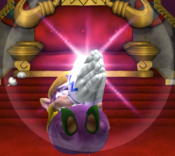
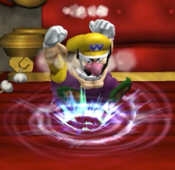
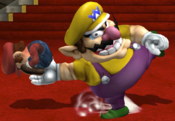
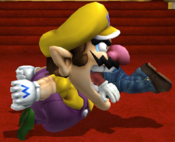
|caption=''GEDOUTTAHERE!'' | |caption=''"GEDOUTTAHERE!"'' | ||
|input= | |input= | ||
|data= | |data= | ||
| Line 278: | Line 278: | ||
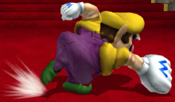
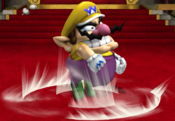
|image=P+_Wario_DSmash.png | |image=P+_Wario_DSmash.png | ||
|name=Down Smash | |name=Down Smash | ||
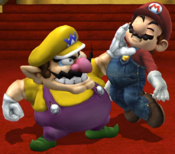
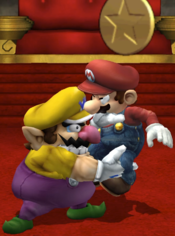
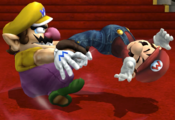
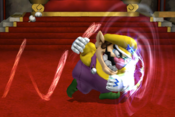
|caption= | |caption=''"MOVE IT!"'' | ||
|input= | |input= | ||
|data= | |data= | ||
| Line 306: | Line 306: | ||
Get-Up Attack | Get-Up Attack | ||
{{MoveData | |||
|image=P+_Wario_Getup.png | |||
|name=Get-Up Attack | |||
|caption= | |||
|input= | |||
|data= | |||
{{AttackData-P+ | |||
|version=Down Get-Up | |||
|damage=6% | |||
|bkb=80 | |||
|kbg=50 | |||
|angle={{Tooltip|text=45°|hovertext=Sakurai Angle: When hit in the air, the attack angle is 45°. When hit on the ground, if knockback is less than 32 then the angle is 0°, otherwise angle is 44°.}} | |||
|startup=16, 21 | |||
|active=2, 2 | |||
|recovery=27 | |||
|landing=- | |||
|advantage=? | |||
|shield dmg=1 | |||
|shield stun=4 | |||
|invul=1-22 Full | |||
}} | |||
{{AttackData-P+ | |||
|header=no | |||
|version=Up Get-Up | |||
|damage=6% | |||
|bkb=80 | |||
|kbg=50 | |||
|angle={{Tooltip|text=45°|hovertext=Sakurai Angle: When hit in the air, the attack angle is 45°. When hit on the ground, if knockback is less than 32 then the angle is 0°, otherwise angle is 44°.}} | |||
|startup=16, 20 | |||
|active=2, 2 | |||
|recovery=28 | |||
|landing=- | |||
|advantage=? | |||
|shield dmg=1 | |||
|shield stun=4 | |||
|invul=1-21 Full | |||
|description=*Character is fully invincible at startup until all hitboxes have ended. | |||
Basic getup attack. Has decent disjoints that can catch off-guard opponents. | |||
}} | |||
}} | |||
Trip Get-Up Attack | |||
{{MoveData | |||
|image=P+_Wario_GetupT.png | |||
|name=Trip Get-Up Attack | |||
|caption= | |||
|input= | |||
|data= | |||
{{AttackData-P+ | |||
|damage=5% | |||
|bkb=80 | |||
|kbg=50 | |||
|angle={{Tooltip|text=45°|hovertext=Sakurai Angle: When hit in the air, the attack angle is 45°. When hit on the ground, if knockback is less than 32 then the angle is 0°, otherwise angle is 44°.}} | |||
|startup=19, 30 | |||
|active=2, 2 | |||
|recovery=19 | |||
|landing=- | |||
|advantage=? | |||
|shield dmg=1 | |||
|shield stun=4 | |||
|invul=1-20 Full | |||
|description=*Character is fully invincible at startup until they finish their first attack. | |||
Basic getup attack, however Wario moves a fair amount horizontally when getting up. | |||
}} | |||
}} | |||
Ledge Attack | Ledge Attack | ||
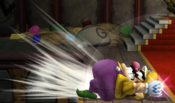
{{MoveData | |||
|image=P+_Wario_GetupL.png | |||
|name=Ledge Attack | |||
|caption= | |||
|input= | |||
|data= | |||
{{AttackData-P+ | |||
|damage=8% (31-32) 6% (33) | |||
|bkb=70 | |||
|kbg=50 | |||
|angle={{Tooltip|text=45°|hovertext=Sakurai Angle: When hit in the air, the attack angle is 45°. When hit on the ground, if knockback is less than 32 then the angle is 0°, otherwise angle is 44°.}} | |||
|startup=31 | |||
|active=3 | |||
|recovery=23 | |||
|landing=- | |||
|advantage=? | |||
|shield dmg=1 | |||
|shield stun=5, 4 | |||
|invul=1-29 Full | |||
|description=*Character is fully invincible until they attack. | |||
Decent ledge attack that puts Wario a fair amount forward. Is notable for sending opponents offstage if they're too close to ledge. | |||
}} | |||
}} | |||
Ledge Attack (When > 99%) | |||
Ledge Attack | {{MoveData | ||
|image=P+_Wario_GetupS.png | |||
|name=Slow Ledge Attack | |||
|caption= | |||
|input= | |||
|data= | |||
{{AttackData-P+ | |||
|damage=10% | |||
|bkb=70 | |||
|kbg=50 | |||
|angle={{Tooltip|text=45°|hovertext=Sakurai Angle: When hit in the air, the attack angle is 45°. When hit on the ground, if knockback is less than 32 then the angle is 0°, otherwise angle is 44°.}} | |||
|startup=53 | |||
|active=3 | |||
|recovery=15 | |||
|landing=- | |||
|advantage=? | |||
|shield dmg=1 | |||
|shield stun=6 | |||
|invul=1-50 Full | |||
|description=*Character is fully invincible until they attack. | |||
A fairly slow high percent ledge attack, although that may catch opponents offguard if they aren't expecting it, especially with that full second of invincibility. Decent poke disjoint as well. | |||
}} | |||
}} | |||
===Aerial Moves=== | ===Aerial Moves=== | ||
| Line 318: | Line 429: | ||
Attack | Attack | ||
{{MoveData | |||
|image=P+_Wario_Nair.png | |||
|name=Neutral Air | |||
|caption= | |||
|input= | |||
|data= | |||
{{AttackData-P+ | |||
|damage=9% (4-12), 6% (15-23), 4% (24-30) | |||
|bkb=30, 20 | |||
|kbg=100 | |||
|angle={{Tooltip|text=45°|hovertext=Sakurai Angle: When hit in the air, the attack angle is 45°. When hit on the ground, if knockback is less than 32 then the angle is 0°, otherwise angle is 44°.}}, 45° | |||
|startup=4, 15 | |||
|active=9, 16 | |||
|recovery=9 | |||
|landing=7 | |||
|advantage=? | |||
|shield dmg=? | |||
|shield stun=6, 4, 3 | |||
|invul=- | |||
|description=*so many hitboxes lol | |||
}} | |||
}} | |||
Forward Attack | Forward Attack | ||
{{MoveData | |||
|image=P+_Wario_Fair.png | |||
|name=Forward Air | |||
|caption= | |||
|input= | |||
|data= | |||
{{AttackData-P+ | |||
|damage=11% (5-7), 6% (8-15) | |||
|bkb=20 | |||
|kbg=80 | |||
|angle=55° | |||
|startup=5 | |||
|active=11 | |||
|recovery=11 | |||
|landing=8 | |||
|advantage=? | |||
|shield dmg=? | |||
|shield stun=6 | |||
|invul=- | |||
|description=*its a move | |||
}} | |||
}} | |||
Backwards Attack | |||
Back | {{MoveData | ||
|image=P+_Wario_Bair.png | |||
|name=Back Air | |||
|caption= | |||
|input= | |||
|data= | |||
{{AttackData-P+ | |||
|damage=16% (10-14), 9% (15-19) | |||
|bkb=20 | |||
|kbg=105 | |||
|angle={{Tooltip|text=45°|hovertext=Sakurai Angle: When hit in the air, the attack angle is 45°. When hit on the ground, if knockback is less than 32 then the angle is 0°, otherwise angle is 44°.}} | |||
|startup=10 | |||
|active=10 | |||
|recovery=22 | |||
|landing=12 | |||
|advantage=? | |||
|shield dmg=? | |||
|shield stun=9, 6 | |||
|invul=- | |||
|description=*its a move | |||
}} | |||
}} | |||
Up Attack | Up Attack | ||
{{MoveData | |||
|image=P+_Wario_Uair.png | |||
|name=Up Air | |||
|caption= | |||
|input= | |||
|data= | |||
{{AttackData-P+ | |||
|damage=9% (7), 14% (8-9) | |||
|bkb=10, 45 | |||
|kbg=115, 110 | |||
|angle=70, 80 | |||
|startup=7 | |||
|active=3 | |||
|recovery=21 | |||
|landing=10 | |||
|advantage=? | |||
|shield dmg=? | |||
|shield stun=6, 8 | |||
|invul=- | |||
|description=*its a move | |||
}} | |||
}} | |||
Down Attack | |||
Down | {{MoveData | ||
|image=P+_Wario_Dair.png | |||
|name=Down Air | |||
|caption= | |||
|input= | |||
|data= | |||
{{AttackData-P+ | |||
|damage=10% | |||
|bkb=43 / 59 | |||
|kbg=127 / 106 | |||
|angle=270 | |||
|startup=15 | |||
|active=15 | |||
|recovery=25 | |||
|landing=17 | |||
|advantage=? | |||
|shield dmg=? | |||
|shield stun=6 | |||
|invul=- | |||
|description=*Can Bounce off of Opponents and Objects such as projectiles. | |||
*On Bounce: 22 Frames of recovery. | |||
}} | |||
}} | |||
===Grabs=== | ===Grabs=== | ||
| Line 338: | Line 557: | ||
Grab | Grab | ||
{{MoveData | |||
|image=P+_Wario_Grab.png | |||
Dash Grab | |name=Grab | ||
|caption= | |||
|input= | |||
|data= | |||
Turnaround Grab | {{AttackData-P+ | ||
|version=Normal Grab | |||
|damage=- | |||
|bkb=- | |||
|kbg=- | |||
|angle=- | |||
|startup=7 | |||
|active=2 | |||
|recovery=23 | |||
|landing=- | |||
|advantage=- | |||
|shield dmg=- | |||
|shield stun=- | |||
|invul=- | |||
}} | |||
{{AttackData-P+ | |||
|header=no | |||
|version=Dash Grab | |||
|damage=- | |||
|bkb=- | |||
|kbg=- | |||
|angle=- | |||
|startup=10 | |||
|active=2 | |||
|recovery=29 | |||
|landing=- | |||
|advantage=- | |||
|shield dmg=- | |||
|shield stun=- | |||
|invul=- | |||
}} | |||
{{AttackData-P+ | |||
|header=no | |||
|version=Turnaround Grab | |||
|damage=- | |||
|bkb=- | |||
|kbg=- | |||
|angle=- | |||
|startup=9 | |||
|active=2 | |||
|recovery=26 | |||
|landing=- | |||
|advantage=- | |||
|shield dmg=- | |||
|shield stun=- | |||
|invul=- | |||
|description=*they are grabs... | |||
}} | |||
}} | |||
Grab > Attack | Grab > Attack | ||
{{MoveData | |||
|image=P+_Wario_Pummel.png | |||
|name=Pummel | |||
|caption= | |||
|input= | |||
|data= | |||
{{AttackData-P+ | |||
|damage=3% | |||
|bkb=- | |||
|kbg=- | |||
|angle=- | |||
|startup=5 | |||
|active=1 | |||
|recovery=20 | |||
|landing=- | |||
|advantage=- | |||
|shield dmg=- | |||
|shield stun=- | |||
|invul=- | |||
|description=*TAKE THEIR MONEY!!!!!! | |||
}} | |||
}} | |||
Grab > Forward | Grab > Forward | ||
{{MoveData | |||
|image=P+_Wario_FThrow.png | |||
|name=Forward Throw | |||
|caption= | |||
|input= | |||
|data= | |||
{{AttackData-P+ | |||
|version=Normal Forward Throw | |||
|damage=7% | |||
|bkb=42 | |||
|kbg=90 | |||
|angle=48 | |||
|startup=- | |||
|active=26 | |||
|recovery=- | |||
|landing=- | |||
|advantage=- | |||
|shield dmg=- | |||
|shield stun=- | |||
|invul=- | |||
}} | |||
{{AttackData-P+ | |||
|header=no | |||
|version=Charged Forward Throw | |||
|damage=10% | |||
|bkb=60 | |||
|kbg=100 | |||
|angle=40 | |||
|startup=- | |||
|active=63 | |||
|recovery=- | |||
|landing=- | |||
|advantage=- | |||
|shield dmg=- | |||
|shield stun=- | |||
|invul=- | |||
|description=*CHUCK EM | |||
}} | |||
}} | |||
Grab > Back | Grab > Back | ||
{{MoveData | |||
|image=P+_Wario_BThrow.png | |||
|name=Back Throw | |||
|caption= | |||
|input= | |||
|data= | |||
{{AttackData-P+ | |||
|damage=9% | |||
|bkb=60 | |||
|kbg=65 | |||
|angle=45 | |||
|startup=- | |||
|active=77 | |||
|recovery=- | |||
|landing=- | |||
|advantage=- | |||
|shield dmg=- | |||
|shield stun=- | |||
|invul=- | |||
|description=*CHUCK EM | |||
}} | |||
}} | |||
Grab > Up | Grab > Up | ||
{{MoveData | |||
|image=P+_Wario_UThrow.png | |||
|name=Up Throw | |||
|caption= | |||
|input= | |||
|data= | |||
{{AttackData-P+ | |||
|damage=6%, 2% | |||
|bkb=30 | |||
|kbg=100 | |||
|angle=90 | |||
|startup=- | |||
|active=45 | |||
|recovery=- | |||
|landing=- | |||
|advantage=- | |||
|shield dmg=- | |||
|shield stun=- | |||
|invul=- | |||
|description=*CHUCK EM | |||
}} | |||
}} | |||
Grab > Down | |||
{{MoveData | |||
|image=P+_Wario_DThrow.png | |||
|name=Down Throw | |||
|caption= | |||
|input= | |||
|data= | |||
{{AttackData-P+ | |||
|damage=4%, 6% | |||
|bkb=30 | |||
|kbg=100 | |||
|angle=270 | |||
|startup=- | |||
|active=38 | |||
|recovery=- | |||
|landing=- | |||
|advantage=- | |||
|shield dmg=- | |||
|shield stun=- | |||
|invul=- | |||
|description=*CHUCK EM | |||
}} | |||
}} | |||
===Specials=== | ===Specials=== | ||
Special | Neutral Special | ||
{{MoveData | |||
|image=P+_Wario_NSpecial.png | |||
|name=Chomp | |||
|caption= | |||
|input= | |||
|data= | |||
{{AttackData-P+ | |||
|version=Grab | |||
|damage=- | |||
|bkb=- | |||
|kbg=- | |||
|angle=- | |||
|startup=10 | |||
|active=59 | |||
|recovery=22 | |||
|landing=- | |||
|advantage=- | |||
|shield dmg=- | |||
|shield stun=- | |||
|invul=- | |||
}} | |||
{{AttackData-P+ | |||
|header=no | |||
|version=Pummel | |||
|damage=13% | |||
|bkb=- | |||
|kbg=- | |||
|angle=- | |||
|startup=21 | |||
|active=4 | |||
|recovery=22 | |||
|landing=- | |||
|advantage=- | |||
|shield dmg=- | |||
|shield stun=- | |||
|invul=- | |||
}} | |||
{{AttackData-P+ | |||
|header=no | |||
|version=Throw | |||
|damage=? | |||
|bkb=? | |||
|kbg=? | |||
|angle=- | |||
|startup=- | |||
|active=27 | |||
|recovery=- | |||
|landing=- | |||
|advantage=- | |||
|shield dmg=- | |||
|shield stun=- | |||
|invul=- | |||
}} | |||
{{AttackData-P+ | |||
|header=no | |||
|version=Eating a Bomb | |||
|damage=13% | |||
|bkb=50 | |||
|kbg=110 | |||
|angle={{Tooltip|text=45°|hovertext=Sakurai Angle: When hit in the air, the attack angle is 45°. When hit on the ground, if knockback is less than 32 then the angle is 0°, otherwise angle is 44°.}} | |||
|startup=17 | |||
|active=1 | |||
|recovery=54 | |||
|landing=- | |||
|advantage=? | |||
|shield dmg=? | |||
|shield stun=1 | |||
|invul=- | |||
|description=*Eating items such as banana peels will increase warios waft charge time | |||
*haha vore | |||
}} | |||
}} | |||
Forward Special | Forward Special | ||
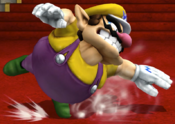
{{MoveData | |||
|image=P+_Wario_FSpecial.png | |||
|name=Shoulder Bash | |||
|caption=''"GO!"'' | |||
|input= | |||
|data= | |||
{{AttackData-P+ | |||
|version=Normal Charge | |||
|damage=12% (9-14), 15% (15-26), 18%(27-41) | |||
|bkb=50 | |||
|kbg=91, 90, 80 | |||
|angle={{Tooltip|text=45°|hovertext=Sakurai Angle: When hit in the air, the attack angle is 45°. When hit on the ground, if knockback is less than 32 then the angle is 0°, otherwise angle is 44°.}} | |||
|startup=9 | |||
|active=33 | |||
|recovery=17 | |||
|landing=- | |||
|advantage=? | |||
|shield dmg=? | |||
|shield stun=7, 8, 10 | |||
|invul=- | |||
}} | |||
{{AttackData-P+ | |||
|header=no | |||
|version=Jumping Charge | |||
|damage=15% | |||
|bkb=50 | |||
|kbg=100 | |||
|angle={{Tooltip|text=45°|hovertext=Sakurai Angle: When hit in the air, the attack angle is 45°. When hit on the ground, if knockback is less than 32 then the angle is 0°, otherwise angle is 44°.}} | |||
|startup=9 | |||
|active=42 | |||
|recovery=8 | |||
|landing=- | |||
|advantage=? | |||
|shield dmg=? | |||
|shield stun=8 | |||
|invul=- | |||
}} | |||
{{AttackData-P+ | |||
|header=no | |||
|version=Aerial Charge | |||
|damage=15% | |||
|bkb=20 | |||
|kbg=100 | |||
|angle={{Tooltip|text=45°|hovertext=Sakurai Angle: When hit in the air, the attack angle is 45°. When hit on the ground, if knockback is less than 32 then the angle is 0°, otherwise angle is 44°.}} | |||
|startup=11 | |||
|active=15 | |||
|recovery=10 | |||
|landing=- | |||
|advantage=? | |||
|shield dmg=? | |||
|shield stun=8 | |||
|invul=- | |||
|description=*On Hit: 55 Frames of recovery | |||
*On Air Hit: 27 Frames of recovery | |||
*Lose double jump on air hit | |||
}} | |||
}} | |||
Up Special | Up Special | ||
{{MoveData | |||
|image=P+_Wario_USpecial.png | |||
|name=Corkscrew | |||
|input= | |||
|data= | |||
{{AttackData-P+ | |||
|damage=1%×12, 4% | |||
|bkb=0, 50, 60 | |||
|kbg=100, 20, 130 | |||
|angle=115°/85°/105°/363°/90°/80° | |||
|startup=7 | |||
|active=24 | |||
|recovery=19 | |||
|landing=- | |||
|advantage=? | |||
|shield dmg=? | |||
|shield stun=2×12 | |||
|invul=- | |||
|description=*into freefall you go | |||
}} | |||
}} | |||
Down Special | |||
{{MoveData | |||
|image=P+_Wario_DSpecial.png | |||
|name=Wario Waft | |||
|caption= | |||
|input= | |||
|data= | |||
{{AttackData-P+ | |||
|version=No Charge | |||
|damage=0% | |||
|bkb=0 | |||
|kbg=1 | |||
|angle=Trip | |||
|startup=16 | |||
|active=3 | |||
|recovery=62 | |||
|landing=- | |||
|advantage=? | |||
|shield dmg=? | |||
|shield stun=1 | |||
|invul=- | |||
}} | |||
{{AttackData-P+ | |||
|header=no | |||
|version=Partial Charge | |||
|damage=12% | |||
|bkb=40 | |||
|kbg=75 | |||
|angle={{Tooltip|text=45°|hovertext=Sakurai Angle: When hit in the air, the attack angle is 45°. When hit on the ground, if knockback is less than 32 then the angle is 0°, otherwise angle is 44°.}} | |||
|startup=10 | |||
|active=2 | |||
|recovery=37 | |||
|landing=- | |||
|advantage=? | |||
|shield dmg=? | |||
|shield stun=7 | |||
|invul=- | |||
}} | |||
{{AttackData-P+ | |||
|header=no | |||
|version=Half Charge | |||
|damage=16% | |||
|bkb=50 | |||
|kbg=70 | |||
|angle={{Tooltip|text=45°|hovertext=Sakurai Angle: When hit in the air, the attack angle is 45°. When hit on the ground, if knockback is less than 32 then the angle is 0°, otherwise angle is 44°.}} | |||
|startup=5 | |||
|active=4 | |||
|recovery=28 | |||
|landing=- | |||
|advantage=? | |||
|shield dmg=? | |||
|shield stun=9 | |||
|invul=- | |||
}} | |||
{{AttackData-P+ | |||
|header=no | |||
|version=Full Charge | |||
|damage=21% (5-6), 18% (7-18) | |||
|bkb=40, 20 | |||
|kbg=80, 100 | |||
|angle=40°, 80° | |||
|startup=5 | |||
|active=14 | |||
|recovery=37 | |||
|landing=- | |||
|advantage=? | |||
|shield dmg=? | |||
|shield stun=11, 10 | |||
|invul=- | |||
|description=*Gains charges at 10 seconds, 30 seconds and 60 seconds | |||
*Half and Full Charges can be used as recovery tools :) | |||
}} | |||
}} | |||
Revision as of 09:53, 13 April 2022
Introduction
Debuting in Super Mario Land 2, Wario initially serves as a petty adversary to Mario who steals his castle to claim it for his own. After being thwarted by Mario, Wario goes off on his own to claim riches and fortune, leading him on a series of wacky adventures. In the current day, Wario serves as a mean-spirited rival to Mario who doesn’t usually act in the antagonistic role, as he has become a hero in his own right. However, Wario’s lust for wealth will always be his defining quality.
Wario is one of the more strange characters in P+, serving as a completely new archetype compared to characters of Melee. Being a heavy yet floaty character with great air mobility, Wario has a lot of similarities to Jigglypuff, however he has his own unique quirks that separate him from the pink puffball, such as his great combo game and his ability to approach and open up opponents.
While he can be classified as a somewhat simple character with his many active powerful hitboxes, he can be fairly in-depth and has a high skill ceiling. Be aware, a good Wario will be able to get in and juggle you mercilessly, and will probably finish you off with his many powerful finishers such as Up Air and Wario Waft. However, he trades this incredible mobility and combo game for lacklustre defense. If you’re willing to adapt to a more unique character with many quirks, Wario may be the character for you.
| Strengths | Weaknesses |
|---|---|
|
|
| Wario | |
|---|---|
| Ease of Use | 4 |
| Character Data | |
| Character Weight | 103 |
| Fall Speed | ? |
| Jump Squat | ? |
| Walk Speed | ? |
| Run Speed | ? |
| Wall Jump | No |
| Resources | |
| Advanced Frame Data | RukaiData |
| Discord | Wario Discord |
| VODs | Bowser VODs |
Move List
Grounded Moves
Attack
| Damage | BKB | KBG | Angle | Startup | Active Frames | Recovery (IASA) | Landing (L-Cancel) | Advantage | Shield Damage | Shield Stun | Invul | ||
|---|---|---|---|---|---|---|---|---|---|---|---|---|---|
| 3% | 21 | 66 | 76° | 3 | 5 | 11 | - | ? | ? | 3 | - | ||
Basic jab. Fairly quick and can be good for staggers, however it doesn't have much use outside of combo-ing into 2nd jab. | |||||||||||||
Attack > Attack
| Damage | BKB | KBG | Angle | Startup | Active Frames | Recovery (IASA) | Landing (L-Cancel) | Advantage | Shield Damage | Shield Stun | Invul | ||
|---|---|---|---|---|---|---|---|---|---|---|---|---|---|
| 6% | 60 | 45 | 83° | 4 | 3 | 20 | - | ? | ? | 4 | - | ||
The 2nd hit of jab is a surprisingly good combo tool, as it launches opponents vertically which can allow for grabs at low percents and sets up for for combos at high percents. However, it does not beat crouch cancelling. | |||||||||||||
Forward Attack (RUKAIDATA DOESN'T SHOW THIS MOVE, LOOK INTO LATER)
| Version | Damage | BKB | KBG | Angle | Startup | Active Frames | Recovery (IASA) | Landing (L-Cancel) | Advantage | Shield Damage | Shield Stun | Invul |
|---|---|---|---|---|---|---|---|---|---|---|---|---|
| Normal | 5% | 50 | 100 | ? | 6 | 3 | 15 | - | ? | 6 | 4 | - |
| Up Angled | 5% | 50 | 100 | ? | 6 | 3 | 15 | - | ? | 6 | 4 | - |
| Down Angled | 5% | 50 | 100 | ? | 6 | 3 | 15 | - | ? | 6 | 4 | - |
Forward tilt is usually reserved as a kill move for Wario. Practically, it is quite slow, much slower than forward smash for instance, making it somewhat situational. However its angled variants can provide some much needed disjoints for Wario, allowing him to edgeguard onstage. | ||||||||||||
Up Attack
| Damage | BKB | KBG | Angle | Startup | Active Frames | Recovery (IASA) | Landing (L-Cancel) | Advantage | Shield Damage | Shield Stun | Invul | ||
|---|---|---|---|---|---|---|---|---|---|---|---|---|---|
| 10% (12-14), 6% (15-27) | 65 (12-14), 45 (15-27) | 89 (12-14), 50 (15-27) | 90° | 12 | 16 | 10 | - | ? | ? | 6 (12-14), 4 (15-27) | 1-37 Head | ||
With intangibility on his head and a large active upwards hitbox, up tilt serves as Wario's main anti-air making it great for stuffing out aerial approaches. However it is rather slow at frame 12, so you might need to preemptively use it or callout aerial approaches. And while Wario's head becomes invincible, the rest of his body is still vulnerable and can trade with aerial hits. It's also a great combo tool, sending opponents straight up allowing for Wario to follow up with his many aerial moves. | |||||||||||||
Down Attack
| Damage | BKB | KBG | Angle | Startup | Active Frames | Recovery (IASA) | Landing (L-Cancel) | Advantage | Shield Damage | Shield Stun | Invul | ||
|---|---|---|---|---|---|---|---|---|---|---|---|---|---|
| 8% | 50 | 45 | 65° | 5 | 4 | 16 | - | ? | ? | 5 | - | ||
Down tilt acts as a poke which can hit opponents below their shield. Launched opponents are sent outwards, so it's not a very effective at higher percents. | |||||||||||||
Dash Attack
| Damage | BKB | KBG | Angle | Startup | Active Frames | Recovery (IASA) | Landing (L-Cancel) | Advantage | Shield Damage | Shield Stun | Invul | ||
|---|---|---|---|---|---|---|---|---|---|---|---|---|---|
| 7% (4-7), 6% (8-23) | 60 | 75 (4-7), 52 (8-23) | 75° (4-7), 120° (8-23) | 4 | 20 | 19 | - | ? | ? | 6 (4-7), 4 (8-23) | - | ||
A decent burst option which allows Wario to catch off-guard opponents, however its awkward launch angles and recovery makes it unsuitable for a combo starter. It can also be a good way to low profile opponents attacks such as projectiles, and could very well punish if done close enough. | |||||||||||||
Forward Smash
| Damage | BKB | KBG | Angle | Startup | Active Frames | Recovery (IASA) | Landing (L-Cancel) | Advantage | Shield Damage | Shield Stun | Invul | ||
|---|---|---|---|---|---|---|---|---|---|---|---|---|---|
| 16% (6-9), 10% (10-13) | 30 | 80 (6-9), 64 (10-13) | 30° | 6 [67] | 8 | 33 | - | ? | ? | 9 (6-9), 6 (10-13) | - | ||
A very fast horizontal kill move, and probably Wario's best kill option during staggers. It's very fast and pushing Wario forward it can catch somewhat distant opponents. It is a risky option however, as it has a very high recovery. | |||||||||||||
Up Smash
| Damage | BKB | KBG | Angle | Startup | Active Frames | Recovery (IASA) | Landing (L-Cancel) | Advantage | Shield Damage | Shield Stun | Invul | ||
|---|---|---|---|---|---|---|---|---|---|---|---|---|---|
| 2%×5, 8% | 60*5, 50 | 0*5, 120 | 210°, 90° | 7 [68] | 1, 1, 1, 1, 1, 1 | 26 | - | ? | 1×5 | 2×5, 5 | 4-16 Head | ||
Up Smash serves an entirely different purpose than a kill move in Wario's kit, rather being his main combo tool against fast-fallers and heavyweights. With its weak base knockback, it can actually combo into itself multiple times depending on percent, and then act as a launcher for kill confirms as it has decent endlag. It's better to combo into this with up throw rather than use it in neutral. It can also be SDI'd by particularly stubborn opponents. | |||||||||||||
Down Smash
| Damage | BKB | KBG | Angle | Startup | Active Frames | Recovery (IASA) | Landing (L-Cancel) | Advantage | Shield Damage | Shield Stun | Invul | ||
|---|---|---|---|---|---|---|---|---|---|---|---|---|---|
| 14% Punch / 12% / 10% | 50 | 90 | 275° | 8 [69] | 3 | 32 | - | ? | 4 Punch / 0 | 8 Punch / 7 / 6 | - | ||
Acting as a large burst action with massive disjoints, down smash gives Wario a way to deal with tech rolls and provides him with a decent on-stage edgeguard. Opponents hit off-stage will be sent downwards, however this move sends at a meteor angle and can be jump or up special cancelled. | |||||||||||||
Get-Up Attack
| Version | Damage | BKB | KBG | Angle | Startup | Active Frames | Recovery (IASA) | Landing (L-Cancel) | Advantage | Shield Damage | Shield Stun | Invul |
|---|---|---|---|---|---|---|---|---|---|---|---|---|
| Down Get-Up | 6% | 80 | 50 | 45° | 16, 21 | 2, 2 | 27 | - | ? | 1 | 4 | 1-22 Full |
| Up Get-Up | 6% | 80 | 50 | 45° | 16, 20 | 2, 2 | 28 | - | ? | 1 | 4 | 1-21 Full |
Basic getup attack. Has decent disjoints that can catch off-guard opponents. | ||||||||||||
Trip Get-Up Attack
| Damage | BKB | KBG | Angle | Startup | Active Frames | Recovery (IASA) | Landing (L-Cancel) | Advantage | Shield Damage | Shield Stun | Invul | ||
|---|---|---|---|---|---|---|---|---|---|---|---|---|---|
| 5% | 80 | 50 | 45° | 19, 30 | 2, 2 | 19 | - | ? | 1 | 4 | 1-20 Full | ||
Basic getup attack, however Wario moves a fair amount horizontally when getting up. | |||||||||||||
Ledge Attack
| Damage | BKB | KBG | Angle | Startup | Active Frames | Recovery (IASA) | Landing (L-Cancel) | Advantage | Shield Damage | Shield Stun | Invul | ||
|---|---|---|---|---|---|---|---|---|---|---|---|---|---|
| 8% (31-32) 6% (33) | 70 | 50 | 45° | 31 | 3 | 23 | - | ? | 1 | 5, 4 | 1-29 Full | ||
Decent ledge attack that puts Wario a fair amount forward. Is notable for sending opponents offstage if they're too close to ledge. | |||||||||||||
Ledge Attack (When > 99%)
| Damage | BKB | KBG | Angle | Startup | Active Frames | Recovery (IASA) | Landing (L-Cancel) | Advantage | Shield Damage | Shield Stun | Invul | ||
|---|---|---|---|---|---|---|---|---|---|---|---|---|---|
| 10% | 70 | 50 | 45° | 53 | 3 | 15 | - | ? | 1 | 6 | 1-50 Full | ||
A fairly slow high percent ledge attack, although that may catch opponents offguard if they aren't expecting it, especially with that full second of invincibility. Decent poke disjoint as well. | |||||||||||||
Aerial Moves
Attack
| Damage | BKB | KBG | Angle | Startup | Active Frames | Recovery (IASA) | Landing (L-Cancel) | Advantage | Shield Damage | Shield Stun | Invul | ||
|---|---|---|---|---|---|---|---|---|---|---|---|---|---|
| 9% (4-12), 6% (15-23), 4% (24-30) | 30, 20 | 100 | 45°, 45° | 4, 15 | 9, 16 | 9 | 7 | ? | ? | 6, 4, 3 | - | ||
| |||||||||||||
Forward Attack
| Damage | BKB | KBG | Angle | Startup | Active Frames | Recovery (IASA) | Landing (L-Cancel) | Advantage | Shield Damage | Shield Stun | Invul | ||
|---|---|---|---|---|---|---|---|---|---|---|---|---|---|
| 11% (5-7), 6% (8-15) | 20 | 80 | 55° | 5 | 11 | 11 | 8 | ? | ? | 6 | - | ||
| |||||||||||||
Backwards Attack
| Damage | BKB | KBG | Angle | Startup | Active Frames | Recovery (IASA) | Landing (L-Cancel) | Advantage | Shield Damage | Shield Stun | Invul | ||
|---|---|---|---|---|---|---|---|---|---|---|---|---|---|
| 16% (10-14), 9% (15-19) | 20 | 105 | 45° | 10 | 10 | 22 | 12 | ? | ? | 9, 6 | - | ||
| |||||||||||||
Up Attack
| Damage | BKB | KBG | Angle | Startup | Active Frames | Recovery (IASA) | Landing (L-Cancel) | Advantage | Shield Damage | Shield Stun | Invul | ||
|---|---|---|---|---|---|---|---|---|---|---|---|---|---|
| 9% (7), 14% (8-9) | 10, 45 | 115, 110 | 70, 80 | 7 | 3 | 21 | 10 | ? | ? | 6, 8 | - | ||
| |||||||||||||
Down Attack
| Damage | BKB | KBG | Angle | Startup | Active Frames | Recovery (IASA) | Landing (L-Cancel) | Advantage | Shield Damage | Shield Stun | Invul | ||
|---|---|---|---|---|---|---|---|---|---|---|---|---|---|
| 10% | 43 / 59 | 127 / 106 | 270 | 15 | 15 | 25 | 17 | ? | ? | 6 | - | ||
| |||||||||||||
Grabs
Grab
| Version | Damage | BKB | KBG | Angle | Startup | Active Frames | Recovery (IASA) | Landing (L-Cancel) | Advantage | Shield Damage | Shield Stun | Invul |
|---|---|---|---|---|---|---|---|---|---|---|---|---|
| Normal Grab | - | - | - | - | 7 | 2 | 23 | - | - | - | - | - |
| Dash Grab | - | - | - | - | 10 | 2 | 29 | - | - | - | - | - |
| Turnaround Grab | - | - | - | - | 9 | 2 | 26 | - | - | - | - | - |
| ||||||||||||
Grab > Attack
| Damage | BKB | KBG | Angle | Startup | Active Frames | Recovery (IASA) | Landing (L-Cancel) | Advantage | Shield Damage | Shield Stun | Invul | ||
|---|---|---|---|---|---|---|---|---|---|---|---|---|---|
| 3% | - | - | - | 5 | 1 | 20 | - | - | - | - | - | ||
| |||||||||||||
Grab > Forward
| Version | Damage | BKB | KBG | Angle | Startup | Active Frames | Recovery (IASA) | Landing (L-Cancel) | Advantage | Shield Damage | Shield Stun | Invul |
|---|---|---|---|---|---|---|---|---|---|---|---|---|
| Normal Forward Throw | 7% | 42 | 90 | 48 | - | 26 | - | - | - | - | - | - |
| Charged Forward Throw | 10% | 60 | 100 | 40 | - | 63 | - | - | - | - | - | - |
| ||||||||||||
Grab > Back
| Damage | BKB | KBG | Angle | Startup | Active Frames | Recovery (IASA) | Landing (L-Cancel) | Advantage | Shield Damage | Shield Stun | Invul | ||
|---|---|---|---|---|---|---|---|---|---|---|---|---|---|
| 9% | 60 | 65 | 45 | - | 77 | - | - | - | - | - | - | ||
| |||||||||||||
Grab > Up
| Damage | BKB | KBG | Angle | Startup | Active Frames | Recovery (IASA) | Landing (L-Cancel) | Advantage | Shield Damage | Shield Stun | Invul | ||
|---|---|---|---|---|---|---|---|---|---|---|---|---|---|
| 6%, 2% | 30 | 100 | 90 | - | 45 | - | - | - | - | - | - | ||
| |||||||||||||
Grab > Down
| Damage | BKB | KBG | Angle | Startup | Active Frames | Recovery (IASA) | Landing (L-Cancel) | Advantage | Shield Damage | Shield Stun | Invul | ||
|---|---|---|---|---|---|---|---|---|---|---|---|---|---|
| 4%, 6% | 30 | 100 | 270 | - | 38 | - | - | - | - | - | - | ||
| |||||||||||||
Specials
Neutral Special
| Version | Damage | BKB | KBG | Angle | Startup | Active Frames | Recovery (IASA) | Landing (L-Cancel) | Advantage | Shield Damage | Shield Stun | Invul |
|---|---|---|---|---|---|---|---|---|---|---|---|---|
| Grab | - | - | - | - | 10 | 59 | 22 | - | - | - | - | - |
| Pummel | 13% | - | - | - | 21 | 4 | 22 | - | - | - | - | - |
| Throw | ? | ? | ? | - | - | 27 | - | - | - | - | - | - |
| Eating a Bomb | 13% | 50 | 110 | 45° | 17 | 1 | 54 | - | ? | ? | 1 | - |
| ||||||||||||
Forward Special
| Version | Damage | BKB | KBG | Angle | Startup | Active Frames | Recovery (IASA) | Landing (L-Cancel) | Advantage | Shield Damage | Shield Stun | Invul |
|---|---|---|---|---|---|---|---|---|---|---|---|---|
| Normal Charge | 12% (9-14), 15% (15-26), 18%(27-41) | 50 | 91, 90, 80 | 45° | 9 | 33 | 17 | - | ? | ? | 7, 8, 10 | - |
| Jumping Charge | 15% | 50 | 100 | 45° | 9 | 42 | 8 | - | ? | ? | 8 | - |
| Aerial Charge | 15% | 20 | 100 | 45° | 11 | 15 | 10 | - | ? | ? | 8 | - |
| ||||||||||||
Up Special
| Damage | BKB | KBG | Angle | Startup | Active Frames | Recovery (IASA) | Landing (L-Cancel) | Advantage | Shield Damage | Shield Stun | Invul | ||
|---|---|---|---|---|---|---|---|---|---|---|---|---|---|
| 1%×12, 4% | 0, 50, 60 | 100, 20, 130 | 115°/85°/105°/363°/90°/80° | 7 | 24 | 19 | - | ? | ? | 2×12 | - | ||
| |||||||||||||
Down Special
| Version | Damage | BKB | KBG | Angle | Startup | Active Frames | Recovery (IASA) | Landing (L-Cancel) | Advantage | Shield Damage | Shield Stun | Invul |
|---|---|---|---|---|---|---|---|---|---|---|---|---|
| No Charge | 0% | 0 | 1 | Trip | 16 | 3 | 62 | - | ? | ? | 1 | - |
| Partial Charge | 12% | 40 | 75 | 45° | 10 | 2 | 37 | - | ? | ? | 7 | - |
| Half Charge | 16% | 50 | 70 | 45° | 5 | 4 | 28 | - | ? | ? | 9 | - |
| Full Charge | 21% (5-6), 18% (7-18) | 40, 20 | 80, 100 | 40°, 80° | 5 | 14 | 37 | - | ? | ? | 11, 10 | - |
| ||||||||||||

