No edit summary |
|||
| Line 258: | Line 258: | ||
<br> | <br> | ||
<br> | <br> | ||
<p> | <p>One of Darkrai's most effective neutral tools in field. With full screen range, above average tracking, and the ability to special cancel, it is an all around safe tool to use offensively and defensively. Being +8 on hit while not impossible to combo with, does leave a much tighter gap to land follow-up projectiles. It can however combo into B.X at a midrange.</p> | ||
<br> | <br> | ||
<br> | <br> | ||
| Line 292: | Line 291: | ||
<p>+1 Orb</p> | <p>+1 Orb</p> | ||
|}</div> | |}</div> | ||
<p>A tool with fairly limited use, especially | <p>A tool with fairly limited use, especially with the existence of ]Y[. It's useful for its evasion, with high invulnerability on frame 1. It is however extremely laggy, but can be cancelled into specials to slightly alleviate this.</p> | ||
<br> | <br> | ||
<br> | <br> | ||
| Line 329: | Line 326: | ||
<p> +1 Orb </p> | <p> +1 Orb </p> | ||
|}</div> | |}</div> | ||
<p> | <p>Darkrai's strongest offensive tool in field. With a nearly ceiling high hitbox, great tracking, and BDR confirms at almost all but max range, it is a potent tool for frame traps and makes approaches threatening. The ground hitbox itself acts as a trap, stunning all those who walk into it, while having almost no projectile priority. The trap itself is a niche way to defensively check an opponent, as B.Y is almost always superior, but it has certain niche uses. F.Y is also immune to Highs and Mid Highs on frame 5, making it a decent option in avoiding certain projectiles and to catch aerial approaches.</p> | ||
<br> | <br> | ||
<br> | <br> | ||
Revision as of 23:37, 19 January 2022
Introduction
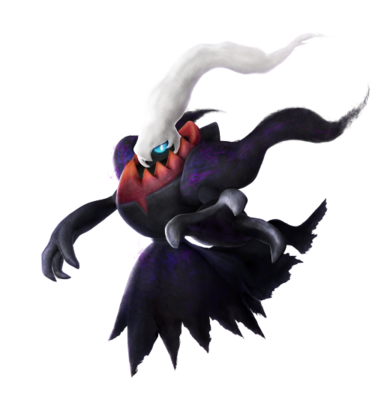
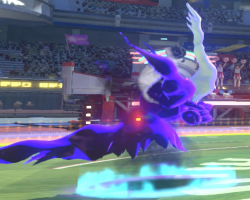
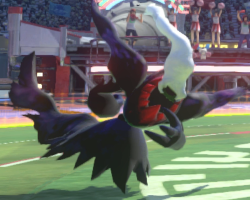
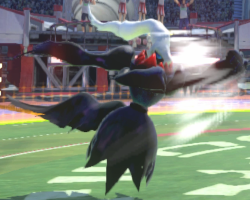
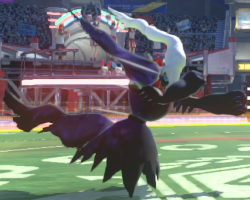
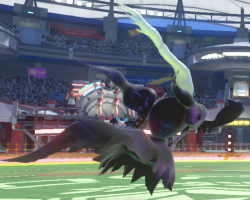
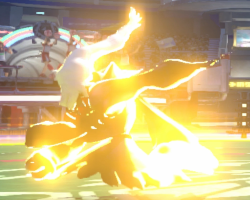
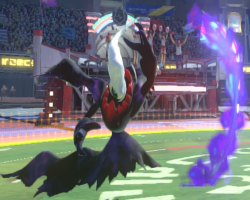
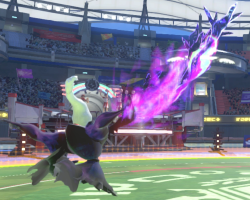
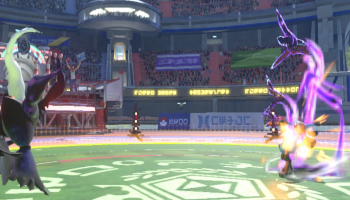
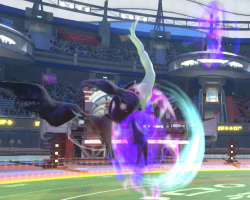
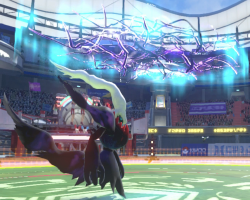
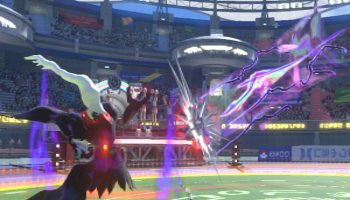
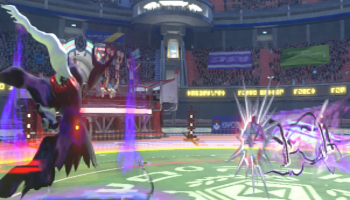
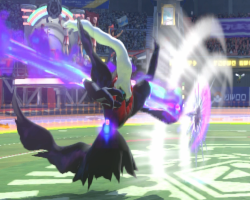
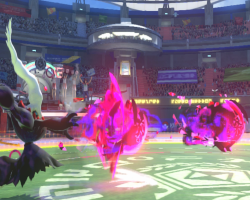
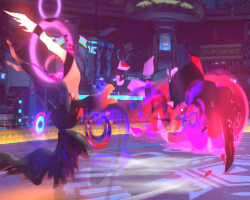
Darkrai is a mostly defensive binary state character with a very strong field phase and an overwhelming Bad Dreams Rising or “nightmare mode” state. In field, he excels at setting traps and punishing approaches by his opponent, and with a victorious field and a nightmare mode achieved, his good mobility, arsenal of invulnerable moves, filthy okizeme and strong chip damage make a nightmare darkrai among the most fearsome characters in the game.
However, he does have notable weaknesses. On the whole, his frame data is extremely slow, both in field and in duel. While he is good at punishing approaches in field, his lack of long-range counter pierces and otherwise fast projectiles make forcing the opponent to approach him difficult. This is not even to mention how he struggles against characters with longer-ranged options that have no need to approach him in the first place.
Furthermore, if he fails to attain a nightmare state, his duel phase is laughably weak. While nightmare can subsist without good frame data, the lack of mobility, invulnerable options, and setups in a “regular state” duel means darkrai can truly struggle if he does lose field or otherwise shifts without nightmare.
Darkrai has air control when jumping.
- Darkai can move forwards and backwards during a neutral jump.
- Darkrai can increase the distance of a forward or backwards jump by holding the direction.
- Darkrai can halt the distance of a forward or backwards jump by pressing the opposite direction.
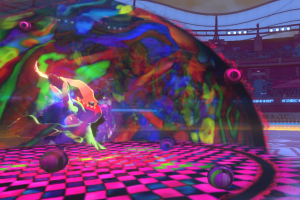
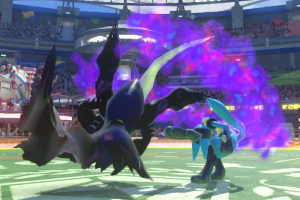
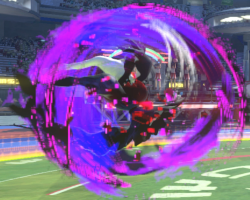
Also known as Nightmare Mode, BDR, or NM for short, Bad Dreams Rising is a special kind of Duel Phase that Darkrai can only enter by landing a Dark Void on the opponent or Phase Shifting from Field to Duel while in Burst Mode. If the latter criteria is met with a Guard Break, Darkrai will instead shift into regular Duel Phase.
Like entering Duel Phase, entering Bad Dreams Rising resets both players' Phase Shift Points to 0. While in BDR, Darkrai undergoes the following changes:
- Darkrai's movement is enhanced across the board, gaining a slight increase to movement speed and teleporting dashes. Darkrai's Forward Dash is also able to pass through the opponent.
- All of Darkrai's Pokemon Moves are powered up, and he gains access to two new ones: Nightmare, an intangible burst option, and Dream Eater, a powerful command grab that siphons the opponent's resources and ends Bad Dreams Rising.
- Darkrai's Rifts activate on their own, but no longer deal chip damage.
- 5Y, 2Y, j.Y, 5X, J.A/AA/AY, and 5A can all be cancelled into Teleportation by pressing R.
- Weak moves (besides Rifts) ignore the Light Armor present during Burst Mode.
- Darkrai can no longer break the opponent's guard.
Bad Dreams Rising ends in the same ways Duel Phase does, but it can also end early if Darkrai is hit by a Grab attack that doesn't Phase Shift, or the first hit of Mewtwo's Psystrike.
| Darkrai #PTDX_DRK | |
|---|---|
| Vitals | |
| HP | 540 HP |
| Shield Health | 600 SH (Normal) |
| Synergy Gauge | 200 CC |
| Burst Mode Duration | 840F (14 sec) |
| Movement | |
| Back Dash | 37F (1-8F Strike and Throw invuln, FP 9-31F High Mid Projectile invuln, Cancelable on Frame 25)
Bad Dreams Rising: 38F (1-22F Strike and Throw invuln, Cancelable on Frame 26) |
| Side Dash | 45F (5-20F Projectile invuln, Cancelable on Frame 33) |
| Forward Dash | 37F (Cancelable on Frame FP 25 / DP 21)
Bad Dreams Rising: 28F (2-6F Projectile invuln, 7-22F Strike, Throw, and Projectile invuln, Cancelable on Frame 22) |
| Unique Movement Options | Aerial Control, Teleportation, ]Y[, Teleport Dashes during BDR |
| Stances | |
| High Stance | Charges Synergy Gauge (0.5CC/tick), can move while active. |
| Low Stance | High Invuln on Frame 1, can move while active. |
General Moves
| Y+B Grab | ||||||
| Attack | Damage | PSP | Height | Impact | Hit Adv | Block |
| Grab | FP 80 / DP 90 | 12 | N/A | i11 | FP Shift (+8) / DP Shift | N/A |
In Burst Mode, activates Bad Dreams Rising upon Phase Shifting from Field to Duel. |
Darkrai is one of the few exceptions to the basic attack triangle. With the character's wincon being BDR, it is often considered detrimental to use Darkrai's throw in field. That being said, it is still something worth using, as duel frame advantage and the threat of a throw can make obtaining BDR easier in close quarter exchanges. In duel, Darkrai's throw is often overshadowed by his command throw in BDR, although it is still a good option in both forms of duel phase, acting as a good mixup agent on okizeme.
| X+A / [X+A] Counter Attack | ||||||
| Attack | Damage | PSP | Height | Impact | Hit Adv | Block |
| Counter | 80 / 100 | 3 | Special Mid | i35 / i55 | 0 / Launch | -8 / 0 |
Darkrai is put into a counter armor state from frame 1-28 (48 if charged). Counter pierces when fully charged. Can be dash canceled by inputting a direction and R. In Burst Mode, activates Bad Dreams Rising upon Phase Shifting from Field to Duel. |
Darkrai's CA is almost entirely eclipsed by Nasty Plot in terms of overall utility and ease of use. With a very slow CADC, slow hitbox, and a low return, it is not often used as a reliable defensive option. In BDR, it gains ghost dash properties on CADC making it a much better tool. It is frame one however, unlike its DP counterpart, although in BDR this change is mitigated, making it a niche option overall.
| j.R Teleportation | ||||||
| Attack | Damage | PSP | Height | Impact | Hit Adv | Block |
| N/A | N/A | N/A | N/A | N/A | N/A | N/A |
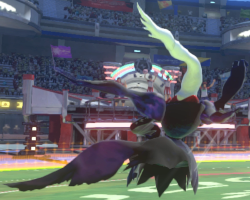
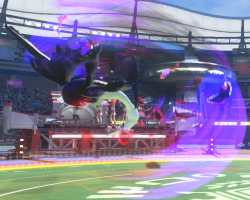
Darkrai vanishes from the air, then teleports down to the ground. Can teleport through opponent, even outside of nightmare. Can teleport left, right, backwards, or straight downwards in Field Phase. Can teleport forward, backwards, or straight downwards in Duel Phase. |
Very useful mobility and mixup option, though some care should be taken. Has a large amount of
invulnerability and can mix up where you're teleporting to, but is rather laggy. Also notable in
usage is the ability to teleport through projectiles.
| ]Y[ Release Y | ||||||
| Attack | Damage | PSP | Height | Impact | Hit Adv | Block |
| N/A | N/A | N/A | N/A | N/A | N/A | N/A |
Darkrai disappears, creates a phantom, then reappears in the same spot. Invincible from frame 5-22. +1 Orb |
]Y[ is an often overlooked tool found in Darkrai's kit. With frame 5-22 invulnerability, it is a good tool to reliably setup in the face of projectile pressure without compromising your position, unlike Nasty Plot. It is also useful for staving off certain pierce options such as Gardevoir F[Y], Chandlure F[Y]/6[Y], and Mewtwo F.A on certain occasions. The real benefit of the tool however comes from clone itself. Being +10 on block upon release, confirming into BDR, and allowing for safe frame traps with 5A, it is a constant overbearing presence players must keep into account. It is difficult to use effectively, but using pokes in tandem with it allows you to setup ]Y[ safely. Charging Y prior to options like 5A and 6X can allow for safe setup of clone. It is also excellent out of 8[Y].
| ]X[ Release X | ||||||
| Attack | Damage | PSP | Height | Impact | Hit Adv | Block |
| N/A | N/A | N/A | N/A | i43 | N/A | N/A |
Darkrai takes a bow, and consumes all orbs to receive healing and buffs. 0 Orbs: Heals 10 recoverable HP. 1 Orb: Heals 30 recoverable HP. 2 Orbs: Heals 30 recoverable HP and grants a Defense buff that lasts for 4 seconds. 3 Orbs: Heals 60 recoverable HP and grants an Attack and Defense buff that last for 8 seconds. 4 Orbs: Deals 60 recoverable HP, grants an Attack and Defense buff that last for 8 seconds, and 30CC of Synergy. |
Given how slow it is, ]X[ is not a primary neutral tool. However, ]X[ is still a valuable tool to have when used properly.
The primary instances of this is to "punish" opponents for not approaching in field
by ]X[ behind a rift, enticing the opponent to approach. Another common use is after the 2x > 4x loops Darkrai is known for in BDR, as you have enough time to use ]X[ and
retain frame advantage. It is also incredibly useful in time-out situations, often recovering the necessary health needed to win a round.
| L+R Infinite Eclipse | ||||||
| Attack | Damage | PSP | Height | Impact | Hit Adv | Block |
| Normal | 180 (60) / 240 (60)* | 12 | Mid | i23 | Shift | -20 / -12* |
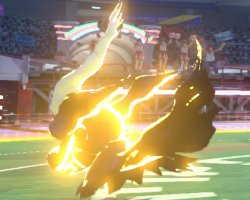
A dome-shaped attack that hits multiple times. Invincible on frame 9.* Counter pierces. * In Bad Dreams Rising, deals additional damage, becomes safer on block, and is invincible on frame 1. |
Outside of BDR, Darkrai's Burst Attack is a rather mediocre button. It has a wide hitbox, but is slow, has little invulnerability, middling damage,
and is extremely unsafe on block. In nightmare, however, it becomes one of the strongest Burst Attacks found in the game. With frame 1 invulnerability,
being safe on block against the majority of the cast due to its large pushback, and extremely high damage, it is an incredible tool.
Field Phase Attacks
| nY | |||||
| Attack | Damage | Height | Impact | Hit Adv | Block |
| Normal | 48 | Special Mid | i23 | +8 | -8 |
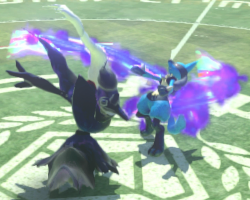
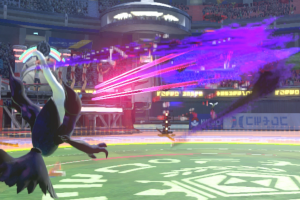
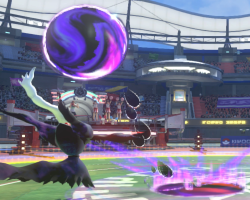
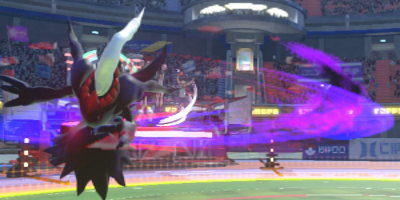
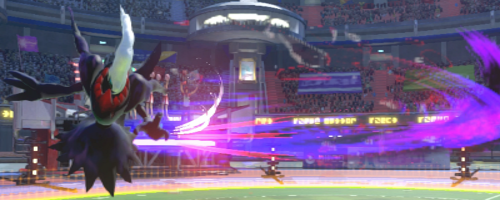
Darkrai throws out three orb projectiles that home in on the opponent. Special cancelable. |
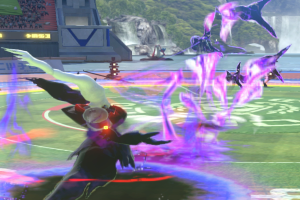
One of Darkrai's most effective neutral tools in field. With full screen range, above average tracking, and the ability to special cancel, it is an all around safe tool to use offensively and defensively. Being +8 on hit while not impossible to combo with, does leave a much tighter gap to land follow-up projectiles. It can however combo into B.X at a midrange.
| sY | |||||
| Attack | Damage | Height | Impact | Hit Adv | Block |
| N/A | N/A | N/A | N/A | N/A | N/A |
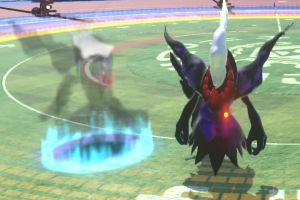
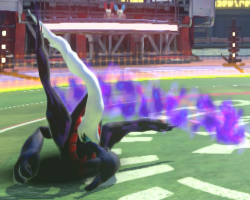
Darkrai ducks and slides to the side, creating a phantom. Invincible against Highs on frame 1. Special cancelable. +1 Orb |
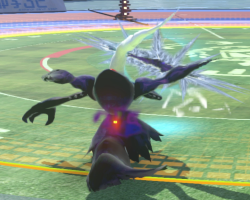
A tool with fairly limited use, especially with the existence of ]Y[. It's useful for its evasion, with high invulnerability on frame 1. It is however extremely laggy, but can be cancelled into specials to slightly alleviate this.
| fY | |||||
| Attack | Damage | Height | Impact | Hit Adv | Block |
| Normal | 60 / 20 / 88 (30) | Mid / Low / Mid | i23 | Shift / Stun / Launch | -8 |
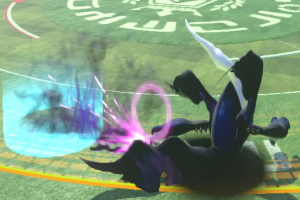
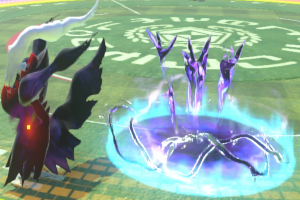
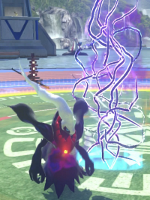
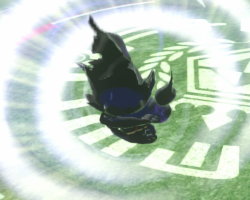
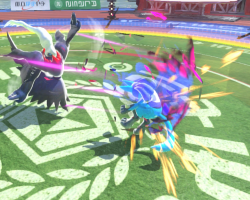
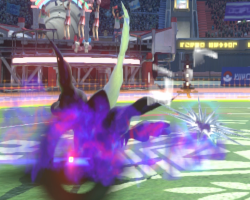
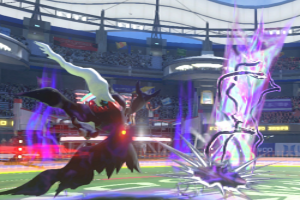
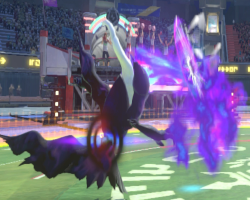
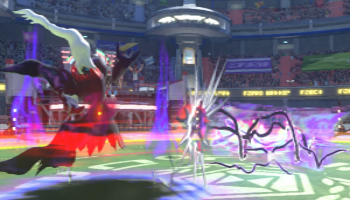
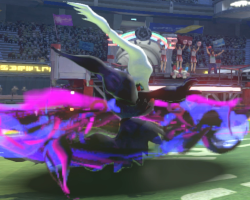
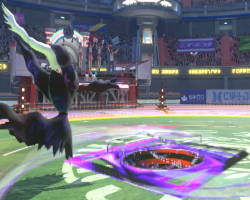
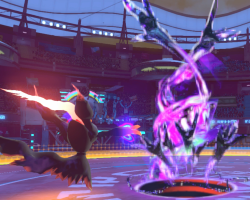
Darkrai summons a pillar of hands that have high vertical height. Erases incoming projectiles. Invincible against Highs and Mid Highs on frame 5. Leaves behind a puddle that stuns the opponent if they come in contact. The puddle can be activated with Nasty Plot, summoning a pillar of hands that chases down the opponent. In Burst Mode, activates Bad Dreams Rising upon Phase Shifting from Field to Duel. +1 Orb |
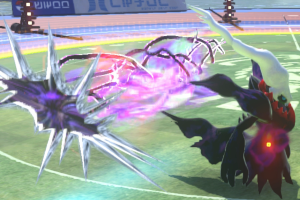
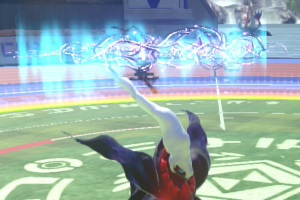
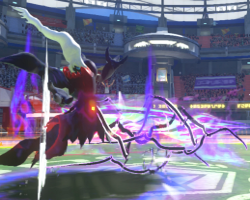
Darkrai's strongest offensive tool in field. With a nearly ceiling high hitbox, great tracking, and BDR confirms at almost all but max range, it is a potent tool for frame traps and makes approaches threatening. The ground hitbox itself acts as a trap, stunning all those who walk into it, while having almost no projectile priority. The trap itself is a niche way to defensively check an opponent, as B.Y is almost always superior, but it has certain niche uses. F.Y is also immune to Highs and Mid Highs on frame 5, making it a decent option in avoiding certain projectiles and to catch aerial approaches.
| bY | |||||
| Attack | Damage | Height | Impact | Hit Adv | Block |
| Normal | 30 / 74 (20) | Mid High / Mid High | i23 | 0 / Stun | -8 |
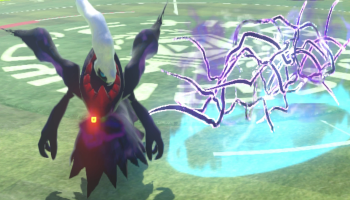
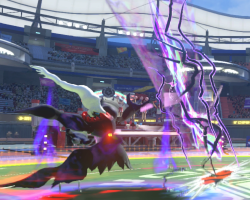
Darkrai claws the air and creates a rift. After a short amount of time, the rift will activate and stun the opponent. Both the initial swipe and the activated vines erase projectiles. bY disappears if Darkrai takes damage during the prep time. Can be activated immediately with Nasty Plot. Holding bY will cause the rift to stay inactive until activated by Nasty Plot. The rift can be angled to darkrai's sides by inputting diagonally back. After blocking the attack from the rift, the hitbox is no longer active. +1 Orb |
While fY is the core of Darkrai's offense in field, bY is the core of his defense. The
projectile deletion is extremely helpful, and once the rift is activated, it gives a nice
wall of high-damage nightmare confirm and projectile deletion to hide behind and
set up again. Like most of darkrai's buttons, it's laggy so be careful with throwing it
out willy-nilly, but it's extremely useful.
| j.Y / j.fY / j.sY | |||||
| Attack | Damage | Height | Impact | Hit Adv | Block |
| Normal | 20 / 20 / 20 | Mid High / Mid / Mid | i15 | Stun | -33 |
Darkrai throws out a trap. The trap is based on the direction input from the j.Y. Inputting a forward direction during j.Y creates a ceiling trap that stuns. Inputting a neutral or back direction creates a vertical wall trap that stuns. Inputting a left or right direction creates a horizontal wall trap that stuns. Holding the input throws the trap further away from Darkrai. Special cancelable. +1 Orb |
A bit of an awkward tool. Mostly used for combos, and occasionally for setups. Not as strong as
its duel counterpart due to the comparatively open nature of Field Phase, but does give an orb.
| bX / b[X] | |||||
| Attack | Damage | Height | Impact | Hit Adv | Block |
| Normal | 70 / 106 / 50 (15) | Mid Low | i19 / i39 | Stun | -8 / +4 |
Darkrai thrusts forward and stuns the opponent. When charged, the move counter pierces and also places a mirror. If the mirror is hit by an opponent's projectile, the mirror turns into a set of jaws that tracks down the opponent. The mirror can automatically turn into the jaws by activating it with Nasty Plot. +1 Orb (b[X] Only) |
Darkrai's second new tool with the advent of DX and definitely the stronger one. bX is a godly whiff punish, great at
smacking people trying to run at you, great to throw out occasionally as it's safe on block, great in combos, and b[X]
is a strong oki. This is definitely one of the moves you'll be using most frequently.
| j.X | |||||
| Attack | Damage | Height | Impact | Hit Adv | Block |
| Normal | 80 | MH | i39 | Shift (Knockdown) | -8 |
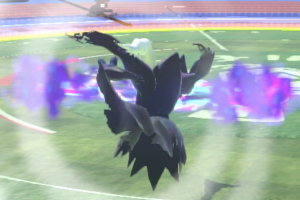
Darkrai dives headfirst to the ground. Teleports backwards, behind the spot at which Darkrai landed. In Burst Mode, activates Bad Dreams Rising upon Phase Shifting from Field to Duel. |
A move with sharply limited utility, mostly due to how slow it is. Can be used as a combo ender in burst mode,
but grab does the same amount and is easier to land. Not something you want to use often.
| X Homing Attack 1 | |||||
| Attack | Damage | Height | Impact | Hit Adv | Block |
| Normal | 40 | Mid | i25 | +8 | -8 |
Darkrai homes in on the opponent and does a double-hit claw attack. Can be canceled with block or jump. Throw crush. Special cancelable. |
| XX / X[X] Homing Attack 2 | |||||
| Attack | Damage | Height | Impact | Hit Adv | Block |
| Normal | 40 / 80 | M | i25 | Shift (+8) / Shift (Knockdown)* | -8 |
Following up from Homing Attack 1, Darkrai summons a rift to attack. Can be charged to guard break / counter pierce. If Homing Attack 1 was blocked, there is a 26 frame window to punish a charged Homing Attack 2. * In Burst Mode, activates Bad Dreams Rising and causes knockdown upon Phase Shifting from Field to Duel. |
Darkrai's homing is largely a grab break, perfect block, and combo tool. Since it's so slow, it's not something you want to do in neutral.
It is special cancellable though and does combo into dark void. However, this means you basically never want to use homing 2 outside
of burst, and even then a grab after a stun will usually do more than homing 1+2.
Duel Phase Weak Attacks
| 2Y | ||||||
| Attack | Damage | PSP | Height | Impact | Hit Adv | Block |
| Normal | 30 | 0 | Low | i15 | +12 | -8 |
A quick low swipe. Special / 2X cancelable. In Bad Dreams Rising, can press R to cancel into Teleportation. |
Good, fast, special cancellable poke. Outside nightmare, 2yx]y[ gets good oki. In nightmare, 2y8aa[x] gets really good
damage, while 2yx leads into loops. Good range and safe on block, only issue is that it's low. One of his best normals.
| 4Y / 4YY / 4YYY / 4YY:Y | ||||||
| Attack | Damage | PSP | Height | Impact | Hit Adv | Block |
| Normal | 20 / 10 / 30 / 50 | 0 / 0 / 3 / 3 | High / Special Mid / Mid / Mid | i15 | +4 / 0 / +8 / Launch | -8 / -8 / -12 / -12 |
Continuous punches that advance Darkrai forward. The Just Frame timing for 4YYY can be found shortly after inputting 4YY. |
Fast but high poke that doesn't lead to much on hit. Mostly used as a combo ender for stuff that
can't confirm into nightmare. Can be used for tick throws or just as a jab.
| 5Y | ||||||
| Attack | Damage | PSP | Height | Impact | Hit Adv | Block |
| Normal | 20 | 0 | Mid | i19 | +4 | -4 |
A vertical claw swipe. Special / 8X cancelable. In Bad Dreams Rising, can press R to cancel into Teleportation. |
Slow jab with deceptively short range. Outside nightmare, mostly used as a faster, lower-psp nightmare combo
ender than 5x. In nightmare, however, being able to cancel into dashes and specials-in particular dream eater
makes it a strong mixup and oki tool.
| 5YY | ||||||
| Attack | Damage | PSP | Height | Impact | Hit Adv | Block |
| Normal | 40 | 3 | Mid Low | i19 | +4 | -8 |
Special cancelable. |
| 6Y / 6:Y | ||||||
| Attack | Damage | PSP | Height | Impact | Hit Adv | Block |
| Normal | 40 / 60 | 3 | Mid | i19 | Launch | -8 / +4 |
An advancing forward uppercut that is invincible against Highs on frame 5. The Just Frame version can be done by pressing forward and Y on the same frame. |
A really strong button that doesn't have that much place in Darkrai's kit. Abusing the + frames and
high invulnerability requires you to be up close, where darkrai doesn't usually like to be. Plus, it doesn't
combo into nightmare on hit. Still, a strong button and some supports can make it combo into nightmare.
Has a bit more utility in nightmare, as it combos into 2yx on nearly the entire cast.
| 8Y / 8[Y] | ||||||
| Attack | Damage | PSP | Height | Impact | Hit Adv | Block |
| Normal | 76 / 72 | 3 / 0 | High / Mid | i23 / i43 | Launch / +28 | -8 / +24 |
Darkrai conjures a wave of hands upwards that launches the opponent. Invincible against Highs and Mid Highs on frame 5. Charging 8Y spawns a wave of hands that pulls the opponent closer to Darkrai. Charging 8Y gives added High and Mid High invincibility frames. 8[Y] loses the hitbox that 8Y has. |
Solid anti-air. A bit slow, but has a huge hitbox, combos into a good damage nightmare on anti-air hit.
The charged version gives you a ton more head invulnerable frames to get through projectiles and the like,
plus combos into nightmare if you're close enough. Furthermore, it naturally puts you in a position to ]Y[
afterwards. You won't use the normal version often, but the charged version is nice.
| j.Y | ||||||
| Attack | Damage | PSP | Height | Impact | Hit Adv | Block |
| Normal | 20 / 18 | 3 / 0 | Mid High / Mid | i15 | -8 / Stun | -16 |
Darkrai throws out a ceiling trap that stuns. Holding Y throws the net further away from Darkrai. Special cancelable. In Bad Dreams Rising, can be canceled into Teleportation by pressing R. |
Strong jump cut-off, but a bit slow outside of nightmare though. In nightmare, the cancel
and stronger knockdown opportunities give you a lot more opportunities to set it up, and it is
a major factor as to why getting knocked down by nightmare krai is scary-you can't jump out.
Strong Moves
| 2X | ||||||
| Attack | Damage | PSP | Height | Impact | Hit Adv | Block |
| Normal | 60 | 3 | Low | i23 | Knockdown / Launch* | -8 / 0* |
Darkrai advances forward and swipes the ground, creating a rift. Invincible against Highs on frame 1. 2X's rift shoots out vertically with a forward diagonal, launching the opponent. * In Bad Dreams Rising, the rift is automatically activated. +1 Orb |
| 2X Rift | ||||||
| Attack | Damage | PSP | Height | Impact | Hit Adv | Block |
| Normal | 52 (12) | 0 | Mid Low | i23 | Launch | -2 |
Outside of nightmare, this is usually used as a combo ender after 2y to get you an orb and a hard knockdown.
Outside of that, being -8 on block and unsafe on CA gives it limited utility. In nightmare, however, this is one
of your most important buttons. 0 on block, starts nightmare loops, and can blow up nearly every CA in the
game on hit thanks to its multiple hits and the existence of drill. High crushing is just a bonus.
| 4X / 4[X] | ||||||
| Attack | Damage | PSP | Height | Impact | Hit Adv | Block |
| Normal | 60 / 90 | 3 / 4 | High | i23 / i43 | Launch | -12 / +4* |
Darkrai swipes upward in the air, creating a rift. 4X's rift shoots out diagonally, and can only hit aerial opponents. Grounded opponents cannot be hit. * In Bad Dreams Rising, the rift is automatically activated. Charging 4X sends out a long range claw swipe that counter pierces but does not place a rift. +1 Orb (4X Only) |
| 4X Rift | ||||||
| Attack | Damage | PSP | Height | Impact | Hit Adv | Block |
| Normal | 51 | 0 | Aerial | i23 | Launch | N/A |
4x is pretty limited in utility. Compared to 5x or 2x which have the same startup, it gives less damage,
less setup potential, is duckable, and is just as bad on block. What it is useful for is setting up an
upwards-facing rift to catch people out of the air. It's a bit difficult to combo off of, but it's good
security against opponents who like to jump at you. 4[x] is in a pretty similar boat, though this can be
used as a knowledge check. If your opponent doesn't know to duck it, it's long range, pierces, and gives
you + frames on block. If they do, you'll usually be punished for even attempting it in neutral. It can be
used as a way to stuff jump-ins though.
| 5X | ||||||
| Attack | Damage | PSP | Height | Impact | Hit Adv | Block |
| Normal | 40 | 4 | Mid Low | i23 | +4 | -12 / 0* |
Darkrai lunges forward, creating a rift. 5X's rift shoots out straight horizontally. Special cancelable. In Bad Dreams Rising, can be cancelled into Teleportation with R. * In Bad Dreams Rising, the rift is automatically activated. +1 Orb |
| 5X Rift | ||||||
| Attack | Damage | PSP | Height | Impact | Hit Adv | Block |
| Normal | 57 (12) | 0 | Mid Low | i23 | +28 | -8 |
Pretty good whiff punisher and combo starter. Can be canceled into nasty plot on block to be made safe,
as the rift blockstrings from most spacings. In nightmare, the special cancel makes 5x pretty good oki with
5x[A:4] or 5x2a. The dash cancel in nightmare. can also be used to make it a strong harassment tool.
| 6X | ||||||
| Attack | Damage | PSP | Height | Impact | Hit Adv | Block |
| Normal | 40 / 57 (12) | 4 / 0 | Special Mid / Mid | i27 | Launch | -12 / +4* |
Darkrai creates a rift at long range. 6X's rift shoots out straight horizontally. * In Bad Dreams Rising, the rift is automatically activated. +1 Orb |
| 6X Rift | ||||||
| Attack | Damage | PSP | Height | Impact | Hit Adv | Block |
| Normal | 57 (12) | 0 | Mid Low | i27 | +28 | -8 |
Pretty useful as a relatively fast long-range button. Extremely difficult to combo off of both in nightmare and out without support,
so is more of a poke than anything, but thanks to how fast it puts out a hitbox at its range still has a lot of use in neutral.
| 8X / 8[X] | ||||||
| Attack | Damage | PSP | Height | Impact | Hit Adv | Block |
| Normal | 60 / 80 | 4 | Special Mid / Mid Low | i31 / i51 | +12 / Crumple | -8 / +4 / +8* |
Darkrai pulls back before lunging forward, creating a rift. Invincible against Lows on frame 1. Throw crush. Charging 8X counter pierces and crumples the opponent. 8X's rift shoots out straight horizontally. * In Bad Dreams Rising, the rift is automatically activated. +1 Orb |
| 8X Rift | ||||||
| Attack | Damage | PSP | Height | Impact | Hit Adv | Block |
| Normal | 57 (12) | 0 | Mid Low | i31 | +24 | -10 |
Darkrai's lone grab crush and low profile option, aside from his lacking jump. Performs its duties admirably as such, comboing into a relatively
high-damage nightmare on critical hit or charged hit. The charged version can be decent okizeme, but somewhat pales in comparison to
clone trickery. In nightmare can also be used to get + frames, but is a bit slow compared to 6:y.
| j.X | ||||||
| Attack | Damage | PSP | Height | Impact | Hit Adv | Block |
| Normal | 70 / 52 (12) | 3 / 0 | Mid High / Mid | i31 | Knockdown / Launch* | -8 / -4* |
Darkrai dives headfirst to the ground, leaving a rift upon landing. Teleports backwards, behind the spot at which Darkrai landed. j.X's rift shoots out vertically with a backwards diagonal. j.X's rift is the only rift that deals chip damage in Bad Dreams Rising. * In Bad Dreams Rising, the rift is automatically activated. +1 Orb |
| j.X Rift | ||||||
| Attack | Damage | PSP | Height | Impact | Hit Adv | Block |
| Normal | 52 (12) | 0 | Mid | i31 | Launch | -10 |
Pretty lacking divekick. Extremely slow, only gives a hard knockdown outside nightmare,
and is extremely minus on block. Should rarely be used. At least it isn't punishable anymore.
Pokemon Moves
| 2A Dream Eater | ||||||
| Attack | Damage | PSP | Height | Impact | Hit Adv | Block |
| Grab | 180 | 12 | N/A | i27 | Knockdown | N/A |
Only usable in Bad Dreams Rising. Darkrai grabs the opponent, absorbing 30 HP and receives added Synergy gain. The first 30 damage of Dream Eater is unaffected by scaling. Instantly Phase Shifts. Upon phase shifting, Darkrai teleports backwards from Its location. |
Despite the subtle startup animation, Dream Eater is pretty slow, so care should be taken with throwing it out raw. However, it is extremely
powerful on hit and with nightmare darkrai's array of special and dash cancels you can get some absolutely filthy setups into it, made
even scarier by placing a net above their head. Can be used after teleporting behind their whiffed attack for a high-damage punish. Also
notable is its use as a combo ender. At the absolute minimum, it will do 45 damage no matter what the combo scaling is at, making it a great
kill move. However, outside of killing it leaves you without advantage in field on hit, so be wary with throwing it out.
| 4A Nasty Plot | ||||||
| Attack | Damage | PSP | Height | Impact | Hit Adv | Block |
| Counter | 34 (12) | 1 per hit (Phantom) | Mid | i21 | Stun | +10 |
Darkrai goes into a counter armor state from frame 5-28.* Countering an opponent's attack causes Darkrai to teleport backwards, leaving behind a phantom. If the input is held, the phantom does not immediately detonate, gaining Darkrai an orb. If it is not, the phantom immediately explodes. Activating Nasty Plot activates all traps that Darkrai has placed (maximum 2). Phantoms explode, rifts expel vines, mirrors become jaws, and fY chases down the opponent. * In Bad Dreams Rising, Nasty Plot is given counter armor on frame 1. |
Nasty Plot is an extremely good tool for krai. It functionally replaces his CA as a defensive tool with its only downside
in comparison being the lack of frame 1 armor which is removed in nightmare. 4[a] is almost unpunishable on proc and
gives you great setups, as well as being great against long-range non-piercing projectiles. 4a puts out a hitbox very
quickly by CA standards which full combos into nightmare. And this is without getting into plot's most defining aspect
which is trap activation. You will be pressing this button a lot playing darkrai.
| 5A Dark Pulse | ||||||
| Attack | Damage | PSP | Height | Impact | Hit Adv | Block |
| Normal | 60 (15) / 96 (30) | 3 / 1 per hit | Special Mid / Mid Low | i27 | +4 / +12 | -8 / 0 |
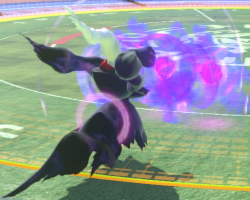
Darkrai fires a projectile. Using Dark Pulse will cause phantoms to throw out a Dark Pulse from their position on the stage. Afterwards they disappear. The Dark Pulses fired by phantoms have much greater tracking than those fired by Darkrai. In Bad Dreams Rising, Dark Pulse gains another hit, improving both its damage and advantage on hit/block. Furthermore, it becomes a Mid-Low rather than a Special Mid In Bad Dreams Rising, can press R to cancel into Teleportation, both before and after the move comes out. |
Very good fireball, especially in nightmare. There's not that much to say about it-it's a high damage, high chip, pretty
plus projectile with a slow startup. Useful for harassing enemies from longer distances and controlling space. It's only
notable that between 8[y] and rifts, it's almost never a good idea for the opponent to CA the fireball against nightmare darkrai.
| 5[A] Dark Pulse: Charge | ||||||
| Attack | Damage | PSP | Height | Impact | Hit Adv | Block |
| Normal | 40/60/80/100/120 | 3 | Special Mid | i27 | Knockdown / +16 / +16 / +16 / Stun | -20 / -16 / -12 / -8 / -4 |
Darkrai consumes all orbs to release a large wave of dark energy. Counter pierces. In addition to having more damage and being better on block and hit with more orbs, the hitbox is larger the more orbs are consumed. |
The other use for orbs other than bow and another extremely strong option. Usually you do not want to use pulses with orb counts less
than 4 outside of combo optimization, but they can have their uses. [A:4], however is ridiculous. Pierces, titanic hitbox, 60 chip,
120 damage and stun on hit, only -4 on block. It's useful for checks out of special cancellable moves in both field and duel, good for
okizeme, good for pressure in general. There are flaws to keep in mind-notably the long startup meaning it's not safe to throw out when
you're at a disadvantage, and that it is special mid, meaning characters with frame 1 anti-airs can evade it easily. However, these are
minor in comparison to its strengths.
| 6A / 6[A] Dark Void | ||||||
| Attack | Damage | PSP | Height | Impact | Hit Adv | Block |
| Normal | 36* | -12 | Mid / Low | i39 / i59 | FP Shift (+8) / DP 0 | -12 / Unblockable |
Darkrai drops a void onto the ground. Landing a Dark Void on the opponent sends Darkrai into Bad Dreams Rising. PSP will be reset for both players if landed in Duel Phase. When charged, Dark Void will go through an opponent's block, though it may still be countered. * Dark Void's damage comes from the aerial hits above. These hits cannot KO. |
| 6A / 6[A] Dark Void | ||||||
| Attack | Damage | PSP | Height | Impact | Hit Adv | Block |
| Normal | 80 (20) / 120 (31) | 3 | Mid | i39 / i59 | Launch | -12 / +8 |
In Bad Dreams Rising, Dark Void spawns a pillar of hands. This version of the move can KO. |
Outside nightmare, used as a combo ender and that's pretty much it. Gets you nightmare. Unsafe on block and slow, definitely not a neutral tool.
Charged version can be used to avoid hit limits after longer stuns or for the occasional setup. Can knowledge check some people, but it's
really slow and possible to CA or jump for a huge punish, so not too good. Slightly more useful in nightmare, where it becomes a powerful
combo starter. Charged one is an incredible combo starter, but there's precious few situations where you actually land it, as it's still CA-able.
If they don't know this, however, can be strong okizeme.
| 8A Nightmare | ||||||
| Attack | Damage | PSP | Height | Impact | Hit Adv | Block |
| Normal | 91 (27) | 3 | Mid High | i27 | Launch | -12 |
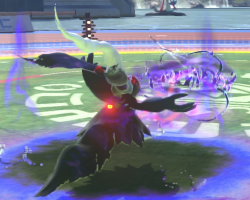
Only usable in Bad Dreams Rising. Darkrai disappears, becoming invincible on frame 5. Darkrai reappears and flies in at the opponent with a drill-like motion. Can cancel into aerials afterwards. |
DRILL.
One of the biggest reasons why darkrai's nightmare mode is so scary, a frame-5 invulnerable move that leads
into 210 and a hard knockdown on hit is huge. Learning what actions from your opponent you can just drill
for free is huge, as most slower moves become a non-issue to nightmare darkrai and he can punish CAs super
hard. However, it is punishable on block by most of the cast, so do be careful with throwing it out. Can also
be used as a damage combo ender.
| j.A Shadow Claw | ||||||
| Attack | Damage | PSP | Height | Impact | Hit Adv | Block |
| Normal | 50 (15) | 0 | Mid High | i19 | Crumple | -4 |
A 360 degree flurry of hits that has two followups. In Bad Dreams Rising, can press R to cancel into Teleportation. Deletes projectiles on frame 5. If one of its followups is land canceled, becomes +12 on block. |
A really good move that is unfortunately stapled to krai's mediocre jump. The projectile deletion is pretty nice to catch Lucario
or Garde's 8y after drill on block, and on oki, it is +12 when properly cancelled while also being safe on CA. With followups, it's
also really useful for combos.
| j.AA Shadow Claw: Kick Followup | ||||||
| Attack | Damage | PSP | Height | Impact | Hit Adv | Block |
| Normal | 55 (16) | 3 | Mid High | i19 | Launch | FP -29 / DP -16 |
A vertical ranged flash kick that launches the opponent. In Bad Dreams Rising, can press R to cancel into Teleportation, but not after a full j.YAA string. |
Basically only used mid-combos and even then only in field. Smallish hitbox, unsafe on block, and slow. Not a neutral tool.
| j.AY/X / j.A[Y/X] Shadow Claw: Slice Followup | ||||||
| Attack | Damage | PSP | Height | Impact | Hit Adv | Block |
| Normal | 80 (20) / 120 (30) | 4 / 6 | High | i19 / i39 | Launch | -33 |
A horizontal ranged slash that launches the opponent. Can be charged to counter pierce and increases Its range. Charging also air stalls Darkrai. In Bad Dreams Rising, can press R to cancel into Teleportation, but not after a full j.YA[Y/X] string. |
Strong combo ender in duel or in burst field. Really good damage, and also has some use as a
knowledge check against people who don't know they can duck it with jump back j.YA[X or Y] strings.
Combos
Field Phase
In Field Phase, there are three broad categories of combos. There are those that get you nightmare by ending in Dark Void, those that extend Field Phase to leave you at an advantage, and those that simply maximize damage dealt before shifting, usually intended to use as kill combos or while in burst mode. These can be further subdivided into two possibilities- if you have four orbs on deck to extend the combo and if you do not.
The former three combo categories will be denoted:
- N (Nightmare)
- E (Extension)
- S (Shift)
- O (Four Orbs denoted by (n/5)[A:4]
fY
- N: fY > bA > j.Y >bX > nX > fA (112 Damage)
Standard confirm off the hands. If you're a bit closer and your timing is good you can do
- N: fY > bA > bX > nX > fA (117 Damage)
For a bit more damage.
- E: fY > bA > j.fY > bX > b[X] (117 Damage)
Same route as nightmare confirm. Cannot do the alternate route however, as a re-standing bX stuns for less time.
- S: fY > bA > bX > Y+B (125 Damage)
Same route as nightmare confirm. Since bX stuns for nearly a fully second and the grab starts up in eleven frame, it can be delayed for a long time to waste the timer if you have a life lead. Thanks to the high scaling involved, spending orbs on an fY combo is usually not worth it. We include optimal bX routes for completion's sake, though remember this requires good spacing and timing-a j.Y makes things more consistent, but less damaging.
- NO: fY > bA > bX > n[A:4] > nX > fA (137 Damage)
- EO: fY > bA > bX > n[A:4] > b[X] (142 Damage)
- SO: fY > bA > bX > n[A:4] > Y+B (141 Damage)
bY
- N: bY activation > bX > nX > fA (154 Damage)
Standard bY confirm. Once again, there's an alternate route for obnoxious damage optimization if you're at the right spacing.
- N: bY activation > sY > nX > nA > nX > fA (158 Damage)
- E: bY activation > bX > b[X] (184 Damage)
No alternate route here, the bX stun is needed to land the b[X].
- S: bY activation > bX > Y+B (178 Damage)
Entirely standard.
- NO: bY activation > 5[A:4] > bX > fA (198 Damage)
bY orb combos hurt.
- EO: bY activation > bX > n[A:4] > b[X] (220 Damage)
- NO: bY activation > bX > n[A:4] > Y+B (218 Damage)
bX
- N bX > nX > fA (102 damage)
Standard bX confirm into nightmare that works universally. However, on the majority of the cast, can be optimized a lot further.
- N bX > j.fY > j.A > j.AA > sY > nX > nA > nX > fA (143 Damage)
Optimized nightmare confirm off bX. Would be standard, but timing of the j.fY is really character-specific and flat-out does not work on a couple characters, notably the pikachus. Generally speaking, you want to j.fY at around the height of the character's head-too high on smalls and it'll whiff, too low on talls and they'll get launched directly into the net, not giving you enough time to set up your sY.
- E bX > b[X] (142 Damage)
Nothing spectacular here. Just good damage for a field extension.
- S bX -> Y+B (134 Damage)
Lower-damage, easier universal route. The j.fY route is still a thing here, but it's not as big of an uptick in damage.
- S bX -> j.fY -> j.A -> j.AA -> sY -> nX -> nA ->nX -> nXX (148 Damage)
There's nothing really of note with orb routes. They just do a lot of damage.
- NO bX > n[A:4] > nX > fA (182 Damage).
- EObX > n[A:4] > b[X] (202 Damage)
- SO bX > n[A:4] > Y+B (198 Damage)
These routes work for b[X] as well, sans the j.fYAA route. However, it's usually not worth it to do orb combos due to the higher scaling of b[X].
Clone explosion
This refers to all clone explosions, which include sY bA, ]Y[ bA, though not guard point bA. For that, simply follow up with standard bX or [A:4] routes. The displayed damage will be from sY bA, though all three vary in damage slightly.
- N Clone explosion > bX > nX > fA (92 Damage)
Standard stuff. Clone explosions scale hard so this won't be as explosive damage as other field combos.
- E Clone explosion > bX > b[X] (112 Damage)
- S Clone explosion > bX > Y+B (108 Damage)
Thanks to high scaling and hit counts, orb combos usually don't get much in the way of extra damage.
- NO Clone explosion > n[A:4] > nX > fA (114 Damage)
- EO Clone explosion > bX > n[A:4] > b[X] (133 Damage)
- SO Clone explosion > bX > n[A:$] > Y+B (132 Damage)
n[A:4]
No non-orb combos here, as you're spending them at the start. However, this is mostly standard stuff.
- NO n[A:4] > b[X] > nX > fA (186 Damage)
- EO n[A:4] > bX > b[X] (198 Damage)
- SO n[A:4] > bX > Y+B (194 Damage)
Regular State Duel Phase
Much like in Field Phase, there are several potential goals for combos in Duel Phase. Similarly, there are orb variants of almost all of these combos, but in duel there are other orb variants. Thanks to having i15 moves now, we can actually combo on dark pulse with 1 to 3 orbs, and as such, there will be partial pulse routes, denoted "PO". However, unlike field, there will not be extension options provided, as staying in regular state duel is almost universally less preferable to going to nightmare or shifting.
5Y
- N 5YY > 6A (60 Damage)
Standard pokecombo, achievable by mashing Y. Low damage, but neither cancel on 5y helps to get more damage without orbs-you can't combo off fireball outside nightmare, and 5y8x doesn't combo.
- S 5YY > 5A (102 Damage)
Similarly, you can't shift out of 5Y without orbs. However, you can do a bit more damage and use up 6 PSP.
- NO 5YY > 5[A:4] > 5X > 6A (156 Damage)
With orbs, we can get some damage with our nightmare confirm. We can't do anything too fancy thanks to how many hits and PSP 5y/5yy5[A:4] uses up, but a nearly 100-damage uptick is worth the orbs spent.
- SPO 5YY > 5[A:1-3] > 2YX (123-137-151 Damage)
With partial orbs, we still can't shift off 5Y, but we can do decent damage and use up 9 PSP. You can 4YY:Y instead of 2YX for 3 more damage but a far worse setup, though this does have better wallsplat potential.
- SO 5YY > 5[A:4] > 8[X] > 2Y > 4A (179 Damage)
With full orbs, however, we can definitely shift, and for alright damage for Darkrai.
2Y
- S 2YX (84 Damage)
Without orbs, we can't do much with 2Y at all. 2YX uses 3 PSP and gives you good oki with ]Y[ afterwards, though.
- NO 2Y > 5[A:4] > 8[X] > 5YY > 6A (187 Damage)
With orbs, 2Y becomes one of darkrai's strongest nightmare confirms. Enjoy your good damage, and note you can 5X6A instead of 5YY6A for one less damage but to gain an orb.
- SPO 2Y > 5[A:1-3] > 2YX (123-141-159 Damage)
Partial orbs gives us alright damage but no shift. Probably not worth the orbs, overall, though you still get a strong setup. Also of note is that you can 4YY:Y instead of 2YX for one more damage and the aforementioned tradeoffs between those enders.
- SO 2Y > 5[A:4] > 8[X] > 2Y > 4A > 5X > 5A (202 Damage)
Full orbs gives us a really strong damage shift. Not much else to say, just hurts, relatively speaking.
5X
- N 5X > 4A > 5X > 6A (109 Damage)
Standard 5X confirm. Does mediocre damage. Can be a bit tricky on certain characters away from the wall. The trick is to delay the first 4A as long as possible to let Darkrai slide forward.
- S 5X > 4A > 5X > 4A > 6X (146 Damage)
Standard shift confirm from 5X. Doesn't need any sort of timing, so can save failed attempts at the nightmare confirm if you recognize it.
- SPO 5X > 5[A:1-3] > 2Y > 4A > 5X > 4A > 6X (133-151-161 Damage)
Usually not worth it, but you can partial orb confirm off 5X. Does a bit more damage if you have a 2-3 orb pulse.
- NO 5X > 5[A:4] > 2Y > 4A > 5X > 6A (167 Damage)
Solid nightmare confirm with orbs. Walk forward a bit before the 2Y to make the 5X 6A connect, and to stall the timer a touch if you're in the lead.
- SO 5X > 5[A:4] > 8[X] > 2Y > 4A (185 Damage)
Good damage. That's about it. You'll usually be going for nightmare here.
Critical Hit 8X / 8[X]
- N 8X / 8[X] > 2Y > 4A > 5X > 6A (155 / 150 Damage)
Standard Nightmare confirm off crit 8X.
- NPO 8X / 8[X] > 2y > 5[A:1-3] > 2Y > 4A > 5X > 6A (161-175-189 / 155-167-179 Damage)
Partial orb nightmare confirm. Can always go for this, as 8x gives an orb, and does good damage. Walk forward slightly before the 2y to make it more consistent.
- S 8X / 8[X] > 2Y > 4A > 5X > 4A > 6X (178/168 Damage)
Shift combo. Nothing impressive here.
- NO 8X / 8[X] > 2Y > 5[A:4] > 5X > 6A (192 / 181 Damage)
Standard orbs stuff.
- SO8[X] > 2Y > 5[A:4] > 8[X] > 2Y > 4A (219 / 198 Damage)
Continual standard orb stuff.
Clone Explosion
Combos from triggered clone explosions. Usually good on oki. For guard point 4a, go for 8[x] routes without orbs, [A:4] routes with.
- N 4A > 8[X] > 2Y > 4A > 5YY > 6A (108 Damage)
This is a lot more consistent than you might think. Even at longer ranges, you can walk forward before 8[x]ing to cover all explosion distances.
- S 4A > 8[X] > 2Y > 4A > 5YY > 5A (114 Damage)
Thanks to how hard clone explosion scales and how much PSP it uses, can't get much damage off it.
- NO 4A > 8[X] > 2Y > 5[A:4] > 6A (115 Damage)
Because of aforementioned scaling, can't get very good damage with orbs.
- 4A > 5[A:4] > 8[X] > 2Y > 4A (133 Damage)
Same issues as above. Usually not worth for the orbs.
8Y
Grounded 8y can combo, but it cannot get you nightmare. If you happen to land it, 8Y 6:Y 4YY:Y is universal and does decent damage. It's not worth learning character-specific combos. What is worthwhile is anti-air 8y.
- N Anti-air 8Y > 8Y > j.Y > 6A (142 Damage)
This is for high anti-airs, the second 8Y gets a lot of damage.
- N Anti-air 8Y > j.Y > 5X > 6A (108 Damage)
And this is for lower. Using orbs isn't worth it thanks to the combined scaling of j.Y and 8Y.
- N 8[Y] > 5X > 4A > 5X > 6A (108 Damage)
You can combo off 8[y] but the spacing is specific. Go for it if you can, nightmare is nice.
- N 8[Y] > 5[A:4] > 5X > 4A > 5X > 6A (136 Damage)
Orbs aren't worth it.
2X / j.X Rift
If you launch with a 2x rift, you can get a nightmare confirm.
- 4A > 8Y > 8Y > j.Y > 6A (148 Damage)
It launches high enough to get the double 8y. Only go for one 8y and the 5x if you need to move up.
- 4A > 8Y > 6:Y > 6:Y > 4YY:Y (181 Damage)
And for damage. This is universal. Orbs aren't worth it between rift, 8y, and j.Y scaling means they add no damage.
5X / 6X / 8X Rift
If you're close, you can combo off a horizontal rift hit too.
- 4A > 5X > 4A > 5X > 6A (138 Damage)
Standard stuff. Can be a bit difficult, so usually you want to cut out the 4a and second 5x for consistency.
- 4A > 2Y > 5[A:4] > 8[X] > 2Y > 4A > 5X > 6A (193 Damage)
Really good damage.
Nightmare Mode
Nightmare combos are a lot simpler. You either optimize for damage, or you optimize for setups afterwards. Orbs aren't usually used mid-combo given how frequently nightmare krai launches and their use in setups. However, a lot more of his starters have meaningful combos in nightmare.
5Y
- 5YY > 6A > 2X > 4X (147 Damage)
Off of vanilla 5Y, going for setups is a little lacking-going for resets or damage is usually better here. Only 2 orbs gain and 6 PSP eaten, plus not too good damage. If you only get the second hit of 5Y, you can go for a final 2x for another orb and more setup. Otherwise, combos are the same.
- 5YY > 8A > j.A[X or Y] (189 Damage)
It's better if you're going for damage. This does use 10 PSP and doesn't give you orbs or time to setup, so it doesn't leave you in too great spot.
- 5Y > [A:4] > 6[A] > j.Y > 2A (213 Damage)
As usual for dream eater, doesn't leave you at a good spot in field, but shifts guaranteed. Good for guaranteed kills. Orbs probably aren't worth the dump.
6:Y
6:Y is actually a really strong starter in nightmare, as the 2y link gets a lot more here. Unfortunately, this link doesn't work on Aegislash, so all of these combos are character-specific, technically. It's also harder on Suicune, Braixen, and Gardevoir. Against these, delay your 2y slightly.
- 6:Y > 2YX > 4X > 2X > 4X (173 Damage)
Uses 6 PSP, but gives you plenty of time to set up and four orbs. Good, standard confirm.
- 6:Y > 2Y > 8A > j.A[X or Y] (232 Damage)
Uses 10 PSP, but really good damage. If you've already nicked them and land a 6:y, this is good to shift.
2Y
- 2YX > 4X > 2X > 4X (142 Damage)
Standard loops. Doesn't work on Croagunk, but just do a second 2x into 4x 2x and it's the same.
- 2Y > 8A > j.A[X or Y] (213 Damage)
D a m a e g. Uses 7 PSP.
- 2Y > [A:4] > 6[A] > j.Y > 2A (249 Damage)
One of the only times where orbs significantly improve your damage in nightmare. Still, not excessively worth it outside of ending health bars.
5X
- 5X > 2YX > 4X > 2X (157 Damage)
Standard 2x 4x loop stuff. Uses 7 PSP, so not too great, but does give you orb and setup opportunity.
- 5X > 8A > j.A[X or Y] (187 Damage)
11 PSP damage option.
- 5X > 2A (205 Damage)
Shifting out d a m a e g option.
- 5X > 5[A:4] > 2A (217 Damage)
Not an option you'd usually want to go for, but if you go for 5x[A:4] on oki you're going to catch people with it sometimes.
2X
- 2X > 4X > 2X > 4X (132 Damage)
The nightmare BNB. If you get only the vine hits of the 2x, either from an anti-air hit or getting a tipper, you can sneak in another 2X at the end.
- 2X > j.Y > 2A
There aren't damage numbers on this because this isn't a conventional combo. The usage here is explicitly finishing healthbars; if you see that they're below 48 health when you land a 2x, assuming you're not at hit or PSP limits, j.y into 2a will kill them. Be aware of this while comboing.
8X
- 8X > 2YX > 4X > 2X (162 Damage)
Standard loops off 8x. Does alright damage, but 6 PSP.
- 8X > 6:Y > 2Y > 8A > j.A[X or Y] (174 Damage)
Shift combo for damage and set up in field.
- 8X > 2YX > j.Y > 2A (195 Damage)
Shift combo for raw damage.
j.X
- j.X > 2YX > 4X > 2X (163 damage)
j.X is kind of like 8x to combo off of but it's a little bit harder. In particular, for this one you have to delay the 2y by a pretty wide margin.
- j.X > 6:Y > 2Y > 8A > j.A[X or Y] (240 damage)
This is also pretty tough with the delay on the 6:y, but the damage is worth it.
Notable Players
- Drakonzeta (NA): Twitter
- Haruyuki (JP): Vods
- Rubs (EU): Twitter
