Project Justice/Chairperson: Difference between revisions

From SuperCombo Wiki
(Added an introduction to this poor soul of a character)
Line 2: Line 2:


==Introduction==
==Introduction==
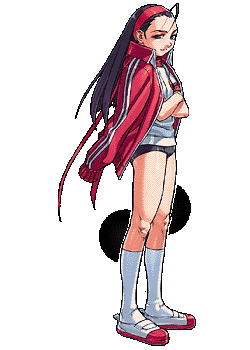
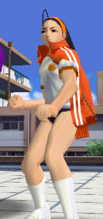
Most people who play Project Justice will agree that every character is viable, not matter where they are on the tier list. This is the exception.


Chairperson has one of the best Team-ups in the game, which makes her a viable partner. And that's where she should be, because she is absolutely horrible on point.
Her frame data is bad across the board, her normals outside of jabs are so bad that the opponent can easily punish her with Tardy Cancel and her Tardy Cancel options are not great either. Almost all of her specials are unsafe and some are unsafe ON HIT, but the worst part is that she has poor damage output. Which means you won't leave a dent unless you do a super.
Only a few souls has dared to play her on point. Some by mistake, and some who are simply just insane.


==Normal Moves==
==Normal Moves==

Revision as of 18:41, 4 September 2021

Project Justice Chairperson.gif

Introduction

Most people who play Project Justice will agree that every character is viable, not matter where they are on the tier list. This is the exception.

Chairperson has one of the best Team-ups in the game, which makes her a viable partner. And that's where she should be, because she is absolutely horrible on point.

Her frame data is bad across the board, her normals outside of jabs are so bad that the opponent can easily punish her with Tardy Cancel and her Tardy Cancel options are not great either. Almost all of her specials are unsafe and some are unsafe ON HIT, but the worst part is that she has poor damage output. Which means you won't leave a dent unless you do a super.

Only a few souls has dared to play her on point. Some by mistake, and some who are simply just insane.

Normal Moves

Name
Command
Startup
Recovery
Hit Adv
Block Adv
Damage
Guard
Notes
N.png Lp.png
9
20
+1
+4
3
All
N.png Hp.png
13
32
+2
-8
7
All
D.png Lp.png
11
17
+9
+5
3
Crouching
D.png Hp.png
18
39
+2
-17
8
Crouching
N.png Lk.png
9
26
-4
-2
4
All
N.png Hk.png
14
25
+2
-1
8
All
D.png Lk.png
12
32
-1
-10
3
Crouching
D.png Hk.png
16
27
+4
-5
7
Crouching
U.png Lp.png
9
On landing, 1
-
-
3
Standing
U.png Hp.png
17
On landing, 13
-
-
7
Standing
U.png Lk.png
8
On landing, 1
-
-
3
Standing
U.png Hk.png
19
On landing, 1
-
-
10
Standing

Command Normals

Name
Command
Startup
Recovery
Hit Adv
Block Adv
Damage
Guard
Notes
Lp.png Lp.png Lp.png
16
46
-3
-22
5
All
Hp.png Hp.png
13
38
+2
-14
11
All
F.png Hp.png
15
45
-2
-21
10
All
F.png Hk.png
15
39
-
-15
11
All
Blowback
B.png Hp.png
20
46
-
-22
7
Standing
Overhead, Knockdown
B.png Hk.png
20
35
-
-11
10
All
Blowback
Df.png Hp.png
12
37
-
-8
8
All
Mini Launcher
Df.png Hk.png
19
32
-
-8
8
All
Mini Launcher
(Air) F.png Hp.png
14
On landing, 1
-
-
11
Standing
Slamming

Universals/Generics

Name
Command
Startup
Recovery
Hit Adv
Block Adv
Damage
Guard
Notes
P.png while facing away from opponent
10
16
2
8
3
All
K.png while facing away from opponent
9
37
-
-13
4
All
Blowback
P.png while running
12
31
-
-7
8
Standing
Overhead, Blowback
Lk.png while running
12
28
-
-6
5
Crouching
Blowback
Hk.png while running
12
32
-
-8
7
Standing
Overhead, Blowback

Throws

Name
Command
Startup
Recovery
Hit Adv
Block Adv
Damage
Guard
Notes
Lp.png + Hp.png, near opponent
10
37
-
-
27
-
Standing Throw
D.png + Lp.png + Hp.png, near opponent
10
47
-
-
32
-
Crouching Throw
Lp.png + Hp.png, when behind opponent
8
51
-
-
35
-
Back Throw
(Air) Lp.png + Hp.png, near opponent
1
-
-
-
39
-
Air Throw

Special Moves

Name
Command
Startup
Recovery
Hit Adv
Block Adv
Damage
Guard
Notes
Hurricane Stance / Wind Stance (weak)
Qcf.png Lp.png
24
46
-
-24
7
Crouching
Blowback
Hurricane Stance (strong) / Wind Stance (weak)
Qcf.png Hp.png
30
30
-
-6
7
All
Blowback
Rising Dragon Stance / Dragon Stance
Dp.png P.png (Hold to charge)
23
47
-26
-23
13~67
All
Blowback when charged
Swordflash Stance / Lightning Stance
Qcf.png K.png (Hold to charge)
26
24
-18
0
8~43
All
Blowback when charged
Rock Breaker Stance
Qcb.png P.png
39
47
-
-23
4
All
Knockdown
Frontal Turnover Stance / Front Stance
Qcb.png K.png
-
61
-
-
-
-
Special Roll

Burning Vigor Attacks

Name
Command
Startup
Recovery
Hit Adv
Block Adv
Damage
Guard
Notes
Performance Demonstration / Demonstration
Qcf.png Qcf.png P.png
36
94
-
-71
30
All
Blowback
Lecture Attack
Qcf.png Qcf.png K.png
19
29
-
-4
45
All
Blowback, Fixed damage

Team Up Techniques

Name
Command
Startup
Recovery
Hit Adv
Block Adv
Damage
Guard
Notes
Chairperson's One-Point Advice
Lp.png + Lk.png (or Hp.png + Hk.png)
25
49
-
-23
30
All
Team Up Technique, Guts Up + Heal Type
Horse Ride Smash
P.png + P.png + K.png (or K.png + K.png + P.png)
20
44
-
-20
100
All
Party Up Technique

Combos

Lp.png Lp.png Hp.png Hp.png ---.png F.png Hp.png ---.png Qcf.png Hp.png

Lk.png ---.png D.png Hp.png ---.png Hk.png ---.png B.png Hk.png

Lp.png Lp.png Hp.png Hp.png ---.png F.png Hp.png ---.png Qcf.png Qcf.png P.png

Lk.png ---.png D.png Hp.png ---.png Hk.png ---.png F.png Hp.png ---.png Dp.png Hp.png

Lk.png ---.png D.png Hp.png ---.png D.png Hk.png ---.png Df.png Hp.png ---.png U.png ---.png Lk.png Lk.png Hp.png Hk.png ---.png (Air) F.png Hp.png

Lp.png Lp.png Hp.png Hp.png ---.png Df.png Hk.png ---.png U.png ---.png Lp.png Lk.png Hp.png Hk.png ---.png (Air) F.png Hp.png

Videos

Skip to 2:24

Colors

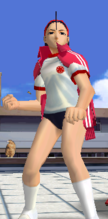
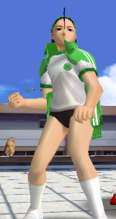
Lp.png Hp.png Lp.png+Hp.png
PJ Chairperson 1.png
PJ Chairperson 2.png
PJ Chairperson 3.png
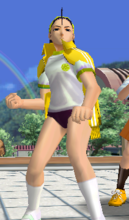
Lk.png Hk.png Lk.png+Hk.png
PJ Chairperson 4.png
PJ Chairperson 5.png
PJ Chairperson 6.png

Game Navigation

General
Controls
HUD
System
FAQ
Glossary
Characters
Batsu
Hinata
Kyosuke
Akira
Edge
Gan
Roy
Boman
Tiffany
Natsu
Shoma
Roberto
Hideo
Kyoko
Hyo
Daigo
Hayato
Ran
Nagare
Burning Batsu
Chairperson
Demon Hyo
Kurow
Momo
Powered Akira
Vatsu
Wild Daigo
Yurika
Zaki