Street Fighter 2: The World Warrior/Ryu: Difference between revisions

From SuperCombo Wiki
Line 723: Line 723:
|}
|}


=Advanced Strategy=
=Basic Strategy=
 
Note: This section also applies to Ken.
 
Ryu's main goal is to pressure his opponents by throwing hadokens, punish jump-ins with his shoryuken, and control space with pokes such as crouching forward (cr mk).  Ryu can fight both offensively and defensively.  If given the right opportunity, Ryu can end the round in seconds (usually if the opponent is dizzy) with fairly simple combos.  However, you shouldn't be focusing on this as it's too easy to mess up and get punished for attacking foolishly.  Be patient, stand your ground, and strike when you find an opening.  Never rush a match.  Stay strong and you can win.
 
=Match-Ups=
=Match-Ups=
Note: The matchup info I'm writing here also applies to Ken.  The only real difference between the two in World Warrior is their kick button throws.  Ken's kick throw tosses the opponent back farther than Ryu's, but otherwise they are identical fighters in this game.  Therefore WW Ken's page will mostly contain identical matchup info.  The good news is that, if your opponent picks Ryu first, you can just select Ken instead and play exactly as you would with Ryu. (Remember, mirror matches are not possible in Street Fighter II: The World Warrior.  However, the SNES version does allow mirror matches by inputting a special code.  Since this matchup section is for the arcade version, I won't be covering mirror matches.)

Revision as of 20:48, 16 October 2019

Street Fighter 2: The World WarriorSf2-ww.gif
Street Fighter 2: The World Warrior#Game ElementsStreet Fighter 2: The World Warrior#Game ElementsStreet Fighter 2: The World Warrior#CharactersStreet Fighter 2: The World Warrior#System InfoStreet Fighter 2: The World Warrior#MiscellaneousStreet Fighter 2: The World Warrior#Basic StrategyMvC3HeaderButtons.png

Sf2wwRyu.gif

Introduction

Color Options

Default
Ryu-old1.gif

Moves List

Normal Moves

Arm Throw (Seoi Nage): close, b or f + Medium or Hard Punch

Back Roll (Tomoe Nage): close, b or f + Medium or Hard Kick

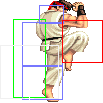
Axe Kick: close, Hard Kick

Drop Knee: Light Kick in air

Special Moves

Fireball (Hadouken): d, df, f + Punch

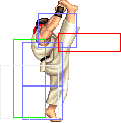
Dragon Punch (Shoryuken): f, d, df + Punch

Hurricane Kick (Tatsumaki Senpuu Kyaku): d, db, b + Kick

The Basics

Anti-Airs: Shoryuken,crouching High Punch,standing High Kick

High Pokes: standing Medium Punch

Low Pokes: crouching Medium Kick

Combos

  • cr.MK xx Hadoken or Shoryuken
  • cr.LP CPS1 Chain s.HP xx Hadoken

Hitboxes

Standing Normals

  • Standing LP:
Damage 6 Sf2ww-ryu-lp-s1.png Sf2ww-ryu-lp-a.png Sf2ww-ryu-lp-s1.png Sf2ww-ryu-lp-r1.png
Stun 1~7
Stun Timer 40
Chain Cancel Yes
Special Cancel Yes
Frame Advantage +6
Frame Count 2 4 4 1
Simplified 1+2 4 5
  • Standing MP:
Damage 16 Sf2ww-ryu-mp-s1.png Sf2ww-ryu-mp-s2.png Sf2ww-ryu-mp-a.png Sf2ww-ryu-mp-s2.png Sf2ww-ryu-mp-s1.png Sf2ww-ryu-lp-r2.png
Stun 5~11
Stun Timer 60
Chain Cancel No
Special Cancel Yes
Frame Advantage +10
Frame Count 1 2 4 3 3 1
Simplified 1+3 4 7
  • Standing HP:
Damage 26 Sf2ww-ryu-mp-s1.png Sf2ww-ryu-mp-s2.png Sf2ww-ryu-hp-a.png Sf2ww-ryu-mp-s2.png Sf2ww-ryu-mp-s1.png Sf2ww-ryu-lp-r2.png
Stun 11~17
Stun Timer 80
Chain Cancel No
Special Cancel No
Frame Advantage -6
Frame Count 3 2 6 10 12 1
Simplified 1+5 6 23
  • Standing LK:
Damage 8 Sf2ww-ryu-mp-s1.png Sf2ww-ryu-lk-s2.png Sf2ww-ryu-lk-a.png Sf2ww-ryu-lk-s2.png Sf2ww-ryu-mp-s1.png
Stun 1~7
Stun Timer 40
Chain Cancel Yes
Special Cancel No
Frame Advantage +3
Frame Count 3 3 8 4 1
Simplified 1+6 8 5
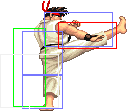
  • Standing MK:
Damage 16 Sf2ww-ryu-mp-s1.png Sf2ww-ryu-lk-s2.png Sf2ww-ryu-mk-a.png Sf2ww-ryu-lk-s2.png Sf2ww-ryu-mp-s1.png
Stun 5~11
Stun Timer 60
Chain Cancel No
Special Cancel Yes
Frame Advantage +1
Frame Count 5 6 12 6 1
Simplified 1+11 12 7
  • Standing HK:
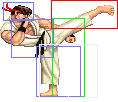
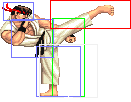
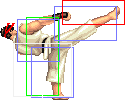
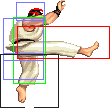
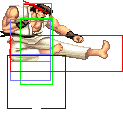
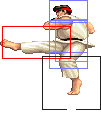
Damage 22 Sf2ww-ryu-hk-s1.png Sf2ww-ryu-hk-a1.png Sf2ww-ryu-hk-a2.png Sf2ww-ryu-hk-r1.png Sf2ww-ryu-hk-r2.png
Stun 11~17
Stun Timer 80
Chain Cancel No
Special Cancel No
Frame Advantage -2
Frame Count 2 4 8 10 7
Simplified 2+1 12 17

Close Standing Normals

  • Close Standing LP:
Damage 6 Sf2ww-ryu-cllp-s1.png Sf2ww-ryu-cllp-a.png Sf2ww-ryu-cllp-s1.png
Stun 1~7
Stun Timer 40
Chain Cancel Yes
Special Cancel Yes
Frame Advantage +6
Frame Count 1+2 4 5
  • Close Standing MP:
Damage 16 Sf2ww-ryu-mp-s1.png Sf2ww-ryu-clmp-s.png Sf2ww-ryu-clmp-a.png Sf2ww-ryu-clmp-r1.png Sf2ww-ryu-clmp-r2.png Sf2ww-ryu-clmp-s.png Sf2ww-ryu-mp-s1.png
Stun 5~11
Stun Timer 60
Chain Cancel No
Special Cancel Yes
Frame Advantage +2
Frame Count 1 2 2 6 4 3 4
Simplified 1+3 2 17
  • Close Standing HP:
Damage 22 Sf2ww-ryu-clhp-s.png Sf2ww-ryu-clhp-a1.png Sf2ww-ryu-clhp-a2.png Sf2ww-ryu-clhp-r1.png Sf2ww-ryu-clhp-r2.png
Stun 11~17
Stun Timer 80
Chain Cancel No
Special Cancel Yes
Frame Advantage -8
Frame Count 3 2 6 10 13
Simplified 1+3 8 23
  • Close Standing LK:
Damage 8 Sf2ww-ryu-mp-s1.png Sf2ww-ryu-cllk-s1.png Sf2ww-ryu-cllk-a1.png Sf2ww-ryu-cllk-s1.png Sf2ww-ryu-mp-s1.png
Stun 1~7
Stun Timer 40
Chain Cancel Yes
Special Cancel Yes
Frame Advantage +5
Frame Count 2 3 6 3 1
Simplified 1+5 6 4
  • Close Standing MK:
Damage 16 Sf2ww-ryu-clmk-s1.png Sf2ww-ryu-clmk-s2.png Sf2ww-ryu-clmk-a.png Sf2ww-ryu-clmk-s2.png Sf2ww-ryu-clmk-s1.png Sf2ww-ryu-mk-r1.png
Stun 5~11
Stun Timer 60
Chain Cancel No
Special Cancel Yes
Frame Advantage +6
Frame Count 2 1 6 4 4 1
Simplified 1+3 6 9
  • Close Standing HK:
Damage 24,6 Sf2ww-ryu-mp-s1.png Sf2ww-ryu-clhk-s1.png Sf2ww-ryu-clhk-a1.png Sf2ww-ryu-clhk-a2.png Sf2ww-ryu-clhk-s1.png Sf2ww-ryu-mp-s1.png
Stun 11~17
Stun Timer 80
Chain Cancel No
Special Cancel No
Frame Advantage +8
Frame Count 3 4 8 4 10 1
Simplified 1+7 12 11

Crouching Normals

  • Crouching LP:
Damage 6 Sf2ww-ryu-crlp-s1.png Sf2ww-ryu-crlp-a.png Sf2ww-ryu-crlp-s1.png Sf2ww-ryu-crlp-r1.png
Stun 1~7
Stun Timer 40
Chain Cancel Yes
Special Cancel Yes
Frame Advantage +6
Frame Count 2 4 4 1
Simplified 1+2 4 5
  • Crouching MP:
Damage 14 Sf2ww-ryu-crmp-s1.png Sf2ww-ryu-crmp-s2.png Sf2ww-ryu-crmp-a.png Sf2ww-ryu-crmp-s2.png Sf2ww-ryu-crmp-s1.png Sf2ww-ryu-crlp-r1.png
Stun 5~11
Stun Timer 60
Chain Cancel No
Special Cancel Yes
Frame Advantage +10
Frame Count 1 2 4 3 3 1
Simplified 1+3 4 7


  • Crouching HP:
Damage 22 Sf2ww-ryu-crhp-s1.png Sf2ww-ryu-crhp-a1.png Sf2ww-ryu-crhp-a2.png Sf2ww-ryu-crhp-r1.png Sf2ww-ryu-crhp-s1.png Sf2ww-ryu-crhp-r2.png
Stun 11~17
Stun Timer 80
Chain Cancel No
Special Cancel Yes
Frame Advantage -11
Frame Count 3 3 8 10 12 1
Simplified 1+3 11 23
  • Crouching LK:
Damage 6 Sf2ww-ryu-crlk-s1.png Sf2ww-ryu-crlk-a.png Sf2ww-ryu-crlk-s1.png Sf2ww-ryu-crlp-r1.png
Stun 1~7
Stun Timer 40
Chain Cancel Yes
Special Cancel Yes
Frame Advantage +6
Frame Count 2 4 4 1
Simplified 1+2 4 5
  • Crouching MK:
Damage 14 Sf2ww-ryu-crlk-s1.png Sf2ww-ryu-crlk-s2.png Sf2ww-ryu-crmk-a.png Sf2ww-ryu-crlk-s2.png Sf2ww-ryu-crlk-s1.png Sf2ww-ryu-crlp-r1.png
Stun 5~11
Stun Timer 60
Chain Cancel No
Special Cancel Yes
Frame Advantage +6
Frame Count 1 2 6 4 4 1
Simplified 1+3 6 9
  • Crouching HK:
Damage 22 Sf2ww-ryu-crhk-s1.png Sf2ww-ryu-crhk-a.png Sf2ww-ryu-crhk-s2.png Sf2ww-ryu-crhk-r1.png Sf2ww-ryu-crhk-r2.png
Stun 11~17
Stun Timer 80
Chain Cancel No
Special Cancel Yes
Frame Advantage +2
Frame Count 3 6 6 8 11
Simplified 1+3 6 25

Aerial Normals

  • Neutral Jumping LP:
Damage 10 Sf2ww-ryu-njlp-s1.png Sf2ww-ryu-njlp-a.png
Stun 1~7
Stun Timer 40
Frame Count 2
  • Diagonal Jumping LP:
Damage 8 Sf2ww-ryu-njlp-s1.png Sf2ww-ryu-djlp-a.png
Stun 1~7
Stun Timer 40
Frame Count 2
  • Neutral/Diagonal Jumping MP:
Damage 16 Sf2ww-ryu-njlp-s1.png Sf2ww-ryu-jmp-s2.png Sf2ww-ryu-jmp-a.png Sf2ww-ryu-jmp-s2.png Sf2ww-ryu-jmp-r1.png Sf2ww-ryu-jmp-r2.png Sf2ww-ryu-jmp-r3.png
Stun 5~11
Stun Timer 50
Frame Count 2 2 20 4 4 4
Simplified 4 20
  • Neutral Jumping HP:
Damage 24 Sf2ww-ryu-njlp-s1.png Sf2ww-ryu-jmp-s2.png Sf2ww-ryu-njhp-a.png Sf2ww-ryu-jmp-s2.png Sf2ww-ryu-jmp-r1.png Sf2ww-ryu-jmp-r2.png Sf2ww-ryu-jmp-r3.png
Stun 11~17
Stun Timer 60
Frame Count 2 2 20 4 4 4
Simplified 4 20
  • Diagonal Jumping HP:
Damage 22 Sf2ww-ryu-njlp-s1.png Sf2ww-ryu-jmp-s2.png Sf2ww-ryu-njhp-a.png Sf2ww-ryu-jmp-s2.png Sf2ww-ryu-jmp-r1.png Sf2ww-ryu-jmp-r2.png Sf2ww-ryu-jmp-r3.png
Stun 11~17
Stun Timer 60
Frame Count 2 2 8 4 4 4
Simplified 4 8
  • Neutral Jumping LK:
Damage 10 Sf2ww-ryu-njlk-s1.png Sf2ww-ryu-njlk-a.png Sf2ww-ryu-njlk-r1.png
Stun 1~7
Stun Timer 40
Frame Count 3 40
  • Diagonal Jumping LK:
Damage 8 Sf2ww-ryu-djlk-s1.png Sf2ww-ryu-djlk-s2.png Sf2ww-ryu-djlk-a.png
Stun 1~7
Stun Timer 40
Frame Count 2 3
Simplified 5
  • Neutral Jumping MK:
Damage 16 Sf2ww-ryu-njmk-s1.png Sf2ww-ryu-njmk-a.png Sf2ww-ryu-jmp-r1.png Sf2ww-ryu-jmp-r2.png Sf2ww-ryu-jmp-r3.png
Stun 5~11
Stun Timer 50
Frame Count 5 13 6 6
Simplified 5 13
  • Diagonal Jumping MK:
Damage 16 Sf2ww-ryu-djlk-s1.png Sf2ww-ryu-djmk-s1.png Sf2ww-ryu-djmk-a.png Sf2ww-ryu-djmk-s1.png Sf2ww-ryu-jmp-r1.png Sf2ww-ryu-jmp-r2.png Sf2ww-ryu-jmp-r3.png
Stun 5~11
Stun Timer 50
Frame Count 2 3 13 3 3 3
Simplified 5 13
  • Neutral Jumping HK:
Damage 24 Sf2ww-ryu-njhk-s1.png Sf2ww-ryu-njhk-a1.png Sf2ww-ryu-njhk-a2.png Sf2ww-ryu-njhk-r1.png Sf2ww-ryu-njhk-r2.png Sf2ww-ryu-jmp-r1.png Sf2ww-ryu-jmp-r2.png
Stun 11~17
Stun Timer 60
Frame Count 2 4 4 3 3 3
Simplified 2 8
  • Diagonal Jumping HK:
Damage 22 Sf2ww-ryu-djlk-s1.png Sf2ww-ryu-djmk-s1.png Sf2ww-ryu-djhk-a.png Sf2ww-ryu-djmk-s1.png Sf2ww-ryu-jmp-r1.png Sf2ww-ryu-jmp-r2.png Sf2ww-ryu-jmp-r3.png
Stun 11~17
Stun Timer 60
Frame Count 2 3 7 3 3 3
Simplified 5 7

Throws

  • Seoi Nage: (←/→ + HP) and Tomoe Nage: (←/→ + HK)
Damage 32 Sf2ww-ryu-throw.png
Duration 130
Stun 7~13
Stun Timer 100
Range (from axis) 48
Range advantage 19

Special Moves

  • Hadoken: (↓↘→ + P)

Startup:

Sf2ww-ryu-hdk-s1.png Sf2ww-ryu-hdk-s2.png Sf2ww-ryu-hdk-s3.png Sf2ww-ryu-hdk-s4.png
Frame Count 2 6 1 1

Active:

LP version:

Damage 12 Sf2ww-ryu-hdk-lp-a1.png Sf2ww-ryu-hdk-lp-a2.png Sf2ww-ryu-hdk-lp-a3.png Sf2ww-ryu-hdk-lp-a4.png
Stun 13~19
Stun Timer 120
Frame Advantage -
Frame Count 1 1 2 2..
Simplified 40

MP version:

Damage 14 Sf2ww-ryu-hdk-mp-a1.png Sf2ww-ryu-hdk-mp-a2.png Sf2ww-ryu-hdk-mp-a3.png Sf2ww-ryu-hdk-mp-a4.png
Stun 13~19
Stun Timer 120
Frame Advantage -
Frame Count 1 1 2 2..
Simplified 40

HP version:

Damage 16 Sf2ww-ryu-hdk-hp-a1.png Sf2ww-ryu-hdk-hp-a2.png Sf2ww-ryu-hdk-hp-a3.png Sf2ww-ryu-hdk-hp-a4.png
Stun 13~19
Stun Timer 120
Frame Advantage -
Frame Count 1 1 2 2..
Simplified 40


  • Shoryuken: →↓↘ + Punch

Startup:

Damage 32 Sf2ww-ryu-srk-s1.png Sf2ww-ryu-srk-a1.png Sf2ww-ryu-srk-a2.png Sf2ww-ryu-srk-r1.png Sf2ww-ryu-srk-r2.png Sf2ww-ryu-srk-r3.png
Stun 13~19
Stun Timer 120
Frame Advantage -18/-26/-40
Jab 4 4 14 6 11 5
Strong 4 4 22 6 14 5
Fierce 4 4 26 6 21 5
  • Tatsumaki Senpuu Kyaku: ↓↙← + Kick

Startup:

Damage 22 Sf2ww-ryu-tsk-s1.png Sf2ww-ryu-tsk-s2.png Sf2ww-ryu-tsk-s3.png
Stun 13~19
Stun Timer 120
Frame Advantage -1
Frame Count 4 4 3


Active:

Sf2ww-ryu-tsk-a1.png Sf2ww-ryu-tsk-m1.png Sf2ww-ryu-tsk-a2.png Sf2ww-ryu-tsk-m2.png
Frame Count 3 3 3 3

Short: 1 Time
Foward: 2 Times
Rounhouse: 3 Times

Recovery:

Sf2ww-ryu-tsk-r1.png Sf2ww-ryu-tsk-r2.png Sf2ww-ryu-tsk-r3.png Sf2ww-ryu-tsk-r4.png
Frame Count 4 4 4 0

Misc Animations

Walk back Neutral Walk Fwd Crouch
Sf2ww-ryu-bwd.png Sf2ww-ryu-cllp-n.png Sf2ww-ryu-fwd.png Sf2ww-ryu-cr-n.png
  • Standing reel:
Sf2ww-ryu-reel1.png Sf2ww-ryu-reel2.png Sf2ww-ryu-reel3.png Sf2ww-ryu-reel4.png
  • Standing gut reel:
Sf2ww-ryu-gutreel1.png Sf2ww-ryu-gutreel2.png Sf2ww-ryu-gutreel3.png Sf2ww-ryu-gutreel4.png
  • Crouching reel:
Sf2ww-ryu-creel1.png Sf2ww-ryu-creel2.png Sf2ww-ryu-creel3.png
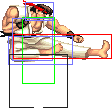
  • Dizzy:
Sf2ww-ryu-dizzy1.png Sf2ww-ryu-dizzy2.png Sf2ww-ryu-dizzy3.png

Basic Strategy

Note: This section also applies to Ken.

Ryu's main goal is to pressure his opponents by throwing hadokens, punish jump-ins with his shoryuken, and control space with pokes such as crouching forward (cr mk). Ryu can fight both offensively and defensively. If given the right opportunity, Ryu can end the round in seconds (usually if the opponent is dizzy) with fairly simple combos. However, you shouldn't be focusing on this as it's too easy to mess up and get punished for attacking foolishly. Be patient, stand your ground, and strike when you find an opening. Never rush a match. Stay strong and you can win.

Match-Ups

Note: The matchup info I'm writing here also applies to Ken. The only real difference between the two in World Warrior is their kick button throws. Ken's kick throw tosses the opponent back farther than Ryu's, but otherwise they are identical fighters in this game. Therefore WW Ken's page will mostly contain identical matchup info. The good news is that, if your opponent picks Ryu first, you can just select Ken instead and play exactly as you would with Ryu. (Remember, mirror matches are not possible in Street Fighter II: The World Warrior. However, the SNES version does allow mirror matches by inputting a special code. Since this matchup section is for the arcade version, I won't be covering mirror matches.)

Vs. Ken

  • 4.5 - 5.5

This is basically as close as it gets to a mirror match in WW. Ryu has some slight differences with some of his hurtboxes that are worse than Ken's, but I don't think this gives Ken anything more than a slight advantage in this matchup (I could be wrong though). The only other advantage Ken has that you'll want to watch out for is Ken's kick button throw which tosses you farther back than your own version of the throw. This means that Ken can throw you into the corner more easily, although this matchup is still pretty even regardless.

Round start: Throw a Hadoken, walk forward slightly and poke Ken with a normal attack like cr mk, or do nothing and wait for him to try something. You'll probably see most Ryu/Ken players start a round by immediately throwing a fireball, but doing this too often gets very predictable. If you expect your opponent to start the round like this, you can try jumping immediately and hit him with j hp or j hk. You can link into st hp, cr hp, st hp, cr mk, etc. if you jumped at him early enough before he could recover from throwing his fireball. If you think you hit him too early, you can try jumping back to avoid a sac throw. You can also just throw a fireball at the start to trade with Ken's. If you suspect that Ken will jump at you at the start of the round, wait and see what happens. If he does jump at you, hit him with a lp shoryuken.

Basic strategy: Ken has the same tools as you to win this fight. Your main goal is to defend yourself better and use your offense more effectively than him. Don't become too predictable. Use hadokens wisely and try mixing up the speed you're throwing them at. If Ken tries jumping over a fast fireball from far away, you can try timing another fireball to hit him before he lands. Be careful throwing fireballs when he's closer to you as he could jump at you and attack before you can counter or block. You can try baiting him to jump at you by whiffing a lp or mp and then counter his jump with a shoryuken. Try to poke at Ken with normals like cr mk, hitting him low with the tip of your foot. This can help you apply pressure and control space. You can cancel out of this with a hp fireball to push him further back.

Vs. E.Honda

Don't abuse Hadoken

Vs. Chun Li

Spinning Bird Kick can beat Hadoken

Vs. Blanka

Its a ground to ground battle

Vs. Zangief

Keep him away

Vs. Guile

Sonic Boom vs Hadoken, he had better anti air

Vs. Dhalsim

Hadoken him at far distance and get close jump in him Template:Street Fighter II