Drakonzeta (talk | contribs) (→Combos) |
|||
| Line 1,399: | Line 1,399: | ||
<br> | <br> | ||
<br> | <br> | ||
*<b> | *<b>E</b>: bY activation > bX > b[X] (184 Damage) | ||
<br> | <br> | ||
No alternate route here, the bX stun is needed to land the b[X]. | No alternate route here, the bX stun is needed to land the b[X]. | ||
<br> | <br> | ||
*<b> | *<b>S</b>: bY activation > bX > Y+B (178 Damage) | ||
<br> | <br> | ||
Entirely standard. | Entirely standard. | ||
| Line 1,419: | Line 1,419: | ||
<b>Yep.</b> | <b>Yep.</b> | ||
<br> | <br> | ||
<br> | <br> | ||
'''bX''' | |||
<br> | |||
<br> | |||
*<b>N</b> bX > nX > fA (102 damage) | |||
<br> | |||
Standard bX confirm into nightmare that works universally. However, on the majority of the cast, can be optimized a lot further. | |||
<br> | <br> | ||
*sY > nA | *<b>N</b> bX > j.fY > j.A > j.AA > sY > nX > nA > nX > fA (143 Damage) | ||
<br> | <br> | ||
Optimized nightmare confirm off bX. Would be standard, but timing of the j.fY is really character-specific and flat-out does not work on a couple characters, notably the pikachus. Generally speaking, you want to j.fY at around the height of the character's head-too high on smalls and it'll whiff, too low on talls and they'll get launched directly into the net, not giving you enough time to set up your sY. | |||
<br> | <br> | ||
* | *<b>E</b> bX > b[X] (142 Damage) | ||
<br> | <br> | ||
Nothing spectacular here. Just good damage for a field extension. | |||
<br> | <br> | ||
*sY > | (Check this combo later, probably char-specific and maybe doesn't work consistently?) | ||
*bX > j.fY > j.AA > sY > nX > nA > Y+B (135 Damage) | |||
<br> | <br> | ||
There's nothing really of note with orb routes. They just do a lot of damage. | |||
<br> | <br> | ||
*<b>NO</b> | *<b>NO</b> bX > n[A:4] > nX > fA (182 Damage). | ||
<br> | <br> | ||
<br> | <br> | ||
*<b>EO</b> | *<b>EO</b>bX > n[A:4] > b[X] (202 Damage) | ||
<br> | <br> | ||
<br> | <br> | ||
*<b>SO</b> | *<b>SO</b> bX > n[A:4] > Y+B (198 Damage) | ||
<br> | <br> | ||
<br> | <br> | ||
''' | '''Clone explosion''' | ||
<br> | <br> | ||
This refers to all clone explosions, which include sY bA, ]Y[ bA, and guard point bA. The displayed damage will be from sY bA, though all three vary in damage slightly. | |||
<br> | <br> | ||
* | *<b>N</b> Clone explosion > bX > nX > fA (92 Damage) | ||
<br> | <br> | ||
Standard stuff. Clone explosions scale hard so this won't be as explosive damage as other field combos. | |||
<br> | <br> | ||
* | *<b>E</b> Clone explosion > bX > b[X] (112 Damage) | ||
<br> | <br> | ||
<br> | <br> | ||
* | *<b>S</b> Clone explosion > bX > Y+B (108 Damage) | ||
<br> | <br> | ||
Thanks to high scaling and hit counts, orb combos usually don't get much in the way of extra damage. | |||
<br> | <br> | ||
* | *<b>NO</b> Clone explosion > n[A:4] > nX > fA (114 Damage) | ||
<br> | <br> | ||
<br> | <br> | ||
* | *<b>EO</b> Clone explosion > bX > n[A:4] > b[X] (133 Damage) | ||
<br> | <br> | ||
<br> | <br> | ||
* | *<b>SO</b> Clone explosion > bX > n[A:$] > Y+B (132 Damage) | ||
<br> | <br> | ||
<br> | <br> | ||
''' | '''n[A:4]''' | ||
<br> | <br> | ||
No non-orb combos here, as you're spending them at the start. However, this is mostly standard stuff. | |||
<br> | <br> | ||
* | *<b>NO</b> n[A:4] > b[X] > nX > fA (186 Damage) | ||
<br> | <br> | ||
<br> | <br> | ||
* | *<b>EO</b> n[A:4] > bX > b[X] (198 Damage) | ||
<br> | <br> | ||
<br> | <br> | ||
* | *<b>SO</b> n[A:4] > bX > Y+B (194 Damage) | ||
<br> | <br> | ||
<br> | <br> | ||
<br> | <br> | ||
'''Clone Pulse''' | |||
<br> | <br> | ||
Finally, if you're close enough, you can combo off of dark pulsing with a clone up. Again, this can be any clone, but sY clones will be used to calculate damage. These are pretty uncommon situations, however, so you won't really need to know these. | |||
<br> | <br> | ||
*<b>N</b> Clone Pulse > bX > nX > fA (114 Damage) | |||
<br> | <br> | ||
<br> | <br> | ||
*<b>E</b> Clone Pulse > bX > b[X] (112 Damage) | |||
<br> | <br> | ||
<br> | <br> | ||
*<b>S</b> Clone Pulse > bX > Y+B (108 Damage) | |||
<br> | <br> | ||
<br> | <br> | ||
*<b>NO</b> sY > nA > n[A:4] > bX > nX > fA (131 Damage) | |||
<br> | <br> | ||
<br> | <br> | ||
*<b>EO</b> sY > nA > n[A:4] > bX > b[X] (136 Damage) | |||
<br> | <br> | ||
<br> | <br> | ||
*<b>SO</b> sY > nA > n[A:4] > bX > Y+B (135 Damage) | |||
<br> | <br> | ||
<br> | <br> | ||
Revision as of 10:47, 11 March 2018
Introduction
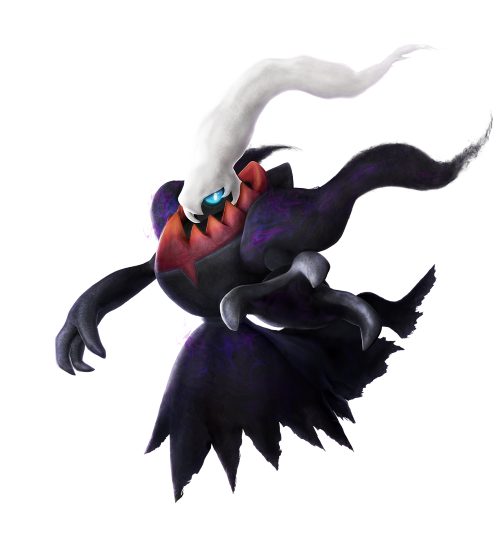
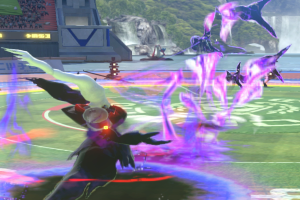
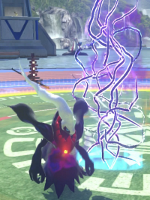
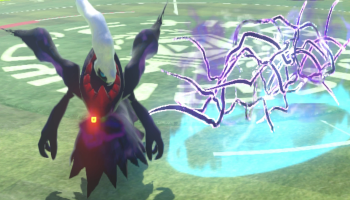
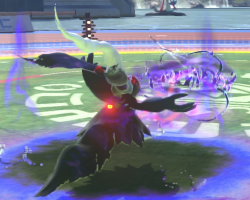
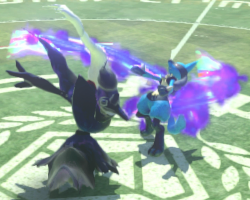
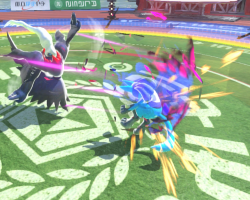
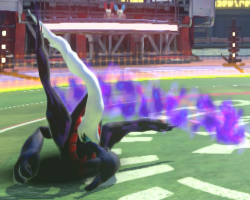
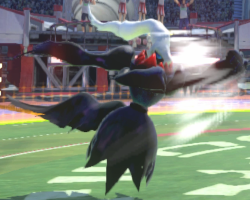
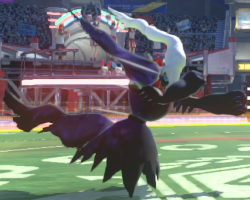
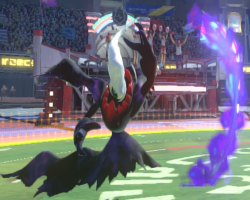
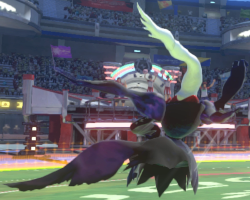
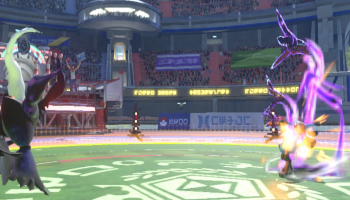
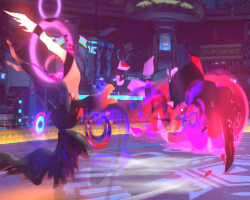
Darkrai is a mostly defensive binary state character with a very strong field phase and an overwhelming Bad Dreams Rising or “nightmare mode” state. In field, he excels at setting traps and punishing approaches by his opponent, and with a victorious field and a nightmare mode achieved, his good mobility, arsenal of invulnerable moves, filthy okizeme and strong chip damage make a nightmare darkrai among the most fearsome characters in the game.
However, he does have notable weaknesses. On the whole, his frame data is extremely slow, both in field and in duel. While he is good at punishing approaches in field, his lack of long-range counter pierces and otherwise fast projectiles make forcing the opponent to approach him difficult. This is not even to mention how he struggles against characters with longer-ranged options that have no need to approach him in the first place.
Furthermore, if he fails to attain a nightmare state, his duel phase is laughably weak. While nightmare can subsist without good frame data, the lack of mobility, invulnerable options, and setups in a “regular state” duel means darkrai can truly struggle if he does lose field or otherwise shifts without nightmare.
- 540 HP
- 200 CC Synergy Gauge
- Burst Mode Duration: 14 Seconds
- Shield: Normal
- High Stance: Charges Synergy Gauge (can move extremely slowly while active).
- Low Stance: Invincible against Highs on frame 1 (can move while active).
- FP Forward Dash: 25 Frames
- FP Back Dash: 25 Frames (Invincible from frame 1-8)
- FP Side Dash: 33 Frames
- DP Forward Dash: 21 Frames
- DP Back Dash: 25 Frames (Invincible from frame 1-8)
- BDR Forward Dash: 22 Frames (Invincible from frame 5-26)
- BDR Back Dash: 26 Frames (Invincible from frame 1-22)
Darkrai has air control when jumping.
- Darkrai can move forwards and backwards during a neutral jump.
- Darkrai can increase the distance of a forward or backwards jump by holding the direction.
- Darkrai can halt the distance of a forward or backwards jump by pressing the opposite direction.
General Moves
| Bad Dreams Rising | ||||||
| Attack | Damage | PSP | Height | Impact | Hit Adv | Block |
| N/A | N/A | N/A | N/A | N/A | N/A | N/A |
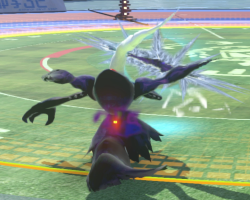
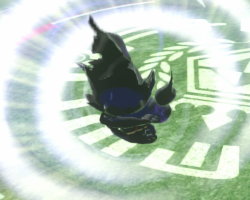
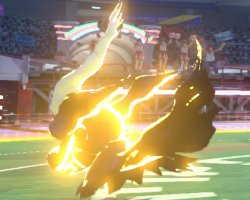
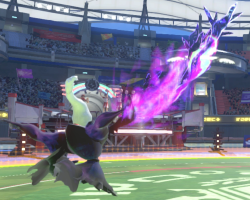
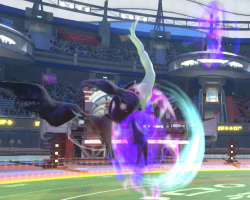
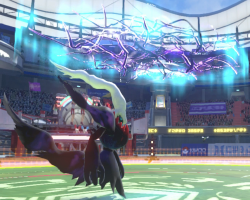
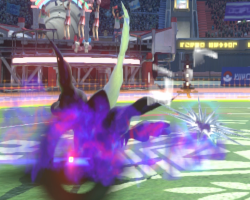
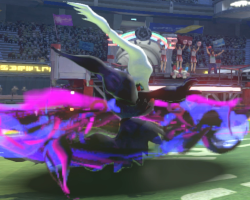
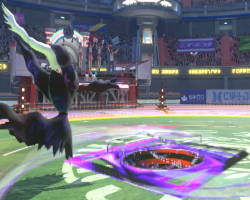
Bad Dreams Rising (otherwise known as Nightmare Mode, BDR, or NM for short) puts Darkrai in a powered up state. To enter this state, Darkrai must land a Dark Void on the opponent or phase shift from Field to Duel while in Burst Mode, aside from shield breaks. All Pokemon moves are enhanced. Darkrai's movement speed is slightly increased. Gains access to two extra Pokemon moves, 2A Dream Eater and 8A Nightmare. Rifts are now automatically activated without the need of Nasty Plot. Weak moves deal hitstun against Light Armor. Rifts are unaffected by this. Specific moves can cancel into Teleportation (On hit, block, and whiff). Forward Dash receives invincibility frames and is able to cross-up the opponent. Back Dash receives added invincibility frames. In Bad Dreams Rising, Darkrai is unable to break shields. Rifts no longer deal chip damage as well, aside from that of j.X. Darkrai is brought out of Bad Dreams Rising if the phase shifts from Duel to Field, or if Darkrai is hit with a non-shifting command grab or the first hit of psystrike. |
| Y+B Grab | ||||||
| Attack | Damage | PSP | Height | Impact | Hit Adv | Block |
| Grab | FP 80 / DP 90 | 12 | N/A | i11 | FP Shift (+8) / DP Shift | N/A |
Field Phase: When in Burst Mode, activates Bad Dreams Rising upon phase shifting from field. |
Solid grab. Good damage for field, good startup and range. Usually not a preferred option due to normally
not gaining nightmare or ending it prematurely, though it is important to threaten now and again.
| X+A / [X+A] Counter Attack | ||||||
| Attack | Damage | PSP | Height | Impact | Hit Adv | Block |
| Counter | 80 / 100 | 3 | Special Mid | i35 / i55 | 0 / Launch | -8 / 0 |
Darkrai is put into a counter armor state from frame 1-28 (48 if charged). When in Burst Mode, activates Bad Dreams Rising upon phase shifting from field. |
Darkrai's CA is of sharply limited usage, almost entirely eclipsed by Nasty Plot. The latter nightmare
confirms without a support, is generally safer, puts out a hitbox faster, and can activate and set traps.
| j.R Teleportation | ||||||
| Attack | Damage | PSP | Height | Impact | Hit Adv | Block |
| N/A | N/A | N/A | N/A | N/A | N/A | N/A |
Teleports from the air to the ground. Can teleport through enemies, even outside nightmare. Can teleport forward, backwards, or straight downward in Duel Phase. Can teleport left, right, backwards, or straight downward in Field Phase. |
Very useful mobility and mixup option, though some care should be taken. Has a large amount of
invulnerability and can mix up where you're teleporting to, but is rather laggy. Also notable in
usage is the ability to teleport through projectiles.
| ]Y[ Release Y | ||||||
| Attack | Damage | PSP | Height | Impact | Hit Adv | Block |
| N/A | N/A | N/A | N/A | i5 | N/A | N/A |
Disappears, creates a phantom, then reappears in the same spot. Invincible from frame 5-22. +1 Orb |
The invulnerability on ]Y[ is good for dodging non-true strings, but aside from that it's mostly
good for oki in RS. Having a clone up means you can threaten both Dark Pulse and Nasty Plot on wakeup,
which are both +10 on block CA-safe options that nightmare confirm. Since you can mix in grabs as well,
this is a strong position. Just be careful of projectile invulnerable/armor moves like Light Screen.
| ]X[ Release X | ||||||
| Attack | Damage | PSP | Height | Impact | Hit Adv | Block |
| N/A | N/A | N/A | N/A | i43 | N/A | N/A |
Darkrai takes a bow, and consumes all orbs to receive healing and buffs. With 0 orbs, heals 10 recoverable HP. With 1 orb, heals 30 recoverable HP. With 2 orbs, heals 30 recoverable HP and grants a 4-second Defense buff. With 3 orbs, heals 60 recoverable HP and grants an 8-second Attack and Defense buff. With 4 orbs, heals 60 recoverable HP, grants an 8-second Attack and Defense buff, and gives Darkrai 30cc of Synergy. |
Given how slow it is, ]X[ is not a neutral tool in the slightest. However, the four-orb buff is extremely strong, so when an
opportunity arises, it is nice to take it. The primary instances of this is to "punish" opponents for not approaching in field
by bowing behind a rift. Another common use is after 2x 4x loops in nightmare, as you have enough time to bow and still
retain the advantage if done properly.
Field Phase Moves
| nY | |||||
| Attack | Damage | Height | Impact | Hit Adv | Block |
| Normal | 48 | Special Mid | i23 | +8 | -8 |
Darkrai throws out three orb projectiles that home in on the opponent. Special cancelable. |
Good harassment tool. A bit slow, but really good damage for an nY and extremely durable. Being able to special cancel
is also really useful, as it lets you pressure with nY trap activation or nY [A:4].
| sY | |||||
| Attack | Damage | Height | Impact | Hit Adv | Block |
| N/A | N/A | N/A | N/A | N/A | N/A |
Darkrai claws the ground, creating a phantom. Invincible against Highs on frame 1. Special cancelable. +1 Orb |
A tool with fairly limited use, especially since ]Y[ exists. Most of what it's useful for is evasion, getting out
of the way of projectiles or most Aqua Jet mixups on block. Extremely laggy, but can be cancelled into
specials to slightly alleviate this.
| fY | |||||
| Attack | Damage | Height | Impact | Hit Adv | Block |
| Normal | 60 / 20 / 88 (30) | Mid / Low / Mid | i23 | Shift / Stun / Launch | -8 |
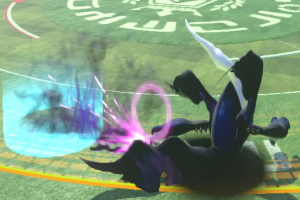
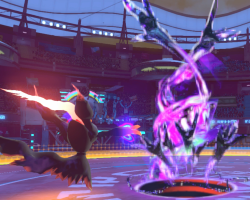
Darkrai summons a pillar of hands that have high vertical height. Leaves behind a puddle that stuns the opponent if they come in contact. The initial swipe deletes projectiles in its hitbox. Has invulnerability to Highs, Mid-Highs, and Special Mids from frame 5. The puddle can be activated with Nasty Plot, summoning a pillar of hands that chases down the opponent. When in Burst Mode, activates Bad Dreams Rising upon phase shifting with the initial swing. +1 Orb |
The core of Darkrai's field offense. Fast moving, high damage, nightmare confirm, and very good at catching opponents
out of the air once it's set. If you can get away with setting fY round start, it's a good idea to do so, but be careful
of characters that can punish you for it. Also good to be aware that it does have a grounded hitbox while it is set,
meaning sitting in the puddle gives you a modicum of protection against melee.
| bY | |||||
| Attack | Damage | Height | Impact | Hit Adv | Block |
| Normal | 30 / 74 (20) | Mid High / Mid High | i23 | 0 / Stun | -8 |
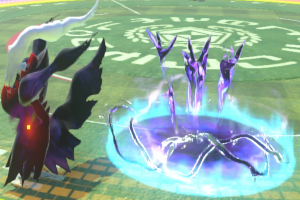
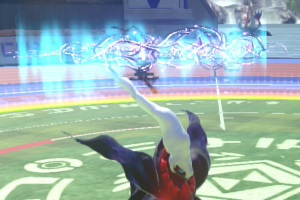
Darkrai creates a rift. After a short amount of time, the rift will activate and stun the opponent. Both the initial swipe and the activated vines delete projectiles. Can be activated immediately with Nasty Plot. Holding bY (b[Y]) will cause the rift to stay inactive until activated by Nasty Plot. The rift can be angled to darkrai's sides by inputting diagonally back. After blocking the attack from the rift, the hitbox is no longer active. +1 Orb |
While fY is the core of Darkrai's offense in field, bY is the core of his defense. The
projectile deletion is extremely helpful, and once the rift is activated, it gives a nice
wall of high-damage nightmare confirm and projectile deletion to hide behind and
set up again. Like most of darkrai's buttons, it's laggy so be careful with throwing it
out willy-nilly, but it's extremely useful.
| j.Y / j.fY / j.sY | |||||
| Attack | Damage | Height | Impact | Hit Adv | Block |
| Normal | 20 / 20 | Mid High / Mid | i15 | -12 / Stun | -33 |
Darkrai throws out a trap. The trap is based on the direction input from the j.Y. Inputting a forward direction during j.Y creates a ceiling trap that stuns. Inputting a neutral or back direction creates a vertical wall trap that stuns. Inputting a left or right direction creates a horizontal wall trap that stuns. Special cancellable. Holding down Y throws the net further +1 Orb |
A bit of an awkward tool. Mostly used for combos, and occasionally for setups. Not as strong as
its duel counterpart due to the comparatively open nature of Field Phase, but does give an orb.
| bX / b[X] | |||||
| Attack | Damage | Height | Impact | Hit Adv | Block |
| Normal | 70 / 106 / 50 (15) | Mid Low | i19 / i39 | Stun | -8 / +4 |
Darkrai thrusts forward and stuns the opponent. When charged, the move counter pierces and also places a mirror. If the mirror is hit by an opponent's projectile, the mirror turns into a set of jaws that tracks down the opponent. The mirror can also be activated into the jaws with Nasty Plot. +1 Orb (b[X] Only) |
Darkrai's second new tool with the advent of DX and definitely the stronger one. bX is a godly whiff punish, great at
smacking people trying to run at you, great to throw out occasionally as it's safe on block, great in combos, and b[X]
is a strong oki. This is definitely one of the moves you'll be using most frequently.
| j.X | |||||
| Attack | Damage | Height | Impact | Hit Adv | Block |
| Normal | 80 | MH | i39 | Shift (Knockdown) | -8 |
Darkrai dives headfirst to the ground. Teleports backwards, behind the spot at which Darkrai landed. When in Burst Mode, activates Bad Dreams Rising upon phase shifting. |
A move with sharply limited utility, mostly due to how slow it is. Can be used as a combo ender in burst mode,
but grab does the same amount and is easier to land. Not something you want to use often.
| X Homing Attack 1 | |||||
| Attack | Damage | Height | Impact | Hit Adv | Block |
| Normal | 40 | Mid | i25 | +8 | -8 |
Darkrai homes in on the opponent and does two strikes. Throw crush. Can be canceled with block or jump. Special cancelable. |
| XX / X[X] Homing Attack 2 | |||||
| Attack | Damage | Height | Impact | Hit Adv | Block |
| Normal | 40 / 80 | M | i25 | Shift (+8) | -8 / Guard Break |
Following up from Homing Attack 1, Darkrai throws out a rift that has a large reach. Can be charged to guard break/counter pierce. If Homing Attack 1 was blocked, there is a 26 frame window to punish a charged Homing Attack 2. When in Burst Mode, activates Bad Dreams Rising upon phase shifting. |
Darkrai's homing is largely a grab break, perfect block, and combo tool. Since it's so slow, it's not something you want to do in neutral.
It is special cancellable though and does combo into dark void. However, this means you basically never want to use homing 2 outside
of burst, and even then a grab after a stun will usually do more than homing 1+2.
Weak Moves
| 2Y | ||||||
| Attack | Damage | PSP | Height | Impact | Hit Adv | Block |
| Normal | 30 | 0 | Low | i15 | +8 | -8 |
A quick low swipe. Special / 2X cancelable. In Bad Dreams Rising, can press R to cancel into Teleportation. |
Good, fast, special cancellable poke. Outside nightmare, 2yx]y[ gets good oki. In nightmare, 2y8aa[x] gets really good
damage, while 2yx leads into loops. Good range and safe on block, only issue is that it's low. One of his best normals.
| 4Y / 4YY / 4YYY (4YY:Y) | ||||||
| Attack | Damage | PSP | Height | Impact | Hit Adv | Block |
| Normal | 20 / 10 / 30 (50) | 0 / 0 / 3 | High / Special Mid / Mid | i15 | +4 / 0 / +8 (Launch) | -8 / -8 / -12 |
Continuous punches that advance Darkrai forward. The Just Frame timing for 4YYY is found shortly after inputting 4YY, around when 4YY lands. |
Fast but high poke that doesn't lead to much on hit. Mostly used as a combo ender for stuff that
can't confirm into nightmare. Can be used for tick throws or just as a jab.
| 5Y | ||||||
| Attack | Damage | PSP | Height | Impact | Hit Adv | Block |
| Normal | 20 | 0 | Mid | i19 | +4 | -4 |
Special / 8X cancelable. Goes into 5YY. In Bad Dreams Rising, can press R to cancel into Teleportation. |
Slow jab with deceptively short range. Outside nightmare, mostly used as a faster, lower-psp nightmare combo
ender than 5x. In nightmare, however, being able to cancel into dashes and specials-in particular dream eater
makes it a strong mixup and oki tool.
| 6Y (6:Y) | ||||||
| Attack | Damage | PSP | Height | Impact | Hit Adv | Block |
| Normal | 40 (60) | 3 | Mid | i19 | Launch | -8 (+4) |
An uppercut that is invincible against Highs on frame 5. The Just Frame version can be done by pressing forward and Y on the exact same frame. |
A really strong button that doesn't have that much place in Darkrai's kit. Abusing the + frames and
high invulnerability requires you to be up close, where darkrai doesn't usually like to be. Plus, it doesn't
combo into nightmare on hit. Still, a strong button and some supports can make it combo into nightmare.
Has a bit more utility in nightmare, as it combos into 2yx on nearly the entire cast.
| 8Y / 8[Y] | ||||||
| Attack | Damage | PSP | Height | Impact | Hit Adv | Block |
| Normal | 76 / 72 | 3 / 0 | High / Mid | i23 / i43 | Launch / +28 | -8 / +24 |
High and Mid High invincible starting on frame 5. Charging 8Y spawns a wave of hands that pulls the opponent closer to Darkrai. Charging 8Y gives added High and Mid High invincibility frames. 8[Y] loses the hitbox that 8Y has. |
Solid anti-air. A bit slow, but has a huge hitbox, combos into a good damage nightmare on anti-air hit.
The charged version gives you a ton more head invulnerable frames to get through projectiles and the like,
plus combos into nightmare if you're close enough. Furthermore, it naturally puts you in a position to ]Y[
afterwards. You won't use the normal version often, but the charged version is nice.
| jY | ||||||
| Attack | Damage | PSP | Height | Impact | Hit Adv | Block |
| Normal | 20 / 18 | 3 / 0 | Mid High / Mid | i15 | -8 / Stun | -16 |
Darkrai throws out a ceiling trap that stuns. Holding Y throws the net further. Special cancellable. Can be cancelled into Teleportation in Bad Dreams Rising by pressing R. |
Strong jump cut-off, but a bit slow outside of nightmare though. In nightmare, the cancel
and stronger knockdown opportunities give you a lot more opportunities to set it up, and it is
a major factor as to why getting knocked down by nightmare krai is scary-you can't jump out.
Strong Moves
| 2X / 2X Rift | ||||||
| Attack | Damage | PSP | Height | Impact | Hit Adv | Block |
| Normal | 60 / 52 (12) | 3 / 0 | Low / Mid Low | i23 | Knockdown / Launch | -8 / Rift -2 / BDR 0 |
Darkrai lunges at the opponent's feet, creating a rift. Invincible against Highs on frame 1. 2X's rift shoots out vertically with a forward diagonal, launching the opponent. In Bad Dreams Rising, the rift is automatically activated. +1 Orb |
Outside of nightmare, this is usually used as a combo ender after 2y to get you an orb and a hard knockdown. Outside of that, being -8 on block and unsafe on CA gives it limited utility. In nightmare, however, this is one of your most important buttons. 0 on block, starts nightmare loops, and can blow up nearly every CA in the game on hit thanks to its multiple hits and the existence of drill. High crushing is just a bonus.
| 4X / 4X Rift / 4[X] | ||||||
| Attack | Damage | PSP | Height | Impact | Hit Adv | Block |
| Normal | 60 / 51 / 90 | 3 / 0 / 4 | High / Aerial / High | i23 / i43 | Launch | -12 / N/A / +4 |
Darkrai swipes upward, creating a rift. 4X's rift shoots out diagonally, and can only hit aerial opponents. Grounded opponents cannot be hit. In Bad Dreams Rising, the rift is automatically activated. Charging 4X sends out a long range claw swipe that counter pierces but does not place a rift. +1 Orb (4X Only) |
4x is pretty limited in utility. Compared to 5x or 2x which have the same startup, it gives less damage, less setup potential, is duckable, and is just as bad on block. What it is useful for is setting up an upwards-facing rift to catch people out of the air. It's a bit difficult to combo off of, but it's good security against opponents who like to jump at you. 4[x] is in a pretty similar boat, though this can be used as a knowledge check. If your opponent doesn't know to duck it, it's long range, pierces, and gives you + frames on block. If they do, you'll usually be punished for even attempting it in neutral. It can be used as a way to stuff jump-ins though.
| 5X / 5X Rift | ||||||
| Attack | Damage | PSP | Height | Impact | Hit Adv | Block |
| Normal | 40 / 57 (12) | 4 / 0 | Mid Low / Mid | i23 | +4 / +28 | -12 / Rift -8 / BDR 0 |
Darkrai lunges forward, creating a rift. 5X's rift shoots out straight horizontally. In Bad Dreams Rising, the rift is automatically activated. Special cancelable. In Bad Dreams Rising, can be cancelled into Teleportation with R. +1 Orb |
Pretty good whiff punisher and combo starter. Can be canceled into nasty plot on block to be made safe, as the rift blockstrings from most spacings. In nightmare, the special cancel makes 5x pretty good oki with 5x[A:4] or 5x2a. The dash cancel in nightmare. can also be used to make it a strong harassment tool.
| 6X / 6X Rift | ||||||
| Attack | Damage | PSP | Height | Impact | Hit Adv | Block |
| Normal | 40 / 57 (12) | 4 / 0 | Special Mid / Mid | i27 | Launch / +28 | -12 / Rift -8 / BDR +4 |
Darkrai creates a rift at long range. 6X's rift shoots out straight horizontally. In Bad Dreams Rising, the rift is automatically activated. +1 Orb |
Pretty useful as a relatively fast long-range button. Extremely difficult to combo off of both in nightmare and out without support, so is more of a poke than anything, but thanks to how fast it puts out a hitbox at its range still has a lot of use in neutral.
| 8X / 8X Rift / 8[X] | ||||||
| Attack | Damage | PSP | Height | Impact | Hit Adv | Block |
| Normal | 60 / 57 (12) / 80 | 4 / 0 | Special Mid / Mid Low | i31 / i51 | +12 / +24 / Crumple | -8 / Rift -10 / +4 / BDR +8 |
Darkrai pulls back before lunging forward, creating a rift. 8X's rift shoots out straight horizontally. Grab crush and invulnerable to Lows on frame 1. In Bad Dreams Rising, the rift is automatically activated. Charing 8X allows it to counter pierce and increases its hitstun. +1 Orb |
Darkrai's lone grab crush and low profile option, aside from his lacking jump. Performs its duties admirably as such, comboing into a relatively high-damage nightmare on critical hit or charged hit. The charged version can be decent okizeme, but somewhat pales in comparison to clone trickery. In nightmare can also be used to get + frames, but is a bit slow compared to 6:y.
| jX / jX Rift | ||||||
| Attack | Damage | PSP | Height | Impact | Hit Adv | Block |
| Normal | 70 / 52 (12) | 3 / 0 | Mid High / Mid | i31 | Knockdown / Launch | -8 / Rift -10 / BDR -4 |
Darkrai dives headfirst to the ground, leaving a rift upon landing. Teleports backwards, behind the spot at which Darkrai landed. j.X's rift shoots out vertically with a backwards diagonal. In Bad Dreams Rising, the rift is automatically activated. This is the only Bad Dreams Rising rift activation that deals chip damage. +1 Orb |
Pretty lacking divekick. Extremely slow, only gives a hard knockdown outside nightmare, and is extremely minus on block. Should rarely be used. At least it isn't punishable anymore.
Pokemon Moves
| 2A Dream Eater | ||||||
| Attack | Damage | PSP | Height | Impact | Hit Adv | Block |
| Grab | 180 | 12 | N/A | i27 | Shift | N/A |
Only usable in Bad Dreams Rising. Darkrai grabs the opponent, absorbing 30 HP and receives added Synergy gain. The first 30 damage of Dream Eater is unaffected by scaling. Instantly phase shifts. Upon phase shifting, Darkrai teleports backwards from Its location. |
Despite the subtle startup animation, Dream Eater is pretty slow, so care should be taken with throwing it out raw. However, it is extremely powerful on hit and with nightmare darkrai's array of special and dash cancels you can get some absolutely filthy setups into it, made even scarier by placing a net above their head. Can be used after teleporting behind their whiffed attack for a high-damage punish. Also notable is its use as a combo ender. At the absolute minimum, it will do 45 damage no matter what the combo scaling is at, making it a great kill move. However, outside of killing it leaves you without advantage in field on hit, so be wary with throwing it out.
| 4A Nasty Plot | ||||||
| Attack | Damage | PSP | Height | Impact | Hit Adv | Block |
| Counter | 34 (12) | 0 / 1 per hit (Phantom) | Mid | i21 | Stun | +10 |
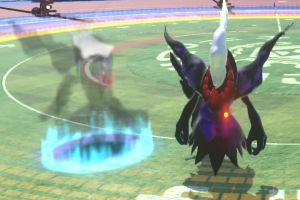
Darkrai goes into a counter armor state from frame 5-28. Countering an opponent's attack causes Darkrai to teleport backwards, leaving behind a phantom. If the input is held, the phantom does not immediately detonate, gaining Darkrai an orb. If it is not, the phantom immediately explodes. Activating Nasty Plot activates all traps that Darkrai has placed (maximum 2). Phantoms explode, rifts expel vines, mirrors become jaws, and fY chases down the opponent. In Bad Dreams Rising, Nasty Plot is given counter armor on frame 1. |
Nasty Plot is an extremely good tool for krai. It functionally replaces his CA as a defensive tool with its only downside in comparison being the lack of frame 1 armor which is removed in nightmare. 4[a] is almost unpunishable on proc and gives you great setups, as well as being great against long-range non-piercing projectiles. 4a puts out a hitbox very quickly by CA standards which full combos into nightmare. And this is without getting into plot's most defining aspect which is trap activation. You will be pressing this button a lot playing darkrai.
| 5A Dark Pulse | ||||||
| Attack | Damage | PSP | Height | Impact | Hit Adv | Block |
| Normal | 60 (15) / 96 (30) | 3 / 1 per hit | Special Mid / Mid Low | i27 | +4 / +12 | -8 / 0 |
Darkrai fires a projectile. Using Dark Pulse will cause phantoms to throw out a Dark Pulse from their position on the stage. Afterwards they disappear. The Dark Pulses fired by phantoms have much greater tracking than those fired by Darkrai. In Bad Dreams Rising, Dark Pulse gains another hit, improving both its damage and advantage on hit/block. Furthermore, it becomes a Mid-Low rather than a Special Mid In Bad Dreams Rising, can press R to cancel into Teleportation, both before and after the move comes out. |
Very good fireball, especially in nightmare. There's not that much to say about it-it's a high damage, high chip, pretty plus projectile with a slow startup. Useful for harassing enemies from longer distances and controlling space. It's only notable that between 8[y] and rifts, it's almost never a good idea for the opponent to CA the fireball against nightmare darkrai.
| 5[A] Dark Pulse | ||||||
| Attack | Damage | PSP | Height | Impact | Hit Adv | Block |
| Normal | 40/60/80/100/120 | 3 | Special Mid | i27 | Knockdown / +16 / +16 / +16 / Stun | -20 / -16 / -12 / -8 / -4 |
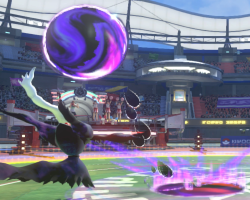
Darkrai consumes all orbs to release a large wave of dark energy. Counter pierces. In addition to having more damage and being better on block and hit with more orbs, the hitbox is larger the more orbs are consumed. |
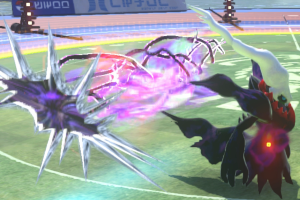
The other use for orbs other than bow and another extremely strong option. Usually you do not want to use pulses with orb counts less than 4 outside of combo optimization, but they can have their uses. [A:4], however is ridiculous. Pierces, titanic hitbox, 60 chip, 120 damage and stun on hit, only -4 on block. It's useful for checks out of special cancellable moves in both field and duel, good for okizeme, good for pressure in general. There are flaws to keep in mind-notably the long startup meaning it's not safe to throw out when you're at a disadvantage, and that it is special mid, meaning characters with frame 1 anti-airs can evade it easily. However, these are minor in comparison to its strengths.
| 6A / 6[A] Dark Void | ||||||
| Attack | Damage | PSP | Height | Impact | Hit Adv | Block |
| Normal | 36 | -12 | Mid / Low | i39 / i59 | FP Shift (+8) / DP 0 | -12 / Unblockable |
Darkrai drops a void onto the ground. Landing a Dark Void on the opponent sends Darkrai into Bad Dreams Rising. PSP will be reset for both players if landed in Duel Phase. When charged, Dark Void will go through an opponent's block, though it may still be countered. Dark Void's damage comes from the aerial hits above. These hits cannot KO. |
| 6A / 6[A] Dark Void | ||||||
| Attack | Damage | PSP | Height | Impact | Hit Adv | Block |
| Normal | 80 (20) / 120 (31) | 3 | Mid | i39 / i59 | Launch | -12 / +8 |
In Bad Dreams Rising, Dark Void spawns a pillar of hands. This version of the move can KO. |
Outside nightmare, used as a combo ender and that's pretty much it. Gets you nightmare. Unsafe on block and slow, definitely not a neutral tool. Charged version can be used to avoid hit limits after longer stuns or for the occasional setup. Can knowledge check some people, but it's really slow and possible to CA or jump for a huge punish, so not too good. Slightly more useful in nightmare, where it becomes a powerful combo starter. Charged one is an incredible combo starter, but there's precious few situations where you actually land it, as it's still CA-able. If they don't know this, however, can be strong okizeme.
| 8A Nightmare | ||||||
| Attack | Damage | PSP | Height | Impact | Hit Adv | Block |
| Normal | 91 (27) | 3 | Mid High | i27 | Launch | -12 |
Only usable in Bad Dreams Rising. Darkrai disappears, becoming invincible on frame 5. Darkrai reappears and flies in at the opponent with a drill-like motion. Can cancel into any aerial or a jump on hit or block. |
DRILL. One of the biggest reasons why darkrai's nightmare mode is so scary, a frame-5 invulnerable move that leads into 210 and a hard knockdown on hit is huge. Learning what actions from your opponent you can just drill for free is huge, as most slower moves become a non-issue to nightmare darkrai and he can punish CAs super hard. However, it is punishable on block by most of the cast, so do be careful with throwing it out. Can also be used as a damage combo ender.
| jA Shadow Claw | ||||||
| Attack | Damage | PSP | Height | Impact | Hit Adv | Block |
| Normal | 50 (15) | 0 | Mid High | i19 | Crumple | -4 |
A 360 degree flurry of hits that has two followups. In Bad Dreams Rising, can press R to cancel into Teleportation. Deletes projectiles on frame 5. If one of its followups is land cancelled, becomes +12 on block. |
A really good move that is unfortunately stapled to krai's mediocre jump. The projectile deletion is pretty nice to catch Lucario or Garde's 8y after drill on block, and on oki, it is +12 when properly cancelled while also being safe on CA. With followups, it's also really useful for combos.
| jAA Shadow Claw: Kick Followup | ||||||
| Attack | Damage | PSP | Height | Impact | Hit Adv | Block |
| Normal | 55 (16) | 3 | Mid High | i19 | Launch | FP -29 / DP -16 |
A vertical ranged flash kick that launches the opponent. In Bad Dreams Rising, can press R to cancel into Teleportation, but not after a full j.YAA string. |
Basically only used mid-combos and even then only in field. Smallish hitbox, unsafe on block, and slow. Not a neutral tool.
| jAY/X / jA[Y/X] Shadow Claw: Slice Followup | ||||||
| Attack | Damage | PSP | Height | Impact | Hit Adv | Block |
| Normal | 80 (20) / 120 (30) | 4 | High | i19 / i39 | Launch | -33 |
A horizontal ranged slash that launches the opponent. Able to be charged, allowing the move to counter pierce. Charging this move air stalls Darkrai. In Bad Dreams Rising, can press R to cancel into Teleportation, but not after a full j.YA[Y/X] string. |
Strong combo ender in duel or in burst field. Really good damage, and also has some use as a knowledge check against people who don't know they can duck it with jump back j.YA[X or Y] strings.
| L+R Infinite Eclipse | ||||||
| Attack | Damage | PSP | Height | Impact | Hit Adv | Block |
| Normal | 180 (66) / 240 (66) | 12 | Mid | i23 | Shift | -20 / -12 |
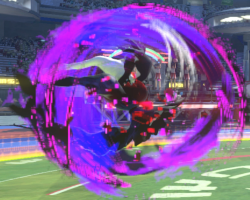
A dome that has multiple hits connected to it. Invincible on frame 9. In Bad Dreams Rising, the move deals more damage, becomes safer on block, and is invincible on frame 1. Counter pierces. |
Outside nightmare, an extremely mediocre burst attack. It has a wide hitbox, but is slow, has little invulnerability, middling damage, and is extremely unsafe on block. In nightmare, however, it becomes one of the dumbest buttons in the game. Frame 1 invulnerability, safe on block against basically every character but Aegislash thanks to pushback, and extremely high damage combine to make an absolutely hilarious package. Against burst nightmare darkrai opponents simply can't do anything for fear of the burst attack, and as burst nightmare darkrai this essentially gives you a license to roll your face on your controller. Extremely good button.
Combos
Field Phase
In field phase, there are three broad categories of combos. There are those that get you nightmare by ending in dark void, those that extend field phase to leave you at an advantage, and those that simply maximize damage dealt before shifting, usually intended to use as kill combos or while in burst mode. These can be further subdivided into two possibilities- if you have four orbs on deck to extend the combo and if you do not. The former three categories will be denoted N (Nightmare), E (Extension), and S (Shift) combos, while an O will signify the use of a four-orb pulse, denoted by (n/5)[A:4].
fY
- N: fY > bA > j.Y >bX > nX > fA (112 Damage)
Standard confirm off the hands. If you're a bit closer and your timing is good you can do
- N: fY > bA > bX > nX > fA (117 Damage)
For a bit more damage.
- E: fY > bA > j.fY > bX > b[X] (117 Damage)
Same route as nightmare confirm. Cannot do the alternate route however, as a re-standing bX stuns for less time.
- S: fY > bA > bX > Y+B (125 Damage)
Same route as nightmare confirm. Since bX stuns for nearly a fully second and the grab starts up in eleven frame, it can be delayed for a long time to waste the timer if you have a life lead. Thanks to the high scaling involved, spending orbs on an fY combo is usually not worth it. We include optimal bX routes for completion's sake, though remember this requires good spacing and timing-a j.Y makes things more consistent, but less damaging.
- NO: fY > bA > bX > n[A:4] > nX > fA (137 Damage)
- EO: fY > bA > bX > n[A:4] > b[X] (142 Damage)
- SO: fY > bA > bX > n[A:4] > Y+B (141 Damage)
bY
- N: bY activation > bX > nX > fA (154 Damage)
Standard bY confirm. Once again, there's an alternate route for obnoxious damage optimization if you're at the right spacing.
- N: bY activation > sY > nX > nA > nX > fA (158 Damage)
- E: bY activation > bX > b[X] (184 Damage)
No alternate route here, the bX stun is needed to land the b[X].
- S: bY activation > bX > Y+B (178 Damage)
Entirely standard.
- NO: bY activation > 5[A:4] > bX > fA (198 Damage)
bY orb combos hurt.
- EO: bY activation > bX > n[A:4] > b[X] (220 Damage)
Yep.
- NO: bY activation > bX > n[A:4] > Y+B (218 Damage)
Yep.
bX
- N bX > nX > fA (102 damage)
Standard bX confirm into nightmare that works universally. However, on the majority of the cast, can be optimized a lot further.
- N bX > j.fY > j.A > j.AA > sY > nX > nA > nX > fA (143 Damage)
Optimized nightmare confirm off bX. Would be standard, but timing of the j.fY is really character-specific and flat-out does not work on a couple characters, notably the pikachus. Generally speaking, you want to j.fY at around the height of the character's head-too high on smalls and it'll whiff, too low on talls and they'll get launched directly into the net, not giving you enough time to set up your sY.
- E bX > b[X] (142 Damage)
Nothing spectacular here. Just good damage for a field extension.
(Check this combo later, probably char-specific and maybe doesn't work consistently?)
- bX > j.fY > j.AA > sY > nX > nA > Y+B (135 Damage)
There's nothing really of note with orb routes. They just do a lot of damage.
- NO bX > n[A:4] > nX > fA (182 Damage).
- EObX > n[A:4] > b[X] (202 Damage)
- SO bX > n[A:4] > Y+B (198 Damage)
Clone explosion
This refers to all clone explosions, which include sY bA, ]Y[ bA, and guard point bA. The displayed damage will be from sY bA, though all three vary in damage slightly.
- N Clone explosion > bX > nX > fA (92 Damage)
Standard stuff. Clone explosions scale hard so this won't be as explosive damage as other field combos.
- E Clone explosion > bX > b[X] (112 Damage)
- S Clone explosion > bX > Y+B (108 Damage)
Thanks to high scaling and hit counts, orb combos usually don't get much in the way of extra damage.
- NO Clone explosion > n[A:4] > nX > fA (114 Damage)
- EO Clone explosion > bX > n[A:4] > b[X] (133 Damage)
- SO Clone explosion > bX > n[A:$] > Y+B (132 Damage)
n[A:4]
No non-orb combos here, as you're spending them at the start. However, this is mostly standard stuff.
- NO n[A:4] > b[X] > nX > fA (186 Damage)
- EO n[A:4] > bX > b[X] (198 Damage)
- SO n[A:4] > bX > Y+B (194 Damage)
Clone Pulse
Finally, if you're close enough, you can combo off of dark pulsing with a clone up. Again, this can be any clone, but sY clones will be used to calculate damage. These are pretty uncommon situations, however, so you won't really need to know these.
- N Clone Pulse > bX > nX > fA (114 Damage)
- E Clone Pulse > bX > b[X] (112 Damage)
- S Clone Pulse > bX > Y+B (108 Damage)
- NO sY > nA > n[A:4] > bX > nX > fA (131 Damage)
- EO sY > nA > n[A:4] > bX > b[X] (136 Damage)
- SO sY > nA > n[A:4] > bX > Y+B (135 Damage)
Duel Phase
2Y
- 2YX (84 Damage)
- 2Y > 5[A:4] > 5X > 4A > 5X > 6A (177 Damage)
- 2Y > 5A[A:4] > 8[X] > 2Y > 4A > 4YY:Y (200 Damage)
5Y
- 5Y > 5YY > 6A (60 Damage)
- 5Y > 5YY > 5A (102 Damage)
- 5Y> 5YY > 5[A:4] > 5X > 6A (156 Damage)
- 5Y> 5YY > 5[A:4] > 8[X] > 2Y > 4A (179 Damage)
6Y
- 6:Y > 4YY:4 (124 Damage)
- 6:Y > 2YX (126 Damage) Only works on:
-Darkrai
-Pikachu / Pikachu Libre
-Croagunk
-Sceptile
-Gengar
-Decidueye
-Machamp
-Empoleon
-Mewtwo / Shadow Mewtwo
-Chandelure
-Weavile
-Charizard
-Garchomp
- 6:Y > 6:Y > 2YX (165 Damage) Only works on:
-Blaziken
-Lucario
-Braixen
- 6:Y > 6:Y > 6:Y > 2YX (198 Damage) Only works on:
-Gardevoir
-Suicune
- 6:Y 2YX 4YY:Y (158 Damage, Only works on Scizor, 2YX can be done in place of 4YY:Y for an Orb but deals 2 less Damage)
8Y
- 8Y > j.Y > 5Y > 5YY > 6A (116 Damage, 5X > 6A can be done in place of 5Y > 5YY > 6A for an Orb but deals 2 less Damage) Does not work on:
-Scizor
-Gengar
-Machamp
-Mewtwo / Shadow Mewtwo
-Chandelure
-Suicune
-Charizard
Garchomp
- 8Y > 6:Y > j.Y > 6A (136 Damage) Only works on:
-Blaziken
-Lucario
-Gardevoir
-Braixen
- 8Y > 6:Y > 4YY:Y (166 Damage) Only works on Decidueye
- 8Y > 2YX > 4YY:Y (157 Damage) Only works on Chandelure
- 8Y > 6:Y > 2YX (166 Damage) Only works on:
-Sceptile
-Machamp
-Mewtwo / Shadow Mewtwo
-Charizard
- Anti-air 8Y > 8Y > j.Y > 6A (142 Damage)
- Anti-air 8Y > j.Y > 5X > 6A (108 Damage)
- 8[Y] > 5[A:4] > 5X > 4A > 5X > 6A (136 Damage)
5X
- 5X > 4A > 5X > 6A (109 Damage)
- 5X > 5[A:4] > 5X > 6A (152 Damage)
- 5X > 5[A:4] > 8[X] > 2Y > 4A (185 Damage)
Critical Hit 8X / 8[X]
- 8X / 8[X] > 2Y > 4A > 5X > 6A (155 / 150 Damage)
- 8X / 8[X] > 2Y > 5[A:4] > 5X > 6A (192 / 177 Damage)
- 8[X] > 2Y > 5[A:4] > 8[X] > 2Y > 4A (219 / 198 Damage)
2X / j.X Rift
- 4A > 8Y > 8Y > j.Y > 6A (148 Damage)
- 4A > 8Y > 6:Y > 6:Y > 4YY:Y (181 Damage)
5X / 6X / 8X Rift
- 4A > 5X > 4A > 5X > 6A (138 Damage)
- 2Y > 5[A:4] > 5X > 6A (177 Damage)
- 4A > 2Y > 5[A:4] > 8[X] > 2Y > 4A (198 Damage)
]Y[ / 4A
- 4A > 8[X] > 5Y > 5YY > 6A (93 Damage)
- 4A > 5[A:4] > 5X > 6A (114 Damage)
- 4A > 5[A:4] > 8[X] > 2Y > 4A (158 Damage)
Notable Players
-BadIntent (US): YouTube, Twitch, Twitter
-Drakonzeta (US): Twitter
-EveryDamnDay (US): Twitch, Twitter
-Haruyuki (JP): Vods
-Jin (US): Twitch, Twitter
-Kamon (US): Twitch, Twitter
-Midori (JP/AUS): Vods, Twitter
-Oreo (US): Twitter
-Rubs (EU): Twitter
-Shadowcat (US): YouTube, Twitch, Twitter
