Matt Cowan (talk | contribs) mNo edit summary |
Lichmassacre (talk | contribs) |
||
| (4 intermediate revisions by 2 users not shown) | |||
| Line 10: | Line 10: | ||
'''63214D'''<br> | '''63214D'''<br> | ||
[[Image:Toki-Toukei.png]]<br> | [[Image:Toki-Toukei.png]]<br> | ||
A slow-moving projectile that slides along the ground. Has short recovery and no limit to how many you can have on screen at one time. Can be used in combination with a teleport as a great wakeup option. | A slow-moving projectile that slides along the ground. Takes off one star on Counter Hit. Has short recovery and no limit to how many you can have on screen at one time. Can be used in combination with a teleport as a great wakeup option. | ||
===Tenshou Hyakuretsuken=== | ===Tenshou Hyakuretsuken=== | ||
'''(Air) 236C'''<br> | '''(Air) 236C'''<br> | ||
[[Image:Toki-Tenshou.png]]<br> | [[Image:Toki-Tenshou.png]]<br> | ||
Toki rapidly punches downward at his opponent. Cancelable into a teleport, except when low in the air. Very important in combos. Can also be used as an overhead after an air dash or by itself. | Toki rapidly punches downward at his opponent. Takes off one star on Counter Hit. Cancelable into a teleport, except when low in the air. Very important in combos. Can also be used as an overhead after an air dash or by itself. | ||
===Hokuto Haryuushou=== | ===Hokuto Haryuushou=== | ||
'''214A'''<br> | '''214A'''<br> | ||
[[Image:Toki-AAtemi.png]]<br> | [[Image:Toki-AAtemi.png]]<br> | ||
1 frame | 1 frame counter move for normal and high attacks. Takes off one star on Counter Hit. Won't work on projectiles or super moves. Causes wall bounce, and you can follow up with a teleport for a 70%~100% combo. Aside from using it on its own, it is also very good to use for baiting Guard Cancels. | ||
===Hokuto Suibugeki=== | ===Hokuto Suibugeki=== | ||
'''214B'''<br> | '''214B'''<br> | ||
[[Image:Toki-BAtemi.png]]<br> | [[Image:Toki-BAtemi.png]]<br> | ||
1 frame | 1 frame counter move for low attacks. Takes off one star on Counter Hit. Sends the opponent flying, and you can follow up with a teleport to continue into a combo. Not as awesome as Haryuushou because it doesn't cause wallbounce, but still insanely good. | ||
===Hokuto Shourinkyaku=== | ===Hokuto Shourinkyaku=== | ||
'''(Air) 214D'''<br> | '''(Air) 214D'''<br> | ||
[[Image:Toki-DAtemi.png]]<br> | [[Image:Toki-DAtemi.png]]<br> | ||
1 frame | 1 frame counter move for use in the air. Takes off one star on Counter Hit. Won't work on projectiles or super moves. Causes wallbounce vs grounded opponents, and recovery ends while still in the air. | ||
===Hokuto Musou Ryuubu (Forwards)=== | ===Hokuto Musou Ryuubu (Forwards)=== | ||
| Line 51: | Line 51: | ||
'''236236C (Uses 1 Bar Aura)'''<br> | '''236236C (Uses 1 Bar Aura)'''<br> | ||
[[Image:Toki-Danjin.png]]<br> | [[Image:Toki-Danjin.png]]<br> | ||
Toki strikes a pose, then speeds forward and past his opponent, striking them many times. No startup invulnerability, but fully invulnerable when Toki moves forward. Staple combo finisher and also used to begin Dribble/Hyakuretsu combos. | Toki strikes a pose, then speeds forward and past his opponent, striking them many times. Takes off one on normal hit and two stars on Counter Hit. No startup invulnerability, but fully invulnerable when Toki moves forward. Staple combo finisher and also used to begin Dribble/Hyakuretsu combos. | ||
===Hikou Sekkatsukou (Self)=== | ===Hikou Sekkatsukou (Self)=== | ||
| Line 66: | Line 66: | ||
'''214214C (Uses 1 Bar Aura)'''<br> | '''214214C (Uses 1 Bar Aura)'''<br> | ||
[[Image:Toki-Saiha.png]]<br> | [[Image:Toki-Saiha.png]]<br> | ||
A huge uppercut. The ultimate anti-air attack - like Raoh's Shinkesshuu, this move cannot be blocked at all in the air. Opponent goes flying into the air on | A huge uppercut. The ultimate anti-air attack - like Raoh's Shinkesshuu, this move cannot be blocked at all in the air. Takes off one on normal hit and two stars on Counter Hit. Opponent goes flying into the air on Counter Hit so you can continue into a combo. However, if this move is used to take off your opponents last star, a special animation plays(3rd picture), and follow up is not possible. | ||
===Hokuto Ujou Haganken=== | ===Hokuto Ujou Haganken=== | ||
'''236CD (Fatal KO)'''<br> | '''236CD (Fatal KO)'''<br> | ||
[[Image:Toki-GG.png]]<br> | [[Image:Toki-GG.png]]<br> | ||
Toki sits down to relax for a moment, then shoots lazers from his hands and kills his opponent. | Toki sits down to relax for a moment, then shoots lazers from his hands and kills his opponent. Hits downed opponents. The lazer beams will also go through other projectiles, although this doesn't have much use except as a gimmick. | ||
[[Category: | [[Category:Articles recommended for deletion]] | ||
Latest revision as of 16:34, 19 January 2021
This page covers Toki's special and super moves. His normal moves are explained here.
Hokuto Ryuukojin
214C
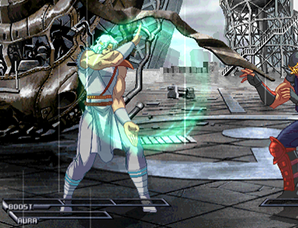
1 frame startup projectile reflector with Super Armor. Reflected projectiles take a star on hit. Toki becomes completely invulnerable on a successful reflection, and is able to act during this time. Cannot reflect beam-type projectiles.
Toukei Kohou
63214D
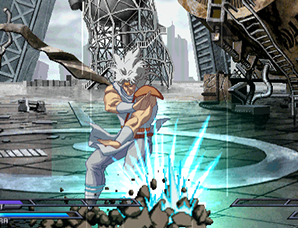
A slow-moving projectile that slides along the ground. Takes off one star on Counter Hit. Has short recovery and no limit to how many you can have on screen at one time. Can be used in combination with a teleport as a great wakeup option.
Tenshou Hyakuretsuken
(Air) 236C
Toki rapidly punches downward at his opponent. Takes off one star on Counter Hit. Cancelable into a teleport, except when low in the air. Very important in combos. Can also be used as an overhead after an air dash or by itself.
Hokuto Haryuushou
214A
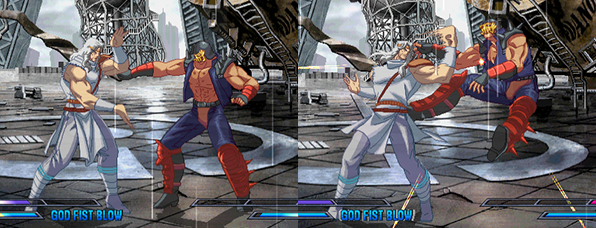
1 frame counter move for normal and high attacks. Takes off one star on Counter Hit. Won't work on projectiles or super moves. Causes wall bounce, and you can follow up with a teleport for a 70%~100% combo. Aside from using it on its own, it is also very good to use for baiting Guard Cancels.
Hokuto Suibugeki
214B
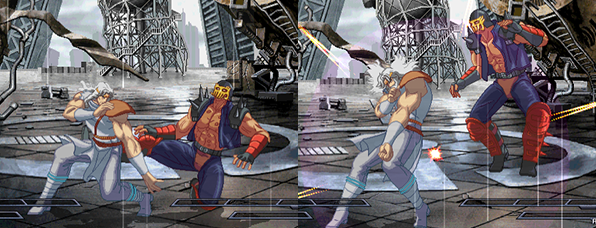
1 frame counter move for low attacks. Takes off one star on Counter Hit. Sends the opponent flying, and you can follow up with a teleport to continue into a combo. Not as awesome as Haryuushou because it doesn't cause wallbounce, but still insanely good.
Hokuto Shourinkyaku
(Air) 214D
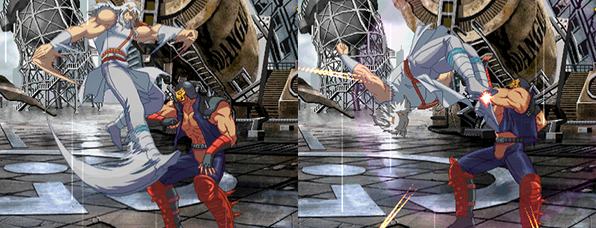
1 frame counter move for use in the air. Takes off one star on Counter Hit. Won't work on projectiles or super moves. Causes wallbounce vs grounded opponents, and recovery ends while still in the air.
Hokuto Musou Ryuubu (Forwards)
623A/B/C/D
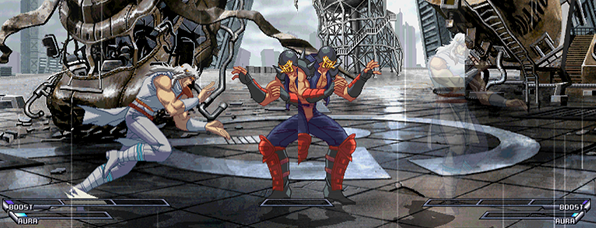
A forward-moving teleport. A and C versions teleport you diagonally into the air, while B and D versions move straight ahead. The C and D versions have the same effect as the A and B ones, but move farther. Toki has almost no hitbox while teleporting, and the recovery can be canceled into any move.
Hokuto Musou Ryuubu (Backwards)
421A/B/C/D
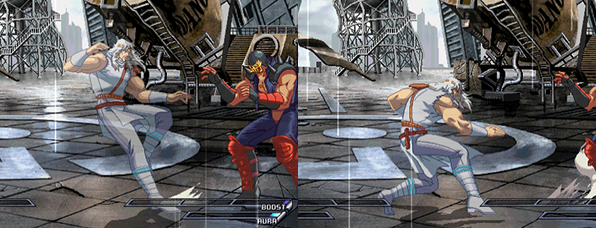
A backward-moving teleport. A and C versions teleport you diagonally into the air, while B and D versions move straight back. The C and D versions have the same effect as the A and B ones, but move farther. Unlike the forward version, this one does have quite a bit of recovery. Pretty much useless for anything but messing around - which you can do if you want, you are Toki after all!
Hokuto Musou Ryuubu (Vertical)
(Land or Air) 236A
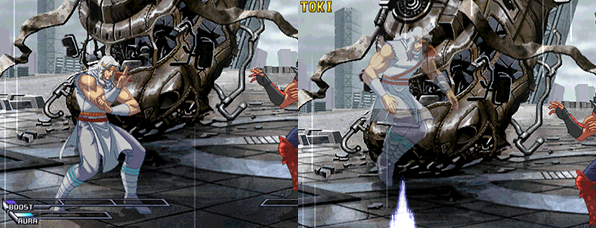
A vertical teleport. On the ground it shoots you up into the air, and in the air it quickly brings you back to the ground. Doesn't count as jumping so you can jump twice after using it on the ground. Used extensively both in and out of combos
Hokuto Ujou Danjinken
236236C (Uses 1 Bar Aura)

Toki strikes a pose, then speeds forward and past his opponent, striking them many times. Takes off one on normal hit and two stars on Counter Hit. No startup invulnerability, but fully invulnerable when Toki moves forward. Staple combo finisher and also used to begin Dribble/Hyakuretsu combos.
Hikou Sekkatsukou (Self)
214214B (Uses 1 Bar Aura)

Toki hits his own pressure points, powering up. Once activated, for a period of time the damage of Tenshou Hyakuretsuken, Toukei Kohou, and Hokuto Saihaken is increased, Tenshou Hyakuretsuken and the catch moves take one extra star than usual, and Toki's life doesn't recover. This move doesn't get much use as Toki usually has better use for his Aura, but it is by no means bad.
Hikou Sekkatsukou (Enemy)
236236B (Uses 1 Bar Aura)

Toki winds up and strikes his opponent's pressure points. Takes two stars on normal hit, and will hit downed opponents. Counter hit causes wallbounce and takes 3 stars. Great reversal move, and has advantage on guard. For a period of time after connecting with this Toki's opponent is unable to recover health.
Hokuto Saihaken
214214C (Uses 1 Bar Aura)

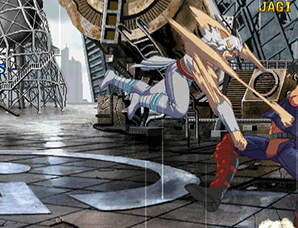
A huge uppercut. The ultimate anti-air attack - like Raoh's Shinkesshuu, this move cannot be blocked at all in the air. Takes off one on normal hit and two stars on Counter Hit. Opponent goes flying into the air on Counter Hit so you can continue into a combo. However, if this move is used to take off your opponents last star, a special animation plays(3rd picture), and follow up is not possible.
Hokuto Ujou Haganken
236CD (Fatal KO)

Toki sits down to relax for a moment, then shoots lazers from his hands and kills his opponent. Hits downed opponents. The lazer beams will also go through other projectiles, although this doesn't have much use except as a gimmick.