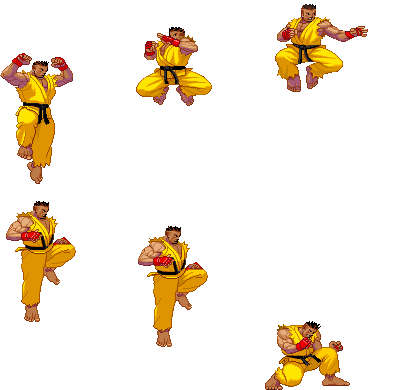
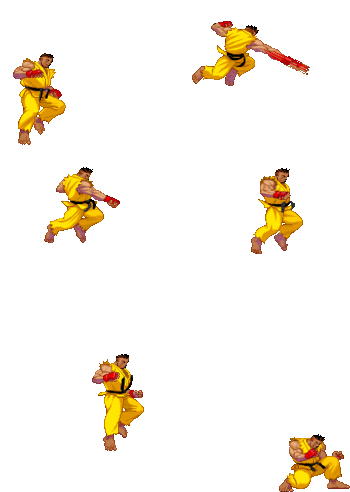
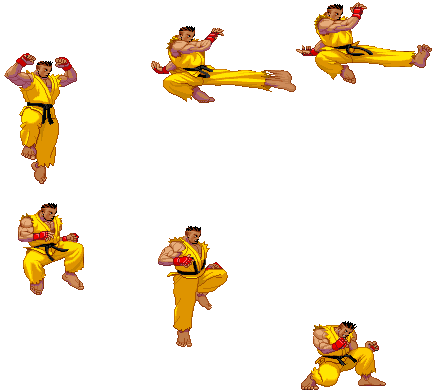
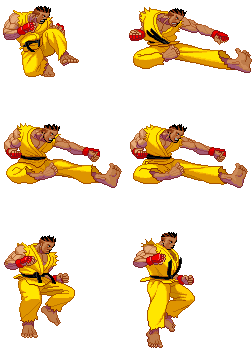
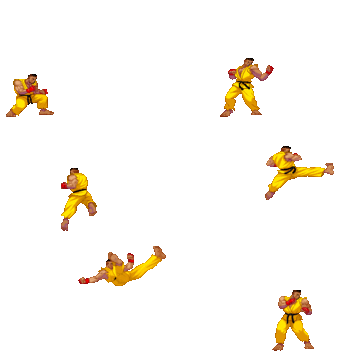
(ported page from third strike wiki) |
No edit summary |
||
| (7 intermediate revisions by the same user not shown) | |||
| Line 1: | Line 1: | ||
{{TOClimit|3}} | {{TOClimit|3}} | ||
{{Infobox Character | {{Infobox Character NG | ||
|name=Sean | |name=Sean | ||
|image=NG Sean Portrait Art.png | |||
|image= | |||
|health=1120 | |health=1120 | ||
|stun=64 | |stun=64 | ||
| Line 20: | Line 19: | ||
|wakeupNormal=77 | |wakeupNormal=77 | ||
|wakeupQuick=50 | |wakeupQuick=50 | ||
}} | }} | ||
<center>{{FrameDataKey- | <center>{{FrameDataKey-NG}}</center> | ||
== Frame Data == | == Frame Data == | ||
| Line 33: | Line 31: | ||
|image=(seanlp).gif | |image=(seanlp).gif | ||
|data= | |data= | ||
{{AttackData- | {{AttackData-NG | ||
|startup=3 | |startup=3 | ||
|active=2 | |active=2 | ||
| Line 45: | Line 43: | ||
|description= | |description= | ||
* Cancel options: self sp su | * Cancel options: self sp su | ||
}} | }} | ||
}} | }} | ||
| Line 55: | Line 52: | ||
|image=(seanclosemp).gif | |image=(seanclosemp).gif | ||
|data= | |data= | ||
{{AttackData- | {{AttackData-NG | ||
|startup=4 | |startup=4 | ||
|active=5 | |active=5 | ||
| Line 68: | Line 65: | ||
* Self meter gain: Whiff: 2, Hit: 11, Block: 6. | * Self meter gain: Whiff: 2, Hit: 11, Block: 6. | ||
* Opponent meter gain: Whiff: 0, Hit: 2, Block: 0. | * Opponent meter gain: Whiff: 0, Hit: 2, Block: 0. | ||
}} | }} | ||
}} | }} | ||
| Line 78: | Line 74: | ||
|image=(seanmp).gif | |image=(seanmp).gif | ||
|data= | |data= | ||
{{AttackData- | {{AttackData-NG | ||
|startup=5 | |startup=5 | ||
|active=4 | |active=4 | ||
| Line 90: | Line 86: | ||
* Self meter gain: Whiff: 2, Hit: 11, Block: 6. | * Self meter gain: Whiff: 2, Hit: 11, Block: 6. | ||
* Opponent meter gain: Whiff: 0, Hit: 2, Block: 0. | * Opponent meter gain: Whiff: 0, Hit: 2, Block: 0. | ||
}} | }} | ||
}} | }} | ||
| Line 100: | Line 95: | ||
|image=(seanclosehp).gif | |image=(seanclosehp).gif | ||
|data= | |data= | ||
{{AttackData- | {{AttackData-NG | ||
|startup=5 | |startup=5 | ||
|active=5 | |active=5 | ||
| Line 113: | Line 108: | ||
* Self meter gain: Whiff: 3, Hit: 19, Block: 10. | * Self meter gain: Whiff: 3, Hit: 19, Block: 10. | ||
* Opponent meter gain: Whiff: 0, Hit: 4, Block: 0. | * Opponent meter gain: Whiff: 0, Hit: 4, Block: 0. | ||
}} | }} | ||
}} | }} | ||
| Line 123: | Line 117: | ||
|image=(seanhp).gif | |image=(seanhp).gif | ||
|data= | |data= | ||
{{AttackData- | {{AttackData-NG | ||
|startup=9 | |startup=9 | ||
|active=4 | |active=4 | ||
| Line 137: | Line 131: | ||
* Self meter gain: Whiff: 2, Hit: 11, Block: 6. | * Self meter gain: Whiff: 2, Hit: 11, Block: 6. | ||
* Opponent meter gain: Whiff: 0, Hit: 2, Block: 0. | * Opponent meter gain: Whiff: 0, Hit: 2, Block: 0. | ||
}} | }} | ||
}} | }} | ||
| Line 147: | Line 140: | ||
|image=(seanlk).gif | |image=(seanlk).gif | ||
|data= | |data= | ||
{{AttackData- | {{AttackData-NG | ||
|startup=4 | |startup=4 | ||
|active=4 | |active=4 | ||
| Line 158: | Line 151: | ||
|stun=3 | |stun=3 | ||
|description= | |description= | ||
}} | }} | ||
}} | }} | ||
| Line 168: | Line 160: | ||
|image=(seanmk).gif | |image=(seanmk).gif | ||
|data= | |data= | ||
{{AttackData- | {{AttackData-NG | ||
|startup=6 | |startup=6 | ||
|active=4 | |active=4 | ||
| Line 180: | Line 172: | ||
* Self meter gain: Whiff: 2, Hit: 11, Block: 6. | * Self meter gain: Whiff: 2, Hit: 11, Block: 6. | ||
* Opponent meter gain: Whiff: 0, Hit: 2, Block: 0. | * Opponent meter gain: Whiff: 0, Hit: 2, Block: 0. | ||
}} | }} | ||
}} | }} | ||
| Line 190: | Line 181: | ||
|image=(seanclosehk).gif | |image=(seanclosehk).gif | ||
|data= | |data= | ||
{{AttackData- | {{AttackData-NG | ||
|startup=5 | |startup=5 | ||
|active=5 | |active=5 | ||
| Line 204: | Line 195: | ||
* Self meter gain: Whiff: 3, Hit: 19, Block: 10. | * Self meter gain: Whiff: 3, Hit: 19, Block: 10. | ||
* Opponent meter gain: Whiff: 0, Hit: 4, Block: 0. | * Opponent meter gain: Whiff: 0, Hit: 4, Block: 0. | ||
}} | }} | ||
}} | }} | ||
| Line 214: | Line 204: | ||
|image=(seanfhk).gif | |image=(seanfhk).gif | ||
|data= | |data= | ||
{{AttackData- | {{AttackData-NG | ||
|startup=7 | |startup=7 | ||
|active=4 | |active=4 | ||
| Line 228: | Line 218: | ||
* Self meter gain: Whiff: 2, Hit: 11, Block: 6. | * Self meter gain: Whiff: 2, Hit: 11, Block: 6. | ||
* Opponent meter gain: Whiff: 0, Hit: 2, Block: 0. | * Opponent meter gain: Whiff: 0, Hit: 2, Block: 0. | ||
}} | }} | ||
}} | }} | ||
| Line 242: | Line 231: | ||
|image=(seanthp).gif | |image=(seanthp).gif | ||
|data= | |data= | ||
{{AttackData- | {{AttackData-NG | ||
|startup=21 | |startup=21 | ||
|active=7 | |active=7 | ||
| Line 256: | Line 245: | ||
* Self meter gain: Whiff: 3, Hit: 18, Block: 8. | * Self meter gain: Whiff: 3, Hit: 18, Block: 8. | ||
* Opponent meter gain: Whiff: 0, Hit: 4, Block: 0. | * Opponent meter gain: Whiff: 0, Hit: 4, Block: 0. | ||
}} | }} | ||
}} | }} | ||
| Line 266: | Line 254: | ||
|image=(seanthk).gif | |image=(seanthk).gif | ||
|data= | |data= | ||
{{AttackData- | {{AttackData-NG | ||
|startup=15 | |startup=15 | ||
|active=5 | |active=5 | ||
| Line 279: | Line 267: | ||
* Self meter gain: Whiff: 2, Hit: 11, Block: 6. | * Self meter gain: Whiff: 2, Hit: 11, Block: 6. | ||
* Opponent meter gain: Whiff: 0, Hit: 2, Block: 0. | * Opponent meter gain: Whiff: 0, Hit: 2, Block: 0. | ||
}} | }} | ||
}} | }} | ||
| Line 292: | Line 279: | ||
|image=(seanclp).gif | |image=(seanclp).gif | ||
|data= | |data= | ||
{{AttackData- | {{AttackData-NG | ||
|startup=4 | |startup=4 | ||
|active=3 | |active=3 | ||
| Line 304: | Line 291: | ||
|description= | |description= | ||
* Cancel options: self sp su | * Cancel options: self sp su | ||
}} | }} | ||
}} | }} | ||
| Line 314: | Line 300: | ||
|image=(seancmp).gif | |image=(seancmp).gif | ||
|data= | |data= | ||
{{AttackData- | {{AttackData-NG | ||
|startup=5 | |startup=5 | ||
|active=4 | |active=4 | ||
| Line 328: | Line 314: | ||
* Self meter gain: Whiff: 2, Hit: 11, Block: 6. | * Self meter gain: Whiff: 2, Hit: 11, Block: 6. | ||
* Opponent meter gain: Whiff: 0, Hit: 2, Block: 0. | * Opponent meter gain: Whiff: 0, Hit: 2, Block: 0. | ||
}} | }} | ||
}} | }} | ||
| Line 338: | Line 323: | ||
|image=(seanchp).gif | |image=(seanchp).gif | ||
|data= | |data= | ||
{{AttackData- | {{AttackData-NG | ||
|startup=7 | |startup=7 | ||
|active=5 | |active=5 | ||
| Line 352: | Line 337: | ||
* Self meter gain: Whiff: 3, Hit: 19, Block: 10. | * Self meter gain: Whiff: 3, Hit: 19, Block: 10. | ||
* Opponent meter gain: Whiff: 0, Hit: 4, Block: 0. | * Opponent meter gain: Whiff: 0, Hit: 4, Block: 0. | ||
}} | }} | ||
}} | }} | ||
| Line 362: | Line 346: | ||
|image=(seanclk).gif | |image=(seanclk).gif | ||
|data= | |data= | ||
{{AttackData- | {{AttackData-NG | ||
|startup=5 | |startup=5 | ||
|active=3 | |active=3 | ||
| Line 374: | Line 358: | ||
|description= | |description= | ||
* Cancel options: self sp su | * Cancel options: self sp su | ||
}} | }} | ||
}} | }} | ||
| Line 384: | Line 367: | ||
|image=(seancmk).gif | |image=(seancmk).gif | ||
|data= | |data= | ||
{{AttackData- | {{AttackData-NG | ||
|startup=7 | |startup=7 | ||
|active=5 | |active=5 | ||
| Line 399: | Line 382: | ||
* Self meter gain: Whiff: 2, Hit: 11, Block: 6. | * Self meter gain: Whiff: 2, Hit: 11, Block: 6. | ||
* Opponent meter gain: Whiff: 0, Hit: 2, Block: 0. | * Opponent meter gain: Whiff: 0, Hit: 2, Block: 0. | ||
}} | }} | ||
}} | }} | ||
| Line 409: | Line 391: | ||
|image=(seanchk).gif | |image=(seanchk).gif | ||
|data= | |data= | ||
{{AttackData- | {{AttackData-NG | ||
|startup=8 | |startup=8 | ||
|active=5 | |active=5 | ||
| Line 423: | Line 405: | ||
* Self meter gain: Whiff: 3, Hit: 19, Block: 10. | * Self meter gain: Whiff: 3, Hit: 19, Block: 10. | ||
* Opponent meter gain: Whiff: 0, Hit: 4, Block: 0. | * Opponent meter gain: Whiff: 0, Hit: 4, Block: 0. | ||
}} | }} | ||
}} | }} | ||
| Line 436: | Line 417: | ||
|image=(seanjlp).gif | |image=(seanjlp).gif | ||
|data= | |data= | ||
{{AttackData- | {{AttackData-NG | ||
|startup=5 | |startup=5 | ||
|parry=H | |parry=H | ||
| Line 442: | Line 423: | ||
|stun=7 | |stun=7 | ||
|description= | |description= | ||
}} | }} | ||
}} | }} | ||
| Line 452: | Line 432: | ||
|image=(seanjlp).gif | |image=(seanjlp).gif | ||
|data= | |data= | ||
{{AttackData- | {{AttackData-NG | ||
|startup=4 | |startup=4 | ||
|parry=H | |parry=H | ||
| Line 458: | Line 438: | ||
|stun=7 | |stun=7 | ||
|description= | |description= | ||
}} | }} | ||
}} | }} | ||
| Line 468: | Line 447: | ||
|image=(seanjmp).gif | |image=(seanjmp).gif | ||
|data= | |data= | ||
{{AttackData- | {{AttackData-NG | ||
|startup=6 | |startup=6 | ||
|active=5 | |active=5 | ||
| Line 477: | Line 456: | ||
* Self meter gain: Whiff: 2, Hit: 11, Block: 6. | * Self meter gain: Whiff: 2, Hit: 11, Block: 6. | ||
* Opponent meter gain: Whiff: 0, Hit: 2, Block: 0. | * Opponent meter gain: Whiff: 0, Hit: 2, Block: 0. | ||
}} | }} | ||
}} | }} | ||
| Line 487: | Line 465: | ||
|image=(seanjmp).gif | |image=(seanjmp).gif | ||
|data= | |data= | ||
{{AttackData- | {{AttackData-NG | ||
|startup=5 | |startup=5 | ||
|active=5 | |active=5 | ||
| Line 496: | Line 474: | ||
* Self meter gain: Whiff: 2, Hit: 11, Block: 6. | * Self meter gain: Whiff: 2, Hit: 11, Block: 6. | ||
* Opponent meter gain: Whiff: 0, Hit: 2, Block: 0. | * Opponent meter gain: Whiff: 0, Hit: 2, Block: 0. | ||
}} | }} | ||
}} | }} | ||
| Line 506: | Line 483: | ||
|image=(seannjhp).gif | |image=(seannjhp).gif | ||
|data= | |data= | ||
{{AttackData- | {{AttackData-NG | ||
|startup=7 | |startup=7 | ||
|active=3 | |active=3 | ||
| Line 515: | Line 492: | ||
* Self meter gain: Whiff: 3, Hit: 19, Block: 10. | * Self meter gain: Whiff: 3, Hit: 19, Block: 10. | ||
* Opponent meter gain: Whiff: 0, Hit: 4, Block: 0. | * Opponent meter gain: Whiff: 0, Hit: 4, Block: 0. | ||
}} | }} | ||
}} | }} | ||
| Line 525: | Line 501: | ||
|image=(seajhp).gif | |image=(seajhp).gif | ||
|data= | |data= | ||
{{AttackData- | {{AttackData-NG | ||
|startup=6 | |startup=6 | ||
|active=4 | |active=4 | ||
| Line 534: | Line 510: | ||
* Self meter gain: Whiff: 3, Hit: 19, Block: 10. | * Self meter gain: Whiff: 3, Hit: 19, Block: 10. | ||
* Opponent meter gain: Whiff: 0, Hit: 4, Block: 0. | * Opponent meter gain: Whiff: 0, Hit: 4, Block: 0. | ||
}} | }} | ||
}} | }} | ||
| Line 544: | Line 519: | ||
|image=(seanjlk).gif | |image=(seanjlk).gif | ||
|data= | |data= | ||
{{AttackData- | {{AttackData-NG | ||
|startup=5 | |startup=5 | ||
|active=19 | |active=19 | ||
| Line 551: | Line 526: | ||
|stun=7 | |stun=7 | ||
|description= | |description= | ||
}} | }} | ||
}} | }} | ||
| Line 561: | Line 535: | ||
|image=(seanjlk).gif | |image=(seanjlk).gif | ||
|data= | |data= | ||
{{AttackData- | {{AttackData-NG | ||
|startup=4 | |startup=4 | ||
|active=10 | |active=10 | ||
| Line 568: | Line 542: | ||
|stun=5 | |stun=5 | ||
|description= | |description= | ||
}} | }} | ||
}} | }} | ||
| Line 578: | Line 551: | ||
|image=(seannjmk).gif | |image=(seannjmk).gif | ||
|data= | |data= | ||
{{AttackData- | {{AttackData-NG | ||
|startup=5 | |startup=5 | ||
|active=6 | |active=6 | ||
| Line 587: | Line 560: | ||
* Self meter gain: Whiff: 2, Hit: 11, Block: 6. | * Self meter gain: Whiff: 2, Hit: 11, Block: 6. | ||
* Opponent meter gain: Whiff: 0, Hit: 2, Block: 0. | * Opponent meter gain: Whiff: 0, Hit: 2, Block: 0. | ||
}} | }} | ||
}} | }} | ||
| Line 597: | Line 569: | ||
|image=(seanjmk).gif | |image=(seanjmk).gif | ||
|data= | |data= | ||
{{AttackData- | {{AttackData-NG | ||
|startup=5 | |startup=5 | ||
|active=6 | |active=6 | ||
| Line 606: | Line 578: | ||
* Self meter gain: Whiff: 2, Hit: 11, Block: 6. | * Self meter gain: Whiff: 2, Hit: 11, Block: 6. | ||
* Opponent meter gain: Whiff: 0, Hit: 2, Block: 0. | * Opponent meter gain: Whiff: 0, Hit: 2, Block: 0. | ||
}} | }} | ||
}} | }} | ||
| Line 616: | Line 587: | ||
|image=(seannjhk).gif | |image=(seannjhk).gif | ||
|data= | |data= | ||
{{AttackData- | {{AttackData-NG | ||
|startup=7 | |startup=7 | ||
|active=5 | |active=5 | ||
| Line 625: | Line 596: | ||
* Self meter gain: Whiff: 3, Hit: 19, Block: 10. | * Self meter gain: Whiff: 3, Hit: 19, Block: 10. | ||
* Opponent meter gain: Whiff: 0, Hit: 4, Block: 0. | * Opponent meter gain: Whiff: 0, Hit: 4, Block: 0. | ||
}} | }} | ||
}} | }} | ||
| Line 635: | Line 605: | ||
|image=(seanjhk).gif | |image=(seanjhk).gif | ||
|data= | |data= | ||
{{AttackData- | {{AttackData-NG | ||
|startup=6 | |startup=6 | ||
|active=4 | |active=4 | ||
| Line 644: | Line 614: | ||
* Self meter gain: Whiff: 3, Hit: 19, Block: 10. | * Self meter gain: Whiff: 3, Hit: 19, Block: 10. | ||
* Opponent meter gain: Whiff: 0, Hit: 4, Block: 0. | * Opponent meter gain: Whiff: 0, Hit: 4, Block: 0. | ||
}} | }} | ||
}} | }} | ||
| Line 664: | Line 633: | ||
|image=(seanhg).gif | |image=(seanhg).gif | ||
|data= | |data= | ||
{{AttackData- | {{AttackData-NG | ||
|startup=2 | |startup=2 | ||
|active=1 | |active=1 | ||
| Line 674: | Line 643: | ||
|description= | |description= | ||
* 20 throw range | * 20 throw range | ||
}} | }} | ||
}} | }} | ||
| Line 684: | Line 652: | ||
|image=(seansn).gif | |image=(seansn).gif | ||
|data= | |data= | ||
{{AttackData- | {{AttackData-NG | ||
|startup=2 | |startup=2 | ||
|active=1 | |active=1 | ||
| Line 694: | Line 662: | ||
|description= | |description= | ||
* 20 throw range | * 20 throw range | ||
}} | }} | ||
}} | }} | ||
| Line 707: | Line 674: | ||
|image=(seanuoh).gif | |image=(seanuoh).gif | ||
|data= | |data= | ||
{{AttackData- | {{AttackData-NG | ||
|startup=15 | |startup=15 | ||
|active=8 | |active=8 | ||
| Line 715: | Line 682: | ||
|stun=3 | |stun=3 | ||
|description= | |description= | ||
}} | }} | ||
}} | }} | ||
| Line 750: | Line 695: | ||
|caption={{lp}}/{{mp}}/{{hp}} | |caption={{lp}}/{{mp}}/{{hp}} | ||
|data= | |data= | ||
{{AttackData- | {{AttackData-NG | ||
|version=LP | |version=LP | ||
|startup=2 | |startup=2 | ||
| Line 756: | Line 701: | ||
|recovery=7 | |recovery=7 | ||
|description= | |description= | ||
}} | }} | ||
{{AttackData- | {{AttackData-NG | ||
|version=MP | |version=MP | ||
|startup=2 | |startup=2 | ||
| Line 764: | Line 708: | ||
|recovery=7 | |recovery=7 | ||
|description= | |description= | ||
}} | }} | ||
{{AttackData- | {{AttackData-NG | ||
|version=HP | |version=HP | ||
|startup=2 | |startup=2 | ||
| Line 772: | Line 715: | ||
|recovery=7 | |recovery=7 | ||
|description= | |description= | ||
}} | }} | ||
}} | }} | ||
| Line 782: | Line 724: | ||
|image=(seanwheel).gif | |image=(seanwheel).gif | ||
|caption={{lk}}/{{mk}}/{{hk}} | |caption={{lk}}/{{mk}}/{{hk}} | ||
|data= | |data= | ||
{{AttackData- | {{AttackData-NG | ||
|version=LK | |version=LK | ||
|startup=25 | |startup=25 | ||
| Line 797: | Line 737: | ||
* Self meter gain: Whiff: 3, Hit: 21, Block: 15. | * Self meter gain: Whiff: 3, Hit: 21, Block: 15. | ||
* Opponent meter gain: Whiff: 0, Hit: 6, Block: 0. | * Opponent meter gain: Whiff: 0, Hit: 6, Block: 0. | ||
}} | }} | ||
{{AttackData- | {{AttackData-NG | ||
|version=MK | |version=MK | ||
|startup=25 | |startup=25 | ||
| Line 811: | Line 750: | ||
* Self meter gain: Whiff: 3, Hit: 21, Block: 15. | * Self meter gain: Whiff: 3, Hit: 21, Block: 15. | ||
* Opponent meter gain: Whiff: 0, Hit: 6, Block: 0. | * Opponent meter gain: Whiff: 0, Hit: 6, Block: 0. | ||
}} | }} | ||
{{AttackData- | {{AttackData-NG | ||
|version=HK | |version=HK | ||
|startup=25 | |startup=25 | ||
| Line 825: | Line 763: | ||
* Self meter gain: Whiff: 3, Hit: 21, Block: 15. | * Self meter gain: Whiff: 3, Hit: 21, Block: 15. | ||
* Opponent meter gain: Whiff: 0, Hit: 6, Block: 0. | * Opponent meter gain: Whiff: 0, Hit: 6, Block: 0. | ||
}} | }} | ||
}} | }} | ||
| Line 849: | Line 772: | ||
|image=(seandtornadokick).gif | |image=(seandtornadokick).gif | ||
|caption={{lk}}/{{mk}}/{{hk}} | |caption={{lk}}/{{mk}}/{{hk}} | ||
|data= | |data= | ||
{{AttackData- | {{AttackData-NG | ||
|version=LK | |version=LK | ||
|startup=11 | |startup=11 | ||
| Line 864: | Line 785: | ||
* Self meter gain: Whiff: 3, Hit: 19, Block: 13. | * Self meter gain: Whiff: 3, Hit: 19, Block: 13. | ||
* Opponent meter gain: Whiff: 0, Hit: 4, Block: 0. | * Opponent meter gain: Whiff: 0, Hit: 4, Block: 0. | ||
}} | }} | ||
{{AttackData- | {{AttackData-NG | ||
|version=MK | |version=MK | ||
|startup=14 | |startup=14 | ||
| Line 878: | Line 798: | ||
* Self meter gain: Whiff: 3, Hit: 20, Block: 14. | * Self meter gain: Whiff: 3, Hit: 20, Block: 14. | ||
* Opponent meter gain: Whiff: 0, Hit: 4, Block: 0. | * Opponent meter gain: Whiff: 0, Hit: 4, Block: 0. | ||
}} | }} | ||
{{AttackData- | {{AttackData-NG | ||
|version=HK | |version=HK | ||
|startup=16 | |startup=16 | ||
| Line 892: | Line 811: | ||
* Self meter gain: Whiff: 3, Hit: 21, Block: 15. | * Self meter gain: Whiff: 3, Hit: 21, Block: 15. | ||
* Opponent meter gain: Whiff: 0, Hit: 4, Block: 0. | * Opponent meter gain: Whiff: 0, Hit: 4, Block: 0. | ||
}} | }} | ||
}} | }} | ||
| Line 916: | Line 820: | ||
|image=(seantacklefull).gif | |image=(seantacklefull).gif | ||
|caption={{lp}}/{{mp}}/{{hp}} | |caption={{lp}}/{{mp}}/{{hp}} | ||
|data= | |data= | ||
{{AttackData- | {{AttackData-NG | ||
|version=LP | |version=LP | ||
|startup=18 | |startup=18 | ||
| Line 930: | Line 832: | ||
|description= | |description= | ||
* 34 throw range | * 34 throw range | ||
}} | }} | ||
{{AttackData- | {{AttackData-NG | ||
|version=MP | |version=MP | ||
|startup=22 | |startup=22 | ||
| Line 943: | Line 844: | ||
|description= | |description= | ||
* 34 throw range | * 34 throw range | ||
}} | }} | ||
{{AttackData- | {{AttackData-NG | ||
|version=HP | |version=HP | ||
|startup=26 | |startup=26 | ||
| Line 956: | Line 856: | ||
|description= | |description= | ||
* 34 throw range | * 34 throw range | ||
}} | }} | ||
}} | }} | ||
| Line 981: | Line 865: | ||
|image=(seands).gif | |image=(seands).gif | ||
|caption={{lp}}/{{mp}}/{{hp}} | |caption={{lp}}/{{mp}}/{{hp}} | ||
|data= | |data= | ||
{{AttackData- | {{AttackData-NG | ||
|version=LP | |version=LP | ||
|startup=5 | |startup=5 | ||
| Line 997: | Line 879: | ||
* Self meter gain: Whiff: 2, Hit: 11, Block: 6. | * Self meter gain: Whiff: 2, Hit: 11, Block: 6. | ||
* Opponent meter gain: Whiff: 0, Hit: 2, Block: 0. | * Opponent meter gain: Whiff: 0, Hit: 2, Block: 0. | ||
}} | }} | ||
{{AttackData- | {{AttackData-NG | ||
|version=MP | |version=MP | ||
|startup=5 | |startup=5 | ||
| Line 1,012: | Line 893: | ||
* Self meter gain: Whiff: 2, Hit: 11, Block: 6. | * Self meter gain: Whiff: 2, Hit: 11, Block: 6. | ||
* Opponent meter gain: Whiff: 0, Hit: 2, Block: 0. | * Opponent meter gain: Whiff: 0, Hit: 2, Block: 0. | ||
}} | }} | ||
{{AttackData- | {{AttackData-NG | ||
|version=HP | |version=HP | ||
|startup=9 | |startup=9 | ||
| Line 1,027: | Line 907: | ||
* Self meter gain: Whiff: 2, Hit: 11, Block: 6. | * Self meter gain: Whiff: 2, Hit: 11, Block: 6. | ||
* Opponent meter gain: Whiff: 0, Hit: 2, Block: 0. | * Opponent meter gain: Whiff: 0, Hit: 2, Block: 0. | ||
}} | }} | ||
}} | }} | ||
| Line 1,055: | Line 919: | ||
|image=(seansa1).gif | |image=(seansa1).gif | ||
|data= | |data= | ||
{{AttackData- | {{AttackData-NG | ||
|startup=2 | |startup=2 | ||
|recovery=61 | |recovery=61 | ||
| Line 1,063: | Line 927: | ||
|stun=9 | |stun=9 | ||
|description= | |description= | ||
}} | }} | ||
}} | }} | ||
| Line 1,073: | Line 936: | ||
|image=(seansa2).gif | |image=(seansa2).gif | ||
|data= | |data= | ||
{{AttackData- | {{AttackData-NG | ||
|startup=1 | |startup=1 | ||
|active=36 | |active=36 | ||
| Line 1,081: | Line 944: | ||
|damage=38 | |damage=38 | ||
|description= | |description= | ||
}} | }} | ||
}} | }} | ||
| Line 1,091: | Line 953: | ||
|image=(seansa3).gif | |image=(seansa3).gif | ||
|data= | |data= | ||
{{AttackData- | {{AttackData-NG | ||
|startup=2 | |startup=2 | ||
|active=14 | |active=14 | ||
| Line 1,100: | Line 962: | ||
|stun=14 | |stun=14 | ||
|description= | |description= | ||
}} | }} | ||
}} | }} | ||
{{Navbox- | {{Navbox-NG}} | ||
[[Category: Street Fighter 3: New Generation]] | [[Category: Street Fighter 3: New Generation]] | ||
Latest revision as of 08:15, 11 May 2022
Introduction
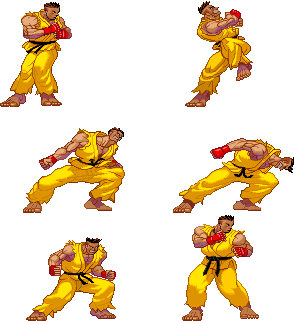
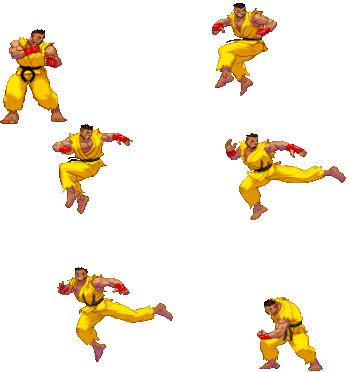
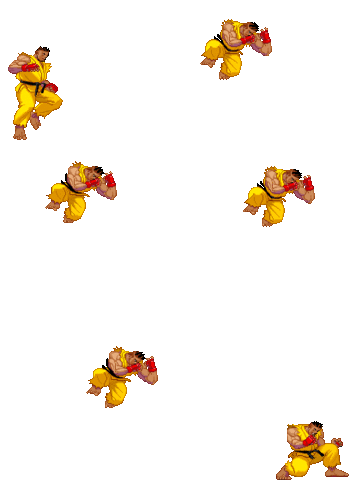
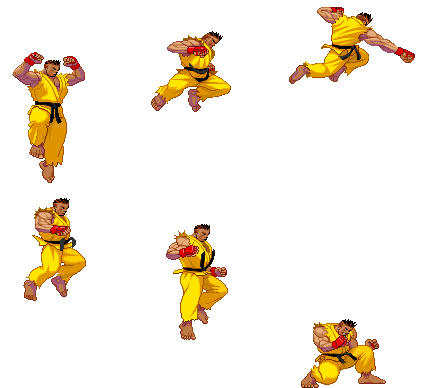
Sean is a young, prideful amateur martial artist from Brazil. He idolizes Ken, eventually becoming Ken's student and seeking to prove his worth as a fighter. Sean first appears in Street Fighter III: New Generation.
Sean is perhaps the most efficient definition of an underrated character in the history of fighting games. As the student of Ken and yet another shoto-based character in the Street Fighter series, he would need to be a fresh face with the same strength as his master and new tools to differentiate himself from Ryu and Ken.
Well, Capcom was more than successful on those fronts.
Other than being top-tier because of both his insane meter building and high stun potential (his Tornado Kick is safe on hit and does ridiculous stun), NG makes Sean much more of an offensive character unlike 3S, where he ends up as a defensive character. When you play as him you have to understand that he does have some flaws however, like his wheel kicks (they are worse here than in 3S), poor high-low mixups (compensated by his strong mids), and lack of an infinite or TOD.
Super Arts
SA1: Hadou Burst
- More Hit-Confirms
- Situational Closer/Punisher
- Anti-Air
- More than 50% damage potential
- 50% stun potential
- Consumes 1-hit projectiles
- Small Meter Length
- Fast travel speed
- Easy to Parry
- Slightly long recovery
- Game-plan: 4 Close Roundhouses can fill up a bar of Hadou Burst. From a long range, the go-to confirm is Cr.MK. Up close, you have either Cl.HK, Cl.HP, Cr.MP or Cr.LK x2. After a parry, you have 3 choices: Cr.MP, Cr.MK and Cr.HP. Cr.HP is good against moves with long reach that recovers late and does great damage, Cr.MK is the standard, and Cr.MP is faster than the other 2 but you need to be within range. This super, like his others can link of a UOH. Parry -> Hadou Burst vs. certain "Parry-Bait Supers" near the corner can potentially deal near 50% if you have 2 stocks. To properly Anti-Air into this super, it has to be done off Cl.MP since that button doesn't reset the juggle counter like the other cancel-able ones. Be looking for opportunities to punish with this move, especially against crouching attacks. Sean can do a lot of "dash-back" set-ups with this super. The max damage output of this super can rival the max damage output of Ken's SA3.
SA2: Shoryu Cannon
- More than 50% damage potential
- Corner Juggles
- True Anti-Air
- Situational Closer/Punisher
- High invincibility
- Grants a free Mix-up afterwards
- Goes through projectiles
- Bad recovery and range
- Game-plan: 6 Close Roundhouses fill up a bar. Cr.LK x 2 or Cl.HK are the go-to confirms for this super. It's main usage is as an Anti-air but still has to be timed correctly or many of the hits will whiff. Cl.HK x SA2 is the primary Anti-air, and should be one of the few things to go for when a super is stocked. This can punish moves that leave opponents too close on block (overheads, Sean tornado, Remy CBK's, etc). The strongest combo with a single stock of Shoryu Cannon (with the corner Cl.HK reset) is equal to Chun's strongest combo with Hoyokusen. With 2, it can deal from 70% to 80%. Beats a lot of Parry-baits with the exception of itself, Hyper Tornado, and a few other supers. It can link off of a UOH but only as a Meaty up close. It doesn't have much range so the main goal should be to always be close to the opponent. S.C. has 10 frames of invincibility and some of the highest priority in the game with the exception of a few supers.
- Sean has 3 moves that can link into Shoryu Cannon: Standing Short, Standing Forward, and the Overhead Wheel Kicks. Standing Forward has to be done on Meaty up close (against Crouchers) for it to work. Same with the Wheel Kick but its a Yun/Yang only link.
SA3: Hyper Tornado
- True Punisher
- More than 50% damage potential
- Higher invincibility
- Travels through projectiles
- Great range
- 50% stun potential
- Large Meter
- Game-plan: The Punisher. Meter building is very important for this super. It takes 7 Close Roundhouses to fill it. It starts up in 3 frames (like Ken's Shippu) which allows him to punish a lot of things in the game once stocked. H.T has the same confirms as Hadou Burst (minus the ones with Dragon Smash) and can almost cover the same amount of range. The go-to confirms are Cr.LK x 2, Cr.MK/MP, and Cl.HK. Hyper Tornado has very high invincibility, even higher than Shoryu Cannon which means it blows up Parry-Baits more reliably (except against itself and a few supers), and it can travel through projectiles too but the projectile has to be far from the opponent or you risk wasting the super. Like his other supers, H.T can be linked off of a UOH too. The maximum damage potential of this super is just shy of Hugo's Gigas by a few pixels.
| Strengths | Weaknesses |
|---|---|
|
|
| Sean | |
|---|---|
| Vitals | |
| Life Points | 1120 |
| Stun Points | 64 |
| Super Art Stock/Size | |
| SA1 | 3/72 |
| SA2 | 2/96 |
| SA3 | 1/120 |
| Ground Movement | |
| Forward Dash duration/distance | 13 (17) (112px) |
| Back Dash duration/distance | 15 (54px) |
| Jumping | |
| Back Jump duration | 41(4+36+1) |
| Neutral Jump duration | 37(4+32+1) |
| Forward Jump duration | 38(4+33+1) |
| Back Super Jump duration | 52(7+44+1) |
| Neutral Super Jump duration | 52(7+44+1) |
| Forward Super Jump duration | 52(7+44+1) |
| Wake up | |
| Wake up duration | 77 |
| Quick rise duration | 50 |
| New Generation Frame Data Glossary | |
|---|---|
| Active |
How many frames a move remains active (can hurt opponents) for. Consecutive sets of active frames on a multi-hit move are separated by an asterisk (ex: 3*5). If there is a gap between sets of active frames, the gap is denoted by a number in parentheses (ex: 2(4)2) |
| Attack |
Attack level is L for low attacks (must be blocked crouching), H is for High attacks (which can be blocked high or low) and M for overhead (must be blocked standing). T is for throw attacks (which cannot be blocked). |
| Cancel options |
Available cancel options.
|
| Damage |
Attack damage on hit in life points. Notation may denote multi-hit or "sweet spot" damage values on certain frames. |
| Hit/Block |
These are frame advantage values when the attack hits or is blocked. If the number is positive, then the move will end before the defender can act again. If the number is negative, the defender will be able to act before the attacker and maybe even punish. D refers to knockdown on hit. "Cr. Hit" is an additional frame advantage value denoting if the advantage on hit changes when the defender is being hit while crouching. |
| Kara Range |
Almost all normal attacks can be canceled into a special or a multi-button command within three frames of startup. During that time, some attacks will shift position forward or backward and affect the reach of the special or command accordingly. This is denoted in pixels of range. There are a handful of moves in the game that can be kara-canceled after this initial window and will be denoted as a late kara-cancel. |
| Link |
A combo that is performed by inputting the second move after the first move has completely recovered (as opposed to cancelling the first move's animation). In 3S, the final frame of a move's hitstun allows a character to block a normal or special move, as well as some projectile supers. Therefore, an attack's frame advantage must be 2 frames greater than the followup move's startup in order to link. |
| Parry |
This field will show a value of A if the attack can be parried standing or crouching, H if it must be parried standing or L if it must be parried crouching. |
| Recovery |
How many frames it takes for a move to finish after it's been active. |
| Startup |
How many frames it takes before the move becomes 'active' or has a hitbox. 3S uses classic startup notation, which does not include the first active frame. A move with 3 startup becomes active on frame 4. |
| Stun |
Amount of stun added to the opponent's stun bar on hit. |
| Throw range |
Range in pixels from the center of the character to the center of the opponent which allows a grab to connect. |
Frame Data
Standing Normals
5LP
| Startup | Active | Recovery | Hit | Cr. Hit | ||
|---|---|---|---|---|---|---|
| 3 | 2 | 5 | 5 | 5 | ||
| Damage | Stun | Attack | Parry | Block | ||
| 3 | 3 | - | A | 5 | ||
| ||||||
5MP (cl)
| Startup | Active | Recovery | Hit | Cr. Hit | ||
|---|---|---|---|---|---|---|
| 4 | 5 | 10 | 1 | 2 | ||
| Damage | Stun | Attack | Parry | Block | ||
| 16 | 9 | - | H | - | ||
| ||||||
5MP (far)
| Startup | Active | Recovery | Hit | Cr. Hit | ||
|---|---|---|---|---|---|---|
| 5 | 4 | 13 | 1 | 2 | ||
| Damage | Stun | Attack | Parry | Block | ||
| 14 | 11 | - | H | - | ||
| ||||||
5HP (cl)
| Startup | Active | Recovery | Hit | Cr. Hit | ||
|---|---|---|---|---|---|---|
| 5 | 5 | 15 | -2 | - | ||
| Damage | Stun | Attack | Parry | Block | ||
| 21 | 13 | - | H | -4 | ||
| ||||||
5HP (far)
| Startup | Active | Recovery | Hit | Cr. Hit | ||
|---|---|---|---|---|---|---|
| 9 | 4 | 19 | -5 | -3 | ||
| Damage | Stun | Attack | Parry | Block | ||
| 21 | 10 | - | H | -7 | ||
| ||||||
5LK
| Startup | Active | Recovery | Hit | Cr. Hit |
|---|---|---|---|---|
| 4 | 4 | 7 | 2 | 2 |
| Damage | Stun | Attack | Parry | Block |
| 5 | 3 | - | A | 2 |
5MK
| Startup | Active | Recovery | Hit | Cr. Hit | ||
|---|---|---|---|---|---|---|
| 6 | 4 | 15 | -1 | - | ||
| Damage | Stun | Attack | Parry | Block | ||
| 16 | 5 | - | A | -2 | ||
| ||||||
5HK (cl)
| Startup | Active | Recovery | Hit | Cr. Hit | ||
|---|---|---|---|---|---|---|
| 5 | 5 | 10 | 4 | 6 | ||
| Damage | Stun | Attack | Parry | Block | ||
| 25 | 11 | - | H | 2 | ||
| ||||||
5HK (far)
| Startup | Active | Recovery | Hit | Cr. Hit | ||
|---|---|---|---|---|---|---|
| 7 | 4 | 26 | -7 | -5 | ||
| Damage | Stun | Attack | Parry | Block | ||
| 21 | 11 | - | H | -9 | ||
| ||||||
Command Normals
6HP
| Startup | Active | Recovery | Hit | Cr. Hit | ||
|---|---|---|---|---|---|---|
| 21 | 7 | 25 | -4 | -2 | ||
| Damage | Stun | Attack | Parry | Block | ||
| 22 | 13 | - | H | -6 | ||
| ||||||
6HK
| Startup | Active | Recovery | Hit | Cr. Hit | ||
|---|---|---|---|---|---|---|
| 15 | 5 | 18 | D | D | ||
| Damage | Stun | Attack | Parry | Block | ||
| 16 | 9 | - | H | -5 | ||
| ||||||
Crouching Normals
2LP
| Startup | Active | Recovery | Hit | Cr. Hit | ||
|---|---|---|---|---|---|---|
| 4 | 3 | 5 | 3 | 3 | ||
| Damage | Stun | Attack | Parry | Block | ||
| 3 | 3 | - | A | 3 | ||
| ||||||
2MP
| Startup | Active | Recovery | Hit | Cr. Hit | ||
|---|---|---|---|---|---|---|
| 5 | 4 | 7 | 4 | 5 | ||
| Damage | Stun | Attack | Parry | Block | ||
| 14 | 7 | - | A | 3 | ||
| ||||||
2HP
| Startup | Active | Recovery | Hit | Cr. Hit | ||
|---|---|---|---|---|---|---|
| 7 | 5 | 17 | -7 | -5 | ||
| Damage | Stun | Attack | Parry | Block | ||
| 21 | 13 | - | A | -9 | ||
| ||||||
2LK
| Startup | Active | Recovery | Hit | Cr. Hit | ||
|---|---|---|---|---|---|---|
| 5 | 3 | 7 | 1 | 1 | ||
| Damage | Stun | Attack | Parry | Block | ||
| 3 | 3 | - | L | 1 | ||
| ||||||
2MK
| Startup | Active | Recovery | Hit | Cr. Hit | ||
|---|---|---|---|---|---|---|
| 7 | 5 | 17 | -2 | -2 | ||
| Damage | Stun | Attack | Parry | Block | ||
| 15 | 3 | - | L | -4 | ||
| ||||||
2HK
| Startup | Active | Recovery | Hit | Cr. Hit | ||
|---|---|---|---|---|---|---|
| 8 | 5 | 26 | D | D | ||
| Damage | Stun | Attack | Parry | Block | ||
| 21 | 3 | - | L | -16 | ||
| ||||||
Jumping Normals
8LP
| Startup | Active | Recovery | Hit | Cr. Hit |
|---|---|---|---|---|
| 5 | - | - | - | - |
| Damage | Stun | Attack | Parry | Block |
| 7 | 7 | - | H | - |
j.LP
| Startup | Active | Recovery | Hit | Cr. Hit |
|---|---|---|---|---|
| 4 | - | - | - | - |
| Damage | Stun | Attack | Parry | Block |
| 8 | 7 | - | H | - |
8MP
| Startup | Active | Recovery | Hit | Cr. Hit | ||
|---|---|---|---|---|---|---|
| 6 | 5 | - | - | - | ||
| Damage | Stun | Attack | Parry | Block | ||
| 16 | 11 | - | H | - | ||
| ||||||
j.MP
| Startup | Active | Recovery | Hit | Cr. Hit | ||
|---|---|---|---|---|---|---|
| 5 | 5 | - | - | - | ||
| Damage | Stun | Attack | Parry | Block | ||
| 16 | 9 | - | H | - | ||
| ||||||
8HP
| Startup | Active | Recovery | Hit | Cr. Hit | ||
|---|---|---|---|---|---|---|
| 7 | 3 | - | - | - | ||
| Damage | Stun | Attack | Parry | Block | ||
| 23 | 15 | - | H | - | ||
| ||||||
j.HP
| Startup | Active | Recovery | Hit | Cr. Hit | ||
|---|---|---|---|---|---|---|
| 6 | 4 | - | - | - | ||
| Damage | Stun | Attack | Parry | Block | ||
| 23 | 13 | - | H | - | ||
| ||||||
8LK
| Startup | Active | Recovery | Hit | Cr. Hit |
|---|---|---|---|---|
| 5 | 19 | - | - | - |
| Damage | Stun | Attack | Parry | Block |
| 8 | 7 | - | H | - |
j.LK
| Startup | Active | Recovery | Hit | Cr. Hit |
|---|---|---|---|---|
| 4 | 10 | - | - | - |
| Damage | Stun | Attack | Parry | Block |
| 8 | 5 | - | H | - |
8MK
| Startup | Active | Recovery | Hit | Cr. Hit | ||
|---|---|---|---|---|---|---|
| 5 | 6 | - | - | - | ||
| Damage | Stun | Attack | Parry | Block | ||
| 16 | 9 | - | H | - | ||
| ||||||
j.MK
| Startup | Active | Recovery | Hit | Cr. Hit | ||
|---|---|---|---|---|---|---|
| 5 | 6 | - | - | - | ||
| Damage | Stun | Attack | Parry | Block | ||
| 16 | 9 | - | H | - | ||
| ||||||
8HK
| Startup | Active | Recovery | Hit | Cr. Hit | ||
|---|---|---|---|---|---|---|
| 7 | 5 | - | - | - | ||
| Damage | Stun | Attack | Parry | Block | ||
| 23 | 13 | - | H | - | ||
| ||||||
j.HK
| Startup | Active | Recovery | Hit | Cr. Hit | ||
|---|---|---|---|---|---|---|
| 6 | 4 | - | - | - | ||
| Damage | Stun | Attack | Parry | Block | ||
| 19 | 13 | - | H | - | ||
| ||||||
Target Combos
Throws
LPLK
| Startup | Active | Recovery | Hit | Cr. Hit | ||
|---|---|---|---|---|---|---|
| 2 | 1 | 21 | D | D | ||
| Damage | Stun | Attack | Parry | Block | ||
| 21 | 10 | - | - | - | ||
| ||||||
4LPLK
| Startup | Active | Recovery | Hit | Cr. Hit | ||
|---|---|---|---|---|---|---|
| 2 | 1 | 21 | D | D | ||
| Damage | Stun | Attack | Parry | Block | ||
| 24 | 4 | - | - | - | ||
| ||||||
Universal Overhead
MPMK
| Startup | Active | Recovery | Hit | Cr. Hit |
|---|---|---|---|---|
| 15 | 8 | 7 | - | - |
| Damage | Stun | Attack | Parry | Block |
| 7 | 3 | - | H | - |
Special Moves
214P
| LP | Startup | Active | Recovery | Hit | Cr. Hit |
|---|---|---|---|---|---|
| 2 | 19 | 7 | - | - | |
| Damage | Stun | Attack | Parry | Block | |
| - | - | - | - | - | |
| MP | Startup | Active | Recovery | Hit | Cr. Hit |
| 2 | 29 | 7 | - | - | |
| Damage | Stun | Attack | Parry | Block | |
| - | - | - | - | - | |
| HP | Startup | Active | Recovery | Hit | Cr. Hit |
| 2 | 43 | 7 | - | - | |
| Damage | Stun | Attack | Parry | Block | |
| - | - | - | - | - |
236K
| LK | Startup | Active | Recovery | Hit | Cr. Hit | ||
|---|---|---|---|---|---|---|---|
| 25 | 8 | 15 | - | - | |||
| Damage | Stun | Attack | Parry | Block | |||
| 21 | 19 | - | H | -3 | |||
| |||||||
| MK | Startup | Active | Recovery | Hit | Cr. Hit | ||
| 25 | 8 | 15 | - | - | |||
| Damage | Stun | Attack | Parry | Block | |||
| 21 | 19 | - | H | -3 | |||
| |||||||
| HK | Startup | Active | Recovery | Hit | Cr. Hit | ||
| 25 | 8 | 15 | - | - | |||
| Damage | Stun | Attack | Parry | Block | |||
| 21 | 19 | - | H | -3 | |||
| |||||||
214K
| LK | Startup | Active | Recovery | Hit | Cr. Hit | ||
|---|---|---|---|---|---|---|---|
| 11 | 4 | 21 | - | - | |||
| Damage | Stun | Attack | Parry | Block | |||
| 16 | 9 | - | H | -7 | |||
| |||||||
| MK | Startup | Active | Recovery | Hit | Cr. Hit | ||
| 14 | 8 | 21 | - | - | |||
| Damage | Stun | Attack | Parry | Block | |||
| 24 | 13 | - | H | -6 | |||
| |||||||
| HK | Startup | Active | Recovery | Hit | Cr. Hit | ||
| 16 | 13 | 21 | - | - | |||
| Damage | Stun | Attack | Parry | Block | |||
| 26 | 17 | - | H | -6 | |||
| |||||||
41236P
| LP | Startup | Active | Recovery | Hit | Cr. Hit | ||
|---|---|---|---|---|---|---|---|
| 18 | 2 | 28 | - | - | |||
| Damage | Stun | Attack | Parry | Block | |||
| 30 | 16 | - | L | -14 | |||
| |||||||
| MP | Startup | Active | Recovery | Hit | Cr. Hit | ||
| 22 | 2 | 28 | - | - | |||
| Damage | Stun | Attack | Parry | Block | |||
| 30 | 16 | - | L | -14 | |||
| |||||||
| HP | Startup | Active | Recovery | Hit | Cr. Hit | ||
| 26 | 2 | 28 | - | - | |||
| Damage | Stun | Attack | Parry | Block | |||
| 30 | 16 | - | L | -14 | |||
| |||||||
623P
| LP | Startup | Active | Recovery | Hit | Cr. Hit | ||
|---|---|---|---|---|---|---|---|
| 5 | 6 | 36 | - | - | |||
| Damage | Stun | Attack | Parry | Block | |||
| 23 | 11 | - | A | -24 | |||
| |||||||
| MP | Startup | Active | Recovery | Hit | Cr. Hit | ||
| 5 | 6 | 36 | - | - | |||
| Damage | Stun | Attack | Parry | Block | |||
| 23 | 11 | - | A | -24 | |||
| |||||||
| HP | Startup | Active | Recovery | Hit | Cr. Hit | ||
| 9 | 9 | 42 | - | - | |||
| Damage | Stun | Attack | Parry | Block | |||
| 23 | 11 | - | A | -34 | |||
| |||||||
Super Arts
236236P (SA1)
| Startup | Active | Recovery | Hit | Cr. Hit |
|---|---|---|---|---|
| 2 | - | 61 | - | - |
| Damage | Stun | Attack | Parry | Block |
| 39 | 9 | - | H | -29 |
236236P (SA2)
| Startup | Active | Recovery | Hit | Cr. Hit |
|---|---|---|---|---|
| 1 | 36 | 36 | - | - |
| Damage | Stun | Attack | Parry | Block |
| 38 | - | - | A | -43 |
236236P (SA3)
| Startup | Active | Recovery | Hit | Cr. Hit |
|---|---|---|---|---|
| 2 | 14 | 53 | - | - |
| Damage | Stun | Attack | Parry | Block |
| 76 | 14 | - | A | -31 |

