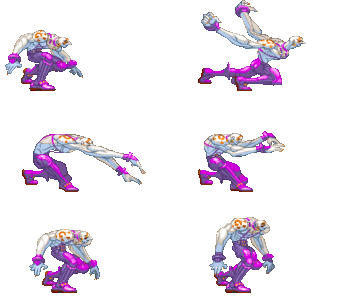
(ported necro page from third strike wiki) |
No edit summary |
||
| (7 intermediate revisions by the same user not shown) | |||
| Line 1: | Line 1: | ||
{{TOClimit|3}} | {{TOClimit|3}} | ||
{{Infobox Character NG | |||
{{Infobox Character | |||
|name=Necro | |name=Necro | ||
|image=NG Necro Portrait Art.png | |||
|image= | |||
|health=1120 | |health=1120 | ||
|stun=64 | |stun=64 | ||
| Line 22: | Line 20: | ||
}} | }} | ||
<center>{{FrameDataKey- | <center>{{FrameDataKey-NG}}</center> | ||
== Frame Data == | == Frame Data == | ||
| Line 32: | Line 30: | ||
|image=(necrolp).gif | |image=(necrolp).gif | ||
|data= | |data= | ||
{{AttackData- | {{AttackData-NG | ||
|startup=5 | |startup=5 | ||
|active=1 | |active=1 | ||
| Line 44: | Line 42: | ||
|description= | |description= | ||
* Cancel options: sp su | * Cancel options: sp su | ||
}} | }} | ||
}} | }} | ||
| Line 54: | Line 51: | ||
|image=(necromp).gif | |image=(necromp).gif | ||
|data= | |data= | ||
{{AttackData- | {{AttackData-NG | ||
|startup=8 | |startup=8 | ||
|active=1 | |active=1 | ||
| Line 68: | Line 65: | ||
* Self meter gain: Whiff: 2, Hit: 11, Block: 6. | * Self meter gain: Whiff: 2, Hit: 11, Block: 6. | ||
* Opponent meter gain: Whiff: 0, Hit: 2, Block: 0. | * Opponent meter gain: Whiff: 0, Hit: 2, Block: 0. | ||
}} | }} | ||
}} | }} | ||
| Line 78: | Line 74: | ||
|image=(necrohp).gif | |image=(necrohp).gif | ||
|data= | |data= | ||
{{AttackData- | {{AttackData-NG | ||
|startup=15 | |startup=15 | ||
|active=1 | |active=1 | ||
| Line 91: | Line 87: | ||
* Self meter gain: Whiff: 3, Hit: 19, Block: 10. | * Self meter gain: Whiff: 3, Hit: 19, Block: 10. | ||
* Opponent meter gain: Whiff: 0, Hit: 4, Block: 0. | * Opponent meter gain: Whiff: 0, Hit: 4, Block: 0. | ||
}} | }} | ||
}} | }} | ||
| Line 101: | Line 96: | ||
|image=(necrolk).gif | |image=(necrolk).gif | ||
|data= | |data= | ||
{{AttackData- | {{AttackData-NG | ||
|startup=4 | |startup=4 | ||
|active=1 | |active=1 | ||
| Line 113: | Line 108: | ||
|description= | |description= | ||
* Cancel options: sp su | * Cancel options: sp su | ||
}} | }} | ||
}} | }} | ||
| Line 123: | Line 117: | ||
|image=(necromk).gif | |image=(necromk).gif | ||
|data= | |data= | ||
{{AttackData- | {{AttackData-NG | ||
|startup=9 | |startup=9 | ||
|active=1 | |active=1 | ||
| Line 135: | Line 129: | ||
* Self meter gain: Whiff: 2, Hit: 11, Block: 6. | * Self meter gain: Whiff: 2, Hit: 11, Block: 6. | ||
* Opponent meter gain: Whiff: 0, Hit: 2, Block: 0. | * Opponent meter gain: Whiff: 0, Hit: 2, Block: 0. | ||
}} | }} | ||
}} | }} | ||
| Line 145: | Line 138: | ||
|image=(necrohk).gif | |image=(necrohk).gif | ||
|data= | |data= | ||
{{AttackData- | {{AttackData-NG | ||
|startup=18 | |startup=18 | ||
|active=1 | |active=1 | ||
| Line 158: | Line 151: | ||
* Self meter gain: Whiff: 3, Hit: 19, Block: 10. | * Self meter gain: Whiff: 3, Hit: 19, Block: 10. | ||
* Opponent meter gain: Whiff: 0, Hit: 4, Block: 0. | * Opponent meter gain: Whiff: 0, Hit: 4, Block: 0. | ||
}} | }} | ||
}} | }} | ||
| Line 171: | Line 163: | ||
|image=(necroblp).gif | |image=(necroblp).gif | ||
|data= | |data= | ||
{{AttackData- | {{AttackData-NG | ||
|startup=3 | |startup=3 | ||
|active=1 | |active=1 | ||
| Line 183: | Line 175: | ||
|description= | |description= | ||
* Cancel options: sp su | * Cancel options: sp su | ||
}} | }} | ||
}} | }} | ||
| Line 193: | Line 184: | ||
|image=(necrobmp).gif | |image=(necrobmp).gif | ||
|data= | |data= | ||
{{AttackData- | {{AttackData-NG | ||
|startup=4 | |startup=4 | ||
|active=2 | |active=2 | ||
| Line 207: | Line 198: | ||
* Self meter gain: Whiff: 2, Hit: 11, Block: 6. | * Self meter gain: Whiff: 2, Hit: 11, Block: 6. | ||
* Opponent meter gain: Whiff: 0, Hit: 2, Block: 0. | * Opponent meter gain: Whiff: 0, Hit: 2, Block: 0. | ||
}} | }} | ||
}} | }} | ||
| Line 217: | Line 207: | ||
|image=(necrobhp).gif | |image=(necrobhp).gif | ||
|data= | |data= | ||
{{AttackData- | {{AttackData-NG | ||
|startup=11 | |startup=11 | ||
|active=4 | |active=4 | ||
| Line 231: | Line 221: | ||
* Self meter gain: Whiff: 3, Hit: 19, Block: 10. | * Self meter gain: Whiff: 3, Hit: 19, Block: 10. | ||
* Opponent meter gain: Whiff: 0, Hit: 4, Block: 0. | * Opponent meter gain: Whiff: 0, Hit: 4, Block: 0. | ||
}} | }} | ||
}} | }} | ||
| Line 241: | Line 230: | ||
|image=(necroblk).gif | |image=(necroblk).gif | ||
|data= | |data= | ||
{{AttackData- | {{AttackData-NG | ||
|startup=3 | |startup=3 | ||
|active=2 | |active=2 | ||
| Line 253: | Line 242: | ||
|description= | |description= | ||
* Cancel options: self sp su | * Cancel options: self sp su | ||
}} | }} | ||
}} | }} | ||
| Line 263: | Line 251: | ||
|image=(necrobmk).gif | |image=(necrobmk).gif | ||
|data= | |data= | ||
{{AttackData- | {{AttackData-NG | ||
|startup=5 | |startup=5 | ||
|active=1 | |active=1 | ||
| Line 278: | Line 266: | ||
* Self meter gain: Whiff: 2, Hit: 11, Block: 6. | * Self meter gain: Whiff: 2, Hit: 11, Block: 6. | ||
* Opponent meter gain: Whiff: 0, Hit: 2, Block: 0. | * Opponent meter gain: Whiff: 0, Hit: 2, Block: 0. | ||
}} | }} | ||
}} | }} | ||
| Line 288: | Line 275: | ||
|image=(necrobhk).gif | |image=(necrobhk).gif | ||
|data= | |data= | ||
{{AttackData- | {{AttackData-NG | ||
|startup=12 | |startup=12 | ||
|active=1 | |active=1 | ||
| Line 302: | Line 289: | ||
* Self meter gain: Whiff: 3, Hit: 19, Block: 10. | * Self meter gain: Whiff: 3, Hit: 19, Block: 10. | ||
* Opponent meter gain: Whiff: 0, Hit: 4, Block: 0. | * Opponent meter gain: Whiff: 0, Hit: 4, Block: 0. | ||
}} | }} | ||
}} | }} | ||
| Line 312: | Line 298: | ||
|image=(necrodbhp).gif | |image=(necrodbhp).gif | ||
|data= | |data= | ||
{{AttackData- | {{AttackData-NG | ||
|startup=9 | |startup=9 | ||
|active=1 | |active=1 | ||
| Line 325: | Line 311: | ||
* Self meter gain: Whiff: 3, Hit: 19, Block: 10. | * Self meter gain: Whiff: 3, Hit: 19, Block: 10. | ||
* Opponent meter gain: Whiff: 0, Hit: 4, Block: 0. | * Opponent meter gain: Whiff: 0, Hit: 4, Block: 0. | ||
}} | }} | ||
}} | }} | ||
| Line 338: | Line 323: | ||
|image=(necroclp).gif | |image=(necroclp).gif | ||
|data= | |data= | ||
{{AttackData- | {{AttackData-NG | ||
|startup=6 | |startup=6 | ||
|active=1 | |active=1 | ||
| Line 350: | Line 335: | ||
|description= | |description= | ||
* Cancel options: sp su | * Cancel options: sp su | ||
}} | }} | ||
}} | }} | ||
| Line 360: | Line 344: | ||
|image=(necrocmp).gif | |image=(necrocmp).gif | ||
|data= | |data= | ||
{{AttackData- | {{AttackData-NG | ||
|startup=8 | |startup=8 | ||
|active=1 | |active=1 | ||
| Line 372: | Line 356: | ||
* Self meter gain: Whiff: 2, Hit: 11, Block: 6. | * Self meter gain: Whiff: 2, Hit: 11, Block: 6. | ||
* Opponent meter gain: Whiff: 0, Hit: 2, Block: 0. | * Opponent meter gain: Whiff: 0, Hit: 2, Block: 0. | ||
}} | }} | ||
}} | }} | ||
| Line 382: | Line 365: | ||
|image=(necrochp).gif | |image=(necrochp).gif | ||
|data= | |data= | ||
{{AttackData- | {{AttackData-NG | ||
|startup=16 | |startup=16 | ||
|active=1 | |active=1 | ||
| Line 395: | Line 378: | ||
* Self meter gain: Whiff: 3, Hit: 19, Block: 10. | * Self meter gain: Whiff: 3, Hit: 19, Block: 10. | ||
* Opponent meter gain: Whiff: 0, Hit: 4, Block: 0. | * Opponent meter gain: Whiff: 0, Hit: 4, Block: 0. | ||
}} | }} | ||
}} | }} | ||
| Line 405: | Line 387: | ||
|image=(necroclk).gif | |image=(necroclk).gif | ||
|data= | |data= | ||
{{AttackData- | {{AttackData-NG | ||
|startup=6 | |startup=6 | ||
|active=1 | |active=1 | ||
| Line 417: | Line 399: | ||
|description= | |description= | ||
* Cancel options: self sp su | * Cancel options: self sp su | ||
}} | }} | ||
}} | }} | ||
| Line 427: | Line 408: | ||
|image=(necrocmk).gif | |image=(necrocmk).gif | ||
|data= | |data= | ||
{{AttackData- | {{AttackData-NG | ||
|startup=12 | |startup=12 | ||
|active=1 | |active=1 | ||
| Line 440: | Line 421: | ||
* Self meter gain: Whiff: 2, Hit: 11, Block: 6. | * Self meter gain: Whiff: 2, Hit: 11, Block: 6. | ||
* Opponent meter gain: Whiff: 0, Hit: 2, Block: 0. | * Opponent meter gain: Whiff: 0, Hit: 2, Block: 0. | ||
}} | }} | ||
}} | }} | ||
| Line 450: | Line 430: | ||
|image=(necrochk).gif | |image=(necrochk).gif | ||
|data= | |data= | ||
{{AttackData- | {{AttackData-NG | ||
|startup=13 | |startup=13 | ||
|active=1 | |active=1 | ||
| Line 463: | Line 443: | ||
* Self meter gain: Whiff: 3, Hit: 19, Block: 10. | * Self meter gain: Whiff: 3, Hit: 19, Block: 10. | ||
* Opponent meter gain: Whiff: 0, Hit: 4, Block: 0. | * Opponent meter gain: Whiff: 0, Hit: 4, Block: 0. | ||
}} | }} | ||
}} | }} | ||
| Line 476: | Line 455: | ||
|image=(necronjlp).gif | |image=(necronjlp).gif | ||
|data= | |data= | ||
{{AttackData- | {{AttackData-NG | ||
|startup=5 | |startup=5 | ||
|active=6 | |active=6 | ||
| Line 483: | Line 462: | ||
|stun=7 | |stun=7 | ||
|description= | |description= | ||
}} | }} | ||
}} | }} | ||
| Line 493: | Line 471: | ||
|image=(necrojlp).gif | |image=(necrojlp).gif | ||
|data= | |data= | ||
{{AttackData- | {{AttackData-NG | ||
|startup=4 | |startup=4 | ||
|active=14 | |active=14 | ||
| Line 500: | Line 478: | ||
|stun=7 | |stun=7 | ||
|description= | |description= | ||
}} | }} | ||
}} | }} | ||
| Line 510: | Line 487: | ||
|image=(necronjmp).gif | |image=(necronjmp).gif | ||
|data= | |data= | ||
{{AttackData- | {{AttackData-NG | ||
|startup=8 | |startup=8 | ||
|active=1 | |active=1 | ||
| Line 519: | Line 496: | ||
* Self meter gain: Whiff: 2, Hit: 11, Block: 6. | * Self meter gain: Whiff: 2, Hit: 11, Block: 6. | ||
* Opponent meter gain: Whiff: 0, Hit: 2, Block: 0. | * Opponent meter gain: Whiff: 0, Hit: 2, Block: 0. | ||
}} | }} | ||
}} | }} | ||
| Line 529: | Line 505: | ||
|image=(necrojmp).gif | |image=(necrojmp).gif | ||
|data= | |data= | ||
{{AttackData- | {{AttackData-NG | ||
|startup=9 | |startup=9 | ||
|active=1 | |active=1 | ||
| Line 538: | Line 514: | ||
* Self meter gain: Whiff: 2, Hit: 11, Block: 6. | * Self meter gain: Whiff: 2, Hit: 11, Block: 6. | ||
* Opponent meter gain: Whiff: 0, Hit: 2, Block: 0. | * Opponent meter gain: Whiff: 0, Hit: 2, Block: 0. | ||
}} | }} | ||
}} | }} | ||
| Line 548: | Line 523: | ||
|image=(necrojhp).gif | |image=(necrojhp).gif | ||
|data= | |data= | ||
{{AttackData- | {{AttackData-NG | ||
|startup=13 | |startup=13 | ||
|active=2 | |active=2 | ||
| Line 557: | Line 532: | ||
* Self meter gain: Whiff: 3, Hit: 19, Block: 10. | * Self meter gain: Whiff: 3, Hit: 19, Block: 10. | ||
* Opponent meter gain: Whiff: 0, Hit: 4, Block: 0. | * Opponent meter gain: Whiff: 0, Hit: 4, Block: 0. | ||
}} | }} | ||
}} | }} | ||
| Line 567: | Line 541: | ||
|image=(necrojlk).gif | |image=(necrojlk).gif | ||
|data= | |data= | ||
{{AttackData- | {{AttackData-NG | ||
|startup=2 | |startup=2 | ||
|active=15 | |active=15 | ||
| Line 574: | Line 548: | ||
|stun=5 | |stun=5 | ||
|description= | |description= | ||
}} | }} | ||
}} | }} | ||
| Line 584: | Line 557: | ||
|image=(necrojmk).gif | |image=(necrojmk).gif | ||
|data= | |data= | ||
{{AttackData- | {{AttackData-NG | ||
|startup=10 | |startup=10 | ||
|active=4 | |active=4 | ||
| Line 593: | Line 566: | ||
* Self meter gain: Whiff: 2, Hit: 11, Block: 6. | * Self meter gain: Whiff: 2, Hit: 11, Block: 6. | ||
* Opponent meter gain: Whiff: 0, Hit: 2, Block: 0. | * Opponent meter gain: Whiff: 0, Hit: 2, Block: 0. | ||
}} | }} | ||
}} | }} | ||
| Line 603: | Line 575: | ||
|image=(necrojhk).gif | |image=(necrojhk).gif | ||
|data= | |data= | ||
{{AttackData- | {{AttackData-NG | ||
|startup=15 | |startup=15 | ||
|active=4 | |active=4 | ||
| Line 612: | Line 584: | ||
* Self meter gain: Whiff: 3, Hit: 19, Block: 10. | * Self meter gain: Whiff: 3, Hit: 19, Block: 10. | ||
* Opponent meter gain: Whiff: 0, Hit: 4, Block: 0. | * Opponent meter gain: Whiff: 0, Hit: 4, Block: 0. | ||
}} | }} | ||
}} | }} | ||
| Line 627: | Line 598: | ||
|caption3={{hk}} | |caption3={{hk}} | ||
|data= | |data= | ||
{{AttackData- | {{AttackData-NG | ||
|version=LK | |version=LK | ||
|startup=9 | |startup=9 | ||
| Line 636: | Line 607: | ||
* Self meter gain: Whiff: 2, Hit: 12, Block: 5. | * Self meter gain: Whiff: 2, Hit: 12, Block: 5. | ||
* Opponent meter gain: Whiff: 0, Hit: 2, Block: 0. | * Opponent meter gain: Whiff: 0, Hit: 2, Block: 0. | ||
}} | }} | ||
{{AttackData- | {{AttackData-NG | ||
|version=MK | |version=MK | ||
|startup=9 | |startup=9 | ||
| Line 647: | Line 617: | ||
* Self meter gain: Whiff: 2, Hit: 11, Block: 5. | * Self meter gain: Whiff: 2, Hit: 11, Block: 5. | ||
* Opponent meter gain: Whiff: 0, Hit: 2, Block: 0. | * Opponent meter gain: Whiff: 0, Hit: 2, Block: 0. | ||
}} | }} | ||
{{AttackData- | {{AttackData-NG | ||
|version=HK | |version=HK | ||
|startup=9 | |startup=9 | ||
| Line 658: | Line 627: | ||
* Self meter gain: Whiff: 3, Hit: 18, Block: 8. | * Self meter gain: Whiff: 3, Hit: 18, Block: 8. | ||
* Opponent meter gain: Whiff: 0, Hit: 4, Block: 0. | * Opponent meter gain: Whiff: 0, Hit: 4, Block: 0. | ||
}} | }} | ||
}} | }} | ||
| Line 678: | Line 646: | ||
|image=(necroshat).gif | |image=(necroshat).gif | ||
|data= | |data= | ||
{{AttackData- | {{AttackData-NG | ||
|startup=2 | |startup=2 | ||
|active=1 | |active=1 | ||
| Line 686: | Line 654: | ||
|description= | |description= | ||
* 26 throw range | * 26 throw range | ||
}} | }} | ||
}} | }} | ||
| Line 696: | Line 663: | ||
|image=(necrofrank).gif | |image=(necrofrank).gif | ||
|data= | |data= | ||
{{AttackData- | {{AttackData-NG | ||
|startup=2 | |startup=2 | ||
|active=1 | |active=1 | ||
| Line 704: | Line 671: | ||
|description= | |description= | ||
* 26 throw range | * 26 throw range | ||
}} | }} | ||
}} | }} | ||
| Line 714: | Line 680: | ||
|image=(necrogersux).gif | |image=(necrogersux).gif | ||
|data= | |data= | ||
{{AttackData- | {{AttackData-NG | ||
|startup=2 | |startup=2 | ||
|active=1 | |active=1 | ||
| Line 722: | Line 688: | ||
* Self meter gain: Whiff: 8, Hit: 0, Block: ---. | * Self meter gain: Whiff: 8, Hit: 0, Block: ---. | ||
* Opponent meter gain: Whiff: 0, Hit: 0, Block: ---. | * Opponent meter gain: Whiff: 0, Hit: 0, Block: ---. | ||
}} | }} | ||
}} | }} | ||
| Line 735: | Line 700: | ||
|image=(necrooh).gif | |image=(necrooh).gif | ||
|data= | |data= | ||
{{AttackData- | {{AttackData-NG | ||
|startup=15 | |startup=15 | ||
|active=10 | |active=10 | ||
| Line 743: | Line 708: | ||
|stun=3 | |stun=3 | ||
|description= | |description= | ||
}} | }} | ||
}} | }} | ||
| Line 782: | Line 721: | ||
|caption={{lp}}/{{mp}}/{{hp}} | |caption={{lp}}/{{mp}}/{{hp}} | ||
|data= | |data= | ||
{{AttackData- | {{AttackData-NG | ||
|version=LP | |version=LP | ||
|startup=6 | |startup=6 | ||
| Line 795: | Line 734: | ||
* Self meter gain: Whiff: 3, Hit: 19, Block: 10. | * Self meter gain: Whiff: 3, Hit: 19, Block: 10. | ||
* Opponent meter gain: Whiff: 0, Hit: 4, Block: 0. | * Opponent meter gain: Whiff: 0, Hit: 4, Block: 0. | ||
}} | }} | ||
{{AttackData- | {{AttackData-NG | ||
|version=MP | |version=MP | ||
|startup=8 | |startup=8 | ||
| Line 810: | Line 748: | ||
* Self meter gain: Whiff: 3, Hit: 21, Block: 11. | * Self meter gain: Whiff: 3, Hit: 21, Block: 11. | ||
* Opponent meter gain: Whiff: 0, Hit: 4, Block: 0. | * Opponent meter gain: Whiff: 0, Hit: 4, Block: 0. | ||
}} | }} | ||
{{AttackData- | {{AttackData-NG | ||
|version=HP | |version=HP | ||
|startup=10 | |startup=10 | ||
| Line 825: | Line 762: | ||
* Self meter gain: Whiff: 3, Hit: 22, Block: 12. | * Self meter gain: Whiff: 3, Hit: 22, Block: 12. | ||
* Opponent meter gain: Whiff: 0, Hit: 4, Block: 0. | * Opponent meter gain: Whiff: 0, Hit: 4, Block: 0. | ||
}} | }} | ||
}} | }} | ||
| Line 836: | Line 772: | ||
|caption={{lk}}/{{mk}}/{{hk}} | |caption={{lk}}/{{mk}}/{{hk}} | ||
|data= | |data= | ||
{{AttackData- | {{AttackData-NG | ||
|version=LK | |version=LK | ||
|startup=12 | |startup=12 | ||
| Line 848: | Line 784: | ||
* Self meter gain: Whiff: 2, Hit: 10, Block: 6. | * Self meter gain: Whiff: 2, Hit: 10, Block: 6. | ||
* Opponent meter gain: Whiff: 0, Hit: 2, Block: 0. | * Opponent meter gain: Whiff: 0, Hit: 2, Block: 0. | ||
}} | }} | ||
{{AttackData- | {{AttackData-NG | ||
|version=MK | |version=MK | ||
|startup=12 | |startup=12 | ||
| Line 862: | Line 797: | ||
* Self meter gain: Whiff: 2, Hit: 10, Block: 6. | * Self meter gain: Whiff: 2, Hit: 10, Block: 6. | ||
* Opponent meter gain: Whiff: 0, Hit: 2, Block: 0. | * Opponent meter gain: Whiff: 0, Hit: 2, Block: 0. | ||
}} | }} | ||
{{AttackData- | {{AttackData-NG | ||
|version=HK | |version=HK | ||
|startup=12 | |startup=12 | ||
| Line 876: | Line 810: | ||
* Self meter gain: Whiff: 2, Hit: 10, Block: 6. | * Self meter gain: Whiff: 2, Hit: 10, Block: 6. | ||
* Opponent meter gain: Whiff: 0, Hit: 2, Block: 0. | * Opponent meter gain: Whiff: 0, Hit: 2, Block: 0. | ||
}} | }} | ||
}} | }} | ||
| Line 886: | Line 819: | ||
|image=(necrothk).gif | |image=(necrothk).gif | ||
|caption={{lp}}/{{mp}}/{{hp}} | |caption={{lp}}/{{mp}}/{{hp}} | ||
|data= | |data= | ||
{{AttackData- | {{AttackData-NG | ||
|version=LP | |version=LP | ||
|startup=6 | |startup=6 | ||
| Line 902: | Line 833: | ||
* Self meter gain: Whiff: 3, Hit: 14, Block: 6. | * Self meter gain: Whiff: 3, Hit: 14, Block: 6. | ||
* Opponent meter gain: Whiff: 0, Hit: 3, Block: 0. | * Opponent meter gain: Whiff: 0, Hit: 3, Block: 0. | ||
}} | }} | ||
{{AttackData- | {{AttackData-NG | ||
|version=MP | |version=MP | ||
|startup=10 | |startup=10 | ||
| Line 917: | Line 847: | ||
* Self meter gain: Whiff: 3, Hit: 14, Block: 6. | * Self meter gain: Whiff: 3, Hit: 14, Block: 6. | ||
* Opponent meter gain: Whiff: 0, Hit: 3, Block: 0. | * Opponent meter gain: Whiff: 0, Hit: 3, Block: 0. | ||
}} | }} | ||
{{AttackData- | {{AttackData-NG | ||
|version=HP | |version=HP | ||
|startup=17 | |startup=17 | ||
| Line 932: | Line 861: | ||
* Self meter gain: Whiff: 3, Hit: 15, Block: 7. | * Self meter gain: Whiff: 3, Hit: 15, Block: 7. | ||
* Opponent meter gain: Whiff: 0, Hit: 3, Block: 0. | * Opponent meter gain: Whiff: 0, Hit: 3, Block: 0. | ||
}} | }} | ||
}} | }} | ||
| Line 957: | Line 870: | ||
|image=(necrofvi).gif | |image=(necrofvi).gif | ||
|caption={{lp}}/{{mp}}/{{hp}} | |caption={{lp}}/{{mp}}/{{hp}} | ||
|data= | |data= | ||
{{AttackData- | {{AttackData-NG | ||
|version=LP | |version=LP | ||
|startup=26 | |startup=26 | ||
| Line 972: | Line 883: | ||
* Self meter gain: Whiff: 3, Hit: 19, Block: 10. | * Self meter gain: Whiff: 3, Hit: 19, Block: 10. | ||
* Opponent meter gain: Whiff: 0, Hit: 4, Block: 0. | * Opponent meter gain: Whiff: 0, Hit: 4, Block: 0. | ||
}} | }} | ||
{{AttackData- | {{AttackData-NG | ||
|version=MP | |version=MP | ||
|startup=26 | |startup=26 | ||
| Line 986: | Line 896: | ||
* Self meter gain: Whiff: 3, Hit: 19, Block: 10. | * Self meter gain: Whiff: 3, Hit: 19, Block: 10. | ||
* Opponent meter gain: Whiff: 0, Hit: 4, Block: 0. | * Opponent meter gain: Whiff: 0, Hit: 4, Block: 0. | ||
}} | }} | ||
{{AttackData- | {{AttackData-NG | ||
|version=HP | |version=HP | ||
|startup=28 | |startup=28 | ||
| Line 1,000: | Line 909: | ||
* Self meter gain: Whiff: 3, Hit: 19, Block: 10. | * Self meter gain: Whiff: 3, Hit: 19, Block: 10. | ||
* Opponent meter gain: Whiff: 0, Hit: 4, Block: 0. | * Opponent meter gain: Whiff: 0, Hit: 4, Block: 0. | ||
}} | }} | ||
}} | }} | ||
| Line 1,024: | Line 918: | ||
|image=(necrorsc).gif | |image=(necrorsc).gif | ||
|caption={{lk}}/{{mk}}/{{hk}} | |caption={{lk}}/{{mk}}/{{hk}} | ||
|data= | |data= | ||
{{AttackData- | {{AttackData-NG | ||
|version=LK | |version=LK | ||
|startup=23 | |startup=23 | ||
| Line 1,039: | Line 931: | ||
* Self meter gain: Whiff: 3, Hit: 13, Block: 5. | * Self meter gain: Whiff: 3, Hit: 13, Block: 5. | ||
* Opponent meter gain: Whiff: 0, Hit: 3, Block: 0. | * Opponent meter gain: Whiff: 0, Hit: 3, Block: 0. | ||
}} | }} | ||
{{AttackData- | {{AttackData-NG | ||
|version=MK | |version=MK | ||
|startup=25 | |startup=25 | ||
| Line 1,053: | Line 944: | ||
* Self meter gain: Whiff: 3, Hit: 13, Block: 5. | * Self meter gain: Whiff: 3, Hit: 13, Block: 5. | ||
* Opponent meter gain: Whiff: 0, Hit: 3, Block: 0. | * Opponent meter gain: Whiff: 0, Hit: 3, Block: 0. | ||
}} | }} | ||
{{AttackData- | {{AttackData-NG | ||
|version=HK | |version=HK | ||
|startup=27 | |startup=27 | ||
| Line 1,067: | Line 957: | ||
* Self meter gain: Whiff: 3, Hit: 13, Block: 5. | * Self meter gain: Whiff: 3, Hit: 13, Block: 5. | ||
* Opponent meter gain: Whiff: 0, Hit: 3, Block: 0. | * Opponent meter gain: Whiff: 0, Hit: 3, Block: 0. | ||
}} | }} | ||
}} | }} | ||
| Line 1,095: | Line 970: | ||
|image=(necrosa1).gif | |image=(necrosa1).gif | ||
|data= | |data= | ||
{{AttackData- | {{AttackData-NG | ||
|startup=2 | |startup=2 | ||
|active=18 - 54 | |active=18 - 54 | ||
| Line 1,107: | Line 982: | ||
|stun=0 | |stun=0 | ||
|description= | |description= | ||
}} | }} | ||
}} | }} | ||
| Line 1,117: | Line 991: | ||
|image=(necrosa2).gif | |image=(necrosa2).gif | ||
|data= | |data= | ||
{{AttackData- | {{AttackData-NG | ||
|startup=3 | |startup=3 | ||
|active=6 | |active=6 | ||
| Line 1,132: | Line 1,006: | ||
* Incredibly fast whiff animation, essentially unpunishable unless the opponent is standing just out of throw range | * Incredibly fast whiff animation, essentially unpunishable unless the opponent is standing just out of throw range | ||
** Even then, if the opponent tries to punish, most attacks will extend their throwable hurtbox into SA2's active frames | ** Even then, if the opponent tries to punish, most attacks will extend their throwable hurtbox into SA2's active frames | ||
}} | }} | ||
}} | }} | ||
| Line 1,142: | Line 1,015: | ||
|image=(necrosa3).gif | |image=(necrosa3).gif | ||
|data= | |data= | ||
{{AttackData- | {{AttackData-NG | ||
|startup=3 | |startup=3 | ||
|recovery=39 | |recovery=39 | ||
| Line 1,155: | Line 1,028: | ||
* Low-profiles under fireballs and many other attacks | * Low-profiles under fireballs and many other attacks | ||
* Necro is in crouching state during entire duration | * Necro is in crouching state during entire duration | ||
}} | }} | ||
}} | }} | ||
{{Navbox- | {{Navbox-NG}} | ||
[[Category: Street Fighter 3: New Generation]] | [[Category: Street Fighter 3: New Generation]] | ||
Latest revision as of 08:24, 11 May 2022
Introduction
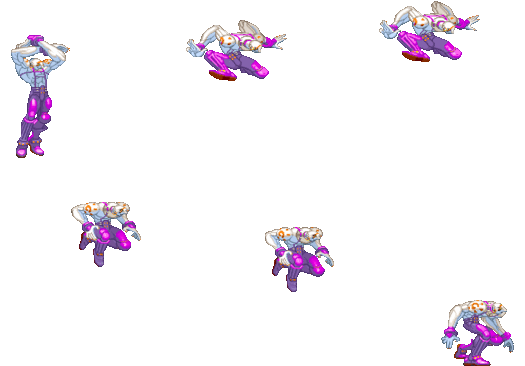
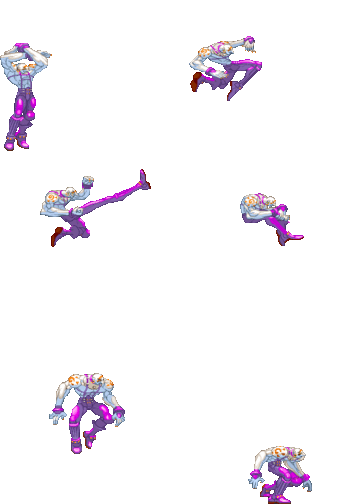
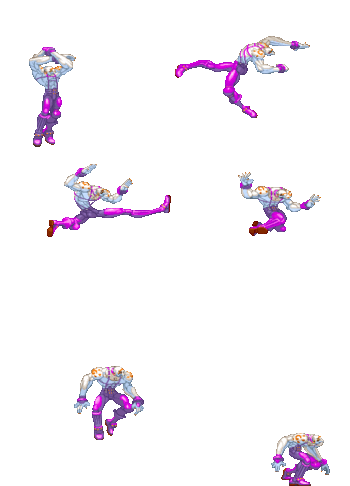
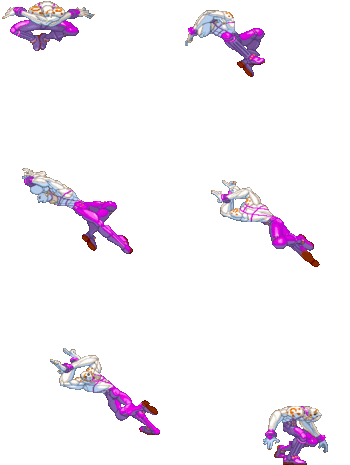
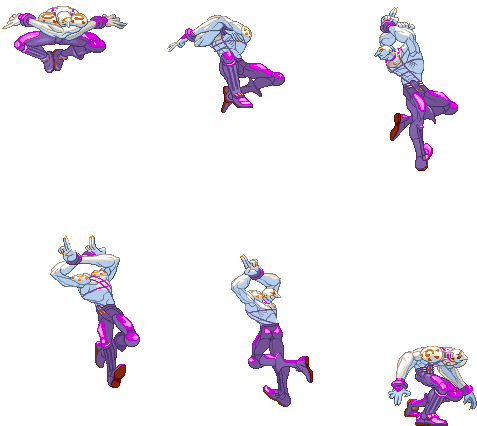
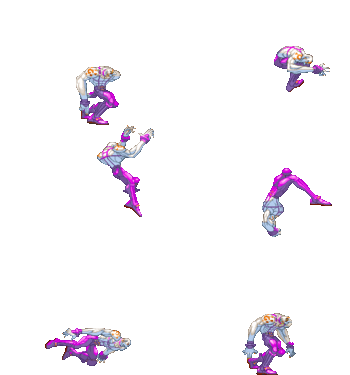
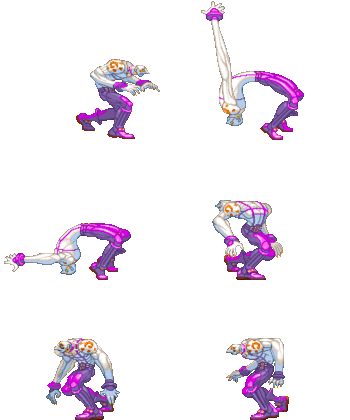
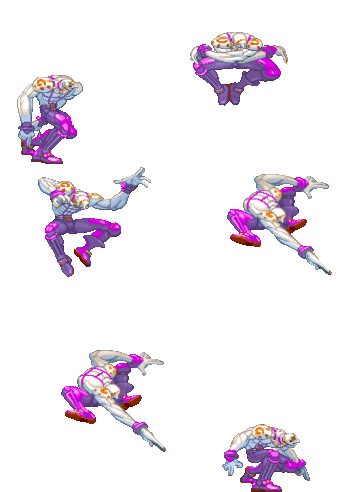
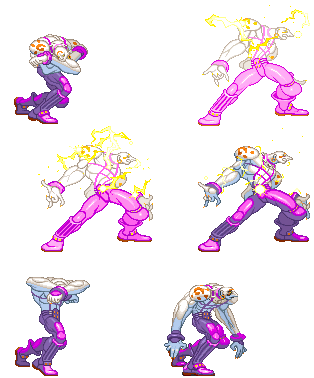
Necro, real name Illia, is a Russian who was genetically experimented on by the Secret Society, leaving him with the ability to stretch his limbs like rubber and create electrical currents throughout his body.
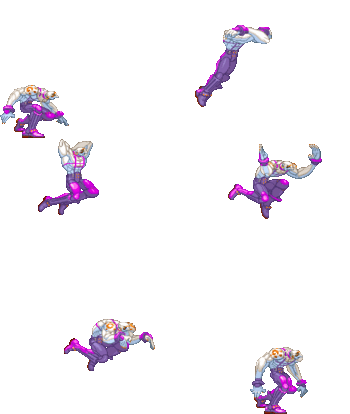
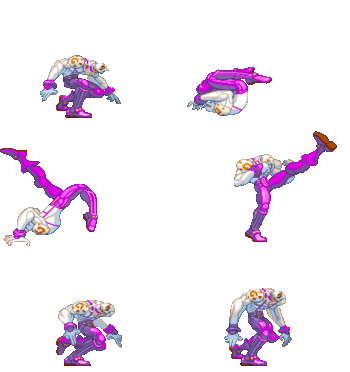
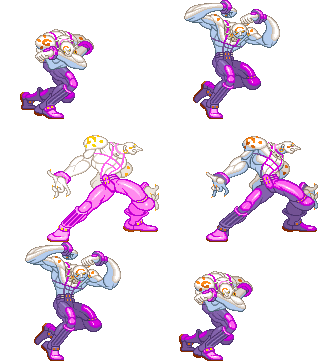
Necro is a strange fusion of Dhalsim and Blanka. He's equipped some incredibly long normals, high damage combos, good high/low game, and the ability to build stun at startling rates (with the use of Electric Snake especially). He also has divekicks to allow his offense to start when spaced well. His jump is very floaty which can be strange to adjust to, and give your opponent more time to react. With his long range buttons, also comes the downside of very extended hurtboxes so he takes smart decisions to avoid being easily counterpoked. A lot of his moves are unsafe as well, so picking your options wisely is important especially given his lower Health. His unorthodox playstyle is a double edged sword, requiring players to utilize a unique set of tools to succeed. Making the right decision can be immensely rewarding though, with his damage, corner pressure, and stun output (along with great stun juggles in the corner) allowing him to win a round off a single situation.
Super Arts
SA1: Magnetic Storm
- 1 Short-Medium stock and Corner Super Cancel Hit Confirm
- Hard to Parry
- Can whiff with Medium and Small hitbox characters
- Use on: Twins,Ibuki,Urien and Hugo They have the larger hitboxes
SA2: Slam Dance
- 1 Short stock
- Bad Throw Range
- Use on: N/A
SA3: Electric Snake
- 2 shorty-medium stocks for EX Moves,low mixups options
- Best Combo Ender
- Large Recovery
- Use on: All (with the possible exception of hitbox characters)
| Strengths | Weaknesses |
|---|---|
|
|
| Necro | |
|---|---|
| Vitals | |
| Life Points | 1120 |
| Stun Points | 64 |
| Super Art Stock/Size | |
| SA1 | 1/88 |
| SA2 | 1/104 |
| SA3 | 2/72 |
| Ground Movement | |
| Forward Dash duration/distance | 22 (132px) |
| Back Dash duration/distance | 20 (123px) |
| Jumping | |
| Back Jump duration | 48(5+42+1) |
| Neutral Jump duration | 48(5+42+1) |
| Forward Jump duration | 49(5+43+1) |
| Back Super Jump duration | 60(6+53+1) |
| Neutral Super Jump duration | 60(6+53+1) |
| Forward Super Jump duration | 60(6+53+1) |
| Wake up | |
| Wake up duration | 59 |
| Quick rise duration | 53 |
| New Generation Frame Data Glossary | |
|---|---|
| Active |
How many frames a move remains active (can hurt opponents) for. Consecutive sets of active frames on a multi-hit move are separated by an asterisk (ex: 3*5). If there is a gap between sets of active frames, the gap is denoted by a number in parentheses (ex: 2(4)2) |
| Attack |
Attack level is L for low attacks (must be blocked crouching), H is for High attacks (which can be blocked high or low) and M for overhead (must be blocked standing). T is for throw attacks (which cannot be blocked). |
| Cancel options |
Available cancel options.
|
| Damage |
Attack damage on hit in life points. Notation may denote multi-hit or "sweet spot" damage values on certain frames. |
| Hit/Block |
These are frame advantage values when the attack hits or is blocked. If the number is positive, then the move will end before the defender can act again. If the number is negative, the defender will be able to act before the attacker and maybe even punish. D refers to knockdown on hit. "Cr. Hit" is an additional frame advantage value denoting if the advantage on hit changes when the defender is being hit while crouching. |
| Kara Range |
Almost all normal attacks can be canceled into a special or a multi-button command within three frames of startup. During that time, some attacks will shift position forward or backward and affect the reach of the special or command accordingly. This is denoted in pixels of range. There are a handful of moves in the game that can be kara-canceled after this initial window and will be denoted as a late kara-cancel. |
| Link |
A combo that is performed by inputting the second move after the first move has completely recovered (as opposed to cancelling the first move's animation). In 3S, the final frame of a move's hitstun allows a character to block a normal or special move, as well as some projectile supers. Therefore, an attack's frame advantage must be 2 frames greater than the followup move's startup in order to link. |
| Parry |
This field will show a value of A if the attack can be parried standing or crouching, H if it must be parried standing or L if it must be parried crouching. |
| Recovery |
How many frames it takes for a move to finish after it's been active. |
| Startup |
How many frames it takes before the move becomes 'active' or has a hitbox. 3S uses classic startup notation, which does not include the first active frame. A move with 3 startup becomes active on frame 4. |
| Stun |
Amount of stun added to the opponent's stun bar on hit. |
| Throw range |
Range in pixels from the center of the character to the center of the opponent which allows a grab to connect. |
Frame Data
Standing Normals
5LP
| Startup | Active | Recovery | Hit | Cr. Hit | ||
|---|---|---|---|---|---|---|
| 5 | 1 | 8 | 2 | 2 | ||
| Damage | Stun | Attack | Parry | Block | ||
| 5 | 3 | - | A | 2 | ||
| ||||||
5MP
| Startup | Active | Recovery | Hit | Cr. Hit | ||
|---|---|---|---|---|---|---|
| 8 | 1 | 12 | 1 | 2 | ||
| Damage | Stun | Attack | Parry | Block | ||
| 8 | 11 | - | H | - | ||
| ||||||
5HP
| Startup | Active | Recovery | Hit | Cr. Hit | ||
|---|---|---|---|---|---|---|
| 15 | 1 | 28 | -11 | -9 | ||
| Damage | Stun | Attack | Parry | Block | ||
| 17 | 11 | - | H | -13 | ||
| ||||||
5LK
| Startup | Active | Recovery | Hit | Cr. Hit | ||
|---|---|---|---|---|---|---|
| 4 | 1 | 9 | 1 | 1 | ||
| Damage | Stun | Attack | Parry | Block | ||
| 7 | 5 | - | A | 1 | ||
| ||||||
5MK
| Startup | Active | Recovery | Hit | Cr. Hit | ||
|---|---|---|---|---|---|---|
| 9 | 1 | 14 | - | 1 | ||
| Damage | Stun | Attack | Parry | Block | ||
| 12 | 3 | - | A | -1 | ||
| ||||||
5HK
| Startup | Active | Recovery | Hit | Cr. Hit | ||
|---|---|---|---|---|---|---|
| 18 | 1 | 24 | -6 | -4 | ||
| Damage | Stun | Attack | Parry | Block | ||
| 19 | 13 | - | H | -8 | ||
| ||||||
Command Normals
4LP
| Startup | Active | Recovery | Hit | Cr. Hit | ||
|---|---|---|---|---|---|---|
| 3 | 1 | 6 | 3 | 3 | ||
| Damage | Stun | Attack | Parry | Block | ||
| 8 | 5 | - | A | 3 | ||
| ||||||
4MP
| Startup | Active | Recovery | Hit | Cr. Hit | ||
|---|---|---|---|---|---|---|
| 4 | 2 | 10 | 2 | 3 | ||
| Damage | Stun | Attack | Parry | Block | ||
| 12 | 11 | - | H | 1 | ||
| ||||||
4HP
| Startup | Active | Recovery | Hit | Cr. Hit | ||
|---|---|---|---|---|---|---|
| 11 | 4 | 15 | D | D | ||
| Damage | Stun | Attack | Parry | Block | ||
| 23 | 15 | - | A | -3 | ||
| ||||||
4LK
| Startup | Active | Recovery | Hit | Cr. Hit | ||
|---|---|---|---|---|---|---|
| 3 | 2 | 7 | 3 | 3 | ||
| Damage | Stun | Attack | Parry | Block | ||
| 8 | 7 | - | A | 3 | ||
| ||||||
4MK
| Startup | Active | Recovery | Hit | Cr. Hit | ||
|---|---|---|---|---|---|---|
| 5 | 1 | 10 | 4 | 5 | ||
| Damage | Stun | Attack | Parry | Block | ||
| 14 | 13 | - | H | 3 | ||
| ||||||
4HK
| Startup | Active | Recovery | Hit | Cr. Hit | ||
|---|---|---|---|---|---|---|
| 12 | 1 | 16 | 12 | 14 | ||
| Damage | Stun | Attack | Parry | Block | ||
| 24 | 17 | - | H | 10 | ||
| ||||||
1HP
| Startup | Active | Recovery | Hit | Cr. Hit | ||
|---|---|---|---|---|---|---|
| 9 | 1 | 14 | D | D | ||
| Damage | Stun | Attack | Parry | Block | ||
| 24 | 11 | - | A | 2 | ||
| ||||||
Crouching Normals
2LP
| Startup | Active | Recovery | Hit | Cr. Hit | ||
|---|---|---|---|---|---|---|
| 6 | 1 | 4 | 5 | 5 | ||
| Damage | Stun | Attack | Parry | Block | ||
| 5 | 3 | - | A | 5 | ||
| ||||||
2MP
| Startup | Active | Recovery | Hit | Cr. Hit | ||
|---|---|---|---|---|---|---|
| 8 | 1 | 12 | 1 | 2 | ||
| Damage | Stun | Attack | Parry | Block | ||
| 10 | 7 | - | A | - | ||
| ||||||
2HP
| Startup | Active | Recovery | Hit | Cr. Hit | ||
|---|---|---|---|---|---|---|
| 16 | 1 | 22 | -5 | -3 | ||
| Damage | Stun | Attack | Parry | Block | ||
| 16 | 5 | - | A | -7 | ||
| ||||||
2LK
| Startup | Active | Recovery | Hit | Cr. Hit | ||
|---|---|---|---|---|---|---|
| 6 | 1 | 8 | 2 | 2 | ||
| Damage | Stun | Attack | Parry | Block | ||
| 6 | 3 | - | L | 2 | ||
| ||||||
2MK
| Startup | Active | Recovery | Hit | Cr. Hit | ||
|---|---|---|---|---|---|---|
| 12 | 1 | 17 | -4 | -3 | ||
| Damage | Stun | Attack | Parry | Block | ||
| 10 | 3 | - | L | -5 | ||
| ||||||
2HK
| Startup | Active | Recovery | Hit | Cr. Hit | ||
|---|---|---|---|---|---|---|
| 13 | 1 | 27 | 31 | 31 | ||
| Damage | Stun | Attack | Parry | Block | ||
| 17 | 3 | - | L | -12 | ||
| ||||||
Jumping Normals
8LP
| Startup | Active | Recovery | Hit | Cr. Hit |
|---|---|---|---|---|
| 5 | 6 | - | - | - |
| Damage | Stun | Attack | Parry | Block |
| 5 | 7 | - | H | - |
j.LP
| Startup | Active | Recovery | Hit | Cr. Hit |
|---|---|---|---|---|
| 4 | 14 | - | - | - |
| Damage | Stun | Attack | Parry | Block |
| 7 | 7 | - | H | - |
8MP
| Startup | Active | Recovery | Hit | Cr. Hit | ||
|---|---|---|---|---|---|---|
| 8 | 1 | - | - | - | ||
| Damage | Stun | Attack | Parry | Block | ||
| 12 | 11 | - | H | - | ||
| ||||||
j.MP
| Startup | Active | Recovery | Hit | Cr. Hit | ||
|---|---|---|---|---|---|---|
| 9 | 1 | - | - | - | ||
| Damage | Stun | Attack | Parry | Block | ||
| 14 | 11 | - | H | - | ||
| ||||||
j.HP
| Startup | Active | Recovery | Hit | Cr. Hit | ||
|---|---|---|---|---|---|---|
| 13 | 2 | - | - | - | ||
| Damage | Stun | Attack | Parry | Block | ||
| 17 | 15 | - | H | - | ||
| ||||||
j.LK
| Startup | Active | Recovery | Hit | Cr. Hit |
|---|---|---|---|---|
| 2 | 15 | - | - | - |
| Damage | Stun | Attack | Parry | Block |
| 5 | 5 | - | H | - |
j.MK
| Startup | Active | Recovery | Hit | Cr. Hit | ||
|---|---|---|---|---|---|---|
| 10 | 4 | - | - | - | ||
| Damage | Stun | Attack | Parry | Block | ||
| 12 | 9 | - | H | - | ||
| ||||||
j.HK
| Startup | Active | Recovery | Hit | Cr. Hit | ||
|---|---|---|---|---|---|---|
| 15 | 4 | - | - | - | ||
| Damage | Stun | Attack | Parry | Block | ||
| 21 | 13 | - | H | - | ||
| ||||||
2LK (air)
| LK | Startup | Active | Recovery | Hit | Cr. Hit | ||
|---|---|---|---|---|---|---|---|
| 9 | - | - | - | - | |||
| Damage | Stun | Attack | Parry | Block | |||
| 10 | 6 | - | A | - | |||
| |||||||
| MK | Startup | Active | Recovery | Hit | Cr. Hit | ||
| 9 | - | - | - | - | |||
| Damage | Stun | Attack | Parry | Block | |||
| 12 | 5 | - | A | - | |||
| |||||||
| HK | Startup | Active | Recovery | Hit | Cr. Hit | ||
| 9 | - | - | - | - | |||
| Damage | Stun | Attack | Parry | Block | |||
| 17 | 9 | - | A | - | |||
| |||||||
Target Combos
Throws
LPLK
| Startup | Active | Recovery | Hit | Cr. Hit | ||
|---|---|---|---|---|---|---|
| 2 | 1 | 21 | - | - | ||
| Damage | Stun | Attack | Parry | Block | ||
| 21 | 12 | - | - | - | ||
| ||||||
4LPLK
| Startup | Active | Recovery | Hit | Cr. Hit | ||
|---|---|---|---|---|---|---|
| 2 | 1 | 21 | - | - | ||
| Damage | Stun | Attack | Parry | Block | ||
| 17 | 18 | - | - | - | ||
| ||||||
LPLK (opp turn)
| Startup | Active | Recovery | Hit | Cr. Hit | ||
|---|---|---|---|---|---|---|
| 2 | 1 | 21 | - | - | ||
| Damage | Stun | Attack | Parry | Block | ||
| - | - | - | - | - | ||
| ||||||
Universal Overhead
MPMK
| Startup | Active | Recovery | Hit | Cr. Hit |
|---|---|---|---|---|
| 15 | 10 | 5 | - | - |
| Damage | Stun | Attack | Parry | Block |
| 7 | 3 | - | H | - |
Special Moves
623P
| LP | Startup | Active | Recovery | Hit | Cr. Hit | ||
|---|---|---|---|---|---|---|---|
| 6 | 6 | 16 | - | - | |||
| Damage | Stun | Attack | Parry | Block | |||
| 10 | 9 | - | H | -10 | |||
| |||||||
| MP | Startup | Active | Recovery | Hit | Cr. Hit | ||
| 8 | 6 | 33 | - | - | |||
| Damage | Stun | Attack | Parry | Block | |||
| 29 | 17 | - | H | -26 | |||
| |||||||
| HP | Startup | Active | Recovery | Hit | Cr. Hit | ||
| 10 | 10 | 35 | - | - | |||
| Damage | Stun | Attack | Parry | Block | |||
| 38 | 21 | - | H | -28 | |||
| |||||||
41236K
| LK | Startup | Active | Recovery | Hit | Cr. Hit | ||
|---|---|---|---|---|---|---|---|
| 12 | 1 | 28 | - | - | |||
| Damage | Stun | Attack | Parry | Block | |||
| 24 | 10 | - | - | -13 | |||
| |||||||
| MK | Startup | Active | Recovery | Hit | Cr. Hit | ||
| 12 | 1 | 30 | - | - | |||
| Damage | Stun | Attack | Parry | Block | |||
| 26 | 12 | - | - | -15 | |||
| |||||||
| HK | Startup | Active | Recovery | Hit | Cr. Hit | ||
| 12 | 1 | 32 | - | - | |||
| Damage | Stun | Attack | Parry | Block | |||
| 28 | 14 | - | - | -17 | |||
| |||||||
41236P
| LP | Startup | Active | Recovery | Hit | Cr. Hit | ||
|---|---|---|---|---|---|---|---|
| 6 | 8 | 13 | - | - | |||
| Damage | Stun | Attack | Parry | Block | |||
| 19 | 13 | - | H | 1 | |||
| |||||||
| MP | Startup | Active | Recovery | Hit | Cr. Hit | ||
| 10 | 7 | 18 | - | - | |||
| Damage | Stun | Attack | Parry | Block | |||
| 21 | 13 | - | H | -4 | |||
| |||||||
| HP | Startup | Active | Recovery | Hit | Cr. Hit | ||
| 17 | 11 | 19 | - | - | |||
| Damage | Stun | Attack | Parry | Block | |||
| 24 | 17 | - | H | -18 | |||
| |||||||
214P
| LP | Startup | Active | Recovery | Hit | Cr. Hit | ||
|---|---|---|---|---|---|---|---|
| 26 | 5 | 17 | - | - | |||
| Damage | Stun | Attack | Parry | Block | |||
| 21 | 13 | - | H | -3 | |||
| |||||||
| MP | Startup | Active | Recovery | Hit | Cr. Hit | ||
| 26 | 6 | 15 | - | - | |||
| Damage | Stun | Attack | Parry | Block | |||
| 24 | 13 | - | H | -2 | |||
| |||||||
| HP | Startup | Active | Recovery | Hit | Cr. Hit | ||
| 28 | 7 | 14 | - | - | |||
| Damage | Stun | Attack | Parry | Block | |||
| 28 | 13 | - | H | -2 | |||
| |||||||
214K
| LK | Startup | Active | Recovery | Hit | Cr. Hit | ||
|---|---|---|---|---|---|---|---|
| 23 | 4 | 17 | - | - | |||
| Damage | Stun | Attack | Parry | Block | |||
| 23 | 7 | - | H | -5 | |||
| |||||||
| MK | Startup | Active | Recovery | Hit | Cr. Hit | ||
| 25 | 4 | 17 | - | - | |||
| Damage | Stun | Attack | Parry | Block | |||
| 26 | 9 | - | H | -5 | |||
| |||||||
| HK | Startup | Active | Recovery | Hit | Cr. Hit | ||
| 27 | 4 | 17 | - | - | |||
| Damage | Stun | Attack | Parry | Block | |||
| 30 | 11 | - | H | -5 | |||
| |||||||
Super Arts
236236P (mash P) (SA1)
| Startup | Active | Recovery | Hit | Cr. Hit |
|---|---|---|---|---|
| 2 | 18 - 54 | 22 | D | D |
| Damage | Stun | Attack | Parry | Block |
| 40 | 0 | H | A | -12 |
236236P (SA2)
| Startup | Active | Recovery | Hit | Cr. Hit | ||
|---|---|---|---|---|---|---|
| 3 | 6 | 8 | D | D | ||
| Damage | Stun | Attack | Parry | Block | ||
| 80 | 18 | T | N | - | ||
| ||||||
236236P (SA3)
| Startup | Active | Recovery | Hit | Cr. Hit | ||
|---|---|---|---|---|---|---|
| 3 | - | 39 | D | D | ||
| Damage | Stun | Attack | Parry | Block | ||
| 47 | 24 | L | L | -11 | ||
| ||||||


