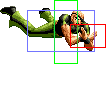
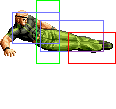
m (→Movelist) |
mNo edit summary |
||
| (3 intermediate revisions by the same user not shown) | |||
| Line 1: | Line 1: | ||
[[image:Ramon01_portrait.png|right]] | [[image:Ramon01_portrait.png|right]] | ||
==General Info== | ==General Info== | ||
{| | {| | ||
! Stand | ! Stand | ||
! Crouch | ! Crouch | ||
! Jump | ! Jump | ||
! Run | ! Run | ||
|- | |- | ||
| Line 20: | Line 10: | ||
|valign="bottom"| [[image:Ramon01_crouch.png]] | |valign="bottom"| [[image:Ramon01_crouch.png]] | ||
|valign="bottom"| [[image:Ramon01_jump.png]] | |valign="bottom"| [[image:Ramon01_jump.png]] | ||
|valign="bottom"| [[image:Ramon01_run.png]] | |valign="bottom"| [[image:Ramon01_run.png]] | ||
|} | |} | ||
| Line 29: | Line 18: | ||
===Colors=== | ===Colors=== | ||
[[image:Ramon01_victory.png|right]] | |||
{| | {| | ||
! [[image:snka.gif]] | ! [[image:snka.gif]] | ||
| Line 182: | Line 172: | ||
|align="center"| H | |align="center"| H | ||
|colspan="2" | [[image:Ramon01_jC.png|center]] | |colspan="2" | [[image:Ramon01_jC.png|center]] | ||
| A very modest crossup in this game, which does not mesh well at all with Ramon's floaty jumps. If you are used to picking up crossups constantly with Ramon then prepare to be disappointed. | | A very modest crossup in this game, which does not mesh well at all with Ramon's floaty jumps. If you are used to picking up crossups constantly with Ramon then prepare to be disappointed. It can still crossup if you space it well and it's still good for corner pressure, so overall it is an important normal. | ||
|- | |- | ||
! [[image:snkd.gif]] | ! [[image:snkd.gif]] | ||
| Line 345: | Line 335: | ||
|valign="bottom" style="border-left:0px;"| [[image:Ramon01_rdpK2.png|center]] | |valign="bottom" style="border-left:0px;"| [[image:Ramon01_rdpK2.png|center]] | ||
|'''Tiger Lord - rdp + K''' | |'''Tiger Lord - rdp + K''' | ||
* The first iteration of Tiger Road, with only one extra followup. Ramon runs to the wall behind him and leaps. You have five frames to input the followup or else Ramon will | * The first iteration of Tiger Road, with only one extra followup. Ramon runs to the wall behind him and leaps. You have five frames to input the followup or else Ramon will faceplant near the wall. | ||
|- | |- | ||
!> [[image:snka.gif]] + [[image:snkb.gif]] + [[image:snkc.gif]] | !> [[image:snka.gif]] + [[image:snkb.gif]] + [[image:snkc.gif]] | ||
| Line 372: | Line 362: | ||
|colspan="2"| [[image:Ramon01_qcbA.png|center]] | |colspan="2"| [[image:Ramon01_qcbA.png|center]] | ||
| '''Feint Step - qcb + A''' | | '''Feint Step - qcb + A''' | ||
* A dropkick intended as a powerful combo ender, particularly when a microrun is involved. | * A dropkick intended as a powerful combo ender, particularly when a microrun is involved. However, this has the nasty tendency of whiffing on low crouchers such as Lin and Athena, as the hitbox doesn't reach low enough to hit them. This was fixed in 02. | ||
* Can be held | * Can be held, in which Ramon will sway back and forth up to three times before performing the attack. The entire startup has lower body invincibility, but between each additional cycle you have three frames of full invincibility. This is useful for avoiding pokes and guard cancels. | ||
* Hard knockdown | * Hard knockdown | ||
* Counter Wire | * Counter Wire | ||
| Line 394: | Line 384: | ||
|colspan="2"| [[image:Ramon01_hcfP.png|center]] | |colspan="2"| [[image:Ramon01_hcfP.png|center]] | ||
| '''Tiger Neck Chancellery - hcf + P''' | | '''Tiger Neck Chancellery - hcf + P''' | ||
*Ramon's fast command grab, Tiger Neck Chancery, traditionally starts on frame 5 as opposed to instantly, with the tradeoff being that the startup is invincible to strikes. Here, this is not the case; under no circumstances is this move a reversal. The existence of Strikers somewhat makes up for this, but overall this severely limits Ramon's options on defense. This is still good for mixups, as its hard knockdown guarantees a safejump afterwards. Slower recovery on whiff than in 02. | *Ramon's fast command grab, Tiger Neck Chancery, traditionally starts on frame 5 as opposed to instantly, with the tradeoff being that the startup is invincible to strikes. Here, this is not the case; under no circumstances is this move a reversal. The existence of Strikers somewhat makes up for this, but overall this severely limits Ramon's options on defense. This is still good for mixups, as its hard knockdown guarantees a safejump afterwards. Slower recovery on whiff than in 02, and doesn't do much damage. | ||
|- | |- | ||
! <br>hcf + [[image:snkb.gif]]<br><br> | ! <br>hcf + [[image:snkb.gif]]<br><br> | ||
| Line 403: | Line 393: | ||
|colspan="2"| [[image:Ramon01_hcfK.png|center]] | |colspan="2"| [[image:Ramon01_hcfK.png|center]] | ||
|'''Somersault - hcf + K''' | |'''Somersault - hcf + K''' | ||
* Ramon's running grab. He runs fullscreen but stops if he is either vertically aligned with the opponent, which makes this move really bad if the opponent jumps, or if he stops it manually. | * Ramon's running grab. He runs fullscreen but stops if he is either vertically aligned with the opponent, which makes this move really bad if the opponent jumps, or if he stops it manually. This deals way more damage than you may expect, with the opponent taking extra damage after hitting the floor. | ||
|- | |- | ||
!> [[image:snka.gif]] + [[image:snkb.gif]] + [[image:snkc.gif]] | !> [[image:snka.gif]] + [[image:snkb.gif]] + [[image:snkc.gif]] | ||
| Line 423: | Line 413: | ||
|rowspan="2" colspan="2"| [[image:Ramon01_qcbhcfK.png|center]] | |rowspan="2" colspan="2"| [[image:Ramon01_qcbhcfK.png|center]] | ||
|rowspan="2"| '''El Diablo Amarillo Ramon - qcb,hcf + K''' | |rowspan="2"| '''El Diablo Amarillo Ramon - qcb,hcf + K''' | ||
*Ramon's ranbu. Can combo from a microrun unlike in 2000. Both versions are two frames slower than their 02 | *Ramon's ranbu. Can combo from a microrun unlike in 2000. Both versions are two frames slower than their 02 iterations. Unfortunately, the opponent is launched fullscreen after it hits. | ||
*Both versions are fully invincible up to the hit, making them still prone to trades. Very vulnerable to safejumps as reversal ranbus usually are. For some reason, the recovery on whiff for either version has lower body invincibility for the first portion of it. | *Both versions are fully invincible up to the hit, making them still prone to trades. Very vulnerable to safejumps as reversal ranbus usually are. For some reason, the recovery on whiff for either version has lower body invincibility for the first portion of it. | ||
|- | |- | ||
Latest revision as of 10:12, 9 May 2022
General Info
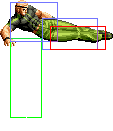
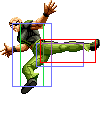
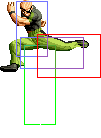
| Stand | Crouch | Jump | Run |
|---|---|---|---|

|

|
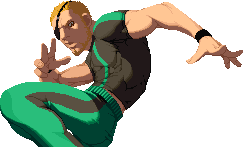
Ramon has gotten a few new tools and a brand new set of sprites, but he is still an incomplete character in 2001. His jump C doesn't crossup well, he doesn't have a triangle jump, his dropkick misses low crouchers and his command grabs aren't even invincible. These work with his usual shortcomings against him hard in a game where infinites and neutral skips are plentiful. His ace in the hole is his microrun combo; though nerfed in damage from 2000, it is still an extremely high source of damage in one touch, and works well with his Feint Step pressure. You still have to be mindful of crouching opponents however, finding some other way to end the combo besides whiffing dropkick. His lack of meterless reversals can be made up for by being placed on anchor, where he has Strikers as reversals and to extend his combos even further, and where he can use Feint Step pressure to push opponents into blowing meter on guard cancels or reversal Strikers. However, it is better to place him first where he can build meter easily for characters who have more opportunities to spend it wisely.
This guide will draw comparisons between this iteration of Ramon and his 2002 version, which directly addressed the issues with the former while likely being one's point of reference with the character. Move names are taken from the English PS2 port.
Colors
Movelist
Combos
Basic Combos
Pretty much every 02 combo will work here except for combos ending in qcb+A against low crouchers.
Striker Combos
(BC) denotes when a Striker hits. A shortcut you can use for Striker combos is qcb+BC, which will call the Striker at the same time you cancel a move with Feint Step.
- Iori - clC df+B qcb+BC, walk/run crC df+B qcb+A, (BC), dp+B~dp+K~dd+P xx qcb,hcf+K
- This is a sample combo which works if your opponent is near the corner of the screen. Even if you drop the microrun, Iori's fireball is still good for extending your blockstrings.
- King - clC df+B qcb+BC, walk stC, (BC), jCD
- This combo works best when you are near the corner, as King won't have to slide as far to continue the combo.

