Project Justice/Kyoko: Difference between revisions

From SuperCombo Wiki
(Framework Added)
(Applying new infobox)
 
(3 intermediate revisions by the same user not shown)
Line 1: Line 1:
{{PJ Character Intro|char= Kyoko|full=Kyoko Minazuki|short=KYOKO|content=
{{PJ Character Intro|char= Kyoko|full=Kyoko Minazuki|short=KYOKO
|school=Justice
|assist=Support
|tier=S
|difficulty=Easy/Medium
 
|content=


{{2 Column Flex|flex1=9|flex2=4
|content1=
|content1=
{{Content Box|header=Introduction|content=
 
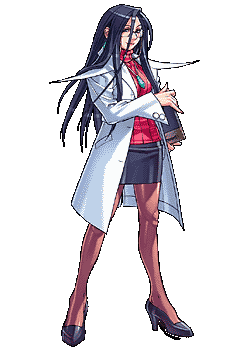
While '''Kyoko''' may appear elegant and professional, she shares some of the same traits as [[Project Justice/Akira | Akira]]...when her lab coat comes off, she's a bit of a slob, and a happy drunkard to boot. '''Kyoko''' is the current school nurse at Justice High, though she originally trained as an orthopedic surgeon- a genius in the field. Even though she's constantly dealing with many fawning students faking illnesses to come to her office, she inevitably recognizes [[Project Justice/Hideo | Hideo's]] feelings for her, and happily gives her hand in marriage after his proposal following the events of '''''Rival Schools: United by Fate'''''. In '''''Project Justice''''', she along with [[Project Justice/Hideo | Hideo]] and [[Project Justice/Hayato | Hayato]] team up to investigate the recent disturbances among the schools and find the assailant responsible for Principal '''Raizos''' recent hospitalization.
Placeholder
<br><br>
 
'''Kyoko''' is an extremely strong character, who is really only outclassed by [[Project Justice/Roy | Roy]]. While having slightly less damage, her 5{{lp}} is a near carbon-copy, and is an incredibly strong pressure tool; on par with [[Project Justice/Roy | Roy's]] for being the best that '''''Project Justice''''' has to offer. Active counters and command grab specials give her a nice variety of mixup tools in the mid-to-close range. Her most powerful super, '''Path To Doom''', is a force to be reckoned with as well. Her only major quirks being that she doesn't have many effective routes into a significant Launch, though most of her effectiveness doesn't hinge on getting a Launch anyways, and her best super, '''Path To Doom''', has an interesting downside in that it will whiff on a selection of characters if they happen to be crouching on activation.
}}
}}
<br>
<br>
Line 22: Line 28:
{{ProConTable
{{ProConTable
|pros=
|pros=
* placeholder
* Excellent mixup options.
* Powerful, confirmable super.
* One of the best close-range pressure tools available in '''''Project Justice''''' with 5{{lp}}.
|cons=
|cons=
* placeholder
* Poor opportunities for Launching- must be comfortable with footsies and ground-based play.
* Her best super, '''Path To Doom''', mysteriously whiffs on some characters when they're crouching. '''Kyoko''' must pay close attention to the opponent's stance to be effective with this destructive tool.
}}
}}
}}
}}
Line 41: Line 50:
}}
}}
}}
}}
----
<br>
<center><span style="font-size: 1.3em;"><u>'''''Old page below the fold until new page converts all information to new format!'''''</u><span></center>
<br>
<div class="mw-collapsible-content srkbox" style="image-align: left; text-align: left; padding: 30px;">
<div class="toccolours mw-collapsible mw-collapsed">
[[File:Project_Justice_Kyoko.gif|right]]
==Introduction==
==Normal Moves==
{{PJMoveListHeader}}
{{PJMoveListRow |  | {{n}} {{lp}} | 7 | 14 | +2 | +10 | 4 | All | }}
{{PJMoveListRow |  | {{n}} {{hp}} | 11 | 40 | +1 | -16 | 10 | All | }}
{{PJMoveListRow |  | {{d}} {{lp}} | 8 | 21 | -2 | +1 | 4 | Crouching | }}
{{PJMoveListRow |  | {{d}} {{hp}} | 14 | 27 | +2 | -5 | 10 | Crouching | }}
{{PJMoveListRow |  | {{n}} {{lk}} | 10 | 25 | +4 | -1 | 5 | All | }}
{{PJMoveListRow |  | {{n}} {{hk}} | 14 | 46 | +3 | -22 | 13 | All | }}
{{PJMoveListRow |  | {{d}} {{lk}} | 12 | 29 | +8 | -7 | 5 | Crouching | }}
{{PJMoveListRow |  | {{d}} {{hk}} | 17 | 38 | - | -16 | 14 | Crouching | Knockdown }}
{{PJMoveListRow |  | {{u}} {{lp}} | 12 | On landing, 1 | - | - | 4 | Standing | }}
{{PJMoveListRow |  | {{u}} {{hp}} | 13 | On landing, 1 | - | - | 10 | Standing | }}
{{PJMoveListRow |  | {{u}} {{lk}} | 13 | On landing, 1 | - | - | 5 | Standing | }}
{{PJMoveListRow |  | {{u}} {{hk}} | 17 | On landing, 1 | - | - | 13 | Standing | }}
{{MoveListFooter}}
==Command Normals==
{{PJMoveListHeader}}
{{PJMoveListRow |  | {{f}} {{hp}} | 15 | 40 | - | -16 | 13 | All | Blowback }}
{{PJMoveListRow |  | {{f}} {{hk}} | 14 | 58 | - | -34 | 17 | All | Blowback }}
{{PJMoveListRow |  | {{b}} {{hk}} | 22 | 30 | +2 | -6 | 16 | Standing | Overhead }}
{{PJMoveListRow |  | {{df}} {{hk}} | 16 | 40 | - | -16 | 11 | All | Rival Launcher }}
{{PJMoveListRow |  | (Air) {{f}} {{hk}} | 19 | On landing, 1 | - | - | 16 | Standing | Slamming }}
{{MoveListFooter}}
==Universals/Generics==
{{PJMoveListHeader}}
{{PJMoveListRow |  | {{p}} while facing away from opponent | 10 | 16 | +2 | +8 | 5 | All | }}
{{PJMoveListRow |  | {{k}} while facing away from opponent | 9 | 37 | - | -13 | 10 | All | Blowback }}
{{PJMoveListRow |  | {{lp}} while running | 12 | 31 | - | -7 | 8 | Standing | Overhead, Blowback }}
{{PJMoveListRow |  | {{lk}} while running | 12 | 28 | - | -6 | 5 | Crouching | Blowback }}
{{PJMoveListRow |  | {{hk}} while running | 12 | 32 | - | -8 | 7 | Standing | Overhead, Blowback }}
{{MoveListFooter}}
==Throws==
{{PJMoveListHeader}}
{{PJMoveListRow |  | {{lp}} + {{hp}}, near opponent | 7 | 46 | - | - | 30 | - | Standing Throw }}
{{PJMoveListRow |  | {{d}} + {{lp}} + {{hp}}, near opponent | 7 | 46 | - | - | 37 | - | Crouching Throw }}
{{PJMoveListRow |  | {{lp}} + {{hp}}, when behind opponent | 19 | 36 | - | - | 41 | - | Back Throw }}
{{PJMoveListRow |  | (Air) {{lp}} + {{hp}}, near opponent | 1 | - | - | - | 35 | - | Air Throw }}
{{MoveListFooter}}
==Special Moves==
{{PJMoveListHeader}}
{{PJMoveListRow | Palpation / Shokushin | {{qcf}} {{p}} | 11 | 47/45 | - | - | 8~48 | - | {{lk}} - Crouching Throw, {{hk}} - Standing Throw, Press {{k}} to add up to 6 hits, Blowback on 6th hit }}
{{PJMoveListRow | Attendance Check / Shusseki Kakunin (weak) | {{qcb}} {{lp}} | 33 | 39 | - | -17 | 23 | Crouching | Blowback }}
{{PJMoveListRow | Attendance Check / Shusseki Kakunin (strong) | {{qcb}} {{hp}} | 33 | 42 | - | -18 | 29 | All | Blowback }}
{{PJMoveListRow | Hospital Rounds / Kaishin (weak) | {{qcb}} {{lk}} | 21 | On landing, 21 | - | -12 | 8 | All | Blowback, can be repeated twice }}
{{PJMoveListRow | Hospital Rounds / Kaishin (strong) | {{qcb}} {{hk}} | 21 | On landing, 21 | - | -16 | 8 | All | Blowback, can be repeated twice }}
{{PJMoveListRow | Aerial Hospital Rounds / Kuchuu Kaishin | (Air) {{qcb}} {{k}} | 20 | On landing, 21 | - | - | 8 | All | Blowback, can be repeated twice }}
{{PJMoveListRow | Ascending Cleave / Shouten Sekkai (weak) | {{dp}} {{lk}} | 14 | On landing, 13 | - | -15 | 11 | All | Mini Launcher }}
{{PJMoveListRow | Ascending Cleave / Shouten Sekkai (strong) | {{dp}} {{hk}} | 14 | On landing, 13 | - | -15 | 11 | All | Blowback }}
{{PJMoveListRow | Follow up | {{---}} {{hk}} | 13 | On landing, 13 | - | +7 | 17 | All | Slamming }}
{{PJMoveListRow | Aerial Ascending Cleave / Kuchuu Shouten Sekkai (weak) | (Air) {{dp}} {{lk}} | 9 | On landing, 13 | - | - | 11 | All | Blowback }}
{{PJMoveListRow | Aerial Ascending Cleave / Kuchuu Shouten Sekkai (strong) | (Air) {{dp}} {{hk}} | 9 | On landing, 13 | - | - | 11 | All | Blowback }}
{{PJMoveListRow | Follow up | {{---}} {{hk}} | 13 | On landing, 13 | - | +10 | 11 | All | Slamming }}
{{PJMoveListRow | One Wing Stance / Katayoku no Kamae (weak) | {{qcf}} {{lk}} | 19 | 34 | - | - | 32 | All | Physical Standing attack counter, active 19~50F, Blowback on hit }}
{{PJMoveListRow | One Wing Stance / Katayoku no Kamae (strong) | {{qcf}} {{hk}} | 19 | 27 | - | - | 43 | All | Physical Standing attack counter, active 19~78F, Blowback on hit }}
{{PJMoveListRow | Stretching / Shinshin  | {{b}} + {{lk}} + {{hk}} | 29 | On landing, 1 | - | +18 | 14 | All | Slamming }}
{{MoveListFooter}}
==Burning Vigor Attacks==
{{PJMoveListHeader}}
{{PJMoveListRow | Final Prescription / Dead Nursing | {{qcf}} {{qcf}} {{p}} | 16 | 70 | - | - | 52 | All | Throw connects whether Standing or Crouching }}
{{PJMoveListRow | Stairway to Heaven / Stairway To The Sky | {{qcf}} {{qcf}} {{k}} | 12 | On landing, 1 | - | - | 39 | All | Slamming }}
{{PJMoveListRow | Pathway to Hell / Path To Doom | {{qcb}} {{qcb}} {{k}} | 19 | On landing, 13 | - | -18 | 58 | All | Fixed damge on 2nd and 3rd hit }}
{{MoveListFooter}}
==Team Up Techniques==
{{PJMoveListHeader}}
{{PJMoveListRow | Ultimate Remedy Art | {{lp}} + {{lk}} (or {{hp}} + {{hk}}) | 25 | 49 | - | -23 | 14 | All | Team Up Technique, Heal Type, Recovery frames may vary }}
{{PJMoveListRow | Purging Tempest | {{p}} + {{p}} + {{k}} (or {{k}} + {{k}} + {{p}}) | 21 | 61 | - | -37 | 100 | All | Party Up Technique }}
{{MoveListFooter}}
==Combos==
{{lp}} {{lp}} {{hp}} {{hk}} {{---}} {{qcb}} {{qcb}} {{k}}
{{lp}} {{lp}} {{hp}} {{hk}} {{---}} {{dp}} {{k}} {{---}} {{u}} {{---}} {{lk}} {{lk}} {{hp}} {{hk}} {{---}} (Air) {{qcb}} {{k}} {{---}} {{qcb}} {{k}} {{---}} {{qcb}} {{k}}
==Videos==
''Skip to 0:26''
<youtube></youtube>
==Colors==
{{PJColors
|Character=Kyoko
}}
</div></div>
----
----
__NOTOC__
__NOTOC__

Latest revision as of 23:37, 6 October 2021

Introduction

While Kyoko may appear elegant and professional, she shares some of the same traits as Akira...when her lab coat comes off, she's a bit of a slob, and a happy drunkard to boot. Kyoko is the current school nurse at Justice High, though she originally trained as an orthopedic surgeon- a genius in the field. Even though she's constantly dealing with many fawning students faking illnesses to come to her office, she inevitably recognizes Hideo's feelings for her, and happily gives her hand in marriage after his proposal following the events of Rival Schools: United by Fate. In Project Justice, she along with Hideo and Hayato team up to investigate the recent disturbances among the schools and find the assailant responsible for Principal Raizos recent hospitalization.

Kyoko is an extremely strong character, who is really only outclassed by Roy. While having slightly less damage, her 5Lp.png is a near carbon-copy, and is an incredibly strong pressure tool; on par with Roy's for being the best that Project Justice has to offer. Active counters and command grab specials give her a nice variety of mixup tools in the mid-to-close range. Her most powerful super, Path To Doom, is a force to be reckoned with as well. Her only major quirks being that she doesn't have many effective routes into a significant Launch, though most of her effectiveness doesn't hinge on getting a Launch anyways, and her best super, Path To Doom, has an interesting downside in that it will whiff on a selection of characters if they happen to be crouching on activation.


{{#evt: service=youtube |id=https://youtu.be/ykwOEXl9gDs |urlargs=start=26&end=47&loop=1 |dimensions=480x320 }}

Strengths Weaknesses
  • Excellent mixup options.
  • Powerful, confirmable super.
  • One of the best close-range pressure tools available in Project Justice with 5Lp.png.
  • Poor opportunities for Launching- must be comfortable with footsies and ground-based play.
  • Her best super, Path To Doom, mysteriously whiffs on some characters when they're crouching. Kyoko must pay close attention to the opponent's stance to be effective with this destructive tool.
Kyoko Minazuki

Project Justice Kyoko.gif
School:

Justice

Assist Type:

Support

Tier:

S

Difficulty:

Easy/Medium

Colors

Lp.png Hp.png Lp.png+Hp.png
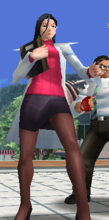
PJ Kyoko 1.png
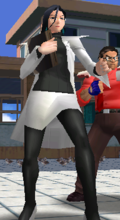
PJ Kyoko 2.png
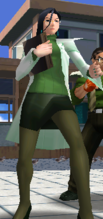
PJ Kyoko 3.png
Lk.png Hk.png Lk.png+Hk.png
PJ Kyoko 4.png
PJ Kyoko 5.png
PJ Kyoko 6.png
Kyoko Wiki Roadmap

70% complete


In Progress / Completed To-do

Completed:

  • Main Page updated!
  • All Frame Data Added!
  • Movelist Complete with Images!

In-Progress:

  • Record previously listed combos and fill/sort combos page.
  • Kyokos best super, Path to Doom, really needs a nice table written in the description field of which characters when crouching will not get hit by this super. There's a table available on The JP Wiki, but it needs to be reformatted and added here.


  • Strategy and Matchup sections are still empty. Character specialists: give us your knowledge!


  • Add further resources as they are created.
  • Lab and record new combos as discovered.


Game Navigation

General
Controls
HUD
System
FAQ
Glossary
Characters
Batsu
Hinata
Kyosuke
Akira
Edge
Gan
Roy
Boman
Tiffany
Natsu
Shoma
Roberto
Hideo
Kyoko
Hyo
Daigo
Hayato
Ran
Nagare
Burning Batsu
Chairperson
Demon Hyo
Kurow
Momo
Powered Akira
Vatsu
Wild Daigo
Yurika
Zaki