|
|
| (11 intermediate revisions by 3 users not shown) |
| Line 1: |
Line 1: |
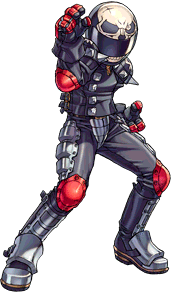
| [[File:Project_Justice_Powered_Akira.png|right]]
| | {{PJ Character Intro|char= Powered Akira|full=Powered Akira|short=PAKIRA |
| | |school=Seijyun |
| | |assist=Damage |
| | |tier=C |
| | |difficulty=Medium/Hard |
|
| |
|
| ==Introduction==
| | |content= |
|
| |
|
| ==Normal Moves==
| | {{2 Column Flex|flex1=9|flex2=4 |
| {{PJMoveListHeader}} | | |content1= |
| {{PJMoveListRow | Standing Light Punch | {{n}} {{lp}} | 9 | 20 | +1 | +4 | 4 | All | }}
| | {{Content Box|header=Introduction|content= |
| {{PJMoveListRow | Standing Strong Punch | {{n}} {{hp}} | 12 | 31 | +2 | -7 | 11 | All | }} | | <div class="toccolours mw-collapsible mw-collapsed"> |
| {{PJMoveListRow | Crouching Light Punch | {{d}} {{lp}} | 9 | 26| +1 | -4 | 4 | Crouching | }}
| | Some of '''Powered Akira's''' story details may fall under "spoilers"! Expand to continue: |
| {{PJMoveListRow | Crouching Strong Punch | {{d}} {{hp}} | 14 | 27 | +2 | -5 | 13 | All | }}
| | ---- |
| {{PJMoveListRow | Standing Light Kick | {{n}} {{lk}} | 10 | 14 | +2 | +6 | 3 | All | Block Adv may vary }}
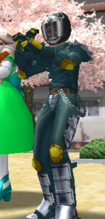
| | <div class="mw-collapsible-content">Akira based on her original appearance in Rival Schools, where she dons her biker suit and helmet.<br> Originally used to hide her true gender, after rescuing her brainwashed [[Project Justice/Wild Daigo | brother]] in Project Justice's story mode, Akira reunites with her original biker helmet given by [[Project Justice/Edge | Edge]] as a thank you gift for saving Daigo. Now, the aggressive little "brother" of Daigo has returned. |
| {{PJMoveListRow | Standing Strong Kick | {{n}} {{hk}} | 15 | 47 | -4 | -23 | 11 | All | }}
| | </div> |
| {{PJMoveListRow | Crouching Light Kick | {{d}} {{lk}} | 12 | 32 | -1 | -10 | 3 | Crouching | }}
| | </div> |
| {{PJMoveListRow | Crouching Strong Kick | {{d}} {{hk}} | 15 | 32 | -1 | -10 | 3 | Crouching | Knockdown }}
| | ---- |
| {{PJMoveListRow | Jumping Light Punch | {{u}} {{lp}} | 11 | On landing, 1 | - | - | 5 | Standing | }}
| | <br><br> |
| {{PJMoveListRow | Jumping Heavy Punch | {{u}} {{hp}} | 12 | On landing, 1 | - | - | 11 | Standing | }}
| | Similar to [[Project Justice/Akira | Akira]], '''Powered Akira''' has a similar gameplan, but with ever so slightly better damage across the board. Her big tradeoff: gone are the old 4{{lp}} confirmable combo routes, and hello to her four new lengthy high-damage combo routes out of her (debatably impractical) Stance. She is also missing her '''Haten Mueishu''' super, but now instead has the '''Destruction Barrage''' Team-Up; dealing more damage than her previous '''Synchronized Kick Chain'''. While the increased damage is generally good, being unable to combo into Stance means many of her opportunities to implement those complex high-damage combo routes will be the result of a well-placed read or mixup. Thankfully, The tradeoffs make choosing between [[Project Justice/Akira | Akira]] and '''Powered Akira''' more a matter of preference- unlike the Batsu variants present in '''''Project Justice'''''. |
| {{PJMoveListRow | Jumping Light Kick | {{u}} {{lk}} | 9 | On landing, 1 | - | - | 4 | Standing | }}
| | }} |
| {{PJMoveListRow | Jumping Heavy Kick | {{u}} {{hk}} | 17 | On landing, 1 | - | - | 13 | Standing | }}
| | <br> |
| {{MoveListFooter}}
| | |content2= |
| | | {{Content Box|content= |
| ==Command Normals==
| | {{#evt: |
| {{PJMoveListHeader}}
| | service=youtube |
| {{PJMoveListRow | Palm Strike | {{lp}} {{lp}} {{lp}} | 12 | 39 | +2 | -15 | 8 | All | }}
| | |id=https://youtu.be/ILJ9XpzhPm8 |
| {{PJMoveListRow | Close Palm Shot | {{f}} {{hp}} | 17 | 41 | +1 | -17 | 14 | All | }}
| | |urlargs=start=146&end=470&loop=1 |
| {{PJMoveListRow | Wheel Kick | {{f}} {{hk}} | 28 | 45 | -2 | -21 | 10 | Standing | Overhead }}
| | |dimensions=480x320 |
| {{PJMoveListRow | Head Kick | {{---}} {{hk}} | 27 | 41 | - | -17 | 10 | All | Blowback }}
| | }} |
| {{PJMoveListRow | Sweep Kick | {{---}} {{d}} {{hk}} | 20 | 39 | - | -17 | 8 | Crouching | Blowback }}
| | }} |
| {{PJMoveListRow | Horse Buck | {{b}} {{hp}} | 17 | 26 | - | -2 | 8 | All | Mini Launcher }}
| | }} |
| {{PJMoveListRow | Sky Piercer | {{df}} {{hp}} | 15 | 38 | - | -14 | 11 | All | Rival Launcher }} | | {{Content Box|content= |
| {{PJMoveListRow | Revolver Leg | (Air) {{f}} {{hk}} | 18 | On landing, 1 | - | - | 14 | Standing | Slamming }} | | {{ProConTable |
| {{MoveListFooter}}
| | |pros= |
| | | * Just like [[Project Justice/Akira | Akira]], Powered Akira has great damage across the board in comparison to most of the cast, but she has to work for it. |
| ==Universals/Generics== | | * An unique stance with multiple routes, leading to incredible meterless damage. |
| {{PJMoveListHeader}}
| | * Multiple launchers. |
| {{PJMoveListRow | Turn Around Punch | {{ p }} while facing away from opponent | 10 | 16 | +2 | +8 | 7 | All | }}
| | |cons= |
| {{PJMoveListRow | Turn Around Kick | {{ k }} while facing away from opponent | 9 | 37 | - | -13 | 8 | All | Blowback}} | | * Again, just like [[Project Justice/Akira | Akira]], she has stubby normals. |
| {{PJMoveListRow | Running Shoulder Tackle | {{ p }} while running | 12 | 31 | - | -7 | 10 | Standing | Overhead, Blowback}} | | * MUST stay in in order to be effective, as she's helpless against strong zoning and tools that prevent her from going in. |
| {{PJMoveListRow | Low Slide Kick | {{ lk }} while running | 12 | 28 | - | -6 | 7 | Crouching | Blowback}}
| | * Losing access to [[Project Justice/Akira | Akira's]] {{b}} {{lp}} rekka as a tradeoff for gaining the stance. |
| {{PJMoveListRow | Flying Jump Kick | {{ hk }} while running | 12 | 32 | - | -8 | 8 | Standing | Overhead, Blowback}}
| | * Stance is useless as a neutral tool and cannot be comboed into due to its long startup. It's only effective as a Tardy Cancel to punish moves with bad recovery. |
| {{MoveListFooter}}
| | }} |
| | | }} |
| ==Throws==
| | }} |
| {{PJMoveListHeader}}
| |
| {{PJMoveListRow | Double Palm Blast | {{lp}} + {{hp}}, near opponent | 7 | 44 | - | - | 32 | - | Standing Throw }}
| |
| {{PJMoveListRow | Circle Throw | {{d}} + {{lp}} + {{hp}}, near opponent | 7 | 44 | - | - | 35 | - | Crouching Throw }}
| |
| {{PJMoveListRow | Back Circle Toss | {{lp}} + {{hp}}, when behind opponent | 8 | 43 | - | - | 30 | - | Back Throw }}
| |
| {{PJMoveListRow | Hell Wheel | (air) {{lp}} + {{hp}}, near opponent | 1 | - | - | - | 37 | - | Air Throw }}
| |
| {{MoveListFooter}}
| |
|
| |
|
| ==Special Moves==
| | {{2 Column Flex|flex1=2|flex2=4 |
| {{PJMoveListHeader}}
| | |content1= |
| {{PJMoveListRow | Gairimon / Gate Elbow (weak) | {{qcf}} {{lp}} | 12 | 40 | - | -16 | 22 | Standing | Blowback}}
| | {{Content Box|header=Colors|content= |
| {{PJMoveListRow | Gairimon / Gate Elbow (strong) | {{qcf}} {{hp}} | 35 | 38 | - | -14 | 22 | Standing | Blowback}}
| |
| {{PJMoveListRow | Urarimon / Gate Shoulder | {{dp}} {{p}} | 14 | 42 | - | -18 | 30 | All | Blowback }}
| |
| {{PJMoveListRow | Haten no Kamae / Reflex Stance | {{qcb}} {{p}} | 13 | | | | | | Stance }} | |
| {{PJMoveListRow | Dragon Fang Slash 1 | {{---}} {{lp}} | 15 | 29 | +12 | -5 | 8 | All | }}
| |
| {{PJMoveListRow | Dragon Fang Slash 2 | {{---}} {{lp}} {{hp}} | 17 | 26 | +14 | -2 | 8 | All | }}
| |
| {{PJMoveListRow | Dragon Fang Slash 3 | {{---}} {{lp}} {{hp}} {{hk}} | 21 | 54 | - | -29 | 8 | All | Special Launch }}
| |
| {{PJMoveListRow | Dragon Fang Slash 4 | {{---}} {{lp}} {{hp}} {{hk}} {{lk}} | - | - | - | - | - | - | Special Jump Follow Up }}
| |
| {{PJMoveListRow | Dragon Fang Slash 5 | {{---}} {{lp}} {{hp}} {{hk}} {{lk}} {{lk}} | 5 | On landing, 1 | - | - | 5 | All | }}
| |
| {{PJMoveListRow | Dragon Fang Slash 6 | {{---}} {{lp}} {{hp}} {{hk}} {{lk}} {{lk}} {{lk}}| 5 | On landing, 1 | - | - | 5 | All | }}
| |
| {{PJMoveListRow | Dragon Fang Slash 7 | {{---}} {{lp}} {{hp}} {{hk}} {{lk}} {{lk}} {{lk}} {{lk}}| 5 | On landing, 1 | - | - | 5 | All | }}
| |
| {{PJMoveListRow | Spinning Swallow Storm Dance 1 | {{---}} {{hp}} | 17 | 38 | +2 | -14 | 11 | All | }}
| |
| {{PJMoveListRow | Spinning Swallow Storm Dance 2 | {{---}} {{hp}} {{lp}} | 14 | 29 | +2 | -4 | 11 | All | }}
| |
| {{PJMoveListRow | Spinning Swallow Storm Dance 3 | {{---}} {{hp}} {{lp}} {{lk}} | 20 | 20 | +16 | +2 | 11 | All | }}
| |
| {{PJMoveListRow | Spinning Swallow Storm Dance 4 | {{---}} {{hp}} {{lp}} {{lk}} {{hk}} | 17 | 34 | - | -10 | 11 | All | Blowback }}
| |
| {{PJMoveListRow | Nirvana Charge 1 | {{---}} {{lk}} | 11 | 25 | -4 | -1 | 5 | All | }}
| |
| {{PJMoveListRow | Nirvana Charge 2 | {{---}} {{lk}} {{lk}} | 7 | 25 | -4 | -1 | 5 | All | }}
| |
| {{PJMoveListRow | Nirvana Charge 3 | {{---}} {{lk}} {{lk}} {{lk}} | 7 | 25 | -4 | -1 | 5 | All | }}
| |
| {{PJMoveListRow | Nirvana Charge 4 | {{---}} {{lk}} {{lk}} {{lk}} {{lp}} | 12 | 24 | +2 | 0 | 8 | All | }}
| |
| {{PJMoveListRow | Nirvana Charge 5 | {{---}} {{lk}} {{lk}} {{lk}} {{lp}} {{hp}} | 15 | 34 | +2 | -9 | 8 | All | }}
| |
| {{PJMoveListRow | Nirvana Charge 6 | {{---}} {{lk}} {{lk}} {{lk}} {{lk}} {{hp}} {{hk}} | 19 | 43 | - | -19 | 8 | All | Blowback }}
| |
| {{PJMoveListRow | Phoenix Wing Sky Kick 1 | {{---}} {{hk}} | 16 | 59 | - | -30 | 8 | All | Launches, Automatic Jump on Hit }}
| |
| {{PJMoveListRow | Phoenix Wing Sky Kick 2 | {{---}} {{hk}} {{lk}} | 5 | On landing, 1 | - | - | 5 | All | }}
| |
| {{PJMoveListRow | Phoenix Wing Sky Kick 3 | {{---}} {{hk}} {{lk}} {{lk}} | 5 | On landing, 1 | - | - | 5 | All | }}
| |
| {{PJMoveListRow | Phoenix Wing Sky Kick 4 | {{---}} {{hk}} {{lk}} {{lk}} {{lk}} | 5 | On landing, 1 | - | - | 5 | All | }}
| |
| {{PJMoveListRow | Phoenix Wing Sky Kick 5 | {{---}} {{hk}} {{lk}} {{lk}} {{lk}} {{lp}} | 8 | On landing, 1 | - | - | 8 | All | }}
| |
| {{PJMoveListRow | Phoenix Wing Sky Kick 6 | {{---}} {{hk}} {{lk}} {{lk}} {{lk}} {{lp}} {{hp}} | 9 | On landing, 1 | - | - | 8 | All | }}
| |
| {{PJMoveListRow | Dancing Cyclone Kick (weak) | {{qcf}} {{lk}} | 26 | 39 | -8 | -17 | 22 | Crouching | Sidesteps, repeat up to 2 times using either Attack }}
| |
| {{PJMoveListRow | Dancing Cyclone Kick (strong) | {{qcf}} {{hk}} | 23| 34 | - | -10 | 22 | Any | Sidesteps, Blowback, repeat up to 2 times using either Attack }}
| |
| {{PJMoveListRow | Houbu / Releasing Dance | {{qcb}} {{k}} | 13 | 34 | - | -10 | 26 | Any | Mini Launcher }}
| |
| {{MoveListFooter}}
| |
| | |
| ==Burning Vigor Attacks==
| |
| {{PJMoveListHeader}} | |
| {{PJMoveListRow | Gou Kikou Kai / Skull Slice | {{qcf}} {{qcf}} {{p}} | 45 | 71 | - | -47 | 48 | Any | Blowback }}
| |
| {{PJMoveListRow | Air Gou Kikou Kai / Skull Slice | (Air) {{qcf}} {{qcf}} {{p}} | 18 | On landing, 13 | - | -23 | 44 | Any | Blowback }}
| |
| {{PJMoveListRow | Ha no Sougeki / Destructive Barrage | {{qcb}} {{qcb}} {{p}} | 16 | 38 | - | -11 | 39 | Any | 5 Hits, Blowback }}
| |
| {{PJMoveListRow | Ten no Renbu / Aerial Barrage | {{qcb}} {{qcb}} {{k}} | 35 | 54 | - | -30 | 38 | Any | 6 Hits, Slamming }}
| |
| {{MoveListFooter}}
| |
| | |
| ==Team Up Techniques== | |
| {{PJMoveListHeader}}
| |
| {{PJMoveListRow | Rengeki Renbu / Combination Barrage | {{lp}} + {{lk}} (or {{hp}} + {{hk}}) | 24 | 40 | - | -16 | 57 | Any | Team Up Technique, damage type }}
| |
| {{PJMoveListRow | Gedo Top | {{p}} + {{p}} + {{k}} (or {{k}} + {{k}} + {{p}}) | 19 | 50 | - | -26 | 100 | Any | Party Up Technique }}
| |
| {{MoveListFooter}}
| |
| | |
| ==Combos==
| |
| | |
| LP, LP, HP, b+HP, jLK, jLK, jHP, jHK, qcf,qcf+P - 69dmg
| |
| | |
| LP, LP, HP, b+HP, jLK, jLK, jHP, jHK, jf+HK - 52dmg, meterless option
| |
| | |
| qcb+HP, HP, LP, LK, qcb+LK, jLK jLK jHP jHK qcfx2+P - 99dmg, very unsafe. Only use if your opponent whiffs/you tardy cancel something extremely unsafe.
| |
| | |
| qcb+LK, jHP jHK qcfx2+P - 86dmg, much safer option for a tardy cancel.
| |
| | |
| ==Videos==
| |
| ''Skip to 2:26''
| |
| <youtube>ILJ9XpzhPm8</youtube>
| |
| | |
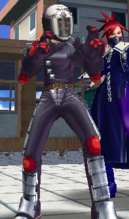
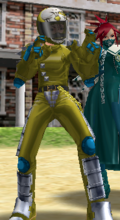
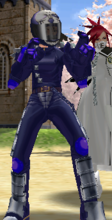
| ==Colors==
| |
| {{PJColors | | {{PJColors |
| |Character=Powered Akira | | |Character=Powered Akira |
| }} | | }} |
| | }} |
| | |content2= |
| | {{Content Box|header=Powered Akira Wiki Roadmap|content= |
| | {{PoweredAkiraRoadmap-PJ}} |
| | }} |
| | }} |
| | ---- |
| | __NOTOC__ |
| | |
|
| |
|
| {{Project Justice}} | | {{Project Justice}} |
|
| |
|
| [[Category:Project Justice]] | | [[Category:Project Justice]] |
| [[Category:Akira Kazama]] | | [[Category:Powered Akira]] |
![]() confirmable combo routes, and hello to her four new lengthy high-damage combo routes out of her (debatably impractical) Stance. She is also missing her Haten Mueishu super, but now instead has the Destruction Barrage Team-Up; dealing more damage than her previous Synchronized Kick Chain. While the increased damage is generally good, being unable to combo into Stance means many of her opportunities to implement those complex high-damage combo routes will be the result of a well-placed read or mixup. Thankfully, The tradeoffs make choosing between Akira and Powered Akira more a matter of preference- unlike the Batsu variants present in Project Justice.
confirmable combo routes, and hello to her four new lengthy high-damage combo routes out of her (debatably impractical) Stance. She is also missing her Haten Mueishu super, but now instead has the Destruction Barrage Team-Up; dealing more damage than her previous Synchronized Kick Chain. While the increased damage is generally good, being unable to combo into Stance means many of her opportunities to implement those complex high-damage combo routes will be the result of a well-placed read or mixup. Thankfully, The tradeoffs make choosing between Akira and Powered Akira more a matter of preference- unlike the Batsu variants present in Project Justice.
