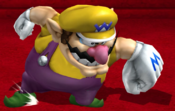
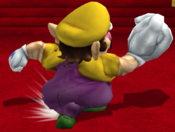
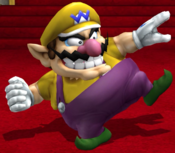
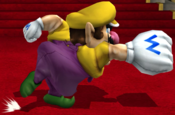
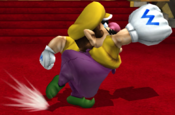
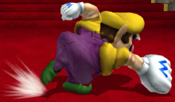
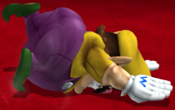
No edit summary |
|||
| (3 intermediate revisions by the same user not shown) | |||
| Line 12: | Line 12: | ||
|frame data=[https://rukaidata.com/P+/Wario/subactions/ RukaiData] | |frame data=[https://rukaidata.com/P+/Wario/subactions/ RukaiData] | ||
|discord=[https://discord.com/invite/Vj35YhY Wario Discord] | |discord=[https://discord.com/invite/Vj35YhY Wario Discord] | ||
|vods=[https://vods.co/projectm/character/Wario | |vods=[https://vods.co/projectm/character/Wario Wario VODs] | ||
}} | }} | ||
==Move List== | ==Move List== | ||
===Grounded Moves=== | ===Grounded Moves=== | ||
{{MoveData | {{MoveData | ||
|image=P+_Wario_Jab1.png | |image=P+_Wario_Jab1.png | ||
|name=Jab 1 | |name=Jab 1 | ||
|input= | |input=Attack | ||
|data= | |data= | ||
{{AttackData-P+ | {{AttackData-P+ | ||
| Line 39: | Line 37: | ||
|invul=- | |invul=- | ||
|description=*Can be cancelled into grab and Wario's 2nd jab. | |description=*Can be cancelled into grab and Wario's 2nd jab. | ||
Basic jab. Fairly quick and can be good for staggers, however it doesn't have much use outside of | Basic jab. Fairly quick and can be good for staggers, however it doesn't have much use outside of combos into 2nd jab. | ||
}} | }} | ||
}} | }} | ||
{{MoveData | {{MoveData | ||
|image=P+_Wario_Jab2.png | |image=P+_Wario_Jab2.png | ||
|name=Jab 2 | |name=Jab 2 | ||
|input= | |input=Attack > Attack | ||
|data= | |data= | ||
{{AttackData-P+ | {{AttackData-P+ | ||
| Line 64: | Line 62: | ||
|invul=- | |invul=- | ||
|description=*Sends opponents upward on hit. | |description=*Sends opponents upward on hit. | ||
Jab 2 is a surprisingly good combo tool, as it launches opponents vertically which can combo into grabs at low percents and sets up for combos at high percents. However, it does not beat crouch cancelling. | |||
}} | }} | ||
}} | }} | ||
{{MoveData | {{MoveData | ||
| Line 80: | Line 78: | ||
|caption4=Down Angled | |caption4=Down Angled | ||
|name=Forward Tilt | |name=Forward Tilt | ||
|input= | |input=Forward Attack | ||
|data= | |data= | ||
{{AttackData-P+ | {{AttackData-P+ | ||
| Line 136: | Line 134: | ||
}} | }} | ||
{{MoveData | {{MoveData | ||
|image=P+_Wario_UTilt.png | |image=P+_Wario_UTilt.png | ||
|name=Up Tilt | |name=Up Tilt | ||
|input=Up Attack | |||
|caption=Put your hands in the air! | |caption=Put your hands in the air! | ||
|data= | |data= | ||
{{AttackData-P+ | {{AttackData-P+ | ||
| Line 160: | Line 158: | ||
*Wario's left hand sends at an angle of 83° on frames 12-14 and at 80° on frames 15-27. | *Wario's left hand sends at an angle of 83° on frames 12-14 and at 80° on frames 15-27. | ||
*Wario's right hand sends at an angle of 97° on frames 12-14 and at 100° on frames 15-27. | *Wario's right hand sends at an angle of 97° on frames 12-14 and at 100° on frames 15-27. | ||
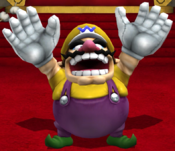
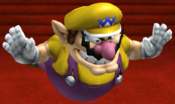
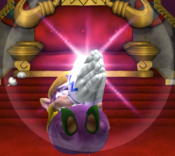
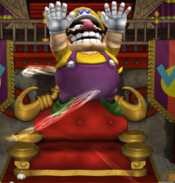
With intangibility on his head and a large active upwards hitbox, up tilt serves as Wario's main anti-air making it great for stuffing out aerial approaches. | With intangibility on his head and a large active upwards hitbox, up tilt serves as Wario's main anti-air making it great for stuffing out aerial approaches. It is rather slow at frame 12 however, so you will need to pre-emptively use it to call out aerial approaches. And while Wario's head becomes invincible, the rest of his body is still vulnerable and can trade with aerial hits. | ||
It's also a great combo tool, sending opponents straight up allowing for Wario to follow up with his many aerial moves. | |||
It's also a great combo tool, sending opponents straight up allowing for Wario to follow up with his many aerial moves, although this is easier at later percents. | |||
}} | }} | ||
}} | }} | ||
{{MoveData | {{MoveData | ||
|image=P+_Wario_DTilt.png | |image=P+_Wario_DTilt.png | ||
|name=Down Tilt | |name=Down Tilt | ||
|input=Down Attack | |||
|caption=The literal poke | |caption=The literal poke | ||
|data= | |data= | ||
{{AttackData-P+ | {{AttackData-P+ | ||
| Line 187: | Line 186: | ||
|invul=- | |invul=- | ||
|description=*Can be cancelled into itself. | |description=*Can be cancelled into itself. | ||
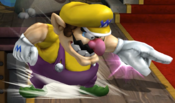
Down tilt acts as a poke which can hit opponents below their shield. Launched opponents are sent outwards | Down tilt acts as a poke which can hit opponents below their shield if it’s weak, although overuse can be punished with a crouch cancel. Launched opponents are sent outwards at a weird position at high percents. | ||
}} | }} | ||
}} | }} | ||
{{MoveData | {{MoveData | ||
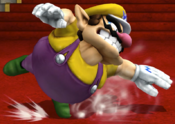
|image=P+_Wario_DAttack.png | |image=P+_Wario_DAttack.png | ||
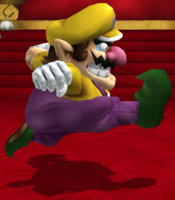
|name=Dash Attack | |name=Dash Attack | ||
|input= | |input=Run > Attack | ||
|data= | |data= | ||
{{AttackData-P+ | {{AttackData-P+ | ||
| Line 216: | Line 215: | ||
}} | }} | ||
{{MoveData | {{MoveData | ||
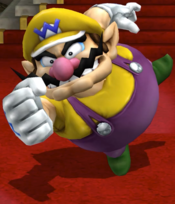
|image=P+_Wario_Fmash.png | |image=P+_Wario_Fmash.png | ||
|name=Forward Smash | |name=Forward Smash | ||
|caption=''GEDOUTTAHERE!'' | |input=Forward Smash Attack | ||
|caption=''"GEDOUTTAHERE!"'' | |||
|data= | |data= | ||
{{AttackData-P+ | {{AttackData-P+ | ||
| Line 240: | Line 239: | ||
*Wario moves forward on use. | *Wario moves forward on use. | ||
*Charged version deals more knockback on hit. | *Charged version deals more knockback on hit. | ||
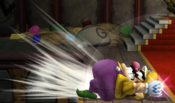
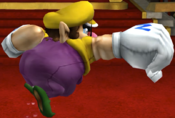
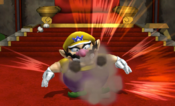
A very fast horizontal kill move, and probably Wario's best kill option during staggers. It | A very fast horizontal kill move, and probably Wario's best kill option during staggers, Forward Smash can be a great quick option against close-up opponents. It also moves Wario forward meaning it can catch somewhat distant opponents. Be wary, as misuse of this move can easily be punished due to its high recovery. | ||
}} | }} | ||
}} | }} | ||
{{MoveData | {{MoveData | ||
| Line 250: | Line 249: | ||
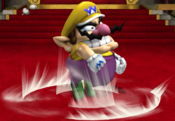
|name=Up Smash | |name=Up Smash | ||
|caption=Today we're going to spin... | |caption=Today we're going to spin... | ||
|input= | |input=Up Smash Attack | ||
|data= | |data= | ||
{{AttackData-P+ | {{AttackData-P+ | ||
| Line 269: | Line 268: | ||
*Charged version deals more knockback on hit. | *Charged version deals more knockback on hit. | ||
*Can be cancelled into with DACUS. | *Can be cancelled into with DACUS. | ||
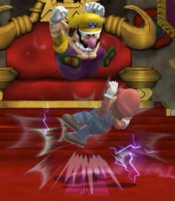
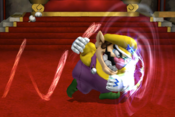
Up Smash | Up Smash is notorious as a powerful combo move in Wario's kit, allowing him to devastate fast-fallers and heavyweights. Due to its weak base knockback, this move can combo into itself multiple times at low percents, and then act as a launcher for kill confirms at high percents thanks to its lower than avergae end lag. This does mean you completely sacrifice it as a kill move, however Wario has so many other vertical kill moves it doesn’t end up mattering. | ||
It’s not perfect however. Despite being DACUS-able it doesn’t fare well in neutral as it leaves Wario quite open on whiff, and on hit it can be SDI'd by opponents. | |||
}} | }} | ||
}} | }} | ||
{{MoveData | {{MoveData | ||
|image=P+_Wario_DSmash.png | |image=P+_Wario_DSmash.png | ||
|name=Down Smash | |name=Down Smash | ||
|caption= | |input=Down Smash Attack | ||
|caption=''"MOVE IT!"'' | |||
|data= | |data= | ||
{{AttackData-P+ | {{AttackData-P+ | ||
| Line 300: | Line 301: | ||
*Main fist hit can be meteor cancelled. | *Main fist hit can be meteor cancelled. | ||
*If grounded, opponents can tech after being hit. | *If grounded, opponents can tech after being hit. | ||
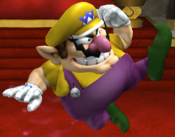
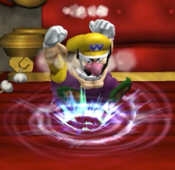
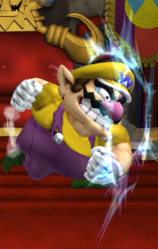
Acting as a large burst action with massive disjoints, | Acting as a large burst action with massive disjoints, Down Smash gives Wario a way to deal with tech rolls and provides him with a decent on-stage edge guard. Opponents hit off-stage will be sent downwards, however this move sends at a meteor angle and can be Jump or Up Special cancelled. | ||
}} | }} | ||
}} | }} | ||
{{MoveData | |||
|name=Get-Up Attack | |||
|input=Attack while Knocked Down | |||
|image=P+_Wario_Getup.png | |||
|caption=Down Get-Up | |||
|image2=P+_Wario_GetupU.png | |||
|caption2=Up Get-Up | |||
|data= | |||
{{AttackData-P+ | |||
|version=Down Get-Up | |||
|damage=6% | |||
|bkb=80 | |||
|kbg=50 | |||
|angle={{Tooltip|text=45°|hovertext=Sakurai Angle: When hit in the air, the attack angle is 45°. When hit on the ground, if knockback is less than 32 then the angle is 0°, otherwise angle is 44°.}} | |||
|startup=16, 21 | |||
|active=2, 2 | |||
|recovery=27 | |||
|landing=- | |||
|advantage=? | |||
|shield dmg=1 | |||
|shield stun=4 | |||
|invul=1-22 Full | |||
}} | |||
{{AttackData-P+ | |||
|header=no | |||
|version=Up Get-Up | |||
|damage=6% | |||
|bkb=80 | |||
|kbg=50 | |||
|angle={{Tooltip|text=45°|hovertext=Sakurai Angle: When hit in the air, the attack angle is 45°. When hit on the ground, if knockback is less than 32 then the angle is 0°, otherwise angle is 44°.}} | |||
|startup=16, 20 | |||
|active=2, 2 | |||
|recovery=28 | |||
|landing=- | |||
|advantage=? | |||
|shield dmg=1 | |||
|shield stun=4 | |||
|invul=1-21 Full | |||
|description=*Character is fully invincible at startup until all hitboxes have ended. | |||
Basic getup attack. Has decent disjoints that can catch off-guard opponents. | |||
}} | |||
}} | |||
{{MoveData | |||
|image=P+_Wario_GetupT.png | |||
|name=Trip Attack | |||
|input=Attack while Tripped | |||
|caption= | |||
|data= | |||
{{AttackData-P+ | |||
|damage=5% | |||
|bkb=80 | |||
|kbg=50 | |||
|angle={{Tooltip|text=45°|hovertext=Sakurai Angle: When hit in the air, the attack angle is 45°. When hit on the ground, if knockback is less than 32 then the angle is 0°, otherwise angle is 44°.}} | |||
|startup=19, 30 | |||
|active=2, 2 | |||
|recovery=19 | |||
|landing=- | |||
|advantage=? | |||
|shield dmg=1 | |||
|shield stun=4 | |||
|invul=1-20 Full | |||
|description=*Character is fully invincible at startup until they finish their first attack. | |||
Basic getup attack, however Wario moves a fair amount horizontally when getting up. | |||
}} | |||
}} | |||
Ledge Attack (When > 99% | |||
{{MoveData | |||
|image=P+_Wario_GetupL.png | |||
|name=Ledge Attack | |||
|input=Attack on Ledge | |||
|caption= | |||
|data= | |||
{{AttackData-P+ | |||
|damage=8% (31-32) 6% (33) | |||
|bkb=70 | |||
|kbg=50 | |||
|angle={{Tooltip|text=45°|hovertext=Sakurai Angle: When hit in the air, the attack angle is 45°. When hit on the ground, if knockback is less than 32 then the angle is 0°, otherwise angle is 44°.}} | |||
|startup=31 | |||
|active=3 | |||
|recovery=23 | |||
|landing=- | |||
|advantage=? | |||
|shield dmg=1 | |||
|shield stun=5, 4 | |||
|invul=1-29 Full | |||
|description=*Character is fully invincible until they attack. | |||
Decent ledge attack that puts Wario a fair amount forward. This move is also notorious for sending opponents outwards offstage if they're close to ledge, so be wary if Wario throws out this move. | |||
}} | |||
}} | |||
{{MoveData | |||
|image=P+_Wario_GetupS.png | |||
|name=Slow Ledge Attack | |||
|input=Attack on Ledge When > 99% | |||
|caption= | |||
|data= | |||
{{AttackData-P+ | |||
|damage=10% | |||
|bkb=70 | |||
|kbg=50 | |||
|angle={{Tooltip|text=45°|hovertext=Sakurai Angle: When hit in the air, the attack angle is 45°. When hit on the ground, if knockback is less than 32 then the angle is 0°, otherwise angle is 44°.}} | |||
|startup=53 | |||
|active=3 | |||
|recovery=15 | |||
|landing=- | |||
|advantage=? | |||
|shield dmg=1 | |||
|shield stun=6 | |||
|invul=1-50 Full | |||
|description=*Character is fully invincible until they attack. | |||
This move is a slower than average high percent ledge attack, although that may catch opponents off-guard with its decent poke disjoint. It also takes Wario a full second to get onto ledge with invincibility, so you will have to vary your timing to punish this getup. | |||
}} | |||
}} | |||
===Aerial Moves=== | ===Aerial Moves=== | ||
Attack | {{MoveData | ||
|image=P+_Wario_Nair.png | |||
|name=Neutral Air | |||
|input=Attack in Air | |||
|caption=Welcome to the blender! | |||
|data= | |||
{{AttackData-P+ | |||
|damage=9% (4-12), 6% (15-23), 4% (24-30) | |||
|bkb=30, 20 | |||
|kbg=100 | |||
|angle={{Tooltip|text=45°|hovertext=Sakurai Angle: When hit in the air, the attack angle is 45°. When hit on the ground, if knockback is less than 32 then the angle is 0°, otherwise angle is 44°.}}, 45° | |||
|startup=4, 15 | |||
|active=9, 16 | |||
|recovery=9 | |||
|landing=7 | |||
|advantage=? | |||
|shield dmg=? | |||
|shield stun=6, 4, 3 | |||
|invul=- | |||
|description=*Multi-hitting move with multiple active hitboxes. | |||
*Hitboxes become smaller as the move progresses. | |||
*Move becomes weaker as the move progresses. | |||
As Wario’s fastest and most active aerial move, Neutral Air can act as a powerful approach option and can be combined with Wario’s air mobility for insane shield pressure and mix-ups. It also is used as Wario’s main out of shield option, however it does lose to faster moves like Shine. It can also be great at edge guarding offstage, however it’s preferential to use Back Air instead for its bigger hitbox disjoint. | |||
}} | |||
}} | |||
Forward Attack | {{MoveData | ||
|image=P+_Wario_Fair.png | |||
|name=Forward Air | |||
|input=Forward Attack in Air | |||
|caption= | |||
|data= | |||
{{AttackData-P+ | |||
|damage=11% (5-7), 6% (8-15) | |||
|bkb=20 | |||
|kbg=80 | |||
|angle=55° | |||
|startup=5 | |||
|active=11 | |||
|recovery=11 | |||
|landing=8 | |||
|advantage=? | |||
|shield dmg=? | |||
|shield stun=6 | |||
|invul=- | |||
|description=*Hitboxes become smaller as the move progresses. | |||
*Damage becomes weaker as the move progresses. | |||
Forward Air is a bit of a strange move in Wario’s aerial arsenal, as it does not possess many unique qualities compared to his other moves. It is Wario’s second fastest aerial, and it’s low base knockback makes it a good combo tool, however it would be better to use Wario’s other aerials at later percents. | |||
}} | |||
}} | |||
Back Attack | {{MoveData | ||
|image=P+_Wario_Bair.png | |||
|name=Back Air | |||
|input=Backwards Attack in Air | |||
|caption= | |||
|data= | |||
{{AttackData-P+ | |||
|damage=16% (10-14), 9% (15-19) | |||
|bkb=20 | |||
|kbg=105 | |||
|angle={{Tooltip|text=45°|hovertext=Sakurai Angle: When hit in the air, the attack angle is 45°. When hit on the ground, if knockback is less than 32 then the angle is 0°, otherwise angle is 44°.}} | |||
|startup=10 | |||
|active=10 | |||
|recovery=22 | |||
|landing=12 | |||
|advantage=? | |||
|shield dmg=? | |||
|shield stun=9, 6 | |||
|invul=- | |||
|description=*Hitboxes become smaller as the move progresses. | |||
*Damage becomes weaker as the move progresses. | |||
Possessing a large disjoint and an insane amount of knockback growth, Back Air can be a fantastic option in a variety of situations. It can be used to approach opponents with Reverse Aerial Rushes, act as a retreating tool, and acts as Wario’s best horizontal kill move. It’s only real weakness is that it only kills from reads, with no real way to set it up as a kill confirm. | |||
}} | |||
}} | |||
Up Attack | {{MoveData | ||
|image=P+_Wario_Uair.png | |||
|name=Up Air | |||
|input=Up Attack in Air | |||
|caption= | |||
|data= | |||
{{AttackData-P+ | |||
|damage=9% (7), 14% (8-9) | |||
|bkb=10, 45 | |||
|kbg=115, 110 | |||
|angle=70°, 80° | |||
|startup=7 | |||
|active=3 | |||
|recovery=21 | |||
|landing=10 | |||
|advantage=? | |||
|shield dmg=? | |||
|shield stun=6, 8 | |||
|invul=- | |||
|description=*Check if hitboxes combine? | |||
While Back Air serves as Wario’s main horizontal kill move, it can be argued that Up Air acts as his best vertical kill move. Having a snappy 2 frame sweet spot, it may seem hard to land at first, however this move is much larger than it appears, and it can actually be pretty easily to land on aerial opponents. This is your main kill move that you should try to land after launching your opponent upwards, and combos well after Up Tilt, Up Smash, Up Throw and even itself. | |||
}} | |||
}} | |||
Down Attack | {{MoveData | ||
|image=P+_Wario_Dair.png | |||
|name=Down Air | |||
|input=Down Attack in Air | |||
|caption= | |||
|image2=P+_Wario_DairB.png | |||
|caption2=Bounce | |||
|data= | |||
{{AttackData-P+ | |||
|damage=10% | |||
|bkb=43 / 59 | |||
|kbg=127 / 106 | |||
|angle=270° | |||
|startup=15 | |||
|active=15 | |||
|recovery=25 | |||
|landing=17 | |||
|advantage=? | |||
|shield dmg=? | |||
|shield stun=6 | |||
|invul=- | |||
|description=*Can Bounce off of Opponents and Objects such as projectiles. | |||
*On Bounce Wario enters a 22 frame recovery animation. | |||
*Can be jumped out of. | |||
Down Air acts like the traditional ground pound of your regular platformer, sending you downwards devastating any opponent that gets in your way, but of course Wario changes the norm for his. On a successful hit, Wario actually bounces off of anything he hits, allowing him to use whatever he bounced off of as a boost to his recovery. He will continue to fall for another half a second on whiff, however you can jump out of this move so performing it on ledge is not a death sentence. | |||
Against linear recoveries this move can be extremely effective with its massive amount of active frames, and will successfully trade against recoveries such as Mario’s and Fox’s. When edge-guarding against opponents, you should note where they recover as opponents will mix up their recovery approach to avoid your edge-guard. | |||
This move can also act as a good way to get back to stage if you are being juggled, as Wario moves extremely quickly downwards and can hit unknowing opponents. If you’re high enough and have your Double Jump, you can use this move to stall, and you can use this move to get back to stage quickly if you land with an L Cancel, but do note you can still be punished with your 17 frames of L Cancel recovery. Another notable recovery quirk is bouncing off of the Smashville balloon if it’s passing by! | |||
}} | |||
}} | |||
===Grabs=== | |||
{{MoveData | |||
|image=P+_Wario_GrabW.png | |||
|image2=P+_Wario_Grab.png | |||
|name=Grab | |||
|input=Grab | |||
|caption= | |||
|data= | |||
{{AttackData-P+ | |||
|version=Normal Grab | |||
|damage=- | |||
|bkb=- | |||
|kbg=- | |||
|angle=- | |||
|startup=7 | |||
|active=2 | |||
|recovery=23 | |||
|landing=- | |||
|advantage=- | |||
|shield dmg=- | |||
|shield stun=- | |||
|invul=- | |||
}} | |||
{{AttackData-P+ | |||
|header=no | |||
|version=Dash Grab | |||
|damage=- | |||
|bkb=- | |||
|kbg=- | |||
|angle=- | |||
|startup=10 | |||
|active=2 | |||
|recovery=29 | |||
|landing=- | |||
|advantage=- | |||
|shield dmg=- | |||
|shield stun=- | |||
|invul=- | |||
}} | |||
{{AttackData-P+ | |||
|header=no | |||
|version=Turnaround Grab | |||
|damage=- | |||
|bkb=- | |||
|kbg=- | |||
|angle=- | |||
|startup=9 | |||
|active=2 | |||
|recovery=26 | |||
|landing=- | |||
|advantage=- | |||
|shield dmg=- | |||
|shield stun=- | |||
|invul=- | |||
|description=*Standard Grab. | |||
Nothing really notable to mention with Wario’s grabs, although his dash grab isn’t terrible. Turnaround grab also is fairly disjointed. | |||
}} | |||
}} | |||
{{MoveData | |||
|image=P+_Wario_Pummel.png | |||
|name=Pummel | |||
|input=Grab > Attack | |||
|caption=GIMME YOUR MONEY | |||
|data= | |||
{{AttackData-P+ | |||
|damage=3% | |||
|bkb=- | |||
|kbg=- | |||
|angle=- | |||
|startup=5 | |||
|active=1 | |||
|recovery=20 | |||
|landing=- | |||
|advantage=- | |||
|shield dmg=- | |||
|shield stun=- | |||
|invul=- | |||
|description=*Standard Pummel. | |||
*Opponent will break out of pummel at 0% if mashing. | |||
}} | |||
}} | |||
{{MoveData | |||
|image=P+_Wario_FThrow.png | |||
|image2=P+_Wario_FThrowR.png | |||
|name=Forward Throw | |||
|input=Grab > Forward | |||
|caption= | |||
|data= | |||
{{AttackData-P+ | |||
|version=Normal Forward Throw | |||
|damage=7% | |||
|bkb=42 | |||
|kbg=90 | |||
|angle=48° | |||
|startup=- | |||
|active=26 | |||
|recovery=- | |||
|landing=- | |||
|advantage=- | |||
|shield dmg=- | |||
|shield stun=- | |||
|invul=- | |||
}} | |||
{{AttackData-P+ | |||
|header=no | |||
|version=Charged Forward Throw | |||
|damage=10% | |||
|bkb=60 | |||
|kbg=100 | |||
|angle=40° | |||
|startup=- | |||
|active=63 | |||
|recovery=- | |||
|landing=- | |||
|advantage=- | |||
|shield dmg=- | |||
|shield stun=- | |||
|invul=- | |||
|description=*Can be charged by performing the Smash input when throwing. | |||
Forward Throw is Wario’s only kill throw, and while it is a good kill move it is somewhat lacking compared to the traditional Back Throw kill move. For instance, charging up the throw makes it easier for an opponent to change their DI before they get launched. | |||
The weaker un-charged forward throw is rarely used as there is no inherit downside to constantly using the charged version, however it can catch opponents off-guard with their DI if they aren’t anticipating it, and its low launch knockback can set up for tech reads at low percents. | |||
}} | |||
}} | |||
Grab > | {{MoveData | ||
|image=P+_Wario_BThrow.png | |||
|image2=P+_Wario_BThrowR.png | |||
|name=Back Throw | |||
|input=Grab > Back | |||
|caption= | |||
|data= | |||
{{AttackData-P+ | |||
|damage=9% | |||
|bkb=60 | |||
|kbg=65 | |||
|angle=45° | |||
|startup=- | |||
|active=77 | |||
|recovery=- | |||
|landing=- | |||
|advantage=- | |||
|shield dmg=- | |||
|shield stun=- | |||
|invul=- | |||
|description=*Wario can move left or right on stage while performing the throw. | |||
As mentioned before, this throw can’t kill within reasonable percents so it instead is mainly used as a way to throw opponents offstage. Being able to manoeuvre the move gives it a bit of utility however, as you can move closer to the ledge if you’re centre stage, or you can throw your opponent onto the stage for a tech read. | |||
}} | |||
}} | |||
Grab > | {{MoveData | ||
|image=P+_Wario_UThrow.png | |||
|name=Up Throw | |||
|input=Grab > Up | |||
|caption= | |||
|data= | |||
{{AttackData-P+ | |||
|damage=6%, 2% | |||
|bkb=30 | |||
|kbg=100 | |||
|angle=90° | |||
|startup=- | |||
|active=45 | |||
|recovery=- | |||
|landing=- | |||
|advantage=- | |||
|shield dmg=- | |||
|shield stun=- | |||
|invul=- | |||
|description=*Standard Up Throw. | |||
Wario’s main combo starter. While this move can be quite match-up dependent, it is generally a great idea to throw your opponents upward to juggle them with Up Air. If you are within percent on a particular opponent however, you can kill with either Up Air or Wario Waft. You can also chain throw with this throw at low percents against fast fallers. | |||
}} | |||
}} | |||
Grab > | {{MoveData | ||
|image=P+_Wario_DThrow.png | |||
|name=Down Throw | |||
|input=Grab > Down | |||
|caption= | |||
|data= | |||
{{AttackData-P+ | |||
|damage=4%, 6% | |||
|bkb=30 | |||
|kbg=100 | |||
|angle=270° | |||
|startup=- | |||
|active=38 | |||
|recovery=- | |||
|landing=- | |||
|advantage=- | |||
|shield dmg=- | |||
|shield stun=- | |||
|invul=- | |||
|description=*Sends opponents to the ground. | |||
Outside of tech reads, Down Throw doesn’t have much usage, but thankfully in most of Wario’s matchups Down Throw will start a tech-read situation in which Wario can perform a series of Down Throws. It can also send outward if facing away from ledge. | |||
}} | |||
}} | |||
===Specials=== | |||
{{MoveData | |||
|image=P+_Wario_NSpecialW.png | |||
|image2=P+_Wario_NSpecial.png | |||
|image3=P+_Wario_NSpecialR.png | |||
|image4=P+_Wario_NSpecialB.png | |||
|name=Chomp | |||
|caption4=I don't feel so good... | |||
|input=Neutral Special | |||
|data= | |||
{{AttackData-P+ | |||
|version=Grab | |||
|damage=- | |||
|bkb=- | |||
|kbg=- | |||
|angle=- | |||
|startup=10 | |||
|active=59 | |||
|recovery=22 | |||
|landing=- | |||
|advantage=- | |||
|shield dmg=- | |||
|shield stun=- | |||
|invul=- | |||
}} | |||
{{AttackData-P+ | |||
|header=no | |||
|version=Pummel | |||
|damage=13% | |||
|bkb=- | |||
|kbg=- | |||
|angle=- | |||
|startup=21 | |||
|active=4 | |||
|recovery=22 | |||
|landing=- | |||
|advantage=- | |||
|shield dmg=- | |||
|shield stun=- | |||
|invul=- | |||
}} | |||
{{AttackData-P+ | |||
|header=no | |||
|version=Throw | |||
|damage=? | |||
|bkb=? | |||
|kbg=? | |||
|angle=- | |||
|startup=- | |||
|active=27 | |||
|recovery=- | |||
|landing=- | |||
|advantage=- | |||
|shield dmg=- | |||
|shield stun=- | |||
|invul=- | |||
}} | |||
{{AttackData-P+ | |||
|header=no | |||
|version=Eating a Bomb | |||
|damage=13% | |||
|bkb=50 | |||
|kbg=110 | |||
|angle={{Tooltip|text=45°|hovertext=Sakurai Angle: When hit in the air, the attack angle is 45°. When hit on the ground, if knockback is less than 32 then the angle is 0°, otherwise angle is 44°.}} | |||
|startup=17 | |||
|active=1 | |||
|recovery=54 | |||
|landing=- | |||
|advantage=? | |||
|shield dmg=? | |||
|shield stun=1 | |||
|invul=- | |||
|description=*This move acts as a grab and will grab shielding opponents. | |||
*Wario can maintain his aerial momentum when performing this move. | |||
*Opponents cannot mash out of this command grab. | |||
*Wario can toss opponents left or right after grabbing them. | |||
*Eating items such as Banana Peels will increase Wario Wafts charge time. | |||
*Wario will stall and then produce a large explosive hitbox after eating explosives such as Bombs. | |||
*This move has grab armor. | |||
Chomp provides Wario an insanely scary and powerful option for opening up opponents which drastically changes his game plan. While it can be hard to see at first why this move is so beneficial to Wario’s kit, especially considering that it doesn’t deal that much damage compared to other iterations of this move, it is specifically tuned to Wario’s P+ move set. Firstly, Wario retains his insane air mobility when performing this move in the air, and given how active the grab box is you can easily snatch opponents on the ground, in the air or even through platforms. It also has grab armor allowing it to trade with certain blows. | |||
Even more devastating is the throw portion of this move. If read correctly, players are able to capitalize on this move with either a tech read or DI read, allowing kill confirms with options such as Waft. This can be difficult to learn however. | |||
Also worth noting is that when eating a bomb Wario will produce a temporary explosive hitbox and take 6%. It’s not particularly helpful as it’s impossible to abuse this in game, but it might be a fun doubles strategy with the few characters with explosives. | |||
}} | |||
}} | |||
=== | {{MoveData | ||
|image=P+_Wario_FSpecial.png | |||
|image2=P+_Wario_FSpecialJ.png | |||
|name=Shoulder Bash | |||
|input=Forward Special | |||
|caption=''"GO!"'' | |||
|caption2=Jumping Charge | |||
|data= | |||
{{AttackData-P+ | |||
|version=Normal Charge | |||
|damage=12% (9-14), 15% (15-26), 18%(27-41) | |||
|bkb=50 | |||
|kbg=91, 90, 80 | |||
|angle={{Tooltip|text=45°|hovertext=Sakurai Angle: When hit in the air, the attack angle is 45°. When hit on the ground, if knockback is less than 32 then the angle is 0°, otherwise angle is 44°.}} | |||
|startup=9 | |||
|active=33 | |||
|recovery=17 | |||
|landing=- | |||
|advantage=? | |||
|shield dmg=? | |||
|shield stun=7, 8, 10 | |||
|invul=- | |||
}} | |||
{{AttackData-P+ | |||
|header=no | |||
|version=Jumping Charge | |||
|damage=15% | |||
|bkb=50 | |||
|kbg=100 | |||
|angle={{Tooltip|text=45°|hovertext=Sakurai Angle: When hit in the air, the attack angle is 45°. When hit on the ground, if knockback is less than 32 then the angle is 0°, otherwise angle is 44°.}} | |||
|startup=9 | |||
|active=42 | |||
|recovery=8 | |||
|landing=- | |||
|advantage=? | |||
|shield dmg=? | |||
|shield stun=8 | |||
|invul=- | |||
}} | |||
{{AttackData-P+ | |||
|header=no | |||
|version=Aerial Charge | |||
|damage=15% | |||
|bkb=20 | |||
|kbg=100 | |||
|angle={{Tooltip|text=45°|hovertext=Sakurai Angle: When hit in the air, the attack angle is 45°. When hit on the ground, if knockback is less than 32 then the angle is 0°, otherwise angle is 44°.}} | |||
|startup=11 | |||
|active=15 | |||
|recovery=10 | |||
|landing=- | |||
|advantage=? | |||
|shield dmg=? | |||
|shield stun=8 | |||
|invul=- | |||
|description=*Wario proceeds to charge forward when performing this move. | |||
*Stops moving upon hitting an opponent or a wall. | |||
*User can Jump when performing this move. | |||
*On hit Wario enters a 55 frame recovery animation. | |||
*On air hit Wario enters a 27 frame recovery animation. | |||
*Loses his double jump he hits something in the air. | |||
*Goes into freefall when this move whiffs in the air. | |||
Shoulder Bash is your typical neutral approach option, with Wario moving forward with an active hitbox that gets stronger the further he moves along. It should be said foremost that this move is very much punishable; whiffing or having this move blocked puts Wario in a lot of recovery where he can easily be punished. However, it should be noted that this is still a scary option for the opponent to deal with and they very much can get hit with it, especially since Wario can jump during grounded version to gain some height. This move is ridiculously good at punishing tech rolls as well, as it can catch an opponent just as they get up with a roll or standard getup, however you will lose to getup attack. | |||
Should Bash also gives Wario a lot of mobility and some good recovery options. As mentioned, you can jump during the grounded version which sends you a great distance, and since you retain your double jump it can be used to close in on high recovering opponents. Shoulder Bash also moves you a short horizontal distance when used in the air which can be great at closing the gap at ledge, and this move is particularly great at snapping to ledge, however you will go into freefall on whiff so be careful against ledgehogs. | |||
Wario does not go into freefall on hit however, and this can be used against opponents or on stages with walls which can be used to stall temporarily. You do lose your double jump if you bash something in the air, which limits its usage and opponents can even use this to trade with you if they’re particularly keen. | |||
}} | |||
}} | |||
{{MoveData | |||
|image=P+_Wario_USpecial.png | |||
|name=Corkscrew | |||
|input=Up Special | |||
|data= | |||
{{AttackData-P+ | |||
|damage=1%×12, 4% | |||
|bkb=0, 50, 60 | |||
|kbg=100, 20, 130 | |||
|angle=115°/85°/105°/363°/90°/80° | |||
|startup=7 | |||
|active=24 | |||
|recovery=19 | |||
|landing=- | |||
|advantage=? | |||
|shield dmg=? | |||
|shield stun=2×12 | |||
|invul=- | |||
|description=*Multi-hitting move with multiple active hitboxes. | |||
*Move can be angled to the left or right in exchange for vertical height. | |||
*Goes into freefall after performing this move. | |||
A pretty standard Up B, however with its multitude of hitboxes and its generous ledge grab box, Corkscrew can be a particularly stubborn move to ledge guard. This makes it great for calling our opponents who want to ledge guard you by launching them away. This move can also be manoeuvred to the left or right for more flexibility in your recovery although this will kill your vertical height. It’s best to try and go straight for the stage or ledge whenever you can, and this can be easily achieved alongside Wario’s great air mobility, as you can even land on stage and then hop back to ledge right afterwards. | |||
Up B can also be a decent finishing move as you can follow up opponents near the top of the blast zone as this move has a strong last hitbox. | |||
}} | |||
}} | |||
{{MoveData | |||
|name=Wario Waft | |||
|input=Down Special | |||
|image=P+_Wario_DSpecial1.png | |||
|caption=No Charge | |||
|image2=P+_Wario_DSpecial2.png | |||
|caption2=Low Charge | |||
|image3=P+_Wario_DSpecial3.png | |||
|caption3=Mid Charge | |||
|image4=P+_Wario_DSpecial4.png | |||
|caption4=Full Charge | |||
|image5=P+_Wario_DSpecial5.png | |||
|caption5=There he goes! | |||
|data= | |||
{{AttackData-P+ | |||
|version=No Charge | |||
|damage=0% | |||
|bkb=0 | |||
|kbg=1 | |||
|angle=Trip | |||
|startup=16 | |||
|active=3 | |||
|recovery=62 | |||
|landing=- | |||
|advantage=? | |||
|shield dmg=? | |||
|shield stun=1 | |||
|invul=- | |||
}} | |||
{{AttackData-P+ | |||
|header=no | |||
|version=Partial Charge | |||
|damage=12% | |||
|bkb=40 | |||
|kbg=75 | |||
|angle={{Tooltip|text=45°|hovertext=Sakurai Angle: When hit in the air, the attack angle is 45°. When hit on the ground, if knockback is less than 32 then the angle is 0°, otherwise angle is 44°.}} | |||
|startup=10 | |||
|active=2 | |||
|recovery=37 | |||
|landing=- | |||
|advantage=? | |||
|shield dmg=? | |||
|shield stun=7 | |||
|invul=- | |||
}} | |||
{{AttackData-P+ | |||
|header=no | |||
|version=Half Charge | |||
|damage=16% | |||
|bkb=50 | |||
|kbg=70 | |||
|angle={{Tooltip|text=45°|hovertext=Sakurai Angle: When hit in the air, the attack angle is 45°. When hit on the ground, if knockback is less than 32 then the angle is 0°, otherwise angle is 44°.}} | |||
|startup=5 | |||
|active=4 | |||
|recovery=28 | |||
|landing=- | |||
|advantage=? | |||
|shield dmg=? | |||
|shield stun=9 | |||
|invul=- | |||
}} | |||
{{AttackData-P+ | |||
|header=no | |||
|version=Full Charge | |||
|damage=21% (5-6), 18% (7-18) | |||
|bkb=40, 20 | |||
|kbg=80, 100 | |||
|angle=40°, 80° | |||
|startup=5 | |||
|active=14 | |||
|recovery=37 | |||
|landing=- | |||
|advantage=? | |||
|shield dmg=? | |||
|shield stun=11, 10 | |||
|invul=- | |||
|description=*Acts as a move that charges and becomes stronger over time. | |||
*Becomes a low charge after 10 seconds. | |||
*Becomes a half charge after 30 seconds. | |||
*Becomes a full charge after 60 seconds. Wario will begin to flash yellow to indicate he has a full charge. | |||
*Full charge Waft has both an initial fart hitbox and a hitbox on Wario as he flies upward. | |||
*Charge resets after performing the move. | |||
*Half and Full Charges sends Wario into the air on use. | |||
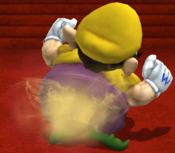
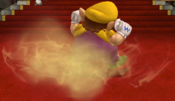
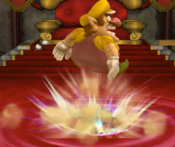
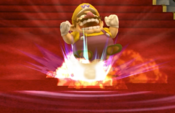
Much like in other titles, Waft provides Wario with one of the best kill moves in the game, and in P+ he sacrifices some of its power for more consistency with an easy to follow charge system. Increasing in power as time goes on, Waft reaches full charge in 60 seconds, 1 minute into the match. This can be a hard move to balance if you’re inexperienced, however good players will easily be able to link this move off of Wario’s many combo starters, most notably Up Air. | |||
With no charge waft only providing a trip on close range opponents and low charge having weaker base knockback, you’ll mainly be relying on half and full charge waft for kills. Half charge is still very effective in this regard as it has a decent hitbox sending outwards. Full charge also turns Wario into a full on rocket as he soars into the air with a hitbox surrounding him for 11 frames which can kill from the top. Both of these versions of waft can also be used as additional recovery tools if necessary; granted it is a waste of a powerful kill resource, however it may be able to save yourself from a low percent gimp or an end game recovery. | |||
}} | |||
}} | |||
Latest revision as of 07:59, 4 May 2022
Introduction
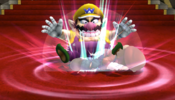
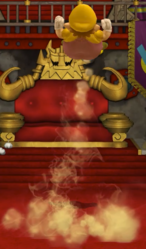
Debuting in Super Mario Land 2, Wario initially serves as a petty adversary to Mario who steals his castle to claim it for his own. After being thwarted by Mario, Wario goes off on his own to claim riches and fortune, leading him on a series of wacky adventures. In the current day, Wario serves as a mean-spirited rival to Mario who doesn’t usually act in the antagonistic role, as he has become a hero in his own right. However, Wario’s lust for wealth will always be his defining quality.
Wario is one of the more strange characters in P+, serving as a completely new archetype compared to characters of Melee. Being a heavy yet floaty character with great air mobility, Wario has a lot of similarities to Jigglypuff, however he has his own unique quirks that separate him from the pink puffball, such as his great combo game and his ability to approach and open up opponents.
While he can be classified as a somewhat simple character with his many active powerful hitboxes, he can be fairly in-depth and has a high skill ceiling. Be aware, a good Wario will be able to get in and juggle you mercilessly, and will probably finish you off with his many powerful finishers such as Up Air and Wario Waft. However, he trades this incredible mobility and combo game for lacklustre defense. If you’re willing to adapt to a more unique character with many quirks, Wario may be the character for you.
| Strengths | Weaknesses |
|---|---|
|
|
| Wario | |
|---|---|
| Ease of Use | 4 |
| Character Data | |
| Character Weight | 103 |
| Fall Speed | ? |
| Jump Squat | ? |
| Walk Speed | ? |
| Run Speed | ? |
| Wall Jump | No |
| Resources | |
| Advanced Frame Data | RukaiData |
| Discord | Wario Discord |
| VODs | Wario VODs |
Move List
Grounded Moves
| Damage | BKB | KBG | Angle | Startup | Active Frames | Recovery (IASA) | Landing (L-Cancel) | Advantage | Shield Damage | Shield Stun | Invul | ||
|---|---|---|---|---|---|---|---|---|---|---|---|---|---|
| 3% | 21 | 66 | 76° | 3 | 5 | 11 | - | ? | ? | 3 | - | ||
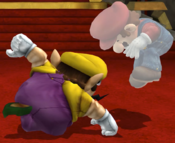
Basic jab. Fairly quick and can be good for staggers, however it doesn't have much use outside of combos into 2nd jab. | |||||||||||||
| Damage | BKB | KBG | Angle | Startup | Active Frames | Recovery (IASA) | Landing (L-Cancel) | Advantage | Shield Damage | Shield Stun | Invul | ||
|---|---|---|---|---|---|---|---|---|---|---|---|---|---|
| 6% | 60 | 45 | 83° | 4 | 3 | 20 | - | ? | ? | 4 | - | ||
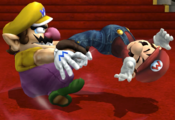
Jab 2 is a surprisingly good combo tool, as it launches opponents vertically which can combo into grabs at low percents and sets up for combos at high percents. However, it does not beat crouch cancelling. | |||||||||||||
| Version | Damage | BKB | KBG | Angle | Startup | Active Frames | Recovery (IASA) | Landing (L-Cancel) | Advantage | Shield Damage | Shield Stun | Invul |
|---|---|---|---|---|---|---|---|---|---|---|---|---|
| Normal | 5% | 50 | 100 | ? | 6 | 3 | 15 | - | ? | 6 | 4 | - |
| Up Angled | 5% | 50 | 100 | ? | 6 | 3 | 15 | - | ? | 6 | 4 | - |
| Down Angled | 5% | 50 | 100 | ? | 6 | 3 | 15 | - | ? | 6 | 4 | - |
Forward tilt is usually reserved as a kill move for Wario. Practically, it is quite slow, much slower than forward smash for instance, making it somewhat situational. However its angled variants can provide some much needed disjoints for Wario, allowing him to edgeguard onstage. | ||||||||||||
| Damage | BKB | KBG | Angle | Startup | Active Frames | Recovery (IASA) | Landing (L-Cancel) | Advantage | Shield Damage | Shield Stun | Invul | ||
|---|---|---|---|---|---|---|---|---|---|---|---|---|---|
| 10% (12-14), 6% (15-27) | 65 (12-14), 45 (15-27) | 89 (12-14), 50 (15-27) | 90° | 12 | 16 | 10 | - | ? | ? | 6 (12-14), 4 (15-27) | 1-37 Head | ||
With intangibility on his head and a large active upwards hitbox, up tilt serves as Wario's main anti-air making it great for stuffing out aerial approaches. It is rather slow at frame 12 however, so you will need to pre-emptively use it to call out aerial approaches. And while Wario's head becomes invincible, the rest of his body is still vulnerable and can trade with aerial hits. It's also a great combo tool, sending opponents straight up allowing for Wario to follow up with his many aerial moves, although this is easier at later percents. | |||||||||||||
| Damage | BKB | KBG | Angle | Startup | Active Frames | Recovery (IASA) | Landing (L-Cancel) | Advantage | Shield Damage | Shield Stun | Invul | ||
|---|---|---|---|---|---|---|---|---|---|---|---|---|---|
| 8% | 50 | 45 | 65° | 5 | 4 | 16 | - | ? | ? | 5 | - | ||
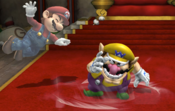
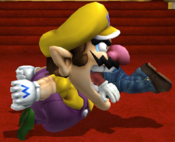
Down tilt acts as a poke which can hit opponents below their shield if it’s weak, although overuse can be punished with a crouch cancel. Launched opponents are sent outwards at a weird position at high percents. | |||||||||||||
| Damage | BKB | KBG | Angle | Startup | Active Frames | Recovery (IASA) | Landing (L-Cancel) | Advantage | Shield Damage | Shield Stun | Invul | ||
|---|---|---|---|---|---|---|---|---|---|---|---|---|---|
| 7% (4-7), 6% (8-23) | 60 | 75 (4-7), 52 (8-23) | 75° (4-7), 120° (8-23) | 4 | 20 | 19 | - | ? | ? | 6 (4-7), 4 (8-23) | - | ||
A decent burst option which allows Wario to catch off-guard opponents, however its awkward launch angles and recovery makes it unsuitable for a combo starter. It can also be a good way to low profile opponents attacks such as projectiles, and could very well punish if done close enough. | |||||||||||||
| Damage | BKB | KBG | Angle | Startup | Active Frames | Recovery (IASA) | Landing (L-Cancel) | Advantage | Shield Damage | Shield Stun | Invul | ||
|---|---|---|---|---|---|---|---|---|---|---|---|---|---|
| 16% (6-9), 10% (10-13) | 30 | 80 (6-9), 64 (10-13) | 30° | 6 [67] | 8 | 33 | - | ? | ? | 9 (6-9), 6 (10-13) | - | ||
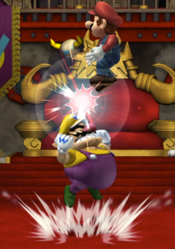
A very fast horizontal kill move, and probably Wario's best kill option during staggers, Forward Smash can be a great quick option against close-up opponents. It also moves Wario forward meaning it can catch somewhat distant opponents. Be wary, as misuse of this move can easily be punished due to its high recovery. | |||||||||||||
| Damage | BKB | KBG | Angle | Startup | Active Frames | Recovery (IASA) | Landing (L-Cancel) | Advantage | Shield Damage | Shield Stun | Invul | ||
|---|---|---|---|---|---|---|---|---|---|---|---|---|---|
| 2%×5, 8% | 60*5, 50 | 0*5, 120 | 210°, 90° | 7 [68] | 1, 1, 1, 1, 1, 1 | 26 | - | ? | 1×5 | 2×5, 5 | 4-16 Head | ||
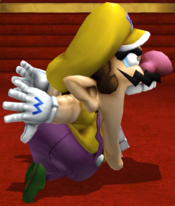
Up Smash is notorious as a powerful combo move in Wario's kit, allowing him to devastate fast-fallers and heavyweights. Due to its weak base knockback, this move can combo into itself multiple times at low percents, and then act as a launcher for kill confirms at high percents thanks to its lower than avergae end lag. This does mean you completely sacrifice it as a kill move, however Wario has so many other vertical kill moves it doesn’t end up mattering. It’s not perfect however. Despite being DACUS-able it doesn’t fare well in neutral as it leaves Wario quite open on whiff, and on hit it can be SDI'd by opponents. | |||||||||||||
| Damage | BKB | KBG | Angle | Startup | Active Frames | Recovery (IASA) | Landing (L-Cancel) | Advantage | Shield Damage | Shield Stun | Invul | ||
|---|---|---|---|---|---|---|---|---|---|---|---|---|---|
| 14% Punch / 12% / 10% | 50 | 90 | 275° | 8 [69] | 3 | 32 | - | ? | 4 Punch / 0 | 8 Punch / 7 / 6 | - | ||
Acting as a large burst action with massive disjoints, Down Smash gives Wario a way to deal with tech rolls and provides him with a decent on-stage edge guard. Opponents hit off-stage will be sent downwards, however this move sends at a meteor angle and can be Jump or Up Special cancelled. | |||||||||||||
| Version | Damage | BKB | KBG | Angle | Startup | Active Frames | Recovery (IASA) | Landing (L-Cancel) | Advantage | Shield Damage | Shield Stun | Invul |
|---|---|---|---|---|---|---|---|---|---|---|---|---|
| Down Get-Up | 6% | 80 | 50 | 45° | 16, 21 | 2, 2 | 27 | - | ? | 1 | 4 | 1-22 Full |
| Up Get-Up | 6% | 80 | 50 | 45° | 16, 20 | 2, 2 | 28 | - | ? | 1 | 4 | 1-21 Full |
Basic getup attack. Has decent disjoints that can catch off-guard opponents. | ||||||||||||
| Damage | BKB | KBG | Angle | Startup | Active Frames | Recovery (IASA) | Landing (L-Cancel) | Advantage | Shield Damage | Shield Stun | Invul | ||
|---|---|---|---|---|---|---|---|---|---|---|---|---|---|
| 5% | 80 | 50 | 45° | 19, 30 | 2, 2 | 19 | - | ? | 1 | 4 | 1-20 Full | ||
Basic getup attack, however Wario moves a fair amount horizontally when getting up. | |||||||||||||
| Damage | BKB | KBG | Angle | Startup | Active Frames | Recovery (IASA) | Landing (L-Cancel) | Advantage | Shield Damage | Shield Stun | Invul | ||
|---|---|---|---|---|---|---|---|---|---|---|---|---|---|
| 8% (31-32) 6% (33) | 70 | 50 | 45° | 31 | 3 | 23 | - | ? | 1 | 5, 4 | 1-29 Full | ||
Decent ledge attack that puts Wario a fair amount forward. This move is also notorious for sending opponents outwards offstage if they're close to ledge, so be wary if Wario throws out this move. | |||||||||||||
| Damage | BKB | KBG | Angle | Startup | Active Frames | Recovery (IASA) | Landing (L-Cancel) | Advantage | Shield Damage | Shield Stun | Invul | ||
|---|---|---|---|---|---|---|---|---|---|---|---|---|---|
| 10% | 70 | 50 | 45° | 53 | 3 | 15 | - | ? | 1 | 6 | 1-50 Full | ||
This move is a slower than average high percent ledge attack, although that may catch opponents off-guard with its decent poke disjoint. It also takes Wario a full second to get onto ledge with invincibility, so you will have to vary your timing to punish this getup. | |||||||||||||
Aerial Moves
| Damage | BKB | KBG | Angle | Startup | Active Frames | Recovery (IASA) | Landing (L-Cancel) | Advantage | Shield Damage | Shield Stun | Invul | ||
|---|---|---|---|---|---|---|---|---|---|---|---|---|---|
| 9% (4-12), 6% (15-23), 4% (24-30) | 30, 20 | 100 | 45°, 45° | 4, 15 | 9, 16 | 9 | 7 | ? | ? | 6, 4, 3 | - | ||
As Wario’s fastest and most active aerial move, Neutral Air can act as a powerful approach option and can be combined with Wario’s air mobility for insane shield pressure and mix-ups. It also is used as Wario’s main out of shield option, however it does lose to faster moves like Shine. It can also be great at edge guarding offstage, however it’s preferential to use Back Air instead for its bigger hitbox disjoint. | |||||||||||||
| Damage | BKB | KBG | Angle | Startup | Active Frames | Recovery (IASA) | Landing (L-Cancel) | Advantage | Shield Damage | Shield Stun | Invul | ||
|---|---|---|---|---|---|---|---|---|---|---|---|---|---|
| 11% (5-7), 6% (8-15) | 20 | 80 | 55° | 5 | 11 | 11 | 8 | ? | ? | 6 | - | ||
Forward Air is a bit of a strange move in Wario’s aerial arsenal, as it does not possess many unique qualities compared to his other moves. It is Wario’s second fastest aerial, and it’s low base knockback makes it a good combo tool, however it would be better to use Wario’s other aerials at later percents. | |||||||||||||
| Damage | BKB | KBG | Angle | Startup | Active Frames | Recovery (IASA) | Landing (L-Cancel) | Advantage | Shield Damage | Shield Stun | Invul | ||
|---|---|---|---|---|---|---|---|---|---|---|---|---|---|
| 16% (10-14), 9% (15-19) | 20 | 105 | 45° | 10 | 10 | 22 | 12 | ? | ? | 9, 6 | - | ||
Possessing a large disjoint and an insane amount of knockback growth, Back Air can be a fantastic option in a variety of situations. It can be used to approach opponents with Reverse Aerial Rushes, act as a retreating tool, and acts as Wario’s best horizontal kill move. It’s only real weakness is that it only kills from reads, with no real way to set it up as a kill confirm. | |||||||||||||
| Damage | BKB | KBG | Angle | Startup | Active Frames | Recovery (IASA) | Landing (L-Cancel) | Advantage | Shield Damage | Shield Stun | Invul | ||
|---|---|---|---|---|---|---|---|---|---|---|---|---|---|
| 9% (7), 14% (8-9) | 10, 45 | 115, 110 | 70°, 80° | 7 | 3 | 21 | 10 | ? | ? | 6, 8 | - | ||
While Back Air serves as Wario’s main horizontal kill move, it can be argued that Up Air acts as his best vertical kill move. Having a snappy 2 frame sweet spot, it may seem hard to land at first, however this move is much larger than it appears, and it can actually be pretty easily to land on aerial opponents. This is your main kill move that you should try to land after launching your opponent upwards, and combos well after Up Tilt, Up Smash, Up Throw and even itself. | |||||||||||||
| Damage | BKB | KBG | Angle | Startup | Active Frames | Recovery (IASA) | Landing (L-Cancel) | Advantage | Shield Damage | Shield Stun | Invul | ||
|---|---|---|---|---|---|---|---|---|---|---|---|---|---|
| 10% | 43 / 59 | 127 / 106 | 270° | 15 | 15 | 25 | 17 | ? | ? | 6 | - | ||
Down Air acts like the traditional ground pound of your regular platformer, sending you downwards devastating any opponent that gets in your way, but of course Wario changes the norm for his. On a successful hit, Wario actually bounces off of anything he hits, allowing him to use whatever he bounced off of as a boost to his recovery. He will continue to fall for another half a second on whiff, however you can jump out of this move so performing it on ledge is not a death sentence. Against linear recoveries this move can be extremely effective with its massive amount of active frames, and will successfully trade against recoveries such as Mario’s and Fox’s. When edge-guarding against opponents, you should note where they recover as opponents will mix up their recovery approach to avoid your edge-guard. This move can also act as a good way to get back to stage if you are being juggled, as Wario moves extremely quickly downwards and can hit unknowing opponents. If you’re high enough and have your Double Jump, you can use this move to stall, and you can use this move to get back to stage quickly if you land with an L Cancel, but do note you can still be punished with your 17 frames of L Cancel recovery. Another notable recovery quirk is bouncing off of the Smashville balloon if it’s passing by! | |||||||||||||
Grabs
| Version | Damage | BKB | KBG | Angle | Startup | Active Frames | Recovery (IASA) | Landing (L-Cancel) | Advantage | Shield Damage | Shield Stun | Invul |
|---|---|---|---|---|---|---|---|---|---|---|---|---|
| Normal Grab | - | - | - | - | 7 | 2 | 23 | - | - | - | - | - |
| Dash Grab | - | - | - | - | 10 | 2 | 29 | - | - | - | - | - |
| Turnaround Grab | - | - | - | - | 9 | 2 | 26 | - | - | - | - | - |
Nothing really notable to mention with Wario’s grabs, although his dash grab isn’t terrible. Turnaround grab also is fairly disjointed. | ||||||||||||
| Damage | BKB | KBG | Angle | Startup | Active Frames | Recovery (IASA) | Landing (L-Cancel) | Advantage | Shield Damage | Shield Stun | Invul | ||
|---|---|---|---|---|---|---|---|---|---|---|---|---|---|
| 3% | - | - | - | 5 | 1 | 20 | - | - | - | - | - | ||
| |||||||||||||
| Version | Damage | BKB | KBG | Angle | Startup | Active Frames | Recovery (IASA) | Landing (L-Cancel) | Advantage | Shield Damage | Shield Stun | Invul |
|---|---|---|---|---|---|---|---|---|---|---|---|---|
| Normal Forward Throw | 7% | 42 | 90 | 48° | - | 26 | - | - | - | - | - | - |
| Charged Forward Throw | 10% | 60 | 100 | 40° | - | 63 | - | - | - | - | - | - |
Forward Throw is Wario’s only kill throw, and while it is a good kill move it is somewhat lacking compared to the traditional Back Throw kill move. For instance, charging up the throw makes it easier for an opponent to change their DI before they get launched. The weaker un-charged forward throw is rarely used as there is no inherit downside to constantly using the charged version, however it can catch opponents off-guard with their DI if they aren’t anticipating it, and its low launch knockback can set up for tech reads at low percents. | ||||||||||||
| Damage | BKB | KBG | Angle | Startup | Active Frames | Recovery (IASA) | Landing (L-Cancel) | Advantage | Shield Damage | Shield Stun | Invul | ||
|---|---|---|---|---|---|---|---|---|---|---|---|---|---|
| 9% | 60 | 65 | 45° | - | 77 | - | - | - | - | - | - | ||
As mentioned before, this throw can’t kill within reasonable percents so it instead is mainly used as a way to throw opponents offstage. Being able to manoeuvre the move gives it a bit of utility however, as you can move closer to the ledge if you’re centre stage, or you can throw your opponent onto the stage for a tech read. | |||||||||||||
| Damage | BKB | KBG | Angle | Startup | Active Frames | Recovery (IASA) | Landing (L-Cancel) | Advantage | Shield Damage | Shield Stun | Invul | ||
|---|---|---|---|---|---|---|---|---|---|---|---|---|---|
| 6%, 2% | 30 | 100 | 90° | - | 45 | - | - | - | - | - | - | ||
Wario’s main combo starter. While this move can be quite match-up dependent, it is generally a great idea to throw your opponents upward to juggle them with Up Air. If you are within percent on a particular opponent however, you can kill with either Up Air or Wario Waft. You can also chain throw with this throw at low percents against fast fallers. | |||||||||||||
| Damage | BKB | KBG | Angle | Startup | Active Frames | Recovery (IASA) | Landing (L-Cancel) | Advantage | Shield Damage | Shield Stun | Invul | ||
|---|---|---|---|---|---|---|---|---|---|---|---|---|---|
| 4%, 6% | 30 | 100 | 270° | - | 38 | - | - | - | - | - | - | ||
Outside of tech reads, Down Throw doesn’t have much usage, but thankfully in most of Wario’s matchups Down Throw will start a tech-read situation in which Wario can perform a series of Down Throws. It can also send outward if facing away from ledge. | |||||||||||||
Specials
| Version | Damage | BKB | KBG | Angle | Startup | Active Frames | Recovery (IASA) | Landing (L-Cancel) | Advantage | Shield Damage | Shield Stun | Invul |
|---|---|---|---|---|---|---|---|---|---|---|---|---|
| Grab | - | - | - | - | 10 | 59 | 22 | - | - | - | - | - |
| Pummel | 13% | - | - | - | 21 | 4 | 22 | - | - | - | - | - |
| Throw | ? | ? | ? | - | - | 27 | - | - | - | - | - | - |
| Eating a Bomb | 13% | 50 | 110 | 45° | 17 | 1 | 54 | - | ? | ? | 1 | - |
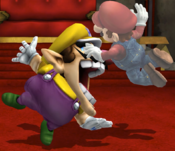
Chomp provides Wario an insanely scary and powerful option for opening up opponents which drastically changes his game plan. While it can be hard to see at first why this move is so beneficial to Wario’s kit, especially considering that it doesn’t deal that much damage compared to other iterations of this move, it is specifically tuned to Wario’s P+ move set. Firstly, Wario retains his insane air mobility when performing this move in the air, and given how active the grab box is you can easily snatch opponents on the ground, in the air or even through platforms. It also has grab armor allowing it to trade with certain blows. Even more devastating is the throw portion of this move. If read correctly, players are able to capitalize on this move with either a tech read or DI read, allowing kill confirms with options such as Waft. This can be difficult to learn however. Also worth noting is that when eating a bomb Wario will produce a temporary explosive hitbox and take 6%. It’s not particularly helpful as it’s impossible to abuse this in game, but it might be a fun doubles strategy with the few characters with explosives. | ||||||||||||
| Version | Damage | BKB | KBG | Angle | Startup | Active Frames | Recovery (IASA) | Landing (L-Cancel) | Advantage | Shield Damage | Shield Stun | Invul |
|---|---|---|---|---|---|---|---|---|---|---|---|---|
| Normal Charge | 12% (9-14), 15% (15-26), 18%(27-41) | 50 | 91, 90, 80 | 45° | 9 | 33 | 17 | - | ? | ? | 7, 8, 10 | - |
| Jumping Charge | 15% | 50 | 100 | 45° | 9 | 42 | 8 | - | ? | ? | 8 | - |
| Aerial Charge | 15% | 20 | 100 | 45° | 11 | 15 | 10 | - | ? | ? | 8 | - |
Shoulder Bash is your typical neutral approach option, with Wario moving forward with an active hitbox that gets stronger the further he moves along. It should be said foremost that this move is very much punishable; whiffing or having this move blocked puts Wario in a lot of recovery where he can easily be punished. However, it should be noted that this is still a scary option for the opponent to deal with and they very much can get hit with it, especially since Wario can jump during grounded version to gain some height. This move is ridiculously good at punishing tech rolls as well, as it can catch an opponent just as they get up with a roll or standard getup, however you will lose to getup attack. Should Bash also gives Wario a lot of mobility and some good recovery options. As mentioned, you can jump during the grounded version which sends you a great distance, and since you retain your double jump it can be used to close in on high recovering opponents. Shoulder Bash also moves you a short horizontal distance when used in the air which can be great at closing the gap at ledge, and this move is particularly great at snapping to ledge, however you will go into freefall on whiff so be careful against ledgehogs. Wario does not go into freefall on hit however, and this can be used against opponents or on stages with walls which can be used to stall temporarily. You do lose your double jump if you bash something in the air, which limits its usage and opponents can even use this to trade with you if they’re particularly keen. | ||||||||||||
| Damage | BKB | KBG | Angle | Startup | Active Frames | Recovery (IASA) | Landing (L-Cancel) | Advantage | Shield Damage | Shield Stun | Invul | ||
|---|---|---|---|---|---|---|---|---|---|---|---|---|---|
| 1%×12, 4% | 0, 50, 60 | 100, 20, 130 | 115°/85°/105°/363°/90°/80° | 7 | 24 | 19 | - | ? | ? | 2×12 | - | ||
A pretty standard Up B, however with its multitude of hitboxes and its generous ledge grab box, Corkscrew can be a particularly stubborn move to ledge guard. This makes it great for calling our opponents who want to ledge guard you by launching them away. This move can also be manoeuvred to the left or right for more flexibility in your recovery although this will kill your vertical height. It’s best to try and go straight for the stage or ledge whenever you can, and this can be easily achieved alongside Wario’s great air mobility, as you can even land on stage and then hop back to ledge right afterwards. Up B can also be a decent finishing move as you can follow up opponents near the top of the blast zone as this move has a strong last hitbox. | |||||||||||||
| Version | Damage | BKB | KBG | Angle | Startup | Active Frames | Recovery (IASA) | Landing (L-Cancel) | Advantage | Shield Damage | Shield Stun | Invul |
|---|---|---|---|---|---|---|---|---|---|---|---|---|
| No Charge | 0% | 0 | 1 | Trip | 16 | 3 | 62 | - | ? | ? | 1 | - |
| Partial Charge | 12% | 40 | 75 | 45° | 10 | 2 | 37 | - | ? | ? | 7 | - |
| Half Charge | 16% | 50 | 70 | 45° | 5 | 4 | 28 | - | ? | ? | 9 | - |
| Full Charge | 21% (5-6), 18% (7-18) | 40, 20 | 80, 100 | 40°, 80° | 5 | 14 | 37 | - | ? | ? | 11, 10 | - |
Much like in other titles, Waft provides Wario with one of the best kill moves in the game, and in P+ he sacrifices some of its power for more consistency with an easy to follow charge system. Increasing in power as time goes on, Waft reaches full charge in 60 seconds, 1 minute into the match. This can be a hard move to balance if you’re inexperienced, however good players will easily be able to link this move off of Wario’s many combo starters, most notably Up Air. With no charge waft only providing a trip on close range opponents and low charge having weaker base knockback, you’ll mainly be relying on half and full charge waft for kills. Half charge is still very effective in this regard as it has a decent hitbox sending outwards. Full charge also turns Wario into a full on rocket as he soars into the air with a hitbox surrounding him for 11 frames which can kill from the top. Both of these versions of waft can also be used as additional recovery tools if necessary; granted it is a waste of a powerful kill resource, however it may be able to save yourself from a low percent gimp or an end game recovery. | ||||||||||||

