No edit summary |
No edit summary |
||
| (2 intermediate revisions by the same user not shown) | |||
| Line 27: | Line 27: | ||
|input= | |input= | ||
|data= | |data= | ||
{{AttackData-P+ | {{AttackData-P+ | ||
| | |damage=6% | ||
|bkb=0 | |||
| | |kbg=91 | ||
| | |angle=83° | ||
| | |startup=5 | ||
| | |active=3 | ||
| | |recovery=12 | ||
| | |landing=- | ||
| | |advantage=? | ||
| | |shield dmg=9 | ||
| | |shield stun=4 | ||
| | |invul=- | ||
| | |||
|description=*A fairly fast normal that can be used to stuff out opponents' approaches. Can be cancelled into grab for mix-ups. | |description=*A fairly fast normal that can be used to stuff out opponents' approaches. Can be cancelled into grab for mix-ups. | ||
And then see what happens when I don't add a bullet. | And then see what happens when I don't add a bullet. | ||
| Line 55: | Line 52: | ||
|caption=And a two! | |caption=And a two! | ||
|name=Jab 2 | |name=Jab 2 | ||
|input= | |||
|data= | |||
{{AttackData-P+ | |||
|damage=5% | |||
|bkb=50 | |||
|kbg=100 | |||
|angle={{Tooltip|text=45°|hovertext=Sakurai Angle: When hit in the air, the attack angle is 45°. When hit on the ground, if knockback is less than 32 then the angle is 0°, otherwise angle is 44°.}} | |||
|startup=6 | |||
|active=3 | |||
|recovery=15 | |||
|landing=- | |||
|advantage=? | |||
|shield dmg=6 | |||
|shield stun=4 | |||
|invul=- | |||
|description=*description goes here | |||
}} | |||
}} | |||
Forward Attack | |||
{{MoveData | |||
|image=P+_Bowser_STilt.png | |||
|image2=P+_Bowser_STiltU.png | |||
|image3=P+_Bowser_STiltD.png | |||
|caption2=Up Angled | |||
|caption3=Down Angled | |||
|name=Forward Tilt | |||
|input= | |input= | ||
|data= | |data= | ||
{{AttackData-P+ | {{AttackData-P+ | ||
|version= | |version=Forward Angled | ||
| | |damage=5% | ||
| | |bkb=50 | ||
| | |kbg=100 | ||
|Angle={{Tooltip|text=45°|hovertext=Sakurai Angle: When hit in the air, the attack angle is 45°. When hit on the ground, if knockback is less than 32 then the angle is 0°, otherwise angle is 44°.}} | |angle={{Tooltip|text=45°|hovertext=Sakurai Angle: When hit in the air, the attack angle is 45°. When hit on the ground, if knockback is less than 32 then the angle is 0°, otherwise angle is 44°.}} | ||
| | |startup=6 | ||
| | |active=3 | ||
| | |recovery=15 | ||
| | |landing=- | ||
| | |advantage=? | ||
| | |shield dmg=6 | ||
| | |shield stun=4 | ||
| | |invul=- | ||
}} | |||
{{AttackData-P+ | |||
|header=no | |||
|version=Up Angled | |||
|damage=5% | |||
|bkb=50 | |||
|kbg=100 | |||
|angle={{Tooltip|text=45°|hovertext=Sakurai Angle: When hit in the air, the attack angle is 45°. When hit on the ground, if knockback is less than 32 then the angle is 0°, otherwise angle is 44°.}} | |||
|startup=6 | |||
|active=3 | |||
|recovery=15 | |||
|landing=- | |||
|advantage=? | |||
|shield dmg=6 | |||
|shield stun=4 | |||
|invul=- | |||
|description=*description goes here | |description=*description goes here | ||
}} | }} | ||
| Line 85: | Line 126: | ||
|input= | |input= | ||
|data= | |data= | ||
{{AttackData-P+ | {{AttackData-P+ | ||
| | |damage=1% | ||
|bkb=2 | |||
| | |kbg=3 | ||
| | |angle=4° | ||
| | |startup=5 | ||
| | |active=6 | ||
| | |recovery=7 | ||
| | |landing=8 | ||
| | |advantage=9 | ||
| | |shield dmg=10 | ||
| | |shield stun=11 | ||
| | |invul=12 | ||
| | |||
|description=*Bullet Point. | |description=*Bullet Point. | ||
Normal text. | Normal text. | ||
| Line 114: | Line 153: | ||
|input= | |input= | ||
|data= | |data= | ||
{{AttackData-P+ | {{AttackData-P+ | ||
| | |damage=1% | ||
|bkb=2 | |||
| | |kbg=3 | ||
| | |angle=4° | ||
| | |startup=5 | ||
| | |active=6 | ||
| | |recovery=7 | ||
| | |landing=8 | ||
| | |advantage=9 | ||
| | |shield dmg=10 | ||
| | |shield stun=11 | ||
| | |invul=12 | ||
| | |||
|description=*Bullet Point. | |description=*Bullet Point. | ||
Normal text. | Normal text. | ||
| Line 143: | Line 180: | ||
|input= | |input= | ||
|data= | |data= | ||
{{AttackData-P+ | {{AttackData-P+ | ||
| | |damage=1% | ||
|bkb=2 | |||
| | |kbg=3 | ||
| | |angle=4° | ||
| | |startup=5 | ||
| | |active=6 | ||
| | |recovery=7 | ||
| | |landing=8 | ||
| | |advantage=9 | ||
| | |shield dmg=10 | ||
| | |shield stun=11 | ||
| | |invul=12 | ||
| | |||
|description=*Bullet Point. | |description=*Bullet Point. | ||
Normal text. | Normal text. | ||
}} | }} | ||
}} | }} | ||
Latest revision as of 02:41, 13 April 2022
Introduction
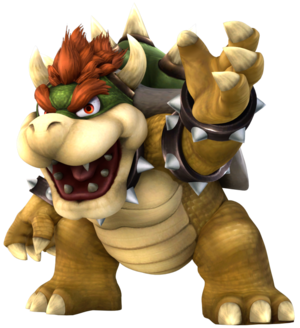
The King of the Koopa’s himself, Bowser is the main antagonist of the Mario universe who constantly antagonizes Mario and his friends. While he isn’t an entirely malicious bad guy, even helping the main cast from time to time, never forget that this towering turtle possesses monstrous force and will use it for his own benefit.
Bowser is defined as the stock-standard heavyweight character of Super Smash Bros, and while Project+ changes it up a bit, he still very much fits into this archetype. Bowser is shockingly strong, with even his weaker hits being able to launch his opponents far at high percentages, and even has armor on his stronger moves allowing him to win in trades. However this comes at a cost, as the biggest and most heavy character in the game Bowser becomes easy combo food and his slow nature can make it very difficult for him to get in on more defensive opponents.
If you’re a fan of the slower, less technical characters but one that capitalizes hard on hit confirms and can power his way through most of the cast, Bowser may be the character for you.
| Strengths | Weaknesses |
|---|---|
|
|
| Bowser | |
|---|---|
| Ease of Use | 5 |
| Character Data | |
| Character Weight | 113 |
| Fall Speed | ? |
| Jump Squat | 5 |
| Walk Speed | ? |
| Run Speed | ? |
| Wall Jump | No |
| Resources | |
| Advanced Frame Data | RukaiData |
| Discord | Bowser Discord |
| VODs | Bowser VODs |
Move List
Grounded Moves
Attack
| Damage | BKB | KBG | Angle | Startup | Active Frames | Recovery (IASA) | Landing (L-Cancel) | Advantage | Shield Damage | Shield Stun | Invul | ||
|---|---|---|---|---|---|---|---|---|---|---|---|---|---|
| 6% | 0 | 91 | 83° | 5 | 3 | 12 | - | ? | 9 | 4 | - | ||
And then see what happens when I don't add a bullet. | |||||||||||||
Attack > Attack
| Damage | BKB | KBG | Angle | Startup | Active Frames | Recovery (IASA) | Landing (L-Cancel) | Advantage | Shield Damage | Shield Stun | Invul | ||
|---|---|---|---|---|---|---|---|---|---|---|---|---|---|
| 5% | 50 | 100 | 45° | 6 | 3 | 15 | - | ? | 6 | 4 | - | ||
| |||||||||||||
Forward Attack
| Version | Damage | BKB | KBG | Angle | Startup | Active Frames | Recovery (IASA) | Landing (L-Cancel) | Advantage | Shield Damage | Shield Stun | Invul |
|---|---|---|---|---|---|---|---|---|---|---|---|---|
| Forward Angled | 5% | 50 | 100 | 45° | 6 | 3 | 15 | - | ? | 6 | 4 | - |
| Up Angled | 5% | 50 | 100 | 45° | 6 | 3 | 15 | - | ? | 6 | 4 | - |
| ||||||||||||
Aerial Moves
| Damage | BKB | KBG | Angle | Startup | Active Frames | Recovery (IASA) | Landing (L-Cancel) | Advantage | Shield Damage | Shield Stun | Invul | ||
|---|---|---|---|---|---|---|---|---|---|---|---|---|---|
| 1% | 2 | 3 | 4° | 5 | 6 | 7 | 8 | 9 | 10 | 11 | 12 | ||
Normal text. | |||||||||||||
Grabs
| Damage | BKB | KBG | Angle | Startup | Active Frames | Recovery (IASA) | Landing (L-Cancel) | Advantage | Shield Damage | Shield Stun | Invul | ||
|---|---|---|---|---|---|---|---|---|---|---|---|---|---|
| 1% | 2 | 3 | 4° | 5 | 6 | 7 | 8 | 9 | 10 | 11 | 12 | ||
Normal text. | |||||||||||||
Specials
| Damage | BKB | KBG | Angle | Startup | Active Frames | Recovery (IASA) | Landing (L-Cancel) | Advantage | Shield Damage | Shield Stun | Invul | ||
|---|---|---|---|---|---|---|---|---|---|---|---|---|---|
| 1% | 2 | 3 | 4° | 5 | 6 | 7 | 8 | 9 | 10 | 11 | 12 | ||
Normal text. | |||||||||||||


