|
|
| (45 intermediate revisions by 2 users not shown) |
| Line 1: |
Line 1: |
| [[File:Project_Justice_Akira.gif|right]]
| | {{PJ Character Intro|char= Akira|full=Akira Kazama|short=AKIRA |
| | |school=Seijyun |
| | |assist=Damage |
| | |tier=C |
| | |difficulty=Medium/Hard |
|
| |
|
| ==Overview== | | |content= |
| <blockquote>Akira is definitely my favourite character in the game. She is beautiful and strong and she hasn't been given huge bosoms or anything to make her more appealing to shallow people.<br>-''Falsehead from Gamefaqs, CEO of Tiffany slander''</blockquote>
| |
|
| |
|
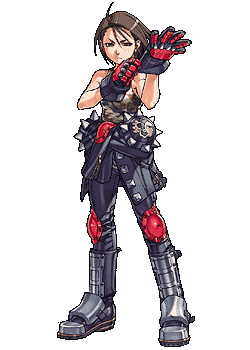
| Everyone's main since Third Strike, Akira is a character that struggles at long/mid range, but once she's in, can run a train on you. Your objective with her is to land the first hit of her rekka series ({{b}}{{lp}}) into air launcher follow up, or {{d}}{{lk}} to start her Textbook Combos. Some of her go-to Tardy Counters include side stepping and hit-grab Specials, which make her a good pick for players who favor a defensive play style. Her main shortcomings are her short range, and having to work for her damage more than other characters in the game. As a partner, her Team Up Techniques are rather standard, but her Party Up Technique is hella cool, so there's that.
| | {{2 Column Flex|flex1=9|flex2=4 |
| | | |content1= |
| ==Normal Moves==
| | {{Content Box|header=Introduction|content= |
| {{PJMoveListHeader}}
| | Akira was originally a silent girl who rarely spoke her mind. She may be tough and commanding while wearing her biker outfit, but is a docile and gentle person without it. The outfit was originally intended to hide her true gender prior to enrolling in Gedo High in order to find her then missing brother, [[Project_Justice/Daigo| Daigo]]. With the help of her newfound friends [[Project Justice/Gan |Gan]] and [[Project Justice/Edge |Edge]], she was able to not only rescue her brother but also further come out of her shell; gaining immense self-confidence leading into '''''Project Justice'''''. She continues to strive to be just like her big brother- both in terms of fighting ability, confidence, and pride. |
| {{PJMoveListRow | Standing Light Punch | {{n}} {{lp}} | 9 | 20 | +1 | +4 | 4 | All | }}
| | <br><br> |
| {{PJMoveListRow | Standing Strong Punch | {{n}} {{hp}} | 12 | 31 | +2 | -7 | 10 | All | }}
| | Akira is a character that struggles at long/mid range, but once she's in, can easily continue pressure. Your objective with her is to land the first hit of her rekka series ({{b}}{{lp}}) into air launcher follow up, or {{d}}{{lk}} to start her Textbook Combos. Some of her go-to Tardy Counters include side stepping and hit-grab Specials, which make her a good pick for players who favor a defensive play style. Her main shortcomings are her short range, and having to work for her damage more than other characters in the game. |
| {{PJMoveListRow | Crouching Light Punch | {{d}} {{lp}} | 9 | 26 | +1 | -4 | 4 | Crouching | }} | | }} |
| {{PJMoveListRow | Crouching Strong Punch | {{d}} {{hp}} | 15 | 37 | - | -15 | 11 | All | Mini launcher }} | | <br> |
| {{PJMoveListRow | Standing Light Kick | {{n}} {{lk}} | 10 | 18 | +2 | +6 | 3 | All | }}
| | |content2= |
| {{PJMoveListRow | Standing Strong Kick | {{n}} {{hk}} | 15 | 47 | -4 | -23 | 10 | All | }}
| | {{Content Box|content= |
| {{PJMoveListRow | Crouching Light Kick | {{d}} {{lk}} | 12 | 32 | -1 | -10 | 3 | Crouching | }}
| | {{#evt: |
| {{PJMoveListRow | Crouching Strong Kick | {{d}} {{hk}} | 15 | 39 | - | -17 | 13 | Crouching | Knockdown }}
| | service=youtube |
| {{PJMoveListRow | Jumping Light Punch | {{u}} {{lp}} | 17 | 1 | - | - | 4 | Standing | }}
| | |id=https://www.youtube.com/watch?v=l21dlusQChc |
| {{PJMoveListRow | Jumping Heavy Punch | {{u}} {{hp}} | 12 | 1 | - | - | 11 | Standing | }}
| | |dimensions=480x320 |
| {{PJMoveListRow | Jumping Light Kick | {{u}} {{lk}} | 9 | 1 | - | - | 4 | Standing | }}
| | }} |
| {{PJMoveListRow | Jumping Heavy Kick | {{u}} {{hk}} | 17 | 1 | - | - | 10 | Standing | }}
| | }} |
| {{MoveListFooter}}
| | }} |
| | | {{Content Box|content= |
| ==Command Normals==
| | {{ProConTable |
| {{PJMoveListHeader}}
| | |pros= |
| {{PJMoveListRow | Palm Strike | {{lp}} {{lp}} {{lp}} | 12 | 39 | +2 | -15 | 8 | All | }}
| | * Has to work for it, but good damage across the board compared to other members of the cast. |
| {{PJMoveListRow | Open Hand Strike | {{f}} {{hp}} | 17 | 41 | +1 | -17 | 13 | All | Special cancelable}}
| | * Strong, versatile, confirmable rekka with multiple routes. |
| {{PJMoveListRow | Wheel Kick | {{f}} {{hk}} | 28 | 45 | -2 | -21 | 10 | Standing | Overhead}}
| | * Multiple Launchers. |
| {{PJMoveListRow | Roundhouse Kick | {{---}} {{hk}} | 27 | 41 | - | -17 | 11 | All | Blowback}}
| | |cons= |
| {{PJMoveListRow | Low Sweep Kick | {{---}} {{d}} {{hk}} | 20 | 39 | - | -17 | 8 | Crouching | Blowback}} | | * Relatively stubby normals. |
| {{PJMoveListRow | Haten Rengeki | {{b}} {{lp}} | 12 | 39 | +2 | 0 | 7 | All | Special chain starter}} | | * MUST stay in to be effective; can be easily out-done by characters with strong zoning and stalling tools. |
| {{PJMoveListRow | Follow up 1 | {{---}} {{lp}} | 17 | 34 | +2 | -10 | 7 | All | }}
| | * At the expense of her (debatably) more effective routes out of 4{{lp}}, some players may prefer [[Project Justice/Powered Akira | Powered Akira]] and her multitude of Stance routes over '''Akira'''. |
| {{PJMoveListRow | Follow up 2 | {{---}} {{lp}} {{lp}} | 11 | 27 | +2 | -3 | 10 | All | }}
| | }} |
| {{PJMoveListRow | Follow up 3 | {{---}} {{lp}} {{lp}} {{lp}} | 8 | 46 | - | -22 | 11 | All | Blowback}}
| | }} |
| {{PJMoveListRow | Follow up 4 | {{---}} {{lk}} | 14 | 29 | +2 | -5 | 10 | All | }}
| | }} |
| {{PJMoveListRow | Follow up 5 | {{---}} {{lk}} {{lk}} | 28 | 45 | -2 | -21 | 10 | Standing | }}
| |
| {{PJMoveListRow | Follow up 6 | {{---}} {{lk}} {{hk}} | 15 | 20 | +2 | +2 | 10 | Crouching | }}
| |
| {{PJMoveListRow | Follow up 7 | {{---}} {{lk}} {{hk}} {{hk}} | 28 | 48 | - | -24 | 29 | All | Blowback}}
| |
| {{PJMoveListRow | Follow up 8 | {{---}} {{lp}} {{lk}} | 21 | 54 | - | -30 | 7 | All | Rival Launcher}}
| |
| {{PJMoveListRow | Heaven's Gate | {{df}} {{hp}} | 15 | 38 | - | -14 | 11 | All | Rival Launcher}}
| |
| {{PJMoveListRow | Extended Spin Kick | (air) {{f}} {{hk}} | 18 | 1 | - | - | 14 | Standing | Knockdown}}
| |
| {{MoveListFooter}}
| |
| | |
| ==Throws==
| |
| {{PJMoveListHeader}}
| |
| {{PJMoveListRow | Pulling Throw | {{n}} {{lp}} + {{hp}} | 7 | 44 | - | - | 26 | - | Standing {{throw}} | }}
| |
| {{PJMoveListRow | Monkey Flip | {{d}} {{lp}} + {{hp}} | 7 | 44 | - | - | 32 | - | Crouch {{throw}} | }}
| |
| {{PJMoveListRow | Behind Monkey Toss | {{n}} {{lp}} + {{hp}} | 8 | 30 | - | - | 30 | - | Back {{throw}} | }}
| |
| {{PJMoveListRow | Hell Wheel | {{u}} {{lp}} + {{hp}} | 1 | - | - | - | 34 | - | Air {{throw}} | }}
| |
| {{MoveListFooter}}
| |
|
| |
|
| ==Special Moves==
| | {{2 Column Flex|flex1=2|flex2=4 |
| {{PJMoveListHeader}}
| | |content1= |
| {{PJMoveListRow | Gate Elbow (weak) | {{qcf}} {{lp}} | 16 | 31 | - | -7 | 14 | Standing | Blowback}} | | {{Content Box|header=Colors|content= |
| {{PJMoveListRow | Gate Elbow (strong) | {{qcf}} {{hp}} | 33 | 30 | - | -6 | 14 | Standing | Sidesteps, Blowback}}
| |
| {{PJMoveListRow | Leaping Smash | {{qcb}} {{p}} {{---}} {{k}} | 36 | 13 | - | -2 | 25 | Standing | Punch Used Determines Jump Distance; Knockdown, Has Landing Recovery}}
| |
| {{PJMoveListRow | Dancing Cyclone Kick (weak) | {{qcf}} {{lk}} | 26 | 39 | -8 | -17 | 22 | Crouching | Sidesteps, Can Follow-up With Either DCK, 2 more times; Follow-Ups Do 8 Dmg}}
| |
| {{PJMoveListRow | Dancing Cyclone Kick (strong) | {{qcf}} {{hk}} | 23| 34 | - | -10 | 14 | Any | Sidesteps, Can Follow-up With Either DCK, 2 More Times; Follow-Ups Do 7 Dmg}}
| |
| {{PJMoveListRow | Houbu | {{qcb}} {{k}} | 13 | 34 | - | -10 | 26 | Any | Mini launcher}}
| |
| {{MoveListFooter}}
| |
| | |
| ==Burning Vigor Attacks== | |
| {{PJMoveListHeader}}
| |
| {{PJMoveListRow | Kikou Kai | {{qcf}} {{qcf}} {{p}} | 35 | 53 | - | -37 | 42 | Any | 5 Hits; 10,9,9,8,6 Dmg, Blowback }}
| |
| {{PJMoveListRow | Air Kikou Kai | (Air) {{qcf}} {{qcf}} {{p}} | 20 | 13 | - | +3 | 47 | Any | 5 Hits; 11,10,10,9,7 Dmg, Blowback }}
| |
| {{PJMoveListRow | Reflex Barrage | {{qcb}} {{qcb}} {{p}} | 19 | 43 | - | -19 | 45 | Any | 7 Hits; 7,6,6,6,4,8,8 Dmg, Blowback }}
| |
| {{PJMoveListRow | Aerial Barrage | {{qcb}} {{qcb}} {{k}} | 35 | 54 | - | -30 | 38 | Any | 6 Hits; 8,6,6,6,4,8 Dmg, Knockdown }}
| |
| {{PJMoveListRow | Haten Mueishu | {{qcf}} {{qcf}} {{k}} | 35 | 41 | - | -24 | 55 | Any | 10 Hits; 10,6,6,6,4,4,4,4,4,7 Dmg, Blowback }}
| |
| {{MoveListFooter}}
| |
| | |
| ==Team Up Techniques==
| |
| {{PJMoveListHeader}} | |
| {{PJMoveListRow | Kyousou Rengekishuu | {{lp}} + {{lk}} (or {{hp}} + {{hk}}) | 24 | 38 | - | -14 | 47 | Any | Team Up Technique, damage type }}
| |
| {{PJMoveListRow | Seijo no Tettsuchi | {{p}} + {{p}} + {{k}} (or {{k}} + {{k}} + {{p}}) | 23 | 37 | - | -13 | 100 | Any | Party Up Technique }}
| |
| {{MoveListFooter}}
| |
| | |
| ==Combos==
| |
| *{{b}} {{lp}} {{lp}} {{lp}} {{lp}} - 33 Dmg
| |
| *{{d}} {{lk}} {{---}} {{hp}} {{---}} {{f}} {{hp}} {{---}} {{qcf}} {{lk}} {{---}} {{qcf}} {{hk}} - 49 Dmg
| |
| *{{lp}} {{lp}} {{---}} {{hp}} {{---}} {{f}} {{hp}} {{---}} {{qcf}} {{lk}} {{---}} {{qcf}} {{hk}} - 50 Dmg
| |
| *{{lp}} {{lp}} {{---}} {{hp}} {{---}} {{f}} {{hp}} {{---}} {{qcb}} {{qcb}} {{p}} - 62 Dmg
| |
| *{{df}} {{hp}} {{---}} {{u}} {{hp}} {{---}} {{u}} {{lk}} {{lk}} {{---}} {{u}} {{hp}} {{---}} {{u}} {{hk}} {{---}} (Air) {{qcf}} {{qcf}} {{P}} - 74 Dmg
| |
| *{{b}} {{lp}} {{lp}} {{lk}} {{---}} {{u}} {{hp}} {{u}} {{lk}} {{lk}} {{---}} {{u}} {{hp}} {{---}} {{u}} {{lk}} {{lk}} {{---}} (Air) {{qcf}} {{qcf}} {{P}} - 77 Dmg
| |
| *{{d}} {{hp}} {{---}} {{u}} {{lk}} {{lk}} {{---}} {{u}} {{hp}} {{---}} {{u}} {{hk}} {{---}} (Air) {{f}} {{hk}} - 46 Dmg
| |
| *{{qcb}} {{k}} {{---}} {{u}} {{lk}} {{lk}} {{---}} {{u}} {{hp}} {{---}} {{u}} {{hk}} {{---}} (Air) {{f}} {{hk}} - 61 Dmg
| |
| *{{d}} {{hp}} {{---}} {{u}} {{lk}} {{lk}} {{---}} {{u}} {{hp}} {{---}} {{u}} {{hk}} {{---}} (Air) {{qcf}} {{qcf}} {{p}} - 67 Dmg
| |
| *{{qcb}} {{k}} {{---}} {{u}} {{lk}} {{lk}} {{---}} {{u}} {{hp}} {{---}} {{u}} {{hk}} {{---}} (Air) {{qcf}} {{qcf}} {{p}} - 82 Dmg
| |
| | |
| ==Videos==
| |
| <youtube>l21dlusQChc</youtube>
| |
| | |
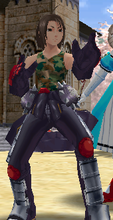
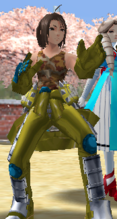
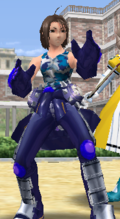
| ==Colors==
| |
| {{PJColors | | {{PJColors |
| |Character=Akira | | |Character=Akira |
| | }} |
| | }} |
| | |content2= |
| | {{Content Box|header=Akira Wiki Roadmap|content= |
| | {{AkiraRoadmap-PJ}} |
| | }} |
| }} | | }} |
|
| |
|
| | __NOTOC__ |
| {{Project Justice}} | | {{Project Justice}} |
|
| |
|
| [[Category:Project Justice]] | | [[Category:Project Justice]] |
| [[Category:Akira Kazama]] | | [[Category:Akira Kazama]] |
![]()
![]() ) into air launcher follow up, or
) into air launcher follow up, or ![]()
![]() to start her Textbook Combos. Some of her go-to Tardy Counters include side stepping and hit-grab Specials, which make her a good pick for players who favor a defensive play style. Her main shortcomings are her short range, and having to work for her damage more than other characters in the game.
to start her Textbook Combos. Some of her go-to Tardy Counters include side stepping and hit-grab Specials, which make her a good pick for players who favor a defensive play style. Her main shortcomings are her short range, and having to work for her damage more than other characters in the game.
