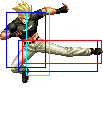
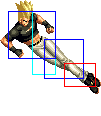
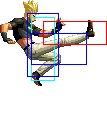
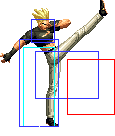
No edit summary |
|||
| Line 88: | Line 88: | ||
cr.Bx1-3 > qcf,qcf+A | cr.Bx1-3 > qcf,qcf+A | ||
{|border="1" | |||
!width="10%"| | |||
! Frames | |||
! Advantage | |||
! Cancel | |||
! Block | |||
!colspan="2"| Hitbox | |||
! Notes | |||
|- | |||
|colspan="8" align="center"| '''Standing Close''' | |||
|- | |||
! [[image:snka.gif]] | |||
|align="center"| // | |||
|align="center"| / | |||
|align="center"| R,C,S,Su | |||
|align="center"| HL | |||
|colspan="2" | [[image:Beni98_clA.png|center]] | |||
| | |||
Chain: repeatable | |||
|- | |||
! [[image:snkb.gif]] | |||
|align="center"| // | |||
|align="center"| / | |||
|align="center"| R,C,S,Su | |||
|align="center"| HL | |||
|colspan="2" | [[image:Beni98_clB.png|center]] | |||
| | |||
Chain: repeatable | |||
|- | |||
! [[image:snkc.gif]] | |||
|align="center"| // | |||
|align="center"| / | |||
|align="center"| C,S,Su | |||
|align="center"| HL | |||
|valign="bottom" style="border-right:0px;"| [[image:Beni98_clC1.png|center]] | |||
|valign="bottom" style="border-left:0px;"| [[image:Beni98_clC2.png|center]] | |||
| | |||
|- | |||
! [[image:snkd.gif]] | |||
|align="center"|// | |||
|align="center"| / | |||
|align="center"| C,S,Su | |||
|align="center"| HL | |||
|colspan="2"| [[image:Beni98_clD.png|center]] | |||
| | |||
|- | |||
|colspan="8" align="center"| '''Standing Far''' | |||
|- | |||
! [[image:snka.gif]] | |||
|align="center"| // | |||
|align="center"| / | |||
|align="center"| - | |||
|align="center"| HL | |||
|colspan="2" | [[image:Beni98_stA.png|center]] | |||
| | |||
Chain: repeatable | |||
|- | |||
! [[image:snkb.gif]] | |||
|align="center"| // | |||
|align="center"| / | |||
|align="center"| - | |||
|align="center"| HL | |||
|colspan="2" | [[image:Beni98_stB.png|center]] | |||
| | |||
Chain: ender | |||
|- | |||
! [[image:snkc.gif]] | |||
|align="center"| // | |||
|align="center"| / | |||
|align="center"| - | |||
|align="center"| HL | |||
|colspan="2" | [[image:Beni98_stC.png|center]] | |||
| | |||
|- | |||
! [[image:snkd.gif]] | |||
|align="center"| // | |||
|align="center"| / | |||
|align="center"| - | |||
|align="center"| HL | |||
|colspan="2"| [[image:Beni98_stD.png|center]] | |||
| | |||
|- | |||
! [[image:snkc.gif]]+[[image:snkd.gif]] | |||
|align="center"| // | |||
|align="center"| KD/ | |||
|align="center"| S | |||
|align="center"| HL | |||
|colspan="2"| [[image:Beni98_stCD.png|center]] | |||
| | |||
|- | |||
|colspan="8" align="center"| '''Crouching''' | |||
|- | |||
! [[image:snka.gif]] | |||
|align="center"| // | |||
|align="center"| / | |||
|align="center"| R,C,Su | |||
|align="center"| HL | |||
|colspan="2" | [[image:Beni98_crA.png|center]] | |||
| | |||
Chain: repeatable | |||
|- | |||
! [[image:snkb.gif]] | |||
|align="center"| // | |||
|align="center"| / | |||
|align="center"| R,C,Su | |||
|align="center"| L | |||
|colspan="2" | [[image:Beni98_crB.png|center]] | |||
| | |||
Chain: repeatable | |||
|- | |||
! [[image:snkc.gif]] | |||
|align="center"| // | |||
|align="center"| / | |||
|align="center"| C | |||
|align="center"| HL | |||
|valign="bottom" style="border-right:0px;"| [[image:Beni98_crC1.png|center]] | |||
|valign="bottom" style="border-left:0px;"| [[image:Beni98_crC2.png|center]] | |||
| | |||
|- | |||
! [[image:snkd.gif]] | |||
|align="center"| // | |||
|align="center"| KD/ | |||
|align="center"| C | |||
|align="center"| L | |||
|colspan="2"| [[image:Beni98_crD.png|center]] | |||
| | |||
|- | |||
|colspan="8" align="center"| '''Jump''' | |||
|- | |||
! [[image:snka.gif]] | |||
|align="center"| //- | |||
|align="center"| -/- | |||
|align="center"| - | |||
|align="center"| H | |||
|colspan="2" | [[image:Beni98_jA.png|center]] | |||
| | |||
|- | |||
! [[image:snkb.gif]] | |||
|align="center"| //- | |||
|align="center"| -/- | |||
|align="center"| - | |||
|align="center"| H | |||
|colspan="2" | [[image:Beni98_jB.png|center]] | |||
| | |||
|- | |||
! [[image:snkc.gif]] | |||
|align="center"| //- | |||
|align="center"| -/- | |||
|align="center"| - | |||
|align="center"| H | |||
|valign="bottom" style="border-right:0px;"| [[image:Beni98_jC1.png|center]] | |||
|valign="bottom" style="border-left:0px;"| [[image:Beni98_jC2.png|center]] | |||
| | |||
|- | |||
! [[image:snkd.gif]] | |||
|align="center"| //- | |||
|align="center"| -/- | |||
|align="center"| - | |||
|align="center"| H | |||
|colspan="2"| [[image:Beni98_jD.png|center]] | |||
| | |||
|- | |||
! [[image:snkc.gif]]+[[image:snkd.gif]] | |||
|align="center"| //- | |||
|align="center"| KD/- | |||
|align="center"| S | |||
|align="center"| HL | |||
|colspan="2"| [[image:Beni98_jCD.png|center]] | |||
| | |||
|- | |||
|colspan="8" align="center"| '''Neutral Jump''' | |||
|- | |||
! [[image:snkd.gif]] | |||
|align="center"| /1/- | |||
|align="center"| -/- | |||
|align="center"| - | |||
|align="center"| H | |||
|colspan="2"| [[image:Beni02_njD.png|center]] | |||
| | |||
|- | |||
|colspan="8" align="center"| '''Command Normals''' | |||
|- | |||
! f+[[image:snkb.gif]] | |||
|align="center"| // | |||
|align="center"| / | |||
|align="center"| S | |||
|align="center"| HL | |||
|colspan="2" | [[image:Beni98_fB.png|center]] | |||
| '''Jackknife Kick - f+B'''<br> | |||
|- | |||
! j.d+[[image:snkd.gif]] | |||
|align="center"| -/-/- | |||
|align="center"| -/- | |||
|align="center"| - | |||
|align="center"| HL | |||
|colspan="2" | [[image:Beni98_jdD.png|center]] | |||
| '''Flying Drill - d+D (air)'''<br> | |||
A good pressure tool as well as the only jumping attack that Benimaru has to hit a sliding Chris. It's safe on block and it sets up for more pressure/mix-up. If the opponent gets antsy and wants to mash a crouching attack or some sort of standing normal, Benimaru could just press far Standing D to beat out whatever is done by the opponent. If the opponent tries to jump the far Standing D, Benimaru could just do far Standing B or Super Inazuma Kick Version B. If the opponent rolls forward, the opponent risks a reaction punish by Benimaru. If the opponent rolls backwards, the opponent just pragmatically moves himself back into the corner. The opponent could at best just commit to blocking and find a different opportunity to get around Benimaru. Be careful though as Benimaru's Drill whiff recovery is pretty big and easily punishable and could be Guard Cancel Rolled then punished if spaced unsafely. Benimaru could cancel his back dash into the Drill although it has no point. Otherwise, it's okay in changing trajectory in the air against projectile characters. | |||
|- | |||
|} | |||
=Strategies= | =Strategies= | ||
[[Category:The King of Fighters '99]] | [[Category:The King of Fighters '99]] | ||
Revision as of 17:42, 22 September 2018
Introduction
The famous electric seducer and Kyo's Friend in KOF. Top-tier character (best character of game among no-banned characters). Existing in all the teams or almost.
Gameplay Overview
Benimaru builds meter fastly with his meterless combos and Dizzy fastly also.
Gets a very good mixups with his crossup j+D, his long range move (cr+C) where you can option select with (at 2:33 of this video), his cr+B to pressure, his instant overhead (j+B) who can be useful after cr+B, his st+B to poke (invincible move), his j+qcf+P to chip damage opponent, his air throw etc
High priority normal attacks with st.B, j+CD, cl.D, st.D , neutral j+D , j+D and his cr+D
His cr+C permits to pass opponent's jump attacks.
His main combo : cr.B, cr.B xx qcf,qcf.A must be mastered.
His problem in this kof is that except his Raijin Ken (qcf+C), he doesn't really get anti-air moves, what can be a problem versus Choi.
Mid-Tier as Striker.
Movelist
THROWS-------------------------------------------------------------------------
Catch and Shoot >> When close - b / f + C
Front Suplex >> When close - b / f + D
Spinning Knee Drop >> When close in the air - any dir. except u + C / D
COMMAND ATTACKS----------------------------------------------------------------
Jackknife Kick >> f + B >> No Overhead.
   Evades several low attacks.
   Can be cancelled into a special move or DM move.
Flying Drill >> In the air - d + D
SPECIAL MOVES------------------------------------------------------------------
Iai-geri >> qcf + K >> Can be followed with Handou Sandan Geri.
/Handou Sandan Geri >> After Iai-geri - d, u + K
Shinkuu Katategoma >> qcb + P
Raijin Ken >> qcf + P
Kuuchuu Raijin Ken >> In the air - qcf + P
DESPERATION MOVES--------------------------------------------------------------
Raikou Ken >> qcf, qcf + A
Gen'ei Hurricane >> qcf, qcf + K >> Evades 1-hit strong normal attack and specials.
Combos
cr.Bx1-3 > qcf+K > d,u+K
cr.C > qcb+C or qcf,qcf+A
Jump Attack > cl.C or cl.D > qcf+P or qcf+K or qcb+P or qcf,qcf+P
cr.Bx1-3 > qcf,qcf+A

