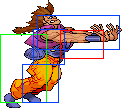
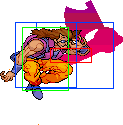
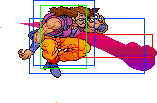
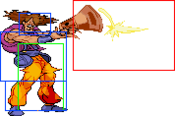
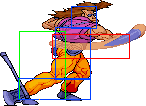
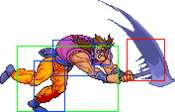
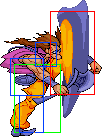
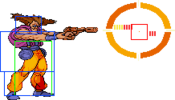
Stand OFF
Normals
| Startup | Active | Recovery | Damage | Guard | ||||
|---|---|---|---|---|---|---|---|---|
| 4 | 2 | 3 | - | - | ||||
| Hit Adv. | Block Adv. | Pushblock Adv. | Cancel | Properties | ||||
| +11 | +10 | +6 | Special/Super | Mid
Air-UB | ||||
|
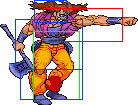
Relatively quick standing jab. Can combo into itself twice and into other normals. Useful combo starter but limited as a confirm since you'll either combo into it or counterpoke with 5C instead. The hitbox is generally too short to jab characters out of the air. | ||||||||
| Startup | Active | Recovery | Damage | Guard | ||||
|---|---|---|---|---|---|---|---|---|
| 5 | 3 | 14 | - | - | ||||
| Hit Adv. | Block Adv. | Pushblock Adv. | Cancel | Properties | ||||
| +3 | +2 | -7 | Special/Super | Low | ||||
|
A low hitting kick with terrible range and combo potential. Useless. | ||||||||
| Startup | Active | Recovery | Damage | Guard | ||||
|---|---|---|---|---|---|---|---|---|
| 4 | 3 | 18 | - | - | ||||
| Hit Adv. | Block Adv. | Pushblock Adv. | Cancel | Properties | ||||
| +2 | +1 | -13 | Special/Super | Mid
Air-UB | ||||
|
Same startup as 5A. Good Stand OFF counterpoke and confirms into Custom Combo or 41236A on reaction. | ||||||||
| Startup | Active | Recovery | Damage | Guard | ||||
|---|---|---|---|---|---|---|---|---|
| 6 | 2 | 6 | - | - | ||||
| Hit Adv. | Block Adv. | Pushblock Adv. | Cancel | Properties | ||||
| +8 | +7 | +3 | Special/Super | Low | ||||
|
Quick low jab. Can combo into itself twice and into other normals. | ||||||||
| Startup | Active | Recovery | Damage | Guard | ||||
|---|---|---|---|---|---|---|---|---|
| 5 | 3 | 8 | - | - | ||||
| Hit Adv. | Block Adv. | Pushblock Adv. | Cancel | Properties | ||||
| +9 | +8 | +1 | Special/Super | Low | ||||
|
Slightly faster than 2A, but more damage and creates more distance on hit. Not a bad counterpoke, and can combo into 663A. Also useful for building meter. | ||||||||
| Startup | Active | Recovery | Damage | Guard | ||||
|---|---|---|---|---|---|---|---|---|
| 6 | 5 | 14 | - | - | ||||
| Hit Adv. | Block Adv. | Pushblock Adv. | Cancel | Properties | ||||
| Hard Knockdown | +1 | -13 | Special/Super
Roll |
Low | ||||
|
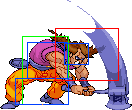
Amazing sweep. Quick, can be comboed into from multiple normals, retains Alessi's low crouching hurtbox, hits behind him and is roll cancellable which makes it a very safe button to press. Keep in mind that its low profile hitbox whiffs against most prejumps. | ||||||||
| Startup | Active | Recovery | Damage | Guard | ||||
|---|---|---|---|---|---|---|---|---|
| 4 | - | - | - | - | ||||
| Hit Adv. | Block Adv. | Pushblock Adv. | Cancel | Properties | ||||
| +12 | +11 | +7 | None | High | ||||
|
Alessi's primary jump-in that can crossup rather well, making it ambiguous for your opponent which direction they should block after you land. | ||||||||
| Startup | Active | Recovery | Damage | Guard | ||||
|---|---|---|---|---|---|---|---|---|
| 5 | 6 | until landing | - | - | ||||
| Hit Adv. | Block Adv. | Pushblock Adv. | Cancel | Properties | ||||
| +12 | +11 | +7 | None | High | ||||
|
Decent air-to-air due to it having more active frames than j.C. Reaches a tiny bit higher than j.C but is mostly used for tech chasing situations. Will lose most trades. | ||||||||
| Startup | Active | Recovery | Damage | Guard | ||||
|---|---|---|---|---|---|---|---|---|
| 5 | 2 | until landing | - | - | ||||
| Hit Adv. | Block Adv. | Pushblock Adv. | Cancel | Properties | ||||
| +12 | +11 | +7 | None | High | ||||
|
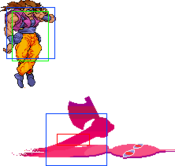
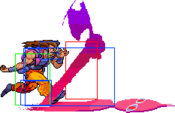
Mighty Sethan punch. A damaging jump-in and more importantly a solid air-to-air move. Has large preemptive hurtboxes similar to Alessi's stand ON buttons which will lose versus other active aerial moves and makes you susceptible to anti airs before it goes active. This button will be your primary way of dealing with jump ins and control aerial space with good horizontal positioning. | ||||||||
Dashing Normals
| Startup | Active | Recovery | Damage | Guard | ||||
|---|---|---|---|---|---|---|---|---|
| 5 | 2 | 9 | - | - | ||||
| Hit Adv. | Block Adv. | Pushblock Adv. | Cancel | Properties | ||||
| +1 | +0 | +0 | Special/Super | Mid
Air-UB | ||||
|
Pretty meh dashing punch, use 663A over this. | ||||||||
| Startup | Active | Recovery | Damage | Guard | ||||
|---|---|---|---|---|---|---|---|---|
| 11 | 3 | 10 | - | - | ||||
| Hit Adv. | Block Adv. | Pushblock Adv. | Cancel | Properties | ||||
| +4 | +3 | -3 | Special/Super | Low | ||||
|
Similar to 5B. Useless. | ||||||||
| Startup | Active | Recovery | Damage | Guard | ||||
|---|---|---|---|---|---|---|---|---|
| 9 | 2 | 16 | - | - | ||||
| Hit Adv. | Block Adv. | Pushblock Adv. | Cancel | Properties | ||||
| +1 | +0 | -11 | Special/Super
Air-UB |
- | ||||
|
Has okay combo potential, range and speed but basically a worse 663C. | ||||||||
| Startup | Active | Recovery | Damage | Guard | ||||
|---|---|---|---|---|---|---|---|---|
| 4 | 2 | 9 | - | - | ||||
| Hit Adv. | Block Adv. | Pushblock Adv. | Cancel | Properties | ||||
| +6 | +4 | +0 | Special/Super | Low | ||||
|
Fast, low jab that keeps your dashing momentum too. Great to start combos and tick throw off of. The d.2A 5A link is 1f. | ||||||||
| Startup | Active | Recovery | Damage | Guard | ||||
|---|---|---|---|---|---|---|---|---|
| 7 | 3 | 15 | - | - | ||||
| Hit Adv. | Block Adv. | Pushblock Adv. | Cancel | Properties | ||||
| +1 | -1 | -7 | Special/Super | Low | ||||
|
A slower 663A and a less damaging 663C which you can't combo off of. Do not use. Ever. | ||||||||
| Startup | Active | Recovery | Damage | Guard | ||||
|---|---|---|---|---|---|---|---|---|
| 10 | 2 | 9 | - | - | ||||
| Hit Adv. | Block Adv. | Pushblock Adv. | Cancel | Properties | ||||
| +12 | +11 | +1 | Special/Super | Low | ||||
|
Hard low jab. Good poke and whiff punish that can combo into 2C, 5C, 663A, and more. Very damaging combo starter, although its startup is a bit slow. | ||||||||
Command Normals
| Startup | Active | Recovery | Damage | Guard | ||||
|---|---|---|---|---|---|---|---|---|
| - | - | - | - | - | ||||
| Hit Adv. | Block Adv. | Pushblock Adv. | Cancel | Properties | ||||
| - | - | - | - | - | ||||
|
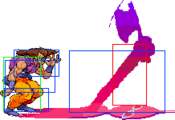
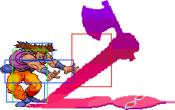
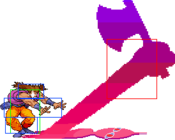
Sethan grabs the opponent and moves them away from Alessi before he chops them with his axe. Decent throw that can't be punished but it forcibly extends Sethan's length.To reset it, you have to turn Stand ON without holding any direction (also works mid air) which makes this a constant annoyance you have to deal with every round. Leaving it extended can make certain combos whiff and it creates a deadzone between Alessi and the active hitbox that characters can fit into and punish you. You almost always want to reset your stand after throwing! | ||||||||
| Startup | Active | Recovery | Damage | Guard | ||||
|---|---|---|---|---|---|---|---|---|
| - | - | - | - | - | ||||
| Hit Adv. | Block Adv. | Pushblock Adv. | Cancel | Properties | ||||
| - | - | - | - | Launcher | ||||
|
Very quick and large reversal, super good guard cancel. Due to Alessi's lack of anti airs, this will be your primary means of stopping continuous jump ins without meter or forcing air-to-airs. | ||||||||
Stand ON
ALL OF ALESSI'S STAND ON NORMALS HAVE DECENTLY SIZED TO EGREGIOUSLY LARGE HURTBOXES THAT ARE ACTIVE BEFORE THE HITBOXES BY A FEW FRAMES. DO NOT TRY TO BEAT OUT MOVES WITH LOTS OF ACTIVE FRAMES WITH STAND ON NORMALS. (This also includes Stand OFF 2C and j.C)
| Startup | Active | Recovery | Damage | Guard | ||||
|---|---|---|---|---|---|---|---|---|
| - | - | - | - | - | ||||
| Hit Adv. | Block Adv. | Pushblock Adv. | Cancel | Properties | ||||
| - | - | - | - | - | ||||
|
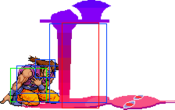
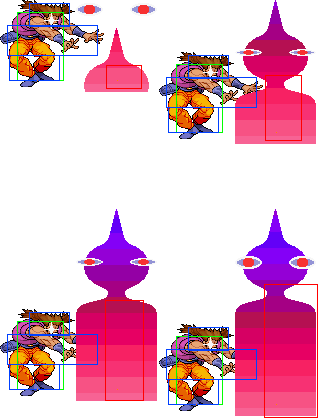
Holding S after activating Stand ON will make Sethan grow taller in size and effectively increase its range. However, this may leave a gap between Alessi and Sethan where the opponent cannot be hit by most of your attacks. Exception being s.2C and your dashing normals, which will come out at the same distance no matter how large Sethan is. Going Stand OFF and turning Stand back ON when neutral (5) will turn it back to normal size. Turning Stand OFF then ON while holding 6 or 4 will keep the added size. Doing s.63214x will also revert this size change. Expanding your stand can be useful to allow you to punish certain moves better in some matchups, especially since you can enlarge it safely between rounds. | ||||||||
Normals
| Startup | Active | Recovery | Damage | Guard | ||||
|---|---|---|---|---|---|---|---|---|
| 5 | 2 | 14 | - | - | ||||
| Hit Adv. | Block Adv. | Pushblock Adv. | Cancel | Properties | ||||
| -1 | -3 | -6 | None | Mid
Air-UB | ||||
|
Decent range, but has small damage and is not much faster than s.5C. Good during a custom combo. | ||||||||
| Startup | Active | Recovery | Damage | Guard | ||||
|---|---|---|---|---|---|---|---|---|
| 4 | 2 | 6 | - | - | ||||
| Hit Adv. | Block Adv. | Pushblock Adv. | Cancel | Properties | ||||
| +10 | +8 | +5 | Special/Super | Mid
Air-UB "Stand" | ||||
|
Same as 5A. A solid jab that can combo into s.5C(close) which converts into a full combo. Very helpful when option selecting jump ins with s.4ABC or when your opponent's jump makes them land behind you. This button is your primary combo confirm while stand ON. | ||||||||
| Startup | Active | Recovery | Damage | Guard | ||||
|---|---|---|---|---|---|---|---|---|
| 6 | 4 | 16 | - | - | ||||
| Hit Adv. | Block Adv. | Pushblock Adv. | Cancel | Properties | ||||
| -2 | -3 | -12 | None | Mid
Air UB | ||||
|
Decent anti-air but suffers from large preemptive hurtboxes similar to Alessi's other normals. Due to aerial moves often having long active frames, s.5B will almost always lose versus a jump in. s.5B is better suited to catch prejumps, characters early in their jump arc or when tech chasing (such as after a grab). Use it as a substitute for s.5C if your opponent jumps a lot. | ||||||||
| Startup | Active | Recovery | Damage | Guard | ||||
|---|---|---|---|---|---|---|---|---|
| 5 | 3 | 13 | - | - | ||||
| Hit Adv. | Block Adv. | Pushblock Adv. | Cancel | Properties | ||||
| +4 | +1 | -6 | Special/Super | Low
"Stand" | ||||
|
Mostly used during custom combos and has limited use in neutral. When your opponent is within close proximity range you'd rather press s.5A or s.5C instead. This move WILL come out when you try to stuff out instant airdashes and you'll die for it. | ||||||||
| Startup | Active | Recovery | Damage | Guard | ||||
|---|---|---|---|---|---|---|---|---|
| 8 | 4 | 15 | - | - | ||||
| Hit Adv. | Block Adv. | Pushblock Adv. | Cancel | Properties | ||||
| +2 | +1 | -13 | None | Mid
Air UB | ||||
|
Primary stand ON poke to control grounded space. Good range, good damage and good framedata. However, its huge hurtbox will make it susceptible to getting stuffed out in neutral so be careful if your opponent is mashing to stuff it out. s.5C whiffs on most prejumps and leaves you vulnerable to their hop in. Your opponent can also iframe through it with tandem and confirm off the huge, lingering hurtbox while their stand rushes towards you. | ||||||||
| Startup | Active | Recovery | Damage | Guard | ||||
|---|---|---|---|---|---|---|---|---|
| 4 | 3 | 18 | - | - | ||||
| Hit Adv. | Block Adv. | Pushblock Adv. | Cancel | Properties | ||||
| +3 | +1 | -12 | Special/Super | Mid
Air-UB "Stand" | ||||
|
Alessi quick shove. Still a useful normal, but its range is mostly negated by how close you need to be for this to activate. Can combo into s.41236+A and s.63214+A and does a BILLION stand gauge damage (26). | ||||||||
| Startup | Active | Recovery | Damage | Guard | ||||
|---|---|---|---|---|---|---|---|---|
| 5 | 6 | 7 | - | - | ||||
| Hit Adv. | Block Adv. | Pushblock Adv. | Cancel | Properties | ||||
| +2 | +1 | -3 | None | Low | ||||
|
Not particularly useful outside of 50/50 shenanigans with 214S s.6B(far) since s.2A has slightly more reach than s.6B(close) or doing s.1AC option selects if they're further away. | ||||||||
| Startup | Active | Recovery | Damage | Guard | ||||
|---|---|---|---|---|---|---|---|---|
| 6 | 2 | 5 | - | - | ||||
| Hit Adv. | Block Adv. | Pushblock Adv. | Cancel | Properties | ||||
| +9 | +7 | +4 | Special/Super | Low
"Stand" | ||||
|
Alessi quick low jab. Can combo into itself twice and into other normals. | ||||||||
| Startup | Active | Recovery | Damage | Guard | ||||
|---|---|---|---|---|---|---|---|---|
| 7 | 4 | 24 | - | - | ||||
| Hit Adv. | Block Adv. | Pushblock Adv. | Cancel | Properties | ||||
| -13 | -3 | -20 | None | Mid
Air-UB | ||||
|
Big hitbox but equally large hurtbox before it goes active. Will lose versus any active jump ins which limits its use for anti airing. Good at stuffing out empty jumps or for tech chasing, but proximity normals don't care about vertical distance so there's a good chance of you getting s.2B(close) instead. | ||||||||
| Startup | Active | Recovery | Damage | Guard | ||||
|---|---|---|---|---|---|---|---|---|
| 10 | 2 | 6 | - | - | ||||
| Hit Adv. | Block Adv. | Pushblock Adv. | Cancel | Properties | ||||
| +14 | +12 | +3 | Special/Super | Low
"Stand" | ||||
|
Same as s.2A (close) except longer startup and more damage. Can combo into other normals. | ||||||||
| Startup | Active | Recovery | Damage | Guard | ||||
|---|---|---|---|---|---|---|---|---|
| 6 | 5 | 14 | - | - | ||||
| Hit Adv. | Block Adv. | Pushblock Adv. | Cancel | Properties | ||||
| Hard Knockdown | -1 | -13 | None | Low | ||||
|
Similar to 2C but can't be cancelled which makes it much more risky. It's still a good move but it squanders the defensive capabilities of your stand ON playstyle by either forcing you to be careful or turning stand OFF to mash 2C. | ||||||||
| Startup | Active | Recovery | Damage | Guard | ||||
|---|---|---|---|---|---|---|---|---|
| 4 | - | - | - | - | ||||
| Hit Adv. | Block Adv. | Pushblock Adv. | Cancel | Properties | ||||
| +12 | +11 | +7 | None | High
"Stand" | ||||
|
Magic leg. Same as j.A, but it's a "Stand" move, and the easiest one to use for that purpose. Although it can cut stuff like Kakyoin's nets or Mariah's wire, the hitbox disappears which leaves you defenseless afterwards. | ||||||||
| Startup | Active | Recovery | Damage | Guard | ||||
|---|---|---|---|---|---|---|---|---|
| 10 | - | Until landing | - | - | ||||
| Hit Adv. | Block Adv. | Pushblock Adv. | Cancel | Properties | ||||
| +18 | +14 | +7 | None | Mid
Air UB | ||||
|
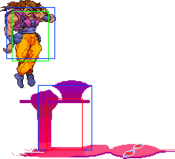
Sethan close and not so long axe coming from the ground, similar to s.2B. Used in stand crash combo. You could catch the opponent dashing into you when doing this move, but when will you ever pull that off? Can also be used as a cheeky, unexpected poke if you're far up in the air as it'll always spring up from the ground regardless of your vertical position. | ||||||||
| Startup | Active | Recovery | Damage | Guard | ||||
|---|---|---|---|---|---|---|---|---|
| 9 | - | Until landing | - | - | ||||
| Hit Adv. | Block Adv. | Pushblock Adv. | Cancel | Properties | ||||
| +12 | +11 | +7 | None | Mid
Air UB | ||||
|
Sethan short axe. Same as s.2A except it does a billion damage. | ||||||||
Dashing Normals
When dashing or backdashing to the right, the recoveries of Stand ON dashing normals are dependent on how fast you're moving. The slower your speed, the less recovery the move has. Additionally, all dashing normals will have Sethan's limb appear as close to Alessi as possible, and are unaffected by stand length.
| Startup | Active | Recovery | Damage | Guard | ||||
|---|---|---|---|---|---|---|---|---|
| 5 | 2 | (11 to 25) | - | - | ||||
| Hit Adv. | Block Adv. | Pushblock Adv. | Cancel | Properties | ||||
| (+4 to -10) | (+4 to -10) | (-5 to -19) | None | Mid
Air UB | ||||
|
Long recovery time and therefore rarely used over your other dashing normals. | ||||||||
| Startup | Active | Recovery | Damage | Guard | ||||
|---|---|---|---|---|---|---|---|---|
| 6 | 2 | (10 to 24) | - | - | ||||
| Hit Adv. | Block Adv. | Pushblock Adv. | Cancel | Properties | ||||
| (+12 to -2) | (+11 to -3) | (-6 to -20) | None | Mid
Air UB | ||||
|
Situationally useful move as the hitbox will always come out close to Alessi regardless of Sethan's length. Can be used to stuff out jumps or tech chasing (such as d.s.5B to catch downtechs after a grab) but leaves you very vulnerable with a long recovery. | ||||||||
| Startup | Active | Recovery | Damage | Guard | ||||
|---|---|---|---|---|---|---|---|---|
| 8 | 2 | (8 to 22) | - | - | ||||
| Hit Adv. | Block Adv. | Pushblock Adv. | Cancel | Properties | ||||
| (+16 to +2) | (+15 to +1) | (-6 to -20) | None | Mid
Air UB | ||||
|
Very good move. Increases your effective range and can confirm into combos at closer distances depending on if you're on the left or the right of your opponent. Harassing your opponent with s.5C into d.s.5C is a decent frametrap but is punishable on pushblock. Short dashes into regular s.5C can have a similar albeit slower effect of increasing your effective range but with less risk. Also comes out from behind Alessi when backdashing which can dissuade your opponent from mindlessly chasing you down. | ||||||||
Alessi does not have dashing lows in Stand ON.
Command Normals
| Startup | Active | Recovery | Damage | Guard | ||||
|---|---|---|---|---|---|---|---|---|
| 11 | 3 | 24 | - | - | ||||
| Hit Adv. | Block Adv. | Pushblock Adv. | Cancel | Properties | ||||
| -9 | -11 | -19 | None | Overhead
Air UB | ||||
|
Useful overhead that can be used during unconfirmed custom combos to create an ambiguous 50/50 with s.6B(far) and s.6B(close). Also stops your opponent from holding down+back the entire game while sitting on top of your stand. Is minus on hit but is difficult to punish on reaction. Despite having a huge hurtbox and relatively slow startup, the hurtboxes follow the animation smoothly which makes it harder to stuff out. You can also use this move on oki to confirm a kill or condition your opponent to block high and open themselves up to eating a 2C meaty if you're not in a position to use gun oki. | ||||||||
| Startup | Active | Recovery | Damage | Guard | ||||
|---|---|---|---|---|---|---|---|---|
| 10 | 2 | 6 | - | - | ||||
| Hit Adv. | Block Adv. | Pushblock Adv. | Cancel | Properties | ||||
| +14 | +12 | +3 | Special/Super | Low
"Stand" | ||||
|
Slower, safer close s.2B. Not used very much due to slow startup and iffy proximity distance, but can combo into far normals with ease. | ||||||||
| Startup | Active | Recovery | Damage | Guard | ||||
|---|---|---|---|---|---|---|---|---|
| - | - | - | - | - | ||||
| Hit Adv. | Block Adv. | Pushblock Adv. | Cancel | Properties | ||||
| - | - | - | - | - | ||||
|
Same as Alessi's stand OFF grab except that you now have to turn it off and on again to reset Sethan's length. If you grab someone while you're stand ON and you want to return to neutral stand OFF without Sethan being extended, you have to Grab, turn stand OFF, turn stand ON without holding any directions then turn stand OFF again. Or throw out s.63214A/B/C if you're lazy and willing to risk it. Thanks Capcom. | ||||||||
| Startup | Active | Recovery | Damage | Guard | ||||
|---|---|---|---|---|---|---|---|---|
| - | - | - | - | - | ||||
| Hit Adv. | Block Adv. | Pushblock Adv. | Cancel | Properties | ||||
| - | - | - | s.214S (with install) | Launcher | ||||
|
Very quick and large reversal, super good guard cancel. Can be cancelled if you maintain your s.[AA] install. Due to Alessi's lack of anti airs, this will be your primary means of stopping continuous jump ins without meter or forcing air-to-airs. | ||||||||
Alessi Mode
Alessi Mode is active when the opponent is in child form. Alessi stands a little taller and gets completely different Stand OFF normals in this mode. He also loses access to special and super moves. Jumping and Stand ON normals are mostly the same, but a.s.j.A's properties will change depending on the previous Alessi Mode move performed (more info in Misc section). Child opponents hit in the air cannot be damaged until they land again.
Normals
| Startup | Active | Recovery | Damage | Guard | ||||
|---|---|---|---|---|---|---|---|---|
| 4 | 2 | 7 | - | - | ||||
| Hit Adv. | Block Adv. | Pushblock Adv. | Cancel | Properties | ||||
| +6 | - | - | - | Special/Super
Crouch | ||||
|
Quick standing jab. | ||||||||
| Startup | Active | Recovery | Damage | Guard | ||||
|---|---|---|---|---|---|---|---|---|
| 6 | 2 | 6 | - | - | ||||
| Hit Adv. | Block Adv. | Pushblock Adv. | Cancel | Properties | ||||
| +7 | - | - | Special/Super | - | ||||
|
Short axe chop, can link into a.5C. Range is poor, so it needs very specific spacing to hit without getting a.c5B instead. | ||||||||
| Startup | Active | Recovery | Damage | Guard | ||||
|---|---|---|---|---|---|---|---|---|
| 4 | 2 | 10 | - | - | ||||
| Hit Adv. | Block Adv. | Pushblock Adv. | Cancel | Properties | ||||
| 0 | - | - | Special/Super | - | ||||
|
Not-so-great jab. | ||||||||
| Startup | Active | Recovery | Damage | Guard | ||||
|---|---|---|---|---|---|---|---|---|
| 6 | 2 | 9 | - | - | ||||
| Hit Adv. | Block Adv. | Pushblock Adv. | Cancel | Properties | ||||
| +5 | - | - | Special/Super | - | ||||
|
This along with any dashing Alessi Mode normal should be the only attack you do in Alessi mode other than s.665C, s.[AA] and 41236+A/B/C. Dashing normals is still heavily preferred over this. | ||||||||
| Startup | Active | Recovery | Damage | Guard | ||||
|---|---|---|---|---|---|---|---|---|
| 4 | 2 | 8 | - | - | ||||
| Hit Adv. | Block Adv. | Pushblock Adv. | Cancel | Properties | ||||
| +13 | - | - | Specials/Super | - | ||||
|
The amazing anti air Alessi so desperately needs limited to bullying children. The kick launches your child mode opponent higher than other moves, wasting even more of your precious Alessi-mode time. Mostly used for when you screw up and let your child mode opponent jump over/towards you and somewhat salvages your damage if you have time to meaty their landing with d.a.5C into gun. | ||||||||
| Startup | Active | Recovery | Damage | Guard | ||||
|---|---|---|---|---|---|---|---|---|
| 4 | 1 | 8 | - | - | ||||
| Hit Adv. | Block Adv. | Pushblock Adv. | Cancel | Properties | ||||
| +6 | - | - | Special/Super | - | ||||
|
Not very useful for damage. For whatever reason, only a.2B will build meter which makes it useful to whiff a couple of times while the opponent is transforming. | ||||||||
| Startup | Active | Recovery | Damage | Guard | ||||
|---|---|---|---|---|---|---|---|---|
| 13 | 3 | 18 | - | - | ||||
| Hit Adv. | Block Adv. | Pushblock Adv. | Cancel | Properties | ||||
| -5 | - | - | Special/Super | - | ||||
|
Deadly finger point that whiffs on most babies. Can be cancelled into 214S and confirm into a full combo on hit when done late into Alessi-mode, but is unlikely as your opponent has around 10 iframes when transforming back. | ||||||||
Dashing Normals
| Startup | Active | Recovery | Damage | Guard | ||||
|---|---|---|---|---|---|---|---|---|
| 6 | 2 | 14 | - | - | ||||
| Hit Adv. | Block Adv. | Pushblock Adv. | Cancel | Properties | ||||
| +12 | - | - | Special/Super | - | ||||
|
Your primary attack during Alessi-mode. Any dashing normal will make Alessi do a dashing version of 5C. Great damage move that can combo into itself if you are fast enough, and also combos into 41236+C which is useful at the end of a transform. This move can whiff on some child forms if they are close enough so you'll have to be careful with your spacing. Learning the timing of nailing down child mode characters with this is vital when playing Alessi. | ||||||||
Special Moves
| Startup | Active | Recovery | Damage | Guard | ||||
|---|---|---|---|---|---|---|---|---|
| 14 | 180 (shots are active for 1f) | 33 | - | - | ||||
| Hit Adv. | Block Adv. | Pushblock Adv. | Cancel | Properties | ||||
| +16 | +15 | +1 | None | Mid | ||||
|
Alessi stands still as he pulls out his gun and a reticle appears on the screen. Shoot by pressing A B or C up to 13 times while controlling the reticle instead of Alessi. It will end when you press S, fire all 13 shots, or after a long period of time. The initial button after 41236 controls where the reticle appears: A = In front of Alessi B = Midscreen, between you and the opponent C = On the enemy or in front of them if fullscreen. Alessi's best move. Allows you to control the screen at any point while also doing about the same damage on hit and block. The chip damage from gun single handedly makes passive stand character's matchup against Alessi awful (Petshop and Shadow DIO being two notable exceptions). Can be done in neutral versus turtling opponents, can be used as an early anti air, can be used in combos to maximize damage, and can be used on okizeme where even if they block they'll still eat a bunch of chip damage. With precise positioning, you can create an unblockable crossup with this move where it hits without giving them a chance to preblock often referred to as "gunblockable". It also destroys some other projectiles but makes your hurtbox slightly taller which lets some moves hit you (like Shadow Dio's laser). This move has some huge drawbacks. It has a long recovery and is easily punished on both whiff, block and on hit at closer distances (such as in the corner). It does nothing vs stand ON characters unless you set up a gunblockable, and stand ON characters can guarantee a tech out on hit mid-air. Will also give you arthritis from hammering out 13 shots five times a round in an hour long sets. Staggering your shots can create enough distance between you and your opponent to recover safely. Shots on hit vs airborne opponents must be mashed out fast with no more than ~5f between each shot vs stand OFF characters while stand ON characters can tech out at any time after the sixth shot or so. | ||||||||
| Startup | Active | Recovery | Damage | Guard | ||||
|---|---|---|---|---|---|---|---|---|
| 25 | 42 | 39 | - | - | ||||
| Hit Adv. | Block Adv. | Pushblock Adv. | Cancel | Properties | ||||
| -52 | -69 | -69 | None | Low
Shrink | ||||
|
Alessi uses a wave of 'energy' on his stand to turn anyone standing in it into their child form. This attack hits low. No variation in buttons. Very slow with no combo potential, you will only do this by accident. Upon a hit and after the long recovery resolves, Alessi will pose in an additional "recovery" animation. This animation wastes precious Alessi Mode time and renders this move punishable on hit (albeit by baby damage). If the opponent is Stand ON when they get hit by this move, Alessi will skip his pose animation and immediately be able to act. | ||||||||
| Startup | Active | Recovery | Damage | Guard | ||||
|---|---|---|---|---|---|---|---|---|
| 16 | 8 | 18 | - | - | ||||
| Hit Adv. | Block Adv. | Pushblock Adv. | Cancel | Properties | ||||
| +12 | -9 | -11 | None | Low
Shrink | ||||
|
Your primary means of transforming your opponent into a child. Unlike the Stand OFF variant, this move is rather fast. Hits low. The button pressed determines the range it comes out from slightly. Can combo into this instead of Custom Combo if you don't have meter. Air-unblockable. Despite this version being much faster than the Stand OFF variant, the pose will usually let the opponent have a chance to at least jump away when performed outside of a Custom Combo. | ||||||||
| Startup | Active | Recovery | Damage | Guard | ||||
|---|---|---|---|---|---|---|---|---|
| 12 | 1 | 20 | - | - | ||||
| Hit Adv. | Block Adv. | Pushblock Adv. | Cancel | Properties | ||||
| -4 | -6 | -17 | 214S | Mid | ||||
|
When pressing and holding two attack buttons in Stand ON, Alessi will charge a Stand On attack. When the buttons are released, a large axe is released from Sethan. Depending on how long you hold the buttons the attack will reach the ceiling or just be slightly larger than a normal attack. Interestingly enough, it has a dead zone right in front of Alessi if fully charged. Charging this move does not do extra damage. Can be used as an early anti-air but needs charge and if it doesn't hit before it finishes extending it suffers from similar hurtbox issues as Alessi's other normals. This move is not air unblockable either. The longer the charge, the more unsafe it is on block, with the shorter version being fairly safe. Its primary use is really during combos thanks to its 30 frame minimum charge. | ||||||||
| Startup | Active | Recovery | Damage | Guard | ||||
|---|---|---|---|---|---|---|---|---|
| 25 | 42 | 39 | - | - | ||||
| Hit Adv. | Block Adv. | Pushblock Adv. | Cancel | Properties | ||||
| -52 | -69 | -69 | 214S (with install) | Low
Shrink | ||||
|
Same animation as Stand OFF 63214 + A/B/C, but leaves you stand on. Never used. | ||||||||
Super Moves
| Startup | Active | Recovery | Damage | Guard | ||||
|---|---|---|---|---|---|---|---|---|
| 17 | 39 | 0 | - | - | ||||
| Hit Adv. | Block Adv. | Pushblock Adv. | Cancel | Properties | ||||
| +61 | -21 | -24 | None | Mid
Shrink | ||||
|
Alessi rushes a short distance forward, if the attack connects he releases a flurry of hits with his stand while posing. At the end of the super the opponent is transformed into child form for a period of time. The invincibility and long active frames makes this a solid option for beating jump ins, although it is not air unblockable and may not be fast enough to catch your opponent's vulnerable landing. It is punishable on block and therefore very susceptible to empty hops. This move also turns your stand ON during the animation, giving your opponent a huge stand crash punish on whiff, block or if they fall out of it mid-super (at least your stand turns back off after you've recovered either on hit or block). It's a decent reversal but often outshined by 214S having longer invincibility. Note that you can use supers during your Custom Combo, so chaining together 214S 236AA for even longer invincibility may beat out moves that are active for longer. Catching some stand hurtboxes will teleport the opponent's body into this move, but hitting a disjointed hurtbox may allow your opponent to simply fall out during the super's duration and open you up for a punish durign the long animation. When used Stand ON you might not have enough time to turn stand OFF during Alessi mode and meaty the child mode with a.d.5C. In this case you can hold [AA] during the super animation to charge your axe and catch the child mode mid air with a big one. | ||||||||
| Startup | Active | Recovery | Damage | Guard | ||||
|---|---|---|---|---|---|---|---|---|
| 50 | 39 | 16 | - | - | ||||
| Hit Adv. | Block Adv. | Pushblock Adv. | Cancel | Properties | ||||
| +34 | -8 | -60 | None | Mid
Air UB Shrink | ||||
|
Alessi shoots up his stand in the form of a tower. If the attack connects it hits 7 times and transforms the opponent into child form for a period of time. Mashing during the super will give you more hits, but changes the move's property meaning you may end up dealing less damage if you only mash a little bit rather than not mashing at all. Only the last hit transforms so mashing may give your opponent more hits to push them out of the super's hitbox. This move is a good early anti-air that can do more damage than 236AA, but it will whiff at very close range, has a sluggish startup, but is also air-unblockable. It will require a perfect read to pull off. | ||||||||


